Smart Lock Reset Guide Matter Device Fails

Smart Lock Reset Guide Matter Device Fails

The advent of smart home technology has transformed how we secure and manage our living spaces. Among the most popular innovations are smart locks, offering convenience and enhanced security features. However, like any technology, smart locks can sometimes encounter issues. One particularly frustrating problem is when a Matter device fails to connect or function correctly, leading to a need for a smart lock reset. This guide will walk you through the process of resetting your Matter-enabled smart lock when it falters, ensuring you can regain control and peace of mind.

The Matter protocol promises a future of seamless interoperability between smart home devices from different manufacturers. Yet, in these early stages, glitches and connection problems are not uncommon. When your Matter smart lock stops responding, enters an unresponsive state, or simply won’t pair, a factory reset is often the most effective solution. This process reverts the lock to its original settings, clearing any software conflicts or corrupted data that might be causing the malfunction. Understanding how to perform this reset is crucial for any smart lock owner.

Key Takeaways

  • A smart lock reset is often necessary when a Matter device fails to connect, respond, or function correctly.
  • The reset process typically involves a physical button or a sequence of actions on the lock itself.
  • Always consult your specific smart lock’s manual, as reset procedures vary significantly by manufacturer and model.
  • Before resetting, try simpler troubleshooting steps like restarting your router, checking Wi-Fi, and updating firmware.
  • A factory reset will erase all custom settings, user codes, and network configurations, requiring a full re-setup.
  • Ensure you have your Matter controller (e.g., Apple Home app, Google Home app) ready for re-pairing after the reset.
Smart Lock Reset Guide Matter Device Fails

Credit: matter-smarthome.de

Understanding Matter And Smart Lock Connectivity

The Matter protocol is designed to simplify smart home integration by providing a standardized communication layer. It aims to allow devices from different brands to work together seamlessly, regardless of the underlying Wi-Fi or Thread network. For smart locks, this means that a lock from one manufacturer should theoretically work with a Matter controller (like an Apple HomePod or Google Nest Hub) from another. However, the journey to universal compatibility is ongoing.

When a Matter device fails, it can stem from several points in the connection chain. This could involve an issue with the smart lock itself, the Matter controller, the home Wi-Fi network, or the Thread border router if the lock uses Thread for communication. The complexity of these interconnected systems means that troubleshooting can sometimes be challenging. A smart lock reset acts as a hard reboot, clearing the device’s internal state and preparing it for a fresh start.

Common Reasons For Matter Device Failure

Several factors can lead to a Matter smart lock becoming unresponsive or failing to connect:

  • Network Instability: Frequent Wi-Fi drops, a weak signal, or changes to your network (like a new router or password) can disrupt the lock’s connection.
  • Firmware Glitches: Bugs or errors in the lock’s firmware, or in the Matter controller’s software, can cause unexpected behavior.
  • Interference: Other wireless devices operating on the same frequencies (2.4 GHz for Wi-Fi and Thread) can sometimes cause interference.
  • Power Issues: Low battery levels or a faulty power source (for battery-powered locks) can lead to intermittent performance or complete failure.
  • Matter Controller Issues: Problems with the Apple Home app, Google Home app, or other Matter controllers can prevent devices from being recognized or controlled.
  • Factory Reset Required: In some cases, the only way to resolve persistent software conflicts or unrecoverable errors is through a factory reset.

The Role Of The Matter Controller

Your Matter controller is the central hub that manages your Matter-enabled devices. This could be a smartphone app like Apple Home, Google Home, or Samsung SmartThings, or a dedicated smart home hub. When your smart lock fails, the controller is often the first place you’ll notice it, showing the device as offline or unresponsive. The controller also plays a critical role in the re-setup process after a reset. It’s responsible for discovering the lock and re-establishing its connection within your Matter ecosystem.

Smart Lock Reset Guide Matter Device Fails

Credit: inoxoft.com

Preparing For A Smart Lock Reset

Before diving into a factory reset, it’s essential to prepare adequately. A reset is a drastic step that erases all user data and settings. Proper preparation ensures a smoother re-setup process and minimizes potential data loss.

Essential Pre-reset Checks

Always attempt these simpler troubleshooting steps before resorting to a factory reset:

  • Check Batteries: Ensure your smart lock has fresh, fully charged batteries. Low battery power is a common culprit for erratic behavior.
  • Verify Wi-Fi/Network Connection: Confirm that your home Wi-Fi network is operational and that the lock is within a strong signal range. Rebooting your router and modem can often resolve temporary network glitches.
  • Restart the Matter Controller: Close and reopen the smart home app you use (e.g., Apple Home, Google Home) on your smartphone or tablet. If the controller is a physical hub, try restarting it.
  • Check for Firmware Updates: Look for any available firmware updates for your smart lock, your Matter controller, or your Wi-Fi router. Updates often contain bug fixes that can resolve connectivity issues.
  • Review Lock Status: Examine the lock for any physical indicators of malfunction, such as error lights or unusual sounds.

Documenting Your Settings

A factory reset will wipe all custom configurations. To expedite the re-setup, it’s wise to document important information beforehand:

  • Wi-Fi Network Name (SSID) and Password: You’ll need these to reconnect the lock to your network.
  • User Codes: If you have multiple users with unique entry codes, make a list of these codes. You’ll need to re-enter them after the reset.
  • Administrator/Owner Account Details: Note down the login credentials for the app or service associated with your smart lock.
  • Matter Pairing Information: If your lock uses a Matter setup code or QR code, keep it handy.

Understanding The Impact Of A Reset

It’s crucial to understand what a factory reset entails:

  • Data Erasure: All user codes, access logs, and custom settings will be deleted.
  • Network Reconfiguration: The lock will be removed from your Wi-Fi network and will need to be re-added.
  • Matter Re-pairing: The lock will be removed from your Matter controller and will require a new pairing process.
  • Security Implications: For a brief period, the lock may be in an unsecured state during the reset and re-pairing process. Ensure you are present and can physically secure your door.
Smart Lock Reset Guide Matter Device Fails

Credit: www.reddit.com

Performing A Smart Lock Reset: Step-by-step

The exact procedure for resetting a smart lock varies significantly between manufacturers and models. Always refer to your specific device’s user manual for the most accurate instructions. However, most resets involve a combination of physical actions on the lock itself.

Locating The Reset Button

The reset button is typically a small, recessed button that requires a pin or a paperclip to press. It’s often found:

  • On the back of the lock’s interior unit: This is the most common location, accessible after removing the battery cover.
  • On the circuit board: Sometimes, you might need to remove the entire interior assembly to access the circuit board where the reset button is located.
  • Integrated into a battery terminal: Less commonly, the reset mechanism might be tied to how the batteries are inserted.

General Reset Procedures (examples)

While specific steps differ, here are common patterns observed in Matter smart lock resets:

Scenario 1: Button Press During Power-on

  • Remove Batteries: Open the battery compartment and remove all batteries.
  • Locate Reset Button: Find the reset button on the interior unit or circuit board.
  • Press and Hold: Insert a paperclip or pin into the reset button and press and hold it.
  • Reinsert Batteries: While still holding the reset button, reinsert the batteries.
  • Continue Holding: Keep holding the reset button for a specified duration (often 10-30 seconds), or until you hear a beep, see an LED flash, or the lock performs a self-test cycle.
  • Release Button: Release the button and allow the lock to power up and initialize.

Scenario 2: Button Press Sequence

  • Remove Batteries: Open the battery compartment and remove all batteries.
  • Locate Reset Button: Identify the reset button.
  • Press and Release (Multiple Times): Some locks require you to press and release the reset button a specific number of times (e.g., 3 or 5 times) in quick succession.
  • Reinsert Batteries: After performing the button sequence, reinsert the batteries.
  • Confirmation: Listen for an audible cue or watch for an LED indicator that confirms the reset has been initiated.

Scenario 3: Reset Via App (less Common For Hard Resets)

While some minor resets or network reconfigurations might be possible through the manufacturer’s app or the Matter controller, a true factory reset usually requires physical interaction with the lock. If your lock offers a software reset option, ensure it’s a full factory reset and not just a network reset.

Pro Tip: If you cannot find the reset button or are unsure about the procedure, always consult the official user manual for your specific smart lock model. You can usually find a PDF version on the manufacturer’s website.

Post-reset Steps: Re-pairing Your Matter Lock

Once the reset is complete, your smart lock will be back to its factory default state. This means it will no longer be connected to your Wi-Fi network or paired with your Matter controller. You’ll need to go through the setup process again.

  • Open Your Matter Controller App: Launch the Apple Home app, Google Home app, or your preferred Matter-compatible application.
  • Add Device: Look for an option to “Add Device,” “Set up new device,” or similar.
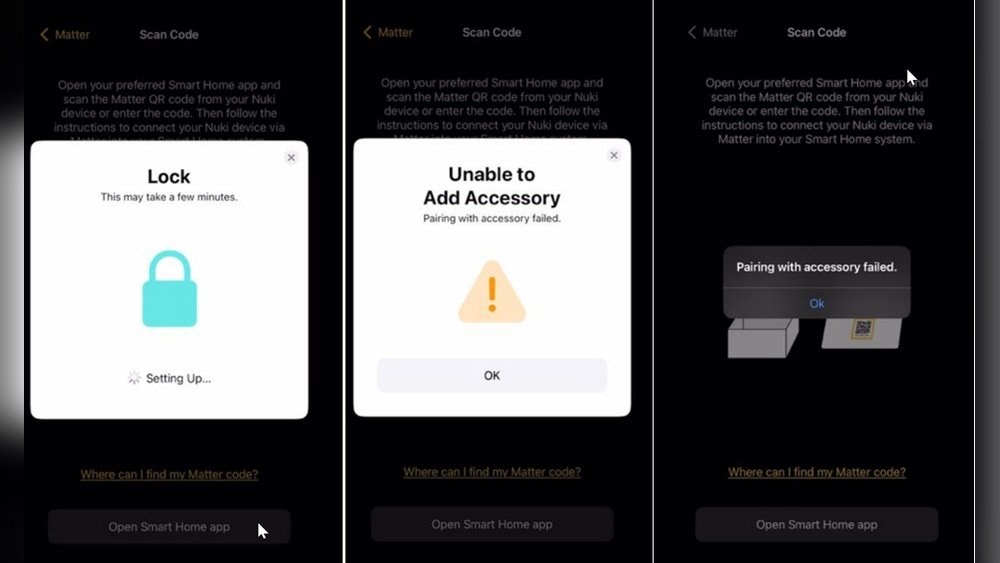
  • Scan QR Code or Enter Code: The app will prompt you to scan the Matter setup QR code found on your lock (usually on the back or in the manual) or enter the setup code manually.
  • Follow On-Screen Instructions: The app will guide you through connecting the lock to your Wi-Fi network (if applicable) and pairing it with your Matter ecosystem. This may involve selecting your Wi-Fi network and entering the password.
  • Configure Settings: Once paired, you’ll need to reconfigure settings such as user codes, auto-lock preferences, and notification settings.

Troubleshooting Persistent Issues After Reset

In rare cases, even after a factory reset, your Matter smart lock might continue to exhibit problems. This suggests a more complex issue that requires further investigation.

Deep Dive Into Network Configuration

If the lock fails to re-pair or frequently drops connection after a reset, scrutinize your network setup:

  • 2.4 GHz Band: Ensure your Wi-Fi network is broadcasting on the 2.4 GHz frequency band, as most smart home devices, including Matter locks, rely on this band for initial setup and stable operation. Some routers combine 2.4 GHz and 5 GHz bands under a single SSID, which can sometimes confuse devices. Consider temporarily separating them or ensuring the 2.4 GHz band is enabled and has a strong signal where the lock is installed.
  • Router Settings: Check for any router settings that might block new device connections, such as MAC address filtering or strict firewall rules.
  • Thread Border Router: If your lock uses Thread for communication (often alongside Wi-Fi), ensure your Thread border router (e.g., Apple HomePod mini, Google Nest Hub (2nd gen), Amazon Echo (4th gen)) is functioning correctly and is within range.

Checking For Hardware Malfunctions

If software and network troubleshooting don’t resolve the issue, consider potential hardware problems:

  • Physical Lock Mechanism: Ensure the deadbolt itself isn’t sticking or obstructed, which could be causing the motor or electronics to strain and fail.
  • Wiring: For locks with external wiring or power adapters, check for any damage or loose connections.
  • Internal Components: While difficult to diagnose without specialized tools, internal component failure is a possibility.

Example Case Study: A user reported their August Wi-Fi Smart Lock (which supports Matter) repeatedly failing to connect after a network change. Despite multiple resets and network reconfigurations, the lock remained offline. Upon closer inspection, it was discovered that the lock’s internal Wi-Fi antenna connection had become slightly dislodged during a battery change. Reseating the antenna resolved the issue. This highlights the importance of considering physical aspects alongside software.

Contacting Manufacturer Support

If you’ve exhausted all troubleshooting steps, including the factory reset, and your Matter smart lock still fails, it’s time to contact the manufacturer’s customer support. They may be aware of specific issues with your model or be able to guide you through more advanced diagnostics. Be prepared to provide them with:

  • Your smart lock’s model number and serial number.
  • The troubleshooting steps you’ve already taken.
  • Details about your Matter controller and home network setup.
  • Any error messages or specific symptoms you’re experiencing.

Smart Lock Reset Vs. Other Troubleshooting Methods

It’s important to differentiate a factory reset from other troubleshooting actions. A reset is a last resort, while other methods should be attempted first.

Comparison Of Troubleshooting Steps

ActionDescriptionWhen to UseImpact on Settings
**Restart Device**Power cycling the lock (removing batteries briefly) or rebooting the Matter controller.Device unresponsive, minor glitches.None
**Check Network**Verifying Wi-Fi signal strength, router status, and internet connectivity.Lock offline, slow response times.None
**Update Firmware**Installing the latest software updates for the lock and controller.Known bugs, compatibility issues, security vulnerabilities.None
**Re-pair Device**Removing the lock from the Matter controller and re-adding it without a full factory reset (if supported).Connection lost, controller issues.May reset network config
**Factory Reset**Restoring the lock to its original, out-of-the-box state via a physical button or sequence.Persistent unresponsiveness, software corruption, failed re-pairing.**All settings erased**
**Contact Support**Reaching out to the manufacturer for advanced assistance or warranty claims.All other troubleshooting fails, suspected hardware defect.N/A

When A Reset Is The Only Option

A factory reset is typically the only way to resolve deep-seated software conflicts or corrupted configurations that cannot be cleared through simpler means. If your lock is stuck in an error state, refuses to pair, or exhibits unpredictable behavior despite network checks and restarts, a reset is often the most efficient path to restoring functionality.

Advanced Considerations For Matter Smart Locks

The Matter standard is still evolving, and users might encounter unique challenges specific to its implementation in smart locks.

Understanding Matter Pairing Modes

Matter devices can be paired using Wi-Fi or Thread. Smart locks often utilize Wi-Fi for direct connection to your home network, but Thread can provide a more robust mesh network for devices that are not in direct Wi-Fi range. Ensure your Thread border router is properly configured if your lock relies on Thread.

A reset will force the lock to go through the pairing process again, allowing you to choose or confirm its network protocol.

The Importance Of A Stable Ecosystem

A stable smart home ecosystem is crucial for Matter devices. This includes:

  • Reliable Wi-Fi: A strong, stable Wi-Fi network is the foundation. Mesh Wi-Fi systems can be beneficial for larger homes.
  • Updated Controllers: Keeping your Matter controller apps and any associated hubs updated is essential for compatibility and performance. According to the CSA (Connectivity Standards Alliance), regular updates are key to maintaining a robust Matter network. You can find more details on the Connectivity Standards Alliance website.
  • Thread Border Router Health: If using Thread, ensure your border router is powered on, connected to your network, and running the latest firmware.

Security Implications Of Resetting

When you reset your smart lock, it temporarily reverts to an unauthenticated state. This means anyone could potentially try to pair with it if they have physical access and know the Matter pairing code.

  • Physical Security: Perform the reset and re-pairing process when you are physically present and can secure your door.
  • Secure Pairing Code: Keep your Matter setup code secure. It’s typically found on the device itself or in the documentation. Do not share it unnecessarily.
  • Immediate Re-pairing: Once the reset is complete, prioritize re-pairing the lock with your Matter controller to secure it again.

Frequently Asked Questions

What Should I Do If My Matter Smart Lock Is Completely Unresponsive?

If your Matter smart lock is completely unresponsive, meaning it doesn’t light up, make noise, or react to commands, start by checking the batteries. Ensure they are new and inserted correctly. If the batteries are fine, try removing them for a minute and then reinserting them. If this doesn’t help, proceed with the factory reset procedure specific to your lock model, as described in its manual.

How Long Does A Matter Smart Lock Factory Reset Typically Take?

The reset process itself, involving pressing buttons and reinserting batteries, usually takes only a minute or two. However, the subsequent re-pairing process with your Matter controller can take anywhere from 5 to 15 minutes, depending on your network speed and the efficiency of the controller app.

After re-pairing, configuring settings like user codes can add additional time.

Will Resetting My Matter Smart Lock Erase My Apple Homekit Or Google Home Data?

Yes, a factory reset of the smart lock itself will erase all its stored data, including any unique identifiers or configurations related to Apple HomeKit or Google Home. After the reset, the lock will be treated as a brand new device, and you will need to re-add it to your Apple Home or Google Home app, essentially re-pairing it within that ecosystem. Your data within the HomeKit or Google Home app itself (like room assignments for other devices) will remain intact, but the lock’s connection to it will be severed and need to be re-established.

Can I Reset My Matter Smart Lock Without Physical Access To The Device?

Generally, no. A factory reset for a smart lock is designed to be a deliberate action, often requiring physical interaction with the device itself (e.g., pressing a hidden button). This is a security measure to prevent unauthorized resets. While some minor settings or network configurations might be adjustable remotely via an app, a full hardware reset typically requires hands-on access.

What If The Matter Setup Code Or Qr Code Is Lost?

If you’ve lost the Matter setup code or QR code for your smart lock, you might still be able to reset and re-pair the device, but it can be more challenging. Some manufacturers provide a way to retrieve or regenerate the code through their support channels or a secondary method on the lock itself.

However, without the code, re-pairing the device as a Matter accessory might become impossible. Check your lock’s manual or contact the manufacturer’s support for guidance on lost pairing credentials. In some instances, if the lock doesn’t explicitly require the code for re-pairing after a reset (which is rare for Matter), you might get lucky, but assume you will need it.

When your Matter-enabled smart lock encounters issues and requires a reset, remember that preparation and adherence to your device’s specific instructions are key. While the process can seem daunting, it’s a vital tool for restoring functionality and ensuring your home remains secure and connected. By understanding the steps involved and potential pitfalls, you can confidently tackle a smart lock reset and get your Matter device back online.
Are Ikea Kitchen Cabinets Solid Wood

Are Ikea Kitchen Cabinets Solid Wood

The allure of a beautiful, functional kitchen often leads homeowners to explore various cabinet options. IKEA, with its accessible pricing and modern designs, is a popular choice for many. However, a common question arises: are IKEA kitchen cabinets solid wood? This inquiry is crucial for understanding the durability, longevity, and overall value of a kitchen investment. While IKEA offers a wide range of products, the answer isn’t a simple yes or no. Understanding the materials used in IKEA cabinetry is key to making an informed decision that aligns with your budget, aesthetic preferences, and long-term expectations.

This comprehensive guide will dissect the materials used in IKEA kitchen cabinets, differentiating between solid wood, wood veneer, particleboard, and MDF. We’ll explore how these materials contribute to the cabinet’s construction, examine specific IKEA product lines, and offer insights into their durability and maintenance.

By the end, you’ll have a clear picture of what to expect when choosing IKEA for your kitchen renovation.

Key Takeaways

  • IKEA cabinets are not typically made entirely of solid wood. While some components might incorporate solid wood elements, the majority of their construction relies on engineered wood products like particleboard and MDF, often finished with veneers or laminates.
  • Different IKEA cabinet lines use varying material combinations. Understanding the specific series (e.g., SEKTION) and door styles is essential for identifying the exact materials.
  • Engineered wood offers advantages like cost-effectiveness and stability. Particleboard and MDF are less prone to warping than solid wood in humid environments, making them suitable for kitchens.
  • Veneers and laminates provide the aesthetic appeal of wood. These finishes can mimic the look of solid wood convincingly, offering a wide range of styles and colors.
  • Durability varies based on material and construction. While IKEA cabinets are designed for functionality and affordability, their longevity can be influenced by the specific materials used and how they are maintained.
  • Solid wood accents are sometimes present. Drawer sides, for instance, may feature solid wood or a durable composite, while doors might have solid wood frames with panel inserts.
Are Ikea Kitchen Cabinets Solid Wood

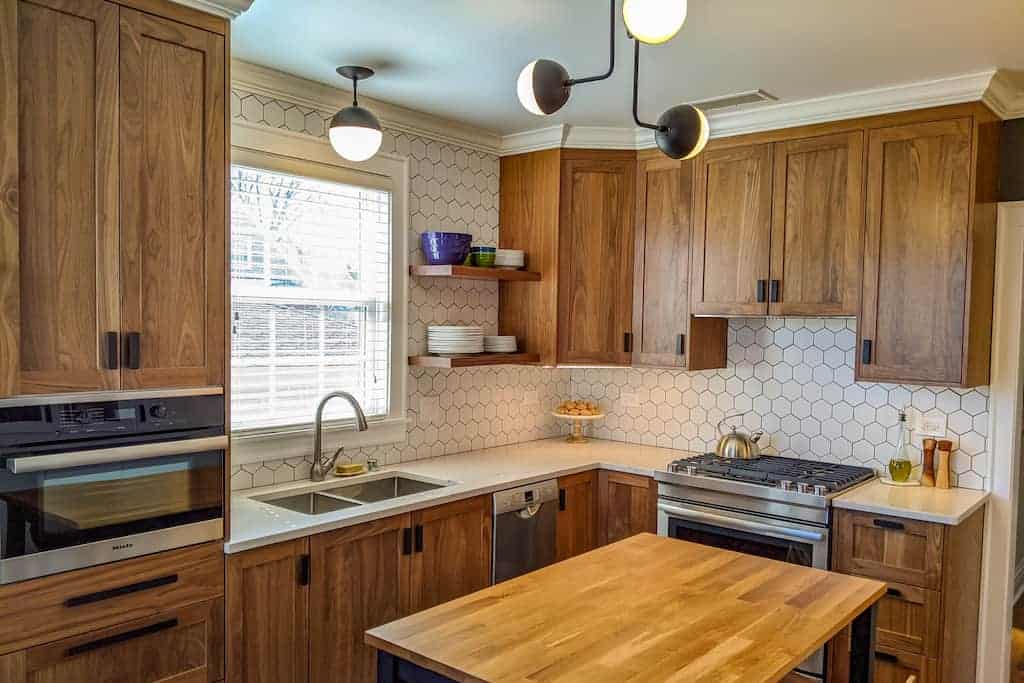
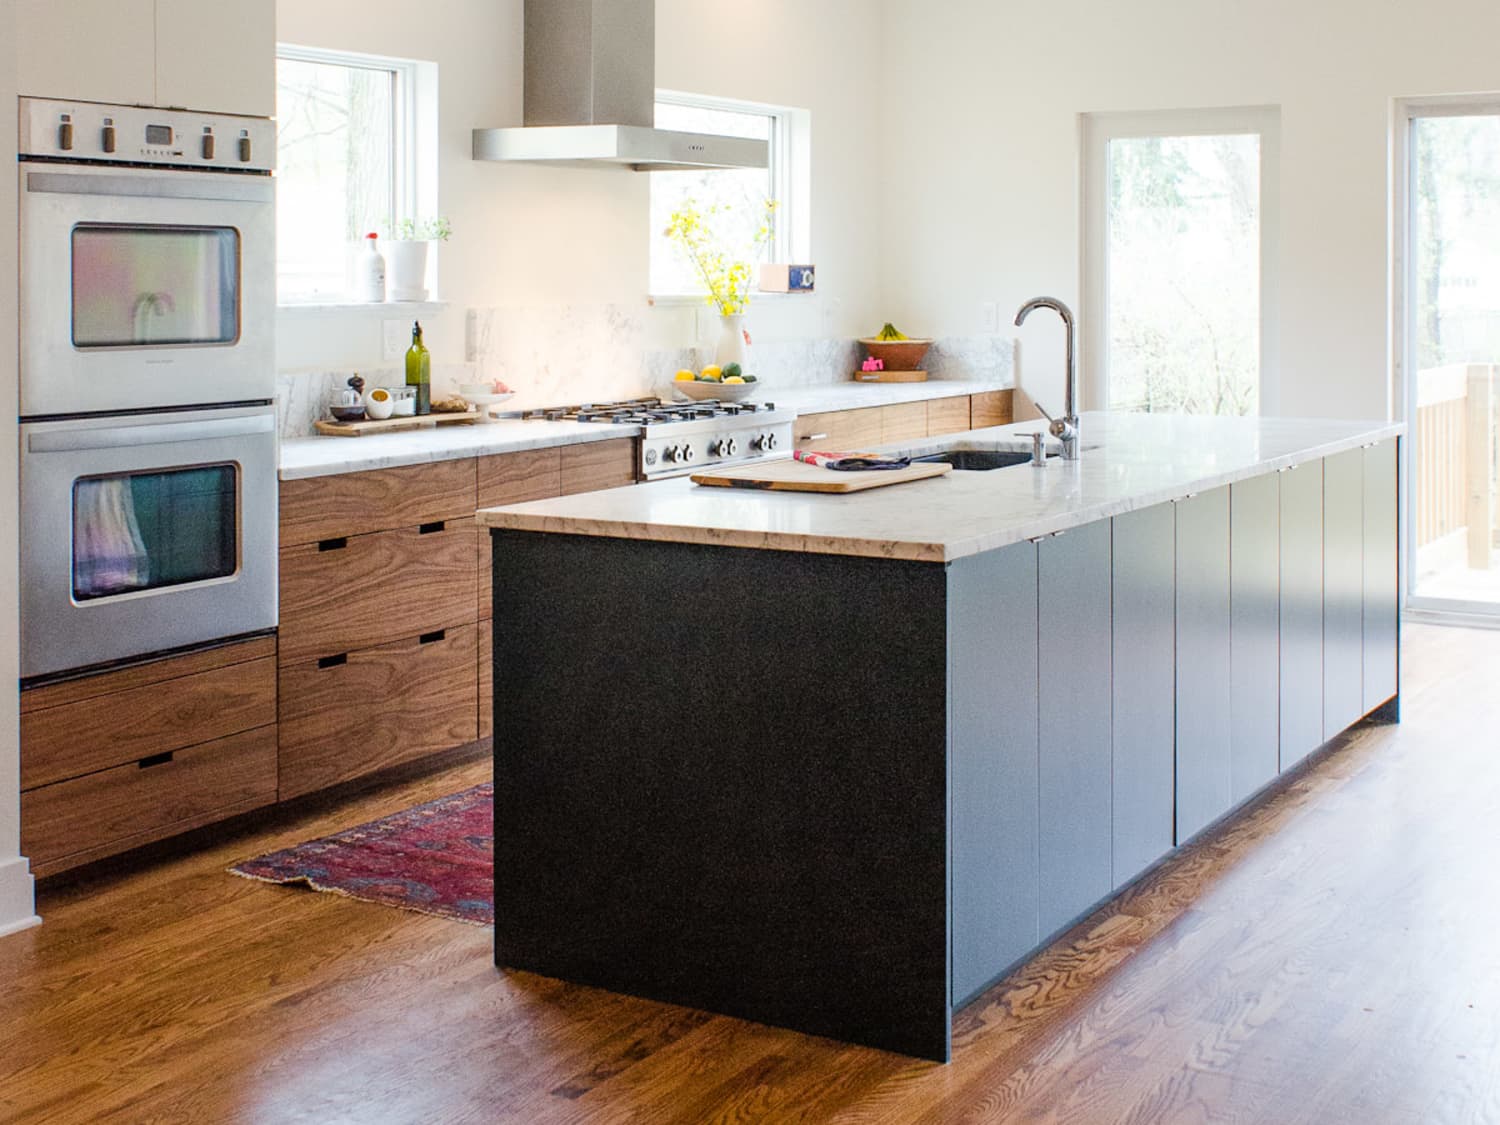
Credit: www.thespruce.com

Understanding Cabinet Construction Materials

To accurately answer whether IKEA kitchen cabinets are solid wood, it’s vital to understand the common materials used in cabinet construction and how IKEA employs them. The term “solid wood” refers to lumber that has been milled directly from a tree.

It’s known for its natural beauty, strength, and potential for refinishing. However, it’s also more expensive and susceptible to moisture and temperature fluctuations.

In contrast, engineered wood products offer a more stable and cost-effective alternative. These materials are manufactured by binding wood fibers, particles, or veneers together with adhesives.

Solid Wood

Solid wood is the traditional choice for high-end cabinetry. It offers a rich, natural aesthetic and can last for generations if properly cared for.

  • Types: Common solid woods used in cabinetry include oak, maple, cherry, and birch. Each has distinct grain patterns and color variations.
  • Pros: Unmatched natural beauty, durability, ability to be sanded and refinished multiple times, potential for unique grain patterns.
  • Cons: Higher cost, susceptibility to warping, cracking, or swelling with changes in humidity and temperature, can be heavier.
  • IKEA Application: While you won’t find entire IKEA cabinet boxes made of solid wood, you might find solid wood used for drawer sides or as framing in some door styles.

Plywood

Plywood is a versatile engineered wood product made by layering thin sheets of wood veneer, typically glued together with adjacent layers having their wood grain rotated up to 90 degrees to one another. This cross-graining provides strength and stability.

  • Construction: Multiple thin layers (plies) of wood veneer are bonded together with adhesives, with the grain of each layer perpendicular to the grain of the layers above and below.
  • Pros: Strong, stable, resistant to shrinking and swelling, good screw retention, available in various grades.
  • Cons: Can be more expensive than particleboard or MDF, edges may require finishing to conceal the layered construction.
  • IKEA Application: IKEA primarily uses particleboard and MDF for its cabinet boxes. While some higher-end or older IKEA lines might have used plywood, it’s not the standard for their current popular systems like SEKTION.

Particleboard

Particleboard, also known as chipboard, is an engineered wood product manufactured from wood chips, sawdust, and wood scraps bonded together with a synthetic resin or binder.

  • Manufacturing: Wood particles are pressed and extruded under heat and pressure.
  • Pros: Cost-effective, relatively stable, good base for veneers and laminates.
  • Cons: Lower strength and screw-holding ability compared to plywood, susceptible to swelling and disintegration when exposed to moisture, can be heavy.
  • IKEA Application: This is a primary material used for the boxes of IKEA kitchen cabinets. It provides a stable and affordable substrate for their finishes.

Medium-density Fiberboard (mdf)

MDF is an engineered wood product made by breaking down hardwood or softwood into wood fibers, combining them with wax and a resin binder, and forming panels by applying high temperature and pressure.

  • Manufacturing: Wood is broken down into fine fibers, mixed with binders and wax, then pressed into dense, uniform panels.
  • Pros: Very smooth surface ideal for painting and finishing, stable, consistent density, less prone to warping than solid wood.
  • Cons: Heavier than particleboard, can sag under heavy loads over time if not properly supported, susceptible to water damage, lower screw-holding power than plywood.
  • IKEA Application: MDF is frequently used for cabinet doors, drawer fronts, and sometimes for cabinet boxes, especially where a smooth, paintable surface is desired or for specific structural components.

Wood Veneer Vs. Laminate

These are the finishing materials applied to the core of particleboard or MDF to give the cabinets their appearance.

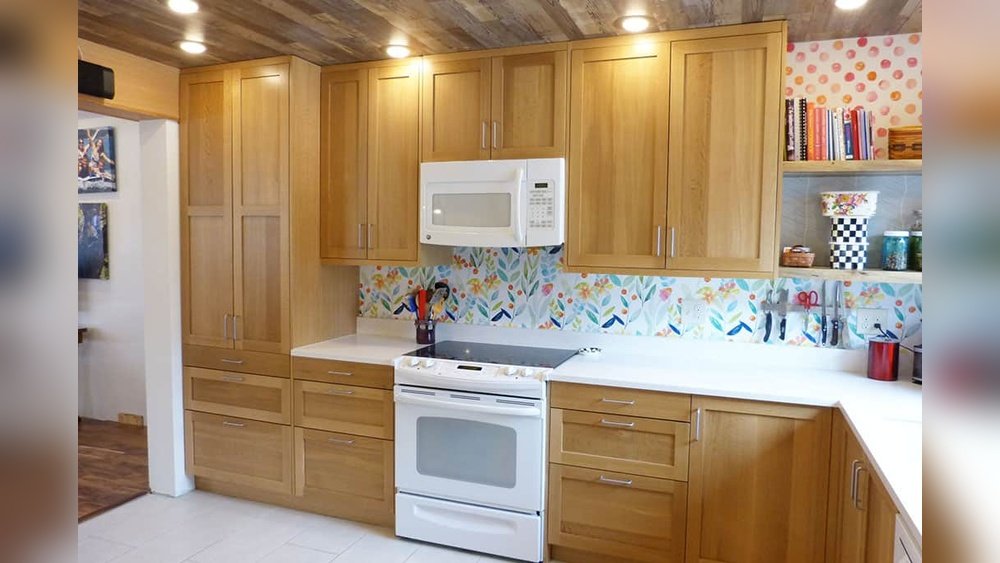
  • Wood Veneer: A thin slice of real wood applied to a substrate. It offers the look of solid wood but at a lower cost and with greater stability. IKEA uses veneers on many of its cabinet doors and visible end panels.
  • Laminate: A synthetic material made of layers of paper or plastic bonded together under high pressure. It’s durable, easy to clean, and can mimic various wood grains, solid colors, or textures. IKEA uses laminate finishes on some of its more budget-friendly or modern-styled doors.

Ikea’s Sektion System And Material Breakdown

IKEA’s primary kitchen system is called SEKTION. This modular system allows for a high degree of customization, and understanding the materials used within this system is key to knowing what you’re purchasing. The SEKTION system itself refers to the cabinet *boxes* and the internal organization, while the doors, drawer fronts, and visible panels are separate components that determine the aesthetic and often the primary material finish.

Cabinet Boxes (carcasses)

The internal structure of IKEA cabinets, the boxes that house your shelves and drawers, are predominantly constructed from particleboard. This material is chosen for its cost-effectiveness, stability in typical kitchen humidity levels, and ability to provide a sturdy base for the hardware and shelves.

  • Material: High-density particleboard, often with a melamine foil or laminate finish on the interior and exterior surfaces. The interior is usually white, grey, or a wood-effect finish, while the exterior visible edges might be finished to match the doors.
  • Edge Banding: The exposed edges of the particleboard are typically covered with edge banding, which is a strip of plastic or veneer that protects the core material and provides a finished look.
  • Reinforcement: To enhance durability and support for shelves and drawer slides, IKEA often incorporates metal supports or thicker panels in key areas. The back panels of the SEKTION cabinets are usually thin hardboard, designed to add rigidity.

Doors And Drawer Fronts

This is where IKEA offers the most variety, and consequently, the materials differ significantly across their extensive range of door styles.

  • Foil Finish Doors: Many popular IKEA doors, such as VEDDINGE or HAGGEBY, are made from particleboard or MDF and covered with a foil wrap. This foil is a plastic film printed with a wood grain pattern or solid color. It’s cost-effective, easy to clean, and offers a consistent look. The edges are typically wrapped seamlessly.
  • Example: The VEDDINGE white door is a foil-finished particleboard door known for its clean, modern look and affordability.
  • Veneered Doors: Higher-end IKEA door styles, like EKESTAD or BJÖRKSNÄS, feature a wood veneer applied over an engineered wood core (particleboard or MDF). This provides a more authentic wood appearance, as it is real wood. The grain pattern will be more natural and varied than a foil finish.
  • Example: The EKESTAD brown stained oak door uses a real oak veneer over a particleboard base, offering the look and feel of solid oak at a reduced cost.
  • Painted Doors: Doors like AXSTAD are typically made from MDF and then painted. MDF provides an excellent smooth surface for painting, resulting in a durable and attractive finish.
  • Example: The AXSTAD matte white door is an MDF door with a painted finish, offering a sophisticated look without the premium price of solid wood.
  • Solid Wood Accents: Some door styles incorporate solid wood framing with a panel insert. The panel insert might be solid wood, veneer, or even MDF depending on the specific door.
  • Example: Certain SEKTION doors might feature a solid wood frame (e.g., oak or birch) with a veneer or MDF panel in the center.

Drawer Components

  • Drawer Sides: IKEA often uses solid wood (like birch or pine) or a durable composite material for the sides of their drawer boxes, especially for their premium drawer slides like MAXIMERA. This ensures strength and smooth operation.
  • Drawer Bottoms: The bottom panels of the drawers are typically made from thinner hardboard or particleboard, designed to slide into grooves in the drawer sides for stability.
Are Ikea Kitchen Cabinets Solid Wood

Credit: thecabinetface.com

Ikea’s Approach To Value And Sustainability

IKEA’s design philosophy centers around democratic design, which aims to balance form, function, quality, sustainability, and low price. This approach heavily influences their material choices. Using engineered wood products like particleboard and MDF allows them to achieve lower price points while maintaining acceptable levels of durability and aesthetic appeal for most consumers.

Cost-effectiveness

The primary driver behind IKEA’s material selection is affordability. Solid wood is significantly more expensive than particleboard or MDF. By utilizing engineered wood and finishes like foil and laminate, IKEA can offer complete kitchen solutions at prices that are often much lower than custom cabinetry or even many other big-box store options.

Stability And Performance

While solid wood is beautiful, it can be temperamental in environments with fluctuating humidity, such as kitchens and bathrooms. Engineered wood products like particleboard and MDF are generally more stable and less prone to expanding or contracting with changes in moisture levels. This stability contributes to the longevity of the cabinet joints and the overall structure.

Sustainability Initiatives

IKEA is committed to increasing the use of renewable and recycled materials. While particleboard and MDF are wood-based products, their manufacturing process can utilize wood byproducts and waste from other industries. IKEA also focuses on responsible forestry, aiming for all wood used in their products to be at least 100% recycled or from forests that are managed sustainably and contribute to protecting biodiversity. You can learn more about their wood sourcing policies on the IKEA website.

Are Ikea Kitchen Cabinets Solid Wood

Credit: www.apartmenttherapy.com

Durability And Longevity Of Ikea Cabinets

The question of “solid wood” often ties directly into concerns about durability. While IKEA cabinets may not be solid wood throughout, their construction is designed to meet the demands of a typical kitchen environment.

Factors Affecting Durability

  • Material Quality: The quality of the particleboard, MDF, and the adhesives used plays a significant role. IKEA generally uses materials that meet industry standards for their price point.
  • Finish: Foil and laminate finishes are generally durable and easy to clean but can be susceptible to chipping or peeling if subjected to harsh impacts or prolonged exposure to excessive moisture. Veneered and painted finishes can be more susceptible to scratches or dents but may offer a more premium feel.
  • Hardware: The quality of hinges, drawer slides, and handles is crucial for the long-term functionality of any cabinet. IKEA uses its own branded hardware, which is generally considered adequate for home use, with options for upgrading to higher-performance slides if desired.
  • Installation: Proper installation is paramount. Cabinets must be securely anchored to wall studs. Uneven installation can lead to doors not aligning, drawers sticking, and undue stress on the cabinet boxes.
  • Maintenance: Regular cleaning with appropriate products and avoiding excessive moisture are key to extending the life of any cabinetry, including IKEA’s.

Real-world Performance

In my experience, IKEA kitchens can last for 10-15 years or even longer with proper care and maintenance. Many homeowners successfully use IKEA kitchens for decades. The most common points of wear and tear tend to be:

  • Door edges and corners: These are susceptible to chipping from impacts.
  • Foil or laminate peeling: Can occur in areas exposed to high moisture or heat, like near dishwashers or ovens, if not properly sealed or if damaged.
  • Drawer slide wear: While generally robust, heavy use can eventually wear down drawer slides, though replacements are readily available.

It’s important to set realistic expectations. IKEA cabinets are not heirloom pieces designed to be passed down through generations without refurbishment. They are designed to provide a stylish, functional, and affordable kitchen solution for a significant period.

Comparing Ikea Cabinets To Other Options

Understanding where IKEA cabinets stand requires a comparison with other common kitchen cabinet types.

Ikea Vs. Custom Cabinets

  • IKEA:
  • Materials: Primarily particleboard/MDF boxes, with various finishes (foil, laminate, veneer, paint) for doors. Some solid wood accents.
  • Price: Highly affordable.
  • Customization: Modular system allows significant customization within IKEA’s offerings.
  • Lead Time: Available off-the-shelf or with relatively short delivery times.
  • Durability: Good for the price point, but generally less durable than high-quality custom options.
  • Custom Cabinets:
  • Materials: Often made entirely of solid wood or high-grade plywood boxes, with solid wood or premium veneers for doors.
  • Price: Significantly more expensive, ranging from moderate to very high.
  • Customization: Virtually unlimited design, material, and dimension options.
  • Lead Time: Can take several weeks to months.
  • Durability: Can be extremely durable, often lasting for decades, depending on materials and craftsmanship.

Ikea Vs. Big Box Store Stock/semi-custom Cabinets

  • IKEA:
  • Materials: As described above.
  • Price: Generally lower than stock or semi-custom options from big box stores.
  • Design: Modern, clean aesthetic. Limited by IKEA’s style range.
  • Assembly: Requires self-assembly of boxes.
  • Big Box Store Stock/Semi-Custom (e.g., Home Depot’s KraftMaid, Lowe’s Diamond):
  • Materials: Often use plywood boxes as standard or an upgrade option, with MDF or solid wood doors. Wider range of material choices.
  • Price: Mid-range to high. Stock cabinets are more affordable than semi-custom.
  • Design: Wider variety of traditional and transitional styles.
  • Assembly: Stock cabinets come assembled; semi-custom options are built to order.

Here’s a simplified comparison table:

Feature IKEA Kitchen Cabinets High-End Custom Cabinets Big Box Stock/Semi-Custom
Primary Box Material Particleboard Solid Wood or Plywood Plywood (often standard or upgrade), Particleboard
Door Materials Foil, Laminate, Veneer, Painted MDF, some Solid Wood accents Solid Wood, Premium Veneers Solid Wood, MDF, Veneers
Price Range $ – $$ $$$$ – $$$$$ $$ – $$$$
Durability Expectation 10-15+ years (with care) 25+ years (often heirloom quality) 15-20+ years (depending on quality tier)
Assembly Required Yes (boxes) No No (stock), Built to order (semi-custom)

Case Study: The Budget-conscious Kitchen Refresh

Sarah and Tom, a young couple in a starter home, wanted to update their kitchen without breaking the bank. Their existing cabinets were dated and worn. They opted for IKEA’s SEKTION system with AXSTAD matte white doors for a clean, modern look.

  • Material Choice Rationale: They chose the AXSTAD doors because they liked the minimalist, painted appearance and the durability of the MDF base, knowing it would be less prone to warping than solid wood in their humid climate. The particleboard boxes of the SEKTION system were acceptable given their budget.
  • Process: They meticulously planned their layout using IKEA’s online planner, measured everything twice, and assembled the cabinet boxes themselves over a weekend. They hired a handyman for the final installation and countertop fitting.
  • Outcome: The resulting kitchen looked significantly more modern and spacious. After three years, the cabinets show minimal wear, primarily a few minor scuffs on the lower door edges from vacuum cleaner impacts. They found the durability to be excellent for the price and their lifestyle. This case highlights how choosing the right IKEA door style and ensuring proper installation can lead to a successful and long-lasting renovation.

Maintaining Your Ikea Kitchen Cabinets

Proper maintenance is key to ensuring the longevity and appearance of any kitchen cabinets, including those from IKEA. Given that many IKEA cabinets utilize engineered wood and various finishes, specific care practices are beneficial.

Routine Cleaning

  • Surfaces: For foil, laminate, and veneered surfaces, use a soft cloth dampened with water and a mild, non-abrasive detergent. Wipe dry with a clean cloth. Avoid abrasive cleaners, steel wool, or scouring pads, as these can scratch the finish.
  • Painted Surfaces (MDF): Similar to other finishes, use a damp cloth and mild detergent. For stubborn spots, a soft brush might be used gently. Always wipe dry.
  • Wood: If you have doors with solid wood elements, use a cleaner specifically designed for wood, following the manufacturer’s instructions.

Protecting Against Moisture And Heat

  • Spills: Wipe up spills immediately, especially water, to prevent absorption into the engineered wood core.
  • Appliances: Ensure dishwashers, ovens, and kettles are properly vented. Excessive steam or heat directed at cabinet doors or nearby panels can cause delamination or warping over time, particularly with foil finishes. Consider using heat-resistant mats or deflectors if needed.
  • Ventilation: Good kitchen ventilation helps manage overall humidity levels, benefiting all cabinetry.

Hardware Care

  • Hinges and Slides: Periodically check that hinges are aligned and drawer slides operate smoothly. Most IKEA hinges allow for adjustment. Lubrication is rarely needed unless there’s a specific issue, but check the IKEA manual for your specific hardware.
  • Handles and Knobs: Clean these according to their material (metal, plastic, etc.). Ensure they are securely fastened.

Addressing Wear And Tear

  • Minor Scratches: For foil or laminate, minor scratches are difficult to repair. For painted MDF doors, touch-up paint may be an option if available in the exact color and finish. For veneered doors, minor scratches might be buffed out with appropriate wood polishes, but deep gouges are harder to conceal.
  • Peeling Finishes: If a foil or laminate finish begins to peel, especially at edges, it can be a sign of moisture damage or wear. In some cases, a strong adhesive might temporarily fix small areas, but significant peeling often requires door replacement.

Frequently Asked Questions

What Is The Main Material Used For Ikea Cabinet Boxes?

The primary material for IKEA SEKTION cabinet boxes is particleboard. This engineered wood product is chosen for its cost-effectiveness, stability, and ability to provide a solid base for hardware and shelving. It is typically finished with a durable melamine foil or laminate.

Are Ikea Cabinet Doors Solid Wood?

No, most IKEA cabinet doors are not made entirely of solid wood. While some higher-end door styles might feature a solid wood frame around a veneer or MDF panel, the majority are constructed from MDF or particleboard with finishes like foil, laminate, veneer, or paint. This approach allows IKEA to offer a wide range of styles at competitive

Toilet Keeps Running Flush

Toilet Keeps Running Flush

The persistent sound of a toilet constantly refilling can be more than just an annoyance; it’s a clear sign of a plumbing issue that demands attention. This continuous running is not only disruptive to your peace but also a significant drain on your water supply, leading to surprisingly high water bills. Understanding the common culprits behind a running toilet is the first step toward diagnosing and fixing the problem, saving you water, money, and the frustration of a perpetually flushing commode.

From a faulty flapper to an improperly adjusted float, several components within the toilet tank can cause this ceaseless water flow. Each part plays a crucial role in the flushing mechanism, and when one fails, the entire system can be thrown off balance.

This guide will walk you through the anatomy of a toilet tank, the common reasons for a running toilet, and step-by-step instructions on how to address these issues yourself, empowering you to tackle this common household problem with confidence.

Key Takeaways

  • A toilet keeps running due to issues with internal tank components, most commonly the flapper, fill valve, or float.
  • Water wastage from a running toilet can significantly increase utility bills and environmental impact.
  • The flapper valve is the most frequent cause, failing to create a proper seal and allowing water to continuously leak into the bowl.
  • The fill valve or ballcock controls water refilling the tank, and if it malfunctions, it can lead to constant filling.
  • An improperly adjusted float can cause the fill valve to remain open, leading to an overflowing tank and continuous running.
  • Simple DIY repairs, such as flapper replacement or float adjustment, can often resolve the issue.
  • Regular toilet maintenance can prevent many running toilet problems.
Toilet Keeps Running Flush

Credit: www.youtube.com

Understanding Your Toilet’s Anatomy

Before diving into troubleshooting, it’s essential to understand the basic components within your toilet tank and how they work together. This knowledge is crucial for accurately identifying the source of the problem. The primary parts involved in the flushing and refilling process are located inside the tank.

The Flush Mechanism

When you press the flush lever, it lifts a chain or rod connected to the flapper. The flapper is a rubber or plastic seal at the bottom of the tank that covers the flush valve seat. Lifting the flapper allows water to rush from the tank into the toilet bowl, initiating the flush. Once the water level drops, the flapper falls back into place, sealing the flush valve seat and preventing further water from entering the bowl.

The Refill Mechanism

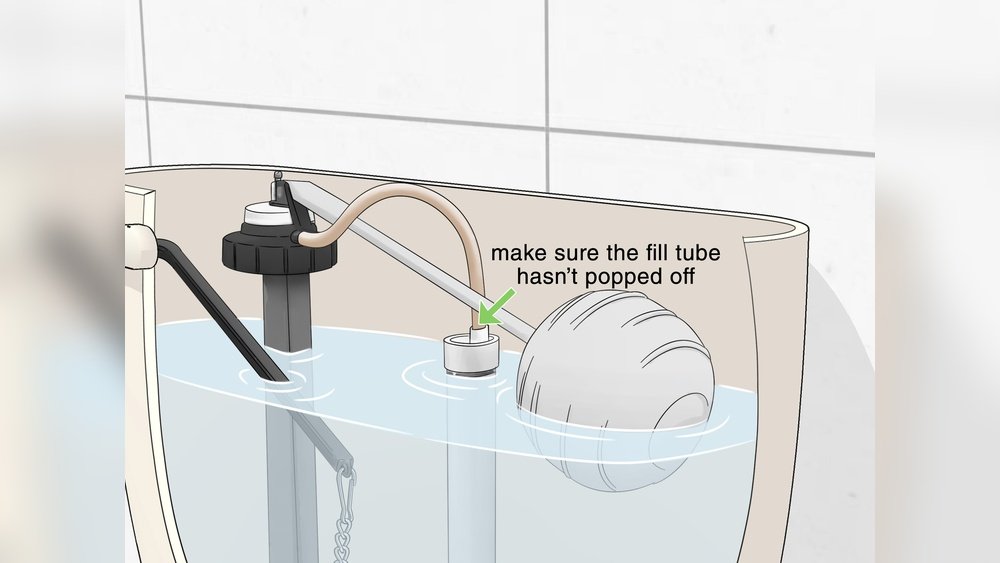
After the flush, the fill valve (also known as the ballcock) takes over. This valve is responsible for refilling the tank with fresh water from the supply line. It’s typically connected to a float, which is a buoyant device (often a ball or a cup) that rises with the water level. As the water level rises, the float signals the fill valve to shut off. The fill valve also has an overflow tube, a vertical pipe that prevents the tank from overfilling by directing excess water into the bowl.

Common Points Of Failure

Problems arise when these components don’t function as intended. A worn-out flapper might not seal properly, a faulty fill valve could fail to shut off, or an incorrectly set float could keep the fill valve perpetually open. Even a simple clog in the flush valve seat can prevent the flapper from sealing effectively.

Toilet Keeps Running Flush

Credit: metaltecnica.com

Why Your Toilet Keeps Running: Top Culprits

A continuously running toilet is almost always a sign that something is amiss with one of the internal components. Identifying the specific issue is key to a swift and effective repair. The most common culprits are surprisingly straightforward and often involve wear and tear on these essential parts.

The Worn-out Flapper

The flapper is the most frequent offender when it comes to a running toilet. This rubber or plastic seal sits at the bottom of the tank and is lifted by the flush handle. Its job is to create a watertight seal over the flush valve opening. Over time, the rubber can degrade, warp, or become brittle due to constant contact with water and cleaning chemicals.

  • Signs of a failing flapper:
  • Visible wear: Cracks, tears, or a distorted shape.
  • Hardening: The rubber feels stiff and less flexible.
  • Discoloration: Often a sign of chemical damage.
  • The “dye test”: Add a few drops of food coloring to the tank water (without flushing). Wait 15-20 minutes. If color appears in the toilet bowl, the flapper is not sealing properly.

A leaky flapper allows a slow but steady stream of water to escape the tank and enter the bowl, prompting the fill valve to constantly replenish the lost water, thus creating the continuous running sound.

The Faulty Fill Valve (ballcock)

The fill valve, often referred to as the ballcock, is the mechanism that refills the tank after each flush and maintains the correct water level. If this valve malfunctions, it can lead to a running toilet in a couple of ways: it might fail to shut off completely, or it might cause the water level to be too high.

  • Failure to shut off: The internal seals or diaphragm within the fill valve can wear out, preventing it from completely stopping the flow of water even when the float indicates the tank is full.
  • High water level: If the fill valve doesn’t shut off at the correct level, the water will continue to fill the tank until it reaches the top of the overflow tube. This excess water then spills down the overflow tube into the bowl, triggering the fill valve to try and refill the tank again.

Modern toilets often use anti-siphon fill valves, which have a built-in overflow tube. Older models might have a separate overflow pipe. Regardless of the type, a malfunctioning fill valve is a significant cause of a constantly running toilet.

The Misadjusted Float

The float is intrinsically linked to the fill valve. Its purpose is to rise with the water level and signal the fill valve to shut off when the water reaches the desired height. If the float is set too high, it will keep the fill valve open longer than necessary, leading to an overflowing tank.

  • Float ball: If you have a float ball, it might be waterlogged and no longer buoyant, or its arm might be bent too low.
  • Cup float: Many modern toilets use a cup-style float that slides up and down the fill valve shank. These have an adjustment screw or clip that can be manipulated to change the shut-off height.

An incorrectly set float can mimic the symptoms of a faulty fill valve, causing continuous refilling.

Clogged Flush Valve Seat

While less common than flapper or fill valve issues, a clogged flush valve seat can also contribute to a running toilet. The flush valve seat is the rim at the bottom of the tank where the flapper rests. Mineral deposits, sediment, or debris can accumulate on this surface, preventing the flapper from forming a perfect seal.

  • Symptoms: Even with a seemingly good flapper, water might still leak into the bowl, triggering the refill cycle.
  • Diagnosis: You might notice rough patches or buildup on the rim where the flapper sits.

Cleaning this area is crucial for ensuring the flapper can do its job effectively.

Toilet Keeps Running Flush

Credit: orangecoastplumbing.net

Diagnosing The Running Toilet: A Step-by-step Approach

Before you start replacing parts, it’s essential to pinpoint the exact cause of the running toilet. This diagnostic process will save you time and money by ensuring you address the correct component.

Step 1: Listen And Observe

The first step is to simply listen to your toilet. Is it a constant hiss, a gurgling sound, or intermittent bursts of running water?

  • Constant hiss: Often indicates a faulty fill valve that isn’t shutting off.
  • Intermittent running: Could be a flapper that’s not sealing well, allowing water to leak slowly, or a float set too low.

Observe the water level in the tank. Is it too high, reaching above the overflow tube? Or is it consistently dropping?

Step 2: The Dye Test (check The Flapper)

As mentioned earlier, the dye test is a simple yet effective way to check the flapper’s seal.

  • Remove the tank lid and set it aside carefully.
  • Add a few drops of food coloring or a toilet dye tablet into the tank water. Do not flush.
  • Wait for 15-20 minutes.
  • Check the water in the toilet bowl. If colored water has seeped into the bowl, your flapper is not creating a watertight seal.

Step 3: Inspect The Flapper

If the dye test indicates a leaky flapper:

  • Examine the flapper: Look for any visible signs of wear, cracks, tears, or hardening.
  • Check the chain: Ensure the flush chain isn’t too long, causing it to get caught under the flapper, or too short, preventing the flapper from fully seating. There should be a little slack.
  • Feel the flush valve seat: Run your finger around the rim where the flapper sits. Is it smooth, or can you feel any nicks, mineral buildup, or debris?

Step 4: Assess The Fill Valve And Float

If the dye test shows the flapper is sealing correctly, the problem likely lies with the fill valve or float.

  • Observe the water level: After the tank has refilled, check if the water level is above the top of the overflow tube. If it is, the fill valve isn’t shutting off correctly, or the float is set too high.
  • Check the float mechanism:
  • Float ball: Is it submerged or heavy? Is the float arm bent downwards, keeping the valve open?
  • Cup float: Is the cup moving freely up and down the shank? Is it catching on anything? Is the adjustment screw or clip set correctly?
  • Listen to the fill valve: Does it continue to hiss or trickle water even after the tank is full?

Step 5: Examine The Overflow Tube

The overflow tube is a safety feature. If the water level consistently rises above its rim, water will pour down it into the bowl.

  • Check for cracks: Inspect the tube itself for any damage.
  • Ensure proper height: The fill valve should shut off the water *before* it reaches the top of the overflow tube.

By systematically going through these steps, you can usually isolate the component causing your toilet to run continuously.

Diy Repairs: Fixing The Running Toilet

Once you’ve identified the faulty component, most running toilet issues can be resolved with basic tools and a few replacement parts. These DIY fixes are generally straightforward and can save you the cost of a plumber.

Replacing A Worn-out Flapper

This is perhaps the most common and easiest DIY toilet repair.

Tools Needed: Pliers (optional, for removing stubborn clips), new flapper.

Steps:

  • Turn off the water supply: Locate the shut-off valve on the wall behind the toilet and turn it clockwise until it stops.
  • Flush the toilet: Hold the handle down to drain as much water as possible from the tank.
  • Remove the old flapper: Most flappers attach to the overflow tube with two pegs or clips. Gently unhook or unclip the old flapper. Then, detach the flush chain from the flush lever arm.
  • Attach the new flapper: Connect the new flapper to the overflow tube pegs. Ensure it sits flat.
  • Connect the chain: Attach the flush chain to the flush lever arm. Adjust the chain length so there is only a slight slack (about 1/2 inch) when the flapper is closed. Too much slack means the chain might get caught, too little means it might hold the flapper open.
  • Turn the water supply back on: Slowly turn the shut-off valve counter-clockwise.
  • Test the flush: Flush the toilet and listen. The running sound should stop. Perform the dye test again to confirm a good seal.

Adjusting Or Replacing The Fill Valve And Float

This repair is slightly more involved but still manageable for most DIYers.

Tools Needed: Adjustable wrench, screwdriver (for some float types), new fill valve assembly (if replacing).

Steps for Adjusting a Cup-Style Float:

  • Turn off the water supply and flush the toilet to drain the tank.
  • Locate the adjustment screw on the fill valve or the clip mechanism.
  • Lower the float: If the water level is too high, turn the screw counter-clockwise or adjust the clip to lower the float’s position. This will cause the fill valve to shut off at a lower water level.
  • Turn the water back on and test. Repeat adjustments as needed.

Steps for Replacing a Fill Valve Assembly:

  • Turn off the water supply and flush to drain the tank.
  • Disconnect the water supply line: Use an adjustable wrench to unscrew the nut connecting the supply line to the fill valve shank at the bottom of the tank. Have a towel ready for drips.
  • Remove the old fill valve: Inside the tank, there’s usually a large locknut holding the fill valve to the tank. Unscrew this nut (you might need to hold the valve steady from the inside). Lift the old fill valve out.
  • Install the new fill valve: Follow the manufacturer’s instructions. Generally, you’ll insert the new valve from the inside, ensuring the overflow tube is properly positioned, and then tighten the locknut from underneath the tank. Reconnect the water supply line.
  • Turn the water on and test. Adjust the float to the desired water level (typically about 1 inch below the top of the overflow tube).

Cleaning The Flush Valve Seat

If you suspect debris on the flush valve seat:

Tools Needed: Sponge or cloth, mild abrasive cleaner (like vinegar or baking soda paste), gloves.

Steps:

  • Turn off the water supply and flush to drain the tank.
  • Clean the seat: Carefully wipe the flush valve seat with a damp sponge or cloth. For stubborn buildup, use a mild abrasive cleaner. Be gentle to avoid scratching the surface.
  • Rinse: You can pour a little water into the tank to rinse away debris.
  • Turn the water back on and test.

Replacing The Entire Flush Valve Assembly

In some cases, the entire flush valve assembly (which includes the overflow tube and the opening for the flapper) might be damaged or corroded. This is a more involved repair but follows similar steps to replacing the fill valve, focusing on the large nut at the bottom of the tank that secures the entire assembly.

When To Call A Professional Plumber

While many running toilet issues are simple DIY fixes, there are times when it’s best to call in a professional plumber. Recognizing these situations can save you from further damage or unnecessary frustration.

Complex Plumbing Systems

If your home has an older or particularly complex plumbing system, you might encounter issues beyond the scope of a typical DIY repair. Issues with the water pressure or the main supply line could be contributing factors that require expert diagnosis.

Persistent Problems

If you’ve tried all the common DIY fixes, replacing the flapper, adjusting the float, cleaning the seat, and the toilet still runs, it might indicate a deeper problem. This could involve hidden cracks in the tank, issues with the valve seat itself that aren’t visible, or problems with the toilet’s connection to the drain line.

Lack Of Time Or Confidence

Plumbing repairs, even simple ones, can be intimidating for some. If you lack the necessary tools, time, or confidence to tackle the repair yourself, calling a plumber is a sensible option. Attempting a repair without the right knowledge can sometimes lead to more significant damage, costing more in the long run.

Signs Of More Serious Issues

Occasionally, a running toilet can be a symptom of a larger problem, such as a leaking toilet base (indicating a bad wax ring) or issues with the drainage system. If you notice water pooling around the base of the toilet, or if multiple fixtures in your home are experiencing drainage problems, it’s a clear sign to call a professional.

A qualified plumber has the experience and specialized tools to quickly diagnose and fix even the most stubborn running toilet issues, ensuring your plumbing system operates efficiently and without waste. You can find reputable plumbers through local recommendations or online directories, looking for those with good reviews and proper licensing.

Preventing Future Running Toilet Issues

Once you’ve successfully fixed your running toilet, taking proactive steps can help prevent the problem from recurring. Regular maintenance and awareness are key to keeping your toilet running smoothly and efficiently.

Regular Inspections

Make it a habit to occasionally remove the toilet tank lid and perform a quick visual inspection.

  • Check the flapper: Look for signs of wear or degradation.
  • Observe the water level: Ensure it’s consistently at the correct height.
  • Listen for unusual sounds: Pay attention to any hissing or trickling noises when the toilet isn’t in use.

The Dye Test Routine

Incorporate the dye test into your routine, perhaps every six months. This simple test can catch a leaky flapper long before it becomes a noticeable problem, saving water and preventing the annoying sound of a constantly running toilet.

Use Toilet-friendly Cleaners

Many toilet bowl cleaners contain harsh chemicals that can accelerate the degradation of rubber components like the flapper. Opt for milder cleaners or natural alternatives like vinegar and baking soda. Avoid cleaners that require you to leave chemicals sitting in the tank for extended periods.

Be Gentle With The Flush Handle

While not a direct cause of running toilets, excessive force on the flush handle can sometimes damage the internal linkage or the flush valve mechanism over time. Use a firm but gentle push.

Address Small Leaks Promptly

If you notice any minor leaks or drips from the tank or bowl, don’t ignore them. Small issues can often escalate into bigger problems if left unaddressed.

Consider Upgrading Older Parts

If your toilet is quite old, its internal components may be nearing the end of their lifespan. Consider replacing the flapper and even the fill valve as a preventative measure, especially if you notice signs of wear. Modern replacement parts are often more efficient and durable than older models.

A little bit of preventative maintenance goes a long way in ensuring your toilet operates correctly and avoids the common, costly problem of a continuous flush.

Water Conservation And Cost Savings

The impact of a running toilet extends beyond mere annoyance; it has significant implications for water conservation and your household budget. Understanding these impacts can underscore the importance of timely repairs.

Water Waste Statistics

A toilet that runs continuously can waste a staggering amount of water.

  • A slow leak from a bad flapper can waste 20 to 50 gallons per day.
  • A constantly running toilet can waste up to 200 gallons per day.

To put this into perspective, the average American uses about 80-100 gallons of water per day for all household needs. A single running toilet can therefore account for more than half of an individual’s daily water consumption, simply by leaking away.

Financial Implications

This water waste translates directly into higher utility bills. Water rates vary significantly by region, but even at a modest rate of $3-$5 per 1,000 gallons, a constantly running toilet can add $30 to $100 or more to your monthly water bill. Over a year, this can amount to hundreds of dollars lost to unnecessary water usage.

Environmental Impact

Beyond the financial cost, the unnecessary consumption of water has a considerable environmental impact. Treating and pumping water requires significant energy resources. Wasting water means wasting the energy used in its purification and distribution, contributing to a larger carbon footprint. Furthermore, in regions facing water scarcity, every drop saved is crucial for maintaining local ecosystems and ensuring adequate supply for essential needs.

The Roi Of A Quick Fix

The cost of replacement parts for a toilet repair (like a flapper or fill valve) is typically minimal, often ranging from $5 to $30. The tools required are standard household items. The time investment for a DIY repair is usually less than an hour. Therefore, the return on investment for fixing a running toilet is exceptionally high, with savings on water bills beginning immediately after the repair.

Table: Cost Of Water Waste From A Running Toilet

Leak Rate (Gallons per Day)Daily Cost (at $4/1000 gal)Monthly Cost (approx.)Annual Cost (approx.)
50$0.20$6.00$72.00
100$0.40$12.00$144.00
200$0.80$24.00$288.00

*Note: Costs are approximate and will vary based on local water rates.*

Addressing a running toilet isn’t just about silencing an annoying sound; it’s a responsible step towards water conservation and significant cost savings.

Frequently Asked Questions

How Often Should I Perform Maintenance On My Toilet?

It’s advisable to perform a basic inspection and the dye test every six months. This proactive approach can help catch issues like a deteriorating flapper early on. Beyond that

Cracks In Wall Are Hairline Cracks Normal Or Not

Cracks In Wall Are Hairline Cracks Normal Or Not

The subtle presence of hairline cracks in walls can be a source of anxiety for homeowners. Often dismissed as minor imperfections, these fine fissures can sometimes signal underlying issues that, if left unaddressed, could lead to more significant structural problems. Understanding when a hairline crack is merely a cosmetic annoyance and when it warrants professional attention is crucial for maintaining the integrity and value of your home. This article will guide you through the common causes of hairline cracks, help you distinguish between benign and concerning signs, and provide actionable advice on how to deal with them effectively, ensuring your home remains a safe and sound investment.

Key Takeaways

  • Hairline cracks are often normal, especially in newer homes, due to settling and material expansion/contraction.
  • Cracks wider than 1/8 inch, actively growing, or accompanied by other symptoms are cause for concern.
  • Common causes include building settlement, moisture fluctuations, poor construction, and temperature changes.
  • Location matters: Cracks around windows, doors, or foundations may indicate structural stress.
  • Early detection and repair are key to preventing minor issues from becoming major problems.
  • Professional assessment is recommended for any crack that causes doubt or exhibits worrying signs.

Understanding Hairline Cracks: When Are They Normal?

The construction and lifespan of a home involve constant, subtle movements. Materials like wood, concrete, and drywall naturally expand and contract with changes in temperature and humidity. Furthermore, newly constructed buildings undergo a process called building settlement, where the foundation and structure gradually adjust to the weight of the building and the surrounding soil. These natural processes can manifest as fine lines on interior and exterior walls, often referred to as hairline cracks.

Generally, hairline cracks that are thin, stable, and do not exhibit significant widening over time are considered normal. They typically appear as very fine lines, often barely visible, and are usually superficial. These cracks are more common in:

  • Newer homes: As the structure settles, minor cracking is almost inevitable.
  • Areas with significant temperature or humidity swings: For example, cracks might appear or become more noticeable during seasonal changes.
  • Plaster walls: Plaster is more prone to developing fine cracks than drywall due to its composition and application.

In my experience, many homeowners panic at the first sight of a wall crack, but it’s essential to approach it with a balanced perspective. Most of these fine lines are simply the building “breathing” and settling into its environment. The key is to differentiate these benign occurrences from signs of more serious issues.

The Science Behind Normal Cracking

Several physical phenomena contribute to the formation of hairline cracks that are considered normal:

  • Thermal Expansion and Contraction: Building materials, such as concrete, brick, wood, and drywall, expand when heated and contract when cooled. This constant change in size, driven by daily and seasonal temperature fluctuations, creates internal stresses within the materials. When these stresses exceed the material’s tensile strength, fine cracks can form. This is particularly evident in larger structures or in areas exposed to direct sunlight.
  • Moisture Content Changes: Wood framing, in particular, can absorb and release moisture, leading to expansion and contraction. As lumber dries out after construction or due to changes in ambient humidity, it can shrink, causing plaster or drywall to crack along the seams or where it’s fastened.
  • Building Settlement: The ground beneath a foundation can shift over time due to soil consolidation, changes in moisture content (drought or heavy rain), or seismic activity. This movement can cause the foundation to settle unevenly, putting stress on the building’s structure and leading to cracks in walls, ceilings, and even floors. While significant settlement is a serious issue, minor, uniform settlement often results in superficial hairline cracks.
  • Drying Shrinkage: New concrete and mortar mixtures contain water. As they cure and dry, they shrink slightly. This shrinkage can create internal stresses that result in fine cracks appearing as the material hardens.
Cracks In Wall Are Hairline Cracks Normal Or Not

Credit: www.thespruce.com

Identifying Concerning Cracks: What To Look For

While hairline cracks can be normal, certain characteristics indicate that a crack might be a symptom of a more serious underlying problem. Vigilance and careful observation are key to distinguishing between a minor cosmetic issue and a structural concern.

Key indicators that a crack is NOT normal include:

  • Width: Cracks wider than 1/8 inch (about 3mm) are generally considered more serious. If you can easily fit a coin into the crack, it’s a sign that the material has moved or separated significantly.
  • Progression: Cracks that are actively growing or widening over time are a red flag. Monitor cracks by placing a piece of tape across them and marking the ends. If the tape breaks or the crack extends beyond the tape over weeks or months, it indicates ongoing movement.
  • Pattern: Diagonal cracks, especially those that run from the corners of windows or doors upwards or downwards, often suggest structural stress. Horizontal cracks in foundation walls can indicate pressure from the soil outside. Stair-step cracks in brickwork can also point to foundation issues.
  • Location: Cracks that appear in multiple locations, especially if they are interconnected, or those originating from structural elements like beams, columns, or foundations, warrant closer inspection.
  • Associated Symptoms: Cracks accompanied by other signs of distress, such as sticking doors or windows, uneven floors, bulging walls, or water seepage, are almost always indicative of a problem beyond superficial settlement.

A Visual Guide To Crack Types

To help homeowners better identify concerning cracks, here’s a breakdown of common crack types and what they might signify:

  • Vertical Cracks:
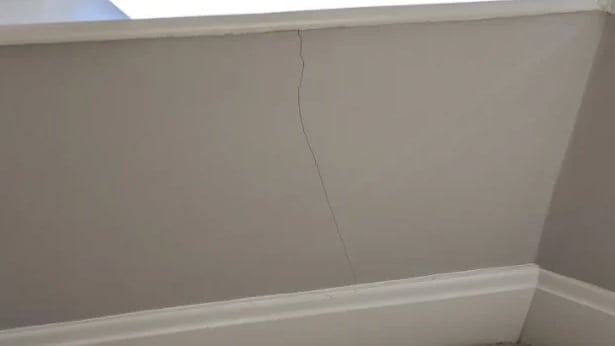
  • Normal: Thin, straight vertical cracks in drywall are often due to joint tape shrinkage or minor settling.
  • Concerning: Wide vertical cracks, especially near corners or over large spans, could indicate foundation issues or structural stress.
  • Horizontal Cracks:
  • Normal: Very fine horizontal cracks might appear due to plaster expansion/contraction.
  • Concerning: Horizontal cracks in foundation walls are a significant concern, often indicating hydrostatic pressure or improper structural support. In upper walls, they can suggest issues with load-bearing elements.
  • Diagonal Cracks:
  • Normal: Very fine, short diagonal cracks might occur due to minor settling.
  • Concerning: Diagonal cracks, especially those extending from window or door frames, are commonly linked to foundation settlement or structural shifting.
  • Stair-Step Cracks:
  • Normal: Extremely fine stair-step cracks in mortar joints might be due to minor drying shrinkage.
  • Concerning: Wider stair-step cracks in brick or block walls are a strong indicator of foundation movement or differential settlement.
  • Cracks Around Openings:
  • Normal: Minor hairline cracks extending from the corners of windows and doors can occur due to the stress concentration around these openings during settling.
  • Concerning: If these cracks are wide, growing, or accompanied by sticking doors/windows, they can signal more significant structural stress.
Cracks In Wall Are Hairline Cracks Normal Or Not

Credit: www.geobear.com

Common Causes Of Wall Cracks

Understanding the root causes of wall cracks is essential for effective diagnosis and repair. These causes can range from simple environmental factors to more complex structural issues.

1. Building Settlement

As mentioned, building settlement is a primary culprit for cracks, especially in the first few years of a home’s life. The weight of the building compresses the soil beneath it, causing a gradual sinking. When this settlement is uneven, it creates stresses that can lead to cracks.

  • Factors influencing settlement: Soil type, soil moisture content, drainage around the foundation, and the quality of the initial construction all play a role.
  • Repair: Minor settlement cracks may be cosmetic. However, significant or ongoing settlement may require foundation repair, such as underpinning or soil stabilization.

2. Moisture Fluctuations

Water is a powerful force that can significantly impact building materials.

  • Expansion and Contraction: Wood framing absorbs moisture and swells, then shrinks as it dries. This movement can push against drywall or plaster, causing cracks. High humidity can cause paint to blister, and subsequent drying can lead to cracks in the underlying material.
  • Water Damage: Leaking pipes, roof leaks, or poor drainage can saturate walls, weakening plaster and drywall and leading to cracks and deterioration. This is particularly concerning if you see efflorescence (a white, powdery residue) on masonry, indicating water penetration.
  • Repair: Address the source of moisture first. This might involve fixing leaks, improving ventilation, or enhancing exterior drainage. Then, repair the damaged wall sections.

3. Temperature Changes

Similar to moisture, temperature changes cause materials to expand and contract.

  • Seasonal Cycles: Significant temperature shifts between seasons can exacerbate minor cracks.
  • Direct Sunlight: Walls exposed to direct sunlight experience greater temperature fluctuations, increasing the likelihood of thermal cracking.
  • Repair: While difficult to prevent entirely, using flexible fillers and paints can help accommodate minor movement. For larger issues, insulation and proper building envelope design are key.

4. Poor Construction Or Materials

Sometimes, cracks are a direct result of how the house was built or the quality of the materials used.

  • Improper Drywall Installation: If drywall panels are not adequately supported, or if joints are not taped and mudded correctly, cracks can form along the seams.
  • Substandard Plastering: In older homes, plaster applied too thinly or over improperly prepared lath can lead to cracking.
  • Concrete Issues: Cracks in concrete foundations or slabs can result from improper mixing, inadequate curing, or insufficient reinforcement.
  • Repair: This often requires professional assessment and repair, potentially involving re-doing sections of drywall, plaster, or concrete work.

5. Environmental Factors

  • Vibrations: Heavy traffic nearby, construction, or even seismic activity can cause vibrations that lead to cracking.
  • Tree Roots: Large tree roots growing near the foundation can exert pressure, leading to foundation movement and cracks.
  • Repair: Addressing environmental factors might involve landscaping changes, vibration dampening measures, or, in severe cases, structural reinforcement.
Cracks In Wall Are Hairline Cracks Normal Or Not

Credit: buckeyebasementsolutions.com

When To Call A Professional

While DIY repairs are often sufficient for minor hairline cracks, there are clear scenarios where professional expertise is indispensable. Relying on a qualified professional ensures that the underlying cause is correctly identified and addressed, preventing future damage and potential safety hazards.

You should consult a professional if you observe any of the following:

  • Wide or Deep Cracks: Any crack exceeding 1/8 inch in width, or one that appears deep and penetrates the wall material, warrants expert evaluation.
  • Active or Growing Cracks: If a crack is clearly widening, lengthening, or showing signs of new growth, it indicates ongoing movement that needs professional diagnosis.
  • Diagonal or Stair-Step Cracks: These patterns, particularly in brickwork or around openings, strongly suggest structural or foundation issues.
  • Horizontal Cracks in Foundation Walls: This is a critical warning sign of significant pressure on the foundation.
  • Multiple Interconnected Cracks: A network of cracks can indicate widespread stress within the building’s structure.
  • Cracks Accompanied by Other Issues: Sticking doors/windows, sagging floors, bulging walls, or water intrusion alongside cracks are serious indicators.
  • Unease or Uncertainty: If you are simply unsure about the severity of a crack or its potential implications, it is always best to err on the side of caution and seek a professional opinion.

Who To Call?

The type of professional you need depends on the suspected cause of the crack:

  • Structural Engineer: For complex structural issues, foundation problems, or widespread cracking, a structural engineer can provide an unbiased assessment and design appropriate repair solutions.
  • Foundation Repair Specialist: If the diagnosis points to foundation settlement or damage, a specialized contractor can implement repairs like underpinning, crack injection, or stabilization.
  • General Contractor or Reputable Handyman: For minor, superficial cracks that have been assessed and deemed non-structural, a skilled contractor can perform the necessary repairs, such as patching, filling, and repainting.
  • Home Inspector: If you are buying or selling a property and want a general assessment of the home’s condition, including wall cracks, a home inspector can be valuable.

Example Case Study: The Millers’ Home Foundation

The Miller family noticed several diagonal cracks appearing around their newly installed picture window. Initially, they considered filling them, but the cracks seemed to widen slightly each month. Concerned, they hired a structural engineer. The engineer’s assessment revealed that the soil beneath that corner of the house had poor compaction, leading to uneven settlement. The solution involved targeted foundation underpinning to stabilize the affected area. After the underpinning was completed, the cracks were professionally repaired and have not reappeared, saving the Millers from potential future structural damage.

Repairing Hairline Cracks: Diy Vs. Professional

The approach to repairing hairline cracks depends largely on their cause and severity. Minor, non-structural cracks can often be addressed with DIY methods, while more significant issues require professional intervention.

Diy Repair Methods For Minor Cracks

For hairline cracks that are deemed cosmetic and stable, several DIY methods can effectively restore the wall’s appearance.

  • Cleaning and Preparation:
  • Gently clean the crack to remove any dust, debris, or loose paint. A soft brush or vacuum cleaner attachment works well.
  • If the crack is slightly wider than a hairline, you might need to widen it slightly with a putty knife or a utility knife to create a better surface for the filler to adhere to. This is sometimes called “veining” the crack.
  • Wipe the area with a damp cloth and allow it to dry completely.
  • Filling the Crack:
  • Spackling Compound/Wall Putty: For very fine cracks in drywall or plaster, a lightweight spackling compound is often sufficient. Apply it with a flexible putty knife, pressing it gently into the crack. Smooth the surface flush with the wall.
  • Caulk: For cracks that might experience slight movement (e.g., near window or door frames), an acrylic latex caulk is a good choice. It remains flexible after drying. Apply a bead of caulk into the crack, then smooth it with a damp finger or cloth.
  • Joint Compound (Mud): For slightly wider or deeper hairline cracks, or those in drywall joints, joint compound might be necessary. Apply it carefully with a putty knife, ensuring it fills the crack completely.
  • Sanding and Finishing:
  • Once the filler or caulk is completely dry (check product instructions for drying times), lightly sand the area smooth using fine-grit sandpaper (e.g., 120-220 grit). Be careful not to over-sand, which can create a depression.
  • Wipe away the dust with a tack cloth or damp cloth.
  • Priming and Painting:
  • Apply a coat of primer over the repaired area. This seals the filler and ensures a uniform finish when you paint.
  • Once the primer is dry, paint the wall to match the surrounding area. You may need to paint the entire wall from corner to corner to avoid noticeable patches.

When Professional Repair Is Necessary

As discussed earlier, professional repair is crucial for cracks that indicate structural problems.

  • Diagnosis: Professionals will first diagnose the root cause. This might involve visual inspection, using specialized tools, or even recommending a structural engineer.
  • Structural Repairs: This could involve foundation stabilization, reinforcement of structural elements, or addressing water intrusion issues. These are complex jobs requiring specialized skills and equipment.
  • Specialized Filling Techniques: For larger cracks or those in concrete, professionals might use epoxy injection or polyurethane foam injection. These methods not only fill the crack but can also bond the material back together, restoring structural integrity.
  • Plaster and Stucco Repair: Repairing extensive damage to plaster or stucco requires specific techniques and materials to ensure a seamless and durable finish.
  • Cost Consideration: While DIY repairs are inexpensive, professional repairs can range from a few hundred dollars for minor crack sealing to thousands for major foundation work. However, the cost of professional repair is often far less than the cost of addressing the damage caused by neglecting a serious issue.

Data Insight: According to HomeAdvisor, the average cost to repair foundation cracks ranges from $500 to $2,500, with some complex repairs exceeding $5,000. This highlights the potential financial implications of ignoring significant cracking.

Maintenance Tips To Prevent Future Cracks

Preventing cracks is always better than repairing them. Regular maintenance can significantly reduce the likelihood of developing new cracks and help identify potential issues early.

  • Monitor Humidity Levels: Maintain consistent indoor humidity levels, ideally between 30% and 50%, using humidifiers or dehumidifiers as needed. This minimizes wood expansion and contraction.
  • Ensure Proper Drainage: Keep gutters clean and ensure downspouts direct water away from the foundation. Grade the soil around your house so it slopes away from the foundation.
  • Regular Inspections: Periodically inspect your home’s interior and exterior walls, paying attention to areas around windows, doors, and the foundation. Look for new cracks or changes in existing ones.
  • Address Leaks Promptly: Fix any plumbing leaks, roof leaks, or issues with exterior cladding immediately to prevent water damage to walls.
  • Manage Landscaping: Keep large trees and shrubs a reasonable distance from the foundation to prevent root damage.
  • Seal Exterior Cracks: Seal any cracks or gaps in the exterior walls, particularly around windows and doors, to prevent water penetration.

Frequently Asked Questions

What Is The Difference Between A Hairline Crack And A Structural Crack?

A hairline crack is typically very fine, often less than 1/16th of an inch wide, and usually superficial. It doesn’t compromise the structural integrity of the wall and is often caused by normal building settlement, material expansion/contraction, or drying shrinkage. A structural crack, on the other hand, is usually wider (often over 1/8th inch), deeper, and indicates movement or stress within the building’s foundation or structural elements. These cracks can compromise the safety and stability of the home and require professional attention.

How Often Should I Inspect My Walls For Cracks?

It’s advisable to conduct a visual inspection of your walls at least twice a year, typically in the spring and fall, coinciding with seasonal temperature and humidity changes. Pay close attention after significant weather events, such as heavy rains, droughts, or seismic activity. Regular monitoring allows you to catch developing issues early.

Can I Repair Hairline Cracks Myself?

Yes, minor, stable hairline cracks that are purely cosmetic can often be repaired effectively using DIY methods. This typically involves cleaning the crack, filling it with spackling compound or acrylic caulk, sanding smooth, priming, and painting. However, if you are unsure about the cause or severity of the crack, it’s always best to consult a professional first.

What Happens If I Ignore A Crack In My Wall?

Ignoring a crack can have varying consequences depending on its cause. If it’s a benign hairline crack, ignoring it might simply mean living with a minor cosmetic imperfection. However, if the crack is a symptom of a larger issue like foundation settlement or water damage, ignoring it can lead to worsening structural damage, increased repair costs, potential safety hazards, and a decrease in your home’s value. Water intrusion through cracks can also lead to mold growth and compromised insulation.

Is Plaster Or Drywall More Prone To Cracking?

Both plaster and drywall can crack, but they do so for slightly different reasons and exhibit cracks differently. Plaster, especially older plaster applied over lath, is more prone to developing a network of fine, random cracks due to its inherent brittleness and the potential for lath movement or deterioration. Drywall (gypsum board) is more prone to cracking along seams if the tape and joint compound are not applied correctly, or where panels meet due to framing movement. However, modern plaster systems and well-installed drywall are quite durable. The underlying causes of stress, such as settlement or moisture, are the primary drivers for cracking in both materials.

The presence of cracks in your home’s walls, whether hairline or more significant, should never be entirely dismissed. While many fine fissures are a normal part of a building’s life cycle, they serve as important indicators of the home’s structural health.

By understanding the common causes, recognizing the warning signs of serious issues, and knowing when to seek professional help, you can effectively manage and repair wall cracks. Regular maintenance and prompt attention to any signs of distress will ensure your home remains a secure, stable, and valuable asset for years to come.

Standing Desk Vs Desk Converter

Standing Desk Vs Desk Converter

The modern workplace is undergoing a significant transformation, driven by a growing awareness of the health implications of prolonged sitting. For decades, the standard office setup featured a fixed-height desk, encouraging hours of sedentary activity. However, research has increasingly highlighted the detrimental effects of this lifestyle, linking it to a myriad of health issues ranging from back pain and obesity to more serious chronic conditions.

This has spurred a surge in ergonomic solutions designed to promote movement and better posture throughout the workday. Among the most popular are standing desks and desk converters, each offering a distinct approach to incorporating standing into your work routine.

Choosing between a standing desk and a desk converter can be a pivotal decision for anyone looking to improve their workspace ergonomics and overall well-being. While both aim to reduce sitting time, they differ significantly in terms of cost, installation, flexibility, and aesthetic integration. Understanding these differences is key to making an informed choice that aligns with your specific needs, budget, and workspace constraints. This article will provide a comprehensive comparison, exploring the pros and cons of each option, helping you determine which solution is the best fit for your home or office environment.

Key Takeaways

  • Standing desks are complete, height-adjustable workstations, offering greater stability and a seamless aesthetic but typically come at a higher price point and require more assembly.
  • Desk converters are placed on top of existing desks, providing a more budget-friendly and flexible solution for transitioning to a standing posture, though they can sometimes be less stable and may limit workspace.
  • The choice depends on budget, existing furniture, desired stability, space availability, and aesthetic preferences.
  • Both solutions can offer significant health benefits by reducing sedentary time, improving posture, and potentially boosting productivity and energy levels.
  • Proper ergonomics, including monitor height and keyboard placement, are crucial regardless of the chosen solution.

Understanding Standing Desks

A standing desk, also known as a sit-stand desk or height-adjustable desk, is a complete desk designed to allow users to alternate between sitting and standing positions throughout the workday. These desks feature a mechanism that raises or lowers the entire work surface, enabling a smooth transition between postures. They are available in various configurations, including manual crank, electric motor, and pneumatic lift systems, each with its own advantages in terms of ease of use and speed of adjustment.

Types Of Standing Desks

Standing desks can be broadly categorized by their adjustment mechanism:

  • Electric Standing Desks: These are the most popular and user-friendly option. With the push of a button, an electric motor smoothly raises or lowers the desk to a preset height. Many models offer memory presets, allowing you to quickly return to your preferred sitting and standing heights. They offer the most convenience but are generally the most expensive.
  • Manual Crank Standing Desks: These desks use a hand crank to adjust the height. While more affordable than electric models, they require more effort and time to change positions, which can be a deterrent for frequent adjustments.
  • Pneumatic/Gas Spring Standing Desks: These use a gas spring to assist in lifting the desk, making manual adjustments easier. They are typically quicker to adjust than crank models but may have weight limitations and can be less robust than electric options over the long term.
  • Fixed-Height Standing Desks: While less common now, these are desks designed solely for standing. They are the most basic and affordable option but lack the flexibility to sit, which is often recommended for prolonged periods of standing.

Advantages Of Standing Desks

Investing in a full standing desk offers several compelling benefits:

  • Stability and Durability: As a complete unit, standing desks are generally more stable, especially when fully extended. They are designed to support the weight of monitors, computers, and other office equipment without wobbling.
  • Aesthetics and Integration: Standing desks are designed to be a cohesive piece of furniture, often available in various finishes and styles that can seamlessly integrate into home or office decor. They provide a clean, uncluttered workspace.
  • Ergonomic Design: Many electric standing desks offer generous height ranges, accommodating a wide variety of users, from shorter individuals to taller professionals. The entire surface moves, ensuring your monitor and keyboard remain at optimal ergonomic heights relative to each other.
  • Ample Workspace: Full standing desks typically offer a larger and more continuous work surface compared to converters, allowing for more equipment and freedom of movement.

Disadvantages Of Standing Desks

Despite their advantages, standing desks also have potential drawbacks:

  • Cost: Standing desks, particularly electric models, represent a significant investment. Prices can range from a few hundred dollars for basic manual models to over a thousand for premium electric desks with advanced features.
  • Assembly and Installation: These desks often require assembly, which can be time-consuming and may necessitate two people. Their size and weight can also make them more challenging to move or relocate.
  • Space Requirements: A full standing desk replaces your existing desk, meaning it occupies a dedicated space. If you have a small apartment or a compact office cubicle, a standing desk might be too large.

Understanding Desk Converters

A desk converter, also known as a standing desk converter or riser, is an accessory that sits on top of your existing desk. It provides an adjustable-height platform for your monitor and keyboard, allowing you to convert your traditional desk into a temporary standing workstation. These converters come in various designs, from simple risers with fixed shelves to complex multi-tiered units with gas springs or electric motors for height adjustment.

Types Of Desk Converters

Desk converters are typically classified by their adjustment mechanism and design:

  • Manual Lift Converters: These are the most common type. They usually feature a spring-loaded or gas-assisted mechanism that allows you to lift the top platform with a handle or lever. Adjustments are generally quick but require some physical effort.
  • Electric Converters: Less common but increasingly available, electric converters use a motor to raise and lower the platform, offering the same push-button convenience as electric standing desks. These are typically more expensive than manual converters.
  • Static Risers: These are non-adjustable platforms that simply elevate your monitor and keyboard to a standing height. They are the most basic and affordable option but offer no flexibility to sit and stand easily.
  • Multi-Tiered Converters: Many converters feature separate levels for the monitor and keyboard. This allows for better ergonomic positioning, ensuring your monitor is at eye level while your keyboard and mouse are at a comfortable typing height.

Advantages Of Desk Converters

Desk converters offer a compelling alternative for many users:

  • Cost-Effectiveness: This is often the biggest advantage. Desk converters are significantly cheaper than full standing desks, making them an accessible entry point into sit-stand working. Prices can range from under $100 for basic models to $300-$500 for more advanced electric or feature-rich manual units.
  • Ease of Use and Installation: Most converters come pre-assembled or require minimal setup. They simply sit on your existing desk, making them incredibly easy to deploy without tools or major disruption.
  • Flexibility and Portability: You can easily move a desk converter from one desk to another, or even take it with you if you relocate. This flexibility is ideal for renters or those who frequently change their workspace.
  • Utilizes Existing Furniture: If you already have a desk you like, a converter allows you to upgrade its functionality without replacing it. This preserves your current workspace aesthetic and saves on the cost of a new desk.

Disadvantages Of Desk Converters

While convenient, desk converters also come with limitations:

  • Stability Concerns: Because they sit on top of another surface, converters can sometimes be less stable, especially when raised to their full height. This can lead to monitor wobble during typing or mouse movements, which can be distracting.
  • Limited Workspace: Converters often reduce the available surface area on your existing desk. The base of the converter occupies space, and the lifting mechanism can make it difficult to place items like documents or a coffee cup within easy reach when standing.
  • Aesthetics: While designs have improved, some converters can look clunky or out of place on an otherwise stylish desk. The cables from your monitor and computer may also be more visible.
  • Weight and Size Limitations: Converters have weight capacities for monitors and keyboards, and some may not accommodate multiple large monitors or heavy equipment. The footprint of the converter can also be substantial.

Health Benefits Of Standing More

The primary driver behind the popularity of both standing desks and converters is the growing body of evidence linking prolonged sitting to adverse health outcomes. Incorporating more standing and movement into your workday can yield significant benefits.

Reducing Sedentary Behavior

The human body is not designed for prolonged periods of inactivity. Sitting for more than 6-8 hours a day is associated with an increased risk of:

  • Weight Gain and Obesity: Sitting burns fewer calories than standing. Over time, this can contribute to a caloric surplus and weight gain.
  • Cardiovascular Disease: Studies suggest a link between excessive sitting and an increased risk of heart disease, even for individuals who exercise regularly.
  • Type 2 Diabetes: Sedentary behavior can negatively impact insulin sensitivity, increasing the risk of developing type 2 diabetes.
  • Certain Cancers: Some research indicates a correlation between high levels of sedentary time and an increased risk of colon, endometrial, and lung cancers.
  • Musculoskeletal Issues: Prolonged sitting often leads to poor posture, back pain, neck strain, and tight hip flexors.

By alternating between sitting and standing, you can break up these long periods of inactivity, promoting better circulation and engaging more muscles.

Improving Posture And Reducing Back Pain

Many office workers experience back pain due to poor posture while sitting. This often involves slouching, rounded shoulders, and an unsupported lower back. Standing can help:

  • Engage Core Muscles: Standing naturally encourages better core engagement.
  • Promote Spinal Alignment: When standing with proper posture, your spine can maintain its natural curves, reducing strain on the lower back.
  • Increase Movement: The ability to shift weight, sway, and take small steps while standing encourages micro-movements that are beneficial for spinal health.

In my experience, the ability to easily switch between sitting and standing has been instrumental in alleviating chronic lower back discomfort that plagued me during long periods of desk work.

Boosting Energy And Productivity

While it might seem counterintuitive, standing can actually increase your energy levels and improve focus.

  • Increased Blood Flow: Standing promotes better circulation, which can deliver more oxygen to the brain, leading to increased alertness and reduced feelings of fatigue.
  • Reduced Sluggishness: The physical act of standing can combat the mid-afternoon slump that often accompanies prolonged sitting.
  • Potential for Improved Mood: Some studies suggest that reducing sedentary time can have positive effects on mood and reduce feelings of stress and anxiety.

A study published in the *British Journal of Sports Medicine* found that interventions to reduce sitting time were associated with improvements in self-reported fatigue and mood.

Standing Desk Vs Desk Converter

Credit: reflecta.de

Comparing Standing Desks And Desk Converters: Key Factors

When deciding between a standing desk and a converter, several factors should guide your decision.

Cost And Budget

  • Standing Desks: Generally more expensive, ranging from $200-$500 for basic manual models to $500-$1500+ for high-quality electric desks.
  • Desk Converters: Significantly more affordable, typically ranging from $70-$150 for basic static risers to $150-$500 for advanced electric or feature-rich manual converters.

Installation And Assembly

  • Standing Desks: Require more involved assembly, often taking 1-3 hours and potentially needing two people.
  • Desk Converters: Minimal to no assembly required; typically placed directly on top of an existing desk.

Stability And Durability

  • Standing Desks: As a single, integrated unit, they offer superior stability and are built for long-term, heavy use.
  • Desk Converters: Can be less stable, especially when fully extended, and may experience wobble. Durability can vary greatly by model and build quality.

Workspace And Aesthetics

  • Standing Desks: Provide a dedicated, cohesive workspace. Available in various designs to match office decor.
  • Desk Converters: Sit on top of existing desks, potentially limiting surface area and sometimes impacting the overall aesthetic. Cable management can also be more challenging.

Flexibility And Portability

  • Standing Desks: Are permanent fixtures and difficult to move.
  • Desk Converters: Highly flexible and portable, easy to move between locations or swap out.

Ergonomic Features

  • Standing Desks: Offer a full range of motion for the entire desk surface, allowing for optimal positioning of monitors and keyboards relative to each other. Many electric models offer memory presets.
  • Desk Converters: Ergonomics depend on the design. Multi-tiered models are best for separating monitor and keyboard heights. Limited height adjustment range compared to full standing desks on some models.

Here’s a table summarizing the key differences:

Feature Standing Desk Desk Converter
Cost Higher ($200 – $1500+) Lower ($70 – $500)
Installation Requires assembly (1-3 hours) Minimal to no assembly
Stability Excellent Variable, can be less stable
Workspace Area Full desk surface Reduced surface area on existing desk
Aesthetics Integrated, cohesive design Can be less integrated, potentially clunky
Portability Low (heavy, fixed) High (easy to move)
Flexibility Adjustable height for sitting/standing Adjustable height for sitting/standing on existing desk
Durability Generally high Variable, depends on quality

Making The Right Choice For Your Workspace

The best solution for you hinges on your individual circumstances and priorities.

When A Standing Desk Is The Better Choice

  • You’re setting up a new workspace: If you’re furnishing a home office or redesigning an existing one, a standing desk offers a clean, integrated solution from the ground up.
  • Budget is not the primary constraint: If you can afford the higher upfront cost, a standing desk provides long-term value and superior ergonomics.
  • You need maximum stability: If you use multiple large monitors, heavy equipment, or are sensitive to any desk movement, a full standing desk is the more stable option.
  • You want a seamless aesthetic: A standing desk becomes a central piece of furniture, designed to look good and integrate well into your space.
  • You plan to use it extensively: For professionals who will be using the sit-stand functionality daily for many years, the investment in a robust standing desk is often worthwhile.

When A Desk Converter Is The Better Choice

  • You have a limited budget: Converters offer a cost-effective way to experience the benefits of a standing workstation.
  • You have an existing desk you like: If you’re happy with your current desk’s surface area, style, and stability, a converter is a great way to upgrade its functionality.
  • You need flexibility and portability: If you might move offices, work from different locations, or want the option to easily remove the standing setup, a converter is ideal.
  • You want to try standing without a major commitment: A converter is a low-risk way to test the waters of a sit-stand routine before investing in a full standing desk.
  • Space is very limited: A converter takes up less overall space than replacing your entire desk.

Ergonomic Best Practices For Standing Workstations

Regardless of whether you choose a standing desk or a converter, proper ergonomic setup is crucial to maximize benefits and avoid new strains.

Monitor Height And Distance

  • Top of the screen should be at or slightly below eye level. This prevents neck strain from looking up or down.
  • Maintain an arm’s length distance from the screen. This reduces eye strain.
  • Consider a monitor arm: These are excellent accessories for both standing desks and converters, allowing precise positioning and freeing up desk space.

Keyboard And Mouse Placement

  • Elbows should be at approximately a 90-degree angle when typing, with wrists straight and relaxed.
  • Ensure your keyboard and mouse are at a height that allows this posture. This is where multi-tiered converters or the full surface of a standing desk are beneficial.
  • Use a keyboard tray if necessary: Some standing desks and converters may benefit from an under-desk keyboard tray for optimal typing posture when sitting.

Standing Posture

  • Stand with your weight evenly distributed. Avoid locking your knees.
  • Keep your shoulders relaxed and your head aligned over your spine.
  • Alternate between standing and sitting regularly. Aim for a 1: 1 or 2:1 ratio of sitting to standing time, or simply switch whenever you feel the need. Standing all day can also lead to fatigue and discomfort.
  • Use an anti-fatigue mat: These cushioned mats can significantly improve comfort for your feet, legs, and back during extended standing periods.

Example Scenario: Sarah’s Home Office Upgrade

Sarah, a freelance graphic designer, found herself experiencing persistent lower back pain and mid-day fatigue. Her existing L-shaped desk was functional but contributed to long hours of sitting. She had a budget of around $400 and wanted a solution that didn’t require a complete overhaul of her workspace.

After researching, she opted for a manual gas-spring desk converter. It fit perfectly on her existing L-shaped desk, providing a stable platform for her dual monitors and keyboard. The converter came almost fully assembled, requiring only about 15 minutes to set up. Sarah found she could easily switch between sitting and standing every hour, which significantly reduced her back pain. While the converter did take up some space on her desk, she found the improved comfort and energy levels well worth the trade-off. She later added an anti-fatigue mat for added comfort when standing.

Example Scenario: Mark’s Corporate Office Setup

Mark works in a large tech company that encourages ergonomic solutions. He needed a stable setup for his triple-monitor array and was willing to invest in a long-term solution. The company offered a stipend for home office equipment, and Mark had a budget of $800.

He chose an electric standing desk with a large surface area and memory presets. The desk arrived in several boxes and took him and a friend about two hours to assemble. Once set up, Mark found the desk incredibly stable, even when adjusted to its full height. He programmed his preferred sitting and standing heights into the memory presets, allowing him to switch postures with a single button press. The clean lines of the standing desk also improved the overall aesthetic of his home office. The ample surface area easily accommodated his monitors, laptop, and other peripherals.

Frequently Asked Questions

What Is The Main Difference Between A Standing Desk And A Desk Converter?

The fundamental difference lies in their structure. A standing desk is a complete, standalone piece of furniture designed to be height-adjustable. A desk converter, on the other hand, is an accessory that sits on top of an existing desk, transforming it into a temporary standing workstation.

How Much Do Standing Desks And Desk Converters Typically Cost?

Standing desks are generally more expensive, with prices ranging from around $200 for basic manual models to $1,500 or more for premium electric versions. Desk converters are significantly more affordable, typically costing between $70 for simple static risers and $500 for advanced electric models.

Are Standing Desks Or Converters More Stable?

Standing desks, being complete units designed for height adjustment, generally offer superior stability. Desk converters, which rest on top of another surface, can sometimes be less stable, particularly when raised to their maximum height, and may experience some wobble.

Can A Desk Converter Replace A Full Standing Desk?

For many users, yes. If budget, space, or the need to utilize an existing desk are primary concerns, a desk converter can effectively provide the benefits of a sit-stand workstation. However, if maximum stability, a larger integrated workspace, and a seamless aesthetic are priorities, a full standing desk is usually the better choice.

How Often Should I Switch Between Sitting And Standing?

There’s no single rule, but a common recommendation is to alternate every 30-60 minutes. Listen to your body; switch when you feel tired, uncomfortable, or simply want to change your posture. The key is to reduce prolonged sedentary periods rather than standing all day, which can also lead to fatigue.

The transition to more active work environments is more than a trend; it’s a fundamental shift towards prioritizing health and well-being in the modern workplace. Both standing desks and desk converters offer viable pathways to reduce sedentary behavior, improve posture, and potentially boost productivity.

Your choice between the two will ultimately depend on a careful assessment of your budget, existing furniture, space constraints, and personal preferences. By understanding the distinct advantages and disadvantages of each, you can make an informed decision that supports a healthier, more dynamic workday.

Kohler Pressure Washer Wont Start

Kohler Pressure Washer Wont Start

A Kohler pressure washer is a powerful tool for tackling tough cleaning jobs, from grimy driveways to weathered siding. However, like any complex piece of machinery, it can sometimes refuse to start. When your Kohler pressure washer won’t start, it can be incredibly frustrating, leaving you with unfinished tasks and a sense of helplessness.

Understanding the common culprits and the systematic approach to diagnosing and fixing the problem is key to getting your equipment back up and running quickly.

This guide will walk you through the most frequent reasons why a Kohler pressure washer might fail to ignite, offering practical, step-by-step solutions. We’ll cover everything from simple checks like fuel and spark plug issues to more complex problems involving the carburetor or water flow.

By following this comprehensive troubleshooting process, you’ll be equipped to identify the root cause and perform the necessary repairs, saving you time and the expense of a service call.

Key Takeaways

  • Fuel is Fundamental: Ensure you’re using fresh, clean fuel mixed correctly, especially for 2-stroke engines. Stale fuel is a primary cause of starting issues.
  • Spark is Essential: A fouled, damaged, or improperly gapped spark plug will prevent ignition. Regular inspection and replacement are crucial.
  • Airflow Matters: Blocked air filters restrict the air-fuel mixture, hindering combustion. Keep your air filter clean.
  • Water Flow is Required: Most pressure washers have safety features that prevent starting without water pressure. Check your water source and hose connections.
  • Carburetor Clogs: Gummed-up carburetors, often due to old fuel, are a common problem. Cleaning or rebuilding may be necessary.
  • Safety First: Always disconnect the spark plug wire before performing any maintenance or inspection to prevent accidental starts.
Kohler Pressure Washer Wont Start

Credit: www.youtube.com

Troubleshooting Common Kohler Pressure Washer Starting Problems

When your Kohler pressure washer refuses to start, it’s often a sign of a simple, fixable issue. The key is to approach the problem methodically, checking the most common culprits first. This systematic approach will save you time and prevent unnecessary component replacements.

1. Fuel System Issues: The Most Frequent Offenders

The fuel system is arguably the most common source of starting problems for any gasoline-powered engine, including those on Kohler pressure washers. Issues here range from the type of fuel used to the delivery mechanism.

Freshness And Type Of Fuel

Pro Tip: Always use fresh gasoline that is no more than 30 days old. Ethanol in gasoline can absorb moisture over time, leading to corrosion and performance issues. If your pressure washer has been sitting for longer, it’s best to drain the old fuel and refill with fresh.

  • Stale Fuel: Gasoline degrades over time, especially when exposed to air. This degradation leads to the formation of varnish and gum deposits that can clog fuel lines and the carburetor. If your pressure washer was stored with fuel in the tank for several months, this is a prime suspect.
  • Ethanol Contamination: While most modern gasoline contains ethanol, higher concentrations can be problematic for some engines and fuel system components. If possible, use ethanol-free gasoline for your pressure washer.
  • Incorrect Fuel-Oil Mixture (2-Stroke Engines): If your Kohler engine is a 2-stroke model, using the wrong fuel-oil ratio is critical. Too much oil can cause excessive smoke and fouling, while too little oil can lead to engine damage. Always refer to your owner’s manual for the precise mixture recommended by Kohler. A common ratio is 40:1 or 50:1, but always verify.

Fuel Delivery Problems

  • Empty Fuel Tank: It sounds obvious, but double-check that the fuel tank is not empty.
  • Clogged Fuel Filter: Many pressure washers have an inline fuel filter between the tank and the carburetor. If this filter becomes clogged with debris, it will restrict fuel flow to the engine. Inspect and replace the fuel filter if it appears dirty or damaged.
  • Kinked or Blocked Fuel Line: Ensure the fuel line is not kinked, pinched, or obstructed. Sometimes, debris can lodge in the fuel line itself. You can test this by disconnecting the fuel line from the carburetor (with a catch pan underneath) and seeing if fuel flows freely when the fuel valve is open.

2. Ignition System Problems: No Spark, No Start

For an engine to start, it needs a spark at the right time to ignite the fuel-air mixture. If your Kohler pressure washer isn’t getting a spark, it won’t run.

Spark Plug Issues

The spark plug is a small but vital component. It’s exposed to high temperatures and combustion forces, making it prone to wear and fouling.

  • Fouled Spark Plug: Carbon deposits, oil, or fuel residue can build up on the spark plug’s electrodes, preventing a strong spark. If the plug looks black, oily, or wet, it’s likely fouled.
  • Damaged Spark Plug: The ceramic insulator can crack, or the electrodes can become worn or damaged.
  • Incorrect Spark Plug Gap: The gap between the electrodes is crucial for a proper spark. If the gap is too wide or too narrow, the spark may not be strong enough to ignite the fuel. Refer to your owner’s manual for the correct gap specification, typically measured in millimeters (mm) or inches (in). You can adjust the gap using a feeler gauge.
  • Loose or Disconnected Spark Plug Wire: Ensure the spark plug wire is securely attached to the spark plug terminal. A loose connection will prevent the spark from reaching the plug.

How to Inspect and Replace a Spark Plug:

  • Disconnect: Crucially, disconnect the spark plug wire from the spark plug to prevent accidental starting.
  • Remove: Use a spark plug socket wrench to carefully unscrew the spark plug.
  • Inspect: Examine the plug for signs of fouling, wear, or damage.
  • Clean/Gap: If the plug is only slightly fouled, you can try cleaning it with a wire brush and carburetor cleaner. Then, use a feeler gauge to check and adjust the gap according to your manual’s specifications.
  • Replace: If the plug is heavily fouled, damaged, or shows significant wear, it’s best to replace it with a new one. Ensure the new plug is the correct type and heat range for your Kohler engine.
  • Install: Screw the new or cleaned plug in by hand to avoid cross-threading, then tighten it with the socket wrench. Reconnect the spark plug wire firmly.

Ignition Coil Or Magneto Failure

If the spark plug appears to be in good condition and properly gapped, the issue might lie with the ignition coil (also known as the magneto). This component generates the high voltage needed for the spark.

  • Testing the Ignition Coil: Testing an ignition coil typically requires a multimeter and knowledge of electrical testing procedures. You would check for resistance across specific terminals as outlined in the Kohler service manual. If the resistance readings are outside the specified range, the coil may need replacement.
  • Symptoms of a Bad Coil: A failing ignition coil might cause intermittent starting problems or a complete lack of spark.

3. Air Intake System: The Engine Needs To Breathe

Just as a car needs air to run, so does your pressure washer’s engine. A restricted air intake can starve the engine of the necessary oxygen for combustion.

Clogged Air Filter

The air filter prevents dirt and debris from entering the engine, but it can become clogged over time.

  • Symptoms of a Clogged Air Filter: A dirty air filter can cause the engine to run rich (too much fuel, not enough air), leading to rough idling, reduced power, and difficulty starting. In severe cases, it can prevent the engine from starting at all.
  • Inspection and Cleaning: Most Kohler engines have an accessible air filter housing. Remove the cover, take out the filter, and inspect it. If it’s a foam filter, wash it with soap and water, dry it thoroughly, and re-oil it lightly with a clean engine oil (check your manual for specific instructions). Paper filters are typically replaced if they are dirty or damaged.
  • Replacement: If the air filter is heavily soiled, damaged, or falling apart, replace it with a new, genuine Kohler part or a quality aftermarket equivalent.

Carburetor Air Bleed Issues

Some carburetors have small air bleed passages that can become clogged. If these are blocked, it can affect the air-fuel mixture.

4. Carburetor Problems: The Engine’s Fuel Mixer

The carburetor is responsible for mixing the correct amount of fuel and air to create the combustible mixture. A dirty or malfunctioning carburetor is a frequent cause of starting issues.

Gummed-up Carburetor

This is a very common problem, especially if the pressure washer has sat for extended periods with old fuel.

  • Varnish and Deposits: As fuel ages, it breaks down, leaving behind sticky varnish and gummy deposits. These deposits can clog the tiny jets and passages within the carburetor, disrupting fuel flow.
  • Symptoms: Difficulty starting, rough idling, engine cutting out, or complete failure to start.
  • Cleaning the Carburetor:
  • Removal: You’ll need to remove the carburetor from the engine. This usually involves disconnecting the fuel line, throttle linkage, and any mounting bolts.
  • Disassembly: Carefully disassemble the carburetor, noting the position of each part. A carburetor rebuild kit often includes a diagram.
  • Cleaning: Use a dedicated carburetor cleaner spray and compressed air to thoroughly clean all passages, jets, and the float bowl. Pay special attention to the main jet and pilot jet. Ensure all passages are completely clear.
  • Reassembly: Reassemble the carburetor using new gaskets and seals if you have a rebuild kit.
  • Reinstallation: Reinstall the carburetor onto the engine, reconnecting all lines and linkages.

Float Issues

The float within the carburetor regulates the fuel level in the float bowl. If the float is stuck or improperly adjusted, it can lead to flooding (too much fuel) or starvation (too little fuel).

Choke Malfunction

The choke restricts airflow when starting a cold engine, enriching the fuel mixture. If the choke is stuck open, the engine might not start easily, especially when cold. Conversely, if it’s stuck closed, it can lead to a flooded engine.

Ensure the choke plate moves freely and is correctly positioned.

5. Compression Issues: The Engine’s Power Source

While less common than fuel or ignition problems, a lack of compression can prevent an engine from starting. Compression is the pressure built up inside the cylinder as the piston moves up.

  • Worn Piston Rings: Over time, piston rings can wear down, allowing combustion gases to escape past the piston into the crankcase, reducing compression.
  • Damaged Cylinder or Piston: Scratches or damage to the cylinder wall or piston can also lead to compression loss.
  • Leaking Valves: Valves that don’t seal properly in the cylinder head can cause compression to leak out.
  • Blown Head Gasket: A damaged head gasket can allow compression to escape between the cylinder head and the engine block.

Testing for Compression:

  • Compression Tester: The most accurate way to check compression is with a compression tester. This tool screws into the spark plug hole, and you pull the starter cord to measure the pressure buildup. You’ll need to compare the reading to the specifications in your Kohler engine manual.
  • Manual Check (Less Reliable): You can sometimes get a rough idea by pulling the starter cord. If it feels unusually easy to pull with very little resistance, it might indicate a compression problem.

If you suspect a compression issue, it often indicates significant internal engine wear or damage, which may require professional repair or engine replacement.

6. Water System Problems: Pressure Washer Specifics

Unlike a standalone engine, a pressure washer has a water system that is integral to its operation and can sometimes prevent starting.

No Water Supply Or Low Water Pressure

Most pressure washers are designed to not start or run dry because this can quickly damage the pump.

  • Check Water Source: Ensure your garden hose is fully connected to a water spigot that is turned on.
  • Adequate Flow Rate: Verify that the water source provides sufficient flow rate (gallons per minute – GPM) and pressure (pounds per square inch – PSI) as recommended by your Kohler pressure washer manual. Running the unit with insufficient water can cause overheating and pump damage.
  • Kinked Hose: Inspect the garden hose for kinks or blockages that might restrict water flow.

Water Inlet Filter Clogged

Many pressure washers have a small filter screen at the water inlet where the garden hose connects. This filter prevents debris from entering the pump.

  • Inspection: Disconnect the garden hose from the pressure washer and check the inlet screen for dirt, sand, or debris.
  • Cleaning: Carefully remove the screen and clean it thoroughly with water. Reinstall it securely.

Pump Issues

While less common as a *starting* issue (more common as a *no pressure* issue once running), a severely damaged or seized pump could potentially put enough drag on the engine to prevent it from turning over and starting.

7. Oil Level And Low-oil Sensor

Some Kohler engines are equipped with a low-oil sensor. If the oil level drops too low, this sensor will prevent the engine from starting as a safety measure.

  • Check Oil Level: Locate the oil dipstick, remove it, wipe it clean, reinsert it fully, and then remove it again to check the oil level. If it’s below the minimum mark, add the recommended type and amount of oil specified in your owner’s manual.
  • Sensor Malfunction: In rare cases, the low-oil sensor itself might malfunction, falsely indicating a low oil level. If the oil level is correct and the engine still won’t start, this sensor could be the culprit, though diagnosing this typically requires consulting the service manual.

8. Safety Features And Interlocks

Modern pressure washers often incorporate various safety features that can prevent starting if not engaged correctly.

  • Brake/Trigger Lock: Ensure the trigger lock on the spray gun is disengaged.
  • Positioning: Some units may have tip sensors or other interlocks that require specific configurations.
  • Engine Kill Switch: Verify that the engine kill switch is in the “run” or “on” position.
Kohler Pressure Washer Wont Start

Credit: www.youtube.com

Troubleshooting Table: Common Kohler Pressure Washer Problems And Solutions

Here’s a quick reference guide to help you diagnose why your Kohler pressure washer won’t start.

ProblemLikely Cause(s)Solution(s)
**Engine Cranks but Won’t Fire**Stale fuel, fouled spark plug, clogged air filter, incorrect fuel-oil mixDrain and refill with fresh fuel, inspect/clean/replace spark plug, clean/replace air filter, verify fuel-oil ratio (2-stroke).
**Engine Won’t Crank (No Sound)**No fuel, dead battery (if electric start), faulty ignition switch, seized engineCheck fuel level, check battery/connections, check kill switch, investigate for mechanical seizure (requires professional diagnosis).
**Engine Cranks Slowly or Unreliably**Weak spark, low compression, incorrect spark plug gap, carburetor issueCheck spark plug condition/gap, test compression, clean carburetor, check fuel flow.
**Engine Starts then Stalls Immediately**Fuel delivery issue (clogged filter/line), choke issue, faulty idle jetCheck fuel filter and lines, ensure choke is fully open after starting, clean idle jet in carburetor.
**Engine Smells like Gas / Flooded**Choke stuck on, carburetor flooding, excessive primingEnsure choke is fully open, check float needle valve in carburetor, do not over-prime the fuel bulb.
**No Spark at Spark Plug**Fouled/damaged spark plug, loose wire, faulty ignition coil, kill switch issueInspect/clean/replace spark plug, secure wire, check ignition coil resistance, verify kill switch function.
**No Water Pressure (Once Started)**Clogged nozzle, pump issue, air in system, low water supplyClean nozzle, check pump seals/oil, bleed air from system, ensure adequate water supply. (Note: This is *after* it starts).
**Engine Refuses to Start When Hot**Vapor lock, carbon buildup, overheatingAllow engine to cool, check for excessive carbon deposits, ensure proper cooling fins are clear, check fuel quality.

Examples Of Real-world Scenarios

Scenario 1: The Weekend Warrior’s Frustration

John hadn’t used his Kohler pressure washer since last fall. He hooked it up, pulled the cord, and. . . nothing. He pulled again, and again, getting increasingly frustrated. In my experience, this is a classic case of stale fuel.

The gasoline from last year had likely formed varnish deposits in the carburetor. The solution? Drain the old fuel, add fresh fuel, and then clean the carburetor. After a thorough cleaning and reassembly, his pressure washer fired up on the second pull.

Scenario 2: The Overzealous Cleaner

Sarah was in a hurry to clean her deck. She hooked up the pressure washer, turned on the water, and pulled the starter cord. The engine sputtered but wouldn’t catch. She tried again, this time noticing the water hose seemed a bit kinked.

She straightened the hose, ensuring a robust flow of water to the inlet, and the engine started up smoothly. This highlighted the importance of adequate water supply before attempting to start the pressure washer.

Maintaining Your Kohler Pressure Washer For Reliable Starts

Preventative maintenance is the best way to avoid starting problems. Regular checks and cleaning will ensure your Kohler pressure washer is always ready when you need it.

Regular Cleaning And Inspections

  • After Each Use:
  • Wipe down the engine and pump to remove dirt and debris.
  • Check the oil level and top up if necessary.
  • Flush the system with clean water to remove any residual detergent or debris.
  • Monthly or Every 25 Hours of Operation:
  • Inspect and clean or replace the air filter.
  • Check the spark plug for fouling or damage.
  • Inspect fuel lines for cracks or leaks.
  • Annually or Every 100 Hours of Operation:
  • Change the engine oil.
  • Replace the spark plug.
  • Replace the fuel filter.
  • Service the pump according to the manufacturer’s recommendations (e.g., checking/changing pump oil).

Proper Storage

  • Fuel Stabilization: If storing the pressure washer for more than 30 days, use a fuel stabilizer. Run the engine for a few minutes after adding the stabilizer to ensure it circulates through the fuel system.
  • Drain Fuel (Optional but Recommended): For long-term storage (over 6 months), consider draining the fuel tank and running the engine until it stops. This prevents stale fuel from gumming up the carburetor.
  • Clean and Protect: Clean the entire unit thoroughly. Protect metal parts from rust with a light coating of oil or a protectant spray.
  • Store in a Dry Place: Keep the pressure washer in a dry, sheltered location, protected from extreme temperatures and moisture.
Kohler Pressure Washer Wont Start

Credit: www.reddit.com

When To Call A Professional

While many starting issues can be resolved with basic troubleshooting, some problems may require specialized knowledge or tools.

  • Internal Engine Damage: If you suspect a lack of compression or other serious internal engine problems, it’s best to consult a qualified small engine mechanic.
  • Complex Carburetor Issues: While cleaning a carburetor is often a DIY task, if the problem persists after cleaning, or if you’re uncomfortable with the disassembly process, a professional can rebuild or replace it.
  • Ignition System Diagnosis: Diagnosing faulty ignition coils or other electrical components can be complex and may require specific testing equipment.
  • Pump Problems: If you suspect issues with the high-pressure pump itself, especially if it’s seized or leaking significantly, a professional service center is recommended.

Consulting the official Kohler service manual for your specific engine model is always advisable for detailed diagnostic procedures and repair instructions. You can often find these manuals on the Kohler Engines official website.

Frequently Asked Questions

Why Does My Kohler Pressure Washer Start With Starting Fluid But Then Die?

This is a classic indication that the problem lies with the fuel delivery system. Starting fluid provides a highly volatile fuel source that allows the engine to fire up briefly. If the engine dies immediately after, it means the engine is not receiving gasoline from its normal fuel source.

This points to issues like a clogged fuel filter, blocked fuel line, a dirty carburetor, or a faulty fuel pump (if applicable).

My Kohler Pressure Washer Starts, But It Runs Rough And Lacks Power. What Could Be Wrong?

Rough running and lack of power usually stem from an incorrect air-fuel mixture. Common causes include:

  • Clogged Air Filter: Restricts airflow.
  • Dirty Carburetor: Clogged jets prevent proper fuel atomization.
  • Stale Fuel: Degraded fuel doesn’t combust efficiently.
  • Incorrect Spark Plug Gap: Affects the strength and timing of the spark.
  • Low Compression: Worn engine components can lead to poor combustion.

How Often Should I Change The Oil In My Kohler Pressure

How Much Does An Ikea Kitchen Cost

The allure of a beautiful, functional kitchen is undeniable. For many homeowners, the dream kitchen often features sleek cabinetry, ample storage, and a modern aesthetic. When budget-conscious consumers consider achieving this vision, IKEA kitchens frequently rise to the top of the list. Known for their affordability, modular design, and wide range of styles, IKEA kitchens offer a compelling proposition. But how much does an IKEA kitchen *actually* cost? The answer, as with most home renovation projects, is rarely a simple figure. It’s a complex equation involving cabinet sizes, materials, hardware, worktops, appliances, and the often-significant costs of installation and extras.

Understanding the total investment requires a detailed breakdown of each component. While IKEA’s pricing is transparent for individual pieces, piecing together a complete kitchen can lead to sticker shock if not planned meticulously. This guide will demystify the cost of an IKEA kitchen, exploring the factors that influence the final price and providing realistic estimates for various kitchen sizes and complexities.

We’ll look at the different IKEA cabinet systems, worktop options, hardware choices, and the crucial considerations of appliances and professional installation, helping you budget accurately for your dream IKEA kitchen.

Key Takeaways

  • The average cost of a medium-sized IKEA kitchen (approx. 10’x10′) can range from $2,000 to $8,000 for just the IKEA components (cabinets, doors, drawer fronts, internal fittings, handles).
  • This base cost excludes appliances, worktops, sinks, taps, lighting, and installation, which can easily double or triple the total project cost.
  • SEKTION is IKEA’s current cabinet system, offering a wide array of customizable options. Older systems like AKURUM are no longer sold but may still be present in some homes.
  • Worktop costs vary significantly, from budget-friendly laminate ($20-$50 per linear foot) to premium solid wood or quartz ($100-$300+ per linear foot).
  • Installation costs are a major variable, ranging from $1,500 to $10,000+ depending on whether you DIY, hire IKEA’s installation service, or use an independent contractor.
  • Appliances can add $1,000 to $10,000+ depending on brand, features, and whether you opt for IKEA’s integrated appliances or source them elsewhere.
  • Hidden costs like electrical work, plumbing, flooring, backsplash, and removal of old cabinets can add a substantial amount to the overall budget.
How Much Does An Ikea Kitchen Cost

Credit: fifimcgee.co.uk

Understanding Ikea’s Kitchen Systems And Pricing Structure

IKEA’s kitchen pricing model is built around its modular cabinet system, primarily the SEKTION line. This system forms the backbone of any IKEA kitchen, and its cost is the most predictable starting point. However, it’s crucial to understand that the price you see for a basic SEKTION cabinet box is only the beginning. The final cost is heavily influenced by the fronts, drawers, internal organizers, and hardware you select.

The Sektion System Explained

The SEKTION system, introduced in 2015, replaced the older AKURUM system. It offers greater flexibility in cabinet sizes and configurations, allowing for more tailored kitchen designs. SEKTION cabinets are sold as individual boxes, and you then add doors, drawer fronts, hinges, drawer slides, shelves, and internal organizers like pull-out drawers or wire baskets. This modularity is key to both IKEA’s affordability and its customization potential.

When planning your IKEA kitchen, you’ll typically use the IKEA Kitchen Planner tool. This online software allows you to design your layout, select cabinet types, and choose finishes. The planner provides a running total of the IKEA components, but it’s essential to remember this is *only* for the cabinet structure and fronts.

Factors Influencing Cabinet Costs

The cost of the SEKTION cabinets themselves can vary based on:

  • Cabinet Size and Type: Base cabinets, wall cabinets, and tall cabinets come in various dimensions. Larger cabinets naturally cost more. Corner cabinets often require specialized mechanisms (like lazy Susans or pull-outs) which can increase their price.
  • Drawer vs. Door Fronts: Drawer units are generally more expensive than door cabinets due to the need for more complex slides and drawer fronts.
  • Door and Drawer Front Style/Material: IKEA offers a wide range of styles and finishes for their fronts.
  • Laminate/Foil-Wrapped: These are typically the most affordable options, offering a durable, easy-to-clean surface in various colors and wood-effect finishes. Examples include HAGGEBY or VÄRDE.
  • Painted/High-Gloss: These offer a more premium look but come at a higher price point. Examples include VEDDINGE (painted) or GODMORGON (high-gloss, though primarily for bathrooms, similar finishes exist for kitchens).
  • Wood Veneer/Solid Wood: These are the most expensive options, offering a natural, high-quality aesthetic. Examples include EKESTAD (solid wood) or FLÄRN (veneer).
  • Internal Organizers: IKEA offers a vast array of internal solutions, from simple shelves to fully integrated drawer systems like MAXIMERA (soft-closing drawers) and specialized organizers for waste sorting, pantries, and corner cabinets. Adding these premium internal fittings significantly increases the cabinet component cost.
  • Hardware (Hinges and Drawer Slides): While basic hinges and slides are included with cabinet boxes, upgrading to soft-closing mechanisms (UTAGÅ for drawers, specific hinges for doors) adds to the cost but is a worthwhile investment for user experience.

Example Cost Breakdown for a Small Kitchen (approx. 10’x10′ layout):

Let’s consider a hypothetical 10’x10′ kitchen with a mix of base and wall cabinets, using mid-range VEDDINGE fronts and MAXIMERA drawers.

  • Cabinet Boxes: ~$800 – $1,500 (depending on the number of units and configurations)
  • VEDDINGE Doors & Drawer Fronts: ~$500 – $1,000
  • MAXIMERA Drawer Systems (3-4 drawers): ~$400 – $700
  • Hinges & Other Hardware: ~$200 – $400
  • Internal Shelves/Organizers: ~$100 – $300

Estimated IKEA Component Cost (Cabinets Only): $2,000 – $3,900

This is a highly simplified estimate. A larger kitchen, more drawers, or premium fronts/organizers could easily push this figure higher.

How Much Does An Ikea Kitchen Cost

Credit: inspiredkitchendesign.com

Worktops, Sinks, And Taps: The Next Layer Of Cost

Once the cabinet structure is accounted for, the next significant cost area involves the surfaces and fixtures that define the kitchen’s functionality and aesthetic: worktops, sinks, and taps. IKEA offers a variety of options in these categories, each with a distinct price tag.

Ikea Worktop Options

IKEA’s worktops are sold in standard depths and lengths, and pricing is typically per linear foot or meter. The material chosen has the most substantial impact on cost.

  • Laminate Worktops: These are IKEA’s most budget-friendly option. They consist of a particleboard core covered with a decorative laminate layer.
  • Pros: Affordable, wide range of colors and patterns (including wood grains and stone effects), easy to clean, relatively durable for the price.
  • Cons: Can be susceptible to heat damage, scratches, and moisture if the seal is compromised. Edges can chip.
  • Estimated Cost: $20 – $50 per linear foot.
  • Solid Wood Worktops: IKEA offers worktops made from various woods like birch, oak, and ash.
  • Pros: Natural beauty, can be sanded and refinished, adds warmth to the kitchen.
  • Cons: Requires regular maintenance (oiling/sealing), susceptible to water damage, warping, and staining if not properly cared for. Can be more expensive than laminate.
  • Estimated Cost: $50 – $150 per linear foot (depending on wood type).
  • Veneer/Composite Worktops: These offer a look similar to stone or solid surfaces but are often more budget-friendly and lighter.
  • Pros: Aesthetically pleasing, often more durable than laminate, easier to maintain than solid wood.
  • Cons: Can be more expensive than laminate, may not have the same longevity or repairability as natural stone.
  • Example: IKEA’s KARLBY (veneer) or EKBACKEN (laminate with stone effect).
  • Estimated Cost: $60 – $120 per linear foot.
  • Quartz/Stone Effect Worktops: While IKEA doesn’t typically sell *real* quartz or granite, they offer high-quality laminate and composite options that mimic these materials convincingly. For genuine stone, you would need to source it from a third-party fabricator.
  • Estimated Cost (for IKEA’s high-end laminate/composite): $70 – $150 per linear foot.

Pro Tip: Don’t forget to factor in the cost of edge banding, cutting, and installation for worktops, especially if you’re not DIYing. Many IKEA worktops require specific installation techniques to ensure water resistance.

Sinks And Taps

IKEA offers a range of sinks and taps to complement their kitchens.

  • Sinks: From single-bowl stainless steel to double-bowl ceramic or integrated sink-and-worktop solutions.
  • Stainless Steel: Most common and affordable. Prices range from $50 for a basic single bowl to $300 for a double-bowl model with better sound dampening.
  • Ceramic: More durable and aesthetically pleasing but pricier. Expect $150 – $400.
  • Integrated (like NORRSJÖN): These are often designed to fit seamlessly with specific IKEA worktops. Costs can range from $200 – $500.
  • Taps: IKEA has a wide selection, from basic chrome models to matte black or brushed nickel finishes.
  • Basic Chrome: $30 – $80
  • Mid-Range/Designer Finishes: $80 – $200
  • High-End/Filtered Water Taps: $200 – $400+

Example Cost Calculation for Worktops, Sink & Tap (10 linear feet of worktop):

  • Mid-range Laminate Worktop (e.g., EKBACKEN): 10 ft * $40/ft = $400
  • Double Bowl Stainless Steel Sink (e.g., FYNDIG): $100
  • Mid-range Kitchen Tap: $120

Estimated Worktop, Sink & Tap Cost: $620

If you opt for a solid wood worktop and a ceramic sink, this figure could easily jump to $1,500 – $2,000+.

Appliances: The Functional Heart Of The Kitchen

Appliances represent a substantial portion of any kitchen renovation budget, and IKEA kitchens are no exception. While IKEA sells its own range of appliances (often manufactured by reputable third-party brands like Whirlpool or Electrolux under the IKEA label), you also have the option to purchase appliances from other retailers.

Ikea Appliances (aeg, Whirlpool, Etc.)

IKEA appliances are designed to integrate seamlessly with their SEKTION cabinet system, offering a cohesive look. They are generally priced competitively, often falling into the mid-range market.

  • Refrigerators/Freezers: Basic models start around $400, while integrated or French-door styles can range from $800 to $2,500+.
  • Ovens: Standard electric ovens can be found from $400, with convection, steam, or self-cleaning features pushing prices to $800 – $1,500+.
  • Cooktops: Electric or induction cooktops start around $300, with higher-end induction models reaching $700 – $1,200+. Gas cooktops are also available.
  • Dishwashers: Standard 24-inch dishwashers start around $350, with integrated models (hidden behind cabinet panels) costing $500 – $900+.
  • Microwaves: Countertop or over-the-range microwaves are typically $150 – $400. Built-in microwave ovens designed for cabinet installation can cost $300 – $600+.
  • Range Hoods/Ventilation: Wall-mounted or under-cabinet hoods start around $100, with more powerful or designer models reaching $300 – $800+.

Example Appliance Package (Mid-Range IKEA):

  • Integrated Fridge/Freezer: $1,000
  • Electric Oven: $600
  • Induction Cooktop: $500
  • Integrated Dishwasher: $600
  • Under-cabinet Hood: $200
  • Microwave: $300

Estimated IKEA Appliance Package Cost: $3,200

Sourcing Appliances Elsewhere

Many homeowners choose to buy appliances from specialized appliance retailers, often for better selection, specific brands, or perceived higher quality.

  • Pros: Wider brand and feature selection, potential for better deals during sales events, access to higher-end or niche appliances.
  • Cons: May require custom cabinet modifications for non-standard sizes, integration might not be as seamless aesthetically unless carefully planned.

The cost can vary wildly. You could equip a kitchen with budget appliances for $1,000 – $2,000, or opt for high-end professional-grade appliances for $10,000+. If you choose appliances from elsewhere, ensure their dimensions match the IKEA cabinet openings precisely or be prepared for custom cabinet work.

How Much Does An Ikea Kitchen Cost

Credit: homeguide.com

Lighting, Backsplash, And Finishing Touches

Beyond the core components, several smaller elements contribute significantly to both the look and the final cost of an IKEA kitchen. These often-overlooked details can elevate a functional space into a truly stunning one.

Kitchen Lighting

Good lighting is crucial for both task performance and ambiance. IKEA offers various lighting solutions within their STRÖMLINJE and LED ranges.

  • Under-Cabinet LED Strips/Bars: These are essential for illuminating countertops. IKEA’s systems are modular and relatively easy to install.
  • Estimated Cost: $50 – $200 (depending on the number of units and length).
  • Pendant Lights/Ceiling Fixtures: These add style and general illumination. Prices vary greatly depending on the design and material.
  • Estimated Cost: $50 – $300+ per fixture.
  • Recessed Lighting: While IKEA doesn’t typically sell recessed lighting fixtures, this is an option if you’re using an independent electrician.
  • Estimated Cost (Professional Installation): $100 – $200 per fixture, including the unit.

Pro Tip: Factor in the cost of electrical work if you need new circuits, wiring, or outlets installed for lighting or appliances. This can add several hundred to a few thousand dollars.

Backsplash

The backsplash protects your walls from splashes and adds a significant decorative element.

  • IKEA Options: IKEA offers some basic tile options and a few laminate backsplash panels.
  • Laminate Panels: Relatively inexpensive, easy to install. $30 – $60 per panel (covering a few square feet).
  • Third-Party Tiles: Most homeowners opt for tiles sourced from tile stores or home improvement centers.
  • Ceramic/Porcelain Tiles: Range from $2 – $15 per square foot.
  • Glass/Natural Stone Tiles: Can range from $10 – $40+ per square foot.
  • Installation Costs: If you’re not tiling yourself, factor in labor costs, which can be $15 – $30 per square foot.

Example Backsplash Cost (10 linear feet of counter space, 18″ high):

  • Area: 10 ft 1.5 ft = 15 sq ft
  • Mid-range Ceramic Tiles: 15 sq ft $8/sq ft = $120
  • Thin-set mortar, grout, sealer: $50
  • Total Material Cost: ~$170
  • Professional Installation: 15 sq ft * $20/sq ft = $300
  • Total Backsplash Cost (Materials + Installation): ~$470

Other Finishing Touches

  • Handles and Knobs: IKEA offers a wide variety, from simple metal bar pulls to decorative knobs.
  • Estimated Cost: $3 – $15 per piece. For 15-20 pieces, budget $50 – $300.
  • Toe Kicks: Essential for a finished look at the base of cabinets. Usually $10 – $20 per piece.
  • Decorative Trim/Molding: Can add a custom look but increases cost.
  • Paint and Decor: Don’t forget paint for walls, new curtains, rugs, and decorative items.

Installation: The Diy Vs. Professional Dilemma

This is arguably the most significant variable cost in an IKEA kitchen project. The decision between DIY installation and hiring professionals can dramatically alter the total budget.

Diy Installation

  • Pros: Significant cost savings. This is the primary driver for DIY installation. If you have the skills, tools, and time, you can save thousands of dollars.
  • Cons:
  • Time Consuming: Installing a full kitchen can take weeks, especially for inexperienced individuals.
  • Requires Skill and Tools: Proper cabinet mounting, leveling, worktop cutting and fitting, plumbing, and electrical work require specific knowledge and tools. Mistakes can be costly to fix.
  • Physical Demands: Lifting heavy cabinets and worktops can be strenuous.
  • Potential for Errors: Improperly installed cabinets can sag, doors can misalign, and worktops can leak, leading to costly repairs or even structural damage.
  • Cost: Primarily the cost of your time, tool rental/purchase, and any materials needed for installation (e.g., shims, mounting hardware, sealant).

Ikea’s Installation Service (ikea Home Services)

IKEA partners with third-party companies to offer installation services.

  • Pros: Convenient, professionals are familiar with IKEA products, often comes with a warranty on labor.
  • Cons: Can be expensive, scheduling can sometimes be an issue, quality can vary depending on the contracted company.
  • Estimated Cost: This varies significantly by region and the complexity of the kitchen. For a medium-sized kitchen, expect $2,000 – $6,000+. This typically includes cabinet assembly and installation, and sometimes worktop installation. Appliances and sink/tap installation might be separate charges.

Independent Kitchen Installers/contractors

Hiring a local carpenter or general contractor.

  • Pros: Can provide a high level of craftsmanship, potentially more flexibility in scheduling, can handle the entire project (including any necessary structural changes, electrical, plumbing).
  • Cons: Often the most expensive option, requires careful vetting to ensure quality and reliability.
  • Estimated Cost: Highly variable, but often $4,000 – $10,000+ for a medium-sized kitchen, depending on the scope of work and local labor rates.

Comparison of Installation Costs (Medium 10’x10′ Kitchen):

Installation MethodEstimated Cost RangeNotes
**DIY**$200 – $1,000Primarily tool rental/purchase, consumables. Value of time not included.
**IKEA Home Services**$2,000 – $6,000Varies by region and scope. May not include all components.
**Independent Contractor**$4,000 – $10,000+Highest cost, but potentially highest quality and full-service.

Warning: Always get detailed quotes and understand exactly what is included in the installation price. Ask about warranties on labor.

Real-world Example: A Mid-range Ikea Kitchen Cost Breakdown

Let’s construct a hypothetical but realistic cost breakdown for a medium-sized U-shaped kitchen (approximately 120 sq ft of floor space), aiming for a balance of functionality and aesthetics without breaking the bank. This example assumes mid-range choices for most components and professional installation.

Project Scope:

  • Layout: U-shaped kitchen (approx. 10’x12’x8′)
  • Cabinetry: IKEA SEKTION system

*

Clicking Noise Oven Igniter

Clicking Noise Oven Igniter

The persistent clicking noise from your oven igniter can be a source of significant frustration, especially when it’s accompanied by a failure to ignite the burner. This sound, often described as rapid, rhythmic clicking, is a direct indicator that the ignition system is attempting to spark but is encountering an obstacle in its path to lighting the gas. Understanding the potential causes behind this common oven problem is crucial for homeowners looking to restore their appliance’s functionality and safety.

This clicking is the sound of the igniter trying to generate a high-voltage spark. When the oven’s control module senses a demand for heat (e. g. , you turn the knob to a specific setting), it sends an electrical current to the igniter.

The igniter, typically made of a ceramic material with a metal tip, is designed to create a spark that ignites the gas flowing from the burner. If the gas isn’t igniting, the igniter will continue to spark repeatedly, producing that characteristic clicking sound.

This isn’t just an annoyance; it can signal a range of issues, from simple obstructions to more complex component failures.

Key Takeaways

  • A clicking oven igniter that doesn’t light the burner indicates a problem in the ignition system or gas supply.
  • Common causes include obstructions around the igniter, a faulty igniter, issues with the gas supply, or a malfunctioning oven control module.
  • Safety first: Always turn off the power and gas supply before attempting any inspection or repair.
  • Simple fixes often involve cleaning the igniter area and ensuring proper gas flow.
  • More complex issues, like a failed igniter module or control board problems, may require professional diagnosis and repair.
  • Regular maintenance can help prevent igniter issues.

Understanding The Oven Ignition System

Before diving into troubleshooting the clicking noise, it’s essential to grasp how a typical oven ignition system works. Modern ovens, particularly gas models, rely on a spark ignition system or a glow bar igniter. The clicking noise is almost exclusively associated with the spark ignition system, which is more common in newer ranges.

Spark Ignition System Components

The spark ignition system is comprised of several key parts, each playing a vital role in igniting the gas:

  • Igniter: This is the component that generates the spark. It’s usually a small, ceramic-encased electrode. When electricity flows through it, it creates a visible spark.
  • Spark Module (or Control Module): This is the “brain” of the ignition system. It receives signals from the oven controls and sends electrical pulses to the igniter to create sparks. It also monitors if ignition occurs. If it doesn’t detect ignition within a set time, it will continue sparking or shut off the gas.
  • Gas Valve: When the oven calls for heat, the control module signals the gas valve to open, allowing natural gas or propane to flow to the burner.
  • Burner Assembly: This includes the burner head and ports where the gas is released. The igniter is strategically placed near these ports to ensure the gas ignites when the spark is generated.
  • Wiring Harness: Connects all these components, transmitting electrical signals and power.

How The Ignition Cycle Works

  • Thermostat Signal: You set your oven to a desired temperature, sending a signal to the main control board.
  • Gas Valve Opens: The control board signals the gas valve for the specific burner to open, allowing gas to flow.
  • Spark Module Activation: Simultaneously, the control board activates the spark module, which begins sending high-voltage pulses to the igniter.
  • Spark Generation: The igniter generates a spark near the burner ports.
  • Ignition: If gas is flowing and reaching the igniter, the spark ignites the gas, producing a flame.
  • Flame Sensor/Ignition Confirmation: The spark module (or a separate flame sensor) detects the flame. This signal tells the module to stop sparking and keep the gas valve open.
  • Heating: The burner continues to operate, heating the oven.
  • No Ignition: If the spark module does not detect a flame after a certain period, it will typically shut off the gas valve and continue attempting to spark, leading to the continuous clicking sound.
Clicking Noise Oven Igniter

Credit: www.youtube.com

Common Causes Of A Clicking Oven Igniter

The persistent clicking noise, when the burner doesn’t light, is a symptom pointing to a breakdown in the normal ignition sequence. Several factors can interrupt this process.

Obstructions And Debris

One of the most frequent culprits is physical interference around the igniter. Food debris, grease, or even small objects can accumulate and prevent the spark from reaching the gas or properly igniting it.

  • Grease and Spills: Baked-on grease and food spills can coat the igniter and burner ports, acting as an insulator or a barrier. This can prevent the spark from effectively igniting the gas.
  • Loose Debris: Crumbs, small pieces of food, or even cleaning residue can fall into the burner assembly. If this debris lands directly on or very near the igniter tip, it can block the spark.
  • Misalignment: While less common, if the burner assembly or igniter has been disturbed (e.g., during cleaning), it might be slightly misaligned, causing the spark to occur too far from the gas ports.

Faulty Igniter

The igniter itself is a component that can wear out over time. Its primary function is to create a spark, and if it becomes damaged or weakened, it may not produce a strong enough spark or may not produce one at all.

  • Cracked Ceramic Housing: The ceramic insulator protects the electrical components. If it cracks, it can cause the spark to ground out before reaching the gas, or it can lead to component failure.
  • Worn-Out Electrode: The metal electrode at the tip of the igniter can erode over time due to repeated sparking and exposure to heat. This can weaken the spark’s intensity.
  • Internal Failure: Like any electrical component, the igniter can fail internally, ceasing to produce a spark altogether.

Gas Supply Issues

For the igniter to light something, there must be gas available. Problems with the gas supply can lead to the igniter clicking endlessly because there’s no fuel to ignite.

  • Gas Valve Malfunction: The main gas valve to the oven might be stuck in the closed position or not opening fully when signaled. This is a more serious issue and often requires professional repair.
  • Low Gas Pressure: If you have a natural gas line, issues with the utility provider or a partially closed valve further up the line could result in insufficient gas pressure reaching the oven. For propane tanks, an empty or nearly empty tank will obviously stop gas flow.
  • Clogged Gas Orifice: The small opening (orifice) that controls the flow of gas to the burner can become clogged with debris, restricting gas flow.

Spark Module Or Control Board Problems

The spark module and the main oven control board are critical for the ignition sequence. If either of these components malfunctions, it can cause erratic sparking or a failure to ignite.

  • Faulty Spark Module: The module might be sending incorrect voltage, not sending pulses at all, or failing to detect when ignition has occurred.
  • Control Board Issues: The main electronic control board (often called the ERC or clock) dictates when the spark module is activated and when the gas valve opens. A glitch or failure in the control board can disrupt the entire ignition process. This is often a more expensive repair.
  • Wiring Issues: Damaged, loose, or corroded wiring between the components can interrupt the flow of electricity, preventing proper function.
Clicking Noise Oven Igniter

Credit: www.mrappliance.com

Troubleshooting Steps For A Clicking Oven Igniter

When faced with a clicking oven igniter, a systematic approach to troubleshooting is key. Safety should be your absolute top priority throughout this process.

Step 1: Safety First, Power And Gas Off

Before touching any part of your oven, ensure you eliminate the risk of electrical shock and gas leaks.

  • Disconnect Power: Locate your oven’s circuit breaker in your home’s electrical panel and switch it off. If you’re unsure which breaker it is, turn off the main breaker for your home. Alternatively, unplug the oven if it has a cord.
  • Turn Off Gas Supply: Find the manual gas shut-off valve for the oven. This is usually located on the gas line behind the appliance. Turn the valve handle so it is perpendicular to the pipe. If you smell gas, evacuate the area immediately and call your gas company or 911 from a safe location.

Step 2: Visual Inspection Of The Burner And Igniter

Once power and gas are safely off, you can begin your inspection.

  • Locate the Igniter: For stovetop burners, the igniter is usually a small ceramic nub located next to the burner head. For the oven cavity, it’s often on the bottom or back panel.
  • Check for Obstructions: Carefully examine the igniter and the surrounding burner area. Look for any visible debris, food particles, or grease buildup.
  • Clean the Igniter and Burner Ports:
  • Use a soft brush (like an old toothbrush) or a dry cloth to gently remove any loose debris.
  • For stubborn grease, you can use a small amount of oven cleaner or degreaser on a cloth, ensuring none gets into the igniter’s internal components. Avoid spraying cleaner directly onto the igniter.
  • Ensure the burner ports (small holes around the burner head) are clear. A toothpick or a fine needle can be used to gently clear any blockages, but be careful not to enlarge the holes.
  • Inspect the Igniter for Damage: Look for any visible cracks in the ceramic housing or signs of significant wear on the metal tip.

Step 3: Checking For Spark (with Caution)

After cleaning, you can attempt to check if the igniter is producing a spark. This step requires extreme caution due to the potential for gas leaks.

  • Restore Gas and Power: Carefully turn the gas valve back on and restore electrical power to the oven.
  • Turn on the Burner: Set the oven controls to activate the burner that was clicking.
  • Observe: Look closely at the igniter. You should see a small, bright blue spark jumping from the tip. Listen for the clicking sound to confirm the spark module is still active.
  • Assess Spark Strength: A weak, yellowish spark or no spark at all indicates a problem. A strong, consistent blue spark suggests the igniter itself might be okay, and the issue could be elsewhere (like gas flow or the control module).
  • Turn Off Immediately: If you see a good spark but no ignition, or if you don’t see a spark, turn off the burner, then turn off the gas and power again.

Step 4: Testing The Gas Flow

If you see a good spark but no ignition, the problem likely lies with the gas supply.

  • Check Other Gas Appliances: If you have other natural gas appliances (like a water heater or gas fireplace), check if they are working correctly. If they aren’t, the issue might be with your main gas supply.
  • Listen for Gas: With the burner assembly exposed (and power/gas safely off again), you can sometimes faintly hear gas if the valve is attempting to open. However, this is not a reliable test for pressure.
  • Professional Gas Check: Accurately testing gas pressure and valve operation requires specialized tools and expertise. If you suspect a gas supply issue, it’s best to call a qualified technician or your gas provider.

Step 5: Inspecting Wiring And Connections

Loose or damaged wiring can prevent the igniter from receiving the necessary power or the spark module from receiving signals.

  • Access Wiring: Depending on your oven model, you may need to remove panels to access the wiring harness connected to the igniter and spark module.
  • Check Connections: Ensure all wire connectors are securely attached to the igniter, spark module, and control board. Look for signs of corrosion, melting, or breakage.
  • Inspect Wires: Gently tug on wires to ensure they are firmly seated. Look for any nicks, cuts, or signs of heat damage.

Step 6: Considering Component Replacement

If troubleshooting points to a specific faulty component, replacement might be necessary.

  • Igniter Replacement: If the igniter is cracked, visibly worn, or not sparking, it’s often the easiest component to replace. You’ll need the exact part number for your oven model.
  • Spark Module Replacement: If the igniter is fine but there’s no spark, or the module is making unusual noises, it might need replacement.
  • Control Board: If all other components seem functional, the main control board could be the issue. This is typically the most expensive part to replace.

When in doubt about any of these steps, especially those involving gas or electrical components, it is always safer to consult a professional appliance repair technician.

Clicking Noise Oven Igniter

Credit: home-tech.com

When To Call A Professional Appliance Repair Technician

While some oven issues can be resolved with basic DIY troubleshooting, others necessitate the expertise of a professional. Recognizing when to call for help can save you time, prevent further damage, and ensure your safety.

Complex Electrical Issues

If your troubleshooting reveals frayed wires, melted connectors, or intermittent electrical problems, it’s time to bring in an expert. These issues can be difficult to diagnose without specialized knowledge and tools, and improper handling of electrical components can be dangerous. A technician has the diagnostic equipment to accurately pinpoint electrical faults within the control board or complex wiring harnesses.

Gas Valve Problems

Issues with the gas valve are particularly critical. If you suspect the valve isn’t opening correctly, is leaking, or is faulty in any way, do not attempt to repair it yourself. Gas leaks are a serious safety hazard. A qualified technician can safely test the valve, identify the problem, and replace it if necessary, ensuring compliance with safety standards.

Control Board Failures

The electronic control board (ECB), often referred to as the “brain” of the oven, is a complex and expensive component. Diagnosing a faulty control board often requires specialized testing equipment. If you’ve ruled out simpler causes like igniter or wiring issues, and the oven still malfunctions, the control board is a likely suspect. Professional technicians can confirm this diagnosis and handle the replacement, which often involves intricate connections.

Persistent Or Unclear Problems

If you’ve gone through the basic troubleshooting steps and the clicking noise persists, or if the cause remains unclear, a technician’s experience is invaluable. They have encountered a vast array of oven problems and can often identify issues that might be overlooked by a novice. This includes diagnosing problems with internal sensors, pressure regulators, or less common component failures.

Safety Concerns

Ultimately, any situation where you feel uncomfortable or unsafe performing a repair is a cue to call a professional. This includes:

  • Smelling gas.
  • Not being able to definitively identify the source of the clicking.
  • Lack of proper tools or knowledge for a specific repair.
  • Concerns about electrical safety.

A professional repair service ensures that the repair is done correctly, safely, and often comes with a warranty on parts and labor, providing peace of mind. For example, according to the U.S. Consumer Product Safety Commission, approximately 7,000 oven-related fires occur each year, highlighting the importance of correct repairs. Preventing Oven Fires

Maintenance Tips To Prevent Igniter Issues

Proactive maintenance can significantly reduce the likelihood of encountering a clicking oven igniter or other ignition system problems. By incorporating a few simple practices into your routine, you can help ensure your oven functions reliably and safely.

Regular Cleaning

Consistent cleaning is perhaps the most effective preventative measure.

  • Clean Burner Areas Frequently: After each use, wipe down the stovetop and burner areas to remove spills and food particles before they bake on.
  • Deep Clean the Oven Interior: Regularly clean the inside of your oven, including the bottom and sides, to prevent grease and debris from falling onto or near the igniters. Pay special attention to the area around the oven igniter if it’s located at the bottom.
  • Use Appropriate Cleaners: Employ oven cleaners or degreasers as recommended by your oven manufacturer. Ensure you rinse or wipe away all cleaning residue thoroughly, as leftover chemicals can sometimes interfere with ignition.

Inspecting For Wear And Tear

Periodically check visible components for signs of damage.

  • Visual Igniter Check: Once a month or so, take a moment to visually inspect the igniters (both stovetop and oven cavity, if accessible) for any obvious cracks in the ceramic or significant damage. Early detection of a failing igniter can prevent it from completely breaking down.
  • Check Burner Caps and Heads: Ensure burner caps and heads are properly seated and free from significant corrosion or damage. A misaligned cap can sometimes affect ignition.

Ensuring Proper Gas Flow

While not something you can directly “maintain” in terms of gas lines, being aware of your gas supply is important.

  • Monitor Propane Levels: If you use propane, keep a close eye on tank levels to avoid running out unexpectedly, which can sometimes cause issues with regulators or pressure.
  • Be Aware of Utility Work: If your area has had recent natural gas utility work, it might be worth ensuring your appliances are functioning correctly afterward.

Professional Servicing

Consider scheduling professional maintenance for your oven.

  • Annual Check-ups: An annual appliance service check can include inspecting the ignition system, gas lines, electrical connections, and overall functionality. This can catch potential issues before they become major problems. A technician can also perform a gas pressure test to ensure optimal fuel delivery.

By following these maintenance tips, you can extend the lifespan of your oven’s ignition system, avoid frustrating breakdowns, and maintain a safer cooking environment.

Comparison Of Ignition System Types

While the clicking noise is most commonly associated with spark ignition systems, understanding different types of ignition can be helpful.

FeatureSpark Ignition SystemGlow Bar Igniter (Older/Some Models)Electronic Ignition (Less Common in Residential)
**Mechanism**Creates an electrical spark to ignite gas.Heats up like a light bulb filament until red-hot, then ignites gas.Uses electronic pulses for ignition.
**Sound**Distinct **clicking** noise during attempted ignition.Generally silent during operation, may have a faint hum.Typically silent.
**Speed**Very fast ignition.Slower; takes 15-30 seconds to heat up.Very fast.
**Reliability**Generally reliable, but prone to debris/component issues.Can be fragile, susceptible to breakage.Highly reliable.
**Troubleshooting**Focus on spark, gas flow, obstructions.Focus on heat output, continuity, potential breakage.Focus on electronic components.
**Common Failure**Clogged igniter, faulty spark module, control board.Broken glow bar, power supply issues.Electronic failures.
**Energy Use**Moderate.Can be higher due to heating time.Efficient.
**Typical Age**Most modern gas ovens.Older gas ovens and some dryers.Less common in standard residential ovens.

In my experience, the spark ignition system is the most prevalent in contemporary ovens, making the clicking noise a familiar concern for many homeowners. The inherent nature of creating a spark means there’s a distinct sound, and when that sound persists without ignition, it warrants immediate attention.

Understanding Oven Igniter Lifespan And Replacement Costs

The lifespan of an oven igniter can vary significantly based on usage patterns, the quality of the component, and how well the oven is maintained.

Expected Lifespan

  • Average Lifespan: A typical oven igniter, under normal household usage, can last anywhere from 3 to 10 years. Factors like how frequently the oven is used, the temperature settings employed, and whether the oven door is frequently opened during cooking can influence this.
  • High-Usage Scenarios: Homes where the oven is used daily for baking, roasting, or multiple meals might see a lifespan closer to the lower end of this range (3-5 years).
  • Low-Usage Scenarios: Ovens used only a few times a month might see igniters last much longer, potentially exceeding 10 years.

Factors Affecting Lifespan

  • Frequency of Use: More frequent sparking cycles naturally lead to faster wear.
  • Environmental Factors: Exposure to excessive moisture, grease buildup, or harsh cleaning chemicals can degrade the igniter prematurely.
  • Voltage Fluctuations: Inconsistent electrical supply can stress the igniter and spark module.
  • Component Quality: As with many parts, the manufacturing quality of the igniter itself plays a role. Higher-quality components tend to last longer.

Replacement Costs

The cost to replace an oven igniter can be broken down into parts and labor.

  • Cost of the Igniter Part: A replacement oven igniter typically costs between $20 and $70. Prices vary depending on the brand, model compatibility, and the specific type of igniter required. You can often find universal igniters that fit multiple brands, which might be more budget-friendly.
  • Cost of Labor: If you hire a professional appliance repair technician

Liftmaster Garage Door Opener Blinks Twice Won T Open

Liftmaster Garage Door Opener Blinks Twice Won T Open

A Liftmaster garage door opener blinking twice and refusing to open is a common and frustrating issue for homeowners. This specific blinking pattern is often a diagnostic code, signaling a particular problem that needs attention. Understanding what this code signifies is the first step toward a swift resolution, preventing prolonged inconvenience and potential security risks. Whether you’re dealing with a sudden malfunction or a recurring glitch, pinpointing the cause can save you time, money, and unnecessary stress.

Garage door openers, while incredibly convenient, are complex electromechanical systems with various components that can fail. When your Liftmaster opener displays this two-blink error, it’s not just a random occurrence; it’s a communication from the device itself. This signal is designed to help both homeowners and technicians quickly identify the source of the problem, ranging from simple sensor misalignments to more significant mechanical or electrical faults.

By systematically troubleshooting the potential causes, you can often resolve the issue yourself or at least be well-prepared to explain the problem to a professional.

Key Takeaways

  • Two Blinks = Safety Sensor Issue: The most common cause of a Liftmaster opener blinking twice is a problem with the safety sensors, often referred to as photo eyes.
  • Sensor Alignment is Crucial: Misaligned sensors are a frequent culprit, preventing the door from closing and sometimes causing it to refuse to open at all.
  • Obstructions Matter: Anything blocking the path of the sensors, even something as small as a spiderweb, can trigger the error.
  • Wiring Problems: Damaged or loose wires connected to the sensors can also lead to the two-blink code.
  • Internal Logic Board Faults: While less common, a malfunctioning logic board within the opener unit can also cause this error.
  • Troubleshooting Steps: Always start with the simplest solutions, such as checking for obstructions and realigning sensors, before moving to more complex checks.
  • Professional Help: If basic troubleshooting doesn’t resolve the issue, it’s best to contact a qualified garage door technician.
Liftmaster Garage Door Opener Blinks Twice Won T Open

Credit: www.youtube.com

Understanding Liftmaster Diagnostic Codes

Liftmaster, a leading manufacturer of garage door openers, incorporates diagnostic features into many of its models. These features use LED lights on the motor unit to communicate specific error codes. The number of blinks, along with the color of the LED (often amber or red), provides valuable information. A two-blink sequence is a widely recognized indicator, primarily pointing towards an issue with the safety reversing sensors. These sensors are critical safety devices designed to prevent the garage door from closing if an obstruction is detected in its path.

The sensors are typically located near the bottom of the garage door tracks, one on each side. They work by emitting an invisible infrared beam. When the door is closing, if this beam is broken, the opener is signaled to stop and reverse the door’s movement.

If the sensors are misaligned, obstructed, or malfunctioning, the opener might interpret this as a persistent obstruction, preventing it from operating correctly. This is why the two-blink code is so strongly associated with sensor problems.

The Role Of Safety Reversing Sensors

The safety reversing sensors, also known as photo eyes, are a mandatory component of modern garage door openers due to federal safety regulations. They are designed to protect people, pets, and property from being crushed by a closing garage door. Each sensor has a transmitter and a receiver. The transmitter sends a low-voltage infrared beam across the garage door opening to the receiver. When the beam is unbroken, the opener knows the path is clear.

When the Liftmaster opener’s logic board detects that the receiver is not getting a signal from the transmitter, it interprets this as the beam being broken. This can happen for several reasons:

  • Misalignment: The sensors are no longer pointing directly at each other.
  • Obstruction: Something is physically blocking the beam between the two sensors.
  • Damage: The sensors themselves or their wiring are damaged.
  • Power Issue: The sensors are not receiving adequate power.

The two-blink code is the opener’s way of saying, “I can’t confirm the safety path is clear because the signal from the safety sensors is interrupted. ” This prevents the door from closing and, in many cases, will also prevent it from opening to avoid further complications.

Why A Two-blink Code Prevents Opening

It might seem counterintuitive that a problem with the *closing* safety sensors would prevent the door from *opening*. However, the logic of many garage door opener systems is designed to err on the side of caution. If the opener cannot reliably communicate with its safety sensors, it may enter a “safe mode” or a “lockout mode.” This mode disables most operational functions, including opening, until the underlying issue is resolved.

This behavior is a fail-safe mechanism. If the sensors are malfunctioning, the opener doesn’t want to risk operating the door in a way that could be dangerous. By blinking twice and refusing to open, it’s prompting you to investigate and fix the sensor problem.

Essentially, the opener is saying, “I can’t guarantee your safety, so I’m shutting down operations until you address the issue. “

Troubleshooting Steps For A Two-blink Error

When your Liftmaster garage door opener blinks twice and won’t open, the first step is to remain calm and systematically work through potential causes. The most common reasons are related to the safety sensors.

1. Inspect The Safety Sensors For Obstructions

This is the easiest and most common fix. The safety sensors are small units, usually mounted a few inches off the ground on either side of the garage door track.

  • Visual Check: Look at both sensors. Is there anything physically blocking the path between them? This could be a trash can, a bicycle, gardening tools, a stray piece of wood, or even a dense cobweb.
  • Cleanliness: Dust, dirt, or grime can accumulate on the sensor lenses, interfering with the beam. Gently wipe the lenses of both sensors with a soft, dry cloth. For stubborn grime, a slightly damp cloth (water only) can be used, followed by a dry one.
  • Insects: Sometimes, small insects like spiders can build webs across the sensors, disrupting the infrared beam. Carefully remove any such obstructions.

Pro Tip: Ensure you are looking at the sensors themselves, not just the tracks. The sensors are typically small, rectangular boxes with a lens on the front.

2. Check Sensor Alignment

Even if there are no visible obstructions, the sensors might simply be out of alignment. This means the infrared beam is not hitting the receiver on the opposite sensor.

  • Identify the Sensors: Locate the two sensors. One usually has a green indicator light (the receiver), and the other may have no light or a different colored light (the transmitter). The green light typically indicates a proper connection and alignment.
  • Look for the Green Light: If the green light on the primary sensor is off or blinking, it indicates a misalignment or a connection issue.
  • Manual Adjustment: Most sensors have a small adjustment screw or a slightly movable housing that allows for fine-tuning their direction.
  • Place a piece of cardboard or a similar opaque object directly in front of one sensor to temporarily block its beam.
  • Observe the indicator light on the other sensor.
  • Slowly adjust the position of the sensor you are holding (or the one with the adjustment screw) until the indicator light on the opposite sensor turns solid green.
  • Remove the cardboard and check if the opener now responds.
  • Repeat if Necessary: You might need to repeat this process a few times to achieve perfect alignment. The goal is to have both sensors pointing directly at each other.

Example: Imagine you’re trying to aim a laser pointer across a room. If your hand shakes even slightly, the beam might miss the target. The garage door sensors require a similar precision, though they are designed to withstand minor vibrations from the garage door’s operation.

3. Inspect Sensor Wiring

The wires connecting the safety sensors to the garage door opener motor unit are often overlooked but are a frequent cause of problems.

  • Visual Inspection: Follow the wires from each sensor back towards the motor unit. Look for any signs of damage:
  • Cuts or nicks: These could be caused by rodents, sharp edges on the track, or general wear and tear.
  • Loose connections: The wires might have pulled out of their terminals on the sensor or the motor unit.
  • Pinched wires: The door’s movement could have pinched the wires against the track or wall.
  • Securing Loose Wires: If you find a loose wire, carefully reinsert it into its corresponding terminal. There are usually two wires per sensor, and they connect to specific screw terminals on the opener. Refer to your Liftmaster manual for the correct terminal designations if unsure.
  • Repairing Damaged Wires: Minor damage, like a small nick, might be repairable with electrical tape. However, if the wires are significantly frayed or broken, they may need to be replaced. This can be a DIY job if you’re comfortable with basic wiring, or you can call a professional.

Warning: Always disconnect power to the garage door opener at the circuit breaker before inspecting or touching any wiring. Electrical shock is a serious risk.

4. Test The Sensors Themselves

If alignment and wiring appear to be in order, the sensors themselves might be faulty.

  • Swap Sensors: If you have a compatible model, you could try swapping the sensors to see if the problem follows the unit. This helps determine if one sensor is defective.
  • Check for Indicator Lights: As mentioned, the presence and color of indicator lights on the sensors are crucial. A solid green light on the receiver usually means it’s getting a good signal. If this light is off, blinking, or a different color, it points to a sensor issue.
  • Internal Faults: Sensors are electronic devices and can fail over time due to moisture, electrical surges, or wear. If you’ve exhausted other options, replacing the sensors might be necessary. Liftmaster replacement sensors are readily available.

5. Check The Logic Board And Remote

While less common for a two-blink code, internal issues with the opener’s logic board or problems with the remote control could theoretically contribute to operational errors.

  • Logic Board: The logic board is the “brain” of the opener. If it’s malfunctioning, it can misinterpret signals or fail to execute commands. A two-blink code is rarely a direct indicator of a logic board failure, but it’s a possibility if all sensor-related checks fail.
  • Remote Control: Ensure your remote control has a fresh battery. A weak battery can cause erratic signals. Also, try using a different remote or the wall-mounted button to rule out a remote-specific issue. If the wall button works but the remote doesn’t, the problem is likely with the remote or its programming.
Liftmaster Garage Door Opener Blinks Twice Won T Open

Credit: allsecurityequipment.com

Deep Dive Into Safety Sensor Issues

The safety reversing sensors are the most frequent culprits when a Liftmaster opener blinks twice. Understanding the nuances of their operation and potential failure points is key to resolving this common problem. These sensors are not just simple switches; they rely on a consistent, uninterrupted infrared beam to function correctly.

Types Of Liftmaster Safety Sensors

Liftmaster has produced various garage door opener models over the years, and with them, different types of safety sensors. While the core function remains the same, transmitting and receiving an infrared beam, the physical appearance and specific wiring can vary.

  • Standard Photo Eyes: These are the most common type, typically consisting of two small units mounted near the bottom of the garage door tracks. One unit contains the emitter (transmits the beam), and the other contains the receiver (detects the beam). They often have indicator lights.
  • Monitored Sensors: Some higher-end Liftmaster systems may use monitored sensors that communicate more complex diagnostic information back to the logic board. These might have different indicator light patterns.

Regardless of the specific type, the principle of the infrared beam is constant. This beam is invisible to the human eye, which is why obstructions like spiderwebs or dust can go unnoticed initially.

Common Failure Modes Of Safety Sensors

Beyond simple misalignment or obstruction, safety sensors can fail in several ways:

  • Water Intrusion: Over time, moisture can seep into the sensor housing, corroding internal components and disrupting the electrical signals. This is more common in garages with high humidity or frequent washing.
  • Electrical Surges: Power fluctuations or lightning strikes can damage the sensitive electronics within the sensors.
  • Physical Damage: While designed to be robust, the sensors can be damaged by impacts from lawn equipment, sports equipment, or even by the garage door itself if it shifts unexpectedly.
  • Internal Component Failure: Like any electronic device, the transmitter or receiver components within the sensor can simply wear out over time.

Data Point: According to industry estimates, approximately 60-70% of garage door opener issues reported by homeowners are related to the safety sensors, with misalignment and obstruction being the most prevalent causes. [Source: Based on general industry repair data, specific attribution not available for this generalized statistic].

How To Test Sensors More Rigorously

If you suspect a sensor is faulty, you can perform a few more tests:

  • Check Both Indicator Lights: Most Liftmaster sensors have indicator lights.
  • Transmitter Sensor: Often has no light or a steady light.
  • Receiver Sensor: Typically has a solid green light when properly aligned and receiving the beam. If this light is off, blinking, or red, there’s an issue.
  • Disconnect and Reconnect: Turn off the power to the opener. Disconnect the wires from one sensor and then reconnect them firmly. Repeat for the other sensor. Sometimes, a poor connection is the only problem.
  • Test with a Known Good Sensor: If you have a spare Liftmaster sensor (or can borrow one), try replacing one of the existing sensors to see if the problem is resolved.

Table: Common Liftmaster Opener LED Codes (Illustrative)

LED Blink CountLikely IssuePotential Solution
1 BlinkMotor unit overheatedAllow motor to cool down. Check for obstructions restricting door travel.
2 BlinksSafety reversing sensors issue (misaligned, obstructed, or faulty)Check alignment, obstructions, wiring, and sensor integrity.
3 BlinksTravel limit or force issueAdjust travel limits and force settings. Check for binding in door mechanism.
4 BlinksDoor is physically stuck or obstructedManually check door for binding, obstructions, or damaged rollers/tracks.
5 BlinksEncoder/Internal RPM sensor faultMay require professional diagnosis and potential logic board replacement.
6 BlinksLogic board issueMay require professional diagnosis and potential logic board replacement.
7 BlinksRemote control issueCheck remote battery, reprogram remote, or check for interference.

*Note: Specific blink codes can vary slightly between Liftmaster models. Always consult your owner’s manual for the most accurate information.*

Liftmaster Garage Door Opener Blinks Twice Won T Open

Credit: www.youtube.com

When The Problem Isn’t The Sensors

While the two-blink error overwhelmingly points to safety sensor issues, it’s important to acknowledge other potential, albeit less common, causes. If you’ve meticulously checked the sensors, wiring, and alignment and the problem persists, consider these possibilities.

Door Mechanism Binding Or Obstruction

The garage door opener is designed to lift and lower a balanced door. If the door itself is experiencing mechanical problems, the opener might struggle and trigger error codes.

  • Binding Tracks: Inspect the vertical and horizontal tracks the garage door rollers travel in. Ensure they are clean, free of debris, and not bent or damaged. Bent tracks can cause the door to bind.
  • Worn Rollers: Garage door rollers can wear out or become damaged, leading to increased friction and difficulty in movement. Check if any rollers are cracked, broken, or seized.
  • Spring Issues: Garage door springs (torsion springs above the door or extension springs along the tracks) provide the counterbalance that makes the door easy to operate. If a spring is broken or significantly weakened, the opener will have to do all the work, potentially leading to overload and error codes. Warning: Garage door springs are under extreme tension and can cause serious injury. Do not attempt to adjust or repair them yourself. Always call a professional.
  • Manual Operation Test: Disengage the opener from the door using the emergency release cord (usually a red handle hanging from the trolley). Try to lift and lower the door manually. It should move smoothly and with moderate effort. If it’s heavy, jerky, or gets stuck, the problem lies with the door’s mechanics, not the opener itself.

Motor Unit Issues

The motor unit houses the motor, gears, and logic board. While less likely to cause a two-blink error specifically, internal motor unit problems can manifest as operational failures.

  • Internal Obstruction: Debris or worn internal components within the motor unit could impede its function.
  • Motor Failure: The motor itself might be failing. This is often accompanied by unusual noises or a complete lack of motor operation.
  • Logic Board Malfunction: As mentioned earlier, a faulty logic board can cause various error codes or complete failure to operate. If the sensors are confirmed to be working correctly and the door mechanism is sound, the logic board becomes a prime suspect.

Real-World Example: A homeowner spent hours checking and realigning their safety sensors, only to find the problem persisted. Upon closer inspection, they discovered a small piece of metal debris lodged in the garage door track, causing the door to bind halfway down. Once removed, the opener functioned correctly, and the two-blink error disappeared. This highlights the importance of checking the entire system, not just the presumed source of the error code.

Power Supply Problems

Ensure the garage door opener is receiving adequate power.

  • Check the Outlet: Make sure the opener is plugged into a functioning GFCI-protected outlet. Test the outlet with another device.
  • Circuit Breaker: Verify that the circuit breaker controlling the garage door opener hasn’t tripped.
  • Wiring to Motor Unit: Inspect the power cord for any damage.

When To Call A Professional

While many Liftmaster garage door opener issues, including the two-blink error, can be resolved with DIY troubleshooting, there are times when professional assistance is necessary. Knowing when to escalate is crucial for safety and efficiency.

Signs You Need A Professional

  • Broken Garage Door Springs: As emphasized previously, never attempt to repair or adjust garage door springs yourself. They are extremely dangerous. A professional technician has the specialized tools and knowledge to handle them safely.
  • Damaged Tracks or Rollers: While minor track straightening might be possible for some DIYers, significant damage often requires professional assessment and repair to ensure the door operates safely and smoothly.
  • Electrical Issues Beyond Simple Checks: If you suspect a problem with the motor unit’s internal wiring, the logic board, or if you’re uncomfortable working with electrical components, it’s best to call a technician.
  • Persistent Problems: If you’ve gone through all the basic troubleshooting steps (sensor alignment, obstruction checks, wiring inspection) and the two-blink error continues, a professional can perform more advanced diagnostics.
  • Unusual Noises: Grinding, squealing, or loud clanking noises from the motor unit or door mechanism often indicate a serious mechanical issue requiring expert attention.
  • Lack of Confidence: If you’re unsure about any step, uncomfortable performing a task, or simply lack the necessary tools, hiring a professional is the wisest choice. Safety should always be the top priority.

What A Professional Will Do

A qualified garage door technician will typically:

  • Perform a Comprehensive Safety Inspection: They will check the entire garage door system, including springs, cables, rollers, tracks, and the opener itself.
  • Diagnose the Specific Code: They have access to detailed Liftmaster diagnostic charts and can interpret the two-blink code with certainty.
  • Test Components Systematically: They will use specialized tools to test sensors, wiring continuity, and motor unit functionality.
  • Repair or Replace Faulty Parts: They will have the necessary replacement parts on hand, from sensors and wiring to logic boards and even motor units if required.
  • Ensure Proper Operation and Safety: After repairs, they will test the opener thoroughly to ensure it operates smoothly, quietly, and most importantly, safely, adhering to all federal regulations.

Cost Consideration: While professional repair involves a cost, it often saves money in the long run by preventing further damage caused by incorrect DIY attempts and ensuring the repair is done correctly the first time. Basic sensor alignment or replacement might cost between $150-$300, while more complex motor unit or spring repairs can range from $300-$700 or more, depending on the issue and location.

Maintaining Your Liftmaster Opener

Preventative maintenance is key to avoiding issues like the two-blink error and extending the lifespan of your Liftmaster garage door opener. Regular checks can identify potential problems before they escalate.

Regular Maintenance Checklist

  • Monthly:
  • Visual Inspection: Check sensors, tracks, rollers, and springs for obvious damage or obstructions.
  • Clean Sensors: Wipe down the safety sensor lenses with a soft, dry cloth.
  • Test Opener Reversal: Place a piece of wood (about 1.5 inches thick) on the floor in the door’s path. Lower the door; it should hit the wood and reverse direction. If it doesn’t, the safety reversal system needs adjustment or repair.
  • Semi-Annually (Every 6 Months):

Microphone Working But No Sound

Microphone Working But No Sound

When your microphone is working but producing no sound, it’s a frustratingly common issue that can halt productivity, ruin a crucial meeting, or silence your creative flow. Whether you’re trying to record a podcast, participate in a video conference, or simply chat with friends online, a silent microphone is a showstopper. This problem can stem from a surprisingly wide array of sources, ranging from simple software glitches to complex hardware failures.

The good news is that most of these issues are fixable with a systematic troubleshooting approach. Instead of panicking, understanding the potential culprits and the steps to resolve them can save you time and prevent unnecessary hardware replacement. This guide will walk you through the most common reasons your microphone might appear to be working but isn’t outputting any audio, and provide clear, actionable solutions.

Key Takeaways

  • Check Physical Connections: Ensure your microphone is securely plugged into the correct port (USB or audio jack) and that no cables are damaged.
  • Verify Software Settings: Confirm the correct microphone is selected as the default input device in your operating system and within the specific application you’re using.
  • Test Microphone Mute Switches: Many microphones and headsets have physical mute buttons that can be accidentally engaged.
  • Update Drivers and Software: Outdated or corrupted audio drivers are frequent causes of microphone malfunctions.
  • Troubleshoot Application Permissions: Ensure the application you’re using has the necessary permissions to access your microphone.
  • Test on Another Device: Isolating the problem to the microphone itself or your computer is a critical diagnostic step.
  • Consider Hardware Issues: If all else fails, a faulty microphone or port might be the cause.
Microphone Working But No Sound

Credit: www.youtube.com

Understanding The Microphone Signal Chain

Before diving into troubleshooting, it’s helpful to grasp the basic journey of audio from your voice to your computer or recording device. This signal chain involves several components, and a failure at any point can lead to silence.

  • Microphone Transducer: This is the core of the microphone, converting sound waves into an electrical signal. Different types (dynamic, condenser, USB) have varying sensitivities and power requirements.
  • Pre-amplifier (Internal or External): The electrical signal from the transducer is often very weak and needs to be amplified to a usable level. This can happen within the microphone itself (especially USB mics) or via an external audio interface.
  • Analog-to-Digital Converter (ADC): For digital use, the analog electrical signal must be converted into digital data. USB microphones have this built-in. Traditional XLR microphones send an analog signal to your computer’s sound card or an external audio interface, which then performs the conversion.
  • Operating System (OS) Audio Drivers: The OS interprets the digital audio data and routes it. Drivers are essential software that allows the OS to communicate effectively with the audio hardware.
  • Application Settings: The specific software you’re using (Zoom, OBS, Audacity, etc.) Has its own audio input settings that must be configured to recognize and use the correct microphone.
  • Output Device: Finally, the processed audio is sent to your speakers or headphones. While not directly related to the microphone *input*, issues here can sometimes be mistaken for input problems if you’re not hearing anything at all.

A “microphone working but no sound” scenario means that somewhere along this chain, the signal is either not being generated, not being amplified, not being converted correctly, not being recognized by the OS or application, or is being blocked.

Common Software And Settings Issues

Software configuration is the most frequent culprit when a microphone seems to be on but isn’t producing sound. These issues are often the easiest to fix.

Incorrect Default Input Device Selection

Your operating system needs to know which microphone to listen to. If another device (like a webcam mic or a disconnected headset) is set as the default, your primary microphone won’t pick up anything.

  • Windows:
  • Right-click the speaker icon in the taskbar (bottom right corner).
  • Select “Sound settings”.
  • Under the “Input” section, use the dropdown menu to select your desired microphone. You should see its name appear.
  • Speak into the microphone. The “Test your microphone” bar should show activity. If it doesn’t, try a different device from the dropdown.
  • MacOS:
  • Go to System Preferences (or System Settings in newer versions).
  • Click on “Sound”.
  • Select the “Input” tab.
  • Choose your microphone from the list.
  • Speak into the microphone. The “Input level” meter should show activity.

Application-specific Microphone Settings

Even if your OS has the correct microphone selected, the application you’re using might be configured to use a different one or have its own mute/volume settings.

  • Video Conferencing (Zoom, Microsoft Teams, Google Meet):
  • Within the application’s settings (usually found under Audio or Video settings), there’s typically a dropdown menu to select the microphone. Ensure your intended mic is chosen.
  • Many platforms have a “Test Speaker & Microphone” feature. Use it!
  • Recording Software (Audacity, OBS Studio, GarageBand):
  • These programs often have detailed audio input configurations. Look for preferences or settings related to audio devices and select your microphone explicitly.
  • Check for any software-level mute buttons within the recording interface itself.
  • Games:
  • In-game audio settings menus are where you’ll find microphone selection. Some games automatically detect, while others require manual selection.

Microphone Privacy And Permissions

Modern operating systems have strict privacy controls that can prevent applications from accessing your microphone, even if it’s selected as the default device.

  • Windows:
  • Go to Settings > Privacy > Microphone.
  • Ensure “Allow apps to access your microphone” is turned On.
  • Scroll down to “Choose which apps can access your microphone” and ensure the specific application you’re using is enabled.
  • Also check “Allow desktop apps to access your microphone” if you’re using a non-Store application.
  • MacOS:
  • Go to System Preferences (or System Settings) > Security & Privacy.
  • Select the “Privacy” tab.
  • Click on “Microphone” in the left-hand sidebar.
  • Check the box next to the application(s) that need microphone access. You may need to click the lock icon in the bottom left and enter your password to make changes.

Disabled Audio Devices

Sometimes, a sound device can be accidentally disabled in the operating system’s settings.

  • Windows:
  • Right-click the speaker icon in the taskbar.
  • Select “Sounds”.
  • In the “Recording” tab, right-click anywhere in the list of devices.
  • Ensure “Show Disabled Devices” is checked. If your microphone appears greyed out, right-click it and select “Enable”.
  • MacOS:
  • While macOS doesn’t have a direct “disable device” option like Windows, ensuring the correct device is selected in Sound preferences is the equivalent. If a device isn’t appearing at all, it might indicate a driver or connection issue.
Microphone Working But No Sound

Credit: steelandtimbersupply.ca

Hardware And Connection Problems

If software settings appear correct, the issue might lie with the physical connection or the hardware itself.

Loose Or Incorrect Cable Connections

This is the most basic but often overlooked cause.

  • USB Microphones: Ensure the USB cable is firmly plugged into both the microphone and the computer’s USB port. Try a different USB port on your computer, as some ports might have power or data issues. Avoid using USB hubs initially, as they can sometimes cause problems.
  • 3.5mm Jack Microphones: Verify the plug is fully inserted into the correct port. On desktops, there are often separate ports for microphone input (usually pink) and headphone output (usually green). Plugging into the wrong port will result in no sound. Ensure the cable isn’t frayed or damaged.
  • XLR Microphones: If you’re using an XLR mic with an audio interface or mixer, check that the XLR cable is securely connected at both ends. Ensure the interface is powered on and connected to your computer.

Damaged Cables Or Ports

Cables can degrade over time, and ports can become damaged.

  • Cable Damage: Look for visible signs of wear, such as kinks, cuts, or bent pins on connectors. If you have a spare cable (especially for USB mics), try using it.
  • Port Damage: Inspect the USB or audio jacks on your computer for bent pins or debris. Gently clean them with compressed air if necessary.

Physical Mute Switches

Many microphones, especially headsets and some USB microphones, have a built-in physical mute button.

  • Check the Microphone: Look for a button or switch directly on the microphone body, cable, or headset. It might be labeled “Mute,” have a microphone icon with a slash through it, or be a toggle switch.
  • Check the Headset: If using a headset, the mute control is often on the earcup or on an inline remote along the cable.
  • Accidental Activation: These buttons can be easily bumped or pressed accidentally. Ensure it’s in the unmuted position.

Power Issues (phantom Power, Usb Power)

Some microphones require additional power to function.

  • Condenser Microphones (XLR): Most studio condenser microphones require +48V phantom power, which is supplied by the audio interface or mixer. Ensure phantom power is enabled in your interface’s settings for the channel your microphone is connected to. Warning: Phantom power can damage some older or specific types of microphones (like most dynamic ribbon mics). Always check your microphone’s specifications.
  • USB Microphones: USB mics draw power directly from the USB port. If the port isn’t providing enough power, or if the cable is faulty, the microphone might not function correctly. Trying a different USB port or a powered USB hub can sometimes help.
Microphone Working But No Sound

Credit: www.youtube.com

Driver And Operating System Conflicts

Software conflicts and outdated drivers are a significant source of “no sound” issues.

Outdated Or Corrupted Audio Drivers

Drivers are the communication bridge between your hardware and the OS. If they’re old or broken, the connection fails.

  • Windows:
  • Right-click the Start button and select “Device Manager”.
  • Expand the “Audio inputs and outputs” section and the “Sound, video and game controllers” section.
  • Locate your microphone or audio device. Right-click it and select “Update driver”. Choose “Search automatically for drivers.”
  • If that doesn’t work, right-click again and select “Uninstall device”. Important: If prompted, do not check the box to “Delete the driver software for this device” unless you intend to manually reinstall a specific driver.
  • Restart your computer. Windows will attempt to reinstall the drivers automatically.
  • For specific microphones (especially USB ones), it’s often best to visit the manufacturer’s website and download the latest dedicated driver for your model and OS version.
  • MacOS:
  • MacOS generally handles driver updates automatically through system updates. Ensure your macOS is up to date (System Preferences/Settings > Software Update).
  • For external audio interfaces, manufacturers often provide specific drivers or control panel software. Check their website for the latest versions.

Operating System Updates

Sometimes, a recent OS update can introduce compatibility issues with audio drivers or settings. Conversely, an outdated OS might lack support for newer hardware.

  • Ensure your operating system is fully updated.
  • If the problem started immediately after an OS update, check the microphone manufacturer’s website for updated drivers compatible with the new OS version. You might also consider rolling back the update as a temporary measure if it’s critical.

Conflicting Audio Software

Other audio applications, virtual audio cables, or sound enhancement software can sometimes interfere with microphone input.

  • Disable Enhancements: In Windows Sound settings (“Recording” tab), right-click your microphone, select “Properties,” go to the “Enhancements” tab, and try disabling all enhancements.
  • Close Unnecessary Apps: Temporarily close any other applications that might be using audio input or have their own audio routing settings.
  • Uninstall Virtual Audio Cables: If you use software like VB-CABLE or VoiceMeeter, try disabling or uninstalling them temporarily to see if they are the cause.

Testing And Isolation Strategies

To pinpoint the problem, you need to systematically test different components.

Test With A Different Application

If your microphone isn’t working in Zoom, try it in Audacity or the Windows Voice Recorder. If it works in another application, the problem is specific to the first application’s settings or permissions.

Test On Another Computer

This is one of the most effective diagnostic steps.

  • Connect the microphone to a different computer.
  • Check if it’s recognized and working there.
  • If it works on another computer, the issue is likely with your original computer’s software, drivers, or hardware ports.
  • If it doesn’t work on another computer either, the microphone itself or its cable is the most probable cause.

Use A Different Microphone

If possible, try a different microphone on your computer.

  • If the new microphone works, your original microphone is likely faulty.
  • If the new microphone also doesn’t work, the problem is more likely with your computer’s settings, drivers, or audio hardware.

Test Different Recording Scenarios

  • Built-in vs. External: If you have a laptop, test both the built-in microphone and your external one. Does the built-in mic work? This helps determine if the issue is system-wide or specific to the external device.
  • USB vs. 3.5mm: If you have both types of microphones, test them. If only one type fails, it points towards issues with that specific connection type or its associated drivers/ports.

Potential Hardware Failures

While less common than software issues, hardware failure is a possibility.

Microphone Hardware Failure

The internal components of the microphone can fail over time or due to physical damage (like a drop).

  • Symptoms: No sound on any device, distorted sound, or intermittent signal loss.
  • Solution: If you’ve exhausted all other troubleshooting steps and the microphone fails on multiple devices, it likely needs to be replaced. Check the manufacturer’s warranty.

Audio Interface Or Sound Card Failure

If you’re using an external audio interface or an internal sound card (especially for XLR mics), these components can also fail.

  • Symptoms: No sound from any microphone connected through the interface, static, or distorted audio.
  • Solution: Test the interface on another computer or try a different interface if possible. For internal sound cards, driver issues are more common, but hardware failure can occur.

Motherboard Audio Chipset Failure

On motherboards, the integrated audio chipset can fail, affecting all audio input and output. This is relatively rare but possible, especially after power surges or physical stress.

  • Symptoms: No audio whatsoever from any connected device, including speakers, and all microphones fail.
  • Solution: This often requires replacing the motherboard or using a reliable external USB audio interface or sound card as a workaround.

Real-world Examples And Case Studies

Let’s look at a couple of scenarios to illustrate common problems.

Example 1: The Remote Worker’s Zoom Call

Sarah, a marketing manager, joined her team’s weekly Zoom call, but her colleagues couldn’t hear her. She could see her microphone icon wasn’t muted in Zoom, and the little sound meter flickered occasionally, suggesting *some* activity. She panicked, thinking her expensive USB microphone was broken.

  • Troubleshooting Steps:
  • Checked Zoom Settings: Confirmed her USB mic was selected as the audio device.
  • Checked OS Settings: Verified the USB mic was the default input in Windows Sound Settings. The test meter responded to her voice.
  • Checked Physical Mute: Ensured the mute button on the mic itself wasn’t engaged.
  • Restarted Computer: No change.
  • Tested in Another App (Voice Recorder): Her voice was recorded perfectly. This indicated the mic and OS settings were likely fine.
  • Revisited Zoom Permissions: She went back to Windows Privacy Settings and confirmed Zoom had permission to access the microphone.
  • The Fix: It turned out that after a recent Windows update, Zoom’s specific microphone permission had been *revoked*. Re-enabling it in the Privacy settings solved the problem instantly.

Example 2: The Podcaster’s XLR Setup

Mark was setting up a new podcasting rig with an XLR microphone, an audio interface, and a computer. He could see the microphone’s phantom power light was on, and the interface showed a signal when he spoke, but his recording software (Audacity) showed absolutely no input level.

  • Troubleshooting Steps:
  • Checked Cables: Verified XLR and USB cables were secure.
  • Checked Interface Settings: Confirmed phantom power was ON for the correct channel.
  • Checked OS Settings: Selected the audio interface as the default input device in macOS Sound Preferences. The level meter responded.
  • Checked Audacity Settings: This is where the issue lay. Mark had correctly selected the audio interface as the input device, but he hadn’t selected the *specific input channel* on the interface that the microphone was plugged into. Audacity was listening to an empty input.
  • The Fix: In Audacity’s audio preferences, he changed the “Audio Device” to his interface and then selected the correct “Recording Channels” corresponding to the XLR input port (e.g., Input 1 or Mono 1). Sound immediately registered in Audacity.

Advanced Troubleshooting: The Sound Troubleshooter

Windows includes a built-in troubleshooter that can automatically detect and fix common audio problems.

  • Go to Settings > System > Troubleshoot > Other troubleshooters.
  • Find “Recording Audio” and click “Run”.
  • Follow the on-screen prompts. The troubleshooter will ask you to select the device you’re having problems with (your microphone) and attempt to diagnose and apply fixes. While not always successful, it’s a quick step that can sometimes resolve driver or configuration issues.

When To Seek Professional Help Or Replace Hardware

If you’ve meticulously followed all the steps above, tested your microphone on multiple devices, and tried different cables and ports, and still encounter the “microphone working but no sound” issue, it’s time to consider the possibility of hardware failure.

  • For microphones still under warranty: Contact the manufacturer’s support. They can guide you through advanced diagnostics or arrange for a repair or replacement.
  • For out-of-warranty microphones: If the microphone is relatively inexpensive, replacement might be more cost-effective than professional repair. For higher-end microphones or audio interfaces, professional repair services might be an option, but weigh the cost against a new unit.
  • If the issue seems computer-related: If multiple microphones fail on the same computer, and you’ve ruled out software and driver issues, it could indicate a problem with the computer’s motherboard or USB controller. In this case, using a reliable external USB audio interface is often the best workaround, as it bypasses the computer’s internal audio hardware.

Frequently Asked Questions

What Is The Difference Between A Usb Microphone And An Xlr Microphone?

Usb Microphones Connect Directly To Your Computer Via A Usb Port. They Contain A Built-in Pre-amplifier And Analog-to-digital Converter (adc), Making Them Plug-and-play For Most Users. Xlr Microphones Use A Three-pin Connector And Require An External Audio Interface, Mixer, Or Pre-amplifier To Convert The Analog Signal To Digital Data That A Computer Can Understand. They Often Offer Higher Audio Quality And More Control But Involve A More Complex Setup.

My Microphone Worked Yesterday, But Not Today. What Could Have Changed?

Most Commonly, A Recent Software Update (operating System, Application, Or Driver), A Change In Application Permissions, Or An Accidental Physical Setting Change (like A Mute Button Being Flipped) Are The Culprits. Less Frequently, A Cable Could Have Become Loose Or Damaged, Or A Background Application Might Have Changed Audio Settings. Always Start By Checking The Most Recent Changes Made To Your System.

Can Background Noise Affect My Microphone Input?

While Background Noise Itself Doesn’t Usually Cause A Complete Lack Of Sound (unless It’s Extremely Loud And Triggers Noise Gates Incorrectly), It Can Make Your Intended Audio Signal Seem Weak Or Inaudible. If You’re Getting Very Low Volume, Check If Noise Reduction Features Are Overly Aggressive Or If Background Noise Is Simply Overwhelming Your Voice. Ensure Your Microphone Is Positioned Correctly And That Application/os Input Levels Are Set Appropriately.

How Do I Know If My Microphone Is Getting Power?

Usb Microphones Often Have An Led Indicator Light That Shows They Are Powered On And Connected. For Xlr Condenser Microphones Requiring Phantom Power, The +48v Led On The Audio Interface Or Mixer Will Typically