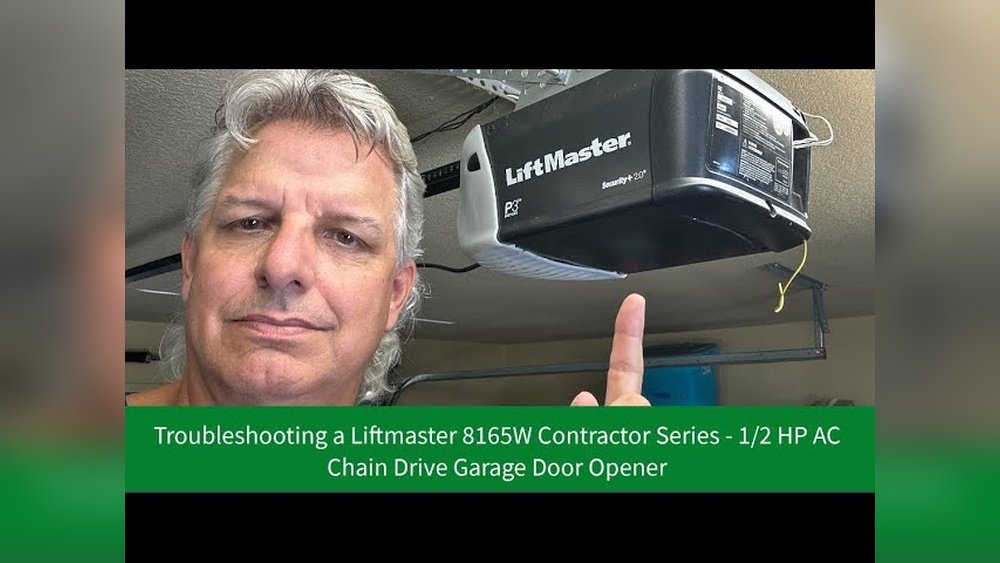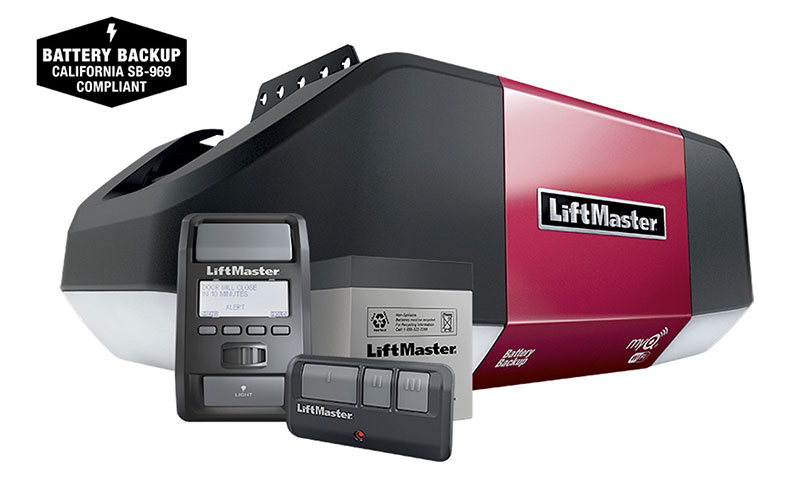
A Liftmaster garage door opener light is more than just a convenience; it’s a crucial safety feature, illuminating your path and deterring potential intruders. When this light suddenly stops working, it can be a perplexing and even frustrating issue. Beyond the immediate inconvenience, a malfunctioning light can signal deeper problems within your opener system. Understanding the common culprits and how to troubleshoot them is essential for maintaining your garage door opener’s functionality and ensuring your home’s security.
This comprehensive guide will walk you through the most frequent reasons why your Liftmaster garage door opener light might not be working. From simple fixes like a burnt-out bulb to more complex electrical issues, we’ll cover the diagnostic steps and potential solutions.
We aim to empower you with the knowledge to tackle this problem head-on, saving you time, money, and unnecessary service calls.
Key Takeaways
- Bulb Issues: The most common cause is a burnt-out or incompatible light bulb. Always check the bulb first and ensure it’s rated for garage door openers.
- Power Supply Problems: Verify that the opener unit is receiving power by checking the circuit breaker and outlet.
- Logic Board Faults: A malfunctioning logic board can prevent the light from activating, often requiring professional diagnosis.
- Travel Limit Settings: Incorrectly set travel limits can sometimes interfere with the light’s operation.
- Remote Control or Wall Button Issues: While less common for the light specifically, faulty remotes or buttons can sometimes affect overall opener function.
- Wiring Connections: Loose or damaged wiring within the opener unit can lead to intermittent or complete light failure.
- Obstruction Sensors: Although primarily for door movement, a fault in the safety sensors can, in rare cases, impact accessory functions.

Credit: www.youtube.com
Troubleshooting A Non-working Liftmaster Garage Door Opener Light
When the light on your Liftmaster garage door opener fails to illuminate, it’s natural to feel a bit in the dark, quite literally. This issue can stem from a variety of sources, ranging from the incredibly simple to the more complex.
Before calling a technician, a systematic approach to troubleshooting can often pinpoint the problem and, in many cases, lead to a quick and easy fix. We’ll explore the most probable causes, starting with the easiest to check and progressing to those that might require a bit more attention.
Checking The Light Bulb And Socket
The simplest explanation is often the correct one. The light bulb in your garage door opener is subject to vibrations and heat, making it susceptible to burning out over time, much like any other light bulb in your home.
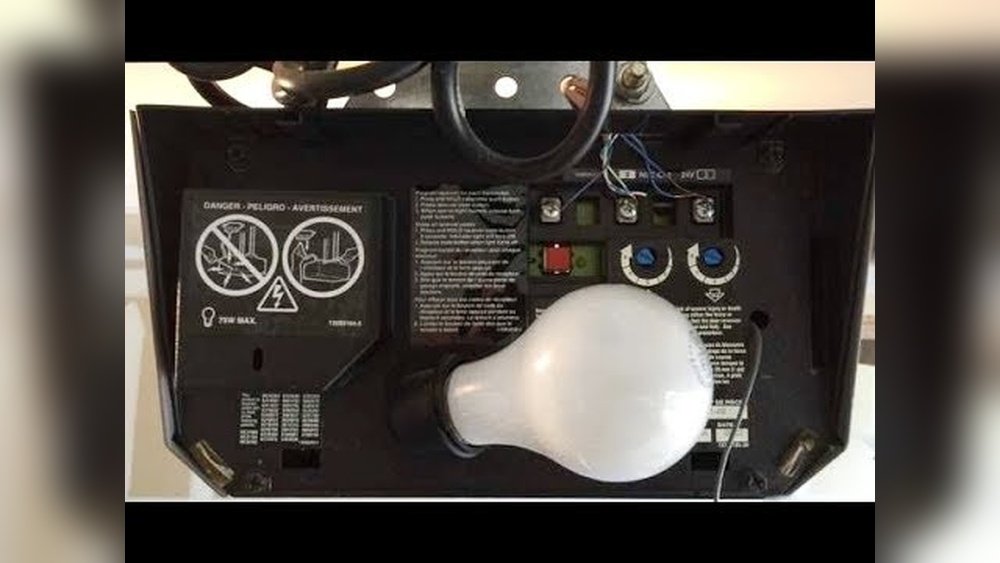
- Inspect the Bulb: Visually examine the bulb. If the filament is broken or the glass appears blackened or scorched, the bulb has likely failed.
- Test with a New Bulb: Replace the old bulb with a new one. Crucially, ensure the new bulb is specifically designed for garage door openers. Standard incandescent bulbs can overheat and potentially damage the opener’s housing or circuitry. LED bulbs are a popular and energy-efficient alternative, but verify they are rated for the opener’s voltage and wattage and are designed to withstand vibrations. The maximum wattage is typically 100 watts for incandescent or the equivalent for LED. Always consult your Liftmaster manual for specific recommendations.
- Check the Socket: Sometimes, the issue isn’t the bulb itself but the connection within the socket. Look for any signs of corrosion, bent metal contacts, or debris inside the socket. If you see corrosion, you can try gently cleaning it with a pencil eraser or a small wire brush. Be sure to disconnect power to the opener before attempting any cleaning or inspection inside the socket.
Verifying Power To The Opener Unit
If a new bulb doesn’t resolve the issue, the next step is to ensure the opener unit itself is receiving adequate power. A lack of power will prevent any of its functions, including the light, from working.
- Check the Circuit Breaker: Locate your home’s electrical panel and find the breaker that controls the garage door opener. If it’s tripped (usually in the middle position or fully off), reset it by pushing it firmly to the “off” position and then back to “on.” If the breaker trips again immediately, there’s an underlying electrical problem that requires professional attention.
- Test the Outlet: If the breaker is fine, test the outlet the opener is plugged into. Use a known working lamp or a voltage tester to confirm that the outlet is supplying power. If the outlet is dead, the problem might be with the outlet itself, the wiring leading to it, or another tripped breaker further down the line.
- Inspect the Power Cord: Ensure the opener’s power cord is not damaged, frayed, or kinked. A damaged cord can interrupt the flow of electricity.
Understanding Logic Board And Internal Wiring
The logic board is the brain of your garage door opener. It controls all its functions, including the light. If the logic board is faulty, it can cause a wide range of issues, including a non-working light.
- Signs of a Faulty Logic Board: Sometimes, a failing logic board will exhibit other symptoms, such as erratic behavior, failure to respond to remotes, or diagnostic error codes (often indicated by flashing LEDs on the unit).
- Wiring Connections: Inside the opener unit, various wires connect the components, including the light socket, the logic board, and the power source. Over time, these connections can become loose due to vibrations or might corrode. If you’re comfortable and have disconnected power, you can open the opener’s casing (refer to your manual for instructions) and visually inspect the wiring. Look for any wires that appear loose, disconnected, or damaged.
- Professional Diagnosis: Diagnosing and replacing a logic board is typically a job for a qualified technician. They have the tools and expertise to test the board and ensure correct installation. Attempting to repair or replace it yourself without the proper knowledge can lead to further damage or safety hazards.
Travel Limit Settings And Light Behavior
While seemingly unrelated, the travel limit settings can sometimes influence the opener’s light behavior, particularly if they are improperly configured. Travel limits tell the opener when to stop moving the door upwards or downwards.
- How Limits Affect Lights: Some Liftmaster models have a feature where the light automatically turns on when the door is in motion and turns off after a set period or when the door is fully closed. If the travel limits are misadjusted, the opener might not be correctly registering the door’s position, which could inadvertently affect the light’s timing or activation.
- Resetting Limits: Consult your Liftmaster manual for specific instructions on how to adjust your model’s travel limits. Typically, this involves using buttons or adjustment screws on the motor unit. It’s a process that requires careful attention to detail to ensure the door operates safely and efficiently. If you’re unsure, it’s best to have a professional do this.
Safety Sensors And Their Impact
The safety sensors are vital for preventing the garage door from closing on an obstruction. While their primary function relates to door movement, a fault in these components can sometimes create unexpected issues with other opener functions.
- Sensor Alignment: Ensure the safety sensors, located near the bottom of the garage door tracks, are clean, unobstructed, and properly aligned. A misalignment or blockage can cause the opener to behave erratically. Many openers have an LED indicator on each sensor; typically, one is solid, and the other blinks, or both are solid when aligned correctly.
- Faulty Sensors: If the sensors are damaged or malfunctioning, they can send incorrect signals to the logic board, potentially affecting the opener’s overall operation, including accessory functions like the light. If you suspect a sensor issue, try cleaning them and checking their alignment. If the problem persists, they may need to be replaced.

Credit: www.youtube.com
Advanced Troubleshooting And Potential Solutions
When the basic troubleshooting steps haven’t resolved the issue of a non-working Liftmaster garage door opener light, it’s time to delve into more advanced possibilities. These might involve specific features of your opener model, or issues that require a deeper understanding of its electrical components.
Understanding Opener Codes And Diagnostic Leds
Modern garage door openers, including many Liftmaster models, come equipped with diagnostic features that can help pinpoint problems. These often involve flashing LEDs on the motor unit that correspond to specific error codes.
- Consult Your Manual: The most crucial step here is to refer to your specific Liftmaster model’s owner’s manual. It will contain a detailed list of diagnostic codes and what they signify. For instance, a certain number of flashes might indicate a problem with the logic board, a remote control signal, or even a power supply issue.
- Interpreting Flashes: For example, if your opener flashes a specific sequence of lights, and your manual states this indicates a “logic board failure,” you know the issue lies with that component. If it indicates a “remote control issue,” you might focus on reprogramming or replacing your remote.
- Common Codes: While specific codes vary by model, common patterns often relate to:
- Power issues: Intermittent power loss.
- Logic board errors: Internal component failure.
- Remote control interference: Signal problems.
- Safety sensor faults: Obstruction or misalignment.
Investigating Remote Control And Wall Button Functionality
While the light is an independent feature on many openers, the primary controls, the remote and the wall-mounted button, interface with the logic board. If these controls are malfunctioning, it could indirectly affect the light’s operation, especially if the light is programmed to activate with door movement initiated by these controls.
- Test the Remote:
- Battery: The simplest cause for a non-functional remote is a dead battery. Replace it with a fresh one, ensuring correct polarity.
- Range: Try operating the opener from closer distances. If it works up close but not far away, the remote battery might be weak or there could be interference.
- Reprogramming: If the remote seems unresponsive, try reprogramming it to the opener. Your manual will provide specific instructions for this process, which usually involves pressing a “learn” button on the motor unit.
- Test the Wall Button:
- Direct Activation: Press the wall-mounted button. If the door operates normally from the wall button but not the remote, the issue is likely with the remote or its reception.
- Wiring: If the wall button itself doesn’t work, check the low-voltage wiring that connects it to the motor unit. Ensure the connections are secure at both the button and the opener. Look for any damage or breaks in the wire.
The Role Of The Receiver Logic Board
The receiver logic board is central to the opener’s operation. It processes signals from remotes and wall buttons and controls the motor, the light, and safety features. Issues with the logic board are often the most complex to diagnose and resolve.
- Power Surges and Age: Logic boards can fail due to power surges, electrical shorts, or simply wear and tear over time. Components on the board can burn out, leading to a complete or partial loss of functionality.
- Intermittent Issues: A failing logic board can cause intermittent problems. The light might work sometimes but not others, or the opener might behave erratically.
- Professional Assessment: Unless you have significant experience with electronics and electrical systems, attempting to repair a logic board is not recommended. A qualified garage door technician can test the board, identify faulty components (though often replacement is more cost-effective), and install a new one safely.
Specific Liftmaster Features Affecting Lighting
Liftmaster offers various models with advanced features, some of which can influence how the light operates. Understanding these can be key to troubleshooting.
- MyQ Technology: If your Liftmaster has MyQ technology, it allows for remote monitoring and control via a smartphone app. While primarily for door operation, the connectivity and associated app settings could, in rare instances, interact with accessory functions. Ensure your MyQ app is updated and that there are no unusual notifications or settings preventing the light from functioning.
- Adjustable Light Settings: Some Liftmaster openers allow you to adjust the duration the light stays on. While this usually affects how long the light stays on *after* activation, an unusual setting or glitch in this feature could potentially lead to the light not turning on at all. Refer to your manual to check and reset these timer settings.
- “Vacation Lock” or “Lockout” Mode: Many openers have a “lock” or “vacation” mode that disables remotes to enhance security when you’re away. If this mode is accidentally engaged, it might prevent remotes from activating the opener, and consequently, the light. Check your unit for a lock indicator or consult your manual on how to disable this mode.
Credit: www.youtube.com
When To Call A Professional
While many garage door opener light issues can be resolved with basic DIY troubleshooting, some problems clearly indicate the need for professional assistance. Pushing your knowledge or skills beyond their limits can lead to further damage, void warranties, or create safety hazards.
Electrical Hazards
Working with electrical systems always carries inherent risks. Garage door openers are connected to your home’s main power supply, and improper handling can result in electric shock or fire.
- Signs of Electrical Issues: If you notice burning smells, sparks, or if the circuit breaker repeatedly trips, do not attempt further DIY repairs. These are clear indicators of a serious electrical problem that requires the expertise of a qualified electrician or garage door technician.
- Internal Wiring: While visual inspection of accessible wiring might be feasible, delving deep into the opener’s internal electrical components or the wiring within your garage walls should be left to professionals. They have the specialized tools and knowledge to work safely and effectively.
Logic Board And Motor Replacement
As discussed, the logic board is a complex electronic component. If diagnostics point to a faulty logic board or if the motor unit itself appears damaged or is making unusual noises, these are tasks best left to professionals.
- Complexity of Repair: Replacing a logic board or motor involves precise electrical connections and potentially mechanical adjustments. Incorrect installation can lead to the opener malfunctioning, failing to operate safely, or even causing damage to the garage door itself.
- Warranty Considerations: For openers still under warranty, attempting unauthorized repairs can void the warranty. A professional technician will be aware of warranty requirements and ensure any work performed aligns with them.
Safety And Mechanical Issues
Beyond electrical concerns, issues with the opener’s mechanical components or safety systems should be handled by experts.
- Door Balance: If you suspect the garage door itself is unbalanced (i.e., it’s difficult to lift manually), this is a serious safety concern. An unbalanced door puts excessive strain on the opener and can lead to catastrophic failure. Never attempt to adjust garage door springs yourself, as they are under extreme tension and can cause severe injury.
- Sensor Malfunctions: While you can check and clean safety sensors, persistent malfunctions or damage to these units often require professional diagnosis and replacement. These sensors are critical for preventing accidents.
When Diy Becomes Too Risky
In general, if at any point during your troubleshooting you feel uncomfortable, unsure, or unsafe, it’s time to stop and call a professional. The cost of a service call is often far less than the potential cost of repairing extensive damage or dealing with an injury caused by attempting a repair beyond your skill level. Reputable garage door service companies have trained technicians who can diagnose and fix the problem efficiently and safely.
Preventative Maintenance For Your Liftmaster Opener
Regular maintenance is key to ensuring the longevity and reliable operation of your Liftmaster garage door opener, including its lighting system. By performing simple checks and tasks periodically, you can often prevent minor issues from escalating into major problems.
Regular Bulb Checks And Replacements
As the most common culprit, the light bulb deserves regular attention.
- Scheduled Inspection: Make it a habit to check the light bulb every few months. If it looks dim or you notice any flickering, it’s likely nearing the end of its lifespan.
- Use Appropriate Bulbs: Always use bulbs specifically rated for garage door openers. These are designed to withstand vibrations and temperature fluctuations better than standard household bulbs. LED versions are highly recommended for their durability and energy efficiency. Check your manual for the maximum wattage and type allowed.
Cleaning And Inspecting Safety Sensors
The safety sensors are critical for preventing accidents and ensuring smooth operation.
- Monthly Cleaning: Wipe down the lenses of the safety sensors with a soft, dry cloth at least once a month. Dust, cobwebs, or smudges can interfere with their alignment and function.
- Alignment Checks: Periodically (every few months), check that the sensors are properly aligned. Most sensors have indicator lights that show their status. If the lights are not steady or indicate a misalignment, gently adjust them until they are correctly positioned.
Lubrication And General Opener Maintenance
Proper lubrication and general upkeep of the entire garage door system contribute to the opener’s overall health.
- Lubricate Moving Parts: Apply a silicone-based lubricant or white lithium grease to the moving parts of the garage door itself, the hinges, rollers, and tracks, about twice a year. This reduces friction and strain on the opener motor. Do not lubricate the opener’s chain or screw drive unless specified by the manual, as this can attract dirt and debris.
- Check Door Balance: Once or twice a year, test your door’s balance. Disengage the opener using the emergency release cord and try to lift the door manually. It should stay open midway without requiring excessive force or slamming shut. If it doesn’t, the spring system may need adjustment by a professional.
- Inspect Drive Mechanism: Check the opener’s chain, belt, or screw drive for any signs of wear, damage, or excessive looseness. Ensure the chain or belt is properly tensioned according to your manual’s recommendations.
Electrical Connections And Power Source
While you shouldn’t tamper with internal wiring, you can perform basic checks on the power source.
- Outlet and Cord Inspection: Regularly inspect the electrical outlet and the opener’s power cord for any signs of damage, fraying, or loose connections. Ensure the outlet is functioning correctly by plugging in another device.
- Circuit Breaker Awareness: Be mindful of your circuit breaker. If it trips frequently, it indicates an electrical issue that needs professional attention rather than just resetting it repeatedly.
By incorporating these simple preventative maintenance steps into your routine, you can significantly reduce the likelihood of encountering problems like a non-working light and ensure your Liftmaster garage door opener performs reliably for years to come.
Frequently Asked Questions
Why Does My Liftmaster Garage Door Opener Light Flash But Not Turn On?
Flashing lights on a Liftmaster opener often indicate a diagnostic code. If the light flashes but doesn’t illuminate, it could signal a problem with the light bulb itself (even if new, it might be incompatible or faulty), a loose connection in the light socket, or an issue with the logic board that prevents it from sending power to the light.
Consult your owner’s manual for the specific meaning of the flashing pattern.
Can I Use A Regular Led Bulb In My Liftmaster Opener?
While many standard LED bulbs might fit, it’s crucial to use LED bulbs specifically designed for garage door openers. These are built to withstand vibrations and operate within the temperature range expected in an opener unit. Regular LEDs may not last as long or could potentially cause issues.
Always check your Liftmaster manual for recommended bulb specifications, including maximum wattage and type.
How Long Should The Garage Door Opener Light Stay On?
The duration the light stays on is typically adjustable on most Liftmaster models. The default setting is often around 4. 5 minutes, but many openers allow you to set this from a few seconds up to 20 minutes, or even continuously on some models.
You can usually adjust this setting via buttons or dip switches on the motor unit itself. Refer to your specific model’s manual for instructions on how to change the light timer settings.
What Does It Mean If My Liftmaster Opener Light Turns On By Itself?
If the light activates spontaneously without any command, it could be due to a few reasons. It might be a delayed timer setting that is about to expire, a faulty remote control that is sending a signal intermittently, interference from another device, or a problem with the opener’s logic board.
Sometimes, a power surge can also trigger unexpected behavior. Check for any active timer settings and consider reprogramming your remotes. If the issue persists, it may require professional diagnosis.
My Liftmaster Opener Light Works, But The Door Doesn’t. What’s Wrong?
This indicates that the opener unit is receiving power and its lighting circuit is functional, but there’s a separate issue preventing the door from moving. Common causes include a disengaged emergency release cord, a problem with the trolley or drive mechanism, a malfunctioning safety sensor that’s preventing closure, or an issue with the motor itself.
The flashing diagnostic lights on the unit can often provide clues to the specific problem.
When your Liftmaster garage door opener light falters, it’s a signal that warrants attention. While a simple burnt-out bulb is the most frequent culprit, a systematic approach to troubleshooting can reveal underlying issues that affect not just the illumination but potentially the entire functionality and safety of your garage door system.
By understanding the common causes, from power supply and bulb compatibility to logic board integrity and sensor alignment, you can effectively diagnose and, in many cases, resolve the problem. Remember to always prioritize safety, disconnect power when necessary, and consult your owner’s manual for model-specific guidance.
For complex electrical or mechanical issues, engaging a professional garage door technician ensures the problem is fixed correctly and safely, maintaining the security and convenience of your home.