Finding the right way to display your memories can be a challenge when you have thousands of photos trapped on your phone. The best digital picture frame helps you move those images into your living space, but choosing the right one means weighing convenience against storage needs. You must decide if you want a simple, app-based system or a frame that offers more manual control over your files. This article helps you settle on the model that fits your home and your habits.
As an Amazon Associate, we earn from qualifying purchases. This post contains affiliate links – if you buy through them, we may earn a commission at no extra cost to you.
Right for: Users wanting a large, premium display with simple cloud sharing.
The Aura Walden 15 offers a large, 15-inch Full HD screen designed for wall mounting or tabletop use. It features an anti-glare display that automatically adjusts brightness and manages photo cropping for you. The frame connects to WiFi and uses the Aura app to let family members send photos from anywhere.
This frame is built for those who want a “set it and forget it” experience. Because it includes unlimited free cloud storage, you don’t need to worry about managing SD cards or USB drives. It’s an excellent choice for a busy family room where everyone wants to contribute photos instantly.
What works:
Large 15-inch Full HD display
Unlimited free cloud storage included
Automatic brightness and orientation adjustments
Easy app-based photo sharing
Wall mounting kit included
Where it gives ground:
Requires a constant WiFi connection
No mention of manual USB photo import
Skip it if: You prefer managing your photo library offline via local storage devices.
Right for: People who need massive local storage and offline playback.
The Frameo 15.6 Inch features a large IPS touchscreen with a 1920 x 1080 resolution. It includes 64GB of internal memory, which the manufacturer states can hold about 100,000 photos. You can also use SD cards or USB drives to import and back up your memories without needing the internet.
This model is a strong pick for someone who wants to keep a huge library of photos available at all times. The ability to use physical storage means your slideshow can keep running even if your WiFi goes down. Just be careful when plugging in the power cable to avoid damaging the port contacts.
What works:
Large 64GB internal storage capacity
Supports SD card and USB expansion
Vivid IPS touchscreen display
Includes built-in speakers for video
Allows offline photo viewing
Where it gives ground:
USB port doesn’t support computer transfers
Requires care when inserting power cable
Skip it if: You want a completely wireless, cloud-only setup without managing physical cards.
Right for: Gift-givers looking for a highly-rated, user-friendly desktop display.
The Aura Carver is a 10-inch digital frame that focuses on ease of use and aesthetics. It’s frequently recommended for its quick setup process, which takes about one minute to connect to WiFi. Like other Aura models, it provides unlimited free cloud storage for your photos and videos.
This frame is ideal for gifting because you can preload it with memories before the recipient even opens the box. It fits easily on a desk or shelf, making it a great choice for grandparents or friends who want to see daily updates. It provides a clean, simple experience for those who aren’t tech-savvy.
What works:
Fast one-minute WiFi setup
Unlimited free cloud storage
Premium packaging for gifting
Supports photos from various sources
No subscription fees required
Where it gives ground:
Smaller screen than the Walden series
No mention of manual SD card slots
Skip it if: You need a very large wall-mounted display for a big room.
Right for: Users needing a compact frame with reliable local memory.
The Frameo 10.1 Inch by moonka uses a 1280×800 IPS screen with a 16:10 aspect ratio. It comes with 32GB of internal storage, allowing you to store thousands of photos locally. The frame includes a touch interface and supports auto-rotation for both landscape and portrait orientation.
Since it supports offline viewing, you don’t have to worry about a persistent internet connection to see your saved slideshows.
What works:
32GB of built-in memory
Reliable IPS touchscreen display
Supports offline photo viewing
Includes auto-rotate and sleep timer
Simple user-friendly interface
Where it gives ground:
Only supports 2.4GHz WiFi networks
Video uploads via app limited to 15 seconds
Skip it if: You require a larger screen for viewing photos from across the room.
Right for: Someone who wants the simplest possible email-based photo sharing.
The Skylight Digital Frame uses a unique email address to receive photos, making it very easy to share from any device. It features a 10-inch color touchscreen with a 1280×800 resolution. The frame is designed to be a “bridge for every generation,” focusing on plug-and-play simplicity.
You can use the Gift Mode to preload images before sending it to a loved one. Because it relies on cloud storage, it avoids the mess of managing physical SD cards entirely.
What works:
Simple email-based photo uploads
Intuitive touchscreen interface that is compact enough for personal spaces.
Gift Mode for preloading photos
No SD card management required
Plug-and-play setup
Where it gives ground:
WiFi required to receive new photos
Smaller screen size compared to premium models
Skip it if: You want to import large batches of photos using a USB drive.
Right for: Those who want a high-quality display with a sleek mat design.
The Aura Aspen offers a 12-inch HD display framed with a black mat, giving it a more traditional picture frame look. It shares the same unlimited cloud storage and easy app-based setup as other Aura models.
The high-resolution screen ensures your photos look clear, and the simple app makes it easy for family members to add new content.
What works:
Elegant design with black mat
High-resolution HD display
Unlimited free cloud storage
Very easy to set up
App-based sharing for multiple users
Where it gives ground:
No mention of manual memory expansion
Requires constant WiFi connectivity
Skip it if: You prefer a frame with a larger screen designed for wall mounting.
Right for: Users who prioritize flexible storage options.
The RCA 10.1 Inch features a 1280×800 IPS touchscreen and 32GB of built-in storage. It uses the “Uhale” app for private sharing, which also includes a website for uploading photos from a computer. It supports SD cards and USB drives for additional memory and offline backups.
Being able to upload photos from a computer website is a convenient feature that many other app-only frames lack.
What works:
32GB internal storage plus expansion
Upload photos via app or website
Bright HD IPS touchscreen
Includes wall mounting and stand
Supports offline slideshow playback
Where it gives ground:
App required for wireless features
Standard 10.1-inch screen resolution
Skip it if: You want a premium, high-resolution screen that is larger than standard desktop models.
How to Think Before You Choose
Cloud vs. Local Storage
Cloud-based frames rely on an app or email to send photos, which is convenient but usually requires a constant WiFi connection. Local storage frames, like those supporting SD cards or USB drives, allow you to keep your photos even when the internet is down. You should check the Energy Star guidelines for electronic display power efficiency at home to ensure your frame is suitable for long-term use.
Screen Size and Resolution
A larger screen makes photos easier to see from a distance, but higher resolution is needed to keep images sharp as the display grows. If you plan to hang the frame on a wall, look for a display with a larger surface area to ensure visibility. Smaller frames are better for bedside tables or desks where you’ll be viewing the screen up close.
Sharing Methods
Consider who will be sending the photos to the frame. Some frames use dedicated apps that allow multiple users to join, while others use a simple email address to receive files. If you have family members who aren’t tech-savvy, an email-based system is often the easiest path.
Who Should Skip These Altogether
Some people may find that these devices don’t fit their specific needs or current lifestyle.
Anyone who prefers to view photos in physical albums or printed frames.
Users who don’t have a reliable 2.4GHz WiFi network at home.
People who would only use the device once and then store it away.
Those who already own a tablet that can be repurposed as a digital photo slideshow.
The Aura Walden 15 is the best choice for those who want a large, high-quality wall display, while the Aura Carver is the top pick for a simple, elegant gift. Check your available space and then follow the provided links to secure your frame today.
Frequently Asked Questions
Do these frames require a monthly subscription?
Most of the frames listed here, such as the Aura models, don’t charge a monthly subscription fee for their cloud storage. You can add unlimited photos and videos using their free apps. Always check the specific product listing to confirm that no hidden fees are mentioned for cloud services.
Can I display videos on these frames?
Yes, most digital frames now support video playback with sound. For example, the Aura Walden 15 and the Frameo models allow you to send videos from your phone or import them via SD card. Note that some app-based uploads have a brief time limit per video.
What happens if my WiFi connection stops?
Frames that rely on cloud storage usually require a WiFi connection to receive new photos or updates. However, many models, including the Frameo 15.6 Inch and RCA 10.1 Inch, allow you to view existing photos stored in their internal memory or on SD cards even without WiFi.
Are these frames difficult to set up for seniors?
Many of these frames are designed with simplicity in mind, featuring quick WiFi setup and easy-to-use touchscreens. Frames like the Skylight or Aura Carver are specifically marketed as being easy for all ages to use. Once set up, the recipient usually just needs to turn the frame on to see new photos.
What should I check before buying a frame?
Check the WiFi compatibility, as many frames only support 2.4GHz networks. You should also confirm whether the frame includes a stand or a wall-mounting kit, depending on where you intend to place it. Finally, ensure the storage capacity meets your needs, especially if you have a very large photo collection.
Final Thoughts
Once you’ve picked your favorite, don’t let those precious moments stay buried in your camera roll for another day. Set up your new display on a shelf where you’ll see it often, and start inviting family members to share their snapshots too. You’ll love how much warmth it brings to your home.
As an Amazon Associate, we earn from qualifying purchases. This post contains affiliate links – if you buy through them, we may earn a commission at no extra cost to you.
Choosing the right gauge depends on your specific vehicle and how often you need to adjust tire pressure. While some prioritize extreme durability for heavy-duty work, others focus on compact portability or specialized valve compatibility. These selections highlight the best tools for different needs based on their build and sensor accuracy.
Best overall:JACO ElitePro Digital Gauge features professional-grade accuracy and a heavy-duty, shock-resistant brass and steel build.
Best for bicycles:Topeak SmartGauge D2 offers a rotating head for seamless switching between Presta and Schrader valve types.
Best for RVs and trucks:TireMinder High Precision Gauge provides a five-year warranty and high-quality metal construction for heavy use.
The rest of this guide helps you find the right fit for your specific vehicle requirements.
Best for: Daily drivers and professional mechanics.
This gauge is built to last, featuring a solid brass and steel construction protected by a shock-resistant guard. The 10-inch HybridFlex air hose and swivel chuck allow for easy access to valve stems in tight spaces. Since it auto-shuts off after 150 seconds, you don’t have to worry about the battery draining if you forget to turn it off.
The professional calibration to ANSI 2A standards makes it a reliable choice for those needing consistent, precise readings. However, it isn’t the most compact option if you’re looking for something to carry in a small saddlebag or pocket.
Best for: Cyclists using Presta or Schrader valves.
This tool is specifically designed for bikes, weighing only 65 grams. The rotating SmartHead eliminates the need for adapters, which simplifies the process when switching between different types of bicycle tires. It provides readings in multiple units, including Bar and PSI, which is helpful for those who follow specific manufacturer inflation guides.
Because it’s built from engineering-grade polymer, it’s lightweight and perfect for travel. This model isn’t intended for heavy-duty truck tires, as its design is optimized for the smaller, higher-pressure valves found on bicycles.
This gauge features a rugged all-metal build and a custom grip that’s easy to hold in various weather conditions. It comes with interchangeable straight and 45-degree heads, which is useful for reaching valves on dual-wheel setups common on larger trucks. The inclusion of a flashlight and backlit screen ensures you can see your tire stems clearly at night.
The five-year warranty adds a layer of confidence for those who put many miles on their vehicles.
Constructed from stainless steel, this gauge is designed to withstand the rigors of truck and RV maintenance. It supports a very wide pressure range up to 230 PSI, making it versatile enough for almost any standard vehicle tire. The non-slip texture on the handle helps maintain a firm grip even when your hands are dirty or cold.
The auto-shutoff feature works quickly to conserve battery life, which is helpful for infrequent users. This gauge isn’t as specialized for low-pressure off-road tires as some other models, as it’s focused on a broader, higher-pressure range.
This gauge is built for accuracy, providing readings to the 0.1 PSI level. It features a continuous pressure reading mode, meaning you don’t have to reset the device when you use the built-in air bleeder valve. This is a significant advantage when you’re trying to reach a specific target pressure without multiple steps.
The 15-inch hose provides plenty of room to maneuver around large brake rotors or rims. It isn’t designed for very high-pressure applications, as it’s capped at 60 PSI.
This tool is unique because it combines a pressure gauge with a rapid air-down deflator. By removing the valve core, it allows you to lower tire pressure much faster than a standard bleed valve, which is essential for off-road traction. The screw-on chuck ensures a secure connection, preventing air leaks while you work.
The rubber bump guard protects the internal components during rough trail use. It’s a more complex tool than a standard gauge, making it better suited for those who frequently adjust pressure for different terrain.
The T300 Plus is engineered with thermal compensation, allowing it to provide accurate readings in temperatures ranging from -4°F to 130°F. It also includes a Presta valve adapter, broadening its utility to include bicycles.
This gauge is a solid choice for people living in climates with extreme seasonal shifts. It isn’t the most lightweight option, so it’s better kept in a truck toolbox than a cycling jersey pocket.
The Accutire gauge features a large, backlit LCD screen that makes reading results very simple. The angled head design is intended to make it easier to reach valve stems without bending the hose at awkward angles. It’s a straightforward, no-nonsense tool that covers the common pressure ranges needed for most passenger vehicles.
The rubber-coated handle provides a comfortable grip that helps prevent slipping. It isn’t designed for the extreme pressures or heavy-duty environments that some of the more industrial gauges on this list are built for.
This gauge is specifically calibrated for low-pressure applications, offering high resolution for tires that require very precise inflation. The 360-degree swivel ball chuck makes it much easier to lock onto awkward valve stems found on small off-road vehicles. Like the other JACO models, it features a sturdy brass gauge body protected by a rubber guard.
It’s an excellent tool for those who maintain tractors or snowblowers. It isn’t suitable for high-pressure highway tires, as its range is limited to 30 PSI.
Weighing 45 grams, this gauge features a rotary head design that allows it to work easily with both Presta and Schrader valves, making it a great companion for cyclists. It provides real-time pressure readings, which is helpful for quick checks before a ride.
The compact design means it fits easily into a seat bag or a jersey pocket. Because of its small size, it doesn’t have the ruggedized heavy-duty guards found on larger, garage-focused gauges.
Pros
Extremely lightweight
Dual-valve compatibility
Real-time pressure monitoring
Cons
No heavy-duty impact guard
How to Choose in Sixty Seconds
Which accuracy standard should I look for?
Tire pressure gauge accuracy is best confirmed by looking for gauges that explicitly mention ANSI 2A certification or specific tolerance levels like ±0.5 PSI. These standards ensure the sensor has been calibrated for professional use. You can confirm the technical requirements through the American National Standards Institute to understand how professional tools are evaluated.
Does the hose length matter?
Yes, hose length affects your ability to reach valve stems on large vehicles or motorcycles with crowded brake assemblies. A longer hose, like those on the JACO ElitePro or Motion Pro, allows for easier positioning without needing to rotate the entire wheel to find the perfect angle.
Should I choose a digital or analog gauge?
Digital gauges are generally easier to read in low light and provide precise 0.1 PSI increments, which is better for fine-tuning. If you prefer a gauge that never needs batteries, you might consider an analog dial, but digital models are superior for readability and quick, accurate adjustments in the dark.
Closing
For most users, the JACO ElitePro Digital Gauge is the best choice due to its high accuracy and rugged build. If you need a specialized tool for cycling, the Topeak SmartGauge D2 is the standout option for its portability. Check your tire sidewall for the recommended pressure and keep your gauge in a safe, dry place.
Most digital gauges, including the TireMinder High Precision Gauge and Accutire Digital Gauge, will show a low battery icon on the LCD screen. Refer to your specific manual for whether it uses AAA, coin cell, or other battery types.
Can I use these on any valve type?
Not all gauges are universal. Models like the Topeak SmartGauge D2 and SKS Germany Airchecker are designed for both Presta and Schrader valves. Others, like the JACO ElitePro, are designed primarily for standard Schrader valves. If you have a bike with Presta valves, check that your chosen gauge includes an adapter or a compatible head.
Final Thoughts
Keeping your tires properly inflated will make your car safer and help you save money at the pump. Once you’ve picked the right tool for your glove box, don’t forget to check your pressure every month. You’ll be glad you did when you’re driving smoothly on your next long road trip.
A persistent hissing noise after flushing a toilet can be more than just an annoyance; it often signals a problem within the toilet tank’s internal mechanisms. This sound, typically caused by air or water escaping where it shouldn’t, can lead to wasted water, increased utility bills, and eventually, more significant plumbing issues. Understanding the common culprits behind this sound is the first step toward a quiet and efficient toilet.
Recognizing the source of the hiss is crucial for effective troubleshooting. While some issues are simple fixes anyone can tackle with basic tools, others might require the expertise of a professional plumber. This guide will walk you through the most frequent reasons your toilet hisses after a flush, providing clear steps for diagnosis and repair, ensuring your bathroom remains a peaceful sanctuary.
Key Takeaways
A hissing toilet after flushing is usually caused by a faulty flapper, a worn-out fill valve, or an issue with the float.
Water wastage is a significant consequence, potentially costing hundreds of dollars annually in increased utility bills.
The most common fix involves replacing the toilet flapper, a relatively simple DIY task.
If the hiss persists after checking the flapper, the fill valve is the next likely culprit, requiring a replacement.
A toilet leak detector can help identify silent leaks that contribute to continuous water loss and hissing sounds.
Regular maintenance and understanding your toilet’s components can prevent future issues.
Credit: www.benjaminfranklinplumbing.com
Understanding Your Toilet’s Anatomy
Before diving into troubleshooting, it’s essential to have a basic understanding of the components within your toilet tank that are responsible for its operation. The tank holds the water used for flushing, and several parts work in concert to refill it and prepare for the next use. The primary components involved in the hissing noise are the fill valve, the flapper, and the float.
The fill valve (also known as the ballcock) is responsible for refilling the tank with water after a flush. It automatically shuts off the water supply once the tank reaches the desired water level. The float, typically a ball or a cup attached to the fill valve, rises with the water level and signals the fill valve to shut off. The flapper is a rubber or plastic seal at the bottom of the tank that lifts when you flush, allowing water to enter the bowl, and then reseals the opening.
The Fill Valve Explained
The fill valve is a critical component that regulates the water entering the tank. When you flush, the flapper opens, and the water level in the tank drops. This causes the float to descend, which in turn opens the fill valve, allowing fresh water to flow into the tank. As the water level rises, the float also rises, eventually signaling the fill valve to close and stop the flow of water. If the fill valve is worn out, damaged, or improperly adjusted, it might not close completely, leading to a continuous trickle of water into the tank, which can manifest as a hissing sound.
The Role Of The Flapper
The flapper is the gatekeeper of the tank’s water. Its primary job is to create a watertight seal at the bottom of the tank. When you press the flush handle, a chain or lever lifts the flapper, allowing the water to rush into the toilet bowl. Once the flush is complete, the flapper is designed to drop back down and seal the opening. Over time, the rubber of the flapper can degrade, becoming stiff, warped, or cracked. This prevents it from forming a proper seal, allowing water to constantly leak from the tank into the bowl, often accompanied by a faint hissing sound as the fill valve tries to compensate for the lost water.
The Float Mechanism
The float is intrinsically linked to the fill valve. Its purpose is to monitor the water level within the tank. As the water fills, the float rises. When it reaches a pre-determined height, it triggers the fill valve to shut off. If the float is set too high, it can cause the water to constantly overflow into the overflow tube, which is a safety feature to prevent flooding. If the float mechanism itself is malfunctioning or misaligned, it might not correctly signal the fill valve, leading to overfilling or a failure to shut off the water supply, both of which can result in hissing noises.
Common Causes Of The Hissing Noise
Several issues can lead to that persistent hiss. Most of these are related to the components within the tank that control water flow and level. Identifying the specific cause is key to implementing the correct repair.
1. A Leaking Or Worn-out Flapper
This is by far the most common reason for a hissing toilet. As mentioned, the flapper is a seal, and if that seal is compromised, water will continuously leak from the tank into the bowl. The fill valve, sensing the drop in water level, will intermittently turn on to replenish the tank, creating a cycle of filling and a characteristic hissing sound.
Symptoms:
A faint but continuous hissing sound coming from the tank.
The toilet may run for a short period after flushing, then stop, only to start again later.
You might hear the fill valve kick on even when the toilet hasn’t been flushed.
Visible signs of wear or degradation on the flapper itself (cracks, stiffness).
Diagnosis:
To check for a faulty flapper, you can perform a simple dye test. Add a few drops of food coloring or a dye tablet to the water in the tank. Wait for about 15-30 minutes without flushing. If you see colored water in the toilet bowl, it means the flapper is not sealing properly, and water is leaking from the tank.
Repair:
Replacing a toilet flapper is a straightforward DIY task. Most flappers are inexpensive and can be found at any hardware or home improvement store. You’ll need to turn off the water supply to the toilet, flush to empty the tank, disconnect the old flapper from the flush valve and the chain, and attach the new one.
Ensure the new flapper creates a good seal.
2. A Faulty Fill Valve (ballcock)
If the flapper is in good condition, the next most likely culprit is the fill valve. This valve is responsible for controlling the flow of water into the tank. If the valve mechanism is worn, damaged, or has debris caught in it, it may fail to close completely, allowing water to continuously flow into the tank. This continuous flow creates a hissing sound.
Symptoms:
The hissing sound is more constant and might be louder than with a leaky flapper.
The water level in the tank might be too high, potentially overflowing into the overflow tube.
The fill valve may not shut off completely even after the tank is full.
The float mechanism might appear to be set correctly, but the valve still leaks.
Diagnosis:
Listen closely to the fill valve itself. If the hissing is directly emanating from the valve assembly, it’s a strong indicator of a problem. You can also try gently pushing down on the float arm or adjusting the float mechanism to see if it temporarily stops the hiss.
If it does, it points to an issue with the valve’s ability to shut off the water.
Repair:
Replacing a fill valve is also a manageable DIY project, though it might be slightly more involved than changing a flapper. You’ll need to turn off the water supply, disconnect the water line, remove the old fill valve, install the new one, reconnect the water line, and adjust the float to the correct water level.
Many modern fill valves are designed for easy installation.
3. Incorrect Float Adjustment
The float is designed to rise with the water level and signal the fill valve to shut off. If the float is set too high, it can cause the water level to exceed the recommended mark. This can lead to water constantly overflowing into the overflow tube, which is essentially a continuous leak. While the primary sound might be gurgling from the overflow, the fill valve working overtime to maintain this high level can also produce a hissing sound.
Symptoms:
Water continuously running into the overflow tube.
The water level in the tank is noticeably high, close to or above the top of the overflow pipe.
The fill valve may be shut off, but the overflow is still active.
Diagnosis:
Visually inspect the water level in the tank. Most toilets have a fill line marked inside the tank or on the overflow tube. If the water level is above this line, the float is likely adjusted too high. You can also observe the float mechanism to see if it’s stuck in a high position.
Repair:
Most floats have an adjustment screw or clip that allows you to lower the float’s position. By adjusting the float to a lower level, you can ensure the water shuts off before reaching the overflow tube. Turn off the water supply, adjust the float downwards, then turn the water back on and check the level.
4. Debris In The System
Occasionally, small pieces of debris, sediment, or mineral buildup can get lodged in the fill valve or around the flapper seal. This debris can prevent the valve from closing properly or interfere with the flapper’s seal, leading to a leak and subsequent hissing.
Symptoms:
Hissing may be intermittent or change in intensity.
The problem might have started suddenly.
Older plumbing systems or areas with hard water are more prone to this.
Diagnosis:
This can be harder to diagnose visually without disassembling parts. However, if you’ve ruled out a worn-out flapper or fill valve, and the float is correctly adjusted, debris is a possibility. Sometimes, a thorough cleaning of the tank’s components can help.
Repair:
For Fill Valve: Turn off the water supply, flush the toilet, and then remove the fill valve. Inspect the inlet and outlet for any visible debris. Some fill valves have a small screen that can be cleaned.
For Flapper: Remove the flapper and clean the rim of the flush valve opening where the flapper seals. Gently scrape away any mineral deposits or debris. Reinstall the flapper and check the seal.
A more thorough cleaning might involve draining the tank completely and scrubbing the inside of the tank and bowl to remove sediment.
5. Issues With The Flush Valve Seat
The flush valve seat is the rim at the bottom of the tank that the flapper seals against. If this seat is corroded, pitted, or damaged, the flapper cannot create a proper watertight seal, even if the flapper itself is in good condition. This continuous leak will cause the fill valve to engage, resulting in a hiss.
Symptoms:
The flapper appears to be in good condition, but the dye test still shows a leak.
Visible corrosion, nicks, or rough spots on the flush valve seat.
The hissing sound is persistent.
Diagnosis:
After removing the flapper, carefully inspect the rim of the flush valve seat. Run your finger gently around it (ensure there are no sharp edges). If you feel roughness, pitting, or see obvious damage, the seat is likely the problem.
Repair:
For minor imperfections, you might be able to smooth the seat using fine-grit sandpaper or a specialized toilet seat repair kit. However, if the damage is significant, the entire flush valve assembly may need to be replaced, which is a more involved plumbing task.
Credit: www.geiler.com
Troubleshooting Steps: A Practical Guide
When faced with a hissing toilet, a systematic approach to troubleshooting can save time and effort. Here’s a step-by-step guide to help you pinpoint and fix the issue.
Step 1: Identify The Source Of The Sound
Listen carefully: Try to determine if the hiss is coming from the fill valve itself, the overflow tube, or the general area of the flapper.
Open the tank lid: With the lid off, the sound should become more apparent.
Water level check: Observe the water level relative to the overflow tube. Is it consistently above the tube’s opening?
Step 2: Perform The Dye Test
Add a few drops of food coloring or a toilet leak detection tablet into the tank water.
Wait 15-30 minutes without flushing.
Check the toilet bowl for any signs of color.
If color appears: The flapper is leaking, or the flush valve seat is compromised. Proceed to Step 3.
If no color appears: The flapper is likely sealing correctly. The issue is more likely with the fill valve or its adjustment. Proceed to Step 4.
Step 3: Address Flapper Or Flush Valve Seat Issues
Inspect the flapper: If the dye test indicated a leak, remove the flapper. Check for cracks, stiffness, or warping. Feel the seal. If it looks or feels worn, replace it.
Replace the flapper:
Turn off the water supply valve behind the toilet.
Flush the toilet to empty the tank.
Unclip the old flapper from the ears on the flush valve.
Disconnect the chain from the flush lever arm.
Attach the new flapper to the ears.
Reconnect the chain to the flush lever arm, ensuring there’s minimal slack (about 1/2 inch).
Turn the water supply back on and let the tank fill. Listen for the hiss.
Inspect the flush valve seat: If replacing the flapper doesn’t solve the hiss, carefully examine the rim of the flush valve seat for damage or corrosion. If damaged, consider a repair kit or professional replacement.
Step 4: Investigate The Fill Valve And Float
Observe the fill valve: If the dye test showed no leak, the problem is likely the fill valve or float. Listen to the fill valve. Is the hiss coming directly from it?
Check float adjustment:
Locate the float (ball or cup) attached to the fill valve.
Ensure the water level in the tank is about 1/2 inch to 1 inch below the top of the overflow tube.
If the level is too high, adjust the float downwards. Many have a screw mechanism; others have a clip you can move.
If the float is stuck or doesn’t seem to be controlling the fill valve, it might be faulty.
Adjust or replace the fill valve:
Turn off the water supply.
Flush to empty the tank.
Disconnect the water supply line from the fill valve.
Release the locking nut or clip holding the fill valve in place.
Remove the old fill valve.
Install the new fill valve according to the manufacturer’s instructions.
Reconnect the water supply line.
Turn the water back on and adjust the float to the correct water level. Listen for the hiss.
Step 5: Consider Less Common Issues
Water Hammer Arrestor: In some rare cases, a hissing sound might be related to water hammer when the fill valve shuts off abruptly. Installing a water hammer arrestor can sometimes help.
Toilet Design: Some modern, low-flow toilets have specific valve designs that might produce a slight “breathing” or hissing sound as they equalize pressure. If the toilet is functioning correctly and the water bill is normal, this might be normal operation.
Credit: www.reddit.com
Tools And Materials You Might Need
Successfully troubleshooting and repairing a hissing toilet often requires a few basic tools and replacement parts. Having these on hand can make the process much smoother.
Essential Tools
Screwdriver Set: Both Phillips and flathead screwdrivers are useful for various adjustments and disassembly.
Pliers: Adjustable pliers (like Channel Locks) are helpful for gripping nuts and fittings, especially when disconnecting the water supply line.
Adjustable Wrench: Similar to pliers, a wrench provides better grip on hexagonal nuts.
Towel or Rag: For wiping up any spilled water.
Bucket: To catch residual water when disconnecting lines.
Gloves: To keep your hands clean.
Common Replacement Parts
Toilet Flapper: Available in various materials (rubber, silicone) and designs to fit different flush valve types. It’s wise to have a universal flapper on hand.
Fill Valve: Modern fill valves are often universal and easier to install than older ballcock types. Consider a quiet-fill model.
Toilet Repair Kit: Some kits include a flapper, a flush valve seal, and sometimes a fill valve, offering a comprehensive solution for common issues.
Toilet Leak Detection Tablets: Useful for regular checks to ensure your flapper is sealing properly.
When To Call A Professional Plumber
While many toilet hissing issues are DIY-friendly, there are times when professional help is necessary.
Persistent Hissing: If you’ve tried all the common fixes and the hissing noise continues, there might be a more complex problem within the toilet’s internal plumbing or even the water supply line.
Damaged Flush Valve Seat: If the flush valve seat is severely corroded or pitted, replacing the entire flush valve assembly can be challenging and may require specialized tools.
Uncertainty or Lack of Confidence: If you’re uncomfortable working with plumbing or unsure about any step, it’s always best to call a licensed plumber. Incorrect repairs can lead to leaks and water damage.
Multiple Toilet Issues: If you have several toilets exhibiting problems or if the issue seems widespread in your plumbing system, a professional can diagnose the root cause.
The Environmental And Financial Impact Of A Hissing Toilet
A seemingly minor hissing sound from your toilet can have significant repercussions on both your wallet and the environment. The continuous, albeit sometimes slow, leak of water translates directly into wasted resources and higher utility bills. Understanding this impact can be a strong motivator for prompt repair.
Water Wastage Statistics
The amount of water wasted by a leaking toilet can be substantial. A small, steady leak from the tank into the bowl can waste dozens of gallons per day.
A toilet that leaks just one drop per second can waste over 3,000 gallons of water per year.
A more significant leak, where the fill valve runs intermittently due to a faulty flapper, can waste up to 200 gallons per day, totaling over 73,000 gallons annually.
According to the U.S. Environmental Protection Agency (EPA), household leaks are responsible for wasting trillions of gallons of water across the country each year, with toilets being a major contributor.
Financial Costs
The financial impact of a hissing toilet is directly tied to your water and sewer bills. Water utilities typically charge based on consumption, and a constant leak means you’re paying for water that is immediately sent down the drain.
For an average household, a constantly running or leaking toilet can add $100 to $1,000 or more to annual utility bills, depending on local water rates and the severity of the leak.
In areas with high water costs or tiered pricing structures, the financial penalty for water wastage can be even more pronounced.
Beyond water costs, excessive use of the water heater can also increase energy bills if the leak is significant enough to trigger frequent reheating cycles.
Environmental Considerations
Water is a precious resource, and its conservation is crucial for environmental sustainability.
Resource Depletion: Wasting water strains local water supplies, especially in drought-prone regions. This impacts ecosystems, agriculture, and the availability of clean drinking water.
Energy Consumption: Treating and pumping water to homes requires significant energy. Wasting water indirectly contributes to carbon emissions associated with energy production.
Wastewater Treatment: Discharged water, even if leaking, still needs to be processed by wastewater treatment plants, which are energy-intensive facilities.
Addressing a hissing toilet promptly is not just about eliminating an annoying sound; it’s a responsible action that benefits your finances and contributes to water conservation efforts.
Toilet Hissing Noise Maintenance And Prevention
Preventing the hissing noise in the first place often comes down to regular maintenance and understanding the signs of wear and tear in your toilet’s components. By being proactive, you can avoid costly repairs and unnecessary water wastage.
Regular Inspections
Listen for unusual sounds: Make it a habit to listen to your toilet after flushing. Any persistent hissing, running, or gurgling sounds should be investigated.
Perform the dye test quarterly: This simple test can catch flapper leaks before they become significant problems.
Check the water level: Ensure the water level in the tank is consistently at the marked line and not overflowing into the tube.
Component Lifespan And Replacement
Flappers: Most toilet flappers have a lifespan of 5 to 10 years, depending on water quality and usage. Hard water and certain water treatment chemicals can shorten this lifespan. Consider replacing the flapper proactively if it’s nearing this age range, especially if you notice it becoming stiff.
Fill Valves: Fill valves can last 10 to 15 years or more, but their seals can degrade over time. If you experience frequent issues with the fill valve not shutting off properly, replacement might be the most cost-effective solution.
The appearance of cracks in your walls can be a source of considerable anxiety for homeowners. While minor hairline fractures might seem cosmetic, more significant fissures can signal underlying structural issues that require prompt attention. Understanding the myriad of potential causes behind wall cracks is the first crucial step in determining the appropriate fix and ensuring the long-term integrity of your home.
From the natural settling of a new building to more serious environmental factors, a variety of elements can contribute to these unwelcome blemishes.
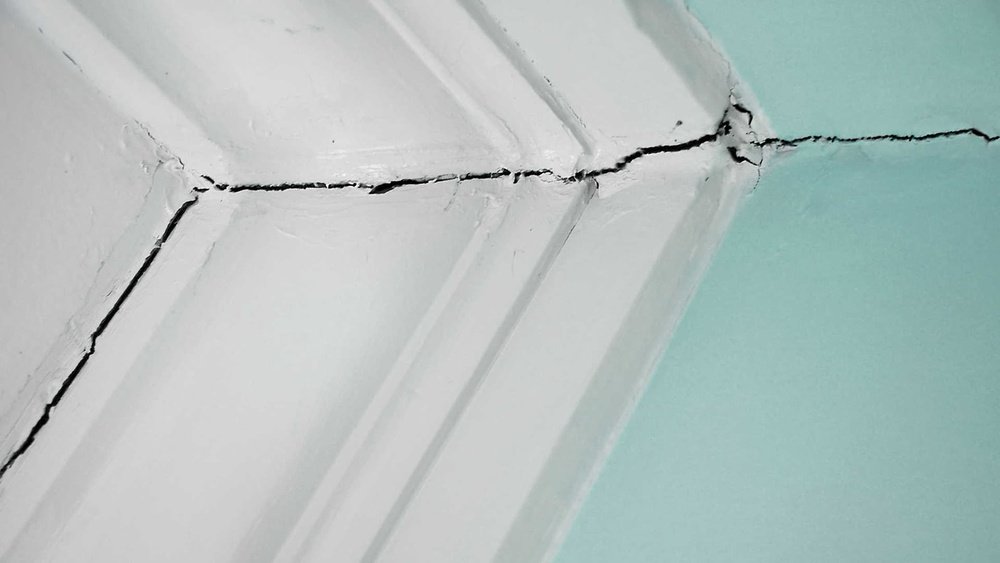
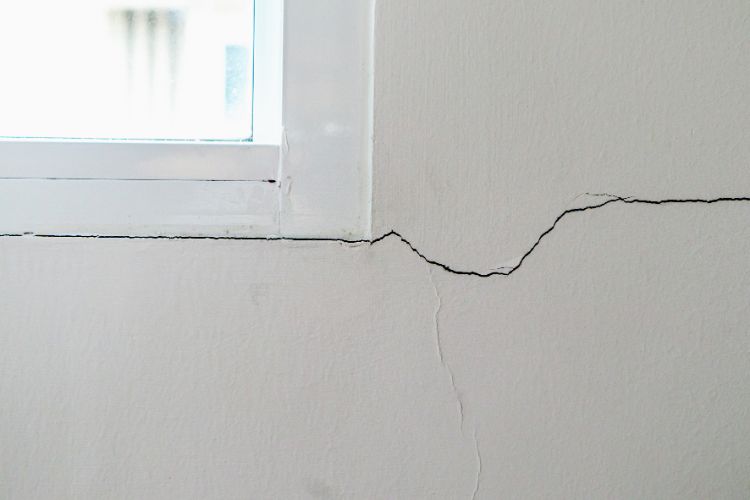
Identifying the type, size, and location of a crack is paramount. A small, horizontal crack near a window might have a different origin than a large, diagonal fissure extending from a doorway. This guide aims to demystify the common culprits behind wall cracks, offering insights into their diagnosis and providing effective solutions, whether you’re a seasoned DIYer or looking to hire a professional.
We will explore everything from minor cosmetic repairs to addressing more complex structural concerns, empowering you with the knowledge to protect your most significant investment.
Key Takeaways
Settling is Common: New homes and even older ones naturally settle, leading to minor hairline cracks, especially around openings like doors and windows.
Moisture is a Major Culprit: Water damage, leaks, and high humidity can cause materials to expand and contract, leading to cracks. This is particularly true for plaster and drywall.
Structural Issues Demand Attention: Significant, widening, or diagonal cracks can indicate foundation problems, which require professional assessment and repair.
Temperature Fluctuations Cause Expansion/Contraction: Extreme temperature swings cause building materials to expand and contract, stressing joints and potentially forming cracks.
DIY vs. Professional Fixes: Minor cracks can often be repaired with spackling or joint compound, while structural cracks necessitate professional expertise.
Prevention is Key: Proper drainage, maintaining consistent humidity, and addressing leaks promptly can help prevent many types of wall cracks.
Credit: www.homesandgardens.com
Understanding The Different Types Of Wall Cracks
Before you can effectively repair cracks in your walls, it’s essential to understand the different types you might encounter. The nature of the crack, its size, shape, direction, and location, often provides clues to its origin. Recognizing these distinctions is the first step in diagnosing the problem and choosing the right repair method.
Hairline Cracks
These are the most common and typically the least concerning cracks. They are usually very fine, often no wider than a strand of hair. Hairline cracks often appear shortly after a house is built or after significant renovations.
Vertical Cracks
Vertical cracks typically run straight up and down the wall. While some can be minor, persistent or widening vertical cracks, especially those that appear near corners or structural elements, might indicate issues with the foundation or settling.
Horizontal Cracks
Horizontal cracks are often a more serious concern. They can suggest pressure pushing on the wall from one side, such as from soil or water pressure against an exterior foundation wall, or from roof load issues. They are less common in interior walls unless there’s a significant structural problem.
Diagonal Cracks
Diagonal cracks, often appearing at a 45-degree angle, are frequently associated with foundation settlement. As the foundation shifts unevenly, it puts stress on the walls above, causing them to crack diagonally, often originating from corners of windows and doors.
Stair-step Cracks
These cracks resemble a staircase pattern, typically found in brick or block walls. They usually occur when the foundation beneath the wall settles unevenly or when there’s lateral pressure on the wall.
Credit: www.crackedslab.com
Common Causes Of Wall Cracks
Numerous factors can contribute to the formation of cracks in your walls. Some are minor and easily addressed, while others point to more significant underlying issues that require professional intervention. Understanding these causes will help you accurately diagnose the problem and implement the most effective solution.
Foundation Settling And Movement
Settling is a natural process that occurs in virtually all buildings. As the soil around and beneath your foundation expands and contracts with changes in moisture and temperature, it can cause the foundation to shift slightly. This movement, especially in the first few years of a building’s life, can lead to minor cracks in interior walls, particularly around door and window frames. This is often referred to as shrinkage cracking.
More problematic is differential settlement, where one part of the foundation settles more than another. This can be caused by:
Poor soil compaction: If the soil beneath the foundation wasn’t properly compacted during construction, it can settle significantly over time.
Changes in soil moisture: Drought conditions can cause soil to shrink, while heavy rains or poor drainage can saturate the soil, leading to expansion and subsequent settlement.
Erosion: Water runoff can erode soil from beneath the foundation.
Differential settlement puts immense stress on the building’s structure, often manifesting as larger, diagonal, or stair-step cracks in walls, especially those that are load-bearing.
Moisture Issues And Water Damage
Moisture is a pervasive enemy of building materials and a frequent cause of wall cracks. When materials absorb water, they expand. As they dry, they contract. This cycle of expansion and contraction, especially if repeated frequently, can weaken joints and create stress fractures.
Leaking Pipes: Hidden leaks within walls, whether from plumbing or HVAC systems, can saturate drywall or plaster, leading to sagging and cracking. The moisture can also promote mold growth, further compromising the material.
Roof Leaks: Water dripping from a faulty roof can travel down wall cavities, causing extensive damage and cracking over time.
High Humidity: In areas like bathrooms or basements, consistently high humidity levels can cause materials to absorb moisture, leading to expansion and eventual cracking.
Exterior Water Intrusion: Poor exterior drainage, clogged gutters, or cracks in the foundation can allow water to penetrate the building envelope, affecting interior walls. For instance, water seeping into basement walls can cause horizontal cracks due to hydrostatic pressure.
Temperature Fluctuations And Material Expansion/contraction
Buildings are made of materials that naturally expand when heated and contract when cooled. This is particularly true for materials like concrete, brick, and wood.
Seasonal Changes: Significant temperature swings between seasons can cause the building’s structure to expand and contract. While most structures are designed to accommodate this, extreme or rapid changes can stress joints and lead to minor cracks, especially in large expanses of wall or at junctions between different materials.
HVAC Systems: While less common as a primary cause, rapid temperature changes induced by powerful heating or cooling systems might contribute to minor stresses over long periods.
Poor Construction Or Material Quality
Sometimes, cracks are a direct result of how the house was built or the quality of the materials used.
Improperly Mixed Mortar or Concrete: If concrete or mortar is not mixed to the correct specifications, it can be weaker and more prone to cracking as it cures or over time.
Inadequate Support: Walls that are not properly braced or supported during construction, or that lack sufficient structural elements, can sag and develop cracks under load.
Fast Drying: If concrete or plaster is forced to dry too quickly (e.g., due to extreme heat or the addition of rapid-drying agents without proper curing), internal stresses can develop, leading to shrinkage cracks.
Using the Wrong Materials: In some cases, materials might be used in applications where they are not suited for the environmental conditions or structural loads, increasing the likelihood of failure and cracking.
Vibrations
Constant or severe vibrations can also contribute to the formation of cracks.
Heavy Traffic: Homes located near busy roads with heavy truck traffic may experience vibrations that can, over time, lead to plaster or drywall cracks.
Nearby Construction: Ongoing construction projects involving heavy machinery or blasting can transmit significant vibrations to nearby structures.
Earthquakes: Seismic activity is a direct cause of structural damage, including widespread wall cracking.
Age And Wear And Tear
Like anything, buildings age, and their components can degrade over time. Plaster can become brittle, drywall can lose its integrity, and even the foundational elements can experience subtle shifts. Minor cracks due to age are often cosmetic, but they should still be monitored to ensure they aren’t indicative of a more serious underlying issue.
Diagnosing Wall Cracks: What To Look For
Accurately diagnosing the cause of wall cracks is crucial for selecting the appropriate repair method. By carefully observing the characteristics of the crack, you can often narrow down the potential causes and determine whether it’s a DIY-friendly fix or requires professional attention.
Size And Width
Hairline cracks (less than 1/8 inch wide): Often superficial, possibly due to settling or minor material shrinkage.
Wider cracks (1/8 inch or more): May indicate more significant structural issues, foundation movement, or moisture damage.
Cracks that are widening: This is a critical indicator. If a crack is growing larger over time, it suggests ongoing movement or stress within the structure.
Depth
Surface-level cracks: Typically cosmetic and easier to repair.
Cracks that go through the entire wall: These are more serious and suggest a deeper structural problem.
Location
Around windows and doors: Common with settling, as these are natural stress points.
Near corners of rooms: Can indicate foundation issues or differential settling.
Along ceilings or where walls meet ceilings: May relate to roof load issues or expansion/contraction of materials.
In basement walls (especially horizontal): Often due to hydrostatic pressure from saturated soil outside.
In the middle of a large wall: Could be due to structural stress, material defects, or moisture.
Pattern And Direction
Vertical or horizontal: Can be related to material stress or moisture.
Diagonal (45-degree angle): Strongly suggestive of foundation settlement.
Stair-step (in brick/block): Indicates uneven foundation movement or lateral pressure.
Associated Signs
Sticking doors or windows: A classic sign of foundation settlement or structural shifting.
Bowing or bulging walls: Indicates significant pressure, often from outside moisture.
Water stains or mold: Points directly to moisture intrusion.
Cracks in the exterior walls or foundation: Reinforces the likelihood of structural or water-related issues.
Monitoring For Change
For any crack that seems more than superficial, the best diagnostic tool is monitoring.
Mark the ends: Draw a small line at the top and bottom of the crack.
Measure the width: Use a ruler or crack gauge.
Record the date: Note when you made the measurements.
Check periodically: Re-measure and re-date the crack every few weeks or months.
If the crack grows in length or width, it’s a clear sign of ongoing movement and requires professional assessment.
Credit: www.swartplastering.com.au
Repairing Minor Wall Cracks (diy-friendly)
For superficial cracks that are not widening and show no signs of structural compromise, DIY repairs are often effective and can significantly improve the appearance of your walls. These methods focus on filling the void and preparing the surface for painting.
Preparing The Area
Before you begin any repair, proper preparation is key to a lasting finish.
Clean the crack: Use a stiff brush or vacuum cleaner to remove any loose paint, dust, or debris from within and around the crack. This ensures the filler adheres properly.
Widen slightly (if necessary): For very fine hairline cracks, gently widening them with a utility knife or a putty knife can create a better surface for the filler to grip. This creates a small V-groove.
Dust or wipe: Ensure the area is completely free of dust.
Using Spackling Compound
Spackling paste is a lightweight, easy-to-use filler suitable for small holes and hairline cracks in drywall and plaster.
Application: Apply the spackling compound directly into the crack using a putty knife. Hold the knife at a slight angle and press the compound in firmly to fill the void completely.
Smoothing: Scrape away excess compound with the putty knife, holding it nearly perpendicular to the wall to leave a smooth, flush surface.
Drying: Allow the spackling compound to dry completely according to the manufacturer’s instructions. Drying times can vary from minutes to hours depending on the product and humidity.
Sanding: Once dry, lightly sand the area with fine-grit sandpaper (e.g., 120-150 grit) until it is smooth and level with the surrounding wall.
Priming and Painting: Apply a coat of primer over the repaired area, followed by two coats of your wall paint to match the surrounding surface.
Using Joint Compound (for Slightly Larger Cracks)
Joint compound, often called “mud,” is a heavier-duty filler than spackling paste. It’s ideal for slightly larger cracks or small holes. It requires a bit more skill to apply smoothly.
Application: Apply the joint compound into the crack with a putty knife or a drywall knife (wider than a putty knife). Press it in firmly.
Smoothing: Use the wider knife to smooth the compound, feathering the edges out onto the surrounding wall. This technique involves gradually thinning the compound as you move away from the crack, making the repair less noticeable.
Multiple Coats: For deeper cracks, you may need two or three thin coats of joint compound, allowing each coat to dry completely before applying the next. Lightly sand between coats if necessary.
Drying and Sanding: After the final coat dries, sand the entire area smooth with medium-grit sandpaper (e.g., 100-120 grit), then finish with fine-grit sandpaper for a seamless finish.
Priming and Painting: Prime the repaired area to seal it, then paint to match the wall.
Using Caulk (for Cracks Near Trim Or Corners)
Paintable acrylic latex caulk is a good option for filling cracks where walls meet trim (baseboards, window frames, door frames) or in corners where there might be slight movement.
Preparation: Ensure the gap is clean and free of dust and old caulk.
Application: Cut the tip of the caulk tube at a 45-degree angle to create a bead of the desired size. Apply a steady, even bead of caulk into the crack.
Smoothing: Immediately after applying, use a damp cloth or a damp finger to smooth the bead, pressing it into the crack and removing excess.
Drying: Allow the caulk to dry completely (check the product label for drying times).
Painting: Once dry, caulk can be painted over. Apply primer first, followed by paint.
Pro Tip: For a perfectly smooth finish after sanding joint compound, wipe the area with a damp cloth to remove all dust before priming. This prevents the dust from showing through the paint.
Repairing Larger Or Structural Cracks
When cracks are wider than 1/8 inch, are actively widening, appear in a stair-step pattern, or are accompanied by other signs of structural distress like sticking doors, it’s time to consider more robust repairs, and often, professional help. These cracks can indicate issues with the foundation, framing, or significant moisture damage.
Reinforcing Cracks With Drywall Tape
For cracks that are too large for simple filling but not yet requiring structural intervention, reinforcing with drywall tape can provide added strength.
Preparation: Clean the crack thoroughly. If it’s in drywall, you might need to cut out any loose paper or material.
Apply Joint Compound: Apply a thin layer of joint compound along the crack with a drywall knife.
Embed Drywall Tape: While the compound is still wet, press a strip of drywall tape (either paper or fiberglass mesh tape) firmly into the compound, centering it over the crack.
Smooth Over Tape: Apply another thin layer of joint compound over the tape, ensuring it’s fully covered and feathered out.
Multiple Coats: Allow the first coat to dry completely. Then, apply one or two more thin coats of joint compound, feathering the edges wider with each coat.
Sand and Finish: Once the final coat is dry, sand smooth and prime/paint as usual.
This method adds tensile strength, helping to prevent the crack from reappearing due to minor shifts.
Addressing Foundation Issues
If cracks are determined to be caused by foundation settlement or movement, the underlying foundation problem must be addressed first. This is critical and almost always requires professional expertise.
Underpinning: This involves installing piers or piles beneath the foundation to transfer the load to more stable soil layers deeper underground.
Mudjacking/Slabjacking: Pumping grout or concrete slurry beneath a settled slab to lift and stabilize it.
Crack Injection: For cracks in concrete foundations, epoxy or polyurethane injection can seal the crack and restore structural integrity.
Exterior Drainage Improvements: Ensuring proper grading and drainage away from the foundation is crucial to prevent future water-related issues.
Warning: Attempting to “fix” a crack caused by foundation issues without addressing the foundation itself is a temporary cosmetic solution at best and can mask a serious problem, potentially leading to more extensive damage later. Always consult a structural engineer or reputable foundation repair specialist.
Repairing Plaster Cracks
Plaster walls, especially older ones, can be prone to cracking due to age, settling, or moisture. Repairing plaster requires specific techniques.
For small cracks: Follow the methods for spackling or joint compound described earlier.
For larger or crumbling plaster: You may need to carefully chip away loose plaster until you reach a solid base. Then, apply a bonding agent, followed by patching plaster or joint compound in layers, allowing each to dry before applying the next. Reinforcing with drywall tape can also be beneficial.
Plaster over lath: If you have older plaster walls, you might be repairing plaster over wooden laths. In these cases, ensure any loose lath is secured, and consider using a product specifically designed for plaster repair, which may offer more flexibility.
Sealing Cracks In Masonry Walls
Cracks in brick or block walls, especially those that are stair-stepped or horizontal, often indicate foundation or lateral pressure issues.
Minor cracks: Can sometimes be filled with a flexible masonry caulk or a specialized masonry repair compound.
Structural cracks: Require professional assessment. Solutions might include repointing (replacing mortar), reinforcing with steel rods, or addressing underlying foundation problems.
When To Call A Professional
While many minor wall cracks can be tackled as DIY projects, certain situations warrant the expertise of a professional. Recognizing these signs can save you time, money, and prevent potentially dangerous structural issues from worsening.
Signs You Need A Professional
Cracks wider than 1/4 inch: These are significant and likely indicate a structural problem.
Cracks that are actively widening: If your monitoring shows the crack growing, it’s a sign of ongoing movement that needs expert diagnosis.
Horizontal cracks: Especially in basement walls or foundation walls, these often point to serious hydrostatic pressure or structural failure.
Stair-step cracks in brickwork: A strong indicator of foundation shift or lateral pressure.
Cracks accompanied by sticking doors or windows: This suggests the building’s structure is warping due to settlement.
Bowing or bulging walls: A clear sign of excessive pressure, often from water or soil.
Multiple cracks appearing simultaneously: This could indicate a widespread structural issue.
Cracks that reappear after repair: If a crack keeps coming back, the underlying cause hasn’t been addressed.
Any crack you are unsure about: If you lack confidence in diagnosing or repairing a crack, it’s always safer to get a professional opinion.
Types Of Professionals To Consider
Structural Engineer: For complex structural issues, foundation problems, or when you need an unbiased assessment of the building’s integrity. They can provide detailed reports and recommendations.
Foundation Repair Specialist: Companies that specialize in diagnosing and repairing foundation issues, including underpinning, crack injection, and stabilization. Ensure they are reputable and licensed.
General Contractor: For broader renovation or repair projects that might involve addressing wall issues as part of a larger scope of work.
Experienced Handyman/Drywaller: For more straightforward repairs of drywall or plaster cracks that are not structural in nature.
When hiring, always:
Get multiple quotes.
Check references and reviews.
Ensure they are licensed and insured.
Get a detailed written estimate outlining the scope of work and warranty.
Preventative Measures To Minimize Future Cracks
While it’s impossible to prevent all wall cracks, especially minor cosmetic ones, taking proactive measures can significantly reduce their occurrence and severity. These steps focus on maintaining the structural health of your home and managing environmental factors.
Maintain Proper Drainage
Water is a primary contributor to foundation issues and material damage.
Gutters and Downspouts: Ensure your gutters are clean and free of debris. Downspouts should extend at least 4-6 feet away from the foundation, directing water away from the house.
Grading: The ground around your foundation should slope away from the house. If it slopes towards the house, water will pool against the foundation, increasing hydrostatic pressure and the risk of leaks and settlement. You may need to add soil to build up the grade.
Sump Pump: If you have a basement or crawl space, ensure your sump pump is functioning correctly and can handle heavy rainfall.
Control Interior Humidity
Excessive moisture within the home can lead to expansion and contraction of materials.
Ventilation: Use exhaust fans in bathrooms and kitchens to vent moisture directly outside. Ensure your clothes dryer is properly vented.
A plunging toilet is more than just an inconvenience; it’s a sign that something is fundamentally wrong with your toilet’s flushing mechanism. When you press the handle and nothing happens, or the flush is weak and ineffective, it can leave you feeling helpless and facing an unsanitary situation.
Understanding the common culprits behind a plunging toilet not working is the first step toward diagnosing and fixing the problem, saving you time, money, and potential water damage.
This issue often stems from simple, fixable problems within the tank or the bowl’s trapway. Many homeowners can tackle these repairs themselves with a few basic tools and a bit of patience. However, if the problem persists or you’re uncomfortable with DIY plumbing, knowing when to call a professional is crucial.
This guide will walk you through the most common reasons why your toilet isn’t flushing and provide actionable steps to get it working again.
Key Takeaways
A plunging toilet not working is typically caused by issues with the flush handle, flapper, fill valve, water level, or clogs.
Check the flush handle connection to the lift chain to ensure it’s properly attached.
Inspect the flapper valve for wear or improper seating, as a leaky flapper prevents the tank from filling adequately.
The fill valve may be malfunctioning, preventing the tank from refilling after a flush.
An improper water level in the tank is a common cause of weak flushes; adjust the float mechanism if necessary.
Clogs in the trapway or drain line are frequent culprits for complete flushing failure or weak flushes.
Simple tools like a plunger, drain snake, and pliers are often sufficient for DIY repairs.
For persistent clogs or complex mechanical issues, consult a licensed plumber.
Credit: www.plumbingsupply.com
Common Causes Of A Plunging Toilet Not Working
When your toilet refuses to flush, it can be frustrating. The issue usually lies within the toilet’s internal mechanisms or the plumbing beyond the bowl. Identifying the specific problem is key to a swift resolution. We’ll break down the most frequent offenders, from the simple to the slightly more complex.
The Flush Handle And Lift Chain Mechanism
The flush handle is the user interface for initiating a flush. When you lift it, it pulls a lift chain, which in turn lifts the flapper valve at the bottom of the tank. This allows water to rush from the tank into the bowl, creating the flush.
H3: Loose Or Disconnected Lift Chain
One of the most common reasons for a flushing failure is a disconnected or too-slack lift chain.
Problem: The chain connecting the flush handle to the flapper might have become unhooked from either end, or it might be too long.
Symptom: Pushing the handle does nothing, or it feels loose and disconnected from any internal mechanism.
Fix: Open the toilet tank lid. Locate the chain attached to the flush handle arm. Ensure it’s securely connected to the flapper. If it’s connected, check the length. There should be just a little slack, enough to allow the flapper to seal but not so much that lifting the handle doesn’t lift the flapper sufficiently. You can often adjust the chain length by moving the clip to a different hole on the chain. Aim for about 1/2 inch of slack when the flapper is closed.
H3: Worn Or Damaged Flush Handle
While less common, the flush handle itself can fail.
Problem: The internal arm of the flush handle, which connects to the lift chain, can break or become stripped.
Symptom: The handle might spin freely without engaging the chain, or it might feel loose and wobbly.
Fix: If the handle is broken, it will need to be replaced. This involves unscrewing the nut on the inside of the tank that holds the handle in place and installing a new one. Replacement handles are inexpensive and readily available at hardware stores.
The Flapper Valve: The Gatekeeper Of The Tank
The flapper is a rubber or plastic seal at the bottom of the tank that covers the flush valve opening. When lifted, it allows water to flow into the bowl. Its condition is critical for a proper flush.
H3: A Leaky Or Worn Flapper
Over time, the rubber flapper can become stiff, warped, or brittle, preventing it from creating a watertight seal.
Problem: The flapper doesn’t seal properly, allowing water to continuously or intermittently leak from the tank into the bowl.
Symptom: You might hear a faint hissing sound, or notice the water level in the tank is consistently lower than it should be. If the leak is significant, the toilet might even flush itself partially or fully. Even a slow leak means the tank may not have enough water for a full, effective flush when you operate the handle.
Fix: A common DIY test is to add a few drops of food coloring to the toilet tank. Wait 15-30 minutes without flushing. If color appears in the toilet bowl, the flapper is leaking. Replacing a flapper is a straightforward and inexpensive repair. Simply unhook the old flapper from the overflow tube posts and detach the chain. Attach the new flapper and reconnect the chain, ensuring proper slack.
H3: Incorrect Flapper Seating
Sometimes, the flapper is fine, but it’s not sitting correctly on the flush valve seat.
Problem: Debris or mineral buildup on the flush valve seat can prevent the flapper from sealing. The flapper might also be misaligned.
Symptom: Similar to a worn flapper, water leaks from the tank.
Fix: After ensuring the tank is empty (you can turn off the water supply and flush once), carefully inspect the flush valve seat. Gently clean any debris or mineral deposits with a soft cloth or a non-abrasive scrubber. Ensure the flapper is centered over the opening. If the seat itself is damaged, the entire flush valve assembly may need replacement, which is a more involved repair.
The Fill Valve: Recharging The Tank
The fill valve (also known as the ballcock) is responsible for refilling the toilet tank with fresh water after each flush and shutting off the water supply when the tank is full.
H3: Malfunctioning Fill Valve
If the fill valve isn’t working correctly, the tank won’t refill, or it won’t refill to the proper level.
Problem: The fill valve mechanism can become clogged with sediment, its seals can wear out, or the float may be stuck.
Symptom: The tank doesn’t refill after a flush, or it refills very slowly. The water level in the tank might be too low. Sometimes, the fill valve may continue to run water into the tank even after it’s full, leading to a constantly running toilet.
Fix: First, check if the water supply valve to the toilet is fully open. If it is, the fill valve itself is likely the issue. You can try cleaning the valve by shutting off the water, removing the cap of the fill valve (refer to manufacturer instructions, as designs vary), and flushing out any debris. If cleaning doesn’t work, the fill valve will need to be replaced. This is a common DIY replacement, usually involving unscrewing the old valve and installing a new one.
H3: Improperly Set Float Mechanism
The float is attached to the fill valve and rises with the water level. When it reaches a predetermined height, it signals the fill valve to shut off.
Problem: The float might be set too low, causing the tank to fill with insufficient water for a proper flush. It could also be stuck.
Symptom: Weak flushes, or the tank not filling to the designated water line.
Fix: Most modern fill valves have an adjustment screw or a clip mechanism to set the float height. Locate the float and adjust it so the water level is about 1/2 to 1 inch below the top of the overflow tube. If the float is stuck, gently try to free it. If it’s damaged, it will need replacement along with the fill valve.
Water Level In The Tank
The amount of water in the tank directly impacts the force of the flush. A toilet is designed to hold a specific volume of water for optimal performance.
H3: Insufficient Water Level
This is a very common reason for weak flushes, leading to the perception that the toilet “isn’t working. “
Problem: The water level in the tank is too low to create adequate siphonic action in the bowl.
Symptom: Flushes are weak, and waste may not be fully cleared. The water level in the tank is noticeably below the overflow tube’s rim.
Fix: As mentioned in the fill valve section, adjust the float mechanism to raise the water level. The ideal water level is typically about 1/2 to 1 inch below the top of the overflow tube. This ensures enough water is available for a strong flush.
Clogs In The Toilet Trapway Or Drain Line
If the internal mechanisms are working fine, the most likely culprit is a blockage somewhere in the toilet’s drainage system.
H3: Bowl Trapway Clogs
The trapway is the S-shaped channel at the bottom of the toilet bowl.
Problem: Too much toilet paper, foreign objects (like toys or sanitary products), or accumulated waste can create a blockage within the trapway.
Symptom: Water backs up in the bowl after flushing, or the flush is very slow and weak, with water rising high before eventually draining.
Fix:
Plunger: This is the first line of defense. Ensure there’s enough water in the bowl to cover the plunger’s rubber cup. Create a good seal and plunge vigorously up and down several times.
Toilet Brush/Wire Hanger: For minor obstructions visible in the trapway opening, a toilet brush or a straightened wire coat hanger (with the end bent into a small hook) can sometimes dislodge the clog. Be careful not to scratch the porcelain.
H3: Main Drain Line Clogs
If plunging doesn’t work, the clog might be further down in the main drain line.
Problem: A blockage in the larger drain pipe that carries waste away from the toilet. This can be caused by accumulated grease, hair, tree roots (in main sewer lines), or a buildup of solid waste.
Symptom: The toilet may not flush at all, or water may back up into other fixtures like showers or sinks when the toilet is flushed.
Fix:
Toilet Auger (Closet Auger/Drain Snake): This is a specialized tool designed for clearing toilet clogs. It has a protective sleeve to prevent scratching the bowl and a crank to feed the cable into the trapway and further down the drain. Carefully feed the auger into the trapway and crank it to break up or retrieve the clog.
Drain Snake (Auger): For clogs further down the line, a longer drain snake can be used. However, this requires accessing the drain pipe, which might involve removing the toilet itself.
Professional Plumber: If you suspect a main drain line clog or cannot clear it with an auger, it’s time to call a professional plumber. They have specialized equipment like powerful drain snakes and cameras to identify and remove stubborn blockages.
Credit: www.timrauschplumbing.com
Troubleshooting Steps For A Plunging Toilet Not Working
When faced with a non-flushing toilet, a systematic approach will help you pinpoint the issue efficiently. Here’s a step-by-step guide to troubleshoot the problem, starting with the simplest checks.
Step 1: Assess The Flush Handle And Chain
Begin by examining the most direct interaction point: the flush handle.
Check Handle Movement: Lift the toilet tank lid and observe the flush handle. Does it feel loose, spin freely, or feel like it’s not connected to anything?
Inspect the Chain: Follow the chain from the handle arm down to the flapper. Is it attached at both ends? Is it excessively long, causing too much slack?
Action: If the chain is disconnected, reattach it. If there’s too much slack, adjust the chain by moving the clip to a shorter link. You want just enough slack for the flapper to seal when closed, but not so much that lifting the handle doesn’t lift the flapper sufficiently.
Step 2: Examine The Flapper Valve
The flapper is crucial for allowing water into the bowl.
Visual Inspection: Look at the flapper. Does it appear warped, cracked, or brittle? Is it sitting squarely on the flush valve seat?
Leak Test: Perform the food coloring test described earlier. Add a few drops of food coloring to the tank water. Wait 15-30 minutes without flushing. If color seeps into the bowl, the flapper is leaking.
Action: If the flapper is worn or leaking, replace it. This is a relatively inexpensive and simple repair. Ensure the new flapper seals properly and the chain has the correct tension.
Step 3: Check The Water Level And Fill Valve
The water in the tank is the power behind the flush.
Observe Water Level: Is the water level in the tank at the marked fill line (usually indicated by a line on the tank or the top of the overflow tube)? If it’s too low, the flush will be weak.
Listen to the Fill Valve: After flushing, does the fill valve shut off properly, or does it keep running? Is it refilling the tank at a reasonable pace?
Action: If the water level is too low, adjust the float mechanism on the fill valve to raise the water level. If the fill valve is malfunctioning (not refilling, constantly running, or slow to refill), it may need cleaning or replacement.
Step 4: Investigate For Clogs
If the internal tank mechanisms appear to be working correctly, a clog is the next most probable cause.
Check Bowl Drainage: After attempting a flush, does the water rise high in the bowl and drain slowly, or does it not drain at all?
Attempt to Plunge: Use a standard toilet plunger. Ensure a good seal and plunge vigorously.
Action: If plunging seems to help but doesn’t fully clear the clog, or if the clog is severe, you may need a toilet auger (closet auger). For stubborn clogs or suspected main line issues, a professional plumber is recommended.
Step 5: Consider Less Common Issues
If the above steps don’t resolve the problem, consider these less frequent causes.
Blocked Overflow Tube: While rare, a blockage inside the overflow tube can affect flushing. Ensure it’s clear.
Vent Stack Issues: A blocked vent stack can cause slow draining and gurgling noises, sometimes mimicking flushing problems. This requires professional diagnosis.
Cracked Tank or Bowl: A crack in the tank or bowl could lead to leaks and affect flushing, though this is usually visually apparent.
Credit: www.thespruce.com
Tools And Materials For Toilet Repair
Having the right tools on hand can make troubleshooting and repairing a plunging toilet much easier. Most common toilet issues can be resolved with a few basic plumbing tools.
Essential Tools
Plunger: A flange plunger (with an extended rubber flange) is ideal for toilets as it creates a better seal in the drain hole.
Toilet Auger (Closet Auger): This specialized tool is designed to snake the toilet trapway without damaging the porcelain. It features a crank handle and a protective sleeve.
Adjustable Wrench: Useful for tightening or loosening nuts, especially when replacing a flush handle or fill valve.
Pliers: Channel-lock pliers can be helpful for gripping various components.
Screwdriver Set: Both Phillips and flathead screwdrivers may be needed for accessing certain parts or making adjustments.
Bucket and Towels: Essential for catching any spilled water during repairs.
Replacement Parts
Flapper Valve: Available in universal sizes or specific types (e.g., 2-inch or 3-inch flappers).
Lift Chain: If the existing chain is broken or corroded.
Flush Handle: If the original handle is damaged.
Fill Valve: A complete replacement unit if the current one is faulty.
Float Ball or Cup: Sometimes only the float mechanism needs replacement.
Pro Tip: Before purchasing replacement parts, identify the type of toilet you have (e.g., brand, model, tank size) as some parts are specific to certain toilet designs. Taking a picture of the internal components can also help when shopping for replacements.
When To Call A Professional Plumber
While many toilet issues are DIY-friendly, there are times when professional expertise is essential. Recognizing these situations can save you from causing further damage or wasting time on repairs beyond your skill level.
Signs You Need A Plumber
Persistent Clogs: If you’ve tried plunging and using a toilet auger without success, the clog is likely deep within the main drain line or is particularly stubborn.
Multiple Fixture Issues: If flushing the toilet causes water to back up in sinks, showers, or tubs, it indicates a blockage in the main sewer line, which requires professional tools and expertise to clear.
Water Damage: If you notice water pooling around the base of the toilet or suspect leaks from the tank or supply line that you can’t locate or fix, it’s crucial to call a plumber to prevent structural damage.
Recurring Problems: If your toilet frequently clogs or has flushing issues despite your repairs, there might be an underlying problem with the plumbing system itself (e.g., improperly sloped pipes, venting issues) that a plumber can diagnose.
Lack of Confidence or Tools: If you’re uncomfortable with the repair process, lack the necessary tools, or simply prefer to have the job done by an expert, don’t hesitate to call a plumber.
A licensed plumber has the experience, specialized equipment (like drain cameras), and knowledge to diagnose and fix complex plumbing problems safely and effectively. They can also advise on potential system-wide issues that might be causing repeated problems.
Toilet Repair Vs. Replacement: Making The Decision
Sometimes, the cost and effort of repairing an old toilet can outweigh the benefits. Deciding whether to repair or replace your toilet depends on several factors.
Factors Favoring Repair
Minor Issues: Problems like a worn flapper, a loose chain, or a slightly misadjusted float are typically inexpensive and easy to fix.
Newer Toilets: If the toilet is relatively new (under 10-15 years) and otherwise in good condition, repairing it is usually the most cost-effective option.
Cost Savings: DIY repairs or even professional repairs for simple issues are significantly cheaper than buying and installing a new toilet.
Factors Favoring Replacement
Frequent Breakdowns: If you’re constantly repairing the same toilet, it might be a sign that the unit is nearing the end of its lifespan, and replacement could save you hassle and future costs.
Inefficiency: Older toilets often use significantly more water per flush (e.g., 3.5 gallons or more) compared to modern high-efficiency toilets (HETs) that use 1.28 gallons or less. Replacing an old toilet can lead to substantial water savings over time, reducing utility bills. According to the EPA WaterSense program, toilets account for about 24% of household water use, making an efficient model a smart investment.
Cracks or Severe Damage: If the toilet tank or bowl is cracked, replacement is usually necessary for safety and to prevent leaks.
Outdated Technology: Very old toilets may lack modern features and can be prone to issues that are difficult or impossible to repair cost-effectively.
Desire for Upgrades: You might want to replace an old toilet to upgrade to a more comfortable height (comfort height or ADA-compliant toilets), a different style, or a dual-flush model for further water savings.
Example: A homeowner with a 20-year-old toilet that frequently clogs and uses 6 gallons per flush (GPF) might find that the cost of repeated repairs and high water bills makes replacing it with a new 1.28 GPF WaterSense-certified toilet a financially and environmentally sound decision, even with the upfront cost of the new fixture.
Frequently Asked Questions
How Can I Tell If My Toilet Is Clogged Or If The Flush Mechanism Is Broken?
You can usually distinguish between a clog and a mechanism failure by observing the water level in the bowl. If the water rises high and drains slowly or not at all after you press the handle, it’s likely a clog. If the handle feels loose, the tank doesn’t fill, or there’s no water movement in the bowl after flushing, it points to an issue with the flush mechanism (handle, chain, flapper, or fill valve).
Can I Fix A Toilet Clog Myself Without A Plumber?
Yes, most common toilet clogs can be cleared with DIY methods. Start with a plunger. If that doesn’t work, a toilet auger (closet auger) is the next best tool for clearing obstructions within the toilet trapway. For clogs deeper in the drain line, a longer
A leaking pressure washer can turn a satisfying cleaning job into a frustrating mess. Whether you’re tackling grime on your driveway, deck, or car, an unexpected drip or gush from the wrong place signals trouble. This isn’t just an inconvenience; a leak can reduce the machine’s water pressure, diminish its effectiveness, and potentially lead to more serious damage if left unaddressed. Understanding the common causes of pressure washer leaks and knowing how to troubleshoot them is crucial for any homeowner or professional who relies on these powerful cleaning tools.
From a loose hose connection to a damaged pump seal, the source of the leak can vary widely. Identifying the origin point is the first step towards a swift and effective repair. This guide will walk you through the most frequent culprits behind a pressure washer leaking water, offering practical solutions and preventative measures to keep your equipment in optimal working condition. We’ll explore everything from simple fixes like tightening fittings to more complex issues requiring part replacement, ensuring you can confidently diagnose and resolve most common leaks.
Key Takeaways
Common Leak Points: Leaks often originate from hose connections, O-rings, pump seals, wands, spray guns, or the unloader valve.
Troubleshooting Steps: Systematically check connections, inspect seals and O-rings, and test components individually to pinpoint the leak’s source.
Hose Leaks: Loose or damaged high-pressure hoses are frequent offenders. Ensure connections are tight and the hose itself is free from cuts or abrasions.
Pump and Seal Issues: The pump is the heart of the pressure washer. Leaks here can stem from worn seals, damaged pistons, or loose fittings.
Accessory Problems: The spray gun, wand, and nozzles can also develop leaks due to worn O-rings or cracks.
Unloader Valve Malfunctions: This valve regulates pressure. If it fails, it can cause leaks and inconsistent pressure.
Preventative Maintenance: Regular inspection, proper storage, and using the correct water supply can prevent many leaks.
When to Call a Pro: For complex internal pump issues or if DIY repairs fail, professional service is recommended.
Understanding Pressure Washer Components And Leak Zones
Before diving into specific leak causes, it’s helpful to understand the main components of a pressure washer and where leaks are most likely to occur. A typical pressure washer consists of an engine (electric motor or gas engine), a pump, a high-pressure hose, a spray gun, a wand, and various nozzles. The water supply hose connects the machine to your water source, while the high-pressure hose carries water from the pump to the spray gun.
The pump is arguably the most critical component, responsible for increasing the water pressure significantly. It contains seals, valves, and pistons that are under constant stress. Leaks originating from the pump area can be particularly concerning, as they often indicate wear or damage to these internal parts.
The unloader valve is another key part that plays a role in pressure regulation and can be a source of leaks. It redirects water flow when the trigger on the spray gun is released, preventing pressure buildup that could damage the system.
Finally, the connections between all these parts, from the garden hose to the pump, from the pump to the high-pressure hose, and from the hose to the spray gun and wand, are prime locations for leaks, often due to loose fittings or worn seals.
The Pump: The Heart Of The Operation
The pump is where the magic happens, transforming low-pressure water from your tap into the high-velocity stream that powers your cleaning. Due to the immense pressures involved (often ranging from 1,000 to over 4,000 PSI), the pump is a complex assembly of seals, valves, and moving parts.
Pump Seals: These are critical for preventing water from escaping the pump housing. Over time, seals can degrade due to heat, friction, and chemical exposure (from detergents). A leaking seal will typically manifest as water dripping from the pump housing itself, often near where the drive shaft enters the pump or around the cylinder head.
Pistons and Plungers: Many pressure washer pumps use pistons or plungers that move within cylinders. If these components become scored, worn, or if their seals fail, water can leak past them. This often results in a loss of pressure as well as visible leaks.
Pump Head/Cylinder: The main housing of the pump, known as the pump head or cylinder, can also develop cracks or have fittings that loosen, leading to leaks.
The Unloader Valve: Pressure Regulation And Potential Leaks
The unloader valve is essential for the safe operation of a pressure washer. When you release the trigger on the spray gun, the valve diverts the high-pressure water back into a low-pressure bypass loop, preventing the pump from building up dangerous pressure when no water is being discharged.
Sticking or Worn Valve: If the unloader valve sticks open or doesn’t seal properly when the trigger is released, water can continuously bypass the system, leading to a leak. This often presents as a steady stream of water returning to the inlet side of the pump or even dripping from the valve assembly itself.
Faulty Spring or Seals: Like any mechanical component, the unloader valve has internal seals and springs that can wear out or break. This can cause leaks directly from the valve body or its connection points.
Hoses And Connections: The First Line Of Defense
The hoses and their connections are often the most accessible parts of the pressure washer system and, therefore, the most common culprits for leaks.
Water Supply Hose: The hose connecting your tap to the pressure washer inlet can leak if not securely attached or if the hose itself is damaged. This is usually a low-pressure leak, but it still reduces the water available to the pump.
High-Pressure Hose: This is the reinforced hose designed to withstand extreme pressure. Leaks here are more serious and can be dangerous. They can occur at either end where the hose connects to the pump outlet or the spray gun inlet, or along the length of the hose if it’s been cut, abraded, or punctured.
Fittings and Couplings: The threaded fittings that connect hoses to the machine, spray gun, and wand can loosen over time due to vibration. O-rings within these connections are also prone to wear and tear, leading to leaks.
Spray Gun, Wand, And Nozzles: The User Interface
While often overlooked, the spray gun, wand, and nozzles can also be sources of leaks, especially with frequent use.
Spray Gun Trigger Valve: The internal mechanism of the spray gun can wear out, causing leaks when the trigger is engaged or released.
Wand Connection: The point where the wand attaches to the spray gun relies on O-rings to create a watertight seal. Worn or damaged O-rings here are a very common cause of leaks.
Nozzle Leaks: While less common, a damaged nozzle or a poorly seated nozzle in the wand can sometimes cause minor leaks or spray.
Credit: www.youtube.com
Diagnosing The Leak: A Step-by-step Approach
Pinpointing the exact source of a pressure washer leak is crucial for an effective repair. A systematic approach will save you time and prevent unnecessary part replacements. Before you start, ensure the pressure washer is turned off, unplugged (for electric models), or has its engine stopped and the trigger released (for gas models) to de-pressurize the system.
Step 1: Visual Inspection And Initial Assessment
Start with a thorough visual inspection of the entire machine while it’s dry. Look for obvious signs of damage, such as cracked plastic housings, frayed hoses, or wet spots on components.
Check Connections: Pay close attention to all threaded connections: where the garden hose connects to the inlet, where the high-pressure hose connects to the pump outlet and spray gun, and where the wand connects to the spray gun. Are they securely tightened? Are there any visible drips or wetness around them?
Inspect Hoses: Examine both the water supply hose and the high-pressure hose for any cuts, abrasions, bulges, or signs of wear. Pay special attention to the ends of the hoses where they connect to fittings.
Look at the Pump: Carefully inspect the pump housing. Are there any wet spots or drips originating from the pump itself, particularly around seals or fittings?
Examine the Spray Gun and Wand: Check the spray gun body, the connection point for the wand, and the nozzle for any signs of leaks.
Step 2: The “run And Observe” Method
Once you have a general idea, the best way to find the leak is to run the pressure washer briefly and observe.
Connect Water Supply: Ensure the water supply hose is securely connected and the water is turned on.
Start the Machine: Start the engine (or turn on the electric motor).
Engage the Trigger (Briefly): Pull the trigger on the spray gun for a few seconds to build pressure.
Turn Off Immediately: Turn off the engine/motor.
Observe: Carefully look and feel around all components. Water under pressure can spray or seep out in unexpected ways. A leak that might be missed when the machine is off can become apparent when it’s running.
Repeat if Necessary: You might need to repeat this process a few times, focusing on different areas, to pinpoint the source. Sometimes, running the machine with the trigger held down for a short period can help reveal leaks that only occur under pressure.
Step 3: Isolating Components (if Necessary)
If the leak is difficult to pinpoint, you may need to isolate components.
Hose Disconnection: Disconnect the high-pressure hose from the spray gun. Turn on the machine briefly. If the leak stops, the problem is likely in the spray gun, wand, or the hose connection to the gun. If the leak continues from the pump outlet, the issue is with the pump or its direct connections.
Wand Disconnection: Disconnect the wand from the spray gun. Run the machine briefly. If the leak stops, the issue is with the wand connection or the wand itself.
Pro Tip: Have rags or towels ready to absorb excess water during your diagnosis. This will help you see fresh drips more easily.
Credit: www.youtube.com
Common Pressure Washer Leaks And Their Solutions
Once you’ve identified the general area of the leak, you can move on to specific troubleshooting and repair.
1. Leaks At Hose Connections (inlet And Outlet)
This is arguably the most frequent type of leak. It occurs where the garden hose connects to the pressure washer inlet, or where the high-pressure hose connects to the pump outlet or spray gun.
Cause: Loose fittings, worn or missing O-rings, damaged threads.
Solution:
Tighten Fittings: First, try simply tightening the connection. Ensure you’re turning it the correct way (usually clockwise).
Inspect and Replace O-rings: Most quick-connect fittings and threaded couplings use rubber O-rings to create a seal. Carefully remove the fitting (you might need pliers or a wrench) and inspect the O-ring. If it’s cracked, brittle, flattened, or missing, it needs replacement. You can find replacement O-rings at hardware stores or online. Make sure to get the correct size and type of O-ring. Lubricating the new O-ring with a bit of plumber’s grease or silicone grease can help ensure a good seal and prevent damage during installation.
Check Threads: Ensure the threads on both the fitting and the component it screws into are not damaged or cross-threaded. Damaged threads usually require replacing the component.
2. High-pressure Hose Leaks
Leaks along the length of the high-pressure hose are more serious due to the extreme pressures involved.
Minor Abrasion: If there’s a very minor abrasion without damage to the reinforcing layers, you might consider a heavy-duty hose repair kit, but this is often a temporary fix.
Significant Damage/Bulging/Bursting: Any significant damage, such as cuts, bulges, kinks, or signs of the hose bursting, means the hose must be replaced immediately. Never attempt to repair a damaged high-pressure hose. The failure could be catastrophic and cause serious injury. Purchase a replacement hose specifically designed for your pressure washer’s PSI rating and ensure it has the correct end fittings.
3. Leaks From The Pump Seals
A leak originating directly from the pump housing is a more involved issue.
Identify Seal Location: Try to determine if the leak is coming from the shaft seal (where the drive shaft enters the pump) or from the cylinder head seals.
Seal Replacement: Replacing pump seals typically requires disassembling parts of the pump. This can be a complex job. If you are comfortable with mechanical repairs and have the correct service manual for your pump model, you can attempt this. You will need specific seal kits designed for your pump.
Professional Repair: For many users, it’s more practical and safer to take the pressure washer to a qualified repair shop or contact the manufacturer for service if the pump seals are leaking. A damaged pump can be costly to repair or replace.
4. Leaks From The Unloader Valve
The unloader valve can leak if it’s malfunctioning or its seals are worn.
Cause: Debris stuck in the valve, worn internal seals, broken spring, loose fittings.
Solution:
Clean the Valve: Sometimes, debris can prevent the valve from seating properly. Consult your manual on how to safely remove and clean the unloader valve. Be careful with any springs or small parts.
Check Fittings: Ensure the fittings connecting the unloader valve to the pump and bypass hose are tight and have good O-rings.
Replace Valve: If cleaning doesn’t help, the unloader valve may need to be replaced. This is often a component that can be purchased separately and replaced by the user, but ensure you get the correct model compatible with your pressure washer.
5. Leaks From The Spray Gun Or Wand
These leaks are usually due to worn seals within the gun or at the wand connection.
Cause: Worn O-rings in the wand coupler, worn trigger valve seals, cracks in the spray gun housing.
Solution:
Wand Connection: As mentioned earlier, check and replace the O-rings where the wand connects to the spray gun. This is a very common fix.
Spray Gun Repair Kit: Many spray guns can be disassembled and repaired using specific rebuild kits. These kits typically include new O-rings, seals, and sometimes replacement springs for the trigger mechanism. Consult your spray gun’s manual or manufacturer’s website for available kits and instructions.
Replace Spray Gun/Wand: If the housing is cracked or the internal damage is severe, it might be more cost-effective to replace the entire spray gun or wand assembly.
6. Leaks From The Water Inlet Filter/screen
Many pressure washers have a filter screen where the garden hose connects to prevent debris from entering the pump.
Clean and Reseat: Remove the screen, clean it thoroughly, and ensure it’s properly seated back into the inlet fitting.
Replace Screen: If the screen is torn or damaged, replace it with a new one.
Check Fitting: Inspect the plastic inlet fitting for cracks. If cracked, the entire fitting assembly may need replacement.
Credit: www.youtube.com
Preventative Maintenance To Avoid Leaks
The best way to deal with pressure washer leaks is to prevent them from happening in the first place. Regular maintenance and proper usage habits can significantly extend the life of your equipment and save you from frustrating downtime.
Regular Cleaning And Inspection
After Each Use: Rinse off any excess dirt or debris from the pump exterior, hoses, and spray gun. Check for any new nicks or cuts on the hoses.
Before Each Use: Perform a quick visual inspection of all connections, hoses, and the pump. Ensure all connections are snug and look for any obvious signs of wear or damage. Check the water inlet filter for debris.
Proper Storage
Winterization (for Gas Models): If you live in an area with freezing temperatures, proper winterization is critical. Drain all water from the pump and hoses to prevent ice expansion damage. Many manufacturers recommend running pump saver fluid through the system. Failure to properly winterize is a leading cause of pump failure and leaks in cold climates.
Storage Location: Store your pressure washer in a clean, dry place, protected from the elements. Avoid storing it where it could be exposed to extreme temperatures or physical damage.
Hose Management: Avoid kinking or tightly coiling high-pressure hoses. Store them loosely to prevent undue stress on the internal reinforcement layers.
Using The Correct Water Supply
Adequate Flow: Ensure your water source can supply the minimum flow rate required by your pressure washer (usually specified in GPM – gallons per minute). Insufficient water supply can cause the pump to overheat and damage seals.
Water Quality: If your water is particularly hard or contains a lot of sediment, consider using an external water filter on your inlet hose to protect the pump.
Avoiding Strain And Overheating
Don’t Run Dry: Never run the pressure washer without a sufficient water supply. This can quickly damage the pump seals and internal components.
Don’t Run Continuously: Avoid running the pressure washer for excessively long periods without breaks, especially on older or less powerful models. Overheating can degrade seals and hoses.
Trigger Use: When taking breaks, turn off the engine/motor rather than letting the machine run continuously with the trigger released (unless your model is specifically designed for extended bypass operation).
When To Call A Professional
While many common pressure washer leaks can be fixed with basic tools and replacement parts, there are times when it’s best to seek professional help.
Internal Pump Damage: If you suspect major internal damage to the pump (e.g., cracked housing, damaged pistons, bearing failure), the repair can be complex and may require specialized tools. It might also be more economical to replace the pump or the entire unit.
Repeated Failures: If you’ve attempted repairs but the leak persists, or if components fail repeatedly, a professional can diagnose underlying issues you might have missed.
Safety Concerns: High-pressure water can be dangerous. If you’re uncomfortable with disassembling components or working with pressurized systems, it’s safer to let an expert handle the repair.
Warranty Repairs: If your pressure washer is still under warranty, attempting DIY repairs could void the warranty. Always check your warranty terms and contact the manufacturer or an authorized service center for repairs.
A reputable pressure washer repair service will have the expertise, diagnostic tools, and genuine parts to fix your machine correctly. They can often assess whether a repair is economically viable compared to purchasing a new unit.
Comparison Of Common Leak Causes And Fixes
To provide a quick overview, here’s a table summarizing the most frequent leak points and their typical solutions.
Leak Location
Common Cause
Typical Solution
Difficulty Level
Estimated Cost (Parts)
Inlet Hose Connection
Loose fitting, worn O-ring
Tighten fitting, replace O-ring
Easy
$1 – $5
High-Pressure Hose Connection
Loose fitting, worn O-ring
Tighten fitting, replace O-ring
Easy
$1 – $5
High-Pressure Hose (Mid-length)
Cut, abrasion, puncture, burst
Replace hose (CRITICAL SAFETY ISSUE)
Medium
$30 – $150+
Pump Seals
Worn seals, damaged pistons
Replace seals (requires disassembly)
Hard
$20 – $100+ (for seal kit)
Unloader Valve
Debris, worn seals, faulty spring
Clean valve, replace valve assembly
Medium
$30 – $100+
Spray Gun / Wand Connection
Worn O-rings
Replace O-rings
Easy
$1 – $5
Spray Gun Internals
Worn trigger valve seals
Replace spray gun rebuild kit
Medium
$15 – $50
*Note: Costs are approximate and can vary significantly based on brand, model, and location.*
Understanding Different Pressure Washer Types And Leaks
The type of pressure washer you own can influence the nature and frequency of leaks.
The acrid smell of burning plastic emanating from your dishwasher can be alarming, conjuring images of melted components and potential fire hazards. This distinct odor isn’t just unpleasant; it’s a clear signal that something is amiss within the appliance. Ignoring it can lead to more significant damage, reduced efficiency, and even safety risks.
Understanding the potential causes behind this smell is the first step toward diagnosing and resolving the issue, ensuring your dishwasher continues to operate safely and effectively.
This comprehensive guide will walk you through the most common reasons your dishwasher might smell like burning plastic, from simple obstructions to more complex electrical issues. We’ll cover troubleshooting steps, maintenance tips, and when it’s time to call in a professional, empowering you to tackle this smoky situation with confidence.
Key Takeaways
Foreign Objects: Small plastic items accidentally left in the dishwasher are a frequent culprit for burning plastic smells.
Heating Element Issues: A malfunctioning or obstructed heating element can overheat and melt nearby plastic components.
Motor Problems: Overheating motor bearings or electrical faults within the motor can produce burning smells.
Pump or Filter Blockages: Clogged pumps or filters can cause components to overheat due to increased strain.
Electrical Wiring: Damaged or loose electrical wiring is a serious hazard and a potential source of burning plastic odors.
Regular Maintenance is Crucial: Cleaning filters, inspecting spray arms, and performing occasional deep cleans can prevent many common issues.
Safety First: If the smell is strong, persistent, or accompanied by smoke, disconnect power immediately and consult a professional.
Credit: www.youtube.com
Common Causes Of Burning Plastic Smell In Dishwashers
The appearance of a burning plastic smell from your dishwasher often points to a localized overheating event. This heat can be generated by friction, electrical malfunction, or obstruction causing components to work harder than intended. Identifying the source requires a systematic approach, moving from the simplest explanations to more complex ones.
Foreign Objects In The Dishwasher
One of the most common and easily rectifiable causes of a burning plastic smell is the presence of foreign objects, particularly small plastic items that have fallen from dishes or utensils.
What to Look For: This could include plastic lids from food containers, small plastic toys that somehow found their way into the wash, pieces of plastic cutlery, or even plastic labels that have detached from dishes. These items can fall to the bottom of the dishwasher tub, often near the heating element or the drain pump.
Why it Smells: During the wash or dry cycle, the dishwasher’s heating element, designed to heat water and air, can come into direct contact with these plastic items. The intense heat causes the plastic to melt and burn, releasing the characteristic acrid odor. This can also happen if a plastic item obstructs the circulation pump or drain pump, causing them to work harder and potentially overheat.
Troubleshooting Steps:
Unplug the Dishwasher: Always disconnect the power supply before performing any inspection.
Empty the Dishwasher: Remove all racks and dishes.
Inspect the Tub Bottom: Carefully examine the bottom of the dishwasher tub, paying close attention to the area around the heating element (if visible) and the drain cover.
Check the Filter: Remove and clean the dishwasher’s filter. Small plastic debris can get lodged here.
Look Under Racks: Sometimes items can get caught on the rack wheels or slide underneath them.
Remove and Discard: If you find any foreign plastic objects, remove them immediately.
Run a Cleaning Cycle: After removing the obstruction, run an empty hot water cycle with a dishwasher cleaner to help remove any residue or lingering smell.
Malfunctioning Heating Element
The heating element is crucial for both heating the wash water and often for drying dishes. When it malfunctions, it can become a source of the burning plastic smell.
Overheating Element: In some cases, the heating element itself might overheat due to an internal fault or a faulty thermostat controlling its temperature. This can cause the element’s protective coating to break down or even melt surrounding plastic components if they are too close.
Obstruction on the Element: As mentioned, foreign objects can rest on the heating element. However, sometimes food debris or mineral buildup can accumulate on the element, causing it to heat unevenly and potentially char or melt nearby plastic seals or parts.
Signs of a Faulty Element:
The smell is strongest during or immediately after the heating cycle.
Dishes are not getting hot enough or are not drying properly.
Visible discoloration or damage to the heating element itself.
A persistent burning smell even after removing obvious obstructions.
What to Do: If you suspect the heating element is the culprit, it’s generally best to leave this repair to a qualified appliance technician. Replacing a heating element involves working with electrical components and requires specific knowledge and tools.
Issues With The Circulation Or Drain Pump
The pumps are vital for moving water through the dishwasher. If they become clogged or their motors fail, they can generate heat and odors.
Clogged Pumps: The circulation pump disperses water through the spray arms, while the drain pump removes dirty water. If either pump is blocked by debris (food particles, glass shards, plastic fragments), it has to work harder to push water. This increased strain can cause the motor to overheat, leading to a burning smell, often described as electrical or plastic.
Motor Bearings: The motors that drive these pumps have bearings. If these bearings become worn or dry, they can create friction and heat, which can melt plastic casings or insulation nearby.
Electrical Faults: The motor itself could have an electrical fault, such as a short circuit or failing windings, which can generate excessive heat and a burning odor.
Identifying Pump Problems:
The smell might be accompanied by unusual noises during the wash or drain cycles (grinding, whining).
Water may not be circulating properly, leading to poor cleaning.
The dishwasher may not be draining effectively.
The smell might be more pronounced when the pump is actively running.
Professional Diagnosis: Like the heating element, pump issues often require professional diagnosis and repair. Accessing and replacing pumps can be complex and involve disconnecting water lines and electrical connections.
Motor Overheating
The main motor in a dishwasher is typically responsible for driving the circulation pump. If this motor overheats, it can produce a distinct burning smell.
Causes of Motor Overheating:
Worn Bearings: Similar to pump motors, the main motor’s bearings can wear out, increasing friction and heat.
Electrical Issues: Faulty windings, a failing capacitor, or internal shorts can cause the motor to draw too much current and overheat.
Ventilation Blockage: Dishwashers have vents to help cool the motor. If these vents become blocked by dust, debris, or insulation, the motor can’t dissipate heat effectively.
Excessive Strain: If the dishwasher is consistently overloaded or if there are blockages in the water circulation system, the motor may be under constant strain, leading to overheating.
Symptoms to Watch For:
A persistent burning smell that doesn’t seem tied to the heating element.
The smell might be stronger when the dishwasher is in the main wash cycle.
The dishwasher might stop mid-cycle or fail to start.
Unusual humming or grinding noises from the motor area.
Safety and Repair: Motor issues are serious. If you suspect motor overheating, turn off the power immediately. Attempting to repair a motor without proper training can be dangerous and may cause further damage. A qualified technician will need to diagnose the specific fault, which could range from cleaning vents to replacing the motor.
Damaged Or Loose Electrical Wiring
Faulty electrical connections are one of the most dangerous reasons for a burning plastic smell. This indicates a potential short circuit or arcing, which poses a fire risk.
How it Happens: Over time, wires can become brittle, insulation can crack due to heat and vibration, or connections can loosen. If a wire’s insulation melts or a connection becomes loose, it can cause arcing (sparks jumping across a gap) or a short circuit, generating intense heat and melting the surrounding plastic insulation.
Where to Look: This is often harder for a homeowner to diagnose safely. Potential areas include:
Connections to the heating element.
Connections to the motor.
Connections within the control panel.
The main power supply cord connection.
Warning Signs:
A strong, acrid burning smell, sometimes accompanied by visible smoke.
The smell might be strongest near the control panel or the base of the appliance.
The dishwasher may fail to power on or operate erratically.
Tripped circuit breakers when the dishwasher is used.
Immediate Action Required: If you smell burning plastic and suspect faulty wiring, immediately shut off the power to the dishwasher at the circuit breaker. Do not attempt to operate the appliance. Contact a qualified appliance repair technician or an electrician experienced with appliance repair. This is a critical safety issue.
Other Less Common Causes
While the above cover the most frequent culprits, a few other less common issues can lead to a burning plastic smell.
Control Panel Malfunction: The electronic control board or its associated wiring can overheat due to a fault, melting nearby plastic components or insulation. This often results in erratic operation of the dishwasher.
Ventilation System Issues: Some dishwashers have specific ventilation systems, often involving a fan. If this fan motor overheats or if the vent is blocked, it can cause a burning smell.
Detergent Buildup: While less likely to cause a strong “burning plastic” smell, excessive buildup of detergent or rinse aid residue, especially if it gets onto the heating element, can sometimes char and produce an unpleasant odor. This is usually more of a chemical or acrid smell than distinctly plastic.
Credit: blog.rentacenter.com
Troubleshooting Steps: A Practical Guide
When faced with the disconcerting smell of burning plastic, a methodical troubleshooting process can help pinpoint the issue and, in many cases, resolve it. Always prioritize safety by ensuring the appliance is powered off before you begin.
Safety First: Power Down And Disconnect
Before attempting any inspection, the most critical step is to disconnect the power supply to the dishwasher. This can be done by unplugging the unit from the wall outlet (if accessible) or, more commonly, by switching off the corresponding circuit breaker in your home’s electrical panel. This prevents electrical shock and reduces the risk of fire if the issue involves wiring.
Step-by-step Inspection
Visual Inspection of the Interior:
Empty Everything: Remove all dishes, cutlery baskets, and dishwasher racks. This provides a clear view of the tub’s interior.
Check for Foreign Objects: Carefully examine the bottom of the tub, the door seal, and the areas around the spray arms and heating element. Look for any small plastic items, food debris, or foreign materials. Pay special attention to the drain filter area.
Inspect the Door Seal: Check the rubber gasket around the door for any signs of melting, discoloration, or damage. Sometimes, a piece of plastic can get caught here during the cycle.
Examine the Filter and Drain Area:
Locate the Filter: Most dishwashers have a removable filter at the bottom of the tub, often under the lower spray arm. Consult your dishwasher’s manual if you’re unsure how to access it.
Clean Thoroughly: Remove the filter and wash it under running water. Use a soft brush to remove any trapped food particles, glass shards, or plastic debris.
Inspect the Drain Pump Inlet: With the filter removed, look into the opening for the drain pump. You might be able to see if any obstructions are visible near the pump inlet. Do not reach into the pump housing unless you are certain the power is off and you know what you are doing, as there can be sharp objects.
Inspect the Heating Element:
Locate the Element: The heating element is typically a U-shaped metal coil at the bottom of the tub.
Look for Damage or Debris: Check if any plastic items are resting directly on the element. Also, look for any signs of damage, corrosion, or melted insulation on the element itself or its connections.
Clean Gently: If debris is present, carefully remove it once the element has cooled. Avoid scrubbing aggressively, which could damage the element.
Check the Spray Arms:
Remove and Inspect: Unscrew or unclip the upper and lower spray arms. Check the small holes for clogs (food particles, mineral buildup).
Look for Damage: Inspect the spray arms themselves for any cracks or signs of melting, particularly near their connection points.
Inspect the Door and Interior Plastics:
Look for Melting: Examine the plastic components inside the dishwasher door, the detergent dispenser housing, and any other plastic liners or parts for signs of warping, melting, or discoloration.
Running A Test Cycle (with Caution)
After performing a thorough visual inspection and cleaning, you can cautiously attempt to run a test cycle.
Ensure Safety: Double-check that all tools are removed, the filter is reinstalled correctly, and the racks are properly placed.
Run an Empty Hot Cycle: Select a high-temperature, empty wash cycle.
Monitor Closely: Stay near the dishwasher during the cycle, especially during the heating and drying phases.
Listen and Smell: Pay attention to any unusual noises or returning smells. If the burning plastic smell reappears, note when it occurs (e.g., during heating, draining, or washing) as this can provide clues.
Power Off Immediately: If the smell returns or you notice any smoke or alarming sounds, turn off the power at the breaker immediately.
Maintenance Tips To Prevent Future Smells
Preventative maintenance is key to avoiding issues like burning plastic smells and ensuring the longevity of your dishwasher. Regular cleaning and attention can save you from costly repairs and unpleasant odors.
Regular Cleaning Schedule
After Every Wash: Scrape off large food debris from dishes before loading. This is the most effective way to prevent clogs and buildup.
Weekly:
Wipe Down Door Seals: Use a damp cloth to clean the rubber gasket around the door. This removes food particles and prevents mold growth.
Check Filter: Give the filter a quick rinse if you notice significant debris.
Monthly:
Clean the Filter Thoroughly: Remove and wash the filter with warm, soapy water and a soft brush.
Clean Spray Arms: Remove spray arms and clear any blocked holes with a toothpick or needle. Rinse them thoroughly.
Wipe Down Interior: Use a damp cloth to wipe down the interior walls and door.
Deep Cleaning And Deodorizing
Monthly or Bi-Monthly: Run an empty hot cycle with a specialized dishwasher cleaner or a cup of white vinegar placed securely on the top rack. Vinegar helps break down grease and mineral deposits.
Baking Soda Treatment: For lingering odors, sprinkle a half cup of baking soda on the bottom of the dishwasher tub and run a short, hot cycle. Baking soda is a natural deodorizer.
Professional Servicing
Annual Check-up: Consider having a qualified technician perform an annual check-up. They can inspect internal components, check electrical connections, and ensure everything is functioning optimally. This is especially recommended for older appliances.
Proper Loading Techniques
Avoid Overcrowding: Ensure water and detergent can reach all surfaces.
Secure Small Items: Place small plastic items (like lids or utensils) in the cutlery basket and ensure they are secured so they don’t fall through and interfere with the heating element or pump.
Check for Obstructions: Make sure no items are blocking the spray arms’ rotation.
Credit: www.youtube.com
When To Call A Professional
While many minor issues can be resolved with DIY troubleshooting, certain situations warrant professional attention. Attempting complex repairs without the necessary expertise can be dangerous and may lead to further damage.
Signs You Need A Technician
Persistent Smell After Cleaning: If you’ve thoroughly cleaned the dishwasher, removed all visible debris, and the burning plastic smell returns, it likely indicates a more serious internal problem.
Visible Smoke or Sparks: If you see smoke emanating from the dishwasher or notice sparks, immediately shut off the power at the breaker and call for professional service. This is a critical fire hazard.
Electrical Issues: Any suspected problems with wiring, the motor, the heating element, or the control board should be handled by a qualified appliance repair technician. They have the tools and knowledge to diagnose and safely repair electrical faults.
Unusual Noises: Grinding, squealing, or loud humming noises, especially when accompanied by a burning smell, often point to motor or pump bearing failure.
Complete Malfunction: If the dishwasher fails to turn on, stops mid-cycle, or exhibits other severe operational problems along with the smell, it’s time to call a pro.
Water Leaks: While not directly related to the smell, significant water leaks combined with a burning odor could indicate a more complex issue involving heating elements or seals.
Choosing A Repair Service
Look for Certified Technicians: Opt for technicians certified by appliance manufacturers or reputable organizations.
Read Reviews: Check online reviews and ask for recommendations from friends or neighbors.
Get Quotes: Obtain estimates from multiple service providers if possible, especially for more significant repairs.
Inquire About Warranties: Ask about the warranty on parts and labor for the repair.
A professional diagnosis ensures the problem is correctly identified and fixed safely, preventing potential hazards and further damage to your appliance.
Dishwasher Smell Troubleshooting Table
This table summarizes common smells and their likely causes, helping you diagnose issues more effectively.
If smell is very strong and persists, or if accompanied by unusual residue. Could indicate a faulty dispenser or unexpected chemical reaction.
**Greasy / Rancid Oil**
Trapped grease and food oils in filters, pump, or tub
Filter, pump inlet, interior walls. Run hot cycles with a degreasing cleaner or vinegar.
If smell persists after deep cleaning. May indicate grease buildup in the pump or drain lines that requires professional cleaning or component replacement.
Frequently Asked Questions
What Should I Do If I Smell Burning Plastic Immediately After Installing A New Dishwasher?
If you detect a burning plastic smell from a brand-new dishwasher, it’s crucial to stop the cycle immediately and unplug the unit. While minor odors from new components burning off are sometimes possible, a distinct burning plastic smell is not typical and could indicate a manufacturing defect or damage during shipping.
Contact the retailer or manufacturer’s customer support right away to discuss the issue. Do not continue using the appliance until it has been inspected.
Can A Simple Plastic Lid Cause Significant Damage?
Yes, even a small plastic lid can cause damage if it interferes with critical components. If a plastic lid falls onto the heating element, it can melt and damage the element itself. If it gets into the pump mechanism, it can obstruct the pump, causing the motor to overheat and potentially burn out.
The melted plastic residue can also be difficult to remove and may affect performance.
How Often Should I Clean My Dishwasher Filter?
It’s recommended to clean your dishwasher filter at least once a month. However, if you frequently wash heavily soiled dishes or notice slower draining, you may need to clean it more often, perhaps even weekly. A clogged filter is a common cause of poor performance and can contribute to odors and component strain.
Is It Safe To Run The Dishwasher If I Smell A Faint Burning Plastic Odor?
While a very faint smell might be attributed to initial run-off from new parts, it’s generally not
The frustration of a Motorola TV remote not working can bring your entertainment to a grinding halt. Whether you’re trying to catch up on your favorite show, switch to a different channel, or adjust the volume, a malfunctioning remote renders your smart TV practically useless. This common issue can stem from a variety of causes, ranging from simple battery problems to more complex internal glitches. Understanding these potential culprits and knowing how to systematically troubleshoot them is key to getting your Motorola TV back under your command.
This comprehensive guide will walk you through the most common reasons why your Motorola TV remote might be unresponsive and provide step-by-step solutions to get it working again. We’ll cover everything from checking batteries and eliminating interference to performing factory resets and understanding when it might be time for a replacement.
By the end of this article, you’ll be equipped with the knowledge to diagnose and resolve most Motorola TV remote issues, saving you time, money, and the annoyance of a non-functional device.
Key Takeaways
Battery Check: The most frequent cause of a non-working remote is dead or improperly inserted batteries. Always start here.
Obstruction & Interference: Ensure a clear line of sight between the remote and the TV’s IR sensor, and check for other electronic devices causing interference.
Remote Pairing: For Bluetooth or voice remotes, re-pairing the remote with your TV is often necessary after a power outage or software update.
TV Power Cycle: A simple reboot of the TV itself can resolve temporary software glitches affecting remote communication.
Remote Reset: Many remotes have a reset mechanism that can clear internal errors and restore functionality.
Check the IR Sensor: Ensure the infrared (IR) sensor on both the remote and the TV is clean and unobstructed.
Test the Remote: Use a smartphone camera to verify if the remote’s IR emitter is sending a signal.
Replacement Options: If all troubleshooting fails, consider replacing the batteries, the remote itself, or exploring universal remote solutions.
Credit: www.youtube.com
Understanding Your Motorola Tv Remote
Before diving into troubleshooting, it’s helpful to understand the different types of Motorola TV remotes and how they communicate with your television. Most modern smart TVs, including those from Motorola, utilize one of two primary communication methods: Infrared (IR) or Bluetooth. Some advanced remotes also incorporate voice control capabilities, which rely on Bluetooth and a built-in microphone.
Infrared (IR) Remotes: These are the traditional remotes that emit an invisible beam of infrared light. For an IR remote to work, there must be a clear line of sight between the remote’s emitter and the TV’s IR receiver. This is why obstructions like furniture or even smudges on the TV screen can sometimes cause issues. The signal is essentially a series of light pulses that the TV decodes.
Bluetooth Remotes: Bluetooth remotes do not require a direct line of sight. They establish a wireless connection with the TV, similar to how your smartphone connects to wireless headphones. This offers more flexibility in how you hold the remote and can be more reliable in environments with potential IR interference. However, Bluetooth remotes can sometimes lose their pairing with the TV, requiring a re-pairing process.
Voice Remotes: These remotes combine Bluetooth connectivity with a microphone. When you press a voice button, the remote sends your spoken command via Bluetooth to the TV, which then processes the command. Issues with voice remotes can sometimes be related to the Bluetooth connection, the microphone, or the TV’s voice recognition software.
Identifying which type of remote you have is the first step in diagnosing the problem. Most Motorola remotes will have a small, dark window at the top for IR remotes, or no visible emitter for Bluetooth models. Refer to your TV’s user manual if you’re unsure.
Credit: www.youtube.com
Troubleshooting Common Motorola Tv Remote Issues
When your Motorola TV remote suddenly stops working, it’s easy to feel frustrated. However, most issues can be resolved with a systematic approach. We’ll break down the most common problems and provide clear steps to fix them.
1. Battery Problems: The Usual Suspect
This is by far the most common reason for a remote to stop working. Batteries can lose their charge, become corroded, or be inserted incorrectly.
Replace the Batteries: Always start by replacing the batteries with a fresh set. Ensure you use the correct type of batteries (usually AA or AAA) as specified by your remote’s manual. Never mix old and new batteries, or different types of batteries, as this can lead to leakage and damage.
Check Battery Orientation: Double-check that the batteries are inserted correctly, paying close attention to the positive (+) and negative (-) markings inside the battery compartment. Even a slight misalignment can prevent the remote from functioning.
Clean Battery Terminals: If you notice any corrosion (a powdery or crystalline substance) on the battery terminals or inside the compartment, gently clean them. You can use a pencil eraser or a cotton swab lightly dampened with isopropyl alcohol (rubbing alcohol). Ensure the terminals are completely dry before inserting new batteries.
Secure Battery Cover: Make sure the battery cover is securely fastened. A loose cover can sometimes interrupt the connection.
2. Obstructions And Line Of Sight Issues (ir Remotes)
For IR remotes, a clear path to the TV is crucial.
Clear the Path: Ensure there are no objects physically blocking the signal between the remote and the TV’s IR receiver. This includes remote controls, decorations, or even the position of the remote itself relative to the TV.
Clean the TV’s IR Sensor: The IR sensor on your TV is usually a small, dark, semi-transparent window located on the front panel, often near the power indicator light. Dust, grime, or screen protectors can obstruct this sensor. Gently clean it with a soft, dry microfiber cloth. Avoid using abrasive materials or harsh cleaners, as this could damage the sensor.
Test IR Signal with a Camera: You can perform a quick test to see if your remote is emitting an IR signal.
Open the camera app on your smartphone.
Point the emitter end of your Motorola TV remote towards the phone’s camera lens.
Press and hold any button on the remote.
Look at your phone’s screen. If the remote is working, you should see a faint pink or purple light being emitted from the remote’s tip. This light is in the infrared spectrum and is visible to most digital cameras.
If you do not see any light, the remote is likely not sending a signal, indicating a problem with the batteries, the remote itself, or its internal components. If you see light, the issue might be with the TV’s receiver or a more complex TV malfunction.
3. Interference From Other Devices
Electronic devices can sometimes interfere with the signals from your remote.
Identify Potential Sources: Devices that emit strong electromagnetic fields, such as fluorescent lights, microwaves, other remote controls (especially universal remotes not programmed correctly), or even certain types of LED lighting, can sometimes disrupt remote signals.
Temporarily Remove Suspect Devices: Try turning off or moving any potentially interfering devices away from the TV and remote to see if the problem resolves. If the remote starts working, you’ve likely found the source of interference.
4. Bluetooth Pairing Issues (bluetooth And Voice Remotes)
If your Motorola TV remote uses Bluetooth, it might have lost its pairing with the TV.
Re-Pair the Remote: The process for re-pairing varies by Motorola TV model, but it generally involves a sequence of button presses on the remote and navigating through the TV’s settings.
Common Method: Often, you need to press and hold a specific combination of buttons on the remote (e.g., Back and Home, or Volume Down and Mute) for several seconds while near the TV. Consult your TV’s user manual for the exact procedure for your model.
TV Settings: You might also need to go into your TV’s settings menu (using the physical buttons on the TV if the remote is completely unresponsive) and look for an option like “Remote Control,” “Bluetooth Devices,” or “Add Device” to initiate the pairing process.
Ensure Proximity: During the pairing process, make sure the remote is within close proximity (usually within 1-3 feet) of the TV.
Check TV’s Bluetooth: Ensure that Bluetooth is enabled on your TV. This setting is typically found within the network or connectivity options in the TV’s settings menu.
5. Remote Reset Procedure
Some remotes have a built-in reset function that can clear temporary glitches.
Remove Batteries: The simplest form of reset involves removing the batteries from the remote for at least 30 seconds to a minute. This allows any residual power to dissipate, effectively resetting the remote’s internal circuitry. Reinsert the batteries and test again.
Specific Reset Buttons: Some advanced remotes might have a small, recessed reset button that requires a paperclip to press. Check your remote’s design and your TV’s manual for any such features.
Credit: www.youtube.com
Advanced Troubleshooting Steps
If the basic troubleshooting steps haven’t resolved the issue, it’s time to explore more advanced solutions. These steps may involve interacting more directly with your TV or considering the possibility of a faulty remote or TV component.
1. Power Cycle Your Motorola Tv
A simple power cycle can resolve many temporary software glitches that might be preventing the TV from communicating with the remote.
Unplug the TV: Disconnect the TV’s power cord directly from the wall outlet. Do not just turn it off using the power button or the remote.
Wait: Leave the TV unplugged for at least 60 seconds. This ensures that all residual power is drained from the TV’s internal components, performing a hard reset.
Press and Hold Power Button (Optional but Recommended): While the TV is unplugged, press and hold the physical power button on the TV itself for about 15-30 seconds. This helps to discharge any remaining electricity in the TV’s capacitors.
Plug Back In: Reconnect the power cord to the wall outlet.
Turn On TV: Power on the TV using the physical power button on the TV set.
Test Remote: Once the TV has fully booted up, try using the remote again.
2. Check Physical Buttons On The Tv
Your Motorola TV should have physical buttons for basic functions like power, volume, and channel control.
Locate Buttons: These are typically found on the back, side, or bottom edge of the TV.
Test Basic Functions: Use these physical buttons to turn the TV on, adjust the volume, and change channels. If these buttons work, it confirms that the TV itself is functioning correctly, and the problem is likely isolated to the remote or its connection to the TV.
Navigate Menu (If Possible): If your physical buttons allow you to navigate the TV’s menu, try accessing the settings related to remotes or Bluetooth to check the remote’s status or attempt re-pairing.
3. Test With A Universal Remote Or App
To further isolate whether the issue lies with the original remote or the TV, you can try alternative control methods.
Universal Remote: If you have a universal remote that is compatible with Motorola TVs, try programming it and see if it can control your TV. If the universal remote works, it strongly suggests your original Motorola remote is faulty.
Smartphone Remote App: Many smart TV manufacturers offer dedicated smartphone apps that can control the TV over Wi-Fi. Search your smartphone’s app store (Google Play Store for Android, Apple App Store for iOS) for an official Motorola TV remote app or a general smart TV remote app compatible with your TV model.
Requirements: To use a smartphone app, your TV and smartphone must be connected to the same Wi-Fi network.
Setup: Follow the app’s instructions to discover and connect to your TV. If the app successfully controls your TV, it further points to an issue with the original remote.
4. Check For Tv Software Updates
Outdated TV firmware can sometimes cause compatibility issues with accessories like remotes.
Access Settings: If you can navigate your TV’s menu using physical buttons or a working remote app, go to the TV’s settings.
Find Update Option: Look for options like “About TV,” “System Update,” or “Software Update.”
Install Updates: Check if any updates are available and install them. The TV will likely need to restart after the update. Once it’s back on, test your original remote again.
5. Factory Reset Your Motorola Tv (use As A Last Resort)
A factory reset will revert your TV to its original settings, erasing all customized data, downloaded apps, and network configurations. This is a drastic step and should only be considered if all other troubleshooting methods have failed, and you suspect a deep-seated software issue within the TV itself that might be affecting remote communication.
Backup Data (If Possible): If you have important settings or app data, try to note them down before proceeding.
Locate Reset Option: Access the TV’s settings menu (using physical buttons or a working app). Look for “System,” “Support,” “Reset,” or “Factory Data Reset.”
Confirm Reset: You will likely be prompted to confirm the reset. Be aware that this action cannot be undone.
Re-setup TV: After the reset, your TV will go through the initial setup process as if it were new. You will need to reconnect to your Wi-Fi network, log into your accounts, and re-download any apps.
Test Remote: Once the TV is set up again, try pairing or using your original remote.
When To Consider Replacing Your Remote
If you’ve exhausted all troubleshooting steps and your Motorola TV remote still isn’t working, it’s highly probable that the remote itself is faulty.
1. Signs Of A Failing Remote
Physical Damage: Cracks, water damage, or buttons that are stuck or unresponsive are clear indicators of a damaged remote.
Intermittent Functionality: If the remote works sometimes but not others, even after replacing batteries, it might be developing internal issues.
No Signal Despite Fresh Batteries: If the smartphone camera test shows no IR signal (for IR remotes) and re-pairing doesn’t help (for Bluetooth remotes), the internal components may have failed.
2. Options For A Replacement Remote
Original Motorola Replacement: The most straightforward option is to purchase an exact replacement remote for your specific Motorola TV model. You can usually find these on the Motorola website, authorized electronics retailers, or online marketplaces like Amazon or eBay. Ensure the model number matches your TV precisely.
Universal Remotes: A good quality universal remote can be a cost-effective solution. These remotes are designed to be programmed to control multiple devices from different brands.
Compatibility: Look for universal remotes that explicitly state compatibility with Motorola TVs and smart TV functions. Brands like Logitech Harmony (though discontinued, still widely available and functional), RCA, and GE offer popular universal remote options.
Programming: Programming usually involves entering a code specific to Motorola TVs or using an auto-scan feature. Follow the universal remote’s instructions carefully.
Table: Popular Universal Remote Brands and Features
Brand
Key Features
Typical Price Range (USD)
Ease of Setup
Logitech Harmony
Advanced customization, app control, multi-device
$50 – $250+
Moderate
RCA
Simple programming, basic functions, affordable
$15 – $40
Easy
GE
Wide device compatibility, easy code entry
$20 – $50
Easy
Philips
User-friendly interface, good device support
$25 – $60
Easy
Smartphone Remote Apps: As mentioned earlier, using a smartphone app can be a free or low-cost alternative if your TV is Wi-Fi enabled and supported by an app. This is particularly useful as a backup even if you have a physical remote.
Maintaining Your Motorola Tv Remote
Preventative measures can help extend the life of your remote and avoid future issues.
Keep it Clean: Regularly wipe down your remote with a dry microfiber cloth to prevent dust and grime buildup, especially around buttons and battery compartments.
Avoid Drops: Handle the remote with care. Dropping it can damage internal components or cause battery contacts to loosen. Consider a silicone remote cover for added protection.
Use Quality Batteries: Invest in reliable, high-quality batteries. Cheap batteries are more prone to leaking and may not last as long.
Store Properly: When not in use for extended periods, remove the batteries to prevent potential leakage.
Frequently Asked Questions
Why Does My Motorola Tv Remote Suddenly Stop Working?
The most common reasons include dead batteries, obstructed sensors, interference from other devices, or a lost Bluetooth pairing (for Bluetooth remotes). Less common causes include a software glitch in the TV or a hardware failure in the remote itself.
How Can I Test If My Motorola Tv Remote Is Broken?
For IR remotes, use your smartphone’s camera. Point the remote’s emitter at the camera and press a button; you should see a light on your screen. If no light appears, the remote is likely not transmitting. For Bluetooth remotes, if re-pairing fails and other troubleshooting steps don’t work, the remote may be internally damaged.
Can I Use My Phone As A Motorola Tv Remote?
Yes, many Motorola smart TVs support control via a smartphone app. You’ll need to download the official Motorola TV remote app or a compatible third-party app from your smartphone’s app store and ensure both your phone and TV are connected to the same Wi-Fi network.
What Should I Do If My Tv Remote Is Lost?
If your remote is lost, your immediate options are to use the physical buttons on the TV, download and use a smartphone remote app if your TV supports it, or purchase a replacement remote, either an original Motorola model or a compatible universal remote.
Is It Possible To Fix A Physically Damaged Motorola Tv Remote?
Minor damage, like a loose battery cover or slightly corroded terminals, can often be fixed. However, significant physical damage such as cracks, water ingress, or broken internal components usually means the remote needs to be replaced. Attempting complex internal repairs is generally not recommended unless you have electronics repair experience.
The journey from a non-responsive Motorola TV remote to seamless control often involves simple yet crucial steps. By systematically working through potential issues, starting with the most common culprits like batteries and obstructions, and progressing to more involved solutions like re-pairing or power cycling the TV, you can usually restore functionality.
Remember to always consult your specific Motorola TV model’s user manual for precise instructions, especially when dealing with pairing or factory resets. If all troubleshooting efforts fail, investing in a reliable replacement remote or a versatile universal remote ensures your entertainment experience remains uninterrupted.
The excitement of moving into a new house is often accompanied by a flurry of activity and the anticipation of making a space truly your own. However, alongside the joy, new homeowners might notice subtle changes in their property, particularly small cracks appearing in walls or ceilings.
This can be a cause for concern, leading many to wonder if their dream home is already developing serious structural issues.
Understanding the natural processes a new building undergoes is key to distinguishing between minor cosmetic imperfections and genuine problems. The materials used in construction, the surrounding soil conditions, and even the weather can all contribute to these changes. Fortunately, for the vast majority of new homes, the settling and cracking observed are a normal part of the building’s life cycle, rather than an indication of imminent failure.
This article will explore why new houses settle, the types of cracks that are typically considered normal, and when it might be time to seek professional advice.
Key Takeaways
Settling is a natural process: Newly constructed homes will inevitably settle as materials compress and the building adjusts to its environment.
Minor cracks are common: Hairline cracks in plaster, drywall, or paint are usually cosmetic and a normal consequence of settling.
Factors influencing settling: Soil type, moisture levels, construction materials, and seasonal temperature changes all play a role.
Distinguishing normal from serious: The size, location, and pattern of cracks are key indicators of whether a crack is cosmetic or a structural concern.
When to worry: Large, expanding, or stair-step cracks, especially those accompanied by other issues like sticking doors or windows, warrant professional inspection.
Proactive measures: Proper landscaping, drainage, and regular maintenance can help mitigate excessive settling and cracking.
Credit: edensstructural.com
Understanding House Settling
The term “house settling” refers to the gradual sinking or shifting of a building’s foundation and structure. This phenomenon is not exclusive to new homes; older houses can also experience settling. However, it is particularly noticeable in new constructions because the materials are still adapting to their new environment and the loads placed upon them. The primary driver behind settling is the compression of building materials and the soil beneath the foundation.
Soil Compression And Expansion
The ground beneath a house is rarely perfectly uniform or static. Soil composition varies significantly, and its ability to support a structure depends on its density and moisture content. When a new home is built, the weight of the structure compacts the soil beneath the foundation. This soil compression is a natural process. Different soil types behave differently. For instance, clay soils are notorious for expanding when wet and shrinking when dry. This cyclical expansion and contraction exert pressure on the foundation, leading to movement. Sandy soils tend to drain well and are generally more stable, while organic soils can decompose and lead to significant settlement.
The moisture content of the soil is a critical factor. Heavy rainfall can saturate the soil, increasing its volume and buoyancy, potentially lifting parts of the foundation. Conversely, prolonged dry spells can cause the soil to shrink and pull away from the foundation, leading to voids and subsequent sinking. This is why homes in areas with fluctuating water tables or significant seasonal weather changes are more prone to settling.
Material Properties And Curing
The materials used in home construction also contribute to settling. Concrete, a staple in foundations and slabs, undergoes a curing process that involves chemical reactions. During curing, concrete shrinks slightly as it hardens. This initial shrinkage is a normal part of the material’s lifecycle. Wood, another primary construction material, expands and contracts with changes in humidity. While modern lumber is kiln-dried, it still retains some moisture and will continue to adjust to the ambient humidity levels over time. This subtle movement in structural components can translate into stress points in finishes like drywall and plaster, leading to cracks.
Construction Loads And Adjustments
During construction, a house is subjected to various loads. Once the building is complete and occupied, these loads change. The weight of furniture, appliances, and occupants adds to the structural load. The building’s frame, walls, and roof will naturally adjust and settle under this combined weight. This adjustment period is crucial, and minor shifts are expected as the structure finds its equilibrium.
In my experience as a homeowner and someone who has followed construction trends, I’ve observed that the initial year or two after moving into a new build is when most of these minor settling signs appear. It’s a period of adjustment for both the house and its inhabitants.
Types Of Normal Cracks
Not all cracks are created equal. While some indicate potential structural problems, many are benign and simply a sign that your new home is settling into its place. Understanding the characteristics of these normal cracks can save you unnecessary worry and expense.
Hairline Cracks In Drywall And Plaster
The most common type of crack found in new homes is the hairline crack. These are very fine fissures, often no wider than a human hair, that typically appear in drywall or plaster finishes. They often occur at joints between drywall panels or around corners and openings like doors and windows. These cracks are usually caused by the slight movement of the building’s frame, the drying and shrinking of joint compound (mud) used to finish the drywall, or minor expansion and contraction of building materials due to temperature and humidity fluctuations.
Paint And Finish Cracks
Sometimes, you might notice cracks that appear in the paint layers rather than the underlying drywall. This can happen when the drywall or plaster shifts slightly, causing the paint to stretch and eventually crack. These are purely cosmetic and do not indicate any structural compromise. They are often easily repaired with a bit of spackling and a fresh coat of paint.
Minor Gaps Around Trim And Doors
As the house settles, slight shifts can cause small gaps to appear around door frames, window casings, and baseboards. This is because the framing members might move independently of the trim. These gaps are typically narrow and can be filled with caulk or paintable filler. Significant gaps or doors and windows that no longer function properly, however, could point to a more serious issue.
Small Cracks In The Foundation (surface Level)
It’s not uncommon to find very fine, superficial cracks on the surface of a concrete foundation. These are often referred to as “crazing” or shrinkage cracks. They occur as the concrete cures and loses moisture, causing it to contract slightly. If these cracks are very narrow (less than 1/16th of an inch) and do not penetrate deeply into the concrete, they are generally not a cause for concern. They are more of a cosmetic issue for the foundation.
A useful way to think about these normal cracks is that they are like wrinkles that appear on a person’s skin as they age; they are a natural part of the process, not indicative of a critical health issue.
Factors Influencing Settling And Cracking
Several environmental and construction-related factors can influence the extent and type of settling and cracking a new house experiences. Understanding these can help homeowners anticipate potential issues and take appropriate measures.
Soil Conditions
As mentioned earlier, the type of soil on which a house is built is a major determinant of settling.
Clay soils: Highly expansive and prone to significant shrinking and swelling with moisture changes. This can cause uneven settlement.
Sandy soils: Generally good drainage and less prone to swelling, offering more stable support.
Loam soils: A mix of sand, silt, and clay, offering moderate stability.
Peaty or organic soils: Can decompose over time, leading to substantial settlement.
The load-bearing capacity of the soil is also crucial. If the soil is too soft or poorly compacted, it may not adequately support the weight of the house, leading to excessive sinking.
Moisture And Drainage
The amount of water in the soil surrounding the foundation directly impacts its stability. Improper drainage can lead to water pooling around the foundation, saturating the soil and causing it to expand or exert hydrostatic pressure. Conversely, dry conditions can cause the soil to shrink.
Poor drainage: Gutters that don’t direct water away from the foundation, or landscaping that slopes towards the house, can exacerbate moisture-related soil issues.
High water table: Areas with a consistently high water table can lead to buoyancy issues and increased soil moisture.
Drought conditions: Extended dry periods can cause significant soil shrinkage, particularly in clay-rich soils, leading to foundation settlement.
Climate And Seasonal Changes
The climate plays a significant role, especially the fluctuations between seasons.
Freeze-thaw cycles: In colder climates, water in the soil can freeze and expand, lifting the soil (frost heave), and then thaw, causing it to settle. This repeated cycle can stress foundations.
Seasonal moisture variations: Wet springs followed by dry summers can cause significant soil expansion and contraction, leading to movement.
Temperature extremes: Rapid temperature changes can cause building materials to expand and contract at different rates, stressing finishes.
Construction Quality And Materials
While settling is natural, the quality of construction and the materials used can influence its severity.
Foundation type and depth: A properly designed and constructed foundation, appropriate for the soil conditions and depth, is crucial.
Drying of lumber: Lumber used in framing will continue to dry and shrink over time, especially in arid climates or heated homes.
Quality of drywall finishing: The skill of the drywall installers and the quality of the joint compound used can affect the likelihood of cracks appearing.
Load Distribution
The way weight is distributed across the foundation and the structure can also contribute to settling patterns. Uneven loads or concentrated stress points can lead to differential settlement, where one part of the house sinks more than another.
When To Be Concerned About Cracks
While minor cracks are normal, certain types and patterns of cracks can signal more serious underlying issues that require attention from a qualified professional. It’s important to differentiate between cosmetic imperfections and potential structural problems.
Size And Width Of Cracks
The width of a crack is a primary indicator.
Hairline cracks (less than 1/16 inch): Generally considered normal, especially in finishes.
Cracks between 1/16 and 1/4 inch: Warrant closer observation. If they are growing, they could be a concern.
Cracks wider than 1/4 inch: Often indicate a more significant issue and should be investigated.
Crack Patterns
The pattern of a crack can reveal its cause.
Vertical or diagonal hairline cracks: Often related to drywall finishing or minor settling.
Stair-step cracks: Typically appear in masonry (brick or block) walls and follow the mortar lines. These can indicate differential settlement of the foundation.
Horizontal cracks: In foundation walls, these can be a sign of excessive soil pressure (hydrostatic pressure or expansive soils) pushing the wall inward.
Cracks radiating from corners of windows or doors: Can be caused by framing settling or the house “racking” (leaning to one side).
Crack Progression
The most critical factor is whether a crack is getting worse over time.
Monitoring cracks: Use a pencil to mark the ends of a crack and note its width. Periodically check if the marks have moved or if the crack has grown.
Seasonal changes: Some minor cracks might appear or widen during dry seasons and narrow during wet seasons due to material expansion. This can be normal. However, consistent widening in any season is a red flag.
Associated Problems
Cracks are often accompanied by other symptoms that can indicate a structural issue.
Sticking doors or windows: If doors or windows no longer open or close smoothly, it suggests the frame is out of square due to foundation movement.
Gaps appearing or widening: Significant gaps forming between walls and ceilings, or around door/window frames, beyond what is expected from minor settling.
Bowing or bulging walls: Walls that appear to be leaning inward or outward.
Cracked tiles: Tiles in floors or walls cracking or becoming loose.
Water intrusion: Water seeping into the basement or crawl space, especially if cracks are present in the foundation walls.
Uneven floors: Floors that slope noticeably or feel soft.
A crack is not just a crack; it’s a symptom. The art of diagnosing its significance lies in observing its characteristics, pattern, progression, and any accompanying signs of distress in the building.
Comparison: Normal Vs. Serious Cracks
To help homeowners distinguish between benign cosmetic cracks and potentially serious structural issues, here’s a comparative table.
Characteristic
Normal/Cosmetic Crack
Serious Structural Crack
Width
Hairline (less than 1/16 inch)
Wider than 1/4 inch, or widening significantly
Depth
Superficial, only in paint or plaster
Appears to go through the material (e.g., concrete, brick)
Pattern
Random, at drywall joints, around corners
Stair-step in masonry, horizontal in foundation walls, radiating from corners
Progression
Stable or minor seasonal changes
Consistently growing wider or longer over time
Associated Signs
None, or very minor cosmetic imperfections
Sticking doors/windows, bowing walls, water intrusion, uneven floors, large gaps
Material
Drywall, plaster, paint
Foundation, structural beams, load-bearing walls (masonry or framing)
Repair Approach
Spackling, caulking, painting
Requires professional assessment and potentially structural repair
This table provides a quick reference, but it’s crucial to remember that context is key. A professional inspection is always recommended if you have any doubts about the severity of a crack.
Mitigating Settling And Cracking
While you can’t entirely prevent a new house from settling, there are several proactive steps homeowners can take to minimize excessive movement and potential cracking. These measures focus on maintaining a stable environment around the foundation and ensuring the building’s structure is sound.
Proper Landscaping And Drainage
The area immediately surrounding your home’s foundation is critical for managing moisture.
Slope away from the foundation: Ensure the ground slopes downwards away from your house for at least 5-10 feet. This directs rainwater and snowmelt away, preventing saturation.
Gutter maintenance: Keep gutters clean and ensure downspouts extend at least 4-6 feet away from the foundation. Consider installing splash blocks or underground drainage pipes.
Avoid planting large trees too close: Large trees near the foundation can have extensive root systems that absorb significant moisture from the soil, leading to shrinkage and settlement, especially during dry periods. Their roots can also potentially damage the foundation over time.
Mulch responsibly: While mulch helps retain soil moisture, avoid piling it directly against the foundation, as this can trap moisture and encourage pests.
Regular Inspections And Maintenance
Consistent monitoring of your home’s exterior and interior can help catch issues early.
Exterior checks: Periodically inspect the foundation walls for new cracks, signs of moisture, or bowing. Check the grading around the house.
Interior checks: Monitor walls, ceilings, and around windows and doors for new or expanding cracks.
Address small issues promptly: Repair minor cracks in paint or plaster as they appear. This prevents them from becoming larger and can sometimes mask underlying minor movements.
Controlling Interior Humidity
Maintaining a consistent indoor humidity level can help minimize the expansion and contraction of building materials like wood framing.
Use of humidifiers/dehumidifiers: Especially important in climates with very dry winters or humid summers. Aim for a relative humidity level between 30% and 50%.
Ventilation: Ensure proper ventilation in bathrooms and kitchens to remove excess moisture.
Understanding Your Home’s Construction
Knowing how your home was built can provide valuable insights.
Foundation type: Understanding whether you have a slab, crawl space, or basement foundation and its specifics can help you identify potential vulnerabilities.
Soil report (if available): If you have access to the original soil report from the builder, it can provide information about the soil’s properties and any special foundation considerations.
Professional Advice
Don’t hesitate to consult professionals if you have concerns.
Builder’s warranty: New homes often come with a builder’s warranty that covers structural defects. Understand the terms and duration of your warranty.
Structural engineer: For significant cracks or persistent concerns, a structural engineer can provide an expert assessment of your home’s condition and recommend solutions. This is a critical step before undertaking any major repairs.
By implementing these preventative measures, homeowners can contribute to the long-term stability of their new house and minimize the visual impact of normal settling processes.
Case Study: The Expanding Crack
Sarah and Tom purchased a new build in a suburban area known for its clay-rich soil. Within six months of moving in, they noticed a fine crack running diagonally from the top corner of their living room window. Initially, they dismissed it as typical settling.
However, over the next year, they observed the crack slowly widening, reaching about 1/8th of an inch. More concerningly, they started experiencing difficulty closing their front door, which had previously operated smoothly.
Alarmed, they contacted their builder, who initially suggested it was just cosmetic. However, Sarah and Tom insisted on a more thorough inspection. The builder agreed to send a structural consultant. The consultant noted the stair-step pattern of the crack in the drywall, which, while not in masonry, mimicked the stress points caused by differential settlement.
Crucially, the consultant also observed that the front door frame was visibly out of square.
The consultant recommended a more detailed foundation inspection. It was discovered that due to a particularly wet spring followed by a dry summer, the clay soil on one side of the house had shrunk more significantly than on the other, causing the foundation to tilt slightly.
This minor tilt was enough to stress the framing and cause the door to stick.
The solution involved a combination of exterior drainage improvements to ensure consistent moisture levels around the foundation and interior drywall repair. The door was planed to operate smoothly again. The crack was repaired and repainted, but Sarah and Tom were advised to continue monitoring it. This case highlights how seemingly minor cracks, when accompanied by functional issues, can point to underlying soil-related problems that require professional intervention.
Frequently Asked Questions
What Is The Difference Between Settlement Cracks And Structural Cracks?
Settlement cracks are typically superficial, hairline fissures that appear due to the natural compression of soil and materials as a new house settles. They often occur in drywall, plaster, or paint finishes and are usually cosmetic. Structural cracks, on the other hand, are wider, deeper, and often follow specific patterns (like stair-step in brick or horizontal in foundation walls).
They indicate a problem with the home’s foundation or structural integrity and are often accompanied by other issues like sticking doors or bowing walls.
How Long Does It Typically Take For A New House To Stop Settling?
Most significant settling occurs within the first one to two years after construction. During this period, the building’s materials compress, and the soil beneath the foundation adjusts to the load. While minor movements and occasional hairline cracks might appear for longer, the most noticeable settling typically stabilizes within this timeframe. However, environmental factors like extreme drought or heavy rainfall can cause further, albeit usually minor, movement at any time.
Can I Repair Settlement Cracks Myself?
Yes, minor hairline cracks in drywall, plaster, or paint are usually safe for homeowners to repair themselves. This typically involves cleaning the crack, applying spackling or joint compound, sanding it smooth, and repainting. For cracks wider than 1/16th of an inch, or if you see multiple cracks appearing, it’s advisable to monitor them first. If they grow or are accompanied by other signs of structural distress, professional assessment is recommended before attempting repairs.
What Are The Signs Of Foundation Problems In A New House?
Signs of foundation problems in a new house include:
Wide cracks (over 1/4 inch) in foundation walls or slabs.
Stair-step cracks in brickwork or block walls.
Horizontal cracks in foundation walls, indicating inward pressure.
Bowing or bulging walls.
Doors and windows that stick or won’t open/close properly.
Gaps appearing between walls and ceilings or around window/door frames.
Uneven or sloping floors.
Water seeping into the basement or crawl space.
Cracked tiles on floors or walls.
If you notice any of these, it’s crucial to consult a professional.
How Does Soil Type Affect Settling?
Soil type significantly impacts how a house settles. Clay soils are highly expansive; they swell when wet and shrink when dry, leading to uneven movement and potential cracking. Sandy soils generally drain well and are more stable, resulting in less settlement. Organic soils (like peat) can decompose over time, causing significant sinking. The load-bearing capacity of the soil is also critical; if the soil is too soft or poorly compacted, it may not adequately support the house’s weight, leading to excessive settlement. Understanding the soil composition is key to anticipating and managing settling issues.
The journey of a new house settling is a complex interplay between construction, materials, and the environment. While the appearance of cracks can be unnerving
A Carrier furnace yellow light is more than just an indicator; it’s your furnace’s way of communicating distress. When this seemingly simple light begins to flash, it’s signaling a specific issue that requires attention. Ignoring these codes can lead to minor inconveniences escalating into major, costly repairs, and worse, a compromised home heating system during the coldest months. Understanding what these flashes mean is the first step toward ensuring your comfort and safety.
This guide will break down the common yellow light codes for Carrier furnaces, explaining what each sequence signifies and what immediate steps you can take. We’ll cover diagnostic procedures, potential causes, and when it’s absolutely crucial to call in a qualified HVAC professional.
Equipping yourself with this knowledge can save you time, money, and unnecessary stress, transforming a potentially frustrating situation into a manageable one.
Key Takeaways
Diagnostic Tool: A flashing yellow light on a Carrier furnace is a diagnostic code indicating a specific operational problem.
Code Recognition: Different flash patterns correspond to different error types, such as ignition failures, flame sensor issues, or limit switch problems.
Self-Troubleshooting Limits: While some issues can be addressed with simple resets, many codes require professional diagnosis and repair.
Safety First: Always prioritize safety; if you suspect a gas leak or electrical hazard, shut off the furnace and call for professional help immediately.
Preventative Maintenance: Regular HVAC maintenance can prevent many of the issues that trigger yellow light codes.
Credit: cornelsplumbing.com
Understanding Carrier Furnace Diagnostic Codes
Carrier furnaces, like most modern heating systems, are equipped with sophisticated control boards that monitor their operation. When a fault is detected, the board triggers a diagnostic light, often on the front panel, to alert homeowners and technicians. The color and pattern of the flashing light are crucial pieces of information.
While red lights typically indicate a more severe, immediate safety concern, a yellow or amber light often points to a malfunction that may not be an emergency but still needs prompt resolution.
The control board uses a series of blinks, pauses, and more blinks to represent a specific error code. These codes are designed to be referenced in the furnace’s service manual or by an HVAC technician. The sequence might be, for example, two short flashes followed by a long flash, or a continuous rapid blinking.
Each unique sequence maps to a particular problem within the furnace’s operation, ranging from issues with the inducer motor or pressure switch to problems with the burner assembly or thermostat.
The Role Of The Control Board
At the heart of your Carrier furnace’s diagnostic system is the control board, also known as the circuit board or motherboard. This electronic component is the brain of the furnace. It receives signals from various sensors and components (like the thermostat, flame sensor, limit switches, pressure switches, and igniter) and dictates the furnace’s operational sequence. When a sensor reports an anomaly, or a component fails to perform as expected, the control board registers this as an error. Instead of simply shutting down, it often initiates a diagnostic sequence, illuminating the status light to provide a clue about the nature of the problem.
Why A Yellow Light?
The choice of a yellow or amber light typically signifies a non-critical fault or a post-shutdown condition. This means the furnace might have shut down its heating cycle due to a detected issue, but it doesn’t necessarily indicate an immediate safety hazard like a gas leak or a critical electrical fault that would warrant a red light and a complete lockout. A yellow light often suggests that the furnace attempted to start or run, but encountered a problem that prevented it from completing its cycle or operating efficiently. This could be related to:
Ignition failures: The furnace tried to light the burner but couldn’t.
Flame sensor issues: The furnace lit, but the sensor couldn’t detect a stable flame.
Limit switch trips: The furnace overheated, and a limit switch opened to shut it down.
Pressure switch malfunctions: Problems with the inducer motor or venting system.
Component failures: Issues with a specific part like a blower motor or gas valve.
Common Carrier Furnace Yellow Light Codes And Their Meanings
Carrier uses a standardized system for its diagnostic codes, though specific models might have slight variations. The most common yellow light codes relate to ignition, flame sensing, and safety interlocks. Understanding these specific sequences is key to effective troubleshooting.
Ignition Failure Codes
These codes indicate that the furnace’s ignition system failed to successfully ignite the gas burner. This is a frequent issue and can stem from several underlying problems.
Code: 3 Flashes (Short)
Meaning: Ignition Failure. The furnace attempted to ignite, but no flame was detected within the expected timeframe.
Potential Causes:
Faulty Igniter: The igniter (either hot surface igniter or spark igniter) may be cracked, worn out, or not receiving adequate power.
Gas Valve Issue: The gas valve might not be opening correctly, or it’s receiving a faulty signal.
Ignition Control Module Failure: The module responsible for sequencing ignition might be malfunctioning.
Incorrect Gas Pressure: Low gas pressure can prevent proper ignition.
Drafting Issues: Problems with the venting system or inducer motor could cause the flame to be blown out or not detected.
What to Do: Check if your gas supply is on. If the problem persists after a couple of attempts (Carrier furnaces often have a lockout period after multiple failed ignitions), it’s time to call a professional. Do not attempt to manually light the pilot if your furnace has electronic ignition.
Code: 4 Flashes (Short)
Meaning: Flame Loss After Ignition. The furnace successfully ignited, but the flame sensor lost the flame signal shortly after.
Potential Causes:
Dirty or Faulty Flame Sensor: This is the most common culprit. The flame sensor rod can become coated with soot, preventing it from sending a strong signal to the control board.
Gas Orifice Clogged: A partially blocked gas orifice can lead to a weak flame that doesn’t consistently engage the flame sensor.
Gas Valve Malfunction: Intermittent issues with the gas valve.
Drafting Problems: Similar to ignition failure, poor venting can cause the flame to be unstable.
What to Do: A dirty flame sensor can sometimes be cleaned by a homeowner. Caution: Turn off power to the furnace before attempting this. Gently remove the flame sensor rod, clean it with fine-grit sandpaper or steel wool, and reinstall it. If this doesn’t resolve the issue, or if you’re uncomfortable with the task, call a technician.
Limit And Safety Switch Codes
These codes indicate that a safety switch has been tripped, usually due to an overheating condition or a problem with the airflow.
Code: 5 Flashes (Short)
Meaning: High Limit Switch Tripped. The furnace overheated, causing the high-limit switch to open and shut down the system.
Potential Causes:
Blocked Airflow: Dirty air filter, blocked vents, closed registers, or a dirty/failed blower motor can restrict airflow, causing the furnace to overheat.
Undersized Ductwork: If the ductwork is too small for the furnace’s output, it can lead to overheating.
Faulty Limit Switch: The limit switch itself might be malfunctioning and tripping prematurely.
Blower Fan Issues: The blower motor may not be running at the correct speed or may not be running at all.
What to Do: Check and replace your air filter. Ensure all vents and registers are open and unobstructed. Listen to see if the blower fan is operating correctly. If the problem persists after checking airflow, the issue might be with the limit switch or blower motor, requiring professional diagnosis.
Code: 6 Flashes (Short)
Meaning: Induced Draft Fault / Pressure Switch Malfunction. The inducer motor failed to start, ran too slowly, or the pressure switch did not close properly, indicating a potential issue with venting or the inducer motor itself.
Potential Causes:
Failed Inducer Motor: The motor that pulls combustion gases out of the furnace may have failed.
Clogged Venting: Blockages in the flue pipe or vent termination can prevent proper exhaust.
Faulty Pressure Switch: The switch that monitors the inducer motor’s operation might be faulty.
Cracked Heat Exchanger (Less Common, More Serious): While less common for this specific code, a severely compromised heat exchanger could affect pressure dynamics.
What to Do: Visually inspect the vent pipe for any obvious obstructions. Listen to the inducer motor to ensure it’s running when the furnace calls for heat. If the motor isn’t running or is making unusual noises, or if you suspect a blockage, call a qualified HVAC technician. This code can sometimes indicate a serious safety issue related to exhaust gases.
Other Common Yellow Light Codes
Beyond ignition and limit issues, other problems can trigger a yellow light.
Code: 7 Flashes (Short)
Meaning: Gas Valve Malfunction. The gas valve is not opening correctly or is not receiving the proper signal.
Potential Causes:
Faulty Gas Valve: The valve itself may be defective.
Wiring Issues: Loose or damaged wiring to the gas valve.
Control Board Problem: The control board might not be sending the correct signal to the valve.
What to Do: This requires professional diagnosis. A faulty gas valve is a safety concern, and only a qualified technician should handle its inspection or replacement.
Code: 8 Flashes (Short)
Meaning: Short-Cycling or Overheating Lockout. The furnace may have shut down due to repeated overheating within a short period, or a component is causing the system to cycle on and off too frequently.
Potential Causes:
Restricted Airflow: As with the high-limit code, this can be caused by dirty filters, blocked vents, or blower issues.
Thermostat Problems: A faulty thermostat could be sending incorrect signals.
System Oversizing: An oversized furnace may heat the space too quickly and shut off before the system can properly regulate.
What to Do: Check air filters and vents. Ensure the thermostat is functioning correctly. If the issue persists, consult an HVAC professional to assess the system’s overall operation and sizing.
Troubleshooting Steps For Carrier Furnace Yellow Light Codes
When you see a flashing yellow light on your Carrier furnace, a systematic approach to troubleshooting can help identify the problem and potentially resolve minor issues before calling for service.
1. Identify The Specific Flash Pattern
The first and most crucial step is to accurately identify the sequence of flashes. Is it two short flashes? Three long flashes? A repeating pattern of one short, one long? Carrier’s diagnostic codes are specific.
Observation: Carefully observe the light. Note the number of flashes, the duration of the flashes (short or long), and any pauses between flashes or sequences.
Documentation: Write down the exact pattern. This information is vital for looking up the code and for providing to an HVAC technician.
Manual Reference: Consult your Carrier furnace’s installation or service manual. These manuals contain a detailed list of all diagnostic codes and their meanings specific to your model. If you don’t have the physical manual, you can often find a digital version on the Carrier website or through an online search using your furnace’s model number.
2. Perform A System Reset
Many electronic control boards can be reset to clear temporary glitches or errors. This is often the simplest solution and should be attempted before deeper troubleshooting.
Power Cycle:
Locate the power switch for your furnace. It’s usually a toggle switch on or near the furnace unit itself.
Turn the switch to the OFF position.
Go to your breaker box and locate the breaker that controls your furnace (it might be labeled “Furnace,” “HVAC,” or “Heating”). Flip this breaker to the OFF position as well. This ensures a complete power disconnect.
Wait for at least 30 seconds to 1 minute. This allows any residual power in the system to dissipate and the control board to fully reset.
Turn the furnace power switch back ON.
Flip the breaker back ON.
Observe the furnace. It should go through its normal startup sequence. If the yellow light is gone and the furnace is operating normally, the issue may have been a temporary glitch.
3. Check Air Filters And Vents
As noted in the code explanations, restricted airflow is a common cause of overheating and system shutdowns.
Air Filter: Locate your furnace’s air filter. If it’s dirty or clogged, replace it with a new one of the correct size and MERV rating. A dirty filter is one of the leading preventable causes of HVAC problems.
Vents and Registers: Ensure that all supply and return air vents and registers in your home are open and not blocked by furniture, curtains, or other obstructions. Proper airflow is essential for the furnace to dissipate heat effectively.
4. Inspect For Obvious Obstructions Or Damage
Visually inspect accessible components for any clear signs of trouble.
Venting: Look at the furnace’s exhaust vent pipe (flue pipe) for any signs of damage, sagging, or blockages (e.g., bird nests, debris).
Wiring: Gently check if any visible wires connected to the control board, sensors, or gas valve appear loose, frayed, or damaged. Do not attempt to reconnect or repair wiring unless you are experienced with electrical work.
Condensate Drain (for high-efficiency furnaces): If you have a high-efficiency furnace, check the condensate drain line for clogs. A blocked drain can sometimes trigger safety shutdowns.
5. When To Call A Professional
If the yellow light persists after a reset, if you’ve checked filters and vents and the problem remains, or if the code indicates a more serious issue (like a gas valve or inducer motor problem), it’s time to contact a qualified HVAC technician.
Safety Concerns: Never ignore potential safety hazards. If you smell gas, shut off the furnace immediately and evacuate the area, calling your gas company or 911 from a safe distance.
Complex Diagnostics: Codes related to internal components like gas valves, pressure switches, igniters, or the control board itself require specialized tools and expertise.
Intermittent Issues: If the furnace works sometimes but then flashes the yellow light again, a technician can perform more in-depth diagnostics.
Credit: www.youtube.com
Comparing Common Carrier Furnace Yellow Light Codes
To better understand the nuances between different yellow light codes, consider this comparative overview. While specific models may have variations, these general categories represent the most frequent issues.
To illustrate how these codes play out in practice, let’s look at a couple of common scenarios.
Scenario 1: The Sudden Chill And A Flashing Light
The Situation: It’s a cold winter evening, and you notice your home is getting uncomfortably cool. You check your Carrier furnace, and the status light is flashing yellow, three short flashes, pause, three short flashes.
Diagnosis: Based on our table and Carrier’s common codes, 3 flashes typically indicate an ignition failure. The furnace tried to light its burner, but the flame sensor never confirmed a flame.
Troubleshooting Steps:
Reset: You perform a power cycle reset as described earlier. The furnace starts up, ignites, and runs normally. The yellow light is gone.
Outcome: The issue was likely a temporary glitch in the ignition sequence or a momentary issue with gas flow. If it happens again, the next step would be to check the air filter and then call a technician to inspect the igniter and gas valve.
Scenario 2: The Intermittent Warmth
The Situation: Your Carrier furnace seems to be working, but it keeps shutting off after about 10-15 minutes, and the yellow light flashes five times. The house never quite reaches the desired temperature.
Diagnosis:5 flashes usually point to the high-limit switch tripping due to overheating. This means the furnace is getting too hot, and a safety device is shutting it down to prevent damage.
Troubleshooting Steps:
Check Air Filter: You immediately check the air filter and find it heavily clogged with dust and debris.
Check Vents: You ensure all supply and return vents are open and unobstructed.
Replace Filter: You replace the dirty filter with a new one.
Outcome: After the replacement, you restart the furnace. It now runs continuously and heats the house effectively. The yellow light does not reappear. The clogged filter had restricted airflow, causing the furnace to overheat and the high-limit switch to trip repeatedly.
These scenarios highlight how understanding the codes and performing basic checks can lead to a swift resolution for common issues. However, more complex codes require professional intervention.
When To Call A Professional Hvac Technician
While some diagnostic steps can be performed by a homeowner, many Carrier furnace yellow light codes indicate issues that require the expertise of a qualified HVAC professional. Attempting repairs beyond your skill level can be dangerous and may void your warranty.
Signs You Need Professional Help:
Persistent Codes: If the yellow light code reappears after a system reset or after you’ve performed basic checks (like changing the air filter), it signifies an underlying problem that requires professional diagnosis.
Safety-Related Codes: Codes indicating potential gas valve issues (like 7 flashes), inducer motor/pressure switch faults (like 6 flashes), or any situation where you smell gas demand immediate professional attention. These can pose serious risks of fire, explosion, or carbon monoxide poisoning.
Complex Component Failures: Issues with the gas valve, control board, igniter, flame sensor (if cleaning doesn’t work), or inducer motor require specialized tools and knowledge for accurate diagnosis and repair.
No Heat: If your furnace is completely failing to produce heat, regardless of the code, it’s best to call a professional to ensure a swift and safe resolution.
Uncertainty: If you are unsure about the meaning of a code, uncomfortable performing troubleshooting steps, or unable to access certain parts of the furnace, it is always safer to call a professional.
Finding A Reputable Technician
When searching for an HVAC technician, look for:
Licensed and Insured: Ensure they hold the necessary licenses and insurance in your area.
Experience with Carrier: Technicians familiar with the Carrier brand may have a deeper understanding of your specific system.
Positive Reviews: Check online reviews and ask for recommendations from friends, family, or neighbors.
Clear Pricing: Request a detailed quote before work begins, outlining parts and labor costs.
Certifications: Look for certifications like NATE (North American Technician Excellence).
A certified professional will have the diagnostic equipment, technical knowledge, and access to genuine replacement parts to correctly address the issue indicated by the yellow light code, ensuring your furnace operates safely and efficiently. For instance, diagnosing a faulty pressure switch involves testing the voltage and continuity of the switch and verifying proper operation of the inducer motor and associated venting, tasks best








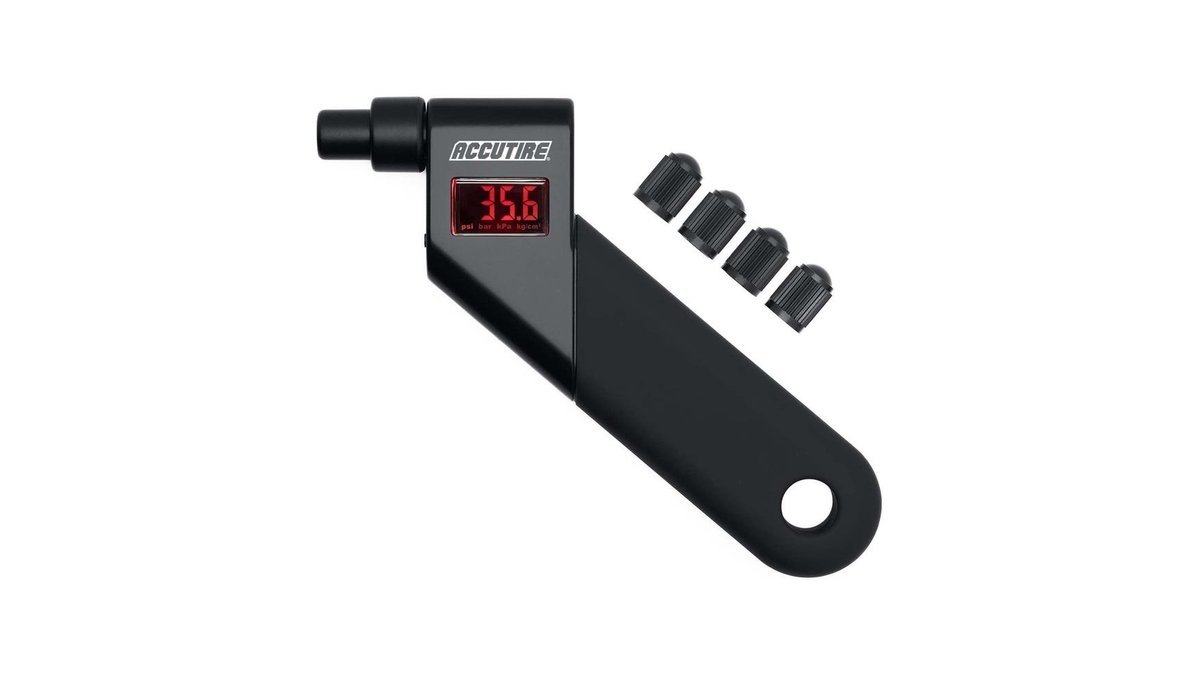


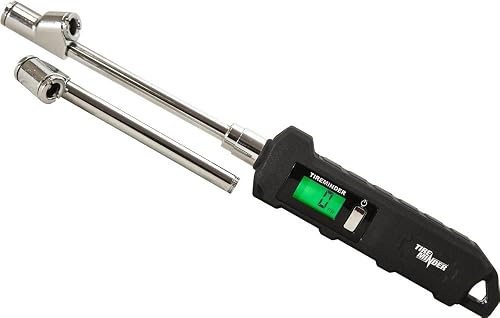

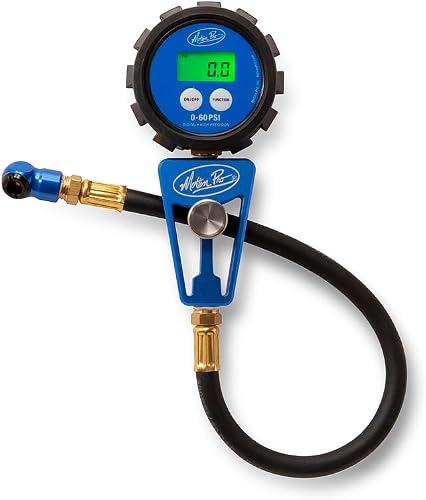


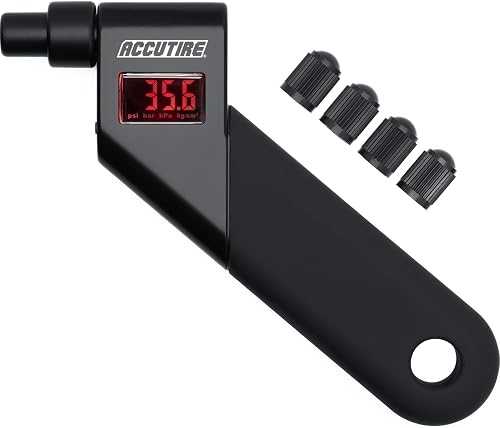


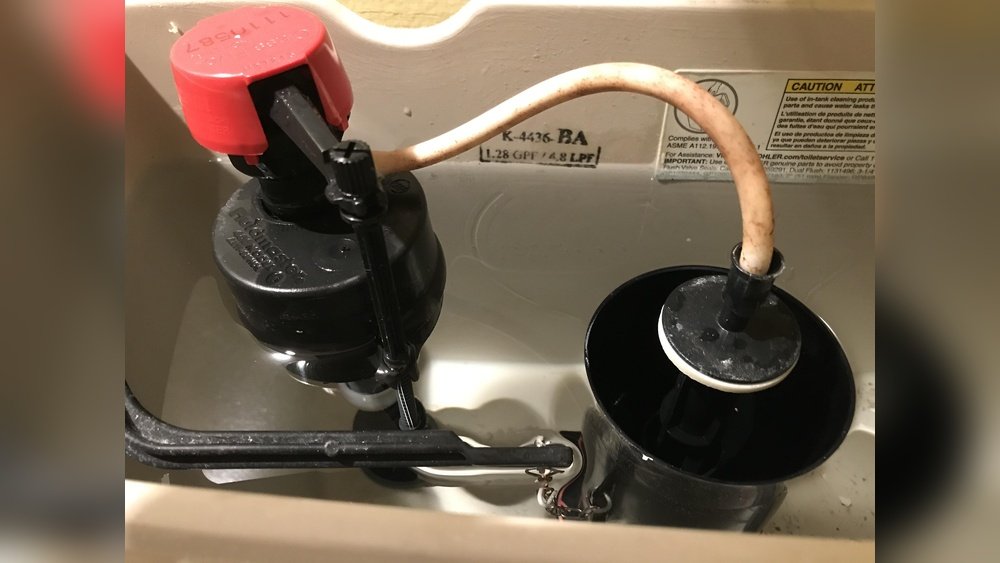
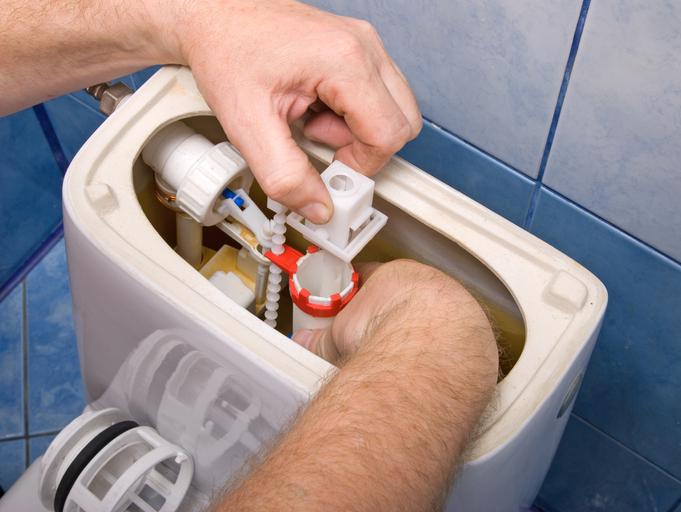
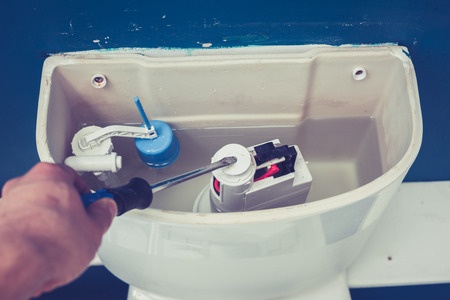

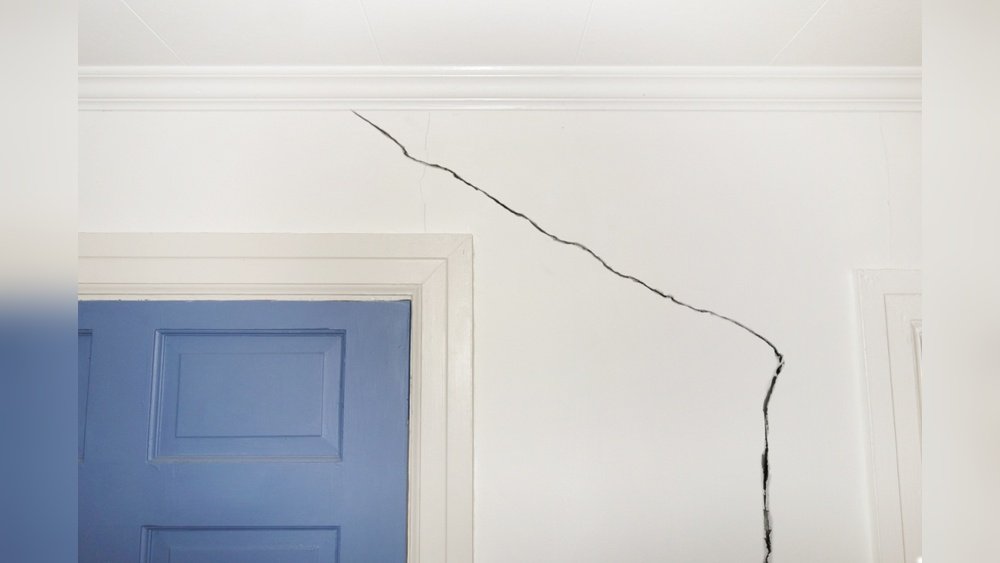
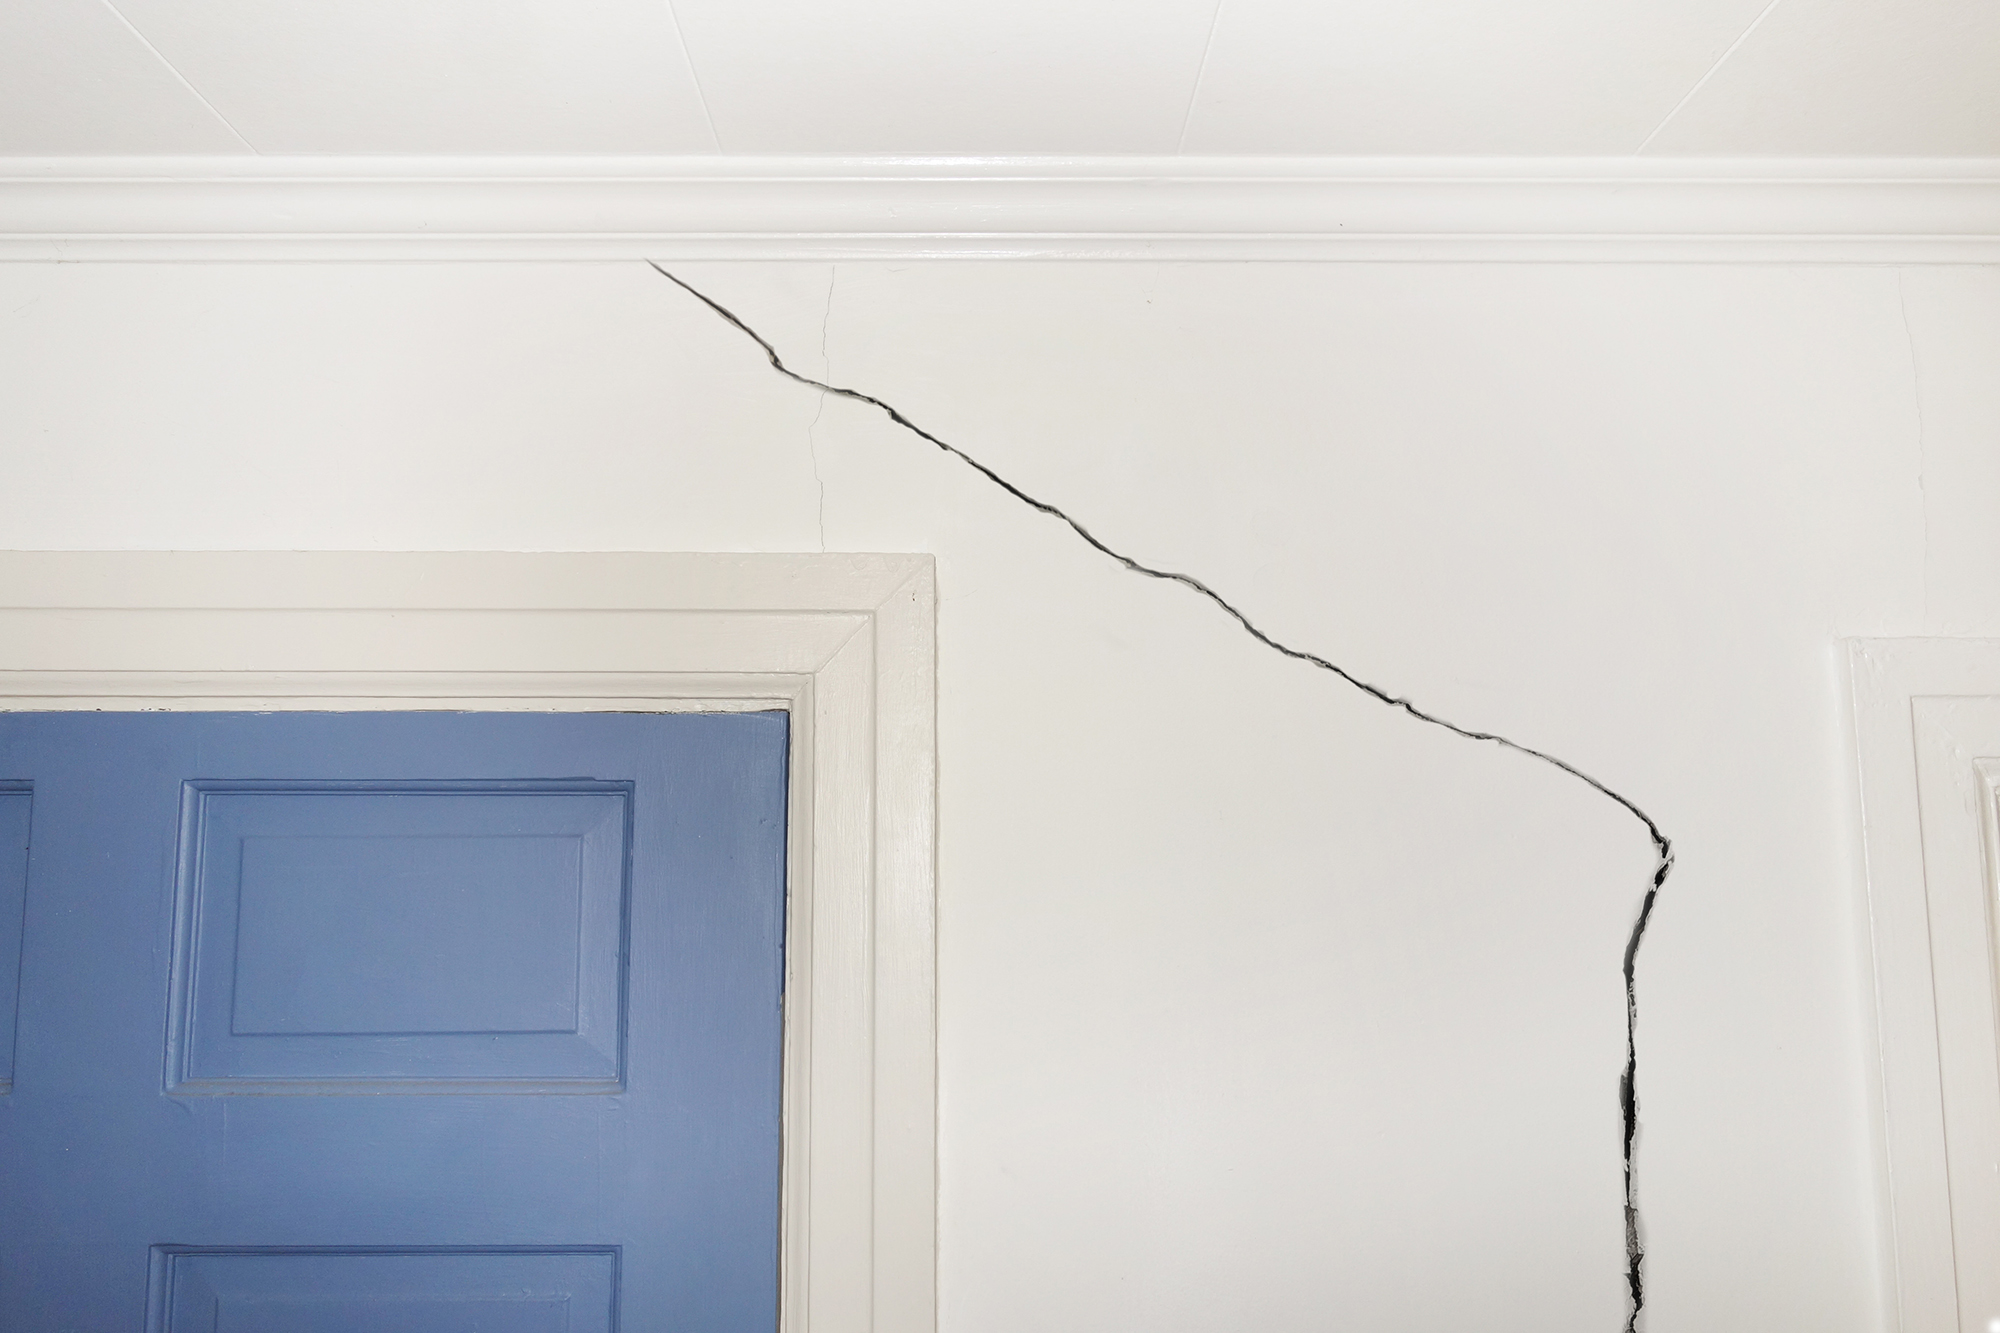




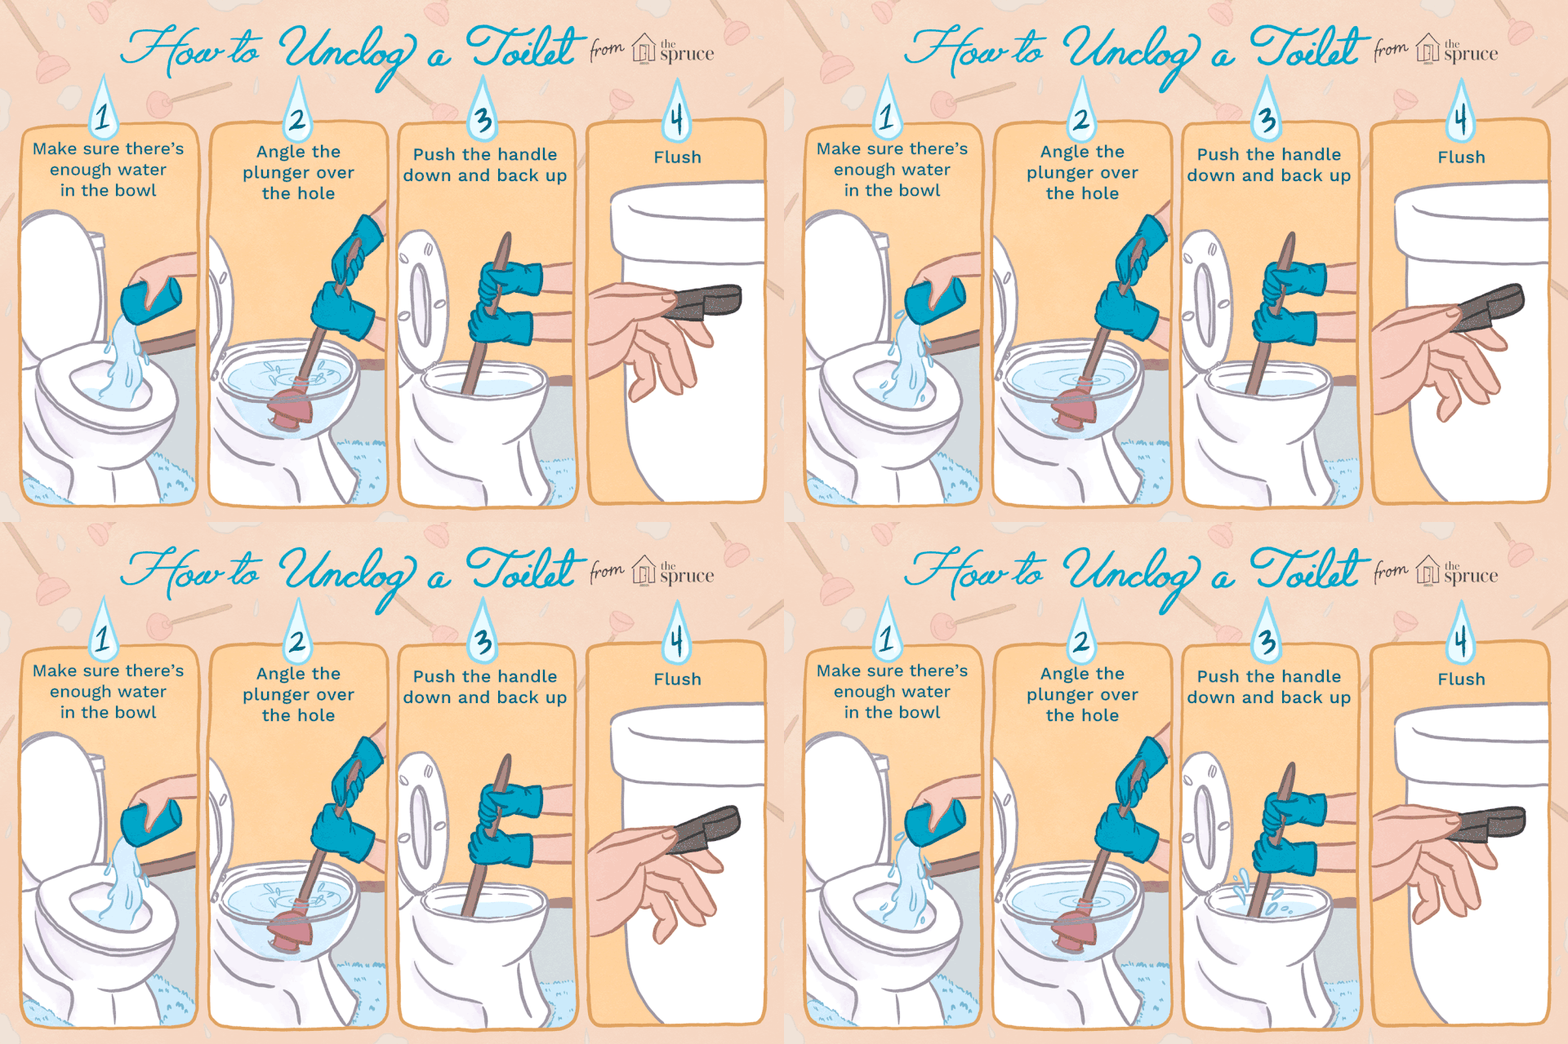
:max_bytes(150000):strip_icc()/unclogging-a-toilet-with-a-plunger-2719030_final_horizontal_10_18-d33deec2a8084e289a5427c6745a0d32.png)