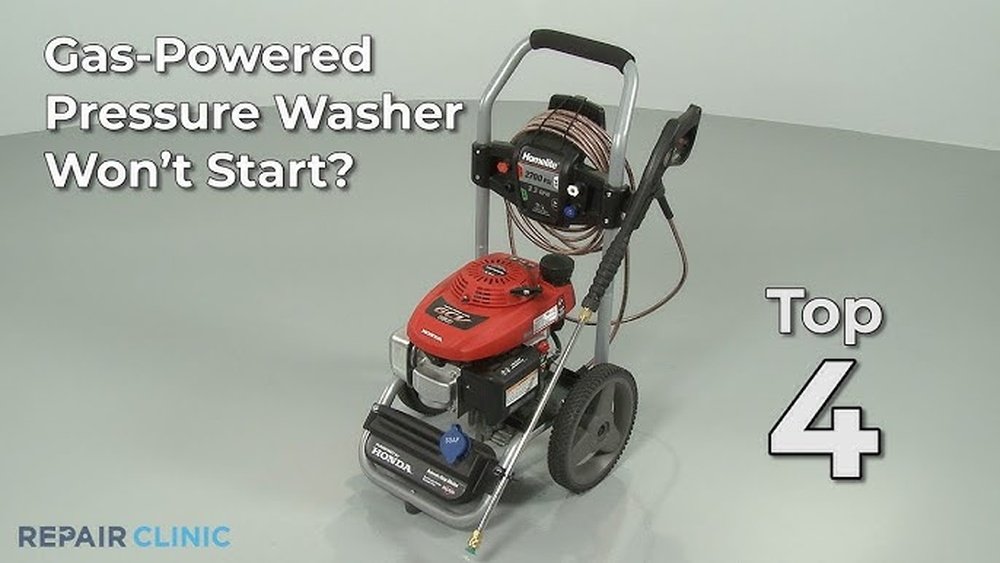
Honda Pressure Washer Wont Start

Honda Pressure Washer Wont Start

A Honda pressure washer is a powerful tool for tackling tough cleaning jobs, from grimy driveways to mildewed siding. However, like any complex machine, it can encounter issues. One of the most frustrating problems is when your Honda pressure washer simply won’t start.

This can bring your cleaning project to a grinding halt and leave you wondering what went wrong. Fortunately, many common reasons why a Honda pressure washer won’t start are relatively straightforward to diagnose and fix.

This comprehensive guide will walk you through the most frequent culprits behind a no-start Honda pressure washer, offering step-by-step troubleshooting advice. We’ll cover everything from fuel and spark plug issues to more complex mechanical problems, empowering you to get your machine back up and running efficiently.

Whether you’re a seasoned homeowner or new to pressure washing, understanding these potential issues can save you time, money, and a significant amount of frustration.

Key Takeaways

  • Fuel System Issues: Ensure fresh fuel, a clean fuel filter, and a clear carburetor are primary checks.
  • Ignition Problems: A dirty or faulty spark plug is a common cause of starting failure.
  • Airflow Obstructions: A clogged air filter restricts necessary airflow for combustion.
  • Water Pressure & Safety: Verify water supply and ensure safety features (like low oil shutdown) aren’t preventing startup.
  • Engine Oil Level: Low oil can trigger safety mechanisms, preventing the engine from starting.
  • Prime and Choke Settings: Correctly using the choke and priming the engine is crucial for cold starts.
  • Mechanical Issues: While less common, internal engine problems may require professional attention.
Honda Pressure Washer Wont Start

Credit: www.bisonindustry.com

Common Honda Pressure Washer Starting Problems And Solutions

When your Honda pressure washer refuses to roar to life, it’s usually due to a handful of predictable issues. Before diving into complex repairs, it’s essential to systematically check the most common and easiest-to-resolve problems. This approach not only saves you time but also prevents unnecessary worry about more serious mechanical failures.

Fuel-related Obstacles

The lifeblood of any gasoline engine is its fuel. If your Honda pressure washer isn’t starting, the fuel system is often the first place to look. Stale fuel, blockages, or incorrect fuel types can all prevent your engine from igniting.

Stale Or Contaminated Fuel

Gasoline, especially ethanol-blended fuel, degrades over time. When left in the tank for extended periods (more than 30 days), it can form gummy deposits and lose its combustibility. This stale fuel can clog fuel lines, the fuel filter, and the carburetor’s tiny jets, preventing the engine from receiving the proper fuel mixture.

Pro Tip: Always use fresh gasoline, ideally purchased within the last 30 days. If you store your pressure washer for longer periods, use a fuel stabilizer or drain the fuel tank and run the engine dry before storage.

If you suspect stale fuel, the solution is to drain the old fuel from the tank and carburetor bowl. You can siphon it out or use a small hand pump. Refill the tank with fresh, high-octane gasoline.

Clogged Fuel Filter

The fuel filter is a small but vital component that traps debris before it reaches the carburetor. A clogged filter restricts fuel flow, starving the engine.

Troubleshooting Steps:

  • Locate the fuel filter, usually found inline between the fuel tank and the carburetor.
  • Disconnect the fuel line from the filter.
  • Inspect the filter for dirt, debris, or a milky appearance.
  • If it’s dirty, replace it with a new, compatible filter. Honda pressure washer parts are readily available through authorized dealers or online.

Carburetor Issues

The carburetor is responsible for mixing the correct amount of fuel and air for combustion. If it’s clogged or dirty, it can prevent starting. This is particularly common with stale fuel.

Symptoms of a Clogged Carburetor:

  • Engine sputters but won’t start.
  • Engine starts but runs rough and dies.
  • Engine only runs with the choke on.

Solutions:

  • Cleaning the Carburetor Bowl: For minor clogs, you can often remove the carburetor bowl (the small cup at the bottom of the carburetor) and clean out any sediment. Be sure to catch any residual fuel in a suitable container.
  • Carburetor Cleaning Spray: After draining the bowl, you can spray carburetor cleaner into the jets and passages.
  • Full Carburetor Rebuild/Replacement: For more severe clogs, the carburetor may need to be removed, disassembled, cleaned thoroughly with specialized solutions, or replaced entirely. This can be a complex task best left to experienced individuals or professionals.

Water In Fuel

Accidentally putting water in the fuel tank is a critical issue. Water doesn’t combust and will prevent the engine from running.

Diagnosis: If you suspect water, drain the entire fuel system. You may need to remove the fuel tank or use a siphon to get all the water out. Then, refill with fresh gasoline.

Ignition System Faults

Even with perfect fuel delivery, your Honda pressure washer won’t start if it doesn’t have a spark. The ignition system, primarily the spark plug, is crucial.

Dirty Or Fouled Spark Plug

The spark plug ignites the fuel-air mixture in the cylinder. Over time, it can become fouled with carbon deposits, oil, or fuel, preventing it from creating a strong spark.

Troubleshooting and Replacement:

  • Locate the Spark Plug: It’s usually a cylindrical component with a wire (spark plug wire) attached to it, threaded into the engine block.
  • Remove the Spark Plug Wire: Gently pull the wire off the spark plug.
  • Unscrew the Spark Plug: Use a spark plug socket wrench to remove the plug.
  • Inspect the Spark Plug: Look for black, sooty deposits (carbon fouling), oil residue, or a damaged electrode.
  • Clean or Replace: If the plug is dirty, you can try cleaning it with a wire brush and carburetor cleaner. However, spark plugs are inexpensive, and replacement is often the most reliable solution. Ensure you get the correct type of spark plug for your specific Honda engine model.
  • Check the Gap: New spark plugs need to be gapped correctly according to your engine’s specifications. Use a spark plug gap tool for this.
  • Reinstall: Screw the new or cleaned spark plug back in, attach the wire firmly, and try starting the engine.

Faulty Spark Plug Wire Or Coil

Less commonly, the spark plug wire itself or the ignition coil (which generates the high voltage for the spark) could be faulty.

Diagnosis: If a new spark plug doesn’t solve the problem, and you confirm fuel is reaching the cylinder, the issue might lie with the ignition coil or the wire. Testing these components typically requires specialized tools and knowledge, often indicating a need for professional service.

Air Intake Restrictions

An engine needs air to combust fuel. A blocked air intake system will prevent your Honda pressure washer from starting.

Clogged Air Filter

The air filter prevents dirt and debris from entering the engine. A heavily clogged filter restricts airflow, leading to a rich fuel mixture and starting problems.

Troubleshooting and Replacement:

  • Locate the Air Filter Housing: This is usually a plastic cover on the side of the engine.
  • Remove the Cover: Unscrew or unclip the cover.
  • Inspect the Filter: Examine the air filter. If it’s covered in dust, dirt, or oil, it needs attention.
  • Clean or Replace: Paper filters can often be replaced. Foam filters can usually be washed with soap and water, dried thoroughly, and then lightly re-oiled with a specific foam air filter oil. Always refer to your Honda manual for specific cleaning instructions.
  • Reassemble: Ensure the filter is correctly seated before replacing the cover.

Mechanical And Safety Features

Beyond fuel and ignition, other mechanical factors and built-in safety features can prevent your Honda pressure washer from starting.

Low Engine Oil Level

Most Honda engines are equipped with a low oil shutdown sensor. This safety feature prevents engine damage by automatically shutting off the engine or preventing it from starting if the oil level is too low.

Check and Refill:

  • Locate the Oil Dipstick: This is typically a yellow or black cap with a handle, often near the engine’s base.
  • Ensure the Engine is Cool: Let the engine cool down before checking the oil.
  • Remove and Wipe the Dipstick: Pull out the dipstick and wipe it clean with a lint-free cloth.
  • Reinsert and Check: Fully reinsert the dipstick, then pull it out again. Check the oil level against the markings on the dipstick.
  • Add Oil if Necessary: If the level is below the minimum mark, add the recommended type and amount of engine oil specified in your Honda pressure washer’s manual. Do not overfill.

Water Supply Issues

While this won’t prevent the engine from *cranking*, it will prevent the pump from operating and can sometimes cause an engine that *does* start to stall if it overheats due to lack of water flow. Always ensure the water supply is adequate and the hose is not kinked.

Safety Interlock Engaged

Some pressure washers have safety interlocks, such as a trigger lock on the spray gun. Ensure these are disengaged before attempting to start the engine.

Starting Procedure Errors

Even with a well-maintained machine, incorrect starting procedures can lead to frustration. Honda pressure washers, particularly those with their GX series engines, have specific startup steps.

Incorrect Choke Setting

The choke restricts airflow to enrich the fuel-air mixture, which is necessary for starting a cold engine.

  • Cold Start: Always engage the choke fully for a cold engine. Once the engine starts, gradually move the choke to the ‘run’ or ‘off’ position as the engine warms up.
  • Warm Start: If the engine is already warm, do not use the choke, or use it only partially. Using the choke on a warm engine can flood it with too much fuel, preventing it from starting.

Not Priming The Engine

Some models may have a primer bulb. This small rubber bulb is used to manually pump fuel into the carburetor, making it easier to start, especially on a cold engine or after it has been sitting for a while.

  • Using the Primer Bulb: Press the bulb several times (usually 3-5) until you feel resistance. This indicates fuel has been delivered to the carburetor.

Flooded Engine

If you’ve tried starting the engine multiple times, especially with the choke on, you may have flooded it. This means there’s too much fuel in the combustion chamber, and the spark can’t ignite it.

How to Clear a Flooded Engine:

  • Turn off the choke (move it to the ‘run’ or ‘off’ position).
  • Attempt to start the engine. You may need to pull the starter rope several times.
  • If it still doesn’t start, wait 10-15 minutes for the excess fuel to evaporate, then try again with the correct choke setting.
  • You can also try removing the spark plug, pulling the starter rope a few times to clear excess fuel, then reinstalling the plug and trying to start again.
Honda Pressure Washer Wont Start

Credit: www.youtube.com

Advanced Troubleshooting For Honda Pressure Washers

If the basic checks haven’t resolved your starting issue, it’s time to consider more in-depth troubleshooting. These steps might require a bit more mechanical aptitude or specialized tools.

Checking For Spark

Confirming you have a spark is a crucial diagnostic step.

How to Test for Spark:

  • Disconnect the spark plug wire from the spark plug.
  • Remove the spark plug using a spark plug socket.
  • Reconnect the spark plug wire to the removed spark plug.
  • Carefully hold the metal body of the spark plug against a clean, unpainted metal part of the engine block. Ensure you are not touching the spark plug terminal or wire.
  • Have someone pull the starter rope (or engage the electric start if applicable) while you watch the spark plug gap.
  • You should see a strong, blue spark jump across the gap.

Interpreting the Results:

  • Strong Blue Spark: Indicates the ignition system is likely working. The problem is probably fuel or compression related.
  • Weak Yellow/Orange Spark: Suggests an issue with the spark plug wire, ignition coil, or a grounding problem.
  • No Spark: Points to a faulty ignition coil, a bad spark plug wire, a faulty ignition switch, or a problem with the engine’s internal ignition components.

Assessing Engine Compression

Compression is the pressure built up inside the cylinder when the piston moves up. Without adequate compression, the fuel-air mixture cannot be ignited effectively. Low compression can be caused by worn piston rings, a damaged cylinder wall, or leaking valves.

How to Test Compression (Requires a Compression Tester):

  • Remove the spark plug.
  • Screw a compression tester into the spark plug hole.
  • Ensure the fuel valve is open and the choke is in the ‘run’ position.
  • Pull the starter rope several times (typically 5-6 pulls) with consistent effort.
  • Read the pressure indicated on the tester’s gauge.

Interpreting the Results:

  • Consult your Honda pressure washer’s service manual for the specific compression specifications for your engine model. Generally, a reading below 70-80% of the specified value indicates a compression problem.
  • If compression is low, it often signifies internal engine wear or damage, which may require professional repair.

Examining The Fuel Lines And Tank

Beyond the filter, the fuel lines themselves can become blocked or kinked. The fuel tank can also accumulate sediment over time.

Steps:

  • Disconnect the fuel line from the carburetor.
  • Point the disconnected end into a suitable container.
  • Turn on the fuel valve (if separate from the tank cap).
  • Observe the fuel flow. You should see a steady stream of fuel. If the flow is weak, intermittent, or nonexistent, the problem lies further upstream (fuel tank sediment, kinked line, faulty fuel valve).
  • If the flow is good, the issue is likely within the carburetor or ignition system.

Checking For Blocked Exhaust

A severely blocked exhaust can create backpressure and prevent the engine from running or starting. This is less common but can occur if the muffler becomes internally damaged or if debris obstructs the outlet.

Diagnosis: Visually inspect the exhaust outlet for any obvious blockages. If you suspect an internal issue, it may require disassembling the muffler for inspection, which is usually a job for a mechanic.

Honda Pressure Washer Wont Start

Credit: www.allpartsinc.com

When To Seek Professional Help

While many Honda pressure washer starting issues can be resolved with DIY troubleshooting, some problems are beyond the scope of basic maintenance. If you’ve exhausted the common solutions or are uncomfortable performing more complex diagnostics, it’s time to call in the experts.

Signs You Need Professional Assistance:

  • Lack of Spark: If you’ve replaced the spark plug and still have no spark, the ignition coil or other electrical components may be faulty.
  • Low Compression: As mentioned, this indicates internal engine wear or damage (piston rings, valves, cylinder).
  • Persistent Carburetor Problems: If cleaning the carburetor doesn’t resolve the issue, it may require a professional rebuild or replacement.
  • Engine Knocking or Strange Noises: Unusual sounds during attempted startup often signal serious mechanical problems.
  • You’re Unsure or Uncomfortable: Safety is paramount. If you’re not confident in your ability to diagnose or repair the issue, it’s always best to consult a qualified technician.

Honda power equipment is known for its reliability, but even the best machines can develop faults. A local Honda power equipment dealer or a small engine repair shop will have the specialized tools, diagnostic equipment, and expertise to pinpoint and fix complex issues.

They can also source genuine Honda parts to ensure your pressure washer runs as intended.

Maintenance Tips To Prevent Starting Issues

The best way to deal with a Honda pressure washer that won’t start is to prevent the problem from occurring in the first place. Regular maintenance is key to ensuring reliable performance.

Regular Fuel Management

  • Use Fresh Fuel: Always use gasoline that is less than 30 days old.
  • Fuel Stabilizer: If you store fuel for longer periods or your pressure washer will sit unused for more than a month, add a fuel stabilizer.
  • Drain for Storage: For long-term storage (over winter), drain the fuel tank and run the engine until it stops to empty the carburetor.

Air Filter Care

  • Inspect Regularly: Check the air filter every few uses, especially if operating in dusty conditions.
  • Clean or Replace: Clean foam filters or replace paper filters as needed. A dirty air filter is a common cause of poor performance and starting difficulty.

Spark Plug Maintenance

  • Inspect Annually: Remove and inspect the spark plug at least once a year.
  • Replace as Needed: Replace the spark plug every 100-200 hours of operation or if it shows signs of wear or fouling.

Oil Level Checks

  • Check Before Each Use: Ensure the engine oil level is correct before operating the pressure washer.
  • Regular Oil Changes: Change the engine oil according to the manufacturer’s recommendations (usually every 50-100 hours of use or annually).

Keeping It Clean

  • General Cleaning: Keep the exterior of the pressure washer clean, especially around the engine and pump. Remove dirt and debris that could clog air intakes or cooling fins.

By adhering to these simple maintenance practices, you can significantly reduce the likelihood of encountering starting problems with your Honda pressure washer and ensure it’s ready to go whenever you need it.

Frequently Asked Questions

Why Does My Honda Pressure Washer Start With The Choke On But Die When I Move It To ‘run’?

This is a classic symptom of a lean fuel mixture, often caused by a partially clogged carburetor. The choke enriches the mixture, allowing it to run, but once the choke is opened and more air enters, the engine can’t get enough fuel and stalls.

It could also indicate a vacuum leak in the fuel system or intake manifold.

Can I Use Regular Car Gasoline In My Honda Pressure Washer?

Yes, you can use regular unleaded gasoline (87 octane or higher). However, it’s crucial to use fresh gasoline. Many modern gasoline blends contain ethanol, which can absorb moisture and degrade over time, leading to starting problems and carburetor damage. If your pressure washer will be stored for an extended period, it’s best to use a fuel stabilizer or drain the fuel.

How Often Should I Change The Oil In My Honda Pressure Washer Engine?

Refer to your specific Honda model’s owner’s manual for the exact interval. Generally, for most Honda GX series engines used in pressure washers, an oil change is recommended every 50 to 100 hours of operation, or annually, whichever comes first.

Frequent use in dusty conditions may necessitate more frequent changes.

My Honda Pressure Washer Is Making A Clicking Noise When I Try To Start It, But It’s Not Turning Over. What Could Be Wrong?

A clicking noise often indicates a problem with the starter mechanism or, if it’s an electric start model, a weak battery or faulty starter solenoid. For pull-start models, it might suggest the recoil starter is engaged but the engine isn’t rotating, possibly due to internal engine damage or a seized component.

It’s advisable to stop trying to start it to prevent further damage and have it inspected by a professional.

Is It Normal For My Honda Pressure Washer To Require Pulling The Starter Rope Many Times To Start?

No, it’s not ideal. While a cold engine might require a few firm pulls, especially if it hasn’t been run recently, consistently needing numerous pulls suggests an underlying issue. This could be related to fuel delivery, ignition, or compression. If starting becomes difficult, it’s a sign to investigate the potential problems discussed earlier, starting with fuel and spark.

Regular maintenance and a methodical approach to troubleshooting are your best allies when dealing with a Honda pressure washer that won’t start. By understanding the common causes and following these steps, you can often resolve the issue yourself and get back to your cleaning tasks efficiently.
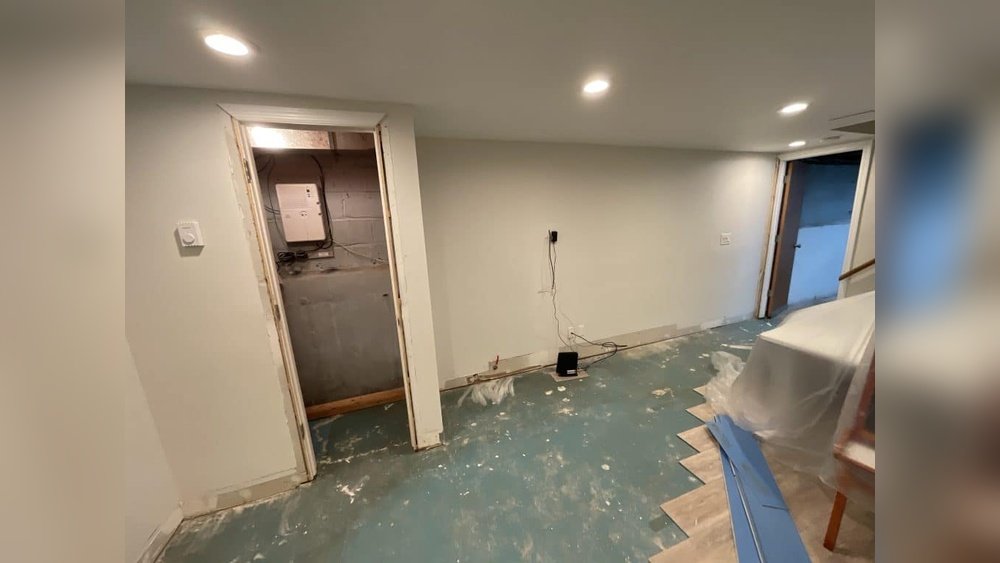
Hairline Cracks In Wall Normal Or Not

Hairline Cracks In Wall Normal Or Not

The gentle spiderweb of hairline cracks appearing on your walls can be a source of considerable anxiety for homeowners. Are these innocuous signs of a settling house, or do they portend a more significant structural issue? Understanding the difference between normal, minor wall imperfections and potentially serious problems is crucial for maintaining your home’s integrity and value.

This guide aims to demystify hairline cracks, helping you assess their significance and determine when it’s time to call in a professional.

Key Takeaways

  • Hairline cracks are often normal: Minor settlement, temperature fluctuations, and material expansion/contraction commonly cause small, thin cracks.
  • Location matters: Cracks near windows, doors, or in areas of structural stress are more concerning than those in the middle of a wall.
  • Crack characteristics are key: Observe the width, length, pattern, and whether the crack is active (growing) or stable.
  • Plaster vs. Drywall: Different materials have different failure modes and crack appearances.
  • Professional assessment is vital: When in doubt, or if cracks exhibit worrying signs, consult a structural engineer or experienced contractor.
  • Prompt repair prevents escalation: Addressing minor cracks can prevent them from becoming larger, more expensive issues.

Understanding What Causes Hairline Cracks In Walls

Walls, whether constructed from traditional plaster and lath or modern drywall, are not static structures. They are subjected to various environmental and physical stresses throughout their lifespan. These stresses, combined with the natural properties of building materials, can lead to the formation of small fissures.

The Natural Process Of House Settling

Every building undergoes a period of settlement, especially during its first few years. This occurs as the foundation compacts the soil beneath it and the structural components of the house adjust to the weight they bear. This gradual movement, though often imperceptible, can translate into tiny stresses within the wall materials, leading to hairline cracks. Think of it like a new pair of shoes that need a little breaking in; the house needs time to find its equilibrium. These settlement cracks are typically thin, often appearing near corners, around window and door frames, or where different building materials meet.

Environmental Factors: Temperature And Humidity

Materials expand when heated and contract when cooled. Similarly, they absorb moisture and expand, and release it to contract. Walls are constantly exposed to these changes. Significant fluctuations in temperature and humidity can cause the various components of your walls, wood framing, drywall, plaster, paint, to expand and contract at different rates. This differential movement creates internal stresses. Over time, these stresses can exceed the tensile strength of the paint or the wall material itself, resulting in fine cracks. These are particularly common in areas with extreme seasonal climate changes or in rooms with significant temperature variations, like attics or basements.

Material Properties And Age

The materials used in wall construction have inherent properties that influence their susceptibility to cracking. Drywall, composed of gypsum plaster sandwiched between paper or fiberglass, is relatively brittle. While it offers a smooth finish, it can crack along seams or where fasteners are placed if not installed or finished perfectly. Plaster and lath, an older method, involves applying plaster over wooden strips (lath). This system is more flexible than drywall but can develop cracks if the lath shrinks or expands unevenly, or if the plaster itself becomes brittle with age. As buildings age, materials can also degrade, becoming more prone to cracking under normal stress.

Minor Impact Or Stress

Even minor events can contribute to hairline cracks. A door being slammed with unusual force, a heavy object being dropped nearby, or even vibrations from nearby construction or heavy traffic can send shockwaves through a structure. These impacts can create localized stress points that manifest as small cracks.

While not indicative of major structural failure, these events highlight the sensitivity of wall materials to external forces.

Hairline Cracks In Wall Normal Or Not

Credit: www.thespruce.com

Identifying Different Types Of Wall Cracks

Not all cracks are created equal. The appearance, location, and behavior of a crack provide crucial clues about its origin and potential severity. Differentiating between minor cosmetic issues and more significant structural concerns is paramount.

Hairline Cracks: The Innocent Bystanders

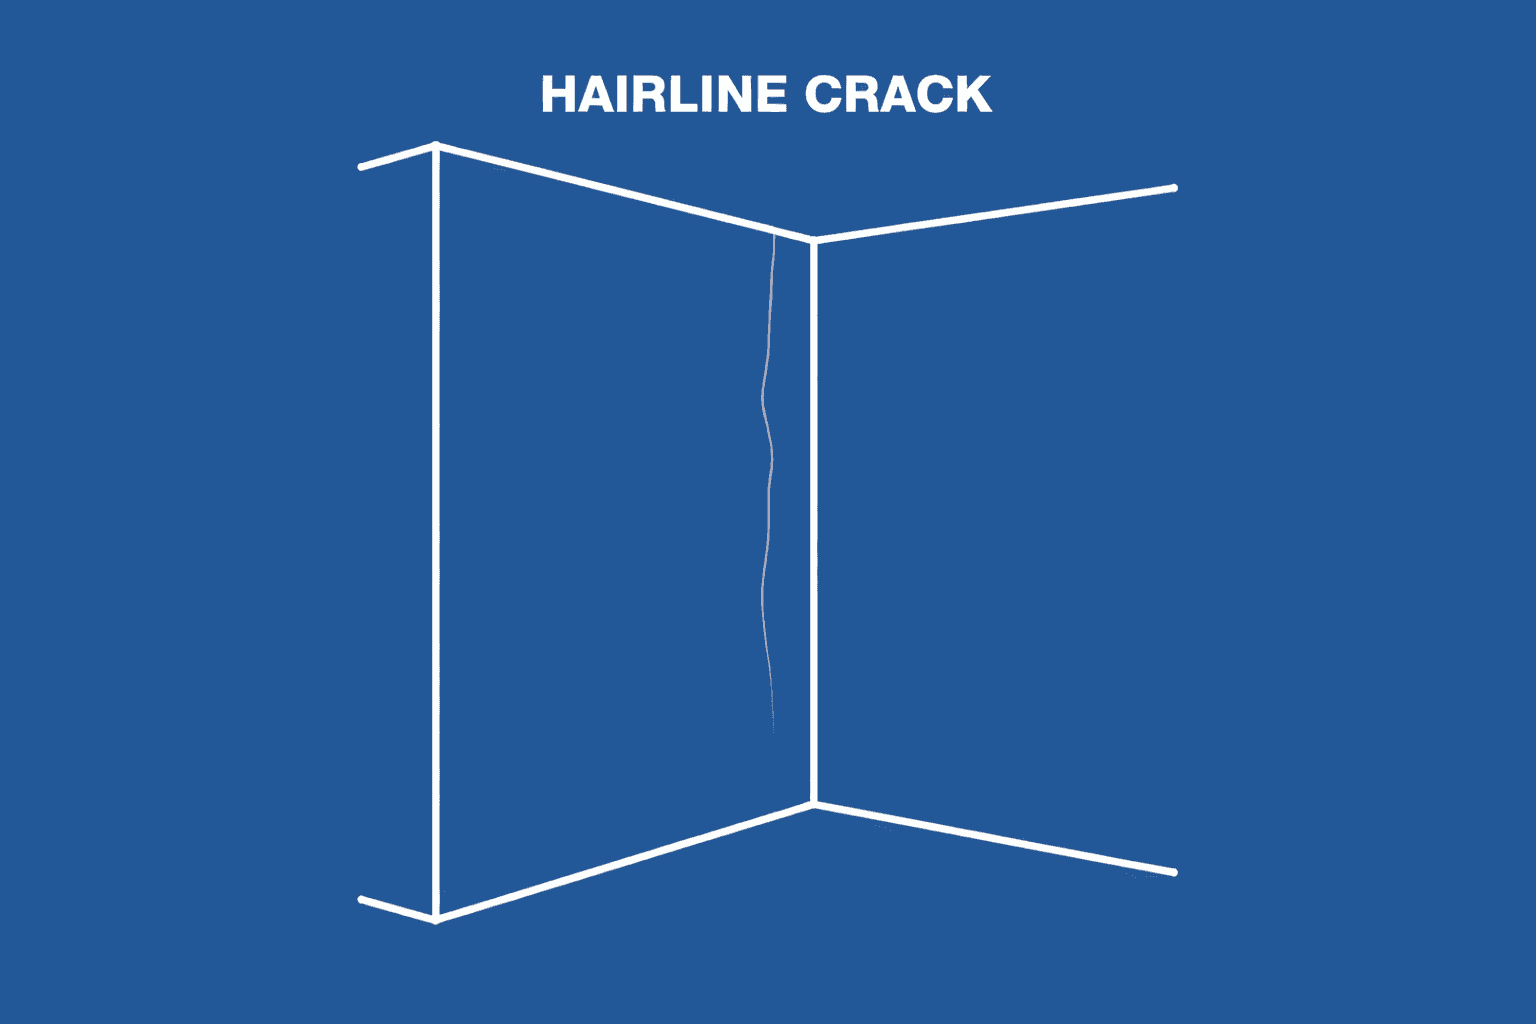
These are the most common type of wall cracks and are usually less than 1/16th of an inch wide. They are often superficial, appearing in the paint layer or the top skim coat of plaster or drywall. Hairline cracks are typically straight or follow the lines of the wall, such as along seams or corners. They rarely indicate a structural problem. Their presence is often attributed to the normal settling of a house, minor temperature-related expansion and contraction, or imperfections in the finishing process.

Lath Cracks (plaster Walls)

In older homes with plaster and lath walls, you might see cracks that follow the pattern of the underlying wooden lath. These cracks occur because the lath expands and contracts with humidity changes, and the plaster, being less flexible, cracks along these lines of movement. These cracks are generally not a structural concern, but they can be more challenging to repair seamlessly than drywall cracks.

Settlement Cracks: Signs Of A Shifting Foundation

These cracks are often wider than hairline cracks and can appear diagonally, typically running from the corner of a window or door opening upwards or downwards. They can also be wider at one end than the other. Settlement cracks are a direct result of the foundation shifting or the house settling unevenly. While some minor settlement is normal, significant or rapidly widening settlement cracks can indicate a more serious foundation issue that requires professional attention.

Stress Cracks: Related To Structural Load

These cracks can appear in areas where the wall is under significant structural load, such as above wide openings or in load-bearing walls. They might be wider than hairline cracks and can indicate that the framing or structural support is not adequately handling the weight. These require careful evaluation by a professional.

Cracks From Water Damage

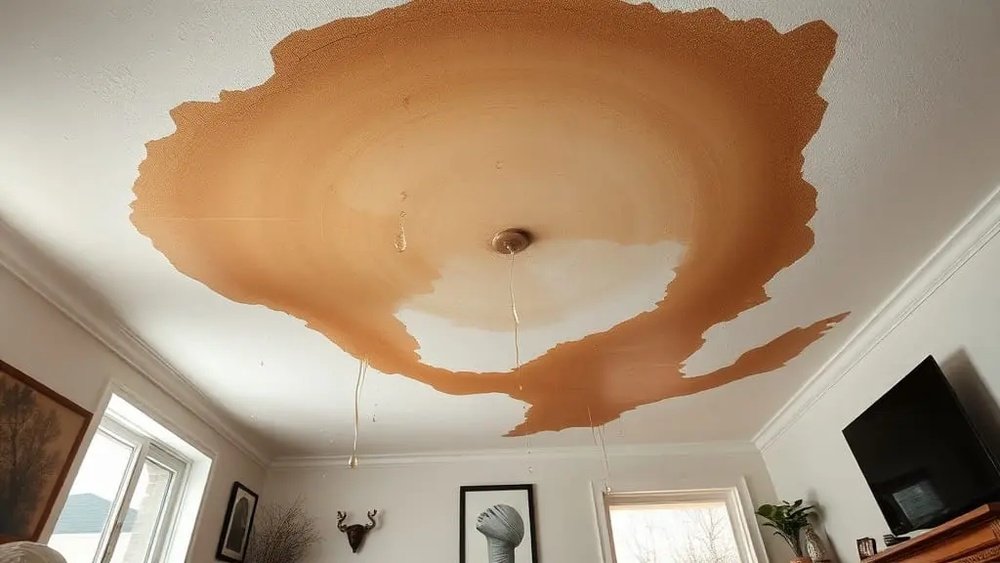
Water is a pervasive enemy of building materials. If a crack is accompanied by discoloration, staining, or dampness, it is likely due to a water issue. Water can weaken drywall, plaster, and the underlying framing, leading to sagging, crumbling, and cracking. The source of the water (e.g., a leaky pipe, roof leak, or poor drainage) must be identified and fixed before repairing the wall damage.

Hairline Cracks In Wall Normal Or Not

Credit: buckeyebasementsolutions.com

When Hairline Cracks Become A Concern: Warning Signs

While most hairline cracks are harmless, certain characteristics can transform them from minor annoyances into indicators of potentially serious underlying issues. Vigilance and careful observation are key to distinguishing between the two.

Width And Depth

The most obvious indicator is the width of the crack. If a crack exceeds 1/8th of an inch (approximately 3mm), it warrants closer inspection. Cracks that are deep enough to feel a significant indentation with your fingernail, or where you can see through to the other side of the wall, are also cause for concern. These wider or deeper fissures suggest more significant stress or material failure than simple surface imperfections.

Crack Patterns And Location

The pattern and location of cracks are critical. A single, isolated hairline crack in the middle of a wall is usually insignificant. However, a series of interconnected cracks, or cracks that form a stair-step pattern along the mortar joints of brickwork (if applicable), can suggest structural movement. Cracks that appear symmetrically on opposite walls or ceilings can also indicate larger-scale settling. Pay special attention to cracks that radiate from corners of doors and windows, as these are common stress points.

Active Vs. Stable Cracks

A crucial factor is whether a crack is active or stable. A stable crack is one that has not changed in size or appearance over a period of months or even years. An active crack, on the other hand, is one that is visibly growing wider, longer, or deeper. To monitor this, you can place a small piece of tape across the crack, marking the ends and date. If the tape breaks or the crack extends beyond the tape, it is active and requires immediate professional assessment.

Associated Signs Of Damage

Look for any associated signs of damage around the crack. This includes:

  • Peeling or bubbling paint: This can indicate moisture issues or movement behind the surface.
  • Sagging ceilings or walls: This is a clear sign of structural distress.
  • Doors or windows that are difficult to open or close: This suggests the frame is warping due to foundation or structural movement.
  • Visible mold or mildew: This points to moisture problems that need addressing.
  • Cracks in adjacent areas: If you see cracks appearing in multiple locations simultaneously, it suggests a widespread issue.
Hairline Cracks In Wall Normal Or Not

Credit: mainmark.co.uk

The Role Of Building Materials: Drywall Vs. Plaster

The type of wall material significantly influences how cracks form and what they signify. Understanding the properties of drywall and plaster can help you better interpret the cracks you observe.

Drywall (gypsum Board)

Drywall is the most common interior wall finish in modern construction. It consists of gypsum plaster pressed between two thick sheets of paper.

  • Seam Cracks: These occur along the taped and mudded joints between drywall panels. They often result from improper taping, drying shrinkage of the joint compound, or minor structural movement. These are typically hairline and can be repaired relatively easily.
  • Nail Pops/Screw Pops: As wood framing expands and contracts with humidity, it can push the drywall fasteners (nails or screws) outward. This creates a small bulge or crack around the fastener head. These are common and usually cosmetic.
  • Impact Cracks: Drywall is susceptible to cracking from direct impacts. These cracks can be sharp and localized.
  • General Surface Cracks: Brittle by nature, drywall can develop fine surface cracks due to general stress or aging.

Plaster And Lath

This older construction method uses thin strips of wood (lath) nailed to wall studs, with multiple layers of plaster applied over the lath to create a smooth, hard surface.

  • Lath Movement Cracks: As mentioned earlier, the wooden lath expands and contracts. This movement can cause the plaster to crack along the lines of the lath. These are often fine, irregular cracks.
  • Plaster Deterioration: Over time, the plaster itself can become brittle and chalky, leading to fine, powdery cracks.
  • Larger Plaster Cracks: If the lath has significantly warped or detached, or if there’s been substantial structural movement, larger, more significant cracks can develop in the plaster. These may show crumbling plaster.

Comparison of Crack Behavior:

FeatureDrywallPlaster and Lath
**Common Cracks**Seam cracks, nail/screw pops, impact cracksLath movement cracks, surface powdering
**Width**Typically hairline, can be wider with impactOften hairline, can be wider with lath issues
**Pattern**Along seams, around fasteners, sharp linesIrregular, follows lath lines, can be spiderweb
**Repair Ease**Generally easier, requires filling and sandingCan be more complex, requires patching
**Structural Risk**Less prone to subtle structural indicationWider cracks can indicate lath/stud issues

Repairing Hairline Cracks: Diy Vs. Professional

The decision to repair hairline cracks yourself or hire a professional depends on the perceived cause, the extent of the damage, and your own DIY skill level. For minor, cosmetic cracks, DIY solutions are often effective.

Diy Repair For Minor Cracks

For simple hairline cracks that you’ve identified as non-structural and stable, several DIY methods can restore a smooth finish.

  • Clean the Area: Thoroughly clean the crack and the surrounding area to remove any dust, dirt, or loose paint. A damp cloth or a soft brush works well.
  • Widen Slightly (Optional): For very fine cracks, you can gently use a utility knife or a putty knife to slightly widen the crack into a “V” shape. This helps the filler material adhere better.
  • Apply Filler: Use a spackling compound or joint compound specifically designed for drywall or plaster repair. Apply it with a putty knife, pressing it firmly into the crack.
  • Smooth and Level: Scrape off any excess compound, ensuring the surface is smooth and level with the wall.
  • Sand: Once the compound is completely dry (follow product instructions), lightly sand the area with fine-grit sandpaper until it is flush with the wall.
  • Prime and Paint: Apply a coat of primer to seal the repaired area, then paint to match the rest of the wall.

Pro Tip: For cracks in plaster walls, consider using a plaster repair compound as it offers better compatibility with the existing material.

When To Call A Professional

There are several scenarios where calling a professional is the wisest course of action.

  • Worrying Crack Characteristics: If cracks are wider than 1/8th inch, actively growing, diagonal, or follow a stair-step pattern.
  • Multiple Cracks: If you notice numerous cracks appearing simultaneously across different areas of the house.
  • Associated Damage: If cracks are accompanied by sagging, water stains, or issues with doors and windows.
  • Structural Concerns: If you suspect the cracks are related to foundation movement, framing issues, or other structural problems.
  • Lack of Confidence: If you are unsure about the cause or how to properly repair the crack, it’s better to err on the side of caution.

Professionals, such as structural engineers or experienced general contractors, have the expertise to diagnose the root cause of significant cracks. A structural engineer can assess the foundation and overall building integrity, while a contractor can advise on and perform necessary repairs to the wall structure itself.

Case Studies: Real-world Examples Of Wall Cracks

Examining real-world scenarios can provide valuable context for understanding wall cracks. These examples illustrate how different causes lead to distinct crack appearances and outcomes.

Case Study 1: The New Build Settlement

Scenario: A homeowner in a newly constructed house (1 year old) noticed several thin, hairline cracks appearing along the corners of living room windows and doors, as well as a few faint lines running vertically in the center of some walls.

Analysis: The house was still undergoing its initial settling period. The weight of the structure was compacting the soil beneath the foundation, causing minor, uniform movement. The cracks around openings were typical stress points where the drywall met the framing. The faint vertical lines were likely due to slight shrinkage of the drywall joint compound as it fully cured.

Resolution: The homeowner monitored the cracks for six months. Since they did not widen or change, they were deemed cosmetic. The homeowner then followed a DIY repair process: cleaning, filling with spackling compound, sanding, priming, and painting. The repairs held perfectly, and no further cracks appeared. This is a classic example of normal house settling.

Case Study 2: The Leaky Roof And Sagging Ceiling

Scenario: An older home developed a significant crack in the ceiling of the master bedroom, accompanied by visible sagging. The crack was about 1/4 inch wide and had darkened edges.

Analysis: Upon investigation, it was discovered that a slow leak from the roof had been seeping into the ceiling joists and drywall for an extended period. The moisture had weakened the drywall and the framing, causing it to sag under its own weight and eventually crack. The dark edges indicated water staining.

Resolution: This required professional intervention. First, the roof leak was repaired. Then, a contractor assessed the damage. The sagging drywall was removed, and the damaged joists were reinforced. New drywall was installed, taped, mudded, sanded, primed, and painted. This case highlights how moisture can exacerbate even minor structural issues, turning a potential hairline crack into a significant problem.

Case Study 3: The Humid Basement Wall

Scenario: A homeowner in a region with high humidity noticed fine, irregular cracks appearing on the plaster walls of their basement. The cracks felt slightly rough to the touch and were accompanied by a faint musty smell.

Analysis: The high humidity in the basement was causing the wooden lath behind the plaster to expand and contract significantly. The relatively inflexible plaster could not accommodate this constant movement, resulting in numerous fine, web-like cracks. The musty smell indicated the high moisture levels contributing to the problem.

Resolution: While the cracks themselves weren’t immediately a structural threat, the underlying humidity issue needed addressing. The homeowner installed a dehumidifier in the basement and ensured proper ventilation. Once the humidity levels stabilized, the fine cracks were repaired using a flexible caulk designed for plaster, followed by painting. This demonstrated how environmental factors can create persistent cracking issues.

Frequently Asked Questions

What Is The Maximum Width For A Crack To Be Considered ‘normal’?

Generally, a crack less than 1/16th of an inch (about 1.5 mm) is considered a hairline crack and is often normal, especially in new construction or older homes experiencing minor settling. If the crack is wider than 1/8th of an inch (about 3 mm), or if you can easily fit a coin into it, it warrants closer inspection by a professional.

Can Hairline Cracks Be A Sign Of Foundation Problems?

Yes, they can be, although not always. Diagonal cracks, stair-step cracks in brickwork, or cracks that appear symmetrically on opposite walls are more likely to indicate foundation issues. Isolated hairline cracks, particularly those running horizontally or vertically in the middle of a wall, are less likely to be related to foundation problems. Always consider the crack’s pattern, width, and location in conjunction with other signs like doors sticking or uneven floors.

How Long Does It Take For A House To Stop Settling And For Cracks To Stabilize?

The most significant settling usually occurs within the first 1-3 years after construction. However, minor settling and associated cracking can continue intermittently for much longer, especially in response to significant environmental changes (droughts, heavy rains) or nearby construction. Cracks related solely to initial settling typically stabilize within this early period. If cracks continue to appear or widen years later, other factors may be at play.

Is It Safe To Live In A House With Hairline Cracks?

For the vast majority of hairline cracks that are cosmetic and stable, yes, it is perfectly safe to live in your home. These are common and often do not indicate any compromise to the structural integrity of the building. However, if you notice any of the warning signs mentioned previously (significant width, active growth, associated damage), it’s prudent to have the situation evaluated by a qualified professional to ensure there isn’t an underlying safety concern.

Can I Just Paint Over Hairline Cracks?

While you can paint over them, it’s not the recommended long-term solution. Painting over a crack without proper filling and preparation will only mask the issue temporarily. The crack will likely reappear through the paint as the underlying cause (settling, movement, etc.) persists. For a lasting repair, cracks should be filled with an appropriate patching compound, sanded smooth, primed, and then painted. This ensures a durable and aesthetically pleasing finish.

The appearance of hairline cracks in your walls doesn’t automatically signal disaster. Often, they are simply the wall’s way of responding to the natural processes of a building, settling, adapting to environmental shifts, and the inherent properties of its materials.

By carefully observing the characteristics of these cracks, their width, pattern, location, and whether they are actively changing, you can make an informed initial assessment. For minor, stable, cosmetic cracks, DIY repair is often a straightforward and effective solution. However, any crack exhibiting worrying signs, such as significant width, active growth, or association with other structural distress, warrants the expertise of a professional.

Addressing potential issues promptly, whether through your own efforts or professional help, is key to maintaining the beauty and structural soundness of your home for years to come.

Heat Pump Feels Cold

Heat Pump Feels Cold

When your heat pump blows cold air, especially during the colder months when you expect cozy warmth, it can be a deeply unsettling experience. This seemingly paradoxical behavior can leave homeowners confused and concerned about their comfort and energy bills.

A heat pump’s primary function is to transfer heat, moving it from one place to another. In winter, it extracts heat from the outside air (even when it’s cold) and brings it inside. In summer, it reverses the process, removing heat from your home and expelling it outdoors.

So, when you feel a chill instead of warmth, it signals a disruption in this essential process.

Understanding why a heat pump might feel cold is crucial for diagnosing the problem and finding a swift solution. It’s not always a sign of a major malfunction; sometimes, it’s a simple setting adjustment or a minor issue. However, it can also indicate more significant mechanical or electrical problems that require professional attention.

This article will explore the common reasons behind a heat pump blowing cold air, offer troubleshooting steps, and guide you on when to call for expert help, ensuring your home remains comfortable year-round.

Key Takeaways

  • Thermostat Settings: Incorrect thermostat settings, such as the emergency heat mode or fan settings, are common culprits for a heat pump blowing cold air.
  • Defrost Cycle: Heat pumps in cold climates periodically enter a defrost cycle to remove ice buildup from the outdoor unit, which temporarily blows cooler air.
  • Refrigerant Issues: Low refrigerant levels or leaks can impair the heat pump’s ability to absorb and transfer heat effectively, leading to cold air.
  • Airflow Problems: Restricted airflow due to dirty filters, blocked vents, or fan motor issues prevents the heat pump from circulating warm air properly.
  • Outdoor Unit Issues: Problems with the outdoor unit, such as ice buildup, a malfunctioning fan, or damaged components, can halt heat absorption.
  • Electrical Malfunctions: Tripped breakers, faulty wiring, or issues with the capacitor or compressor can cause the heat pump to stop heating.
  • Auxiliary Heat: If the heat pump can’t generate enough heat on its own, it relies on auxiliary heat (often electric resistance coils), which might feel less warm or take longer to heat up.
  • Professional Diagnosis: For complex issues like refrigerant leaks or compressor problems, professional HVAC technicians are essential for safe and effective repairs.
Heat Pump Feels Cold

Credit: coldfactor.com

Common Reasons For A Heat Pump Blowing Cold Air

When your heat pump behaves unexpectedly, it’s usually due to one or a combination of factors. These can range from simple user errors to more complex mechanical failures. Understanding these common causes is the first step toward resolving the issue and restoring comfortable temperatures in your home.

Thermostat Settings And Malfunctions

The thermostat is the brain of your HVAC system, controlling when and how it operates. Misconfigured settings are remarkably common reasons for a heat pump blowing cold air, especially after a power outage or a change in seasons.

  • Incorrect Mode: The most frequent issue is the thermostat being set to the wrong mode. If it’s accidentally set to “Cool” instead of “Heat,” it will, of course, blow cool air. Similarly, if it’s in “Fan Only” mode, it will circulate air without heating it.
  • Emergency Heat Engaged: Heat pumps have an “Emergency Heat” or “Emergency Heat ON” setting. This mode is designed to activate when the primary heat pump system is not functioning optimally, typically in very cold temperatures. It usually engages electric resistance heating strips, which are less efficient and produce air that feels less intensely hot than the heat pump’s output. If this mode is accidentally engaged, the air might feel cool or only slightly warm.
  • Fan Settings: The thermostat’s fan setting can also play a role. If the fan is set to “On,” it will continuously circulate air, even when the heating system isn’t actively running. This can lead to feeling cool air when the system is in a rest cycle or during the defrost mode. Setting the fan to “Auto” ensures it only runs when the heating or cooling system is actively engaged.
  • Calibration Issues: Older or malfunctioning thermostats can also be a problem. If the thermostat is not accurately reading the indoor temperature, it might incorrectly signal the heat pump to turn on or off, or not reach the desired temperature.

The Defrost Cycle In Action

Heat pumps operate by extracting heat from the outside air. In colder climates, this process can lead to frost or ice accumulating on the outdoor unit’s coils. To maintain efficiency, heat pumps have an automatic defrost cycle. This is a normal and essential function, but it can be mistaken for a malfunction.

During the defrost cycle, the heat pump temporarily reverses its operation, acting like an air conditioner. It sends warm refrigerant to the outdoor coils to melt the ice. This means that for a period of 5 to 15 minutes, the system will blow cooler air from the indoor vents.

  • How to Identify: You might notice the outdoor unit fan stops running, and the indoor vents blow air that feels cooler than usual, or even cold. After the cycle, the system will automatically return to heating mode.
  • Frequency: The defrost cycle typically kicks in when outdoor temperatures drop below freezing (around 25-40°F or -4 to 4°C) and humidity is present. It can occur several times a day.
  • Potential Problems: While the defrost cycle is normal, if it runs too frequently or for too long, it could indicate an issue with the defrost control board, a low refrigerant charge, or a dirty outdoor coil that impedes heat transfer.

Refrigerant Leaks And Low Levels

Refrigerant is the lifeblood of any heat pump system. It’s the substance that absorbs heat from the outside air and releases it inside (or vice versa). If the refrigerant level is low, or if there’s a leak, the heat pump cannot efficiently transfer heat.

  • How it Affects Performance: Low refrigerant means the system can’t absorb enough heat from the outside air. Consequently, the air blown into your home will be much cooler than expected, or even cold. The system may also struggle to reach your desired temperature, leading to longer run times and increased energy consumption.
  • Signs of Low Refrigerant:
  • Icing on Outdoor Coils: A common symptom of low refrigerant is excessive ice buildup on the outdoor unit’s coils, even outside of the normal defrost cycle.
  • Reduced Heating Capacity: The most direct sign is simply not getting enough heat.
  • Hissing Noises: Refrigerant leaks can sometimes produce audible hissing sounds.
  • High Energy Bills: The system works harder to compensate for the lack of heat transfer, leading to higher electricity usage.
  • Addressing Refrigerant Issues: Refrigerant leaks are not a DIY fix. They require a certified HVAC technician to locate the leak, repair it, and recharge the system with the correct amount and type of refrigerant. Handling refrigerants without proper certification is illegal and dangerous.

Airflow Restrictions

Proper airflow is critical for any HVAC system to function efficiently. If air cannot move freely through the system, the heat pump cannot effectively deliver heated air into your home. Several factors can restrict airflow:

  • Dirty Air Filters: This is by far the most common cause of airflow problems. A clogged air filter chokes off the air supply to the indoor unit (air handler). This not only reduces heating and cooling but can also cause the evaporator coil to freeze up, further hindering performance.
  • Recommendation: Check and replace your air filter regularly, typically every 1-3 months, depending on the filter type and household conditions (pets, allergies, etc. ).
  • Blocked Vents and Registers: Furniture, curtains, or other obstructions placed in front of supply or return vents can impede airflow. Ensure all vents are clear and open.
  • Ductwork Issues: Leaky, collapsed, or poorly insulated ductwork can significantly reduce the amount of conditioned air reaching your rooms. Over time, ductwork can become damaged or disconnected.
  • Fan Motor Problems: The blower motor in the indoor air handler is responsible for pushing air through the system. If this motor is failing or has failed, airflow will be significantly reduced or stopped altogether, leading to cold air or no air movement.
  • Dirty Evaporator Coil: Even with a clean filter, the indoor evaporator coil can become dirty over time. This buildup acts like another filter, restricting airflow and reducing heat transfer efficiency.

Outdoor Unit Problems

The outdoor unit of a heat pump is exposed to the elements and can be susceptible to various issues that impact its ability to gather heat.

  • Ice Buildup: As mentioned with the defrost cycle, excessive ice on the outdoor coils is a major problem. If the defrost cycle isn’t working correctly, or if there’s a significant issue like low refrigerant, the ice can become so thick that it blocks airflow and prevents the unit from absorbing heat.
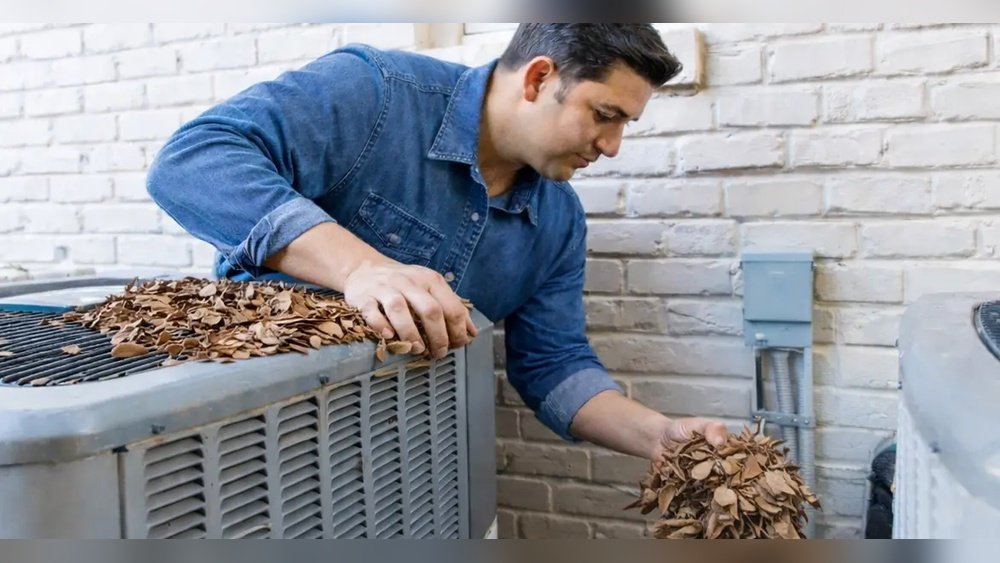
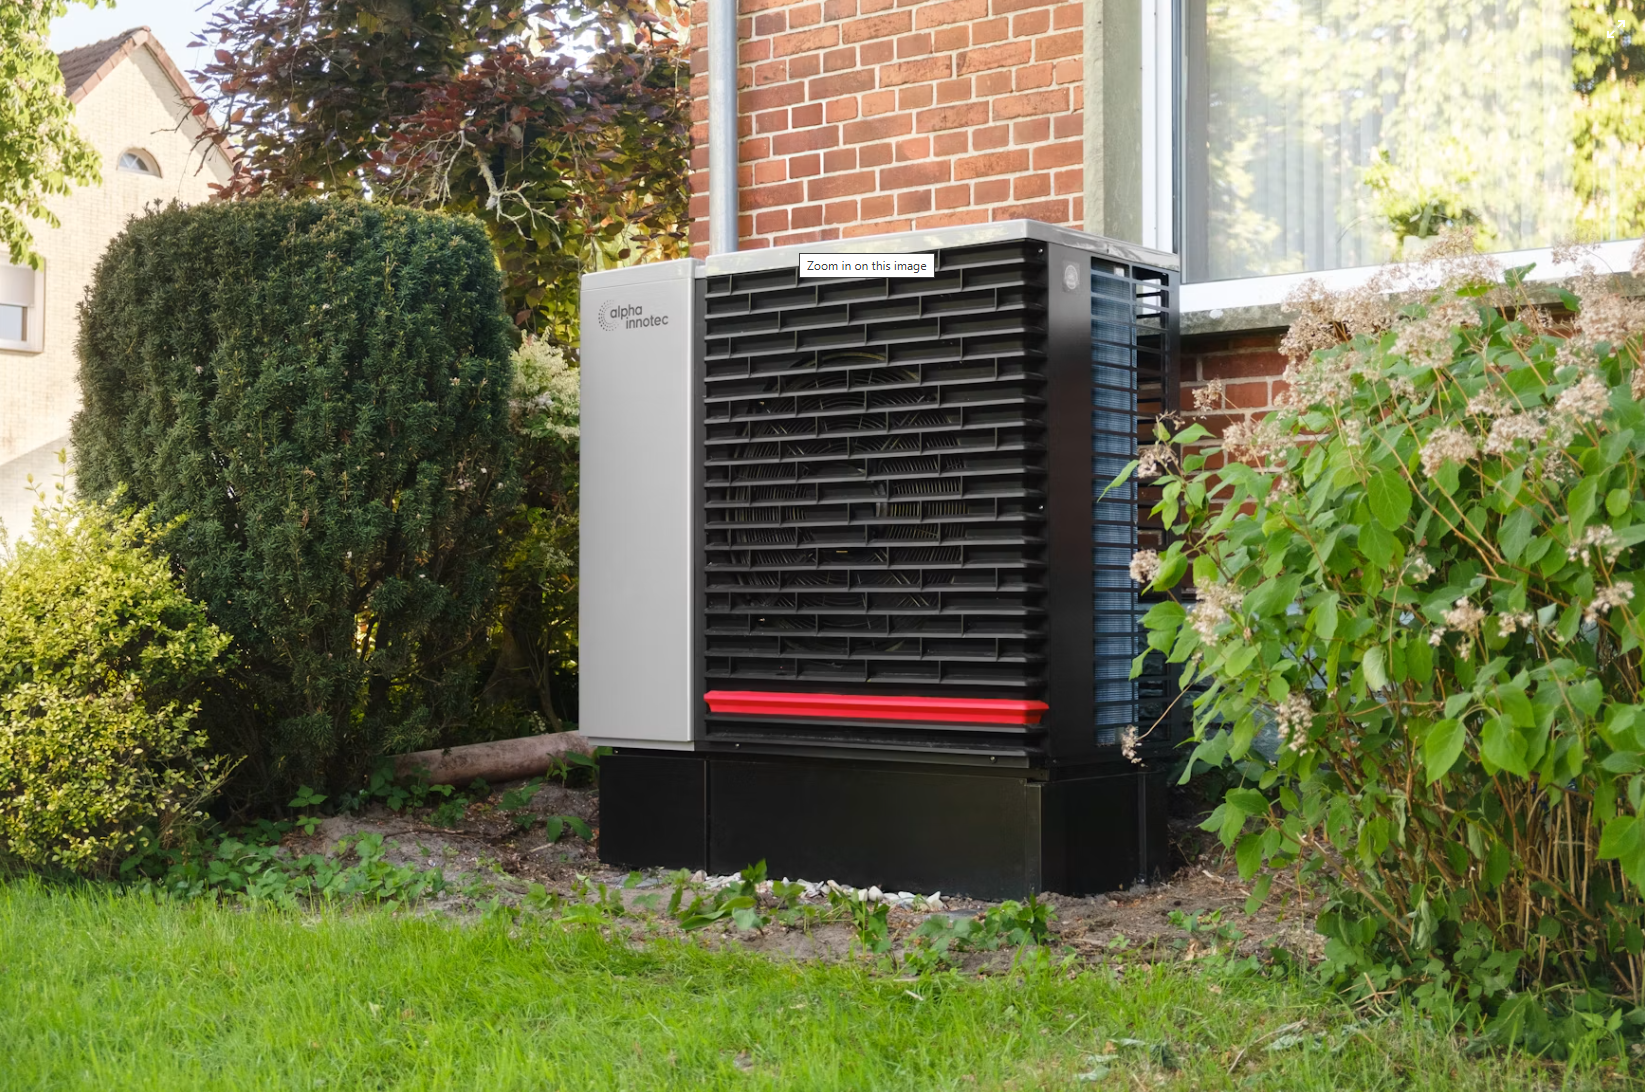
  • Obstructed Airflow: Anything blocking the airflow around the outdoor unit, such as overgrown vegetation, debris, or snow accumulation, will prevent it from efficiently drawing in outside air to extract heat. Keep the area around the outdoor unit clear.
  • Outdoor Fan Motor Failure: The fan in the outdoor unit is crucial for drawing air across the coils. If this fan motor fails, the unit cannot effectively transfer heat, and the system will likely shut down or blow cool air.
  • Contactor Issues: The contactor is an electrical switch that controls power to the outdoor unit’s compressor and fan. If it malfunctions, the outdoor unit may not turn on at all.

Electrical Malfunctions

Heat pumps are complex systems with numerous electrical components. A failure in any of these can cause the system to stop heating or blow cold air.

  • Tripped Circuit Breaker: The most basic electrical issue is a tripped breaker. This can happen due to an overload, short circuit, or power surge. Check your electrical panel and reset any tripped breakers. If a breaker trips repeatedly, it indicates a more serious electrical problem that needs professional diagnosis.
  • Faulty Capacitor: Capacitors help start and run the motors in the heat pump (compressor and fan motors). A weak or failed capacitor can prevent these motors from starting or running correctly, leading to a lack of heating.
  • Compressor Failure: The compressor is the heart of the heat pump. If the compressor fails, the entire system will stop working, and you’ll likely get no heat at all, or only air moved by the indoor fan. Compressor failures are often expensive to repair.
  • Wiring Issues: Loose or damaged wiring connections can disrupt the flow of electricity to various components, causing intermittent or complete system failure.

Auxiliary Heat Not Engaging Or Malfunctioning

Most heat pumps are paired with a secondary or auxiliary heat source, often electric resistance heating strips located in the indoor air handler. This backup system is designed to kick in when:

  • The outdoor temperature drops too low for the heat pump to efficiently extract heat.
  • The heat pump is in its defrost cycle.
  • The thermostat calls for heat and the heat pump cannot meet the demand quickly enough.

If the auxiliary heat fails to engage or is not working correctly, the air coming from your vents will be significantly cooler than expected, especially during very cold weather.

  • Reasons for Auxiliary Heat Failure:
  • Thermostat Settings: The thermostat may not be programmed correctly to engage auxiliary heat when needed.
  • Wiring Issues: Problems with the wiring connecting the thermostat to the auxiliary heat strips.
  • Tripped Safety Switch: A safety switch within the air handler might have tripped, preventing the electric heat from operating.
  • Burned-out Heating Elements: The electric resistance elements themselves can burn out over time.
  • Difference in Heat: It’s important to note that auxiliary heat (especially electric resistance) typically produces air that is not as hot as the air from a functioning heat pump in milder temperatures. It might feel only “warm” rather than “hot,” which can sometimes be mistaken for a problem if the homeowner isn’t aware of the difference.
Heat Pump Feels Cold

Credit: www.comfortprosnc.com

Troubleshooting Steps For A Cold Heat Pump

Before calling a professional, there are several troubleshooting steps you can take yourself. These simple checks can often resolve the issue or at least help you provide better information to your HVAC technician.

1. Check Your Thermostat Settings

This is the easiest and most common fix.

  • Mode: Ensure your thermostat is set to Heat. Verify it’s not accidentally set to Cool, Fan Only, or Off.
  • Temperature: Make sure the set temperature is higher than the current room temperature. If it’s set too low, the system won’t call for heat.
  • Fan Setting: Set the fan to Auto. If it’s set to On, it will circulate air constantly, potentially blowing cool air when the heating cycle isn’t active.
  • Emergency Heat: If your thermostat has an “Emergency Heat” or “EM Heat” setting, ensure it’s not engaged unless there’s a true emergency and the main heat pump is not working. If it is engaged, switch it back to Auto or Heat mode.

2. Inspect The Air Filter

A dirty air filter is a major cause of reduced airflow and can lead to the evaporator coil freezing, which severely impacts heating.

  • Locate: Find your air filter. It’s usually located in the return air duct near the indoor unit (furnace or air handler).
  • Inspect: Pull out the filter and hold it up to a light source. If you can’t see light through it, or if it’s visibly clogged with dust and debris, it needs replacing.
  • Replace: Install a new filter of the correct size and MERV rating. Mark the date of replacement to help you remember for the future.

3. Check For Ice On The Outdoor Unit

If you suspect the defrost cycle is malfunctioning or there’s another issue causing ice buildup:

  • Visual Inspection: Carefully look at the outdoor unit’s coils. If they are covered in a thick layer of ice, this is a problem.
  • Clear Obstructions: Ensure there are no leaves, branches, snow, or other debris blocking the airflow around the outdoor unit. Trim back any overgrown vegetation.
  • Allow Defrost: If there’s minor icing, you can try turning the thermostat setting to Off for about 30 minutes to allow the system to enter a passive defrost mode (if the outdoor temperature is above freezing). Do not try to chip away ice with sharp objects, as this can damage the coils.

4. Verify Vents And Registers

Ensure that warm air can actually reach your living spaces.

  • Open Vents: Make sure all supply and return air vents in your home are open and not blocked by furniture, rugs, or curtains.
  • Listen for Airflow: Feel the air coming from the supply vents. Is it weak? Is there no air at all? This can indicate an airflow problem.

5. Check Your Circuit Breakers

An electrical issue could be preventing the system from running correctly.

  • Locate Panel: Find your main electrical panel.
  • Identify Breakers: Look for breakers labeled “Furnace,” “Air Handler,” “Heat Pump,” or similar.
  • Reset: If a breaker is tripped (usually in the middle position or “Off”), switch it completely to the “Off” position and then back to “On.”
  • Caution: If a breaker trips again immediately or frequently, do not keep resetting it. This indicates a serious electrical fault that requires professional attention.

6. Listen For Unusual Noises

Strange sounds can offer clues about the problem.

  • Hissing: Could indicate a refrigerant leak.
  • Grinding or Squealing: Often points to a failing motor (fan or compressor).
  • Buzzing: May signal an electrical issue, like a faulty capacitor or relay.

When To Call A Professional Hvac Technician

While basic troubleshooting can solve some issues, many heat pump problems require specialized knowledge, tools, and safety precautions. It’s crucial to know when to stop DIY efforts and contact a qualified professional.

Complex Electrical Issues

Problems like faulty capacitors, malfunctioning contactors, or issues with the control board often require diagnostic tools and electrical expertise. Attempting to repair these yourself can be dangerous due to the high voltages involved.

Refrigerant Leaks And Handling

Refrigerant is a hazardous substance. It requires EPA certification to handle legally and safely. If you suspect a refrigerant leak (indicated by icing, hissing sounds, or a significant drop in heating performance), a technician must:

  • Safely recover any remaining refrigerant.
  • Locate and repair the leak using specialized equipment.
  • Evacuate the system to remove air and moisture.
  • Recharge the system with the precise amount of the correct refrigerant type.

This is not a job for a homeowner.

Compressor Problems

The compressor is the most expensive component of a heat pump. Diagnosing and repairing compressor issues requires advanced knowledge and specialized tools. If the compressor has failed, replacement is often the only option, and this is a significant repair.

Air Handler Or Blower Motor Issues

If you suspect the indoor fan motor is failing or has failed, it needs professional diagnosis and replacement. A technician can determine if it’s a motor issue, a capacitor problem, or something else preventing the fan from working.

System Not Heating At All

If you’ve checked the thermostat, filter, and breakers, and there’s still no heat, especially during very cold weather, it’s time to call a pro. This could indicate a serious issue with the reversing valve, compressor, or a critical electrical component.

Intermittent Problems

If your heat pump works sometimes but not others, it can be tricky to diagnose. A technician has the experience to identify the root cause of intermittent failures, which could be related to failing electrical components, temperature sensors, or control board issues.

Safety Concerns

Any time you smell burning odors, hear loud or unusual noises, or suspect a gas leak (if your system has a gas furnace backup), immediately turn off the system at the breaker and call for professional service. Your safety is paramount.

Heat Pump Feels Cold

Credit: www.lombardienergy.com

Understanding Heat Pump Efficiency And Cold Weather Performance

Heat pumps are renowned for their energy efficiency, often delivering more heat energy than the electrical energy they consume. However, their efficiency and heating capacity are directly influenced by the outdoor temperature.

How Outdoor Temperature Affects Heat Pumps

  • Above 40°F (4°C): Heat pumps operate at peak efficiency and capacity. They can easily extract sufficient heat from the outside air to warm your home comfortably.
  • Between 25°F and 40°F (-4°C to 4°C): Efficiency begins to decrease slightly, but most modern heat pumps can still provide adequate heat. The system may enter defrost cycles more frequently.
  • Below 25°F (-4°C): The ability of the heat pump to extract heat from the air diminishes significantly. The air it *can* extract and transfer is cooler, and the unit works much harder. This is when auxiliary heat becomes increasingly important.

The Role Of Auxiliary Heat

When the outdoor temperature drops to a point where the heat pump can no longer efficiently heat your home on its own (often referred to as the balance point), the auxiliary heat source automatically engages.

  • Balance Point: This is the outdoor temperature at which the heat generated by the heat pump equals the heat loss from the building. Below this point, the auxiliary heat must supplement or take over. For many heat pumps, this balance point is around 30-40°F (-1 to 4°C), but it varies depending on the unit’s efficiency and your home’s insulation.
  • Auxiliary Heat Type: Most commonly, this is electric resistance heat, which directly converts electricity into heat. While effective, it’s much less energy-efficient than the heat pump’s operation and can lead to higher electricity bills. Some systems may use a gas furnace as auxiliary heat, offering a more efficient backup in very cold climates.
  • Perceived Warmth: Air from electric auxiliary heat strips is typically hotter than air from a heat pump operating in very cold weather. However, the *energy cost* is much higher. If your heat pump is struggling in cold weather and the auxiliary heat isn’t kicking in, the air might feel cooler than you expect.

Cold Climate Heat Pumps

Advancements in technology have led to the development of cold climate heat pumps. These units are specifically designed to operate more efficiently and effectively at much lower temperatures than traditional models.

  • Enhanced Technology: They often feature variable-speed compressors and advanced refrigerants that allow them to extract heat even from sub-zero outdoor temperatures.
  • Reduced Reliance on Auxiliary Heat: Cold climate heat pumps can maintain their heating capacity at lower outdoor temperatures, significantly reducing or even eliminating the need for less efficient auxiliary heat in many regions.
  • Installation Considerations: If you live in a region with consistently very cold winters, investing in a cold climate heat pump can offer substantial energy savings and improved comfort compared to a standard heat pump.

Maintenance Tips To Prevent Future Issues

Regular maintenance is key to ensuring your heat pump operates efficiently and reliably, minimizing the chances of it blowing cold air unexpectedly.

Regular Filter Changes

As emphasized earlier, this is the single most important maintenance task you can perform.

  • Frequency: Check your filter monthly and replace it as needed, typically every 1-3 months.
  • Impact: Prevents airflow restrictions, reduces strain on the fan motor, improves indoor air quality, and helps prevent coil freezing.

Annual Professional Tune-ups

Schedule at least one professional inspection and tune-up per year, ideally before the peak heating or cooling season. A qualified HVAC technician will:

  • Clean Coils: Clean both the indoor evaporator coil and the outdoor condenser coil.
  • Check Refrigerant Levels: Ensure the system is properly charged

Why Does My House Smell Like Fish

Why Does My House Smell Like Fish

The distinct, often unpleasant, aroma of fish can permeate a home, leaving residents and guests wondering about the source. This isn’t just a minor inconvenience; a persistent fishy smell can indicate underlying issues ranging from simple spoilage to more complex plumbing or even electrical problems.

Understanding the potential causes is the first step toward eliminating the odor and ensuring a healthy living environment.

This comprehensive guide will explore the myriad reasons why your house might smell like fish, offering practical solutions and preventative measures. We’ll cover everything from common culprits like spoiled food and stagnant water to less obvious sources such as electrical malfunctions and certain types of mold.

By the end, you’ll be equipped to identify the source of the smell and take the necessary steps to restore freshness to your home.

Key Takeaways

  • A fishy smell can originate from spoiled food, particularly seafood, in refrigerators, pantries, or garbage disposals.
  • Plumbing issues, including drain clogs, dry P-traps, and sewer gas leaks, are frequent sources of persistent fishy odors.
  • Electrical problems, such as overheating wiring or faulty appliances, can emit a distinct fish-like smell.
  • Certain types of mold and mildew, especially in damp areas, can produce an odor reminiscent of fish.
  • Even seemingly unrelated issues like pet waste or certain cleaning products can sometimes mimic a fishy smell.
  • Prompt identification and addressing the source are crucial for eliminating the odor and preventing potential hazards.
Why Does My House Smell Like Fish

Credit: www.youtube.com

Common Culprits: Food And Waste

The most immediate and common reason for a fishy smell in your home is related to food, especially if you’ve recently cooked or stored seafood. However, the problem can extend beyond fresh food to various waste disposal systems within your house.

Spoiled Food In Refrigerators And Pantries

It might seem obvious, but spoiled food is a primary suspect. Seafood, in particular, spoils quickly and develops a potent odor. Even if you haven’t recently cooked fish, other perishable items can break down and produce gases that might be mistaken for a fishy smell.

  • Check the Refrigerator: Thoroughly inspect all shelves, drawers, and the crisper. Look for forgotten leftovers, expired dairy products, or meats that may have gone bad. Don’t forget to check the door seals and any hidden corners.
  • Inspect the Pantry: While less common for fishy smells, expired canned goods or other forgotten perishables can also contribute to unpleasant odors.
  • Clean Spills: Small spills that have seeped into cracks or under drawers can harbor bacteria and cause persistent smells.

Garbage Disposals And Trash Cans

Your garbage disposal and trash cans are breeding grounds for bacteria and can quickly develop foul odors if not maintained properly.

  • Garbage Disposal: Food particles, especially those from meat and fish, can get trapped in the disposal’s blades and drain. This decaying matter emits a strong, often fishy, odor.
  • Cleaning Tip: Run cold water while grinding food scraps. Periodically clean the disposal by grinding ice cubes, followed by citrus peels or baking soda and vinegar.
  • Trash Cans: Regular emptying is essential, but even clean trash cans can retain odors.
  • Deep Cleaning: Wash trash cans periodically with hot, soapy water and a disinfectant. Ensure they are completely dry before putting in new liners.
  • Odor Absorbers: Place baking soda or activated charcoal at the bottom of the can to absorb smells.

Pet Waste

While not directly fish-related, the smell of pet waste, especially if left uncleaned or if a pet has had an accident in an unusual spot, can sometimes be confused with a fishy odor. This is particularly true for cat litter boxes that aren’t cleaned frequently enough.

  • Immediate Cleanup: Scoop litter boxes daily and clean up accidents promptly.
  • Enzyme Cleaners: Use specialized enzyme cleaners to break down the organic matter in pet waste, eliminating odors at their source.
Why Does My House Smell Like Fish

Credit: www.youtube.com

Plumbing Problems: The Hidden Culprits

When food spoilage is ruled out, the next major category of potential causes lies within your home’s plumbing system. Leaks, clogs, and improperly functioning traps can allow unpleasant gases to enter your living space.

Dry Or Faulty P-traps

Every drain in your house (sinks, showers, tubs, floor drains) is equipped with a P-trap. This U-shaped pipe is designed to hold a small amount of water, creating a seal that prevents sewer gases from backing up into your home.

  • How it Works: When water flows down the drain, it fills the trap. When water flow stops, some water remains, blocking gases.
  • Why it Dries Out: Drains that are infrequently used, such as those in guest bathrooms, basements, or laundry rooms, can allow the water in the P-trap to evaporate over time. This evaporation breaks the seal, allowing sewer gases (which can smell fishy) to escape.
  • Solution: Run water down infrequently used drains for a minute or two every week or two to replenish the water seal.

Clogged Drains And Pipes

A clogged drain doesn’t just slow down water flow; it can trap decaying organic matter (hair, soap scum, food particles) that decomposes and produces foul odors. If the clog is significant, these gases can be pushed back up through the drain.

  • Symptoms: Slow draining, gurgling sounds, and unpleasant smells emanating from the drain.
  • DIY Solutions:
  • Boiling Water: Pouring boiling water down the drain can help dissolve grease and soap scum.
  • Baking Soda and Vinegar: A mixture of baking soda followed by vinegar can help break down clogs and deodorize.
  • Plunger: A good quality plunger can often dislodge minor clogs.
  • Professional Help: For stubborn clogs, a plumber may need to use a drain snake or hydro-jetting to clear the obstruction.

Sewer Gas Leaks

A more serious plumbing issue is a sewer gas leak. These gases are produced by decomposing waste in the sewer system and can contain harmful compounds like hydrogen sulfide, which has a characteristic rotten egg or fishy smell.

  • Sources of Leaks:
  • Cracked or broken sewer pipes.
  • Loose pipe joints.
  • Improperly sealed vents.
  • Failed P-traps (as mentioned above).
  • Health Concerns: Sewer gases can be toxic, causing headaches, nausea, and respiratory issues. They can also be flammable.
  • Action: If you suspect a sewer gas leak, vacate the area immediately and call a qualified plumber or your local utility company. Do not attempt to fix this yourself.

Septic System Issues (if Applicable)

For homes not connected to a municipal sewer system, a septic tank is used. Problems with the septic system can also lead to fishy odors.

  • Full or Leaking Tank: If the septic tank is full or has a leak, untreated sewage can back up into the plumbing system or seep into the ground, releasing unpleasant gases.
  • Vent Blockages: Blocked septic vents can prevent gases from escaping properly, forcing them back into the house.
  • Maintenance: Septic tanks require regular pumping (typically every 3-5 years) and inspection to prevent these issues.

Electrical Malfunctions: An Unexpected Source

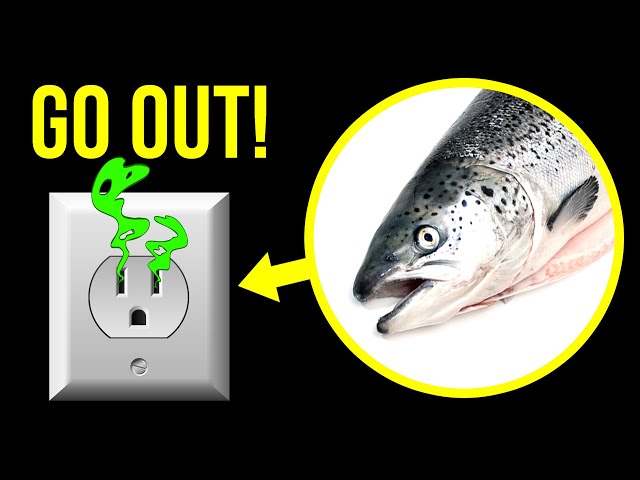
The smell of fish is not typically associated with electricity, yet electrical issues are a surprisingly common cause of this specific odor. This smell is often described as slightly sweet or fish-like and is a critical warning sign.

Overheating Wiring

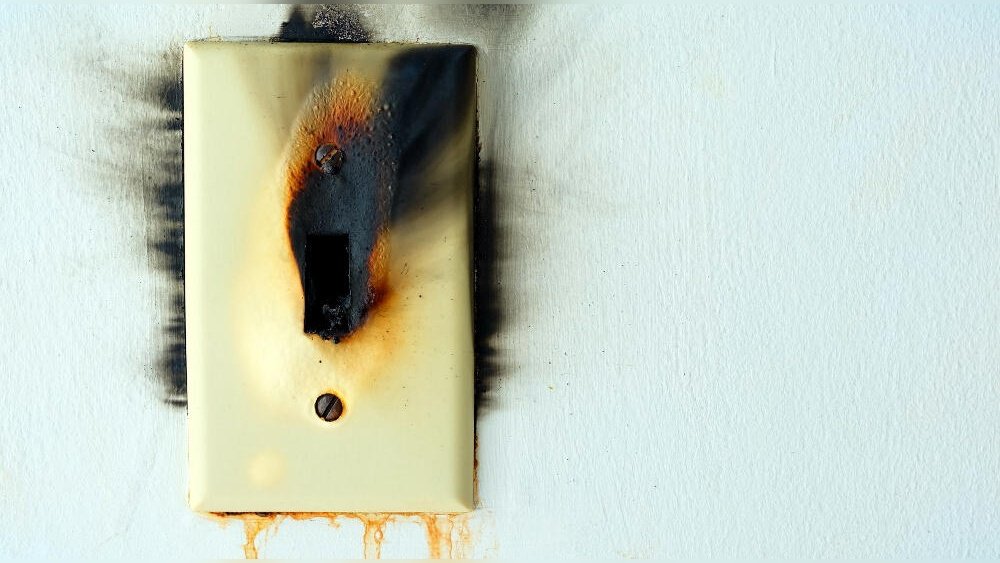
When electrical wiring is overloaded, damaged, or has loose connections, it can overheat. The plastic insulation around the wires begins to melt and degrade, releasing a distinct, pungent odor that many people describe as fishy.

  • Causes:
  • Using extension cords as permanent wiring.
  • Overloaded circuits.
  • Faulty circuit breakers or outlets.
  • Rodent damage to insulation.
  • Warning Signs:
  • The fishy smell is often strongest near outlets, switches, or light fixtures.
  • Discoloration or scorching around electrical components.
  • Flickering lights.
  • Action: If you detect this smell, immediately turn off the power to the affected circuit at the breaker box and call a licensed electrician. Do not try to diagnose or fix electrical problems yourself, as they pose a serious fire hazard.

Faulty Appliances

Certain appliances, particularly those with heating elements or motors, can also produce a fishy smell when they malfunction.

  • Specific Appliances:
  • Dishwashers: Food debris left in the filter or a malfunctioning heating element can cause odors.
  • Washing Machines: Lint buildup or electrical issues within the machine.
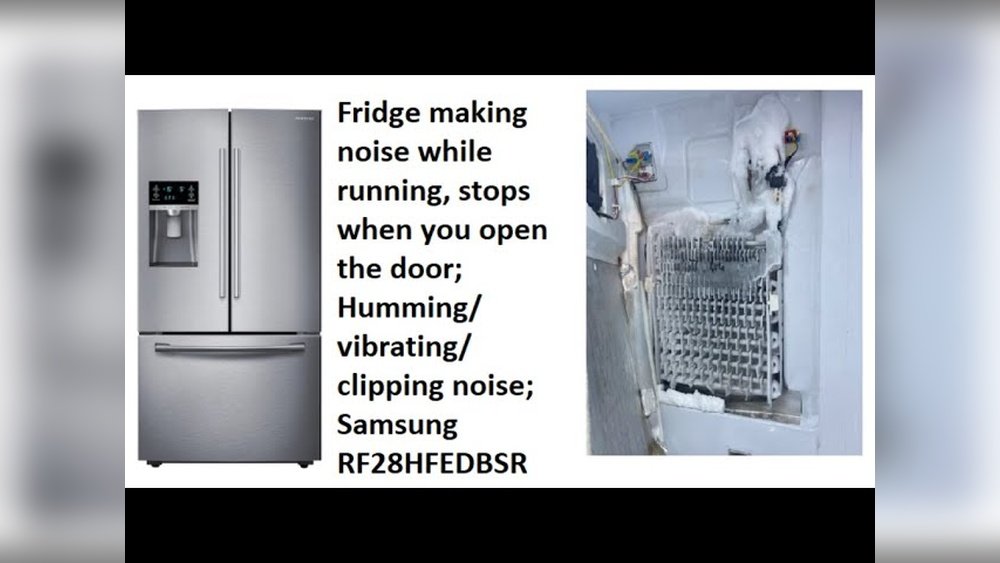
  • Refrigerators: While often related to spoiled food, a malfunctioning compressor or electrical component can also emit odors.
  • Computers and Electronics: Overheating components or power supply issues in electronics can sometimes produce this smell.
  • Troubleshooting: Unplug the suspect appliance. If the smell disappears, the appliance is likely the culprit. Have it inspected and repaired by a qualified technician.
Why Does My House Smell Like Fish

Credit: www.reddit.com

Mold And Mildew: Dampness And Decay

Mold and mildew thrive in damp, poorly ventilated areas and can produce a wide range of odors, some of which can be mistaken for a fishy smell. This is especially true for certain types of mold that feed on organic materials.

Types Of Mold And Their Odors

While mold is often associated with a musty or earthy smell, some species can produce odors that are more acrid or even fish-like. This can depend on the substrate the mold is growing on and the specific metabolic byproducts it releases.

  • Common Areas: Bathrooms, basements, attics, crawl spaces, around windows, and areas with water leaks.
  • Identification: Look for visible signs of mold growth, discoloration on walls, ceilings, or fabrics.
  • Health Risks: Mold spores can cause allergic reactions, respiratory problems, and other health issues.

Identifying And Remediation

  • Locate the Source: The key is to find the source of moisture that is allowing the mold to grow. Check for leaks in pipes, roofs, or windows. Poor ventilation in bathrooms and kitchens can also contribute.
  • Small Areas: For small areas of mold (less than 10 square feet), you can often clean it yourself using a mixture of water and detergent or a bleach solution (1 cup bleach per gallon of water). Ensure good ventilation and wear protective gear (gloves, mask).
  • Large Infestations: For larger or more widespread mold problems, it’s best to call a professional mold remediation service. They have the expertise and equipment to safely remove the mold and address the underlying moisture issue.
  • Prevention: Improve ventilation, fix leaks promptly, and use dehumidifiers in damp areas.

Less Common, But Possible, Causes

Beyond the most frequent culprits, a few other less common issues can contribute to a fishy smell in your home.

Chemical Reactions And Off-gassing

Certain chemical reactions or the off-gassing of specific materials can sometimes produce odors that mimic a fishy smell.

  • New Carpeting or Furniture: Some synthetic materials used in manufacturing can release volatile organic compounds (VOCs) that have unusual odors.
  • Cleaning Products: Certain cleaning agents, especially when mixed or used improperly, can create unexpected chemical reactions and smells. Always follow product instructions carefully and ensure good ventilation.
  • Pesticides or Herbicides: If these have been used recently in or around your home, their chemical breakdown could potentially cause an odor.

Certain Types Of Fish Or Seafood Products

Even without spoilage, some types of fish or seafood products, particularly those that are heavily processed or preserved, can have a strong inherent odor that might linger in the air or on surfaces.

  • Fish Oil Supplements: If fish oil capsules leak or break, the oil can be difficult to clean and leave a persistent fishy smell.
  • Live Bait: If you use live bait for fishing, the container or residual odor can sometimes transfer.

Bacterial Growth In Humidifiers Or Hvac Systems

Humidifiers, especially portable ones or those integrated into HVAC systems, can become breeding grounds for bacteria and mold if not cleaned regularly. The water and organic matter can decompose, releasing odors into the air, which might be perceived as fishy.

  • Maintenance: Clean humidifiers and change filters in HVAC systems according to the manufacturer’s recommendations. Use distilled or demineralized water in portable humidifiers.

Identifying The Source: A Systematic Approach

Pinpointing the exact source of a fishy smell requires a methodical approach. Start with the most likely causes and work your way through the possibilities.

Step-by-step Investigation

  • Note the Location and Timing:
  • Where in the house is the smell strongest? Is it localized to one room, a specific area (like the kitchen or bathroom), or throughout the house?
  • When is the smell most noticeable? Does it appear at certain times of the day, or after specific activities (like running the dishwasher or showering)?
  • Check Obvious Food Sources:
  • Inspect your refrigerator, pantry, and trash cans thoroughly for spoiled food.
  • Run your garbage disposal and clean it if necessary.
  • Examine Plumbing Fixtures:
  • Pour water down all drains, especially those in infrequently used areas, to ensure P-traps are full.
  • Check for slow drains or gurgling sounds.
  • If you have a septic system, consider when it was last serviced.
  • Investigate Electrical Appliances and Outlets:
  • Sniff around outlets, switches, and major appliances.
  • If you smell it near an outlet or appliance, try turning off the corresponding breaker. Does the smell disappear?
  • Look for Signs of Moisture and Mold:
  • Check damp areas like bathrooms, basements, and laundry rooms for visible mold or water damage.
  • Sniff around windows and in closets.
  • Consider Less Common Causes:
  • Think about any recent chemical use, new purchases, or unusual activities.

Using Your Senses: Beyond Smell

While smell is the primary indicator, other senses can help.

  • Sight: Look for visible signs of spoilage, mold, water damage, or scorching around electrical components.
  • Sound: Listen for gurgling drains, buzzing sounds from outlets, or unusual noises from appliances.
  • Touch: Feel for unusual warmth around outlets or appliances (use caution). Check for dampness on walls or floors.

When To Call A Professional

Some smells require expert attention. Don’t hesitate to call a professional if:

  • You suspect a sewer gas leak. This is a health and safety hazard.
  • You cannot locate the source after a thorough investigation.
  • You suspect an electrical problem. Fire risk is significant.
  • You find extensive mold growth. Professional remediation is often necessary.
  • Plumbing issues persist despite DIY attempts.

Professional Help Options:

  • Plumber: For all plumbing-related issues, including clogs, P-trap problems, and sewer line issues.
  • Electrician: For any suspected electrical problems, overheating wires, or faulty outlets/appliances.
  • HVAC Technician: If the smell seems to come from your air vents or heating/cooling system.
  • Mold Remediation Specialist: For significant mold issues.
  • Pest Control: If rodent activity is suspected as the cause of damaged wiring.

Prevention: Keeping Your Home Fresh

The best way to deal with a fishy smell is to prevent it from occurring in the first place. Regular maintenance and vigilance are key.

Regular Cleaning And Maintenance Routines

  • Kitchen:
  • Clean out the refrigerator weekly, discarding old food.
  • Clean the garbage disposal regularly.
  • Wipe down countertops and sinks daily.
  • Empty trash cans frequently.
  • Bathrooms:
  • Run water in infrequently used drains weekly.
  • Clean shower and sink drains to prevent buildup.
  • Ensure good ventilation (use exhaust fans).
  • General:
  • Address any water leaks immediately.
  • Keep areas around plumbing fixtures clean and dry.

Proactive Measures

  • Appliance Maintenance: Follow manufacturer guidelines for cleaning and servicing appliances like dishwashers, washing machines, and HVAC systems.
  • Electrical Safety: Avoid overloading circuits. If you have old wiring, consider having it inspected by an electrician.
  • Ventilation: Ensure your home is adequately ventilated, especially in kitchens, bathrooms, and basements.

Frequently Asked Questions

What Is The Most Common Cause Of A Fishy Smell In The Kitchen?

The most common culprits in the kitchen are spoiled food, particularly seafood, left in the refrigerator or trash, and decaying food particles in the garbage disposal. Always check these areas first.

Can A Fishy Smell Be A Sign Of A Serious Problem?

Yes, a persistent fishy smell can indicate serious issues. Electrical malfunctions pose a significant fire risk, and sewer gas leaks can be toxic and indicate major plumbing failures. It’s crucial to address the smell promptly and seek professional help if you suspect these problems.

How Do I Get Rid Of A Fishy Smell In My Bathroom Drain?

Start by running hot water down the drain to clear minor buildup. If the smell persists, try the baking soda and vinegar method, followed by hot water. Ensure the P-trap is not dry by running water in the drain for a minute. If the odor continues, it might indicate a deeper clog or a sewer gas issue requiring a plumber.

Is A Fishy Smell From My Car’s Ac System Related To A House Smell?

While a fishy smell from a car’s AC system is usually due to mold or mildew growth within the vents or evaporator core, it’s generally unrelated to a persistent fishy smell in your house. However, if you notice similar odors in both locations, it might point to a broader issue with humidity control or mold prevention in your environment.

Can Certain Cleaning Products Cause A Fishy Smell?

Yes, some cleaning products, especially when mixed inappropriately or when reacting with other substances, can produce unusual odors, sometimes described as fishy. Always use cleaning products as directed and ensure good ventilation when cleaning. If you suspect a specific product, stop using it and air out the area.

By systematically investigating potential sources, from simple food spoilage to complex plumbing and electrical issues, you can effectively identify and eliminate that unwelcome fishy odor, ensuring your home remains a fresh and safe environment. Regular maintenance and prompt attention to any unusual smells are your best defenses against these pervasive problems.

Humming Noise Refrigerator

Humming Noise Refrigerator

The rhythmic hum of a refrigerator is often a background noise we barely notice, a sign that our essential appliance is diligently working to keep our food fresh. However, when that familiar sound escalates into a loud, persistent humming, it can be a source of significant annoyance and a worrying indicator that something is amiss.

Understanding the potential causes behind a noisy refrigerator is the first step toward diagnosing the problem and restoring peace to your kitchen.

This unexpected symphony of buzzing, rattling, or humming can stem from a variety of sources, ranging from simple, easily fixable issues to more complex mechanical failures. Ignoring these sounds can lead to reduced efficiency, spoiled food, and ultimately, a more costly repair or replacement.

This guide aims to demystify the common culprits behind a humming refrigerator, providing you with the knowledge to identify the source and take appropriate action, whether it’s a DIY fix or a call to a professional technician.

Key Takeaways

  • A humming refrigerator can be normal, but an unusual or loud hum often signals a problem.
  • Common causes include evaporator fan issues, condenser fan problems, compressor troubles, defrost system malfunctions, and loose components.
  • Leveling the refrigerator is a simple yet often overlooked fix for vibration-related noise.
  • Cleaning the condenser coils can improve efficiency and reduce strain on the compressor, potentially quieting the unit.
  • Regular maintenance, including cleaning and checking seals, can prevent many noise issues.
  • When in doubt, or if the problem involves electrical components or the sealed system, always consult a qualified appliance repair technician.
Humming Noise Refrigerator

Credit: www.youtube.com

Understanding Normal Refrigerator Sounds

Before delving into the causes of an unusually loud hum, it’s crucial to understand what constitutes normal operation. Modern refrigerators employ various components that produce sounds as part of their regular function. These include:

  • Compressor: This is the heart of your refrigerator, responsible for circulating refrigerant. When it kicks on, you’ll typically hear a low hum or a buzzing sound. This is completely normal. The frequency and duration of compressor cycles depend on factors like ambient temperature, how often the door is opened, and the thermostat setting.
  • Fans: Refrigerators use fans to circulate air within the freezer and refrigerator compartments (evaporator fan) and to cool the condenser coils and compressor (condenser fan). These fans produce a whirring or blowing sound when active.
  • Water Valve: If your refrigerator has an ice maker or water dispenser, you might hear a brief buzzing or clicking sound when the water valve opens to fill the ice bin or dispense water.
  • Defrost Cycle: Refrigerators with automatic defrost systems periodically heat up elements to melt frost buildup. This can sometimes create popping, cracking, or hissing sounds.
  • Refrigerant Flow: As refrigerant circulates through the system, you might hear gurgling or trickling sounds.

These sounds are generally consistent and not excessively loud. The issue arises when the hum becomes jarring, changes in pitch, or is accompanied by vibrations or other disturbing noises.

Humming Noise Refrigerator

Credit: www.asurion.com

Common Causes Of A Loud Humming Refrigerator

When your refrigerator starts humming louder than usual, it’s often a sign that one or more of its key components are working harder than they should or are experiencing a malfunction.

Evaporator Fan Motor Issues

The evaporator fan is located inside the freezer compartment, behind the back panel. Its job is to circulate cold air from the freezer into the refrigerator section and back. If this fan is obstructed, failing, or its motor is weak, it can produce a loud humming or buzzing noise.

  • Ice Buildup: The most common reason for an obstructed evaporator fan is excessive ice buildup around it. This can happen if the defrost system isn’t working correctly, leading frost to accumulate on the fan blades. As the blades spin, they hit the ice, creating a loud humming or grinding sound.
  • Diagnosis: You might hear the noise most prominently when the freezer door is open. If you can access the fan (after unplugging the unit and removing panels), check for ice.
  • Solution: A temporary fix involves unplugging the refrigerator and letting it defrost completely for 24-48 hours with the doors open. For a permanent solution, the defrost system (heater, thermostat, or timer) will likely need repair.
  • Worn Motor Bearings: Over time, the bearings in the evaporator fan motor can wear out. This leads to increased friction and a louder humming or whining sound as the motor struggles to turn.
  • Diagnosis: The sound will be consistent and might change pitch if you manually try to spin the fan (with the power off).
  • Solution: The entire evaporator fan motor assembly will need to be replaced. This is a moderately difficult DIY repair for some, but often best left to a professional.

Condenser Fan Motor Problems

The condenser fan is located near the compressor, usually at the bottom rear of the refrigerator. It blows air over the condenser coils to dissipate heat removed from the inside of the fridge. A malfunctioning condenser fan can cause the unit to overheat and work inefficiently, leading to a louder hum.

  • Obstructions: Dust, dirt, pet hair, or debris can accumulate on the fan blades or block airflow. This forces the fan motor to work harder, producing a louder hum and potentially leading to overheating.
  • Diagnosis: The noise will likely come from the rear bottom of the refrigerator. You may also notice the refrigerator feeling warmer than usual or running more frequently.
  • Solution: Cleaning the condenser coils and fan is a crucial maintenance task. Unplug the refrigerator, locate the fan, and carefully remove any debris. A vacuum cleaner with a brush attachment is useful here.
  • Worn Motor: Similar to the evaporator fan, the condenser fan motor can wear out. Worn bearings will result in a loud humming or grinding noise.
  • Diagnosis: The noise will be constant when the compressor is running. The fan might also spin slowly or erratically.
  • Solution: The condenser fan motor needs to be replaced. This is generally a more accessible repair than the evaporator fan, as it’s often easier to reach.

Compressor Issues

The compressor is the most critical and often the loudest component in a refrigerator. While a normal compressor hum is expected, an unusually loud, rattling, or vibrating hum can indicate a serious problem.

  • Aging Compressor: As compressors age, they can become less efficient and noisier. The internal components might wear down, leading to a louder operational hum.
  • Diagnosis: The hum is deep, loud, and might be accompanied by significant vibration. The refrigerator may also struggle to maintain temperature.
  • Solution: Replacing a compressor is an expensive and complex repair, often involving specialized tools and knowledge of the sealed refrigeration system. In many cases, the cost of a compressor replacement might approach the cost of a new refrigerator, making replacement a more economical option.
  • Compressor Mountings: The compressor is mounted on rubber grommets or springs to absorb vibrations. If these mountings become loose or damaged, the compressor can vibrate excessively against its housing, creating a loud humming or rattling sound.
  • Diagnosis: The noise is often most noticeable when the compressor kicks on and might lessen slightly as it runs. You might feel excessive vibration at the base of the unit.
  • Solution: Inspect the compressor mounting hardware. Tighten any loose bolts or replace damaged grommets or springs. This is a repair that requires caution due to the proximity of electrical components.
  • Internal Compressor Problems: Less commonly, internal issues within the compressor, such as failing valves or windings, can cause abnormal noises.
  • Diagnosis: These noises can be varied, including buzzing, clicking, or grinding, often accompanied by poor cooling performance.
  • Solution: This almost always requires professional diagnosis and repair, and as mentioned, replacement is often the more practical choice.

Defrost System Malfunctions

While the defrost system itself doesn’t typically produce a loud hum, its failure can lead to ice buildup that causes other components, like the evaporator fan, to hum loudly.

  • Faulty Defrost Heater: The defrost heater melts frost from the evaporator coils. If it fails, frost will accumulate.
  • Defective Defrost Thermostat: This component tells the heater when to turn on and off. If it malfunctions, the heater may not activate.
  • Bad Defrost Timer/Control Board: This orchestrates the defrost cycle. A faulty timer or control board can prevent the defrost system from running.
  • Diagnosis: The primary symptom is excessive frost buildup in the freezer, particularly around the evaporator coils and fan. This ice buildup then causes the evaporator fan to make noise.
  • Solution: The specific faulty component in the defrost system needs to be identified and replaced. This often requires disassembling parts of the freezer compartment.

Loose Components And Vibration

Sometimes, the humming noise isn’t from a failing motor but from something vibrating against the refrigerator or loose within it.

  • Refrigerator Not Level: If the refrigerator isn’t perfectly level, it can vibrate against the floor or cabinets, creating a humming or rattling sound. The internal components might also be under more stress.
  • Diagnosis: Check if the refrigerator rocks or wobbles. The noise might change if you gently push on the top or sides.
  • Solution: Adjust the leveling legs at the bottom of the refrigerator until it sits firmly and evenly on the floor. Use a level to ensure accuracy.
  • Items on Top or Inside: Storing items on top of the refrigerator or having items inside vibrate against each other or the walls can create noise.
  • Diagnosis: Listen carefully to pinpoint the source. The noise might stop if you remove items from the top or rearrange items inside.
  • Solution: Remove any items stored on top. Organize the contents inside the refrigerator to prevent items from rattling against each other.
  • Loose Drain Pan: The drain pan at the bottom of the refrigerator collects condensation. If it’s loose or cracked, it can vibrate and produce noise.
  • Diagnosis: Inspect the drain pan for secure fitting.
  • Solution: Ensure the drain pan is properly seated. If cracked, it may need replacement.

Water Inlet Valve Issues

If your refrigerator has an ice maker or water dispenser, the water inlet valve can sometimes cause humming or buzzing sounds.

  • Valve Malfunction: When the refrigerator calls for water (e.g., to fill the ice maker), the valve opens. If the valve is failing, it might buzz loudly as it tries to open or close, or if it’s partially clogged.
  • Diagnosis: The sound typically occurs intermittently when the ice maker is supposed to be filling or when the water dispenser is used.
  • Solution: The water inlet valve may need to be cleaned or replaced. This involves shutting off the water supply to the refrigerator and disconnecting the water line.

Troubleshooting Steps For A Humming Refrigerator

When faced with an unusually loud hum, a systematic approach to troubleshooting can help you pinpoint the cause and determine the best course of action.

Step 1: Identify The Type And Location Of The Noise

  • Characterize the Hum: Is it a steady hum, a buzzing, a rattling, a grinding, or a high-pitched whine? Does it happen constantly, or only when the compressor kicks on, or when the ice maker fills?
  • Pinpoint the Source: Carefully listen to identify the general area from which the noise is emanating. Is it from the top, bottom, front, or rear of the refrigerator? Is it inside the freezer or refrigerator compartment?

Step 2: Check For Simple, Non-mechanical Causes

  • Leveling: Use a level to check if the refrigerator is sitting evenly. Adjust the leveling legs as needed.
  • External Vibrations: Ensure the refrigerator is not touching any walls or cabinets that could amplify its sounds.
  • Internal Contents: Remove items from the top of the refrigerator and rearrange items inside to see if the noise changes.
  • Drain Pan: Check if the drain pan at the bottom is securely in place.

Step 3: Inspect Accessible Components (with Power Off)

Warning: Always unplug the refrigerator from the power outlet before attempting any internal inspection or cleaning.

  • Condenser Coils and Fan: Locate the condenser coils and fan, usually behind a rear access panel at the bottom. Carefully clean the coils and fan blades using a vacuum cleaner and a soft brush. Check if the fan spins freely.
  • Evaporator Fan (Internal): If you suspect the evaporator fan, you may need to remove shelves and the rear panel inside the freezer. Look for ice buildup or obstructions around the fan. Check if the fan blades spin freely (after manual defrosting if ice is present).

Step 4: Observe Component Operation (with Power On, Cautiously)

Once you’ve performed basic checks and cleaning, you can cautiously plug the refrigerator back in and listen.

  • Compressor: Note the sound and vibration when the compressor engages. Does it sound strained?
  • Fans: Listen to the evaporator fan (inside freezer) and condenser fan (rear). Do they sound smooth or are they making irregular noises?

Step 5: Consult Your Refrigerator Manual

Your owner’s manual may contain a troubleshooting section that addresses common noises and their potential causes specific to your model.

Step 6: When To Call A Professional

If you’ve gone through the basic troubleshooting steps and the humming persists, or if you suspect a problem with the compressor, sealed refrigeration system, or complex electronic controls, it’s time to contact a qualified appliance repair technician. Attempting repairs beyond your comfort level or expertise can be dangerous and may cause further damage.

Humming Noise Refrigerator

Credit: www.partselect.com

Maintenance Tips To Prevent Humming Noises

Regular maintenance is key to preventing many common refrigerator problems, including excessive noise.

  • Clean Condenser Coils Regularly: Aim to clean your condenser coils at least twice a year, or more often if you have pets that shed. Dirty coils force the compressor and condenser fan to work harder, leading to increased noise and reduced efficiency.
  • Check Door Seals: Ensure the door gaskets are clean and creating a tight seal. Poor seals allow warm air to enter, making the refrigerator run more often and potentially louder. You can test seals by closing the door on a piece of paper; if you can pull it out easily, the seal might need cleaning or replacement.
  • Keep the Refrigerator Level: Periodically check that your refrigerator remains level. Adjust the leveling legs if necessary.
  • Allow Proper Air Circulation: Ensure there is adequate space around the refrigerator (sides, back, and top) for proper ventilation. Do not block air vents inside the refrigerator.
  • Defrost Manually (if applicable): If you have an older model without automatic defrost, follow manufacturer instructions for periodic manual defrosting to prevent excessive ice buildup.

Case Study: The Persistent Buzzing Freezer

Sarah noticed a persistent, high-pitched buzzing sound coming from her Samsung refrigerator, particularly noticeable at night. Initially, she dismissed it as normal operation. However, the sound grew louder over a few weeks, and she started noticing frost buildup inside the freezer.

Diagnosis: Sarah consulted her refrigerator manual, which suggested checking for ice buildup around the evaporator fan. Unplugging the unit and removing the freezer’s back panel revealed a significant amount of ice encasing the evaporator fan.

Solution: She performed a manual defrost by unplugging the refrigerator and leaving the freezer and fridge doors open for 48 hours with towels to catch melting ice. After thoroughly drying the interior, she reassembled the panel and plugged the unit back in. The buzzing noise disappeared. However, aware that the defrost system might be failing, she scheduled a technician to inspect the defrost heater, thermostat, and timer to prevent the problem from recurring. This proactive step saved her from potential spoilage and a more complex repair later.

Comparison: Common Refrigerator Noises And Their Likely Causes

Understanding the nuances of different sounds can help in diagnosis.

Sound TypeLocationPossible Cause(s)SeverityDIY Fix Potential
**Steady Hum**General UnitNormal operation (compressor, fans)LowN/A
**Loud Hum/Buzz**Rear BottomDirty condenser coils, failing condenser fan motor, struggling compressorMedium-HighMedium
**Loud Hum/Grind**Inside FreezerObstructed evaporator fan (ice), failing evaporator fan motorMedium-HighMedium
**Rattling**Rear Bottom or BaseLoose compressor mountings, loose drain pan, items vibrating against unitMediumHigh
**Clicking/Popping**Inside Freezer/FridgeDefrost cycle, expansion/contraction of materialsLowN/A
**Gurgling/Trickling**Within the systemRefrigerant flow, defrost waterLowN/A
**Buzzing (Intermittent)**Water line connection (rear)Water inlet valve issueMediumMedium

*Note: This table provides general guidance. Specific sounds and causes can vary greatly by refrigerator model.*

When To Consider Replacement

While many humming noises can be repaired, there comes a point where repair might not be economically viable, especially for older units.

  • Cost of Repair: If the estimated cost of repair, particularly for major components like the compressor, is a significant percentage (e.g., 50% or more) of the cost of a new, comparable refrigerator, replacement is often the better long-term investment.
  • Age of Appliance: Refrigerators typically have a lifespan of 10-15 years. If your unit is nearing or past this age and requires a major repair, it might be more prone to other issues soon after.
  • Frequency of Repairs: If you’ve had multiple repairs in a short period, it might indicate a declining appliance that is becoming increasingly unreliable.
  • Energy Efficiency: Newer refrigerators are significantly more energy-efficient than older models. Replacing an old, noisy unit could lead to substantial savings on your electricity bill. For instance, ENERGY STAR certified refrigerators can use 10-15% less energy than standard models. A study by the U.S. Department of Energy indicates that refrigerators manufactured after 2000 are about 20% more efficient than those made in the 1990s.

Frequently Asked Questions

Why Does My Refrigerator Hum Loudly When I First Plug It In?

When a refrigerator is first plugged in after being moved or after a power outage, its components are starting from a standstill. The compressor may work harder initially to reach the set temperature, and fans might spin up. This can result in a louder hum for the first few hours.

However, if the loud hum persists for more than a day or two, it could indicate an underlying issue, such as the need for the unit to fully level itself or a component struggling to start.

Is A Humming Sound From The Bottom Rear Of My Fridge Normal?

A low, steady hum from the bottom rear is typically normal, as this is where the compressor and condenser fan are located. These components are essential for the refrigerator’s cooling process. However, if this hum becomes excessively loud, changes pitch, or is accompanied by significant vibration, it warrants investigation for potential issues like a dirty condenser fan, clogged coils, or a compressor problem.

Can A Refrigerator Humming Loudly Indicate A Coolant Leak?

A coolant (refrigerant) leak itself doesn’t typically cause a loud humming noise directly. Instead, a leak leads to reduced cooling efficiency. To compensate, the compressor and fans will run much longer and harder, which can result in a louder, more persistent hum due to the increased workload.

If you suspect a leak along with poor cooling and a loud hum, it’s crucial to have it inspected by a professional.

How Often Should I Clean My Refrigerator’s Condenser Coils?

It is generally recommended to clean your refrigerator’s condenser coils at least twice a year. If you have pets that shed heavily, live in a dusty environment, or notice significant dust buildup on the coils, you may need to clean them more frequently, perhaps quarterly. Neglecting this maintenance task is a common cause of increased noise, reduced efficiency, and potential component strain.

What Is The Difference Between The Evaporator Fan And The Condenser Fan?

The evaporator fan is located *inside* the freezer compartment, usually behind a panel. Its function is to circulate cold air from the evaporator coils throughout the freezer and refrigerator sections. The condenser fan is located *outside* the sealed system, typically at the *bottom rear* of the refrigerator. Its job is to blow air over the condenser coils and compressor to dissipate heat removed from the inside of the fridge. Both fans produce a whirring or blowing sound during operation, but issues with either can lead to different types of humming noises.

The symphony of a refrigerator is usually a subtle background note, but when it crescendly shifts to a loud hum, it’s a clear signal that attention is required. From simple fixes like leveling the unit and cleaning coils to more complex issues involving fan motors or the compressor, understanding the potential causes empowers you to act.

Regular maintenance remains your best defense against unexpected noises and costly repairs, ensuring your appliance runs efficiently and quietly for years to come.

Wall Plaster Falling Off Causes

Wall Plaster Falling Off Causes

The sight of plaster crumbling and falling from your walls can be alarming. It’s not just an aesthetic issue; it can indicate underlying structural problems or moisture damage that, if left unaddressed, could lead to more significant and costly repairs.

Understanding the common causes behind this deterioration is the first step toward protecting your home’s integrity and maintaining its value.

From the subtle creep of dampness to the more dramatic effects of settlement, various factors can compromise the bond between plaster and the underlying substrate. Identifying these culprits requires a keen eye and a systematic approach, often involving a close examination of the affected areas and the surrounding environment.

This guide aims to equip you with the knowledge to diagnose why your plaster is falling off and what steps you can take to rectify the situation.

Key Takeaways

  • Moisture is a primary culprit: Water ingress from leaks, high humidity, or rising damp weakens plaster and its bond.
  • Settlement and structural movement can cause cracks and plaster detachment due to shifting foundations or building stress.
  • Poor original workmanship or using the wrong materials during installation can lead to premature failure.
  • Age and wear and tear naturally degrade plaster over time, especially in older properties.
  • Impact damage from accidental knocks can dislodge plaster.
  • Temperature fluctuations can cause expansion and contraction, stressing the plaster.
  • Identifying the root cause is crucial for effective and lasting repair.

Understanding Wall Plaster And Its Vulnerabilities

Plaster, traditionally a mix of lime or gypsum, sand, and water, is applied in layers to create a smooth, durable surface for walls and ceilings. It acts as a protective coating and a base for decorative finishes like paint or wallpaper.

However, plaster is porous and susceptible to a range of environmental and structural stresses. Its strength lies not only in its composition but also in its adhesion to the lath or masonry substrate behind it. When this bond weakens or the plaster itself degrades, it can begin to crack, blister, and eventually fall away.

The substrate plays a significant role. Older homes often feature lath and plaster, where plaster is applied over thin wooden strips (laths). This system allows for some flexibility but can be prone to issues if the wood rots or shrinks.

Modern plasterboard (drywall) construction offers a different set of potential vulnerabilities, primarily related to the joints between boards or damage to the board itself. Regardless of the construction method, understanding the common failure points is key to diagnosis.

Wall Plaster Falling Off Causes

Credit: www.damp-solutions.com

Common Causes Of Falling Plaster

The reasons behind plaster falling off are diverse, ranging from environmental factors to construction defects. A thorough inspection often reveals tell-tale signs pointing to the specific issue at hand.

Moisture Intrusion: The Silent Destroyer

Water is arguably the most common and insidious cause of plaster failure. Its presence can manifest in several ways, each with its own set of symptoms and origins.

Leaking Pipes And Roofs

Plumbing leaks, whether from aging pipes within walls or faulty fixtures, can saturate the plaster and underlying materials. This constant dampness weakens the plaster’s structure and its bond to the substrate. Look for:

  • Discoloured patches: Often brown or yellowish, indicating water staining.
  • Blistering or bubbling: The moisture trapped behind the plaster can cause it to lift and bubble.
  • Soft or crumbly plaster: When wet, plaster loses its rigidity.
  • Musty odours: A persistent damp smell can signal hidden water issues.

Similarly, roof leaks that penetrate the ceiling or walls can introduce significant amounts of water. Even small, persistent drips can cause gradual damage over time, leading to plaster detachment, especially at the ceiling-to-wall junctions or around windows and doors where water might track down.

High Humidity And Condensation

Excessive moisture in the air, particularly in bathrooms, kitchens, and poorly ventilated basements, can lead to condensation on walls and ceilings. This moisture can be absorbed by the plaster, especially if it’s not adequately sealed or painted. Over time, repeated cycles of dampness and drying can degrade the plaster.

  • Symptoms: Similar to minor leaks, but often more widespread and less localized. You might notice a general dampness, peeling wallpaper, or mould growth.
  • Mitigation: Improving ventilation, using extractor fans, and ensuring proper insulation can help reduce condensation.

Rising Damp And Penetrating Damp

Rising damp is a phenomenon where groundwater is absorbed by porous building materials (like brick or stone foundations) and travels upwards through capillary action. This moisture can reach the plaster layer, causing it to decay and fall. It typically affects the lower sections of walls, usually up to about 1 meter in height.

Penetrating damp occurs when external water (rain, snowmelt) finds its way through the building fabric. This can be due to damaged render, cracked brickwork, faulty pointing, or poorly sealed window and door frames. It can appear at any height on a wall, depending on the source of the ingress.

Structural Movement And Settlement

Buildings are not static. They experience minor movements due to temperature changes, soil conditions, and the natural aging process. However, significant structural movement or settlement can exert considerable stress on plasterwork.

Foundation Issues

If a building’s foundations settle unevenly, it can cause the entire structure to shift. This movement translates into stress on the walls, leading to cracks that often start small but can widen over time. As the plaster is rigid, it cannot accommodate this movement and will crack and eventually detach from the substrate.

Expansion And Contraction Of Building Materials

Wood, metal, and even masonry expand and contract with changes in temperature and humidity. In lath and plaster systems, the wooden laths can shrink or swell, creating stress on the plaster applied over them. If the plaster is too brittle or the movement is too extreme, it can crack and fall.

Poor Installation And Material Defects

The quality of the initial plastering job significantly impacts its longevity. Several issues related to installation and materials can lead to premature failure.

Inadequate Substrate Preparation

If the lath or masonry surface is not properly prepared before plastering, adhesion can be compromised. For example, applying plaster over dusty, greasy, or excessively smooth surfaces can prevent a strong bond.

  • Lath and Plaster Specifics: Insufficient “key”, the plaster needs to key into the gaps between laths for mechanical strength. If the plaster is applied too thinly or doesn’t fully embed the laths, it’s more prone to detaching.

Incorrect Material Mix

The ratio of ingredients (lime/gypsum, sand, water) in the plaster mix is crucial. An incorrect mix can result in plaster that is too weak, too brittle, or dries too quickly, leading to cracking and poor adhesion.

  • Modern Plasters: Using inappropriate types of plaster for certain substrates (e.g., a highly cementitious render on an old, breathable lime-plastered wall) can trap moisture or create differential movement, causing failure.

Insufficient Drying Time

Allowing plaster to dry too quickly, perhaps due to excessive heat or drafts, can cause it to shrink unevenly and crack. Conversely, not allowing enough time for initial setting before applying subsequent coats can lead to delamination.

Age And General Wear And Tear

Like any building material, plaster deteriorates over time. In older properties, particularly those with traditional lime plaster, the material itself can become brittle and lose its strength.

  • Natural Degradation: Over decades, plaster can become more susceptible to minor impacts, vibrations, and environmental changes.
  • Vibrations: Proximity to heavy traffic or construction work can cause vibrations that, over time, can loosen plaster, especially if it’s already weakened by other factors.

Impact Damage

Direct physical impact is a straightforward cause of plaster falling off. A hard knock from furniture, a dropped tool, or even a ball can dislodge plaster, creating chips or larger sections that break away.

  • Minor Impacts: Even seemingly minor impacts can create hairline cracks that, if not repaired, can allow moisture ingress and exacerbate the damage.
Wall Plaster Falling Off Causes

Credit: britishdampproofing.co.uk

Diagnosing The Cause: A Step-by-step Approach

Identifying why your plaster is falling off requires careful observation. Start by examining the affected area and its surroundings.

1. Assess The Location And Pattern Of Failure

  • Lower Walls: Often points to rising damp or penetrating damp from ground level.
  • Upper Walls/Ceilings: Suggests roof leaks, plumbing leaks in upper floors, or condensation issues.
  • Around Windows/Doors: Can indicate issues with seals, frames, or penetrating damp.
  • Corners and Edges: Prone to stress from structural movement or thermal expansion/contraction.
  • Widespread vs. Localized: Widespread issues might point to general humidity or systemic problems, while localized patches suggest specific leaks or impacts.

2. Look For Signs Of Moisture

  • Water Stains: Check for discolouration on the plaster or paint.
  • Damp Patches: Feel the wall for cold, damp spots.
  • Mould Growth: Black or green mould often thrives in damp conditions.
  • Peeling Wallpaper: Moisture trapped behind wallpaper can cause it to lift.
  • Musty Odours: A persistent smell of dampness is a strong indicator.

3. Examine The Substrate (if Possible)

If a piece of plaster has fallen off, try to examine the underlying surface.

  • Lath and Plaster: Are the wooden laths intact? Do they appear rotten or excessively warped? Is there evidence of old repairs?
  • Masonry: Is the brickwork or stonework damp? Is the mortar crumbling?

4. Consider The Building’s Age And History

Older homes are more prone to issues like rising damp, lime plaster degradation, and settlement. Recent renovations or changes to the building’s surroundings (e. g. , new paving, landscaping) could also be contributing factors.

5. Test For Soundness

Gently tap the plaster surface with a knuckle or a small rubber mallet.

  • Hollow Sound: A hollow or drumming sound often indicates that the plaster has lost its bond with the substrate behind it, even if it hasn’t visibly fallen off yet. This is a critical warning sign.
  • Solid Sound: A solid, consistent sound suggests the plaster is still well-adhered.
Wall Plaster Falling Off Causes

Credit: www.reddit.com

Common Scenarios And Their Solutions

Let’s explore typical situations where plaster falls off and the recommended remedies.

Scenario 1: Damp Patches And Crumbling Plaster At The Base Of Walls

  • Likely Cause: Rising damp.
  • Diagnosis: The dampness is confined to the lower section of the wall, typically below 1 meter. The plaster may feel soft and crumbly. You might see a tide mark or efflorescence (white, powdery salt deposits).
  • Solution:
  • Identify the Source: Confirm it’s rising damp and not just penetrating damp from a faulty external render.
  • Install a Damp-Proof Course (DPC): This is the most effective long-term solution. It involves injecting a water-repellent cream or creating a physical barrier into the wall to stop moisture rising. This is a specialist job.
  • Renew Plaster: Once the rising damp is treated, the affected plaster must be removed back to the brickwork. It’s crucial to use a salt-retardant plaster mix, as salts within the wall can continue to draw moisture from the air, even after the DPC is installed. Avoid standard gypsum plasters. Lime-based or sand-cement renders with appropriate additives are often recommended.
  • Ventilation: Ensure good air circulation around the base of the wall.

Scenario 2: Blistering And Falling Plaster After Heavy Rain

  • Likely Cause: Penetrating damp.
  • Diagnosis: Damp patches and blistering appear after rainfall, often following cracks in external render, faulty pointing, or damaged gutters and downpipes. The issue might be localized to a specific area.
  • Solution:
  • External Inspection: Thoroughly inspect the exterior of the affected wall. Look for:
  • Cracked or missing render.
  • Damaged brickwork or crumbling mortar joints.
  • Blocked or leaking gutters and downpipes.
  • Faulty window or door seals.
  • Issues with external pipework.
  • Repair External Issues: Address the source of the water ingress. This might involve repointing brickwork, repairing render, cleaning gutters, or replacing seals.
  • Internal Repair: Once the external source is fixed and the wall has dried, remove the damaged plaster. Allow the wall to dry thoroughly before replastering. Use a suitable plaster mix, ensuring good adhesion.

Scenario 3: Hollow-sounding Plaster And Hairline Cracks

  • Likely Cause: Structural movement or age-related degradation.
  • Diagnosis: Tapping the wall reveals a hollow sound, indicating a loss of adhesion. Hairline cracks may be visible, and small pieces of plaster might be flaking off. This is common in older lath and plaster ceilings and walls.
  • Solution:
  • Minor Cracks: For very minor, stable cracks, you might attempt to re-adhere the plaster using a specialized bonding agent and filler. However, this is often a temporary fix.
  • Significant Delamination: If the hollow sound is widespread or large sections are loose, the most reliable solution is to remove the failing plaster entirely.
  • Lath and Plaster Repair: If the laths are sound, you can replaster over them. This involves applying a bonding agent, followed by a suitable plaster mix (often a multi-finish plaster). Ensure the plaster keys well into the laths.
  • Plasterboard Overlay: Alternatively, for larger areas, you can fix new plasterboard directly over the existing lath and plaster (if it’s stable enough) or directly to battens if the old plaster is removed. The new plasterboard is then skimmed to create a smooth finish. This is often more cost-effective than traditional replastering.
  • Structural Assessment: If the cracking is severe and suggests significant structural movement, consult a structural engineer to assess the building’s stability before undertaking plaster repairs.

Scenario 4: Plaster Falling Around New Openings Or After Vibrations

  • Likely Cause: Impact damage or stress from new openings/vibrations.
  • Diagnosis: Plaster has broken away around a new doorway, window, or following nearby construction work.
  • Solution:
  • Repair Damage: Remove all loose and damaged plaster back to a sound edge.
  • Reinforce: If the damage is near an opening, ensure the surrounding structure (e.g., lintel, timber frame) is sound. You might need to install reinforcing mesh (like scrim tape) over the repaired area before applying the final coat of plaster to bridge any residual cracks and provide extra strength.
  • Plastering: Apply a suitable plaster mix in layers, allowing each to dry partially before applying the next. Finish with a smooth skim coat.

Repairing And Preventing Future Issues

Once the root cause is addressed, the focus shifts to repairing the damage and implementing preventative measures.

The Repair Process: Beyond Simple Patching

While small patches can sometimes suffice for minor damage, larger areas of falling plaster often require more comprehensive repair.

  • Remove Damaged Plaster: Carefully chip away all loose, crumbling, or delaminated plaster using a plasterer’s hawk, trowel, and hammer. Extend the removal area beyond the visibly damaged zone to ensure you reach sound plaster.
  • Prepare the Substrate: Clean the exposed lath or masonry thoroughly. Remove dust, debris, and any signs of mould or rot. If dealing with damp, ensure the substrate is as dry as possible before proceeding. For lath and plaster, ensure the laths are sound. If they are rotten, they may need replacing.
  • Apply Bonding Agent/Primer: Depending on the substrate, apply a suitable bonding agent (e.g., PVA for plasterboard or masonry) or a specific primer (e.g., salt-retardant primer for damp walls). This improves adhesion for the new plaster.
  • Apply Base Coat (Scratch Coat/Brown Coat): Apply a thicker base coat of plaster. For lath and plaster, this coat needs to be pushed well into the gaps between the laths to create a strong mechanical key. This coat should be slightly under the level of the surrounding good plaster.
  • Allow to Dry: Let the base coat dry sufficiently. The drying time will vary depending on the plaster type, thickness, and environmental conditions.
  • Apply Top Coat (Skim Coat): Apply a thinner finishing coat (skim coat) to achieve a smooth, level surface ready for decoration. This coat is applied slightly proud to match the level of the existing plaster.
  • Curing and Decoration: Allow the final coat to cure fully (this can take several weeks for thicker applications) before decorating. Ensure any underlying damp issues are fully resolved before painting or wallpapering.

Preventing Future Plaster Failure

Proactive maintenance is key to avoiding recurring plaster problems.

  • Maintain Gutters and Downpipes: Regularly clean and repair your guttering system to prevent water overflow and wall saturation.
  • Check External Finishes: Inspect render, pointing, and seals around windows and doors annually for cracks or damage and repair promptly.
  • Manage Indoor Humidity: Ensure adequate ventilation in bathrooms and kitchens. Use extractor fans and consider dehumidifiers in persistently damp areas.
  • Monitor for Leaks: Address any plumbing drips or suspected leaks immediately.
  • Address Settlement: If you notice significant or worsening cracks, consult a professional to assess the building’s structural integrity.
  • Proper Decoration: Use breathable paints on older properties, especially those with lime plaster. Ensure wallpaper paste is suitable and applied correctly.

Comparison Of Plaster Repair Methods

Choosing the right repair method depends on the extent of the damage and the underlying cause. Here’s a comparison of common approaches:

Method Best For Pros Cons Typical Cost Range (per sq m)
Patch Repair Small, superficial cracks or chips Quick, inexpensive, minimal disruption May not address underlying issues, can be noticeable if not blended well £50 – £150
Full Wall/Ceiling Re-plastering (Lath & Plaster) Extensive damage, delamination, rotten laths Restores original finish, strong bond if done correctly Labour-intensive, requires skilled tradesperson, can be costly £100 – £250
Plasterboard Overlay Widespread damage, uneven surfaces, cost-effective alternative Quick installation, creates a new, stable surface, good for covering imperfections Reduces room size slightly, can mask underlying issues if not inspected first £80 – £180
Skim Coating Over Existing Plaster Minor surface imperfections, hairline cracks (after addressing cause) Fast, relatively inexpensive, smooth finish Only suitable if the base plaster is sound and well-adhered £40 – £100

*Note: Cost ranges are estimates and can vary significantly based on location, complexity, and tradesperson rates.*

When To Call A Professional

While minor plaster chips can sometimes be repaired by a competent DIYer, more significant issues warrant professional attention. You should call a professional if:

  • The plaster failure is extensive or widespread.
  • You suspect underlying damp issues (rising or penetrating).
  • There are signs of significant structural movement or cracking.
  • The affected area is a load-bearing wall or ceiling.
  • You are dealing with lath and plaster and are unsure about the condition of the laths.
  • You have attempted a DIY repair that has failed.

Professionals, such as plasterers, damp proofing specialists, or surveyors, have the expertise and tools to accurately diagnose the cause, recommend the most effective solution, and carry out the repairs to a high standard. For instance, a damp proofing specialist can conduct tests to confirm the source and extent of moisture problems, ensuring that any replastering is done with appropriate materials designed to cope with residual salts and moisture.

Data Insights On Building Material Failures

Building material failures, including plaster issues, are a significant concern in property maintenance. While specific statistics on “plaster falling off” are scarce, general data on building defects provides context. A report by the UK’s Building Research Establishment (BRE) has highlighted moisture-related issues as a leading cause of building defects, contributing to problems like decay, corrosion, and material degradation. For example, studies on domestic properties indicate that dampness affects a substantial percentage of homes, often stemming from issues like leaking pipes, condensation, and inadequate external maintenance.

Furthermore, the lifespan of traditional building materials can be a factor. Lime plaster, while breathable and flexible, may have a shorter effective lifespan compared to modern cementitious renders if not properly maintained or if subjected to conditions it wasn’t designed for.

Conversely, modern materials can fail if improperly applied or incompatible with older building structures. Understanding these broader trends underscores the importance of regular building inspections and prompt attention to any signs of deterioration.

Frequently Asked Questions

What Is The Difference Between Plaster And Drywall?

Plaster

Most Common Home Problems And Fixes

Most Common Home Problems And Fixes

Owning a home is a significant investment and a source of pride, but it also comes with the responsibility of maintenance. Over time, even the most well-built homes will encounter issues, ranging from minor annoyances to more serious structural concerns.

Proactive identification and timely repair of common home problems can save you considerable stress and expense down the line. Understanding these potential pitfalls is the first step toward becoming a savvy and prepared homeowner.

This guide will walk you through the most prevalent home issues, detailing their causes, symptoms, and, most importantly, effective solutions. By equipping yourself with this knowledge, you can tackle repairs confidently, whether you’re a DIY enthusiast or simply seeking to better communicate with professionals.

Key Takeaways

  • Plumbing issues like leaks, clogs, and low water pressure are frequent and can lead to water damage if not addressed promptly.
  • Electrical problems, including flickering lights, tripped breakers, and outdated wiring, pose significant safety risks and require expert attention.
  • HVAC system malfunctions, such as poor heating/cooling, strange noises, and system failure, impact comfort and energy efficiency.
  • Roofing concerns, like leaks, missing shingles, and sagging, are critical for structural integrity and preventing further damage.
  • Foundation problems, including cracks, settling, and water intrusion, are serious and can compromise the entire home.
  • Pest infestations can damage property and pose health risks, requiring identification and eradication strategies.
  • Gutter and drainage issues can lead to water pooling around the foundation, causing significant structural damage.
  • Regular preventative maintenance is key to averting many common home problems and extending the lifespan of your home’s systems.
Most Common Home Problems And Fixes

Credit: varminpool.com

Common Plumbing Problems And Their Fixes

Plumbing systems are the arteries of a home, and like any complex system, they can develop issues. From dripping faucets to overflowing toilets, plumbing problems are among the most common headaches for homeowners. Ignoring these can lead to water damage, mold growth, and significantly higher utility bills.

Leaky Faucets And Pipes

Symptoms: A constant drip from a faucet, visible moisture around pipes, water stains on ceilings or walls.

Causes: Worn-out washers or O-rings are the most frequent culprits in faucets. For pipes, corrosion, loose fittings, or physical damage can cause leaks. In older homes, galvanized steel pipes can corrode from the inside out.

Fixes:

  • Faucets: Replacing worn-out washers or O-rings is usually a straightforward DIY task. Shut off the water supply to the faucet, disassemble the handle, replace the faulty part, and reassemble. If the leak persists or is from the spout itself, the cartridge or valve seat might be damaged and require replacement.
  • Pipes: Minor leaks from pipe joints might be fixable with plumber’s tape or epoxy putty. However, significant leaks or corroded pipes often necessitate replacing the damaged section. This is typically a job for a licensed plumber, especially if the pipes are within walls or under floors.

Clogged Drains

Symptoms: Slow-draining sinks, tubs, or showers; water backing up into other fixtures; gurgling sounds.

Causes: Hair, soap scum, grease, food particles, and foreign objects are the usual suspects. In toilets, excessive toilet paper or non-flushable items are common causes.

Fixes:

  • Minor Clogs: Start with a plunger. Ensure a good seal around the drain and plunge vigorously. For sink drains, remove and clean the drain stopper. A drain snake or auger can be effective for deeper clogs.
  • Stubborn Clogs: For grease or soap scum, pouring boiling water down the drain can help. A mixture of baking soda and vinegar can also dislodge some clogs, followed by hot water.
  • Toilet Clogs: A toilet auger is specifically designed for this and is more effective than a plunger.
  • Professional Help: If DIY methods fail, it’s time to call a plumber. They have specialized equipment like hydro-jetters to clear stubborn blockages without damaging pipes.

Low Water Pressure

Symptoms: Weak stream from faucets, showerheads, or other water outlets.

Causes: This can stem from several issues:

  • Partially closed shut-off valve: Check the main water shut-off valve and any individual fixture valves.
  • Clogged aerators or showerheads: Mineral deposits can build up. Unscrew them and soak them in vinegar to clean.
  • Leaks in the system: Even small leaks can reduce overall pressure.
  • Issues with the pressure regulator: If your home has one, it might be malfunctioning.
  • Municipal supply problems: Less common, but worth considering if multiple homes in the area are affected.

Fixes:

  • Clean aerators and showerheads.
  • Ensure all valves are fully open.
  • Inspect visible pipes for leaks.
  • If the problem persists, a plumber should inspect the pressure regulator and the overall system.

Running Toilets

Symptoms: The toilet constantly runs or makes refilling noises long after being flushed.

Causes: This is usually due to a faulty flapper valve in the tank, a worn-out flush valve seal, or an improperly adjusted float ball.

Fixes:

  • Flapper: This is the rubber seal at the bottom of the tank that lifts to let water into the bowl. They are inexpensive and easy to replace. Ensure the new flapper is compatible with your toilet model.
  • Float Ball: If the water level in the tank is too high, it can seep over the overflow tube. Adjust the float mechanism to lower the water level.
  • Flush Valve Seal: If the flapper is intact and the float is set correctly, the seal around the flush valve might be worn. This is a more involved repair, often requiring tank removal.
Most Common Home Problems And Fixes

Credit: www.twintel.net

Electrical System Issues

Faulty electrical systems are not just inconvenient; they are a significant fire hazard and can lead to electrocution. Recognizing the signs of electrical problems is crucial for the safety of your household.

Flickering Lights

Symptoms: Lights dim or flicker intermittently, especially when appliances are turned on.

Causes:

  • Loose bulb: Ensure the bulb is screwed in tightly.
  • Faulty light switch or dimmer: The internal components may be worn.
  • Loose wiring: Connections in the switch box, outlet, or junction box may have come loose.
  • Overloaded circuit: Too many appliances drawing power can cause voltage drops.
  • Issues with the main service panel: Problems with circuit breakers or the main connection.

Fixes:

  • Tighten bulbs.
  • Replace faulty switches or dimmers.
  • For loose wiring or panel issues, always call a qualified electrician. Working with electrical wiring is dangerous and should not be attempted by amateurs.

Tripped Circuit Breakers Or Blown Fuses

Symptoms: A specific circuit loses power, and the corresponding breaker is in the “off” or “tripped” position, or a fuse has blown.

Causes:

  • Overloaded circuit: This is the most common cause, occurring when too many devices are plugged into one circuit.
  • Short circuit: A fault in an appliance or wiring causes electricity to flow along an unintended path, leading to a surge.
  • Arc fault: A dangerous electrical discharge that can occur in faulty wiring.

Fixes:

  • Resetting Breakers/Replacing Fuses: Turn off all appliances on the affected circuit, then reset the breaker or replace the fuse. If it trips again immediately, there’s a persistent problem.
  • Identify the Culprit: If the breaker trips when a specific appliance is turned on, that appliance might be the issue.
  • Persistent Tripping: If breakers repeatedly trip or fuses blow, it indicates a more serious underlying problem like a short circuit or overloaded wiring. An electrician must diagnose and fix this.

Outdated Wiring

Symptoms: Frequent breaker trips, flickering lights, buzzing sounds from outlets or switches, burning smells, multiple high-wattage appliances causing issues, homes built before the 1970s.

Causes: Older homes may have wiring that is insufficient for modern electrical demands. Aluminum wiring, common in homes from the 1960s and 70s, is also known to be a fire hazard if not properly maintained and connected. Knob-and-tube wiring, found in even older homes, lacks grounding and is a significant fire risk.

Fixes:

  • Upgrade to Modern Wiring: Replacing outdated wiring with new copper wiring is a major undertaking but essential for safety and capacity.
  • Aluminum Wiring Remediation: If you have aluminum wiring, hire an electrician experienced in its specific remediation techniques, such as installing specialized connectors.
  • AFCI/GFCI Protection: Install Arc Fault Circuit Interrupters (AFCIs) and Ground Fault Circuit Interrupters (GFCIs) to add layers of safety.
  • Professional Assessment: An electrician can assess your home’s wiring and recommend the necessary upgrades.
Most Common Home Problems And Fixes

Credit: bestutahrealestate.com

Hvac System Problems

Your Heating, Ventilation, and Air Conditioning (HVAC) system is vital for comfort and air quality. When it malfunctions, it can lead to discomfort, high energy bills, and potential health issues.

Insufficient Heating Or Cooling

Symptoms: The house doesn’t reach the desired temperature, rooms are unevenly heated/cooled, the system runs constantly but doesn’t perform effectively.

Causes:

  • Dirty air filters: This is the most common and easiest fix. A clogged filter restricts airflow, making the system work harder.
  • Low refrigerant levels (AC): Leaks in the AC system reduce efficiency.
  • Dirty coils: Both evaporator and condenser coils can become dirty, hindering heat transfer.
  • Thermostat issues: Malfunctioning thermostat or incorrect settings.
  • Ductwork problems: Leaks, blockages, or disconnected ducts.
  • System sizing: The unit may be too small for the home.

Fixes:

  • Change Air Filters Regularly: Check filters monthly and replace them every 1-3 months, depending on the filter type and household conditions.
  • Clean Vents and Registers: Ensure they are not blocked by furniture or debris.
  • Check Thermostat: Ensure it’s set correctly and batteries are fresh if applicable.
  • Professional Maintenance: Schedule annual check-ups with an HVAC technician. They can clean coils, check refrigerant levels, inspect ductwork, and ensure the system is running efficiently.

Strange Noises

Symptoms: Unusual sounds like banging, rattling, screeching, or whistling coming from the furnace, air conditioner, or ductwork.

Causes:

  • Banging: Often indicates a loose part or a problem with the blower motor.
  • Rattling: Can be loose screws, panels, or debris in the system.
  • Screeching: Typically points to a worn-out motor bearing or a loose belt.
  • Whistling: Usually caused by restricted airflow, often due to a dirty filter or closed vents.

Fixes:

  • Check for Loose Parts: Ensure panels are secured.
  • Inspect Filters and Vents: Address airflow restrictions.
  • Professional Diagnosis: For most mechanical noises, especially screeching or banging, it’s best to call an HVAC professional. These sounds often signal imminent component failure.

System Failure

Symptoms: The HVAC system completely stops working, no air is produced, or it fails to turn on.

Causes:

  • Electrical issues: Tripped breaker, blown fuse, faulty wiring, or a failed capacitor.
  • Motor failure: The blower motor or fan motor may have burned out.
  • Frozen evaporator coil: Often caused by low refrigerant or poor airflow.
  • Ignition problems (furnace): Issues with the igniter or gas valve.

Fixes:

  • Check Breakers/Fuses: The first step is always to check your electrical panel.
  • Defrost AC Unit: If the AC unit is frozen, turn off the cooling and run the fan to thaw it. Then, address the underlying cause (airflow or refrigerant).
  • Professional Repair: For most system failures, especially those involving motors, electrical components, or gas lines, contact an HVAC technician immediately.

Roofing Issues

Your roof is your home’s first line of defense against the elements. Neglecting roof maintenance can lead to a cascade of problems, including water damage, mold, and structural compromise.

Roof Leaks

Symptoms: Water stains on ceilings or walls, drips, mold or mildew growth, peeling paint, missing or damaged shingles.

Causes:

  • Damaged or missing shingles: Wind, hail, or age can cause shingles to lift, crack, or break off.
  • Cracked or deteriorated flashing: The metal strips around chimneys, vents, and skylights can fail.
  • Ice dams: In cold climates, ice can build up at the roof’s edge, forcing water under shingles.
  • Age: Shingles have a lifespan and eventually degrade.

Fixes:

  • Temporary Fixes: For small leaks, emergency roof repair tape or tarps can provide a temporary solution.
  • Replace Shingles: Damaged or missing shingles should be replaced promptly.
  • Repair/Replace Flashing: Damaged flashing needs to be sealed or replaced.
  • Address Ice Dams: Improve attic insulation and ventilation to prevent ice dams.
  • Professional Inspection & Repair: For significant leaks or if the source is unclear, hire a qualified roofing contractor. They can identify the exact source of the leak and perform lasting repairs.

Sagging Roofline

Symptoms: A visible dip or curve in the roofline.

Causes:

  • Structural damage: Rotted or broken rafters or trusses due to water intrusion.
  • Inadequate support: Poor initial construction or modifications that removed support.
  • Excessive weight: Heavy snow loads or improperly installed solar panels.

Fixes:

  • Immediate Professional Attention: Sagging is a serious structural issue. Contact a roofing contractor or structural engineer immediately. Ignoring this can lead to roof collapse. Repairs often involve reinforcing or replacing damaged structural members.

Granule Loss

Symptoms: Granules in gutters or downspouts, bald spots on shingles where granules have worn away.

Causes:

  • Age and weathering: Shingles naturally lose granules over time.
  • Harsh weather: Extreme heat, cold, or hail can accelerate granule loss.
  • Physical damage: Walking on the roof improperly can dislodge granules.

Fixes:

  • Monitor: For minor granule loss on older shingles, it’s a sign of nearing the end of its lifespan.
  • Professional Inspection: If you see significant granule loss, especially on newer shingles, have a roofer inspect for underlying damage or installation issues. Replacing severely worn shingles is necessary to prevent leaks.

Foundation Issues

The foundation is the bedrock of your home. Cracks, settling, or water intrusion can lead to severe structural problems that are costly and complex to repair.

Foundation Cracks

Symptoms: Visible cracks in basement walls, crawl spaces, or exterior foundation walls.

Causes:

  • Shrinkage: Concrete naturally shrinks as it cures.
  • Settling: The ground beneath the foundation can shift over time due to soil expansion/contraction or erosion.
  • Hydrostatic pressure: Water accumulating around the foundation can exert pressure.
  • Tree roots: Large tree roots can exert pressure on the foundation.

Fixes:

  • Hairline Cracks: Very fine, non-structural cracks (less than 1/8 inch) might be sealed with epoxy or polyurethane injection by a foundation repair specialist.
  • Wider or Horizontal Cracks: These are more serious and indicate structural stress. They require professional assessment and repair, often involving carbon fiber straps, steel beams, or underpinning.

Foundation Settling

Symptoms: Uneven floors, doors and windows that stick or won’t close properly, cracks in interior walls (especially above doors/windows), cracks in the foundation itself, visible leaning of the foundation.

Causes:

  • Soil erosion or washout: Poor drainage can wash away soil from under the foundation.
  • Soil expansion and contraction: Clay soils expand when wet and contract when dry, causing movement.
  • Inadequate initial foundation design or installation.

Fixes:

  • Professional Assessment: Settling is a serious issue requiring a foundation repair expert or structural engineer.
  • Underpinning: This involves driving piers or piles deeper into the ground to reach stable soil, then lifting and stabilizing the foundation.
  • Slab Jacking/Mudjacking: For concrete slabs, this process injects grout to fill voids and lift the slab.
  • Improving Drainage: Essential to prevent future settling. Ensure downspouts direct water far from the foundation and consider grading.

Water Intrusion

Symptoms: Dampness or puddles in the basement or crawl space, musty odors, mold or mildew growth, efflorescence (white powdery deposit) on concrete walls.

Causes:

  • Poor exterior drainage: Water pooling around the foundation.
  • Cracked foundation walls: Allowing water to seep in.
  • Clogged or improperly sloped gutters and downspouts.
  • High water table.

Fixes:

  • Improve Drainage: Ensure the ground slopes away from the house. Extend downspouts at least 5-10 feet away.
  • Seal Foundation Cracks: As mentioned above, sealing cracks is crucial.
  • Install a Sump Pump: A sump pump system can collect and pump water away from the foundation.
  • Waterproofing: Applying waterproof coatings to interior or exterior foundation walls.
  • Exterior Excavation and Waterproofing: The most effective but also most expensive solution, involving digging around the foundation to apply membranes and drainage systems.

Pest Infestations

Pests can cause significant damage to your home’s structure and pose health risks. Early detection and effective treatment are key.

Termites

Symptoms: Mud tubes on foundation walls, discarded wings near windows or doors, frass (termite droppings resembling sawdust), damaged wood that sounds hollow when tapped.

Causes: Termites are attracted to wood and moisture. They build colonies and consume wood from the inside out.

Fixes:

  • Professional Pest Control: Termite treatment is complex and requires specialized knowledge and chemicals. Contact a licensed pest control operator for inspection and treatment. Methods include baiting systems, liquid termiticides, and direct wood treatment.
  • Preventative Measures: Eliminate moisture sources, remove wood-to-ground contact, and maintain a buffer zone around your foundation.

Rodents (mice And Rats)

Symptoms: Droppings, gnaw marks on wires or wood, scratching or scurrying noises within walls or ceilings, nests made of insulation or shredded materials, foul odors.

Causes: Rodents seek shelter, food, and water. They can enter homes through small openings.

Fixes:

  • Sealing Entry Points: Inspect the exterior and interior for any holes or cracks larger than 1/4 inch and seal them.
  • Sanitation: Keep food stored in airtight containers and clean up spills promptly. Secure garbage cans.
  • Trapping: Use snap traps or live traps to remove existing rodents.
  • Professional Pest Control: For severe infestations, a pest control service can offer more aggressive baiting and trapping strategies.

Carpenter Ants And Carpenter Bees

Symptoms:

  • Carpenter Ants: Piles of sawdust-like shavings (frass) near wooden structures, especially in damp areas like bathrooms or under sinks.
  • Carpenter Bees: Small, perfectly round holes (about 1/2 inch diameter) drilled into wooden surfaces (decks, eaves, fences), often accompanied by sawdust.

Causes: Both insects excavate wood for nesting. Carpenter ants don’t eat wood but tunnel through it. Carpenter bees drill into wood to lay eggs.

Fixes:

  • Carpenter Ants: Identify and treat the nest directly with insecticidal dust or spray. Address any moisture issues attracting them. Pest control professionals are recommended for difficult-to-reach nests.
  • Carpenter Bees: Treat the holes with an insecticidal dust or spray, then plug the holes with wood putty or dowels once the bees are gone. Preventative treatments can be applied to wood surfaces.

Gutter And Drainage System Issues

While often overlooked, gutters and drainage systems are critical for protecting your home’s foundation, basement, and landscaping from water damage.

Clogged Gutters

Symptoms: Water overflowing from gutters, especially during rain; sagging gutters; visible debris buildup; water pooling around the foundation.

Causes: Leaves, twigs, shingle grit, and other debris accumulate over time, blocking the flow of water.

Fixes:

  • Manual Cleaning: The most common solution is to manually remove debris from gutters. Wear gloves and use a small trowel or scoop.
  • Gutter Guards: Installing gutter guards or screens can significantly reduce the amount of debris that enters the gutters, minimizing the need for frequent cleaning.
  • Professional Cleaning: If gutters are hard to reach or you prefer not to do it yourself, hire a gutter cleaning service.

Improperly Sloped Gutters Or Downspouts

Symptoms: Water pooling in sections of the gutter, water not flowing towards the downspouts, downsp

10 Best Digital Meat Thermometers for Precise Cooking Results in 2026

A digital meat thermometer measuring the temperature of a delicious seared ribeye steak.

As an Amazon Associate, we earn from qualifying purchases. This post contains affiliate links – if you buy through them, we may earn a commission at no extra cost to you.

You’re choosing between different ways to check your food’s temperature, from instant-read probes to smart wireless monitors. The main differences are how fast they read, how they connect to your devices, and whether they need wires. This guide helps you pick the right tool for your specific cooking needs.

Best overall: ThermoWorks Thermapen ONE for its speed and reliable, NIST-traceable precision for every cook. Best for wireless: MEATER Plus because it offers complete freedom with a wire-free design and extended range. Best for simplicity: OXO Good Grips for its straightforward interface and a handy probe cover with reference charts.

The rest of the guide is for those who want to compare specific features like sensor counts, battery types, and water resistance ratings.

How We Picked

The listings for these products include details on accuracy, sensor technology, and durability. We looked for specific details like NIST certification and IP water-resistance grades to ensure reliability.

1Best Overall
ThermoWorks Thermapen ONE
2Fastest Read Time
Typhur InstaProbe Core
3Best Wireless Connectivity
MEATER Plus
MEATER Plus
4Most Precise Accuracy
ThermoMaven Professional Digital
5Best Ergonomic Design
Lavatools Javelin PRO
6Most Advanced Sensors
CHEF iQ Sense
CHEF iQ Sense
7Best Dual Probe
TempPro TempTrack Dual
8Best Rechargeable
GrillBliss USB-C
GrillBliss USB-C
9Best Simple Interface
OXO Good Grips
OXO Good Grips
10Best Waterproof Build
Taylor Waterproof Digital

1. ThermoWorks Thermapen ONE

ThermoWorks Thermapen ONE

Check Price on Amazon

Best for: Cooks who want professional-grade speed and reliability.

This thermometer stands out for its one-second read time, which helps you get precise results quickly. It includes a NIST-traceable calibration certificate, meaning you can trust the temperatures it displays. The motion-sensing auto-on feature and backlight make it very easy to use in a busy kitchen.

The 360-degree rotating display is helpful for both left- and right-handed users. Because it’s IP67 waterproof, you don’t have to worry about splashes or cleanup. It isn’t for someone who needs a wireless remote monitor, as this is a traditional handheld tool.

Pros

  • Blazing fast one-second read time.
  • NIST-traceable accuracy for precision.
  • IP67 waterproof for easy cleaning.

Cons

  • Handheld design requires physical presence.

2. Typhur InstaProbe Core 0.5 Second Instant Read Meat Thermometer Digital

Typhur InstaProbe Core

Check Price on Amazon

Best for: Those who prioritize the absolute fastest temperature read time.

This model claims the top spot for speed with a 0.5-second response time. It’s NIST-certified for accuracy, ensuring you get the right reading for steaks or desserts. The addition of a magnetic storage slot and an external control button makes it very user-friendly.

The 180-degree rotating screen adapts to your hand, which is great for awkward angles on the grill. It’s IP67 waterproof, so you can rinse it off after use without stress. If you want a device that integrates with a smartphone app, this isn’t the right choice for you.

Pros

  • Extremely fast 0.5-second readings.
  • NIST-certified accuracy.
  • Convenient magnetic storage.

Cons

  • No smartphone connectivity features.

3. MEATER Plus Smart Meat Thermometer

MEATER Plus

Check Price on Amazon

Best for: People who want to monitor their meat from another room.

This is a 100% wire-free thermometer that uses Bluetooth to connect to your phone. The charger acts as a repeater to extend your range, so you can check your food from anywhere in your home. It tracks both internal meat and ambient oven temperatures at the same time.

The app provides guided cooking steps and estimated finish times, which removes the guesswork from roasting. It’s dishwasher safe, making cleanup simple after a long day of cooking. This isn’t for a cook who prefers a fast handheld tool that doesn’t require a phone.

Pros

  • Completely wire-free cooking experience.
  • Dual sensors track meat and ambient heat.
  • App provides guided cooking alerts.

Cons

  • Requires a smartphone to function.

4. ThermoMaven Professional Digital Meat Thermometer

ThermoMaven Professional Digital

Check Price on Amazon

Best for: Cooks who want a simple, highly accurate handheld tool.

This thermometer features 0.5-second response time thanks to its thermocouple technology. It’s NIST-certified and built with an IP67 waterproof rating for durability. The built-in bottle opener is a unique bonus that adds some fun to your grilling routine.

It uses a standard AAA battery, which is easy to replace when needed. The auto-rotating display and backlight make it readable in almost any condition. This tool isn’t for someone looking for advanced smart features or remote monitoring capabilities.

Pros

  • The device provides near-instantaneous feedback.
  • NIST-certified for high accuracy.
  • Uses standard, easy-to-find AAA batteries.

Cons

  • No advanced app integration.

5. Lavatools Javelin® PRO Classic Ultra-Fast 2-Second Professional Digital Instant Read

Lavatools Javelin PRO

Check Price on Amazon

Best for: Users who value long battery life and ergonomic design.

This model is known for its large, auto-rotating display that makes it easy to read from any angle. It has a high-performance Japanese sensor that provides blazing fast instant-read times. With extensive expected battery life, it’s perfect for those who don’t want to change batteries often.

The IP65 water-resistant construction protects it from spills and kitchen messes. It’s NSF certified, confirming it meets safety standards for food preparation. This isn’t the best pick if you need the absolute fastest reading speed on the market.

Pros

  • Very long battery life.
  • Large, easy-to-read rotating display.
  • NSF certified for food safety.

Cons

  • Slightly slower read time than some competitors.

6. CHEF iQ Sense

CHEF iQ Sense

Check Price on Amazon

Best for: Advanced cooks who want unlimited range via WiFi.

This smart thermometer uses WiFi to let you monitor your food from anywhere, not just near your grill. It features five sensors, including four for internal meat temp and one for ambient heat. The probe is ultra-thin to keep juices inside your meat during the cook.

It features commercial-grade durability with an IP67 waterproof rating and a 5-year warranty. The app provides guided recipes and push notifications to keep you updated. It isn’t for the cook who prefers a basic, no-frills thermometer that works without a network.

Pros

  • Unlimited WiFi range for remote monitoring.
  • Five sensors for total temperature tracking.
  • Ultra-thin probe design.

Cons

  • Requires a WiFi connection for full features.

7. TempPro TempTrack Digital Cooking Meat Thermometer with Dual Meat Probe

TempPro TempTrack Dual

Check Price on Amazon

Best for: Pitmasters who need to monitor two items at once.

This device comes with two probes, allowing you to track two different pieces of meat or the meat and the smoker temperature simultaneously. It includes USDA presets to help you reach the right doneness without manual setup. The large, backlit display shows both temperatures and a timer at the same time.

The HI/LOW temp alarm is a great feature for smokers, as it alerts you if your grill goes out of your set range. It includes a flip-out stand and magnets for easy placement. This isn’t for someone who only needs to check the temperature of a single item quickly.

Pros

  • Monitors two temperatures at once.
  • Useful HI/LOW temperature range alarm.
  • Includes USDA preset temperatures.

Cons

  • Less portable than single-probe handheld models.

8. GrillBliss USB-C

GrillBliss USB-C

Check Price on Amazon

Best for: Anyone who wants to avoid buying replacement batteries.

This thermometer features a USB-C rechargeable battery, which saves you from buying AAA or button cells. It delivers readings in 0.5 seconds and is NIST-certified for accuracy. The VA LCD display is designed to be clear even under bright sunlight.

Its IP65 waterproof rating makes it easy to rinse off after cooking. With a wide temperature range, it works for everything from deep frying to brewing. It isn’t for a user who prefers a traditional battery-operated device that’s ready to use immediately without charging.

Pros

  • Convenient USB-C rechargeable battery.
  • The device offers an incredibly rapid reading speed.
  • Clear display for outdoor use.

Cons

  • Must be charged before first use.

9. OXO Good Grips Chef’s Precision Digital Instant Read Thermometer

OXO Good Grips

Check Price on Amazon

Best for: Those who want a simple, reliable tool with no extra fuss.

This thermometer is very straightforward, featuring a large, easy-to-read display. The head pivots 90 degrees, which is helpful when checking food in an oven or on a crowded grill. It comes with a probe cover that includes useful temperature charts for quick reference.

The ultra-thin tip is designed for quick readings and minimal damage to your food. It’s a simple tool that does one job well. This isn’t for a cook who needs smart features, app connectivity, or alarm settings.

Pros

  • Simple, intuitive interface.
  • Rotating head for better viewing.
  • Includes handy reference charts.

Cons

  • No advanced sensors or alerts.

10. Taylor Waterproof Digital Instant Read Thermometer

Taylor Waterproof Digital

Check Price on Amazon

Best for: Cooks who need a basic, water-safe tool that’s easy to recalibrate.

This thermometer is designed to handle splashes, making it a reliable choice for the kitchen. It’s NSF-certified, which means it meets strict standards for quality and cleanability. You can even recalibrate it using the included sleeve to ensure it maintains its specified accuracy.

The display is easy to see from different angles, and it comes with a pocket clip for storage. It uses a standard LR44 battery. This isn’t for someone who needs high-speed, sub-second readings or wireless connectivity.

Pros

  • Waterproof design handles splashes well.
  • NSF-certified for safety and quality.
  • Recalibratable for long-term accuracy.

Cons

  • Slower read time compared to high-end models.

How to Choose in Sixty Seconds

Which type of thermometer is better, wired or wireless?

Wireless thermometers are better if you want to leave your food in the oven or smoker and monitor it from another room. Wired or handheld models are better for quick, instant checks when you’re standing right by the grill. Choose based on whether you prefer convenience or speed.

How do I know if the accuracy is good enough?

Look for NIST-certified accuracy, which ensures the device has been tested against high standards. Most professional models offer accuracy within ±0.5°F. Always follow the National Institute of Standards and Technology guidelines for measuring temperature to ensure your food is cooked to safe levels.

Does the temperature range matter for my cooking?

Yes, check the range if you plan to do deep frying or candy making, as these require much higher heat than roasting meat. A range up to 572°F covers almost all home cooking needs. If you only grill steaks, a smaller range is usually enough for your needs.

Closing

For those seeking professional-grade performance, the ThermoWorks Thermapen ONE is the top pick for its incredible speed and reliability. If you prefer a wire-free experience, the MEATER Plus is an excellent alternative. To get started, consider your primary cooking method and choose the tool that best fits your daily kitchen workflow.

Related guides

Frequently Asked Questions

Is it hard to keep a digital meat thermometer clean?

Most modern digital thermometers are rated for water resistance, meaning you can easily rinse them under a tap. Models like the ThermoWorks Thermapen ONE and Typhur InstaProbe Core are designed for easy cleaning. Always check the specific IP rating in your manual to see if it’s safe for rinsing.

What should I do if my thermometer stops reading correctly?

If your thermometer seems off, check if it’s a model that allows for recalibration, like the Taylor Waterproof Digital. Some models have a simple process to reset them using ice water. The listing doesn’t mention support processes.

Can these models work for a professional?

Many models listed, such as the Lavatools Javelin PRO and Taylor Waterproof Digital, are NSF-certified for commercial use. These certifications confirm that the thermometers meet specific standards for quality and cleanability, ensuring they are suitable for professional environments where speed and accuracy are essential for daily cooking tasks.

Final Thoughts

Choosing the right tool makes every meal you cook safer and more delicious. Once you’ve picked your favorite, try it out on a simple roast chicken this weekend. You’ll be surprised at how much better your food tastes when you don’t have to guess if it’s perfectly done. Happy cooking!

Craftsman Pressure Washer Wont Start

Craftsman Pressure Washer Wont Start

A Craftsman pressure washer is a powerful tool for tackling tough cleaning jobs around your home, from dirty driveways and siding to grimy patio furniture. When it’s working correctly, it delivers a high-pressure stream that can make old surfaces look new.

However, like any piece of machinery, a Craftsman pressure washer can sometimes refuse to start, leaving you with a half-finished project and a growing sense of frustration. This situation can arise from a variety of issues, ranging from simple user errors to more complex mechanical problems.

Understanding why your Craftsman pressure washer won’t start is the first step toward getting it back in action. Common culprits include fuel-related problems, ignition issues, water supply blockages, or even safety lockouts. Many of these issues can be resolved with basic troubleshooting and maintenance, saving you the time and expense of a professional repair.

This guide will walk you through the most frequent reasons your Craftsman pressure washer might be failing to start and provide clear, actionable steps to diagnose and fix the problem, drawing on common experiences and manufacturer recommendations.

Key Takeaways

  • Fuel Issues: Ensure you are using fresh, clean gasoline, the correct fuel-to-oil ratio (if applicable for 2-stroke engines), and that the fuel valve is open. Clogged fuel filters or carburetors are common.
  • Spark Plug Problems: A dirty, fouled, or improperly gapped spark plug is a frequent cause of no-start conditions. Inspect, clean, or replace it.
  • Water Supply & Inlet: Verify the water source is adequate, the hose is connected correctly, and there are no kinks or blockages in the inlet filter or hose.
  • Air Filter: A clogged air filter restricts airflow, preventing combustion. Check and clean or replace it.
  • Safety Features: Ensure all safety interlocks (like the trigger lock) are disengaged and the unit is properly primed.
  • Engine Oil Level: For 4-stroke engines, ensure the oil level is adequate, as low oil can trigger a safety shut-off.
  • Carburetor Issues: A dirty or malfunctioning carburetor is a very common problem, often requiring cleaning or rebuilding.
  • Primer Bulb: If your model has a primer bulb, ensure it is functioning correctly to help start a cold engine.

Common Reasons A Craftsman Pressure Washer Won’t Start

When your Craftsman pressure washer refuses to fire up, it’s usually due to one of several common issues. These problems often fall into categories related to fuel, ignition, air intake, or water supply. Before diving into complex repairs, it’s essential to systematically check these fundamental areas.

Many users report that a simple oversight in one of these domains is the root cause of their starting troubles.

Fuel System Problems

The fuel system is the lifeblood of any gasoline-powered engine, and pressure washers are no exception. Issues here can range from stale fuel to blockages that prevent fuel from reaching the combustion chamber.

Stale Or Contaminated Fuel

Gasoline degrades over time, especially when stored for extended periods. Ethanol in modern gasoline can also attract moisture, leading to separation and corrosion. If your pressure washer has been sitting for more than a month or two, the fuel in the tank could be the culprit.

  • Symptoms: The engine may sputter, run rough, or not start at all.
  • Solution: Drain the old fuel from the tank and carburetor bowl. Refill with fresh gasoline. For best results, use gasoline that is less than 30 days old and has an octane rating of 87 or higher, as recommended by most Craftsman engine manuals. If you anticipate storing the pressure washer for an extended period, use a fuel stabilizer.

Clogged Fuel Filter

The fuel filter prevents debris from entering the carburetor. If it becomes clogged, it restricts fuel flow.

  • Symptoms: Engine may start briefly and then die, or refuse to start at all.
  • Solution: Locate the fuel filter (usually inline between the fuel tank and carburetor). Replace it with a new one. This is a relatively inexpensive part and a common maintenance item.

Fuel Valve Blockage

Some pressure washers have a fuel shut-off valve between the tank and the carburetor. If this valve is closed or partially blocked, fuel won’t flow.

  • Symptoms: Engine won’t start, or starts and immediately dies.
  • Solution: Ensure the fuel valve is in the “ON” position. If it appears obstructed, you may need to remove and clean it.

Carburetor Issues

The carburetor mixes fuel and air. If it’s dirty, clogged with gummed-up fuel residue, or has a faulty float, it can prevent the engine from starting. This is one of the most common reasons for a no-start condition, especially after the unit has been stored.

  • Symptoms: Engine cranks but won’t fire, or sputters and dies.
  • Solution:
  • Check the Carburetor Bowl: Look for a small bolt or nut at the bottom of the carburetor. Carefully loosen and remove it to drain any fuel and debris from the bowl.
  • Clean the Carburetor: For a more thorough cleaning, you may need to remove the carburetor from the engine. Disassemble it carefully, clean all jets and passages with carburetor cleaner and compressed air, and reassemble. If you’re uncomfortable with this, consider taking it to a small engine repair shop.
  • Primer Bulb: If your Craftsman model has a primer bulb, ensure it is functioning. It should feel firm when pressed after a few pumps, indicating it’s drawing fuel. If it feels soft or cracked, it needs replacement.

Ignition System Problems

A spark is necessary to ignite the fuel-air mixture. If the ignition system isn’t working correctly, the engine won’t start.

Spark Plug Issues

The spark plug is a small but vital component. It can become fouled with carbon deposits, oil, or fuel, or the gap can be incorrect, preventing a strong spark.

  • Symptoms: Engine cranks but doesn’t start, or starts intermittently.
  • Solution:
  • Remove the Spark Plug: Use a spark plug wrench to carefully remove the plug.
  • Inspect: Check for heavy carbon buildup, oil fouling, or damage to the electrode.
  • Clean and Gap: If dirty, clean the plug with a wire brush and carburetor cleaner. Check the gap using a feeler gauge and adjust it to the manufacturer’s specification (usually found in your owner’s manual, often around 0.020-0.030 inches).
  • Replace: If the plug is damaged or heavily fouled, it’s best to replace it. Spark plugs are inexpensive.

Faulty Ignition Coil Or Module

The ignition coil (or module) generates the high voltage needed to create a spark. If this component fails, you won’t get a spark.

  • Symptoms: Engine cranks but no spark at the plug.
  • Solution: This is a more complex repair. You can test for spark by removing the spark plug wire, inserting a spare spark plug into the boot, grounding the metal body of the plug against the engine block, and pulling the starter cord. If you see no spark, the ignition coil may be faulty and will need replacement. This often requires diagnosing with a multimeter or by trying a known good coil.

Loose Or Damaged Spark Plug Wire

A loose connection or damaged wire can prevent the spark from reaching the plug.

  • Symptoms: No spark, or intermittent spark.
  • Solution: Ensure the spark plug wire is firmly seated on both the spark plug and the ignition coil. Inspect the wire for cracks or damage.

Air Intake Problems

The engine needs air to combust fuel. Restrictions in the air intake system can prevent starting.

Clogged Air Filter

A dirty air filter restricts the flow of air into the carburetor, leading to a rich fuel mixture that can prevent starting.

  • Symptoms: Engine may start and run poorly, or not start at all.
  • Solution: Locate the air filter housing. Remove the filter and inspect it. If it’s dirty or clogged with debris, clean it (if it’s a foam or washable type) or replace it with a new one. Foam filters can often be washed with soap and water, then re-oiled lightly. Paper filters typically need replacement.

Blocked Air Intake

Obstructions in the intake manifold or carburetor throat can also prevent airflow.

  • Symptoms: Engine won’t start.
  • Solution: Visually inspect the air intake path for any blockages, such as spiderwebs or debris.

Water Supply And Pump Issues

While these don’t directly prevent the *engine* from starting, they can prevent the *pressure washer* from operating correctly or from starting in a way that indicates a problem. Some safety features are tied to water flow.

Insufficient Water Supply

Most pressure washers require a minimum water flow rate from your garden hose to operate safely and effectively. If the water supply is too low, the pump can overheat or the engine may not start due to safety cutoffs.

  • Symptoms: Engine may start briefly and die, or not start at all. Pump may make unusual noises.
  • Solution: Ensure your garden hose is fully connected to the water inlet and that the water source (faucet) is fully open. Check the flow rate by timing how long it takes to fill a 5-gallon bucket. You typically need at least 5-6 GPM (gallons per minute).

Kinked Or Blocked Inlet Hose

A kink in the garden hose or a blockage in the water inlet filter can restrict water flow.

  • Symptoms: Low pressure, or engine won’t start/runs poorly.
  • Solution: Inspect the entire length of the garden hose for kinks. Remove the water inlet filter screen from the pressure washer pump and clean any debris from it.

Water In Oil (4-stroke Engines)

For 4-stroke engines, if water contaminates the engine oil, it can prevent the engine from starting and cause significant damage. This can happen if the unit is stored improperly or if seals fail.

  • Symptoms: Milky or foamy oil, engine won’t start.
  • Solution: Check the oil level and appearance. If the oil looks milky, drain it completely, flush the engine with clean oil (if possible, consult your manual), and refill with the correct type and amount of fresh engine oil. If the problem persists or you suspect internal damage, consult a professional.

Safety Features And Operator Error

Modern pressure washers have safety features that can prevent them from starting if not engaged correctly.

Trigger Lock Engaged

Most Craftsman pressure washers have a safety lock on the trigger to prevent accidental spraying. If this is engaged, the engine may not start or the pump may not engage.

  • Symptoms: Engine won’t start, or pump doesn’t engage.
  • Solution: Ensure the trigger lock is disengaged.

Low Oil Level Sensor (4-stroke Engines)

Many 4-stroke engines have a low oil sensor that will prevent the engine from starting if the oil level is too low.

  • Symptoms: Engine won’t crank or start.
  • Solution: Check the engine oil level using the dipstick. Add the correct type of oil if it’s low. Refer to your owner’s manual for the recommended oil type and capacity.

Unit Not Primed (cold Start)

Some engines, especially when cold, benefit from priming to help draw fuel into the cylinder. If your model has a primer bulb, ensure you use it correctly.

  • Symptoms: Engine cranks but won’t start, especially when cold.
  • Solution: Press the primer bulb 3-5 times until you feel resistance or see fuel in the bulb. If the bulb is cracked or doesn’t seem to be working, it may need replacement.
Craftsman Pressure Washer Wont Start

Credit: www.youtube.com

Troubleshooting Steps For A Craftsman Pressure Washer That Won’t Start

When your Craftsman pressure washer refuses to cooperate, a methodical approach to troubleshooting is key. Rather than randomly trying fixes, follow a logical sequence to identify and resolve the issue efficiently. This process mirrors what a mechanic would do, starting with the simplest and most common problems.

Step 1: Check The Basics (the Obvious First)

Before you start disassembling anything, run through a quick checklist of the most common oversights.

  • Fuel Level: Is there enough fresh fuel in the tank?
  • Fuel Valve: Is the fuel shut-off valve open?
  • Water Supply: Is the water source turned on, and is the hose connected securely?
  • Trigger Lock: Is the trigger safety lock disengaged?
  • Choke: Is the choke set correctly for a cold start (usually ON or CLOSED)?
  • Oil Level (4-Stroke): Is the engine oil at the proper level?

Step 2: Inspect Fuel And Air Components

If the basics check out, move to the fuel and air systems, as these are frequent culprits.

Inspecting The Fuel System

  • Freshness: If the fuel is more than a month old, drain it and refill with fresh gasoline.
  • Fuel Filter: Locate and inspect the fuel filter. If it looks dirty or clogged, replace it. This is a simple and common fix.
  • Fuel Line: Check the fuel line for kinks or damage.

Inspecting The Air System

  • Air Filter: Remove the air filter. If it’s visibly dirty or clogged, clean it or replace it. A clean air filter is crucial for proper engine operation.

Step 3: Check The Ignition System

No spark means no combustion. This is another very common area for problems.

Spark Plug Inspection And Testing

  • Removal: Carefully remove the spark plug using a spark plug wrench.
  • Visual Check: Look for signs of fouling (black, sooty deposits), oil (wet, black residue), or damage to the electrode.
  • Cleaning/Gapping: Clean any deposits with a wire brush and carb cleaner. Check the gap with a feeler gauge and adjust to your manual’s specification.
  • Testing for Spark: Reconnect the spark plug wire to the removed spark plug. Ground the metal body of the spark plug firmly against a clean metal part of the engine block (e.g., a cooling fin). Have someone pull the starter cord while you observe the spark plug gap. A strong, blue spark indicates the ignition system is likely working. A weak, yellow spark, or no spark at all, suggests an ignition problem (coil, wiring, or plug itself).

Step 4: Address Carburetor Issues

If you have fuel, air, and spark, but the engine still won’t start or runs very poorly, the carburetor is a prime suspect.

  • Primer Bulb: If your model has one, ensure it functions correctly. If it feels soft or cracked, replace it.
  • Carburetor Bowl Drain: Loosen the drain screw at the bottom of the carburetor bowl. If fuel drains out, it means fuel is reaching the bowl. If not, there’s a blockage upstream (filter, fuel line, or valve).
  • Carburetor Cleaning: If fuel is reaching the bowl but the engine still won’t start, the internal passages of the carburetor may be clogged. This often requires removing and cleaning the carburetor, as detailed in the “Fuel System Problems” section.

Step 5: Water And Pump System Checks

While not directly related to engine ignition, these can cause issues or indicate underlying problems.

  • Water Flow: Ensure you have strong water flow from your faucet and no kinks in the hose.
  • Inlet Filter: Clean the water inlet filter.
  • Pump Damage: Listen for unusual noises from the pump when attempting to start. While less common for a no-start issue, a seized pump can sometimes prevent an engine from turning over.

Step 6: When To Seek Professional Help

If you’ve gone through these steps and your Craftsman pressure washer still won’t start, or if you’ve identified a more complex mechanical issue (like a suspected faulty ignition coil, internal engine damage, or a severely gummed-up carburetor you’re not comfortable fixing), it’s time to consult a qualified small engine mechanic.

Attempting repairs beyond your comfort level can sometimes cause more damage.

Craftsman Pressure Washer Wont Start

Credit: www.youtube.com

Diagnosing Specific Craftsman Pressure Washer Models

While the general principles of troubleshooting apply to all Craftsman pressure washers, specific models might have unique features or common issues. Craftsman offers a range of pressure washers, from smaller electric models to powerful gas-powered units, often featuring engines from brands like Briggs & Stratton or Honda, or their own branded engines.

Understanding your specific model can help narrow down potential problems.

Gas Vs. Electric Models

The most significant distinction is between gas and electric pressure washers.

  • Electric Models: These are simpler and have fewer potential starting issues related to fuel or ignition. Problems are typically related to power supply (tripped breaker, faulty cord, GFCI issues) or pump blockages. If an electric Craftsman pressure washer won’t start, check the power source, the GFCI outlet, and ensure the water inlet isn’t blocked.
  • Gas Models: These have the complexities of an internal combustion engine, involving fuel, air, spark, and oil. The troubleshooting steps outlined above primarily apply to these models.

Engine Brand Specifics

Many Craftsman gas pressure washers use engines manufactured by other companies, most notably Briggs & Stratton. While Craftsman engines also exist.

  • Briggs & Stratton Engines: These are very common. Many Briggs & Stratton engines have features like:
  • ReadyStart®: Auto-choke system, meaning you don’t need to manually choke the engine. If the ReadyStart system malfunctions, it could affect starting.
  • Lo-Tone™ Muffler: Affects sound, not starting.
  • Paper Air Filters: Typically require replacement when dirty.
  • Overhead Valve (OHV) Design: Common in modern engines, offering better efficiency.
  • Low Oil Shutdown: A safety feature that prevents starting if oil is low.
  • Common Issues: Carburetor gumming, clogged fuel filters, and spark plug fouling are prevalent, much like any small engine. Referencing the specific Briggs & Stratton engine manual for your model can provide detailed troubleshooting for that engine. You can often find the engine model number on a sticker on the engine itself.
  • Craftsman Branded Engines: Older or some newer models might feature engines branded as Craftsman. These often operate on similar principles to Briggs & Stratton or Honda engines.
  • Common Issues: Similar to other gasoline engines, expect fuel system (carburetor, filter, fuel line) and ignition system (spark plug, coil) issues to be the most frequent causes of no-start problems.

Model-specific Features To Consider

When troubleshooting your specific Craftsman pressure washer, consider these features:

  • Primer Bulb: If your model has one, check its condition and function. A cracked or non-functional primer bulb will make cold starts difficult.
  • Choke System: Is it manual or automatic (like ReadyStart)? Ensure it’s functioning correctly. A stuck choke can cause starting problems.
  • Fuel Shut-off Valve: Some models have one, others don’t. If yours does, ensure it’s open.
  • Water Pressure Sensor/Low Water Cutoff: Some advanced models might have sensors that prevent starting if water flow is inadequate. This is less common on basic Craftsman units but worth considering for higher-end models.

Example Scenario: Craftsman 2700 Psi Pressure Washer

Let’s say you have a Craftsman 2700 PSI model with a Briggs & Stratton engine that won’t start.

  • Initial Check: You confirm there’s fresh fuel, the fuel valve is open, water is on, and the trigger lock is off.
  • Air Filter: You remove and inspect the air filter; it’s dirty. You clean it or replace it.
  • Spark Plug: You remove the spark plug. It’s fouled with black carbon. You clean it, check the gap, and reinstall it.
  • Attempt to Start: The engine still won’t start.
  • Carburetor Bowl: You loosen the drain screw on the carburetor bowl. No fuel drains out. This indicates a blockage *before* the bowl.
  • Fuel Filter: You locate the inline fuel filter and see it’s clogged. You replace it.
  • Attempt to Start: The engine now fires up and runs, albeit a bit rough.
  • Carburetor Cleaning (if needed): If it still runs rough, the carburetor itself might need cleaning or adjustment.

This example illustrates how a systematic approach, starting with simple checks and moving to more involved components, can pinpoint the issue.

Craftsman Pressure Washer Wont Start

Credit: www.youtube.com

Maintenance Tips To Prevent Starting Problems

Preventative maintenance is the most effective way to avoid your Craftsman pressure washer refusing to start. Regular care ensures all components are in good working order and prevents the buildup of issues that lead to breakdowns.

Regular Fuel System Care

The fuel system is often the most problematic area for small engines that aren’t used daily.

  • Use Fresh Fuel: Always use fresh gasoline (less than 30 days old).
  • Fuel Stabilizer: If you don’t use the pressure washer regularly or during seasonal storage, add a quality fuel stabilizer to prevent fuel degradation and gum formation. This is a critical step.
  • Clean Fuel Tank: Periodically inspect and clean the fuel tank for any sediment or rust.
  • Replace Fuel Filter: Change the fuel filter annually or as recommended

7 Best Digital Picture Frames for Your Home Photo Display in 2026

A modern digital picture frame displaying a landscape photograph on a wooden side table.

Finding the right way to display your memories can be a challenge when you have thousands of photos trapped on your phone. The best digital picture frame helps you move those images into your living space, but choosing the right one means weighing convenience against storage needs. You must decide if you want a simple, app-based system or a frame that offers more manual control over your files. This article helps you settle on the model that fits your home and your habits.

As an Amazon Associate, we earn from qualifying purchases. This post contains affiliate links – if you buy through them, we may earn a commission at no extra cost to you.

1Best Overall
Aura Walden 15
Aura Walden 15
2Best Large Display
Frameo 15.6 Inch
Frameo 15.6 Inch
3Best for Gifting
Aura Carver
Aura Carver
4Best Compact Design
Frameo 10.1 Inch
Frameo 10.1 Inch
5Easiest to Use
Skylight Digital Frame
6Best High-Resolution Display
Aura Aspen
Aura Aspen
7Best Alternative Brand
RCA 10.1 Inch
RCA 10.1 Inch

1. Aura Walden 15″ WiFi Digital Picture Frame

Aura Walden 15

Check Latest Price on Amazon

Right for: Users wanting a large, premium display with simple cloud sharing.

The Aura Walden 15 offers a large, 15-inch Full HD screen designed for wall mounting or tabletop use. It features an anti-glare display that automatically adjusts brightness and manages photo cropping for you. The frame connects to WiFi and uses the Aura app to let family members send photos from anywhere.

This frame is built for those who want a “set it and forget it” experience. Because it includes unlimited free cloud storage, you don’t need to worry about managing SD cards or USB drives. It’s an excellent choice for a busy family room where everyone wants to contribute photos instantly.

What works:

  • Large 15-inch Full HD display
  • Unlimited free cloud storage included
  • Automatic brightness and orientation adjustments
  • Easy app-based photo sharing
  • Wall mounting kit included

Where it gives ground:

  • Requires a constant WiFi connection
  • No mention of manual USB photo import

Skip it if: You prefer managing your photo library offline via local storage devices.

2. 64GB 15.6″ Frameo Digital Picture Frame WiFi

Frameo 15.6 Inch

Check Latest Price on Amazon

Right for: People who need massive local storage and offline playback.

The Frameo 15.6 Inch features a large IPS touchscreen with a 1920 x 1080 resolution. It includes 64GB of internal memory, which the manufacturer states can hold about 100,000 photos. You can also use SD cards or USB drives to import and back up your memories without needing the internet.

This model is a strong pick for someone who wants to keep a huge library of photos available at all times. The ability to use physical storage means your slideshow can keep running even if your WiFi goes down. Just be careful when plugging in the power cable to avoid damaging the port contacts.

What works:

  • Large 64GB internal storage capacity
  • Supports SD card and USB expansion
  • Vivid IPS touchscreen display
  • Includes built-in speakers for video
  • Allows offline photo viewing

Where it gives ground:

  • USB port doesn’t support computer transfers
  • Requires care when inserting power cable

Skip it if: You want a completely wireless, cloud-only setup without managing physical cards.

3. Aura Digital HD Picture Frame

Aura Carver

Check Latest Price on Amazon

Right for: Gift-givers looking for a highly-rated, user-friendly desktop display.

The Aura Carver is a 10-inch digital frame that focuses on ease of use and aesthetics. It’s frequently recommended for its quick setup process, which takes about one minute to connect to WiFi. Like other Aura models, it provides unlimited free cloud storage for your photos and videos.

This frame is ideal for gifting because you can preload it with memories before the recipient even opens the box. It fits easily on a desk or shelf, making it a great choice for grandparents or friends who want to see daily updates. It provides a clean, simple experience for those who aren’t tech-savvy.

What works:

  • Fast one-minute WiFi setup
  • Unlimited free cloud storage
  • Premium packaging for gifting
  • Supports photos from various sources
  • No subscription fees required

Where it gives ground:

  • Smaller screen than the Walden series
  • No mention of manual SD card slots

Skip it if: You need a very large wall-mounted display for a big room.

4. Frameo 10.1 Inch

Frameo 10.1 Inch

Check Latest Price on Amazon

Right for: Users needing a compact frame with reliable local memory.

The Frameo 10.1 Inch by moonka uses a 1280×800 IPS screen with a 16:10 aspect ratio. It comes with 32GB of internal storage, allowing you to store thousands of photos locally. The frame includes a touch interface and supports auto-rotation for both landscape and portrait orientation.

Since it supports offline viewing, you don’t have to worry about a persistent internet connection to see your saved slideshows.

What works:

  • 32GB of built-in memory
  • Reliable IPS touchscreen display
  • Supports offline photo viewing
  • Includes auto-rotate and sleep timer
  • Simple user-friendly interface

Where it gives ground:

  • Only supports 2.4GHz WiFi networks
  • Video uploads via app limited to 15 seconds

Skip it if: You require a larger screen for viewing photos from across the room.

5. Skylight Digital Picture Frame

Skylight Digital Frame

Check Latest Price on Amazon

Right for: Someone who wants the simplest possible email-based photo sharing.

The Skylight Digital Frame uses a unique email address to receive photos, making it very easy to share from any device. It features a 10-inch color touchscreen with a 1280×800 resolution. The frame is designed to be a “bridge for every generation,” focusing on plug-and-play simplicity.

You can use the Gift Mode to preload images before sending it to a loved one. Because it relies on cloud storage, it avoids the mess of managing physical SD cards entirely.

What works:

  • Simple email-based photo uploads
  • Intuitive touchscreen interface that is compact enough for personal spaces.
  • Gift Mode for preloading photos
  • No SD card management required
  • Plug-and-play setup

Where it gives ground:

  • WiFi required to receive new photos
  • Smaller screen size compared to premium models

Skip it if: You want to import large batches of photos using a USB drive.

6. Aura Digital HD Picture Frame

Aura Aspen

Check Latest Price on Amazon

Right for: Those who want a high-quality display with a sleek mat design.

The Aura Aspen offers a 12-inch HD display framed with a black mat, giving it a more traditional picture frame look. It shares the same unlimited cloud storage and easy app-based setup as other Aura models.

The high-resolution screen ensures your photos look clear, and the simple app makes it easy for family members to add new content.

What works:

  • Elegant design with black mat
  • High-resolution HD display
  • Unlimited free cloud storage
  • Very easy to set up
  • App-based sharing for multiple users

Where it gives ground:

  • No mention of manual memory expansion
  • Requires constant WiFi connectivity

Skip it if: You prefer a frame with a larger screen designed for wall mounting.

7. RCA 10.1” WiFi Digital Picture Frame

RCA 10.1 Inch

Check Latest Price on Amazon

Right for: Users who prioritize flexible storage options.

The RCA 10.1 Inch features a 1280×800 IPS touchscreen and 32GB of built-in storage. It uses the “Uhale” app for private sharing, which also includes a website for uploading photos from a computer. It supports SD cards and USB drives for additional memory and offline backups.

Being able to upload photos from a computer website is a convenient feature that many other app-only frames lack.

What works:

  • 32GB internal storage plus expansion
  • Upload photos via app or website
  • Bright HD IPS touchscreen
  • Includes wall mounting and stand
  • Supports offline slideshow playback

Where it gives ground:

  • App required for wireless features
  • Standard 10.1-inch screen resolution

Skip it if: You want a premium, high-resolution screen that is larger than standard desktop models.

How to Think Before You Choose

Cloud vs. Local Storage

Cloud-based frames rely on an app or email to send photos, which is convenient but usually requires a constant WiFi connection. Local storage frames, like those supporting SD cards or USB drives, allow you to keep your photos even when the internet is down. You should check the Energy Star guidelines for electronic display power efficiency at home to ensure your frame is suitable for long-term use.

Screen Size and Resolution

A larger screen makes photos easier to see from a distance, but higher resolution is needed to keep images sharp as the display grows. If you plan to hang the frame on a wall, look for a display with a larger surface area to ensure visibility. Smaller frames are better for bedside tables or desks where you’ll be viewing the screen up close.

Sharing Methods

Consider who will be sending the photos to the frame. Some frames use dedicated apps that allow multiple users to join, while others use a simple email address to receive files. If you have family members who aren’t tech-savvy, an email-based system is often the easiest path.

Who Should Skip These Altogether

Some people may find that these devices don’t fit their specific needs or current lifestyle.

  • Anyone who prefers to view photos in physical albums or printed frames.
  • Users who don’t have a reliable 2.4GHz WiFi network at home.
  • People who would only use the device once and then store it away.
  • Those who already own a tablet that can be repurposed as a digital photo slideshow.

The Aura Walden 15 is the best choice for those who want a large, high-quality wall display, while the Aura Carver is the top pick for a simple, elegant gift. Check your available space and then follow the provided links to secure your frame today.

Frequently Asked Questions

Do these frames require a monthly subscription?

Most of the frames listed here, such as the Aura models, don’t charge a monthly subscription fee for their cloud storage. You can add unlimited photos and videos using their free apps. Always check the specific product listing to confirm that no hidden fees are mentioned for cloud services.

Can I display videos on these frames?

Yes, most digital frames now support video playback with sound. For example, the Aura Walden 15 and the Frameo models allow you to send videos from your phone or import them via SD card. Note that some app-based uploads have a brief time limit per video.

What happens if my WiFi connection stops?

Frames that rely on cloud storage usually require a WiFi connection to receive new photos or updates. However, many models, including the Frameo 15.6 Inch and RCA 10.1 Inch, allow you to view existing photos stored in their internal memory or on SD cards even without WiFi.

Are these frames difficult to set up for seniors?

Many of these frames are designed with simplicity in mind, featuring quick WiFi setup and easy-to-use touchscreens. Frames like the Skylight or Aura Carver are specifically marketed as being easy for all ages to use. Once set up, the recipient usually just needs to turn the frame on to see new photos.

What should I check before buying a frame?

Check the WiFi compatibility, as many frames only support 2.4GHz networks. You should also confirm whether the frame includes a stand or a wall-mounting kit, depending on where you intend to place it. Finally, ensure the storage capacity meets your needs, especially if you have a very large photo collection.

Final Thoughts

Once you’ve picked your favorite, don’t let those precious moments stay buried in your camera roll for another day. Set up your new display on a shelf where you’ll see it often, and start inviting family members to share their snapshots too. You’ll love how much warmth it brings to your home.