Why Wall Paint Bubbles And Peels

Why Wall Paint Bubbles And Peels

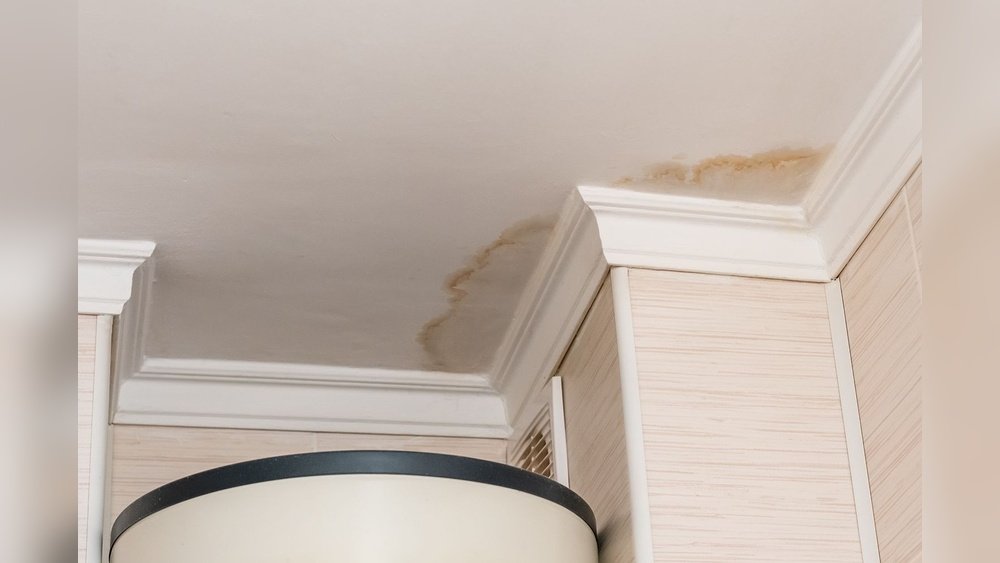
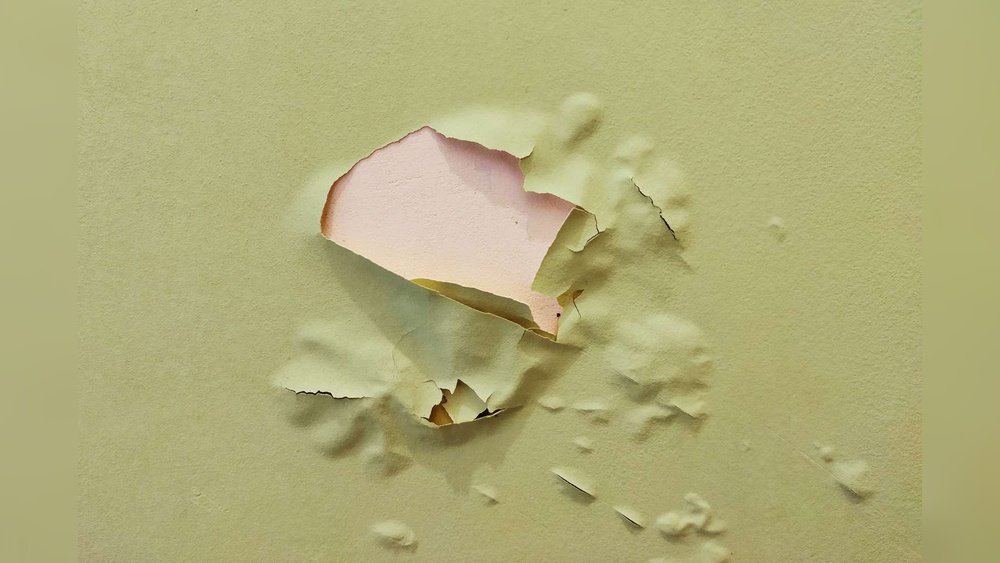
The once pristine finish on your walls, a smooth canvas of color, has begun to betray you. Small blisters, then larger ones, appear, eventually leading to unsightly patches of peeling paint that mar the aesthetic of your home. This phenomenon, often dismissed as a minor annoyance, is a clear indicator of underlying issues that need to be addressed. Understanding why wall paint bubbles and peels is the first crucial step toward preventing it from happening again and restoring the integrity of your home’s surfaces.

Paint failure isn’t just about aesthetics; it can signal moisture problems, poor surface preparation, or the use of incompatible materials, all of which can lead to more significant structural damage if left unchecked. Whether you’re a seasoned DIYer or a homeowner looking to understand professional work, this guide will equip you with the knowledge to identify the root causes of paint failure and implement effective solutions.

We’ll explore the science behind paint adhesion, the common culprits behind bubbling and peeling, and the preventative measures you can take to ensure a durable, long-lasting finish.

Key Takeaways

  • Moisture is the primary culprit: Water trapped beneath the paint film is the most frequent cause of bubbling and peeling. This can stem from leaks, high humidity, or condensation.
  • Poor surface preparation is critical: Inadequate cleaning, sanding, or priming before painting will severely compromise paint adhesion.
  • Incompatible materials cause issues: Applying oil-based paint over latex, or vice-versa, without proper sealing can lead to adhesion problems.
  • Quality of paint matters: Lower-quality paints may have weaker binders, making them more susceptible to failure.
  • Environmental factors play a role: Extreme temperature fluctuations and direct sunlight can stress the paint film.
  • Proper application techniques are essential: Applying paint too thinly, too thickly, or in unfavorable weather conditions can lead to premature failure.
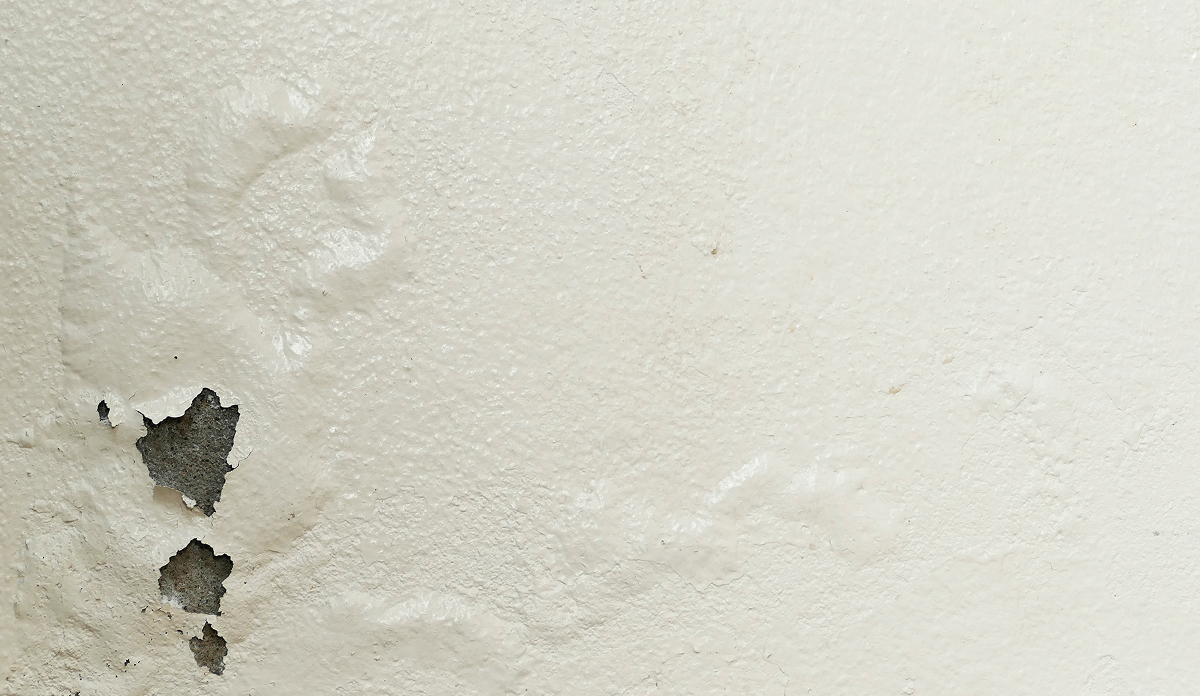
Why Wall Paint Bubbles And Peels

Credit: www.ringsend.com

The Science Of Paint Adhesion: Why Paint Sticks (or Doesn’t)

Paint is more than just a coat of color; it’s a complex system of pigments, binders, solvents, and additives. The binder is the critical component responsible for adhesion. It’s the “glue” that holds the pigment particles together and, more importantly, adheres them to the surface. When paint is applied, the solvent (water in latex paints, mineral spirits in oil-based paints) evaporates, leaving behind a solid film of binder and pigment. For this film to remain intact and adhere strongly, several factors must be in play.

The surface itself must be clean and porous enough to allow the binder to penetrate and create a mechanical bond. Surface tension also plays a role; if the paint has high surface tension, it might bead up rather than spread evenly, leading to poor contact and adhesion. The binder needs to form a continuous film that is flexible enough to withstand minor surface movements but strong enough to resist external forces like moisture or abrasion. When these conditions aren’t met, the bond between the paint and the surface, or between layers of paint, weakens, setting the stage for bubbling and peeling.

Why Wall Paint Bubbles And Peels

Credit: www.ultratechcement.com

Common Causes Of Paint Bubbling And Peeling

The appearance of bubbles and peeling paint on your walls isn’t a random occurrence. It’s a symptom, and like any symptom, it points to an underlying cause. Identifying these causes is paramount to fixing the problem effectively and preventing its recurrence.

Moisture Trapped Beneath The Paint Film

This is, by far, the most common reason for paint failure. Water is the enemy of paint adhesion. When moisture penetrates the paint film from behind, it breaks the bond between the paint and the substrate (the wall itself) or between different layers of paint.

  • Leaks from Plumbing or Roofs: Hidden leaks within walls, from faulty plumbing pipes, or from a compromised roof can saturate the drywall or plaster. As the water evaporates, it pushes against the paint film, creating blisters. In severe cases, this moisture can also lead to mold growth, further damaging the surface.
  • High Humidity and Condensation: Bathrooms, kitchens, and laundry rooms are prone to high humidity. Inadequate ventilation can lead to significant condensation forming on walls, especially during colder months when there’s a temperature differential between the interior and exterior. This moisture seeps into the paint.
  • Rising Damp: In older homes, moisture from the ground can wick up through porous building materials like brick or plaster, a phenomenon known as rising damp. This moisture can travel up the wall, compromising the paint finish at lower levels.
  • Inadequate Exterior Sealing: If the exterior of your home isn’t properly sealed or painted, water can penetrate the walls and find its way to the interior surface, causing the interior paint to bubble.

Poor Surface Preparation

Paint needs a clean, sound surface to adhere to. Skipping or rushing crucial preparation steps is a surefire way to invite paint failure down the line.

  • Dirty or Greasy Surfaces: Walls that haven’t been properly cleaned before painting can have a layer of dust, grease, or grime. Paint simply cannot adhere effectively to these contaminants. This is particularly common in kitchens where cooking grease accumulates.
  • Unprimed or Improperly Primed Surfaces: Priming is essential for several reasons: it seals porous surfaces, provides a uniform base for the topcoat, and enhances adhesion. Painting directly over glossy surfaces, stains, or new drywall without appropriate primer will almost certainly lead to peeling.
  • Old, Peeling Paint Not Removed: If you’re painting over an existing layer of paint that is already loose or peeling, you’re essentially painting over a failing surface. The new paint will only be as strong as the old layer beneath it, and it will inevitably start to peel along with the old paint.
  • Dust After Sanding: Sanding creates fine dust particles. If this dust isn’t thoroughly wiped away after sanding (using a damp cloth or tack cloth), it will prevent the primer or paint from making direct contact with the wall surface.

Incompatible Paint Layers

Paint formulations have evolved over the years, and not all types are compatible with each other. Applying one type of paint over another without the correct intermediary steps can lead to adhesion failure.

  • Latex Over Oil-Based Paint: Latex (water-based) paint does not adhere well to oil-based paint. The flexible binders in latex paint can’t get a proper grip on the hard, non-porous surface of oil-based paint. This often results in the latex paint bubbling and peeling off in sheets.
  • Oil-Based Over Latex Paint: While generally less problematic than the reverse, applying oil-based paint over latex can still cause issues if the latex paint isn’t completely cured or if the oil-based paint is too heavy. It can also lead to a less breathable surface.
  • Using the Wrong Primer: Different primers are designed for different surfaces and paint types. Using a primer not suited for the existing surface or the intended topcoat will compromise adhesion. For example, using a standard latex primer over a glossy oil-based surface won’t provide adequate grip.

Application Errors

Even with the right materials and preparation, improper application techniques can lead to paint failure.

  • Painting in Extreme Temperatures or Humidity: Most paints have optimal temperature and humidity ranges for application. Painting when it’s too cold, too hot, or too humid can affect how the paint cures and adheres. High humidity, in particular, can slow down drying and curing, increasing the risk of moisture issues.
  • Applying Paint Too Thinly or Too Thickly: Applying paint too thinly may not provide adequate coverage or film integrity. Conversely, applying it too thickly can prevent proper drying and curing, leading to sagging, cracking, and potential adhesion problems as the surface dries unevenly.
  • Insufficient Drying Time Between Coats: Each coat of paint needs adequate time to dry and cure before the next is applied. Rushing this process traps solvents and moisture, weakening the overall paint film and its bond to the surface.

Quality Of Paint And Materials

While less common as a sole cause, the quality of the paint and primer used can contribute to paint failure, especially when combined with other factors.

  • Low-Quality Binders: Cheaper paints often use lower-quality binders, which have weaker adhesive properties. This means they are less forgiving of minor imperfections in surface preparation or environmental conditions.
  • Old or Degraded Paint: Paint that has been stored for a very long time, especially if exposed to freezing temperatures, can degrade. Its chemical properties can change, affecting its ability to adhere and form a durable film.
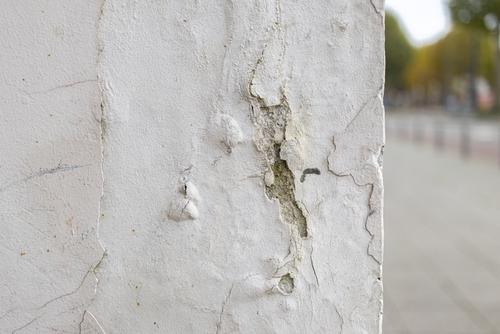
Why Wall Paint Bubbles And Peels

Credit: www.ultratechcement.com

Identifying The Root Cause: A Diagnostic Approach

Before you can effectively repair bubbling and peeling paint, you need to pinpoint the exact cause. This diagnostic process will save you time and money by ensuring you address the underlying problem, not just the symptom.

The Water Test: Is Moisture The Culprit?

The most telling sign of moisture-related paint failure is the location and nature of the bubbles.

  • Location: Are the bubbles appearing in areas prone to moisture, such as near windows, bathrooms, kitchens, or on exterior walls that face prevailing winds or rain?
  • Bubbles from Behind: If you gently poke a bubble, does it feel soft or damp? Is there any discoloration or mold growth visible beneath the paint layer? This strongly suggests moisture is seeping from behind the paint.
  • Exterior Wall Issues: If the peeling is on an interior wall directly opposite an exterior wall, inspect the exterior for cracks, failing sealant around windows, or damaged siding.

Pro Tip: For suspected moisture issues, consider using a moisture meter. These devices can accurately measure the moisture content in drywall and plaster, confirming or ruling out water intrusion.

Inspecting Surface Preparation And Previous Work

Examine the condition of the paint layers and the surface itself.

  • Adhesion Test: Try to scrape or peel a small section of the affected paint. Does it come off easily? Does it pull away cleanly, or does it take chunks of the substrate with it? If it pulls away easily, it indicates poor adhesion, likely due to surface contamination or lack of primer.
  • Paint Type Check: If you’re unsure about the type of paint currently on the walls, you can perform a simple test. Moisten a cotton ball with denatured alcohol and rub it on an inconspicuous area. If the paint comes off onto the cotton ball, it’s likely latex. If it doesn’t, it’s probably oil-based. This helps determine compatibility for future painting.
  • Glossy Surfaces: If the paint is peeling from a surface that appears very glossy and smooth, it might be that the previous paint was oil-based and not properly deglossed or primed before a latex topcoat was applied.

Evaluating Application And Material Quality

While harder to assess without prior knowledge, some signs can indicate application or material issues.

  • Uneven Drying: If the paint seems to have dried unevenly, with some areas appearing thicker or stickier than others, it could point to over-application or poor drying conditions.
  • Paint Film Integrity: Examine the peeling paint itself. Does it seem brittle and crumbly (potential quality issue) or flexible and rubbery (often related to moisture)?

Remediation: Fixing Bubbling And Peeling Paint

Once you’ve identified the cause, you can proceed with repairs. The repair process will vary depending on the severity and the underlying issue.

Addressing Moisture Problems

This is the most critical step. If you don’t fix the moisture source, any new paint job will eventually fail again.

  • Identify and Repair Leaks: This might involve calling a plumber to fix leaky pipes, a roofer to repair roof damage, or a contractor to address issues with exterior siding or sealant.
  • Improve Ventilation: In bathrooms and kitchens, ensure exhaust fans are working correctly and are used consistently. Consider installing a dehumidifier if persistent humidity is an issue.
  • Address Rising Damp: This often requires professional intervention, such as installing a damp-proof course or improving exterior drainage.

Preparing The Surface For Repainting

This is a universal step for any paint repair.

  • Remove Loose Paint: Using a putty knife or scraper, carefully remove all loose, bubbling, or peeling paint. Work outwards from the edge of the affected area until you reach sound paint.
  • Sand the Edges: Feather the edges of the remaining paint by sanding them down to a smooth transition with the exposed surface. This prevents the new paint from showing ridges.
  • Clean the Area: Wash the entire area with a mild detergent and water solution to remove dust, dirt, grease, and any residue from the scraping and sanding process. Rinse thoroughly and allow the surface to dry completely. If mold was present, use a solution of bleach and water (1 part bleach to 3 parts water) and rinse well.
  • Repair Damage: Fill any gouges, holes, or cracks with appropriate spackle or joint compound. Allow it to dry, then sand smooth.

Priming And Repainting

With the surface prepared and moisture issues resolved, you can proceed with priming and painting.

  • Apply a Quality Primer: This is non-negotiable. Use a high-quality primer specifically designed for the type of surface and the problem you’ve encountered.
  • For moisture issues: Use a stain-blocking, moisture-resistant primer. These primers are formulated to seal porous surfaces and prevent residual moisture from affecting the topcoat.
  • For adhesion issues (e.g., over oil-based paint): Use a bonding primer. These primers are designed to adhere strongly to difficult surfaces like glossy paint or laminate.
  • For new drywall or repairs: Use a drywall primer/sealer to create a uniform surface.
  • Allow Primer to Dry: Follow the manufacturer’s instructions for drying times. This is crucial for the primer to form a proper bond.
  • Apply Topcoats: Apply two thin, even coats of your chosen paint. Avoid applying paint too thickly, as this can lead to drying issues. Ensure adequate drying time between coats.

Preventing Future Paint Failure: A Proactive Approach

The best way to deal with bubbling and peeling paint is to prevent it from happening in the first place. Implementing good practices during the initial painting process can save you significant headaches and expenses later on.

Meticulous Surface Preparation

This Cannot Be Overstated. Invest Time In Proper Preparation.

  • Clean Thoroughly: Always wash walls to remove any dirt, grease, or grime, especially in kitchens and bathrooms.
  • Scrape and Sand: Remove all loose paint and sand any glossy surfaces to create a better grip for the new paint.
  • Dust Removal: Ensure all sanding dust is completely removed before priming.
  • Use the Right Primer: Always prime new surfaces, repaired areas, and surfaces where paint adhesion might be an issue (like glossy paint or stained areas). Choose a primer that is compatible with both the surface and your topcoat.

Choose Quality Materials

  • Invest in Good Paint: While budget is always a consideration, investing in higher-quality paints with superior binders and pigments will generally result in a more durable and longer-lasting finish.
  • Select Appropriate Primer: Don’t skimp on primer. A good primer acts as the foundation for your paint job.

Proper Application Techniques

  • Follow Manufacturer Guidelines: Pay close attention to the recommended application temperatures, humidity levels, and drying times on the paint and primer cans.
  • Apply Even Coats: Avoid applying paint too thickly or too thinly. Two thin coats are almost always better than one thick coat.
  • Use the Right Tools: Ensure your brushes and rollers are appropriate for the type of paint you are using and are in good condition.

Address Moisture Sources Promptly

  • Ventilation is Key: Ensure adequate ventilation in moisture-prone areas like bathrooms and kitchens. Use exhaust fans and consider a dehumidifier if necessary.
  • Exterior Maintenance: Regularly inspect and maintain the exterior of your home, including gutters, siding, and sealant around windows and doors, to prevent water intrusion.

Consider Paint Type Compatibility

  • Know Your Paints: If painting over an existing surface, try to determine if it’s oil-based or latex. If unsure, use a bonding primer designed to adhere to most surfaces.
  • Latex Over Latex, Oil Over Oil: Generally, it’s safest to apply latex over latex and oil over oil. If you must switch types, thorough preparation and the correct primer are essential.

Case Study: The Bathroom Re-paint That Went Wrong

Sarah decided to repaint her small, frequently used bathroom to freshen it up. The existing paint was a light blue, slightly glossy finish. She skipped cleaning, assuming it was clean enough, and directly applied a new coat of premium latex paint.

Within a few weeks, small bubbles started appearing around the shower area and near the window.

The Problem: Sarah’s mistake was twofold: she didn’t clean the greasy residue and soap scum that had accumulated on the walls, and she applied a latex paint directly over what was likely an oil-based or heavily sealed latex paint without proper preparation. The humidity from showers exacerbated the poor adhesion, causing moisture to get trapped and the paint to bubble.

The Fix: Sarah had to scrape off all the bubbling paint, sand the entire wall surface to degloss it, clean it thoroughly with a TSP (trisodium phosphate) substitute, rinse, and let it dry completely. She then applied a high-quality bonding primer suitable for glossy surfaces and moisture-prone areas. Once the primer was dry, she applied two coats of a mold-resistant, bathroom-specific latex paint. She also made sure to use the exhaust fan during and after showers. This time, the paint held firm.

Data Snapshot: Paint Failure Costs

The cost of paint failure extends beyond the price of paint and labor. While exact figures vary widely by region and the extent of damage, studies and industry reports consistently highlight the significant financial impact. According to a report by the Painting Contractors of America, improper surface preparation is cited as the leading cause of premature paint failure, leading to costly rework. For a typical 3-bedroom home, the cost of repainting due to failure can easily range from $3,000 to $10,000 or more, depending on the complexity of the repairs needed, such as fixing underlying water damage or structural issues. This underscores the economic importance of getting the paint job right the first time.

Frequently Asked Questions

Why Does Paint Bubble Immediately After Painting?

Bubbling that appears very soon after painting is often due to trapped solvents or moisture. If the paint was applied too thickly, the surface may have dried while the underlying layers were still wet. This trapped solvent or moisture can cause the paint film to blister as it tries to escape. Applying paint in very high humidity or direct, hot sunlight can also cause the surface to skin over too quickly, trapping moisture underneath.

Can I Just Paint Over Small Bubbles?

No, you should never paint over small bubbles without addressing the underlying cause. Painting over a bubble is like putting a band-aid on a serious wound. The bubble indicates a loss of adhesion or moisture issues. Painting over it will only temporarily hide the problem, and the bubble will likely return, possibly larger and more difficult to repair. You must remove the loose paint, prepare the surface, and reapply primer and paint.

How Does Temperature Affect Paint Bubbling?

Temperature significantly impacts paint adhesion and drying. Painting in extreme cold can slow down the curing process, preventing the paint from forming a strong, cohesive film. The binders may not fully harden, leading to a weak bond susceptible to damage. Conversely, painting in extreme heat can cause the paint to dry too quickly, especially on the surface. This can lead to a condition known as “mud cracking” or cause the paint to lose adhesion as it dries unevenly, sometimes resulting in blistering as trapped moisture or solvents escape. Always adhere to the temperature ranges recommended by the paint manufacturer.

Is Peeling Paint A Sign Of Lead Paint?

Peeling paint, especially in homes built before 1978, can be a sign of lead-based paint. Lead paint is hazardous, particularly when it deteriorates into dust or chips that can be ingested or inhaled. If you suspect lead paint, do not attempt to remove or disturb it yourself. Hire a certified lead abatement professional to test and safely remove the paint. Proper containment and disposal are crucial to prevent lead poisoning.

What Is The Difference Between Paint Bubbling And Cracking?

Bubbling is characterized by the formation of blisters or pockets where the paint has lost adhesion to the surface, often due to moisture or solvent entrapment. The paint lifts away from the substrate. Cracking, on the other hand, occurs when the paint film itself fails due to stress. This can be caused by the paint film becoming too brittle over time, expansion and contraction of the underlying surface due to temperature or humidity changes, or applying incompatible paint layers that pull against each other. Cracks can appear as hairline fissures or larger, alligator-like patterns. While both are forms of paint failure, they stem from different underlying issues.

The recurring issue of wall paint bubbling and peeling is a frustrating problem for homeowners, but it’s rarely an insurmountable one. By understanding the fundamental principles of paint adhesion and systematically diagnosing the root causes, most commonly moisture intrusion and inadequate surface preparation, you can effectively remediate the problem. The key lies in patience and thoroughness: remove all failing paint, prepare the surface meticulously, use high-quality primers and paints suited to the specific issue, and ensure proper ventilation and exterior maintenance. Proactive measures, from diligent cleaning and sanding to choosing the right materials and application techniques, are the most effective defense against future paint failures, safeguarding both the appearance and integrity of your home’s surfaces for years to come.
Jelly Comb Mouse Not Working

Jelly Comb Mouse Not Working

The Jelly Comb mouse not working is a frustrating issue that can bring your productivity to a standstill. Whether you’re in the middle of a crucial work project, enjoying a gaming session, or simply browsing the web, a malfunctioning mouse can derail your entire digital experience. Jelly Comb, known for its range of affordable and functional computer peripherals, offers various mouse models, from wireless optical mice to ergonomic designs. When one of these devices suddenly stops responding, it’s essential to have a systematic approach to troubleshooting. This guide will walk you through the most common reasons why your Jelly Comb mouse might not be working and provide step-by-step solutions to get it back up and running. We’ll cover everything from simple fixes like checking batteries and connections to more complex software-related issues and hardware diagnostics.

Understanding the potential causes behind a non-responsive mouse is the first step toward a swift resolution. Often, the problem is a minor oversight, but sometimes it can point to a deeper issue with your computer’s operating system, drivers, or even the mouse hardware itself.

By systematically eliminating possibilities, you can save time and avoid unnecessary stress. This comprehensive guide aims to equip you with the knowledge and actionable steps to diagnose and resolve most Jelly Comb mouse problems, ensuring you can return to your tasks with minimal interruption.

Key Takeaways

  • Check Power & Connection: Ensure batteries are fresh and correctly inserted (wireless) or that the USB cable is securely plugged in (wired).
  • Test on Another Device: A simple test on a different computer can quickly determine if the issue lies with the mouse or your primary PC.
  • Inspect Sensor & Surface: Clean the optical sensor and try a different mousepad or surface to rule out tracking problems.
  • Restart Your Computer: A basic reboot can resolve many temporary software glitches affecting peripheral recognition.
  • Update/Reinstall Drivers: Outdated or corrupted drivers are a common culprit; re-installing or updating them can fix the problem.
  • Check Device Manager: Verify that the mouse is recognized by Windows and look for any error indicators.
  • Troubleshoot Wireless Interference: For wireless models, ensure there are no nearby devices causing signal disruption.
  • Consider Hardware Failure: If all else fails, the mouse itself might be defective and require replacement.
Jelly Comb Mouse Not Working

Credit: www.ifixit.com

Troubleshooting A Jelly Comb Wireless Mouse

Wireless mice offer the freedom of a clutter-free desk, but they also introduce a few potential points of failure that wired mice don’t have. The most common issues with Jelly Comb wireless mice revolve around power, connectivity, and interference. Addressing these systematically is key to restoring functionality.

Power Issues: Batteries And Charging

The most frequent reason a wireless mouse stops working is a lack of power. This can be due to dead batteries or, in the case of rechargeable models, a depleted battery that needs charging.

  • Check and Replace Batteries: For mice that use standard AA or AAA batteries, ensure they are inserted correctly with the positive and negative terminals aligned with the markings in the battery compartment. If the batteries are old, replace them with a fresh set. Even if you think the batteries are new, try a different set to rule out faulty batteries.
  • Verify Battery Contacts: Sometimes, the metal contacts inside the battery compartment can become dirty or corroded, preventing a good connection. Gently clean these contacts with a pencil eraser or a cotton swab lightly dampened with isopropyl alcohol. Ensure they are completely dry before inserting new batteries.
  • Rechargeable Models: If your Jelly Comb mouse has a built-in rechargeable battery, ensure it’s adequately charged. Connect the mouse to its charging cable and plug it into a powered USB port on your computer or a wall adapter. Allow sufficient time for charging, as indicated in the mouse’s manual. Some mice have an indicator light that shows charging status.

Connection Problems: Pairing And Dongle Issues

Wireless mice rely on a stable connection, typically established via a USB dongle or Bluetooth. Issues with the pairing process or the dongle itself can render the mouse inoperable.

  • USB Dongle (2.4GHz Wireless):
  • Secure Connection: Ensure the USB dongle is firmly plugged into a working USB port on your computer. Try a different USB port to rule out a faulty port.
  • Dongle Recognition: Check if your computer recognizes the dongle. Open Device Manager (Windows) or System Information (macOS) to see if the USB receiver is listed.
  • Re-pairing: Some Jelly Comb wireless mice require re-pairing with their dongle if the connection is lost. Consult your mouse’s manual for specific instructions, which often involve pressing a combination of buttons on the mouse while the dongle is plugged in.
  • Bluetooth Connection:
  • Bluetooth Enabled: Ensure Bluetooth is enabled on your computer. You can usually find this setting in your operating system’s Bluetooth or Network settings.
  • Pairing Mode: Put your Jelly Comb mouse into Bluetooth pairing mode. This typically involves holding down a dedicated Bluetooth button or a combination of buttons until an indicator light flashes.
  • Remove and Re-pair: If the mouse was previously paired but is now not working, try removing it from your computer’s list of Bluetooth devices and then re-pairing it from scratch.

Wireless Interference

Wireless devices, especially those operating on the 2. 4GHz frequency band (common for USB dongles), can be susceptible to interference from other electronic devices.

  • Minimize Obstructions: Ensure there are no physical obstructions between the mouse and its USB dongle or receiver. Thick desks, metal objects, or even the computer case itself can sometimes weaken the signal.
  • Reduce Competing Devices: Devices like wireless routers, cordless phones, microwaves, and other wireless peripherals can interfere with the mouse’s signal. Try temporarily turning off or moving these devices away from your mouse and computer.
  • USB Port Proximity: If using a USB dongle, try plugging it into a port that is closer to the mouse or using a short USB extension cable to position the dongle more favorably.

Troubleshooting A Jelly Comb Wired Mouse

Wired Jelly Comb mice are generally more reliable due to their direct connection, but they can still encounter issues. The primary culprits are usually the cable, the USB port, or software conflicts.

Cable And Connector Integrity

The physical connection is paramount for wired peripherals. Damage to the cable or the USB connector can prevent the mouse from functioning.

  • Inspect the Cable: Carefully examine the mouse’s USB cable for any signs of damage, such as cuts, kinks, fraying, or exposed wires. If the cable is visibly damaged, it’s a strong indicator that the mouse may be faulty.
  • Check the USB Connector: Ensure the USB connector at the end of the cable is clean and free from debris. Gently clean it with compressed air or a dry, soft brush if necessary.
  • Secure Connection: Make sure the USB connector is fully and securely plugged into the computer’s USB port.

Usb Port Issues

A faulty USB port on your computer can prevent the mouse from being recognized or receiving power and data.

  • Try Different USB Ports: Plug the Jelly Comb mouse into a different USB port on your computer. This helps determine if the issue is with a specific port or the mouse itself. Ports on the back of a desktop computer are often directly connected to the motherboard and can be more reliable than front-panel ports.
  • Test Other USB Devices: Plug another known-working USB device (like a USB flash drive or a different mouse) into the port you suspect might be faulty. If the other device also doesn’t work, the USB port is likely the problem.

Driver And Software Conflicts

While wired mice often use generic drivers that are built into the operating system, sometimes driver issues or software conflicts can arise.

  • Restart Your Computer: This is a fundamental troubleshooting step that can resolve many temporary glitches. A simple reboot can reset the USB bus and allow the operating system to re-detect the mouse.
  • Check Device Manager (Windows):
  • Right-click the Start button and select Device Manager.
  • Expand the Mice and other pointing devices category.
  • Look for your Jelly Comb mouse. If it has a yellow exclamation mark or a red ‘X’ next to it, there’s a driver or hardware issue.
  • Update Driver: Right-click the mouse and select Update driver. Choose Search automatically for drivers.
  • Uninstall Device: If updating doesn’t work, right-click the mouse and select Uninstall device. Then, disconnect and reconnect the mouse, or restart your computer, to allow Windows to reinstall the driver.
  • Check System Information (macOS):
  • Click the Apple menu > About This Mac > System Report.
  • Under Hardware, select USB.
  • Look for your Jelly Comb mouse in the USB Device Tree. If it’s listed, it’s recognized by the system. If not, there might be a connection or hardware issue.
Jelly Comb Mouse Not Working

Credit: www.youtube.com

General Troubleshooting Steps For All Jelly Comb Mice

Beyond the specific issues related to wireless or wired connections, several general troubleshooting steps apply to all Jelly Comb mice and can resolve a wide range of problems.

Test The Mouse On Another Computer

This is one of the most effective diagnostic steps. If your Jelly Comb mouse works perfectly on a different computer, the problem almost certainly lies with your original computer’s hardware, software, or operating system. Conversely, if the mouse fails to work on multiple computers, it strongly suggests a hardware defect with the mouse itself.

  • Procedure:
  • Disconnect the Jelly Comb mouse from your primary computer.
  • Connect it to a different computer (laptop, desktop, Mac, or PC).
  • Observe if the mouse cursor moves and if the buttons function correctly on the second computer.

Clean The Optical Sensor

The optical sensor on the underside of the mouse is responsible for tracking movement. Dust, hair, or debris can obstruct the sensor, leading to erratic cursor movement or a complete lack of response.

  • Cleaning Method:
  • Turn off your computer or disconnect the mouse to avoid accidental clicks.
  • Turn the mouse upside down.
  • Use a can of compressed air to blow away any visible dust or debris from the sensor lens.
  • For stubborn grime, you can use a dry cotton swab or a microfiber cloth. Avoid using liquids directly on the sensor.
  • Ensure the sensor area is completely dry before reconnecting or turning on the mouse.

Try A Different Surface Or Mousepad

The surface on which you use your mouse can significantly impact its tracking performance. Highly reflective, transparent, or uneven surfaces can confuse the optical sensor.

  • Recommended Surfaces:
  • A plain, light-colored mousepad.
  • A matte-finished desk surface.
  • Surfaces to Avoid:
  • Glass tables.
  • Highly polished or reflective surfaces.
  • Transparent materials.
  • Surfaces with complex patterns or textures.
  • Test: If you’re not using a mousepad, try using one. If you are, try a different one or a plain piece of paper to see if it improves tracking.

Check Mouse Software And Settings

Some Jelly Comb mice come with optional software that allows for customization of button assignments, DPI settings, and lighting. Issues with this software, or even basic mouse settings in your operating system, can cause problems.

  • Operating System Mouse Settings:
  • Windows: Go to Settings > Devices > Mouse. Check settings like pointer speed, double-click speed, and primary button. Ensure pointer trails are turned off, as they can sometimes cause confusion.
  • MacOS: Go to System Preferences > Mouse. Adjust tracking speed and scrolling options.
  • Jelly Comb Software: If you installed specific software for your Jelly Comb mouse, check its settings. Ensure no unusual configurations are enabled. Try uninstalling and reinstalling the software if you suspect it’s causing conflicts.
Jelly Comb Mouse Not Working

Credit: h30434.www3.hp.com

Advanced Troubleshooting And Potential Hardware Failure

If you’ve exhausted the common troubleshooting steps, it’s time to consider more advanced diagnostics or the possibility of a hardware failure.

Checking For Usb Power Issues

In rare cases, your computer’s USB ports might not be providing sufficient power, especially if multiple high-power devices are connected.

  • Disable USB Power Saving: Windows has a power-saving feature that can turn off USB ports to save energy. You can disable this for specific devices:
  • Open Device Manager.
  • Expand Universal Serial Bus controllers.
  • Right-click on entries like USB Root Hub or Generic USB Hub.
  • Select Properties.
  • Go to the Power Management tab.
  • Uncheck Allow the computer to turn off this device to save power.
  • Repeat for all relevant USB hub entries.
  • Restart your computer.
  • External USB Hubs: If you are using an unpowered USB hub, try connecting the mouse directly to the computer. If you are using a powered hub, ensure it’s properly plugged in and has sufficient power output.

Conflicts With Other Peripherals

Sometimes, other connected peripherals can cause conflicts, especially if they share similar drivers or interrupt requests.

  • Disconnect Other Devices: Temporarily disconnect all other non-essential USB devices (webcams, external hard drives, game controllers, other mice/keyboards) and see if the Jelly Comb mouse starts working. If it does, reconnect devices one by one to identify the conflicting peripheral.

Operating System Issues

A corrupted operating system file or a recent update can sometimes interfere with hardware detection.

  • System Restore (Windows): If the mouse stopped working after a recent software installation or update, you can try using System Restore to revert your computer to a previous state when the mouse was functioning correctly. Search for “Create a restore point” in the Windows search bar and follow the prompts.
  • Safe Mode: Booting your computer into Safe Mode loads only essential drivers and services. If the mouse works in Safe Mode, it indicates that a third-party application or driver is causing the conflict. You can then attempt to identify and remove the problematic software.

Potential Hardware Failure Of The Jelly Comb Mouse

Despite all troubleshooting efforts, it’s possible that the Jelly Comb mouse itself has failed. This is more likely if the mouse is old, has suffered physical damage (like a drop), or if it consistently fails to work on multiple computers.

  • Signs of Hardware Failure:
  • No visible lights on the mouse (even with fresh batteries or when plugged in).
  • Physical damage to the cable, casing, or buttons.
  • Consistent failure across multiple computers and operating systems.
  • Erratic behavior that cannot be resolved by any software or connection troubleshooting.
  • Warranty and Replacement: If your Jelly Comb mouse is still under warranty, contact the manufacturer or the retailer for a potential replacement or repair. Check the warranty period provided at the time of purchase.

Comparison: Jelly Comb Wireless Vs. Wired Mice

Choosing between a wireless and a wired Jelly Comb mouse depends on your priorities regarding convenience, performance, and potential troubleshooting. Both have their advantages and disadvantages.

FeatureJelly Comb Wireless MouseJelly Comb Wired Mouse
**Connectivity**USB Dongle (2.4GHz) or BluetoothUSB Cable
**Portability**High (no cables to manage)Moderate (cable can be cumbersome)
**Desk Clutter**LowModerate (cable management needed)
**Power Source**Batteries (disposable or rechargeable)Computer’s USB port
**Interference**Susceptible to wireless interferenceNot susceptible to wireless interference
**Latency**Generally low, but can be affected by interferenceTypically near-zero latency, ideal for gaming/precision
**Setup**May require pairing (especially Bluetooth)Plug-and-play
**Troubleshooting**Battery issues, pairing problems, interference, dongleCable damage, USB port issues, driver conflicts
**Reliability**Can be affected by battery life and signal strengthGenerally high, limited by physical cable integrity
**Cost**Often slightly more expensive due to wireless techTypically more affordable

Example Scenario: A graphic designer who values a clean workspace and moves between different workstations might prefer a Jelly Comb wireless mouse for its portability and lack of cables. However, a competitive gamer who demands the absolute lowest latency and highest reliability might opt for a Jelly Comb wired mouse, ensuring consistent performance without battery concerns or potential signal drops.

Jelly Comb Mouse Not Working: A Practical Example

Let’s consider a common scenario: Sarah, a freelance writer, finds her Jelly Comb wireless optical mouse suddenly stops responding mid-sentence.

  • Initial Reaction: Sarah first checks if the mouse is moving the cursor at all. It isn’t. She notices no lights are on the mouse.
  • Power Check: Her first thought is the batteries. She opens the battery compartment, flips the two AA batteries, and reinserts them. Still no response. She then remembers she has a pack of brand-new batteries and replaces the old ones with fresh ones. The mouse lights up, and the cursor starts moving again.
  • If Batteries Weren’t the Issue: Had replacing the batteries not worked, Sarah’s next step would be to check the USB dongle. She’d unplug it from her laptop’s side port and plug it firmly back in. If that failed, she’d try a different USB port on the laptop.
  • Surface and Sensor: If the mouse was still unresponsive, she would turn it over and gently blow compressed air at the optical sensor. She’d also try moving the mouse to a different surface, like a plain white sheet of paper, to rule out tracking issues with her patterned mousepad.
  • Testing on Another Device: If none of these steps resolved the issue, Sarah would connect the mouse and its dongle to her partner’s computer. If it worked there, she’d know the problem was with her laptop (likely a driver or USB port issue) and would proceed to check Device Manager and potentially reinstall drivers. If it *didn’t* work on the second computer, she would conclude the mouse hardware itself was likely faulty and consider a replacement.

This step-by-step approach, starting with the simplest and most common solutions, is crucial for efficiently diagnosing and fixing the “Jelly Comb mouse not working” problem.

Frequently Asked Questions

How Do I Reset My Jelly Comb Wireless Mouse?

Many Jelly Comb Wireless Mice Can Be Reset By Removing The Batteries For At Least 30 Seconds, Then Reinserting Them. For Mice That Use A Usb Dongle, Unplugging The Dongle For 30 Seconds And Then Plugging It Back In Can Also Help Re-establish The Connection. Some Models May Have A Specific Reset Button Or A Pairing Procedure Outlined In Their User Manual That Effectively Resets The Device’s Connection To Its Receiver. Always Refer To Your Specific Model’s Documentation For The Most Accurate Reset Instructions.

Why Is My Jelly Comb Mouse Cursor Jumping Or Moving Erratically?

Erratic Cursor Movement Is Often Caused By A Dirty Optical Sensor, An Unsuitable Surface, Or Wireless Interference. First, Clean The Optical Sensor On The Underside Of The Mouse Using Compressed Air Or A Dry Cotton Swab. Then, Try Using The Mouse On A Different Surface, Preferably A Plain, Matte Mousepad. If It’s A Wireless Mouse, Move It Closer To The Usb Dongle And Ensure There Are No Other Wireless Devices (like Routers Or Microwaves) Causing Interference. For Wired Mice, Ensure The Cable Is Not Damaged And Try A Different Usb Port.

My Jelly Comb Mouse Worked Yesterday, But Not Today. What Could Be The Cause?

This Sudden Failure Often Points To A Power Issue (for Wireless Mice) Or A Temporary Software Glitch. For Wireless Models, Try Replacing The Batteries With Fresh Ones Or Recharging The Battery If It’s A Rechargeable Model. For Both Wired And Wireless Mice, The First Step Should Be To Restart Your Computer. This Can Resolve Many Temporary Operating System Or Driver Issues That Might Prevent The Mouse From Being Recognized. If The Problem Persists After A Restart And Battery Check, Proceed To Check The Usb Connection And Drivers.

How Do I Update The Drivers For My Jelly Comb Mouse?

Most Jelly Comb Mice Use Generic Drivers That Are Built Into Windows And Macos. You Typically Don’t Need To Manually Install Specific Drivers Unless Your Mouse Model Came With Dedicated Software. If You Suspect A Driver Issue, The Best Approach Is Often To Let Windows Reinstall The Driver: Go To Device Manager, Right-click Your Mouse, Select Uninstall Device, And Then Disconnect And Reconnect The Mouse (or Restart Your Computer). Windows Will Attempt To Detect And Install The Appropriate Driver Automatically. If Your Mouse Came With Specific Software, Check The Manufacturer’s Website For Any Available Driver Or Firmware Updates.

Can A Jelly Comb Mouse Be Damaged By A Power Surge?

Yes, Like Any Electronic Device, A Jelly Comb Mouse, Particularly A Wired One, Can Potentially Be Damaged By A Power Surge. A Power Surge Can Occur During Electrical Storms Or Due To Issues With The Power Grid, Sending A Sudden Jolt Of Excess Electricity Through The Connected Devices. While Modern Computers Often Have Some Surge Protection Built Into Their Power Supplies And Usb Ports, A Significant Surge Can Still Cause Damage. Using A Quality Surge Protector For Your Entire Computer Setup Is The Best Way To Mitigate This Risk For All Your Peripherals And Computer Components. Wireless Mice Are Generally Less Susceptible

What Are Ikea Kitchen Cabinets Made Of

What Are Ikea Kitchen Cabinets Made Of

The allure of a beautiful, functional kitchen is undeniable, and for many homeowners, IKEA kitchen cabinets represent an accessible entry point to achieving that dream. Renowned for their affordability, modularity, and stylish designs, IKEA kitchens have become a staple in homes worldwide. But beneath the sleek finishes and clever storage solutions lies a fundamental question for many potential buyers: what are IKEA kitchen cabinets actually made of? Understanding the materials used is crucial for assessing durability, longevity, maintenance requirements, and environmental impact. This deep dive will explore the core components of IKEA’s popular SEKTION cabinet system, examining the different types of wood, particleboard, laminate, and foil finishes that contribute to their overall construction and aesthetic appeal.

Key Takeaways

  • Core Construction: IKEA kitchen cabinets, primarily the SEKTION system, are largely constructed from particleboard and fiberboard, often coated with laminates, foils, or melamine.
  • Solid Wood Components: While not the primary structural material for carcases, solid wood is used for visible elements like doors, drawer fronts, and sometimes decorative trim, offering a premium look and feel.
  • Finishes Matter: The exterior finish (foil, laminate, paint, wood veneer) significantly impacts the cabinet’s appearance, durability, and how it should be cleaned and maintained.
  • Durability Factors: The density of the particleboard, the quality of the laminate/foil, and the construction method all play a role in the cabinet’s resistance to moisture, scratches, and general wear and tear.
  • Environmental Considerations: IKEA emphasizes sustainability, using recycled materials, certified wood, and low-VOC finishes in many of their cabinet components.
  • Cost vs. Material: The material choices directly influence the lower price point of IKEA cabinets compared to custom or high-end solid wood alternatives.
What Are Ikea Kitchen Cabinets Made Of

Credit: erinzubotdesign.com

Understanding The Sektion System: Ikea’s Cabinet Backbone

IKEA’s current kitchen cabinet system, known as SEKTION, replaced the older AKURUM system in 2015. SEKTION is designed for maximum flexibility and customization, allowing users to create unique layouts tailored to their specific kitchen space and needs. The core of the SEKTION system consists of cabinet boxes, doors, drawer fronts, shelves, and various internal organizers. While the exterior components like doors and drawer fronts often feature a variety of materials and finishes, the underlying cabinet carcases are typically made from a combination of engineered wood products.

Cabinet Carcase Construction

The primary material for the SEKTION cabinet boxes is particleboard. This engineered wood product is made by compressing wood particles (sawdust, wood chips, shavings) with a synthetic resin or binder under high pressure and temperature. IKEA sources its particleboard from certified sustainable forests, and it often contains a significant percentage of recycled wood.

  • Particleboard: This forms the bulk of the cabinet carcase, the sides, top, bottom, and back panels. It’s chosen for its cost-effectiveness, stability, and ability to hold screws well, which is crucial for assembling the modular units. The density and quality of the particleboard can vary, influencing its weight-bearing capacity and resistance to moisture. IKEA uses a specific grade of particleboard that balances these factors for everyday use.
  • Fiberboard (MDF/HDF): In some instances, particularly for thinner back panels or specific components, IKEA might use Medium-Density Fiberboard (MDF) or High-Density Fiberboard (HDF). These are also engineered wood products, but they are made from finer wood fibers, creating a denser, smoother surface than particleboard. MDF and HDF are known for their excellent workability and smooth finish, making them ideal for applications where a precise fit or a paintable surface is needed.
  • Moisture Resistance: It’s important to note that standard particleboard and MDF are susceptible to moisture damage. While IKEA applies finishes to protect the surfaces, prolonged exposure to water or high humidity can cause swelling and degradation. This is why proper installation, ventilation, and care are essential for the longevity of IKEA cabinets, especially in areas prone to moisture like under sinks.

Structural Integrity And Assembly

The SEKTION system relies on a robust assembly method to ensure structural integrity. The cabinet boxes are typically joined using cam lock fasteners and dowels. These methods allow for relatively easy assembly and disassembly, which is a hallmark of IKEA furniture. The back panels are often secured with small nails or screws, adding rigidity to the overall structure. The design prioritizes a balance between ease of assembly for the end-user and the strength required to support shelves, drawers, and the weight of kitchenware.

Exploring Ikea Cabinet Finishes: From Foil To Veneer

The most visible aspect of any kitchen cabinet is its finish. IKEA offers a wide array of finishes for its doors and drawer fronts, each providing a distinct look, feel, and level of durability. These finishes are applied over the core particleboard or fiberboard structure.

High Gloss / High Gloss Foil

High gloss finishes are a popular choice for a modern, sleek aesthetic. IKEA achieves this look primarily through high gloss foil.

  • Foil: This involves wrapping a thin layer of plastic film, often with a printed decorative layer, around the core material (usually particleboard or MDF). The foil is then heated and pressed to create a smooth, seamless surface. High gloss foils reflect light significantly, making kitchens appear brighter and more spacious.
  • Pros: Offers a very smooth, reflective surface; relatively affordable; available in a wide range of colors.
  • Cons: Can be prone to scratching and showing fingerprints; edges can be susceptible to chipping if impacted; repairs can be difficult.
  • Maintenance: Requires gentle cleaning with a soft, damp cloth. Avoid abrasive cleaners or sponges that can dull the finish or cause scratches.

Laminate Finishes

Laminates offer a durable and versatile option for cabinet fronts. IKEA uses different types of laminates depending on the desired look and performance.

  • Standard Laminate: This typically consists of layers of paper impregnated with melamine resin, fused together under heat and pressure. A decorative layer provides the color or pattern. Laminates are known for their resistance to scratches, stains, and heat.
  • Pros: Highly durable; resistant to scratches, stains, and heat; easy to clean; available in various textures and patterns (e.g., wood grain, solid colors).
  • Cons: Can sometimes look less “natural” than wood veneer; edges might be visible depending on the construction method.
  • Structure Laminate: Some IKEA doors feature a “structure laminate” which mimics the texture of wood grain or other natural materials. This adds a tactile element to the visual appeal, making the cabinets feel more realistic and less like a simple plastic coating.

Painted Finishes

For a classic look, IKEA offers cabinet doors with a painted finish. This usually involves applying paint to an MDF or particleboard substrate.

  • Painted MDF: MDF is an excellent substrate for painting due to its smooth, uniform surface. IKEA paints are typically applied in a controlled factory environment, ensuring a consistent and durable finish.
  • Pros: Offers a rich, deep color; can be matte or satin; provides a seamless look; generally more resistant to chipping than foil.
  • Cons: Can be more expensive than foil or basic laminate; deep scratches can be difficult to repair invisibly; requires careful cleaning to avoid damage.
  • Maintenance: Similar to high gloss, use a soft, damp cloth and mild detergent. Avoid harsh chemicals.

Wood Veneer

For a premium, natural wood look, IKEA utilizes wood veneers.

  • Wood Veneer: This involves a thin layer of real wood (like ash, oak, or birch) applied over a substrate, typically particleboard or MDF. This provides the aesthetic of solid wood at a lower cost and with greater stability.
  • Pros: Offers the authentic look and feel of real wood; each piece has unique grain patterns; can be sanded and refinished (though this is complex on cabinetry).
  • Cons: More expensive than foil or laminate; can be susceptible to fading from direct sunlight; requires careful maintenance to preserve the natural wood finish.
  • Maintenance: Typically requires cleaning with a damp cloth and occasional conditioning with a wood-specific polish, following IKEA’s specific care instructions for the veneer type.

Melamine Surfaces

Melamine is another common material used for finishes, especially on the interior surfaces of cabinets and sometimes on the exterior of more budget-friendly options. It’s a durable thermosetting plastic known for its resistance to stains and wear.

  • Melamine: Similar in application to foil, melamine is a resin-impregnated paper that is bonded to the substrate. It offers good durability and is easy to clean. Often used for the interior of cabinets and shelves due to its practicality and cost.
What Are Ikea Kitchen Cabinets Made Of

Credit: chrislovesjulia.com

Materials For Doors And Drawer Fronts: Beyond The Carcase

While the carcase forms the structural box, the doors and drawer fronts are the most prominent visual elements. IKEA offers a vast selection, utilizing various materials and finishes to cater to different styles and budgets.

Solid Wood Doors

While less common for the entire SEKTION system due to cost, IKEA does offer some doors and drawer fronts made from solid wood or featuring solid wood components. These are typically the most premium and expensive options.

  • Solid Wood: Often used for specific door styles (e.g., traditional shaker styles), solid wood (like oak, birch, or pine) provides a classic look and feel. Each piece has unique grain patterns and natural variations.
  • Pros: Highest aesthetic appeal; durable and long-lasting; can be painted or stained; feels substantial.
  • Cons: Most expensive option; can be susceptible to warping or cracking with significant changes in humidity; heavier than engineered wood options.
  • Examples: IKEA’s EKESTAD series has featured solid oak doors with a stained finish, offering a robust and traditional appearance.

Veneered Doors

As mentioned earlier, veneer doors combine the look of real wood with the stability of engineered boards.

  • Veneered Particleboard/MDF: A thin layer of real wood is glued onto a substrate. This is a cost-effective way to achieve a natural wood look.
  • Pros: Authentic wood appearance at a lower cost; more stable than solid wood.
  • Cons: The veneer layer is thin and can be damaged; repairs are difficult.
  • Examples: IKEA’s HÄGGEBY or VEDDINGE door styles might utilize veneers or foil finishes designed to mimic wood grain.

Foil-wrapped Doors

These are among the most common and affordable options.

  • Foil-Wrapped MDF/Particleboard: A decorative foil (often printed to resemble wood, solid color, or textured finish) is wrapped around the edges and surfaces of an MDF or particleboard core.
  • Pros: Wide variety of designs and colors; affordable; relatively easy to clean.
  • Cons: Edges can be prone to peeling or chipping over time, especially with moisture exposure; can look less premium than painted or veneered options.
  • Examples: The LERHYTTAN collection offers various finishes, some of which are foil-wrapped in different colors and styles, from matte black to light grey.

Painted Doors

Painted doors offer a smooth, consistent color finish.

  • Painted MDF: MDF is ideal for painting due to its smooth surface. The paint provides a durable, uniform color.
  • Pros: Consistent color; smooth finish; available in various colors (often matte or satin).
  • Cons: Can be more expensive than foil; deep scratches are hard to repair.
  • Examples: The AXSTAD matte collection, available in colors like matte white and matte dark grey, features painted MDF doors for a sleek, contemporary look.

Glass Doors

For display cabinets or to add visual lightness, IKEA offers glass-fronted doors.

  • Framed Glass Doors: These typically consist of a frame (made from various materials like painted MDF or veneer) with glass panels inserted. The glass itself can be clear, frosted, or patterned.
  • Pros: Adds visual interest and allows for display of items; can make a kitchen feel more open.
  • Cons: Requires keeping the contents tidy; glass can break; frames need cleaning.
What Are Ikea Kitchen Cabinets Made Of

Credit: www.housedigest.com

Comparison: Ikea Cabinet Materials Vs. Alternatives

Understanding IKEA’s material choices becomes clearer when compared to other kitchen cabinet options available on the market. The primary trade-off for IKEA’s affordability is the extensive use of engineered wood products rather than solid wood for the carcases.

FeatureIKEA Cabinets (SEKTION System)Custom Solid Wood CabinetsSemi-Custom Cabinets (e.g., KraftMaid, Merillat)
**Carcas Material**Primarily **particleboard** and **MDF/HDF**, finished with foil, laminate, or melamine.**Solid wood** (e.g., oak, maple, cherry, birch) for boxes and fronts.Often **plywood** or high-quality **particleboard/MDF** for carcases; solid wood or veneers for doors.
**Door/Drawer Fronts**Wide variety: foil, laminate, painted MDF, veneer, some solid wood accents.**Solid wood**, stained or painted.Solid wood, veneers, painted MDF.
**Durability**Good for typical use; susceptible to prolonged moisture. Finishes vary in scratch resistance.Excellent; highly durable if maintained.Very good; generally more durable than IKEA particleboard carcases.
**Cost****Most affordable**.**Most expensive**.Mid-to-high range.
**Moisture Resistance**Moderate; requires careful management, especially around sinks.Good, but can warp/swell with extreme humidity.Generally better than IKEA particleboard due to plywood carcases.
**Customization**High modularity, but limited to IKEA’s sizes and finishes.**Unlimited**; built to exact specifications.High degree of customization in sizes, styles, and finishes.
**Assembly**DIY-friendly flat-pack.Professional installation usually required.Often requires professional installation.
**Environmental**Focus on sustainable sourcing, recycled content, low-VOC finishes.Can be sustainable if sourced responsibly; natural material.Varies by manufacturer; many offer eco-friendly options.

Example Scenario: The Moisture Challenge

Consider a kitchen with a common issue: a leaky pipe under the sink.

  • IKEA Cabinets: If a leak occurs and isn’t immediately addressed, the particleboard carcase of an IKEA cabinet can absorb water, swell, and become structurally compromised. The laminate or foil finish might bubble or peel. Repair might involve replacing the entire cabinet box.
  • Custom Solid Wood/Plywood Cabinets: While solid wood can also be damaged by water, high-quality plywood carcases found in semi-custom or custom cabinets are generally more resistant to moisture absorption and swelling than IKEA’s particleboard. Prompt cleanup can often prevent significant damage.

This highlights that while IKEA cabinets offer excellent value, understanding their material limitations is key to ensuring their longevity, particularly in high-moisture areas.

Sustainability And Environmental Impact

IKEA places a strong emphasis on sustainability across its product lines, and kitchen cabinets are no exception. Their approach involves responsible sourcing, efficient manufacturing, and minimizing environmental impact.

Responsible Wood Sourcing

A significant portion of the wood fiber used in IKEA’s particleboard and MDF comes from certified sustainable forests. IKEA aims for all wood used in its products to be either recycled or sourced from forests that are managed responsibly, meeting criteria set by organizations like the Forest Stewardship Council (FSC).

  • FSC Certification: Products with FSC certification guarantee that the wood comes from responsibly managed forests that provide environmental, social, and economic benefits. IKEA has been a major user of FSC-certified wood for many years.

Recycled Materials

IKEA actively incorporates recycled materials into its products. The particleboard used in SEKTION cabinets often contains a substantial percentage of wood waste from other manufacturing processes or post-consumer recycled wood. This reduces the demand for virgin timber and diverts waste from landfills.

Low-voc And Safer Chemicals

Volatile Organic Compounds (VOCs) are chemicals emitted into the air from products and can impact indoor air quality. IKEA has committed to phasing out hazardous chemicals and reducing the use of VOCs in its products. The finishes, adhesives, and binders used in their cabinets are designed to meet stringent environmental and health standards.

This includes using water-based lacquers and low-emission particleboard.

Product Lifespan And Circularity

While not always the focus for budget-friendly kitchens, IKEA’s design philosophy also considers the product lifecycle. The modularity of the SEKTION system allows for easier replacement of individual parts (like a damaged door) rather than the entire kitchen. This can extend the usable life of the kitchen components.

IKEA also explores initiatives related to furniture take-back and refurbishment, contributing to a more circular economy.

Durability, Maintenance, And Longevity

The durability and longevity of IKEA kitchen cabinets are directly tied to their materials and how they are cared for. While they are built for everyday use, they require specific maintenance practices to ensure they last.

Factors Affecting Durability

  • Material Quality: The density and quality of the particleboard or MDF used for the carcase play a role. Higher density generally means better screw-holding power and resistance to sagging under load.
  • Finish Type: High gloss foils are prone to scratching, while painted finishes can chip. Laminates and melamine generally offer good scratch and stain resistance. Wood veneers require protection from UV light and moisture.
  • Edge Banding: The quality of the edge banding (the material applied to the exposed edges of panels) is critical. Poorly applied or damaged edge banding can allow moisture to seep into the core material.
  • Hardware: The quality of hinges and drawer runners (provided by partners like Blum) significantly impacts the user experience and long-term functionality. IKEA generally uses high-quality hardware.
  • Assembly: Correct assembly according to IKEA’s instructions is crucial. Properly tightened fasteners and correctly installed back panels contribute significantly to the cabinet’s rigidity and load-bearing capacity.

Maintenance Guidelines

  • Cleaning: For most IKEA cabinets (foils, laminates, painted), regular cleaning with a soft, damp cloth is sufficient. A mild detergent can be used for tougher spots, but avoid abrasive cleaners, scouring pads, or harsh chemicals (like ammonia or bleach), as these can damage the finish. Always wipe dry after cleaning.
  • Moisture Management: This is perhaps the most critical aspect. Wipe up spills immediately. Ensure good ventilation, especially around the dishwasher and sink areas. Use moisture-resistant mats under the sink and in front of the dishwasher.
  • Heat: Avoid placing heat-generating appliances (like kettles or toasters) directly on countertops adjacent to cabinet edges, as prolonged heat exposure can damage finishes.
  • Sunlight: Direct, prolonged sunlight can cause fading, particularly on wood veneer and some painted finishes.
  • Hardware Care: Hinges and drawer runners may require occasional cleaning and lubrication as per the manufacturer’s (often Blum’s) recommendations.

Expected Lifespan

With proper installation and diligent maintenance, IKEA kitchen cabinets can last 10-15 years or even longer for the carcases and well-maintained doors. The modular design also allows for easier upgrades; for instance, you could replace just the doors and drawer fronts after 10 years to refresh the kitchen’s look without replacing the entire cabinet structure. However, in high-traffic or high-moisture environments, or with less careful use, visible wear and tear might appear sooner.

Real-world Examples And Considerations

To truly understand the materials, consider how they perform in different kitchen scenarios.

Example 1: The Busy Family Kitchen

A family with young children will put their kitchen through its paces. Constant use, spills, and the occasional accidental bump are inevitable.

  • Materials Choice: In this scenario, opting for laminate or painted MDF doors with robust particleboard carcases would be advisable. These finishes tend to be more forgiving with scratches and easier to wipe clean than high gloss foils or delicate wood veneers. The SEKTION system’s ability to replace individual doors means a scratched door front can be swapped out without a complete renovation.
  • Longevity: With regular cleaning and prompt attention to spills, these cabinets can easily last through the demanding years of childhood and beyond. The key is consistent, gentle maintenance.

Example 2: The Rental Property Kitchen

For landlords or those outfitting a rental property, cost-effectiveness and ease of maintenance are paramount.

  • Materials Choice: IKEA’s foil-finished doors on standard particleboard carcases represent a highly cost-effective solution. The finishes are available in a wide range of neutral colors that appeal to many renters. The ease of assembly also keeps installation costs down.
  • Longevity: While perhaps not as durable as higher-end options under heavy, long-term use, these cabinets provide a functional and attractive kitchen for a reasonable period. If a door or drawer front gets significantly damaged, it’s relatively inexpensive to replace. The focus here is on providing good value and a clean aesthetic for potential tenants.

Example 3: The Design-conscious Homeowner

Someone prioritizing aesthetics might lean towards IKEA’s more premium finishes.

*

Why Ceiling Has Water Stains

Why Ceiling Has Water Stains

Water stains on your ceiling can be a perplexing and often alarming sight. What might initially appear as a minor cosmetic issue can signal a more significant problem lurking within your home’s structure. These unsightly blemishes are not just an aesthetic nuisance; they are often early warning signs of water damage, which, if left unaddressed, can lead to costly repairs, mold growth, and even structural compromise. Understanding the root causes of these stains is crucial for homeowners to act promptly and protect their property.

The appearance of a water stain, typically a yellow, brown, or even rusty-colored mark that may be accompanied by sagging drywall or peeling paint, indicates that water has saturated the ceiling material. This water could originate from various sources, both inside and outside your home.

Identifying the specific source is the first step toward effective remediation and prevention. Ignoring these signs is a gamble that can significantly increase the expense and complexity of repairs down the line. This article will comprehensively explore the myriad reasons why your ceiling might be showing water stains, offering detailed insights into diagnosis, potential solutions, and preventative measures to keep your home dry and sound.

Key Takeaways

  • Common Causes: Water stains on ceilings are primarily caused by leaks from plumbing (pipes, fixtures, appliances), roof issues (shingles, flashing, gutters), and condensation.
  • Diagnosis is Crucial: Identifying the source of the leak is the first and most critical step, as different causes require distinct repair methods.
  • Potential for Damage: Unresolved leaks can lead to mold growth, structural damage to the ceiling and framing, electrical hazards, and compromised insulation.
  • Repair Process: Repairs typically involve fixing the source of the leak, drying the affected area thoroughly, repairing or replacing damaged drywall, and repainting.
  • Prevention is Key: Regular maintenance of roofs, plumbing, and HVAC systems, along with proper insulation and ventilation, can prevent future water stains.
  • Professional Help: For complex or persistent leaks, consulting with a qualified plumber, roofer, or restoration specialist is highly recommended.
Why Ceiling Has Water Stains

Credit: roofingbylandmark.com

Plumbing Problems: The Silent Culprits

One of the most frequent culprits behind ceiling water stains is a problem within your home’s plumbing system. These issues can range from minor drips to major bursts, all of which can eventually find their way to your ceiling. Understanding the common plumbing sources is vital for accurate diagnosis.

Leaky Pipes

Supply lines and drainage pipes that run through your ceiling or the floor above can develop leaks over time. Copper pipes can corrode, PEX pipes can develop pinhole leaks, and older galvanized steel pipes are prone to rust and blockage. Even a slow, consistent drip from a tiny hole in a pipe can saturate the insulation and drywall above, eventually manifesting as a stain on the finished ceiling.

  • Supply Lines: These carry pressurized water to fixtures like sinks, toilets, and showers. A leak here can be more significant, as water is constantly under pressure, potentially leading to faster water damage.
  • Drainage Lines: These carry wastewater away from fixtures. Leaks from drain pipes are often due to cracked seals at joints or corrosion. While not under pressure, a persistent leak can still cause substantial damage.

Faulty Fixtures And Appliances

Many plumbing fixtures and appliances are located on upper floors or in attics, with their supply lines and connections directly above the ceiling below.

  • Toilets: A leaking toilet seal (wax ring) on the floor above can allow water to seep through the subfloor and into the ceiling.
  • Sinks and Showers: Leaks can occur at the connections of faucets, showerheads, or from the drain assembly beneath the sink or shower pan. A cracked shower pan or improperly sealed tile grout can also allow water to penetrate the subfloor.
  • Washing Machines: The supply hoses and drain connections for washing machines are common sources of leaks. A burst hose or a loose connection can release a significant amount of water quickly.
  • Dishwashers: Similar to washing machines, dishwashers have water supply and drain lines that can leak.
  • Refrigerators with Ice Makers: The small water line connected to a refrigerator’s ice maker can develop leaks or burst, especially in freezing temperatures.

Overflowing Toilets Or Sinks

While seemingly obvious, an overflowing toilet or sink, especially if it goes unnoticed for a period, can cause water to pool on the floor and find its way through gaps in the subfloor or around pipe penetrations, leading to ceiling stains.

This is more common if the overflow is occurring on a floor directly above the affected ceiling.

Why Ceiling Has Water Stains

Credit: www.uandscompanies.com

Roof And Exterior Issues: Water’s Journey In

The roof is your home’s first line of defense against the elements. When it fails, water can find numerous pathways to infiltrate your home, often traveling long distances before appearing as a ceiling stain.

Damaged Or Missing Shingles

The most direct route for water to enter is through compromised shingles. Cracked, curled, or missing shingles expose the underlayment and decking to moisture. Rainwater can then seep through these openings.

Compromised Flashing

Flashing is the thin, waterproof material (usually metal) installed around roof penetrations like chimneys, vents, skylights, and in valleys where two roof planes meet. If flashing is damaged, corroded, or improperly installed, it can create a direct channel for water to enter the attic and eventually the ceiling below.

Clogged Gutters And Downspouts

Gutters are designed to channel rainwater away from your home’s foundation. When they become clogged with leaves, debris, or ice, water can back up. This backed-up water can then overflow the gutter edge and saturate the fascia and soffit areas, potentially seeping into the attic or wall cavities and traveling down to the ceiling.

In extreme cases, ice dams can form, forcing water up and under shingles.

Ice Dams

In colder climates, ice dams can form along the eaves of a roof. These are ridges of ice that prevent melting snow from draining. The trapped water can then back up onto the roof and seep under shingles and through the roof decking.

Skylight Leaks

Skylights, while offering natural light, are essentially holes in your roof and are prone to leaks if not properly sealed and maintained. Issues can arise from cracked glass, faulty seals, or problems with the flashing around the skylight frame.

Attic Ventilation Problems

While not a direct entry point for rain, inadequate attic ventilation can exacerbate moisture problems. Poor ventilation can lead to excessive heat buildup in the summer and condensation in the winter. This condensation can drip onto ceiling joists and insulation, eventually causing stains.

Condensation And Humidity: The Invisible Threat

Sometimes, water stains aren’t from an external leak but from moisture that forms within your home’s structure due to temperature differences and high humidity.

Attic Condensation

Attics can become very cold in winter. If warm, moist air from the living space below rises into the attic and comes into contact with cold surfaces (like the underside of the roof decking or pipes), it can condense into water droplets.

This is particularly common if there are air leaks from the living space into the attic or if the attic insulation is insufficient or improperly installed. The resulting moisture can drip down onto ceiling joists and eventually cause stains.

Insufficient Insulation

Poorly insulated ceilings allow more heat transfer between the living space and the attic or the exterior. In winter, this can lead to cold spots on the ceiling surface, promoting condensation. In summer, it can lead to a hotter attic, potentially increasing the likelihood of condensation on any cool surfaces within it.

Hvac System Issues

  • Leaky Ductwork: If your home has ductwork running through the attic or above the ceiling, leaks in these ducts can release conditioned air. If the air is cold and moist, it can contribute to condensation on surrounding surfaces.
  • Clogged AC Drip Pan: The drip pan and drain line for your air conditioning unit can become clogged with debris or algae. If this happens, water can overflow the pan and drip onto the ceiling below, especially if the unit is located in an attic or above a finished ceiling.
Why Ceiling Has Water Stains

Credit: www.mrhandyman.com

Diagnosing The Stain: A Step-by-step Approach

Identifying the source of a ceiling water stain is the most critical step in resolving the issue. A systematic approach can help pinpoint the problem before it escalates.

Initial Inspection: What To Look For

  • Stain Appearance: Note the color, size, and shape of the stain. Is it fresh and actively wet, or old and dry? Rusty or dark stains might indicate a long-standing issue.
  • Location: Is the stain directly under a bathroom, kitchen, attic, or chimney? This can provide clues.
  • Sagging Drywall: If the ceiling material is bulging or sagging, it indicates a significant amount of water saturation and an immediate need for attention.
  • Mold or Mildew: The presence of black, green, or fuzzy spots around the stain is a clear sign of mold growth, which requires professional remediation.
  • Active Dripping: Is water actively dripping from the ceiling? This signifies an active leak that needs immediate containment.

Checking The Area Above

The most effective way to diagnose a ceiling stain is to inspect the area directly above it.

  • Attic Inspection: If there’s an attic above the stained ceiling, this is your primary area of investigation.
  • Look for Wet Insulation: Is the insulation damp or matted down?
  • Check Joists and Sheathing: Look for water marks, rot, or mold on the wooden framing and the underside of the roof decking.
  • Trace the Source: Examine pipes, ductwork, vents, and the underside of the roof for signs of leaks, condensation, or damage. Use a flashlight and wear protective gear.
  • Check Vent Boots and Flashing: Pay close attention to the seals around plumbing vents, exhaust fans, and skylights.
  • Floor Above Inspection: If the stain is on the first floor ceiling, inspect the floor above, particularly the area directly over the stain.
  • Check for Spills or Leaks: Look for any signs of water around toilets, sinks, bathtubs, showers, washing machines, or dishwashers.
  • Inspect Flooring: Are there any warped floorboards or signs of water damage around fixtures?
  • Check Underlayment: If possible, check the subfloor for dampness.

Using Simple Tests

  • The Dye Test: If you suspect a specific fixture (like a toilet or shower) is the source, you can use food coloring. Add a few drops of food coloring to the toilet tank or shower drain. If the stain reappears after a period, it strongly suggests that fixture is the culprit.
  • Monitoring Water Bills: A sudden, unexplained increase in your water bill can indicate a hidden plumbing leak somewhere in your system.

The Consequences Of Neglect: Beyond The Stain

A water stain on your ceiling is more than just an eyesore; it’s a symptom of an underlying problem that, if ignored, can lead to a cascade of detrimental effects. The moisture that causes the stain can compromise the integrity of your home in several significant ways.

Mold And Mildew Growth

Mold thrives in damp, dark environments. The moisture that causes ceiling stains provides the perfect breeding ground for mold and mildew. Once established, mold can spread rapidly within the ceiling cavity, insulation, and even into the living space.

  • Health Risks: Mold spores can trigger allergies, asthma attacks, and other respiratory problems. Some types of mold produce mycotoxins that can have more severe health impacts.
  • Structural Damage: Certain types of mold can feed on organic materials like wood and drywall, weakening these structural components over time.
  • Odor: Mold growth often produces a distinct, musty odor that can permeate your home.

Structural Damage

Sustained moisture exposure can degrade building materials.

  • Drywall Degradation: Drywall (plasterboard) is made of gypsum and paper. When it becomes saturated, it loses its structural integrity, leading to sagging, crumbling, and eventual collapse.
  • Wood Rot: Wooden ceiling joists, rafters, and framing can absorb moisture, leading to rot. Wood rot weakens these critical structural elements, potentially compromising the stability of your roof and upper floors.
  • Corrosion: Metal components within the ceiling cavity, such as electrical conduit or plumbing fixtures, can corrode when exposed to prolonged moisture.

Electrical Hazards

Water and electricity are a dangerous combination. If water leaks onto or near electrical wiring, junction boxes, or light fixtures within the ceiling cavity, it can create a serious fire hazard or electrocution risk.

  • Short Circuits: Water can cause short circuits, leading to sparks and potentially igniting surrounding materials.
  • Corrosion of Connections: Moisture can corrode electrical connections, leading to intermittent power issues or complete failure of lighting or ceiling fans.

Damaged Insulation

Ceiling insulation is designed to keep your home warm in winter and cool in summer. When insulation becomes wet, its effectiveness is severely diminished.

  • Reduced Thermal Performance: Wet insulation traps moisture and loses its ability to resist heat flow, leading to higher energy bills.
  • Mold Growth in Insulation: Insulation, especially fiberglass or cellulose, can become a prime location for mold growth when damp.
  • Weight and Sagging: Saturated insulation can become very heavy, contributing to the sagging of drywall.

Pest Infestations

Damp, damaged areas within your home can attract pests like rodents and insects seeking moisture and shelter.

Repairing Ceiling Water Stains: A Comprehensive Guide

Once the source of the leak has been identified and repaired, the process of fixing the water stain can begin. This typically involves several steps to ensure a lasting repair and prevent future issues.

Step 1: Addressing The Source Of The Leak

This is the most critical step. No amount of cosmetic repair will solve the problem if the underlying leak is not permanently fixed. This might involve:

  • Plumbing Repairs: Replacing a section of pipe, tightening a fitting, replacing a wax ring, or repairing a faulty fixture.
  • Roof Repairs: Replacing damaged shingles, repairing or replacing flashing, sealing roof penetrations.
  • Gutter Cleaning/Repair: Ensuring gutters are clear and properly sloped.
  • Condensation Control: Improving attic ventilation, adding insulation, or repairing HVAC leaks.

Step 2: Drying The Area

Before any repairs can be made to the ceiling itself, the affected area must be completely dried.

  • Ventilation: Open windows and use fans to increase air circulation in the room.
  • Dehumidifiers: Running a dehumidifier can significantly speed up the drying process, especially in humid conditions or enclosed spaces like attics.
  • Professional Drying Equipment: For severe water damage, professional restoration companies use specialized equipment like air movers and industrial dehumidifiers to ensure thorough drying and prevent mold growth. This process can take several days.

Step 3: Repairing Or Replacing Damaged Drywall

Once the area is dry, the damaged drywall can be addressed.

  • Minor Stains: If the stain is superficial and the drywall is not structurally compromised, you might be able to simply clean the area (if mold is present, use an appropriate mold cleaner) and then prime and paint.
  • Moderate Damage: If the drywall is soft, crumbling, or shows signs of sagging, the affected section will need to be cut out and replaced.
  • Cut Out Damaged Section: Use a utility knife or drywall saw to carefully cut out the stained and damaged portion of the drywall. Ensure you cut back to solid, undamaged material.
  • Install New Drywall: Cut a new piece of drywall to fit the opening. Secure it to the ceiling joists using drywall screws. You may need to add wood bracing if the new piece doesn’t align perfectly with existing joists.
  • Tape and Mud: Apply drywall tape over the seams and cover it with joint compound (mud). Apply multiple thin coats, allowing each coat to dry and sanding lightly between coats until the patch is smooth and level with the surrounding ceiling.
  • Severe Damage: If the damage is extensive, or if structural elements like joists are compromised, a larger section of the ceiling may need to be replaced, potentially requiring professional assistance.

Step 4: Priming And Painting

After the new drywall (or repaired section) is smooth and ready, it needs to be primed and painted.

  • Stain-Blocking Primer: It is essential to use a high-quality stain-blocking primer (like KILZ or Zinsser B-I-N) specifically designed for water stains. These primers seal the stain and prevent it from bleeding through the new paint. Apply at least one, preferably two, coats of primer.
  • Paint: Once the primer is dry, apply your ceiling paint. You may need to paint the entire ceiling to ensure a uniform color match, as freshly patched areas can sometimes look slightly different.

Preventing Future Water Stains: Proactive Home Maintenance

The best way to deal with water stains is to prevent them from happening in the first place. Regular maintenance and attention to potential problem areas can save you significant time, money, and stress.

Regular Roof Inspections And Maintenance

Your roof is your home’s primary shield against water.

  • Annual Inspections: Inspect your roof at least once a year, and after major storm events. Look for missing, cracked, or curling shingles, damaged flashing, and debris buildup.
  • Gutter Cleaning: Clean your gutters and downspouts at least twice a year (spring and fall) to ensure proper water flow away from your home. Consider gutter guards to minimize debris accumulation.
  • Trim Overhanging Branches: Tree branches can damage shingles or clog gutters. Keep them trimmed back from your roofline.

Plumbing System Upkeep

  • Inspect Visible Pipes: Periodically check exposed pipes under sinks and in basements or crawl spaces for signs of corrosion, leaks, or condensation.
  • Water Pressure: High water pressure can put extra strain on your plumbing system. Consider installing a pressure-reducing valve if your home’s pressure is too high (typically above 80 psi).
  • Appliance Hoses: Regularly inspect hoses for washing machines and dishwashers. Replace rubber hoses with more durable braided stainless steel hoses, and replace them every 5-10 years regardless of appearance.
  • Know Your Shut-Off Valve: Familiarize yourself with the location of your main water shut-off valve in case of a major leak or burst pipe.

Hvac And Appliance Maintenance

  • AC Tune-Ups: Have your air conditioning system serviced annually by a professional. This includes checking and cleaning the drip pan and drain line.
  • Humidifier Checks: If you have a whole-house humidifier, ensure it’s functioning correctly and not leaking.
  • Appliance Seals: Check seals on washing machines, dishwashers, and refrigerators to ensure they are intact and not leaking.

Insulation And Ventilation

  • Attic Insulation: Ensure your attic is adequately insulated according to local building codes. Proper insulation acts as a thermal barrier, reducing temperature differences that lead to condensation.
  • Attic Ventilation: Verify that your attic has proper ventilation (soffit vents, ridge vents, or gable vents) to allow moist air to escape. This helps prevent condensation buildup.
  • Seal Air Leaks: Seal any gaps or cracks between your living space and the attic, such as around light fixtures, plumbing vents, and attic hatches.

Bathroom And Kitchen Precautions

  • Check Grout and Caulking: Regularly inspect the grout and caulking around tubs, showers, and sinks. Re-caulk or re-grout as needed to prevent water from seeping beneath tiles.
  • Monitor Humidity: Use exhaust fans during and after showers or baths to reduce humidity levels. Consider a whole-house dehumidifier if your home consistently has high humidity.

When To Call A Professional

While some minor ceiling stains can be addressed with DIY repairs, there are several situations where calling a professional is the safest and most effective course of action.

Complex Or Persistent Leaks

If you’ve tried to locate the source of a leak but can’t find it, or if the leak continues after initial repairs, it’s time to bring in an expert. Plumbers have specialized tools like moisture meters and thermal cameras that can detect hidden leaks.

Roofers are essential for diagnosing and repairing roof-related water intrusion.

Significant Structural Damage

If the water damage has caused sagging drywall, compromised ceiling joists, or visible rot, professional assessment and repair are necessary to ensure the structural integrity of your home is restored.

Suspected Mold Growth

If you see or smell mold, it’s crucial to address it promptly and correctly. Mold remediation can be complex and requires specialized knowledge and equipment to ensure it’s removed safely and effectively without spreading spores. Certified mold remediation specialists can handle this.

Electrical Concerns

If water has come into contact with electrical wiring or fixtures, do not attempt repairs yourself. Immediately shut off the power to the affected area at the circuit breaker and call a licensed electrician.

Extensive Water Damage

For large-scale water intrusion, such as from a burst pipe or severe storm damage, professional water damage restoration companies have the equipment and expertise to dry out your home thoroughly, preventing further damage and mold growth.

Frequently Asked Questions

What Is The First Thing I Should Do When I See A Water Stain On My Ceiling?

The very first thing you should do is investigate the area directly above the stain. Look for any obvious signs of leaks from plumbing fixtures, appliances, or the roof. If you can identify the source, turn off the water supply to that fixture or area if possible, and begin the drying process. If the stain is actively dripping or you suspect an electrical issue, shut off the power to that section of your home and call a professional immediately.

How Can I Tell If The Water Stain Is From A Plumbing Leak Or A Roof Leak?

The location of the stain can be a significant clue. Stains

Analog Vs Digital Time: Ultimate Guide to Choosing Right Clock

Analog Vs Digital Time

Have you ever glanced at a clock and wondered why some use hands to tell time while others show numbers on a screen? Understanding the difference between analog and digital time can make a big difference in how you manage your day.

Whether you’re picking a watch, setting an alarm, or teaching someone how to read time, knowing which format suits you best is key. Stick with me, and you’ll discover which style fits your lifestyle and why it matters more than you might think.

Ready to unlock the secrets behind these two ways of telling time? Let’s dive in.

Analog Time Basics

Analog time shows hours and minutes using a clock face and moving hands. It is one of the oldest ways to tell time. Many people find it easy to understand and use.

Analog clocks display time visually. This helps users see how much time has passed or remains. The design is simple but effective.

Clock Face And Hands

The clock face is usually round with numbers 1 to 12. It divides the day into 12-hour segments. Two or three hands move around the face.

The shortest hand shows the hour. The longer hand shows the minutes. Sometimes, a thin hand shows seconds too. These hands rotate to point at numbers.

Reading Hours And Minutes

Reading analog time means looking at where the hands point. The hour hand points near a number for the hour. The minute hand points to marks for minutes.

Each number on the clock equals five minutes. For example, if the minute hand points at 3, it means 15 minutes past the hour. Learning this helps tell time quickly.

Common Uses Of Analog Clocks

Analog clocks are found in homes, schools, and offices. They help people learn time skills. Many wall clocks and wristwatches still use analog faces.

Some prefer analog clocks for their classic look. They also show time progress visually. This makes them useful in many settings.

Digital Time Essentials

Digital time has become a common way to tell time in homes and offices. It shows the time in numbers, making it quick and easy to read. Understanding the basics of digital time helps people use clocks better. This section covers key parts of digital time that make it special and useful.

Digital clocks offer clear displays and extra features that analog clocks do not. Many devices, like phones and microwaves, use digital time for accuracy and convenience. Below are the main features and types of digital clocks to know.

Numeric Display Features

Digital clocks show time using numbers, usually in hours and minutes. The numbers are easy to read even from far away. Some clocks also show seconds for more precise timing. The display often uses LED or LCD screens to light up the numbers clearly. This type of display is simple and fast to understand.

Am And Pm Indicators

Many digital clocks use AM and PM to show morning or evening time. AM stands for the time from midnight to noon. PM covers the hours from noon to midnight. This helps avoid confusion between morning and afternoon hours. The indicators appear next to the numbers and are easy to spot.

Popular Digital Clock Types

Digital clocks come in many forms. Alarm clocks are common and help people wake up on time. Wall clocks with digital displays are popular in schools and offices. Wristwatches with digital screens are useful for sports and daily wear. Some digital clocks also show the date and temperature, adding more functions.

Accuracy And Reliability

Accuracy and reliability are key factors in choosing between analog and digital clocks. Knowing how each type performs helps in making the right choice. Both have strengths and weaknesses in this area.

Precision Of Analog Clocks

Analog clocks depend on mechanical parts or quartz crystals. Mechanical clocks can lose or gain a few seconds daily. Quartz analog clocks are more precise but still have minor time drift. External factors like temperature affect their accuracy. Small errors can add up over time. Regular adjustments are needed for better precision.

Digital Clock Accuracy

Digital clocks often use quartz crystals for timing. They keep time more accurately than most analog clocks. Some digital clocks sync with internet or radio signals. This syncing ensures near-perfect accuracy. They rarely need manual adjustments. Digital displays show exact time, easy to read.

Impact Of Power Sources

Analog clocks may run on batteries or mechanical winding. Battery power affects their run time and precision. Mechanical winding clocks stop if not wound regularly. Digital clocks usually need batteries or electricity. Power loss causes digital clocks to reset or stop. Backup power can keep digital clocks running during outages.

Design And Aesthetics

The design and aesthetics of timepieces play a big role in their appeal. Analog and digital clocks offer very different looks. Each style suits different tastes and spaces. Understanding their design helps you choose the right one for your home or office.

Traditional And Vintage Styles

Analog clocks often feature classic, vintage designs. They showcase round faces with Roman or Arabic numerals. Wooden frames and brass hands add charm. These timepieces bring warmth and nostalgia. They fit well in cozy, traditional rooms. Antique or retro lovers appreciate this timeless look.

Modern And Minimalist Looks

Digital clocks lean toward sleek, modern designs. They often have simple, clear displays. LED or LCD screens show time with bright numbers. Many have slim, compact shapes. These clocks suit minimalist and contemporary decor. They add a clean and high-tech vibe to any space.

Customization Options

Both analog and digital clocks offer customization choices. Analog clocks can have different dials, hands, and frames. Digital clocks allow changes in brightness and color. Some models include multiple time zones or alarms. Custom options help match clocks to personal style. This makes them more than just timekeepers.

Ease Of Use

Ease of use is a key factor when choosing between analog and digital time displays. Both types have their own strengths and weaknesses. Understanding these can help you decide which fits your needs best.

Reading Speed Comparison

Digital clocks show time with numbers. This makes reading the time quick and easy. You see the exact hour and minute right away.

Analog clocks use hands on a dial. Some people find it harder to read the exact time. It takes a moment to understand the position of the hands.

For fast reading, digital time often works better. But analog clocks give a better sense of how much time is left in an hour.

Setting And Adjusting Time

Digital clocks usually have buttons to set the time. This can be simple and fast. You press the buttons until you get the right time.

Analog clocks require turning a small knob. This can take more time and may be tricky for some users. You need to be careful to avoid moving the hands too much.

For quick and precise setting, digital clocks have an advantage. Analog clocks need more patience and care.

Accessibility Considerations

Digital clocks are easier for people who struggle with numbers. The clear display shows exact time without guesswork.

Analog clocks can be difficult for people with poor vision. Small hands and numbers are hard to see.

Some analog clocks have large faces and bold numbers. These improve accessibility but still require more effort than digital ones.

Overall, digital clocks often provide better accessibility for many users.

Analog Vs Digital Time: Ultimate Guide to Choosing Right Clock

Credit: www.youtube.com

Functional Features

Functional features define how well a clock serves daily needs. They help decide which type fits best for different users. Analog and digital clocks offer different functions beyond basic time display. Understanding these features clarifies which clock suits your lifestyle.

Additional Analog Functions

Analog clocks often include classic features like a sweeping second hand. Some models have luminous hands for easy night reading. Certain analog clocks show the date with small dials. Mechanical versions may include a chime or strike mechanism. These extras add charm and tradition to timekeeping.

Digital Extras And Alarms

Digital clocks provide clear, easy-to-read numbers. Many include multiple alarms for different times. Features like snooze and countdown timers are common. Some digital clocks show temperature or date. These functions make digital clocks practical and versatile.

Smart Clock Capabilities

Smart clocks connect to Wi-Fi and sync with devices. They offer voice control and can play music or podcasts. Some show weather updates and news headlines. They often include customizable alarms and reminders. Smart clocks blend timekeeping with modern technology.

Energy Consumption

Energy consumption plays a key role in choosing between analog and digital clocks. It affects battery life, cost, and environmental impact. Understanding how each type uses power helps make a better choice.

Battery Life Of Analog Clocks

Analog clocks often use a simple quartz movement. This design requires very little energy. Most analog clocks can run for months or even years on a single battery. The slow, steady movement of the hands uses power efficiently. This makes analog clocks a good choice for low energy use.

Power Needs Of Digital Clocks

Digital clocks need more power than analog ones. They use electricity to light up the display and run extra features. Some digital clocks plug into the wall, while others use batteries. Battery-powered digital clocks usually need new batteries more often. The screen and alarms increase power use.

Eco-friendly Clock Options

Eco-friendly clocks focus on saving energy and reducing waste. Solar-powered clocks use sunlight to recharge, cutting battery needs. Mechanical clocks work without batteries by using a winding mechanism. Choosing clocks with long battery life also helps the environment. These options reduce energy consumption and waste.

Cost And Maintenance

Cost and maintenance play a big role in choosing between analog and digital timepieces. Understanding these factors helps you pick the right option for your budget and needs.

Both types have different price points and upkeep demands. Knowing these differences can save money and reduce hassle over time.

Price Range Comparisons

Analog clocks and watches often cost less at the entry level. Basic models use simple mechanics and fewer parts. Digital versions can start higher due to screens and electronics. However, both types offer options for all budgets. High-end analog watches may be more expensive than many digital models. Digital watches with extra features might also cost more.

Durability And Repairs

Analog devices have moving parts that can wear out or break. Repairs might require skill and special tools. Digital clocks have fewer moving parts, which can mean fewer mechanical failures. Still, electronics may fail or screens can crack. Repair costs vary. Analog fixes may be pricier due to complex parts. Digital repairs might be cheaper but depend on the problem and brand.

Long-term Ownership Costs

Battery life differs between analog and digital. Analog watches often use small batteries that last years. Digital devices may need more frequent battery changes. Some digital clocks use USB power or solar energy, reducing costs. Maintenance on analog watches might require occasional cleaning or servicing. Digital clocks usually need less routine care. Consider these factors to estimate overall expenses over time.

Best Uses For Each Type

Both analog and digital clocks have their strengths. Choosing the right type depends on where and how you use them. Each style fits different needs and settings.

Home And Office Settings

Analog clocks add style to any room. Their classic look suits living rooms and offices well. They show time with clear hour and minute hands. This makes it easy to see time at a glance. Digital clocks work well for desks and kitchens. They show exact time in numbers. This helps with precise scheduling and quick checks.

Educational Environments

Analog clocks help students learn to read time. They teach the concepts of hours and minutes clearly. Teachers use them in classrooms for this reason. Digital clocks show time in a simple way. They help young children who just start telling time. Both types support different learning stages effectively.

Outdoor And Specialty Uses

Analog clocks are often found in parks and public places. Their large faces can be seen from far away. They do not need electricity if they are mechanical. Digital clocks work well in gyms and sports arenas. They offer countdowns and timers needed in events. Some digital models are bright and easy to read in low light.

Analog Vs Digital Time: Ultimate Guide to Choosing Right Clock

Credit: executivefunctioningsuccess.com

Choosing The Right Clock

Picking the right clock matters for daily life and style. Both analog and digital clocks show time well. Yet, each has unique features that suit different needs.

Think about your habits and what fits your room or office. The right clock makes time easy to read and adds to your space.

Personal Preferences

Some people like watching the hands move on an analog clock. It feels classic and calm. Others prefer digital clocks because numbers are clear and quick to read.

Choose a style that feels right to you. A clock is not just a tool but part of your daily routine.

Lifestyle And Needs

Your daily activities affect the best clock choice. A digital clock with a backlight helps at night. Analog clocks work well in quiet, simple spaces.

Consider if you need extra features like alarms or timers. Match the clock to how you live and work.

Budget Considerations

Clocks come in many prices. Simple analog clocks are often cheaper. Digital clocks with many functions may cost more.

Set a budget before buying. Find a clock that fits your price range without losing quality.

Analog Vs Digital Time: Ultimate Guide to Choosing Right Clock

Credit: magazine.joovy.com

Frequently Asked Questions

What Is The Main Difference Between Analog And Digital Time?

Analog time shows time with moving hands on a dial. Digital time displays numbers for hours and minutes.

Which Time Format Is Easier For Kids To Learn?

Digital clocks are easier for kids to read because numbers are clear. Analog clocks help kids understand time concepts better.

How Does Analog Time Help With Learning Time Concepts?

Analog clocks show the passing of time visually with hands. This helps people understand hours, minutes, and seconds better.

Why Do Some People Prefer Digital Clocks Over Analog?

Digital clocks are quick to read and show exact time. Analog clocks can be harder to read quickly for some.

Can Both Analog And Digital Clocks Be Accurate?

Yes, both can be very accurate if well made. Digital clocks often use electronic timekeeping for precision.

Conclusion

Both analog and digital clocks show time clearly. Analog clocks help you learn how time flows. Digital clocks give exact numbers fast and easy. Each type has its own benefits and uses. Choosing one depends on what you prefer. Understanding both helps you read time better.

Time is important, and these clocks keep you on track. Pick the style that fits your needs best. Simple, clear, and useful—time stays easy to read.

Nintendo Switch Digital Vs Physical: Ultimate Buying Guide 2026

Nintendo Switch Digital Vs Physical

Are you wondering whether to choose Nintendo Switch digital games or physical copies? This decision might seem simple, but it can change the way you enjoy your gaming experience.

Whether you prefer the convenience of instant downloads or the satisfaction of holding a game cartridge, each option has its own perks and drawbacks. By the end of this article, you’ll know exactly which choice fits your style and needs.

Ready to find out what’s best for you? Let’s dive in.

Digital Games On Nintendo Switch

Digital games on Nintendo Switch are becoming more popular every day. Players can buy and download games directly to their consoles. No need to visit a store or wait for a shipment. This method offers many benefits for gamers who want easy access to their favorite titles.

Benefits Of Digital Downloads

Digital downloads save physical space. No cartridges or discs to carry around. Games are always ready to play after download. You can start playing immediately without inserting a game card. It is easy to switch between games on the console.

Digital games also reduce the risk of losing or damaging physical copies. Updates and patches install automatically. This keeps games running smoothly without extra effort.

Storage And Memory Considerations

Digital games need space on your Switch or memory card. Some games require large amounts of storage. It is important to check game size before downloading. You can add a microSD card to expand storage. Managing your storage helps avoid running out of space.

Access And Convenience

Accessing digital games is simple and fast. You can buy games anytime from the Nintendo eShop. No need to wait for store hours or delivery. Your game library stays linked to your account. It is easy to download purchased games on any Switch console.

Traveling with digital games is also easier. Carry one device, not multiple game cartridges. Play your favorite games wherever you go.

Sales And Discounts Online

Online sales offer great deals on digital games. Special discounts happen regularly in the Nintendo eShop. You can save money on popular titles. Seasonal sales often feature big discounts. Watching for sales helps you build a game collection affordably.

Physical Games On Nintendo Switch

Physical games for the Nintendo Switch come on cartridges you can hold in your hand. These game cards slide into the console, allowing you to play without downloading large files. Many players enjoy collecting these physical copies. They offer a different experience than digital downloads. Here are key points about physical games on the Nintendo Switch.

Advantages Of Physical Copies

Physical copies let you play instantly after inserting the cartridge. No need to wait for downloads or updates. You can also lend or borrow games easily from friends. This flexibility appeals to many gamers. Physical games often come with manuals or extras that digital copies lack. They offer a sense of ownership you cannot get from digital versions.

Resale And Sharing Options

Physical games can be sold or traded after you finish playing. This helps recover some of the purchase cost. You can also share physical games with family or friends without restrictions. Digital games usually limit sharing to the same account. Physical copies give you freedom to pass games around or sell them later.

Collector’s Value And Packaging

Collectors prize physical games for their unique packaging and artwork. Special editions often include extras like maps or figurines. These items add value over time. Physical games can become rare and more valuable. Displaying game boxes on a shelf shows your favorite titles and adds to your game room’s charm.

No Need For Extra Storage

Physical cartridges do not take up storage space on your Switch. This saves room for save files and downloadable content. Digital games can quickly fill internal memory or require extra SD cards. With physical copies, you swap cartridges to play different games without deleting files. This ease helps manage your game library efficiently.

Cost Comparison

Choosing between digital and physical games for the Nintendo Switch often depends on cost. This section breaks down the price differences, long-term expenses, and how sales affect each format. Understanding these points helps you save money on your gaming collection.

Price Differences Between Formats

Physical games usually cost more upfront. They come in boxes with cartridges and sometimes extras like manuals. Digital games often have lower starting prices. No packaging means less cost for the seller. Some new digital titles launch at the same price as physical copies.

Physical copies can be found used. Used games are cheaper but might have wear. Digital games cannot be resold or traded. This limits ways to save on digital purchases.

Long-term Savings And Expenses

Physical games can be shared or sold after playing. This helps recover some money. Digital games stay tied to your account. You cannot get money back from them.

Digital games take up no shelf space and never wear out. Physical games might get damaged or lost over time. Replacing a physical game costs extra. Digital games avoid these risks.

Impact Of Sales And Bundles

Sales often favor digital games. Online stores offer deep discounts regularly. Special bundles combine multiple digital games at a lower price. Physical games do get sales too but less often.

Some retailers bundle physical games with consoles or accessories. These bundles can save money on new releases. Digital bundles require no extra space and are easy to download.

Nintendo Switch Digital Vs Physical: Ultimate Buying Guide 2026

Credit: www.reddit.com

Performance And User Experience

Performance and user experience are key factors for Nintendo Switch gamers. Whether you choose digital or physical games, how the system handles them affects your playtime. This section explores load times, updates, and accessibility for both formats.

Load Times And Game Performance

Digital games often load faster than physical copies. The Switch reads data directly from the internal storage or SD card. Physical games rely on the cartridge, which can be slower. Both formats run games smoothly once loaded. No major difference in frame rates or graphics quality exists. The main delay is during game startup and loading screens.

System Updates And Game Patching

Both digital and physical games need updates. Digital games update automatically when connected to Wi-Fi. Physical games also require patches but must be downloaded separately. Updates fix bugs and add new features. The update size depends on the game and patch. Digital users get updates faster since downloads start immediately after release.

Offline Play And Accessibility

Physical games work without internet after installation. You only need the cartridge to play offline. Digital games usually require a system check to verify ownership. Offline play is possible but with limits. Accessing digital games needs the original account logged in. Physical copies offer easier access without online checks. Both formats allow gaming without internet, but physical games are simpler for offline use.

Switch Console Models And Compatibility

The Nintendo Switch offers different console models, each with unique features. These models affect how you play and store games. Understanding the differences helps in choosing the right console for digital or physical games.

Standard Vs Oled Vs Lite Models

The Standard Switch has a 6.2-inch screen and detachable Joy-Cons. It supports both docked and handheld play. The OLED model has a brighter 7-inch screen with better colors. It also offers improved audio and a wider stand for tabletop mode. The Lite model is smaller and lighter. It only supports handheld play and has no detachable controllers.

Storage Capacity Differences

The Standard and Lite models come with 32GB of internal storage. The OLED model doubles this with 64GB. Storage affects how many digital games you can keep on your console. You can add microSD cards to expand storage on all models.

Compatibility With Digital And Physical Games

The Standard and OLED Switch consoles accept both physical game cartridges and digital downloads. You can switch between playing physical and digital games easily. The Lite model does not have a game card slot. It can only play digital games downloaded from the Nintendo eShop.

Internet And Connectivity Factors

Internet and connectivity play a big role in choosing between digital and physical Nintendo Switch games. They affect how you get your games and how you play them. The type of internet connection you have can make a big difference.

Understanding these factors helps you decide which format fits your needs better.

Downloading Speeds And Network Requirements

Digital games need to be downloaded before playing. Download size varies from a few hundred megabytes to several gigabytes. Faster internet means shorter wait times. Slow connections can cause long downloads and interruptions. A stable network is important to avoid errors during download. Some games also need updates, which require more data. Physical games avoid this initial download but may still need updates.

Playing Without Internet Access

Physical games do not need internet to start playing. You can play anytime without worrying about connection. Digital games usually need at least one internet check before playing. Some digital titles allow offline play after initial activation. But others require a constant connection. This can be a problem during travel or in places with weak internet. Physical copies offer more freedom for offline play.

Impact On Digital Game Usage

Digital games rely heavily on internet access. Frequent updates and online features require good connectivity. Poor internet can limit access to some features. Downloading many digital games needs large data plans. Storage space on the Switch can fill up quickly. Managing downloads and updates takes time and effort. Physical games reduce reliance on internet and storage.

Environmental And Practical Considerations

Choosing between digital and physical games for the Nintendo Switch involves thinking about the environment and daily use. These factors affect your gaming experience and the planet. Let’s explore these practical and eco-friendly points.

Physical Waste And Sustainability

Physical game cartridges and cases create waste. They use plastic and paper, which can harm nature. Digital games do not need packaging, reducing waste. Less waste means less pollution and fewer resources used. Choosing digital games supports a cleaner environment.

Convenience Of Carrying Games

Digital games stay on your console’s memory. No need to carry many cartridges. Easy access to your full library anywhere. Physical games require space and can be heavy to carry. Digital saves room and makes travel simpler.

Durability And Loss Risks

Physical cartridges can break or get lost. They are small and easy to misplace. Digital games are stored safely online. No risk of damage or loss from physical handling. Digital games offer more security for your collection.

Nintendo Switch Digital Vs Physical: Ultimate Buying Guide 2026

Credit: www.imore.com

Making The Right Choice

Choosing between digital and physical games for your Nintendo Switch can be tricky. Both options offer unique benefits and challenges. Understanding your personal needs helps make the best choice. Think about how you play, your budget, and how the game market is changing. This helps you pick what fits your lifestyle and gaming style.

Assessing Your Gaming Habits

Do you play many games at once or stick to a few favorites? Digital games let you carry many titles without swapping cartridges. Physical games offer the joy of collecting and sharing with friends. Consider how often you trade or lend games. Also, note if you prefer instant downloads or owning a physical copy.

Budget And Space Constraints

Digital games often have sales and discounts online. Physical copies might cost less in stores or secondhand. Think about your device storage. Digital games need free space on your Switch. Physical cartridges save storage but require carrying extra items. Budget and storage size influence which option suits you best.

Future Trends In Game Distribution

Game companies are moving toward digital sales. More games may only release online soon. Internet speed and data limits affect digital downloads. Physical games remain popular for collectors and offline play. Keep an eye on market shifts to stay updated. Your choice might need to adapt over time.

Nintendo Switch Digital Vs Physical: Ultimate Buying Guide 2026

Credit: www.youtube.com

Frequently Asked Questions

What Are The Main Differences Between Digital And Physical Nintendo Switch Games?

Digital games download directly to your console, while physical games use cartridges. Digital offers instant play, but physical lets you share or resell games.

Is It Cheaper To Buy Digital Or Physical Nintendo Switch Games?

Physical games often go on sale or can be bought used, making them cheaper sometimes. Digital games offer convenience but usually sell at full price.

Can I Play Nintendo Switch Games Without Internet For Both Formats?

Physical games do not need internet after installation, so you can play offline anytime. Digital games may need internet to verify ownership before playing offline.

How Much Storage Do Digital Nintendo Switch Games Require?

Digital games take up console storage space, which can fill quickly. You may need a microSD card to store many digital titles.

Are There Any Benefits To Owning Physical Nintendo Switch Games?

Physical games can be shared, traded, or sold later. They don’t use console storage, leaving more space for other digital content.

Conclusion

Choosing between Nintendo Switch digital and physical games depends on your needs. Digital games save space and offer quick downloads. Physical copies can be shared or sold later. Some players like having a game collection on shelves. Others prefer the convenience of digital libraries.

Both options have good points to consider. Think about how you play and what fits your lifestyle best. Either way, Nintendo Switch offers great gaming fun. Pick what feels right for you and enjoy your game time.

Film Vs Digital Movies: Ultimate Showdown for Cinematic Quality

Film Vs Digital Movies

Are you curious about what really sets film and digital movies apart? Whether you’re a casual viewer or a budding filmmaker, understanding the differences can change the way you experience movies.

From the look and feel to the way they’re made, film and digital each have unique qualities that affect your viewing experience. Keep reading to discover which style might be right for you and why it matters more than you think.

Image Quality Comparison

Comparing image quality between film and digital movies reveals unique strengths. Both mediums capture visuals differently. Each offers distinct textures, colors, and details. Understanding these differences helps appreciate their artistic value and technical aspects.

Resolution And Detail

Film captures images with tiny grains that create natural detail. It can record very high resolution, especially on 35mm or larger formats. Digital cameras use pixels to form images. High-end digital cameras now match or exceed film resolution. But film still holds subtle details in complex scenes.

Color Reproduction

Film produces rich, organic colors with smooth gradients. It handles skin tones and natural colors well. Digital cameras offer more control over color settings. Colors can be adjusted easily in post-production. Some digital images may look sharper but less warm than film.

Dynamic Range

Dynamic range means the ability to show details in bright and dark areas. Film has a wide dynamic range, preserving highlights and shadows nicely. Digital sensors have improved dynamic range greatly. Some high-end digital cameras now rival film’s ability to capture light and shadow.

Grain Versus Noise

Film grain appears as a natural texture adding character to images. It varies with film type and exposure. Digital noise occurs in low light or high ISO settings. Noise often looks harsher and less appealing than grain. Many filmmakers prefer grain for its artistic feel.

Film Vs Digital Movies: Ultimate Showdown for Cinematic Quality

Credit: www.youtube.com

Production Process Differences

The production process of film and digital movies shows clear differences. Each method affects how movies are shot, edited, and how much they cost. These differences shape the final look and feel of the movie.

Shooting Techniques

Film cameras use physical rolls of film to capture images. This limits the number of shots and requires careful planning. Digital cameras record images on memory cards, allowing more takes and instant review. Digital shooting offers more flexibility on set.

Editing Workflow

Editing film involves physically cutting and splicing film strips. This process takes longer and needs special equipment. Digital editing uses software to cut and arrange clips on a computer. It speeds up the process and allows easy changes.

Cost And Time Implications

Film production costs include buying and developing film stock. This adds to the budget and extends production time. Digital production reduces material costs and speeds up shooting and editing. It often fits better with tight budgets and schedules.

Aesthetic And Artistic Impact

The choice between film and digital affects a movie’s look and feel deeply. Each format offers unique qualities that shape the story’s visual style. The aesthetic and artistic impact influences how audiences connect with the movie. It also guides creative decisions for directors and cinematographers.

Texture And Depth

Film creates a natural grain that adds texture to images. This grain gives a sense of depth and richness. Digital images appear cleaner and sharper but can lack this organic feel. The subtle imperfections in film contribute to its charm. Digital allows more control over clarity and detail. Both textures serve different artistic purposes.

Emotional Tone

Film often delivers a warmer, nostalgic tone. It can evoke feelings tied to past memories or classic cinema. Digital tends to produce cooler and more neutral colors. This can make scenes feel more modern or realistic. Filmmakers choose a format based on the mood they want. The medium itself helps set the emotional atmosphere.

Filmmaker Preferences

Many directors love film for its timeless look. They appreciate its ability to capture light naturally. Others prefer digital for its flexibility and ease of use. Digital allows quick edits and immediate feedback. Some filmmakers combine both formats for unique effects. Personal style and project goals guide their choice.

Technical Challenges And Advantages

Choosing between film and digital movies involves understanding their technical challenges and benefits. Each format has unique demands in equipment, editing, and storage. These factors shape how filmmakers work and how audiences experience movies.

Equipment And Maintenance

Film cameras need physical reels and special handling. They require regular cleaning and careful storage. Digital cameras use sensors and memory cards. They need software updates and battery care. Film gear can be bulky and heavy. Digital equipment tends to be lighter and more compact. Film requires a dark room or lab for developing. Digital footage can be viewed instantly on screens.

Post-production Flexibility

Film editing involves cutting and splicing physical strips. This process takes more time and skill. Digital editing uses software, allowing quick changes and effects. It offers more options for color grading and corrections. Film has a unique grain and texture that many prefer. Digital images can sometimes look too clean or artificial. Both formats can produce high-quality results with the right tools.

Archiving And Preservation

Film reels can last many decades if stored well. They need cool, dry conditions to avoid damage. Digital files can be copied easily but may become corrupted. Technology changes can make digital formats obsolete. Proper backup and migration are crucial for digital storage. Film is physical and tangible, which some find reassuring. Digital archives require constant attention to remain accessible.

Audience Experience

The audience experience differs greatly between film and digital movies. Each format offers unique qualities that affect how viewers connect with the story and visuals. This section explores key aspects shaping the audience’s experience in both formats.

Visual Authenticity

Film has a grainy texture that many find charming and real. It captures light in a way that creates depth and warmth. Digital movies often look sharper and cleaner but can feel less natural. Some viewers prefer film for its organic look. Others enjoy digital’s crisp and clear images. The choice changes how the story feels on screen.

Screening Environments

Films usually play in traditional theaters with large, bright screens. This setup enhances the film’s unique qualities. Digital movies can show in various places, from cinemas to home setups. Digital screens adapt well to different lights and sizes. This flexibility changes how people watch and enjoy movies. The environment shapes the overall mood and immersion.

Viewer Perceptions

Many viewers see film as a classic, artistic choice. It feels like watching history in motion. Digital movies seem modern and accessible. Some think digital lacks the soul of film. Others appreciate digital’s convenience and consistency. These opinions affect how audiences value each format. Personal taste plays a big role in the viewing experience.

Film Vs Digital Movies: Ultimate Showdown for Cinematic Quality

Credit: www.youtube.com

Future Trends In Cinema

The world of cinema keeps changing with new ideas and tools. Filmmakers explore fresh ways to tell stories. The future of movies blends old and new technology. This mix creates exciting chances for filmmakers and viewers alike.

Emerging Technologies

Virtual reality (VR) and augmented reality (AR) are entering cinema. These tools make movies feel more real and interactive. AI helps in editing, color grading, and visual effects. High-resolution cameras capture stunning images with great detail. These tech advances improve movie quality and storytelling.

Hybrid Approaches

Some films combine film and digital methods. Directors use film for its look and digital for editing ease. This blend offers creative freedom and cost savings. Hybrid movies keep the charm of film with digital’s convenience. It offers the best of both worlds for filmmakers.

Industry Adoption

Studios and filmmakers invest in new movie technology. Streaming services push digital formats for fast delivery. Independent creators often prefer film for its unique style. Big studios adopt hybrid methods to reduce costs. The industry adapts quickly to meet audience demands.

Film Vs Digital Movies: Ultimate Showdown for Cinematic Quality

Credit: www.vox.com

Frequently Asked Questions

What Are The Main Differences Between Film And Digital Movies?

Film movies use physical film to record images, while digital movies use electronic sensors. Film often has a grainy look, and digital is clearer. Each has its own style and feel.

Which Format Offers Better Image Quality, Film Or Digital?

Digital movies usually provide sharper and cleaner images. Film can have more natural colors and texture but may show grain. Quality depends on equipment and skill.

Is Shooting On Film More Expensive Than Digital?

Yes, film is generally more costly due to film rolls and processing. Digital saves money with reusable memory cards. Costs vary by project size.

How Does The Editing Process Differ For Film Versus Digital?

Digital editing is faster and easier with computers. Film editing requires physical cutting and splicing of film strips. Digital allows more effects and changes.

Do Filmmakers Prefer Film Or Digital For Artistic Reasons?

Some directors like film for its classic look and feel. Others choose digital for convenience and flexibility. Preference depends on the story and style desired.

Conclusion

Both film and digital movies have unique strengths and weaknesses. Film offers a classic look with rich textures and colors. Digital provides convenience, quick editing, and easier sharing. Choosing depends on personal taste and project needs. Each method shapes the final story differently.

Embrace what suits your style and goals best. The art of filmmaking continues to grow with both options.

Offset Vs Digital Printing: Ultimate Comparison for Best Results

Offset Vs Digital Printing

When it comes to printing your designs, you might be wondering which method is best for you: offset or digital printing? Choosing the right option can save you time, money, and frustration.

You want your prints to look sharp, colors to pop, and the process to fit your needs perfectly. This guide will help you understand the key differences between offset and digital printing so you can make a confident choice. Keep reading to find out which printing method suits your project and budget the best.

Offset Vs Digital Printing: Ultimate Comparison for Best Results

Credit: printingpressdelhi.com

Offset Printing Basics

Offset printing is a popular printing method used for high-quality prints. It works by transferring an image from a plate to a rubber blanket, then onto the paper. This process helps create sharp and clear images.

Many businesses use offset printing for their large print jobs. It is reliable and cost-effective for mass production. The colors are consistent, and the print quality stays high.

How Offset Printing Works

First, an image is etched onto a metal plate. The plate gets wet and then inked. The ink sticks only to the image area. The plate transfers the image to a rubber blanket. The blanket presses the image onto paper. This indirect method protects the plate and creates sharp prints.

Common Uses Of Offset Printing

Offset printing suits large print runs like books and magazines. It is ideal for brochures, flyers, and newspapers. Many companies use it for packaging and labels. The method works best for jobs needing many copies.

Benefits Of Offset Printing

Offset printing offers high image quality and color accuracy. It handles large volumes with low cost per unit. The process works on many paper types and sizes. It also produces consistent results across all prints.

Digital Printing Essentials

Digital printing is a popular choice for many printing needs. It uses technology to print images directly from a computer file. This method is fast and flexible. It works well for short runs and quick turnarounds.

Understanding the basics of digital printing helps you choose the right method. Below are key points about how it works, where it is used, and its benefits.

How Digital Printing Works

Digital printing uses inkjet or laser printers. It prints images directly onto paper or other materials. There is no need for printing plates like in offset printing. The process starts with a digital file, such as a PDF. This file sends the image to the printer. The printer then applies ink or toner to the material in layers. This method allows for fast setup and less waste.

Typical Applications Of Digital Printing

Digital printing is great for short runs and customized jobs. It is common for business cards, flyers, and brochures. Personalized marketing materials often use digital printing. It also works well for labels and packaging. Small posters and photo prints are other typical uses. The ability to print variable data makes it ideal for direct mail campaigns.

Advantages Of Digital Printing

Digital printing offers fast turnaround times. It requires less setup than offset printing. This reduces costs for small print jobs. It allows easy customization of each print. Quality has improved and is good for most purposes. There is minimal waste of ink and paper. It supports on-demand printing, which reduces inventory needs. This method suits businesses that need flexibility and speed.

Cost Comparison

Cost plays a big role in choosing between offset and digital printing. Each method has different expenses depending on the project size and details. Understanding these costs helps you pick the best option for your needs.

Setup And Production Costs

Offset printing requires high setup costs. Making printing plates takes time and money. The process needs more preparation before printing starts. This cost stays the same no matter the number of prints.

Digital printing has low setup costs. It does not use plates. Files go directly to the printer. This makes it faster and cheaper to start printing small jobs.

Cost Efficiency For Small And Large Runs

Digital printing is best for small runs. The cost per print stays steady. You pay less upfront and can print fewer copies. It is good for tests, samples, or personalized prints.

Offset printing is cheaper for large runs. The cost per print drops as quantity grows. Once the setup is paid, printing more copies costs less. It suits big orders with consistent designs.

Quality Differences

Quality is a key factor when choosing between offset and digital printing. Both methods have unique traits that affect the final print look. Understanding these differences helps pick the right printing type for each project.

Print quality depends on how sharp the images look and how true the colors appear. The type of paper or material used also impacts the output quality. Let’s explore these aspects in detail.

Image Resolution And Color Accuracy

Offset printing offers high image resolution. It produces crisp and clear details. This method uses plates, which help create sharp images with smooth gradients. Color accuracy is strong in offset printing. It uses precise color mixing and layering. This results in consistent and vibrant colors.

Digital printing works well for simple images and quick jobs. It prints directly from digital files. The resolution depends on the printer’s technology. Some digital printers can match offset quality for small runs. Color accuracy varies but is improving with new technology. It may not always match the depth and consistency of offset printing.

Material Compatibility

Offset printing handles a wide range of materials. It works well on coated, uncoated, and textured papers. It also prints on plastic, metal, and other surfaces. This makes it ideal for many commercial uses. The inks used in offset printing bond strongly to different materials, ensuring durability.

Digital printing is best for standard papers and some specialty materials. It may struggle with very rough or thick surfaces. Some digital printers use special inks for materials like fabric or vinyl. These inks are designed to stick well and resist fading. Material choices for digital printing are growing but still more limited than offset.

Turnaround Time

Turnaround time is a key factor in choosing between offset and digital printing. It affects how fast you get your printed materials. Understanding the time differences helps plan projects better. Each printing method has unique speed traits that impact delivery.

Speed Of Production

Digital printing is faster for small runs. It requires less setup, so printing starts quickly. This means jobs can finish in hours or a day. Offset printing takes longer to set up. Plates must be made, which slows the start. Large orders print faster with offset once setup is done. The production speed depends on the job size.

Impact On Project Deadlines

Digital printing suits tight deadlines and quick changes. It allows for last-minute edits without delay. Offset printing suits projects with more time available. It ensures high quality but needs early planning. Missed deadlines can happen if setup takes too long. Choosing the right method helps meet time goals.

Offset Vs Digital Printing: Ultimate Comparison for Best Results

Credit: www.jukeboxprint.com

Customization And Flexibility

Customization and flexibility play a big role in choosing between offset and digital printing. Both methods offer unique benefits. Understanding how each handles changes and personal touches helps make the right choice for your project.

Variable Data Printing

Digital printing allows variable data printing with ease. Each printed piece can have different text or images. This works well for personalized marketing materials, like postcards or flyers. Offset printing does not support this type of customization. It uses fixed plates, so every print looks the same. Digital printing saves time and money for small batches with unique details.

Design Changes And Proofing

Design changes are easier with digital printing. Proofs can be made quickly and cheaply before the full run. This helps catch mistakes early and avoid waste. Offset printing requires making new plates for any change. This adds cost and delays the process. Small design tweaks are more flexible and faster with digital printing. It suits projects that need frequent updates or tests.

Environmental Impact

Printing methods affect the environment in different ways. Choosing the right process helps reduce harm. Both offset and digital printing have unique impacts on nature. Understanding these impacts can guide better decisions.

Ink And Material Waste

Offset printing often creates more waste. It requires plates and large ink quantities. Unused ink and cleaning fluids add to waste. Paper waste is also higher due to setup runs.

Digital printing uses ink more efficiently. It prints only what is needed. This reduces leftover ink and materials. Less paper waste occurs since no setup sheets are needed.

Energy Consumption

Offset presses use more energy during setup. The process involves multiple steps before printing. Energy use is higher for small print runs. Large runs become more efficient over time.

Digital printers use less energy overall. They start printing immediately without setup. Energy savings are clear for short runs. This makes digital printing greener for small jobs.

Offset Vs Digital Printing: Ultimate Comparison for Best Results

Credit: www.sunprinting.com

Choosing The Right Method

Choosing the right printing method can shape the success of your project. It affects cost, look, and timing. Understanding key factors helps you pick offset or digital printing wisely. This guide covers project size, budget, quality, finishing, and delivery time. Use these points to decide what fits your needs best.

Project Size And Budget

Large print runs usually favor offset printing. It becomes cheaper per copy as quantity grows. Small orders suit digital printing better. Digital has low setup costs and no minimums. Budget limits also guide the choice. Offset needs more upfront investment. Digital offers lower start costs but higher unit prices.

Desired Quality And Finishing

Offset printing delivers sharp, rich colors and smooth gradients. It excels in high-quality images and fine details. Digital prints can vary in quality but improve fast. Digital is good for simple graphics and photos. For special finishes like embossing or foil, offset is best. Digital printing has fewer finishing options.

Delivery Time Considerations

Digital printing is faster for small jobs and proofs. It requires less setup and can print on demand. Offset printing takes longer due to plate making and setup. Large runs take more time but printing itself is quick. Choose digital for tight deadlines and quick changes. Offset suits projects with flexible schedules.

Frequently Asked Questions

What Is The Main Difference Between Offset And Digital Printing?

Offset printing uses plates to transfer images, while digital printing prints directly from a file. Offset is best for large runs; digital suits small jobs.

Which Printing Method Is Cheaper For Small Print Runs?

Digital printing is usually cheaper for small quantities due to less setup time. Offset printing has higher setup costs but lowers per unit price for large orders.

How Does Print Quality Compare Between Offset And Digital Printing?

Offset printing generally offers higher image quality and color accuracy. Digital printing quality has improved but may show slight differences in fine details.

Can Digital Printing Handle Custom Designs Better Than Offset?

Yes, digital printing easily handles custom designs and variable data. Offset printing is less flexible and best for consistent, repeated images.

Which Printing Method Is Faster For Urgent Print Jobs?

Digital printing is faster because it requires minimal setup. Offset printing takes longer due to plate preparation but is efficient for large volumes.

Conclusion

Choosing between offset and digital printing depends on your project needs. Offset printing suits large runs with consistent quality. Digital printing works best for small orders and quick turnarounds. Cost and time matter a lot in this choice. Think about your budget, quantity, and speed requirements.

Both methods have clear strengths and weaknesses. Understanding these helps you pick the right printing style. Make your decision based on what fits your goals the best. Simple and smart choices lead to great results.

Digital Optical Audio Vs HDMI: Ultimate Audio Connection Showdown

Digital Optical Audio Vs Hdmi

Are you confused about whether to use Digital Optical Audio or HDMI for your home entertainment system? Choosing the right connection can make a big difference in sound quality and ease of use.

You want clear, powerful audio without the hassle of complicated setups or extra cables. This guide will help you understand the key differences between Digital Optical Audio and HDMI, so you can make the best choice for your TV, soundbar, or gaming console.

Keep reading to find out which option will give you the best listening experience and make your setup simple and efficient.

Digital Optical Audio Vs HDMI: Ultimate Audio Connection Showdown

Credit: www.heyoptics.net

Digital Optical Audio Basics

Digital optical audio is a popular way to send sound signals. It uses light to carry audio data. This method keeps sound clear and free from electrical noise.

Many people choose optical audio for home theaters and sound systems. It supports high-quality sound for movies, music, and games. Understanding how it works helps you use it better.

What Is Optical Audio?

Optical audio sends sound using light pulses. It travels through a special cable called a TOSLINK. This cable looks like a small glass or plastic fiber.

The light signals carry digital audio data. These signals keep audio free from interference. Optical audio supports stereo and surround sound formats.

How Optical Audio Works

Optical audio converts sound into light pulses. A small LED inside the device sends these pulses. The light travels through the optical cable to the receiver.

The receiver changes the light back into audio signals. This process keeps the sound quality high. It avoids problems like static or humming noise.

Common Optical Audio Devices

Many devices use optical audio connections. TVs often have an optical output for sound systems. Soundbars and home theater receivers accept optical input.

Gaming consoles and DVD players also support optical audio. This connection helps deliver clear and rich sound. It works well with many types of audio gear.

Digital Optical Audio Vs HDMI: Ultimate Audio Connection Showdown

Credit: www.amazon.com

Hdmi Audio Fundamentals

Understanding HDMI audio basics helps you choose the right connection for your devices. HDMI carries both video and audio signals through one cable. This simplifies setup and reduces clutter behind your TV or sound system.

Many people use HDMI for high-quality sound. It supports various audio formats and offers clear, digital sound. Knowing how HDMI audio works can improve your home entertainment experience.

What Is Hdmi?

HDMI stands for High-Definition Multimedia Interface. It is a cable and port used to send audio and video signals. HDMI replaced older cables like VGA and RCA. It carries signals in digital form, which keeps the quality high.

HDMI is common in TVs, computers, game consoles, and Blu-ray players. It supports high-definition video and multi-channel audio in one cable. This makes it easier to connect devices without many wires.

Audio Capabilities Of Hdmi

HDMI supports multiple audio formats, including stereo, surround sound, and lossless audio. It can carry up to 8 channels of high-quality audio. This supports formats like Dolby TrueHD and DTS-HD Master Audio.

It also supports newer formats like Dolby Atmos and DTS:X. These provide immersive sound with height effects. HDMI can send audio signals without compression, keeping sound clear and detailed.

Devices Supporting Hdmi Audio

Most modern devices support HDMI audio. TVs, soundbars, AV receivers, and gaming consoles all use HDMI. Blu-ray players and streaming devices also rely on HDMI for audio and video.

Laptops and desktop computers often include HDMI ports. This lets users connect to monitors or TVs with sound. HDMI compatibility is widespread and essential for modern media devices.

Sound Quality Comparison

Sound quality plays a key role in choosing between Digital Optical Audio and HDMI connections. Both can deliver great audio, but they differ in how they handle sound data. Understanding these differences helps pick the best option for your setup.

Audio Formats Supported

Digital Optical Audio supports stereo and compressed surround sound like Dolby Digital and DTS. It cannot carry newer, high-definition formats such as Dolby TrueHD or DTS-HD Master Audio. HDMI supports all these formats and more, including uncompressed audio tracks. This means HDMI can deliver richer, clearer sound with more detail.

Bitrate And Bandwidth Differences

Optical cables have a limited bandwidth around 5 Mbps. This restricts the amount of audio data transmitted. HDMI offers much higher bandwidth, up to 18 Gbps or more, depending on the version. Higher bandwidth allows HDMI to carry uncompressed multi-channel audio and higher bitrates. As a result, HDMI handles complex audio signals better.

Impact On Listening Experience

Audio through HDMI often sounds fuller and more immersive. It supports advanced features like surround sound formats and higher sample rates. Optical audio still delivers clear sound but lacks the depth of high-definition audio. For movies and games, HDMI provides a more engaging experience. For basic stereo or standard surround sound, optical audio remains a solid choice.

Compatibility And Connectivity

Compatibility and connectivity play a key role in choosing between digital optical audio and HDMI. These factors affect how well your devices work together and how easy it is to set up your system. Understanding these differences helps you pick the right option for your needs.

Device Compatibility

Digital optical audio works with many older and newer audio devices. It sends only sound signals, so it cannot carry video. HDMI supports both audio and video in one cable. Most modern TVs, soundbars, and gaming consoles use HDMI. Some older devices may lack HDMI ports, making optical audio a better fit.

Cable Length And Signal Loss

Optical cables use light to transmit sound. They can lose signal over long distances, usually after 30 feet. HDMI cables carry electrical signals and can also lose quality over very long runs. But HDMI supports repeaters and boosters to extend length. Shorter cables help keep sound clear for both types.

Ease Of Setup And Use

Optical cables connect easily with a simple plug. They do not carry video, so you need another cable for TV images. HDMI bundles audio and video, reducing cable clutter. It also supports automatic device recognition and volume control. This makes HDMI simpler for many users to manage.

Advanced Features

Advanced features set digital optical audio and HDMI apart in many ways. These features affect sound quality, video integration, and connectivity. Understanding these differences helps choose the right option for your devices.

Surround Sound Support

Digital optical audio supports surround sound formats like Dolby Digital and DTS. It delivers clear, high-quality audio for movies and games. HDMI supports all these formats plus newer ones like Dolby TrueHD and DTS-HD Master Audio. HDMI offers richer, lossless audio for home theaters.

Audio Return Channel (arc)

ARC lets your TV send audio back to a sound system using one cable. Digital optical cables do not support ARC. HDMI cables include ARC, reducing cable clutter and simplifying connections. This feature works well for smart TVs and streaming devices.

Hdr And Video Integration

Digital optical cables only carry audio signals. They cannot transmit video or support HDR features. HDMI carries both audio and video signals in one cable. It supports HDR formats like HDR10 and Dolby Vision. This makes HDMI ideal for high-quality video and sound setups.

Use Cases And Recommendations

Choosing between Digital Optical Audio and HDMI depends on your devices and needs. Both have unique strengths. Understanding where each works best helps you get clear sound and video.

Below are common use cases with clear recommendations for each connection type.

Home Theater Systems

Digital Optical Audio is a solid choice for home theaters. It carries high-quality sound without interference. Many older receivers support optical inputs only.

HDMI offers both audio and video in one cable. It supports advanced audio formats like Dolby Atmos. If your system is modern, HDMI is best for simplicity and quality.

Gaming Consoles

HDMI is the go-to for gaming consoles. It delivers high-definition video and audio through one cable. This reduces clutter and setup time.

Optical audio can work but limits audio features. It won’t carry the latest surround sound formats. HDMI ensures full audio and video experience for games.

Streaming Devices

Streaming devices like Roku or Fire TV often use HDMI. It handles both sound and picture easily. Streaming in high definition needs HDMI’s bandwidth.

Optical audio may be used if HDMI is unavailable. It still delivers good audio but no video. HDMI is best for smooth streaming and clear sound.

Cost And Availability

Cost and availability play a big role when choosing between digital optical audio and HDMI. Understanding the price and how easy it is to find cables and devices helps you make the best choice. Both options have pros and cons in these areas.

Price Differences

Digital optical cables usually cost less than HDMI cables. Optical cables are simple and use less material. HDMI cables can be more expensive, especially high-speed versions. Devices with HDMI ports might also cost more because of extra features.

Cable And Equipment Options

Digital optical cables are widely available and easy to buy. Most stores carry them at low prices. HDMI cables come in many types, including standard and ultra-high speed. This variety gives more options but can confuse buyers. Equipment with HDMI is common in modern TVs and sound systems. Optical ports appear mostly on older or mid-range devices.

Future-proofing Your Setup

HDMI supports newer audio and video formats. Choosing HDMI helps keep your setup ready for future tech. Digital optical audio has limits on sound quality and features. Optical may work well now but might not support upgrades later. Investing in HDMI equipment can save money over time.

Digital Optical Audio Vs HDMI: Ultimate Audio Connection Showdown

Credit: www.whathifi.com

Frequently Asked Questions

What Is The Main Difference Between Digital Optical Audio And Hdmi?

Digital Optical Audio transmits sound only, while HDMI carries both sound and video signals. HDMI supports higher quality audio formats too.

Can I Use Digital Optical Audio For Surround Sound?

Yes, Digital Optical Audio supports surround sound but only up to 5. 1 channels. It cannot carry newer formats like Dolby Atmos.

Which Connection Is Better For Gaming, Optical Audio Or Hdmi?

HDMI is better for gaming because it carries both video and audio with low latency. Optical Audio only sends audio.

Does Hdmi Provide Better Sound Quality Than Digital Optical Audio?

HDMI usually offers better sound quality as it supports higher audio formats. Optical Audio is limited to standard surround sound.

Can I Connect A Tv To A Soundbar Using Digital Optical Audio?

Yes, many TVs and soundbars have Digital Optical ports for easy audio connection. HDMI ARC is another common option for this.

Conclusion

Choosing between digital optical audio and HDMI depends on your needs. Optical cables work well for simple audio setups. HDMI carries both video and audio with high quality. It supports newer formats and devices better. Think about your equipment and future upgrades.

Both options have clear strengths. Pick the one that fits your system best. Sound quality and convenience matter most. This helps you enjoy your music and movies fully.

Traditional Marketing Vs Digital: Ultimate Guide to Winning Strategies

Traditional Marketing Vs Digital

Are you wondering which marketing approach will work best for your business—traditional marketing or digital? Choosing the right path can feel overwhelming, especially when both seem powerful in their own way.

But what if understanding the real differences could help you make smarter decisions and get better results? This article will guide you through the key points of traditional marketing vs digital, so you can spot opportunities that fit your goals perfectly.

Keep reading, and you’ll discover how to connect with your audience like never before.

Traditional Marketing Basics

Traditional marketing forms the foundation of advertising. It uses offline channels to reach customers. This method has existed for decades and remains familiar to many businesses. Understanding its basics helps compare it to digital marketing. It also shows why some companies still rely on it today.

Key Channels And Techniques

Traditional marketing uses many well-known channels. These include print ads in newspapers and magazines. Television commercials also play a major role. Radio ads target local or broad audiences. Direct mail sends physical offers to homes. Billboards and posters catch attention in public places. Events and sponsorships build brand presence.

Strengths Of Traditional Marketing

Traditional marketing reaches a wide audience quickly. It builds trust through familiar formats. Physical ads create a lasting impression. It works well for local businesses. Some customers prefer tangible materials. It supports brand recognition over time. Many people still watch TV and listen to radio daily.

Limitations And Challenges

Traditional marketing can be costly. Printing and airtime require large budgets. Measuring results is often difficult. Targeting specific groups is less precise. Campaigns take longer to launch and adjust. It lacks interactive features that engage users. Younger audiences may ignore or avoid it.

Traditional Marketing Vs Digital: Ultimate Guide to Winning Strategies

Credit: www.reddit.com

Digital Marketing Essentials

Digital marketing is a key part of modern business. It uses the internet to reach customers and promote products. Businesses can target specific groups with digital ads. This makes marketing efforts more focused and cost-effective.

Successful digital marketing requires understanding its tools and platforms. Knowing these basics helps create better campaigns. It also helps avoid common mistakes that waste time and money.

Popular Platforms And Tools

Social media sites like Facebook, Instagram, and Twitter are popular for ads. Google Ads helps place ads on search results and websites. Email marketing tools like Mailchimp send messages to many people fast. Analytics tools track how well campaigns perform. These platforms and tools make digital marketing easier and more efficient.

Advantages Of Digital Marketing

Digital marketing reaches a large audience quickly. It allows precise targeting by age, location, and interests. Costs are often lower than traditional marketing. Results can be measured in real-time. Campaigns can be adjusted instantly for better results. It also offers more ways to interact with customers directly.

Common Obstacles In Digital Campaigns

Many campaigns face issues like low engagement or poor targeting. Competition is high, making it harder to stand out. Ads may get blocked by users or software. Creating quality content requires time and skill. Tracking results can be confusing without the right tools. Overcoming these challenges is part of digital marketing success.

Comparing Reach And Engagement

Reach and engagement are key factors in marketing success. Traditional and digital marketing differ greatly in these areas. Understanding these differences helps businesses choose the right strategy. Reach means how many people see your message. Engagement means how many people interact with it.

Audience Targeting Methods

Traditional marketing targets broad groups through TV, radio, and print. It aims at a general audience based on location or demographics. Digital marketing uses data to target specific users. Ads can reach people by age, interests, behavior, and location. Digital targeting is more precise and flexible than traditional methods. This precision helps deliver messages to the right people.

Measuring Impact And Roi

Traditional marketing impact is hard to measure exactly. Businesses rely on surveys and sales trends to guess results. Digital marketing offers clear data on clicks, views, and conversions. This data shows what works and what does not. Digital ROI measurement is faster and more accurate. Marketers can adjust campaigns quickly to improve results.

Customer Interaction Differences

Traditional marketing is mostly one-way communication. Customers see ads but cannot respond directly. Digital marketing allows two-way interaction through comments and shares. This creates conversations and builds relationships. Customers feel more involved with brands online. Higher engagement helps brands gain trust and loyalty.

Budgeting And Cost Efficiency

Budgeting and cost efficiency are key factors in choosing marketing methods. Businesses must understand where money goes and how much impact it has. Traditional marketing and digital marketing have very different cost models. Knowing these helps plan better and avoid waste.

Cost Structures In Traditional Marketing

Traditional marketing costs often include printing, TV or radio ads, and event sponsorships. These require large upfront payments. Many campaigns need long-term commitments. Costs are fixed and hard to change once started. Tracking exact return on investment is difficult. Unused materials or airtime still cost money. Budgets can quickly rise without clear results.

Digital Marketing Budgeting Strategies

Digital marketing allows flexible spending. Businesses can start small and increase budgets based on results. Pay-per-click and social media ads let companies control daily spend. Data analytics show what works and what does not. This information helps adjust budgets quickly. Digital campaigns often need less initial money. Testing different ads is easier and cheaper.

Maximizing Value From Spending

Effective budgeting means spending on the most effective channels. Traditional marketing works well for broad brand awareness. Digital marketing targets specific groups with precision. Combining both can balance reach and cost. Monitoring performance regularly improves cost efficiency. Avoid spending on low-performing campaigns. Focus funds on strategies that deliver clear returns.

Creative Approaches And Content

Creative approaches and content play a big role in marketing success. They shape how brands talk to their audience. Each method, traditional or digital, demands different tactics. Understanding these helps create better messages.

Crafting Messages For Traditional Media

Traditional media uses clear and direct messages. Print ads, TV, and radio need simple language. Stories must be easy to follow. Visuals are bold and eye-catching. The goal is to make a quick impact. Repetition helps people remember the message. Creativity lies in strong slogans and memorable images.

Content Strategies For Digital Channels

Digital marketing allows more detailed content. Brands can share stories through blogs, videos, and social posts. Content changes fast to keep up with trends. Interaction is key; users can like, comment, or share. This feedback shapes future content. Creativity means using different formats and styles. Personalization makes messages feel unique to each user.

Adapting Creativity Across Platforms

Creative content must fit each platform’s style. A TV ad won’t work the same online. Brands adjust length, tone, and visuals for each channel. Consistency in message is important, though. Creativity means knowing what works where. Testing ideas helps find the best fit. The goal is to engage the audience everywhere.

Traditional Marketing Vs Digital: Ultimate Guide to Winning Strategies

Credit: digitalmarketinggroup.com

Integrating Both Strategies

Integrating traditional marketing with digital strategies creates a powerful approach. Combining both methods helps reach more people effectively. It also builds stronger brand awareness and trust.

Each strategy has unique strengths. Using them together improves overall marketing impact. The key is knowing when and how to apply each one.

When To Use Traditional Marketing

Traditional marketing works well for local audiences. It suits older demographics who prefer print, TV, or radio. Events, flyers, and billboards create physical presence. These methods build trust through face-to-face or tangible contact. Use traditional marketing for brand recognition in specific regions.

Leveraging Digital For Better Results

Digital marketing reaches people fast and at low cost. It targets specific groups using data and analytics. Social media, email, and search ads boost engagement. Digital tools track results instantly and adjust campaigns. Use digital marketing to reach younger audiences and measure success quickly.

Creating A Cohesive Marketing Mix

Combine traditional and digital channels for a balanced plan. Align messages across print, online, and events for consistency. Use traditional methods to support digital campaigns and vice versa. This mix increases visibility and builds trust with diverse audiences. Plan each channel’s role carefully to avoid overlap or gaps.

Case Studies And Success Stories

Case studies and success stories show how brands use marketing strategies effectively. They help us see what works in real life. Comparing traditional and digital marketing through examples gives clear insights. These stories highlight strengths and challenges of each approach.

Brands Excelling With Traditional Tactics

Some brands still thrive using traditional marketing methods. Coca-Cola, for example, invests heavily in TV ads. Their commercials connect emotionally with viewers worldwide. Local businesses also succeed with flyers and billboards. These methods build strong community ties and trust. Traditional marketing creates a lasting impression in many cases.

Digital Campaigns Driving Growth

Many companies grow fast with digital marketing campaigns. Nike uses social media to reach young audiences. Their online ads and influencer partnerships boost engagement. Small startups gain attention through targeted ads on Google and Facebook. Digital marketing helps track results and adjust strategies quickly. It offers wide reach at lower costs.

Hybrid Approaches That Work

Combining traditional and digital marketing often yields the best results. McDonald’s runs TV ads alongside online promotions. This mix increases brand visibility across different platforms. Local shops use radio ads plus email newsletters for better reach. Hybrid strategies allow brands to connect with more customers. They balance old and new methods effectively.

Traditional Marketing Vs Digital: Ultimate Guide to Winning Strategies

Credit: www.somsdigital.co.za

Future Trends In Marketing

The marketing world is changing fast. Traditional methods still have value, but digital marketing grows stronger each day. Knowing future trends helps businesses stay ahead. These trends shape how brands connect with customers. Understanding them is key to effective marketing.

Emerging Technologies And Tools

New technology changes marketing strategies. Artificial intelligence helps personalize ads for users. Chatbots provide quick customer support online. Virtual and augmented reality create interactive experiences. These tools make marketing more engaging and efficient. Brands that use these technologies gain an advantage.

Shifts In Consumer Behavior

Consumers expect fast and easy interactions. They use multiple devices to shop and browse. Trust and authenticity influence buying decisions more than before. People prefer brands that show social responsibility. Marketing must focus on building real connections and trust. Understanding these shifts helps create relevant messages.

Preparing For Marketing Evolution

Marketers need to adapt quickly to change. Learning new skills and tools is essential. Data analysis helps make better marketing choices. Flexibility allows brands to respond to trends fast. Investing in digital skills prepares businesses for future challenges. Staying curious and open to change is vital.

Frequently Asked Questions

What Is The Main Difference Between Traditional And Digital Marketing?

Traditional marketing uses offline methods like print, TV, and radio ads. Digital marketing focuses on online channels like websites and social media.

Which Marketing Type Offers Better Targeting Options?

Digital marketing allows precise targeting by age, location, and interests. Traditional marketing targets broader audiences with less accuracy.

How Do Costs Compare In Traditional Vs Digital Marketing?

Traditional marketing often requires higher upfront costs for materials and media space. Digital marketing can be more budget-friendly and flexible.

Can Traditional Marketing Reach A Global Audience Effectively?

Traditional marketing is usually local or regional. Digital marketing easily reaches audiences worldwide through the internet.

Which Marketing Method Provides Faster Results?

Digital marketing often shows quick results with instant feedback. Traditional marketing takes longer to measure impact and response.

Conclusion

Both traditional and digital marketing have clear strengths. Traditional methods build trust with local customers. Digital marketing reaches more people quickly and cheaply. Choosing the right approach depends on your goals. Many businesses find combining both works best. Test and see what fits your audience well.

Marketing is about connecting, not just selling. Keep your message simple and clear. Success comes from knowing your customers and adapting. Keep learning and adjusting to stay effective.