
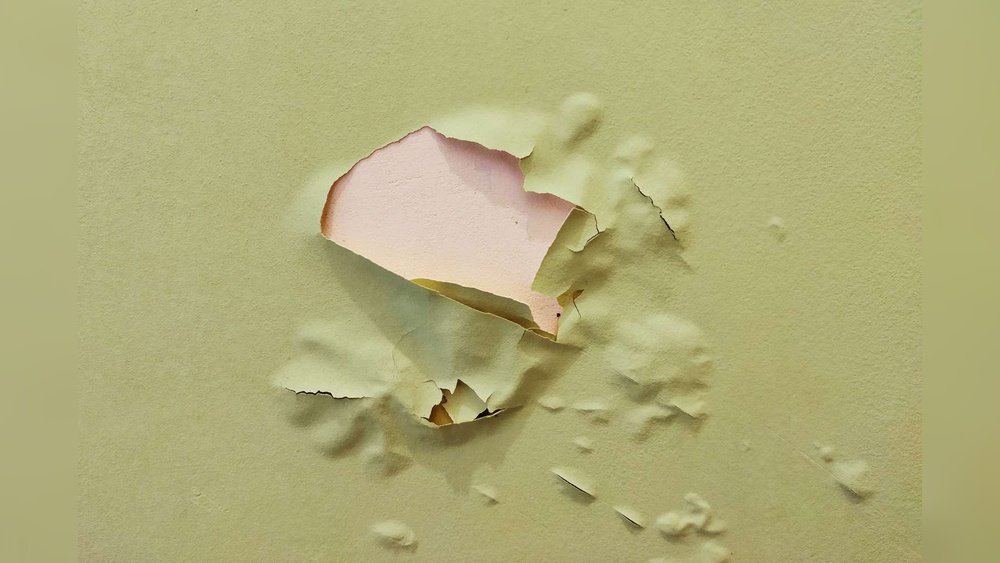
The once pristine finish on your walls, a smooth canvas of color, has begun to betray you. Small blisters, then larger ones, appear, eventually leading to unsightly patches of peeling paint that mar the aesthetic of your home. This phenomenon, often dismissed as a minor annoyance, is a clear indicator of underlying issues that need to be addressed. Understanding why wall paint bubbles and peels is the first crucial step toward preventing it from happening again and restoring the integrity of your home’s surfaces.
Paint failure isn’t just about aesthetics; it can signal moisture problems, poor surface preparation, or the use of incompatible materials, all of which can lead to more significant structural damage if left unchecked. Whether you’re a seasoned DIYer or a homeowner looking to understand professional work, this guide will equip you with the knowledge to identify the root causes of paint failure and implement effective solutions.
We’ll explore the science behind paint adhesion, the common culprits behind bubbling and peeling, and the preventative measures you can take to ensure a durable, long-lasting finish.
Key Takeaways
- Moisture is the primary culprit: Water trapped beneath the paint film is the most frequent cause of bubbling and peeling. This can stem from leaks, high humidity, or condensation.
- Poor surface preparation is critical: Inadequate cleaning, sanding, or priming before painting will severely compromise paint adhesion.
- Incompatible materials cause issues: Applying oil-based paint over latex, or vice-versa, without proper sealing can lead to adhesion problems.
- Quality of paint matters: Lower-quality paints may have weaker binders, making them more susceptible to failure.
- Environmental factors play a role: Extreme temperature fluctuations and direct sunlight can stress the paint film.
- Proper application techniques are essential: Applying paint too thinly, too thickly, or in unfavorable weather conditions can lead to premature failure.
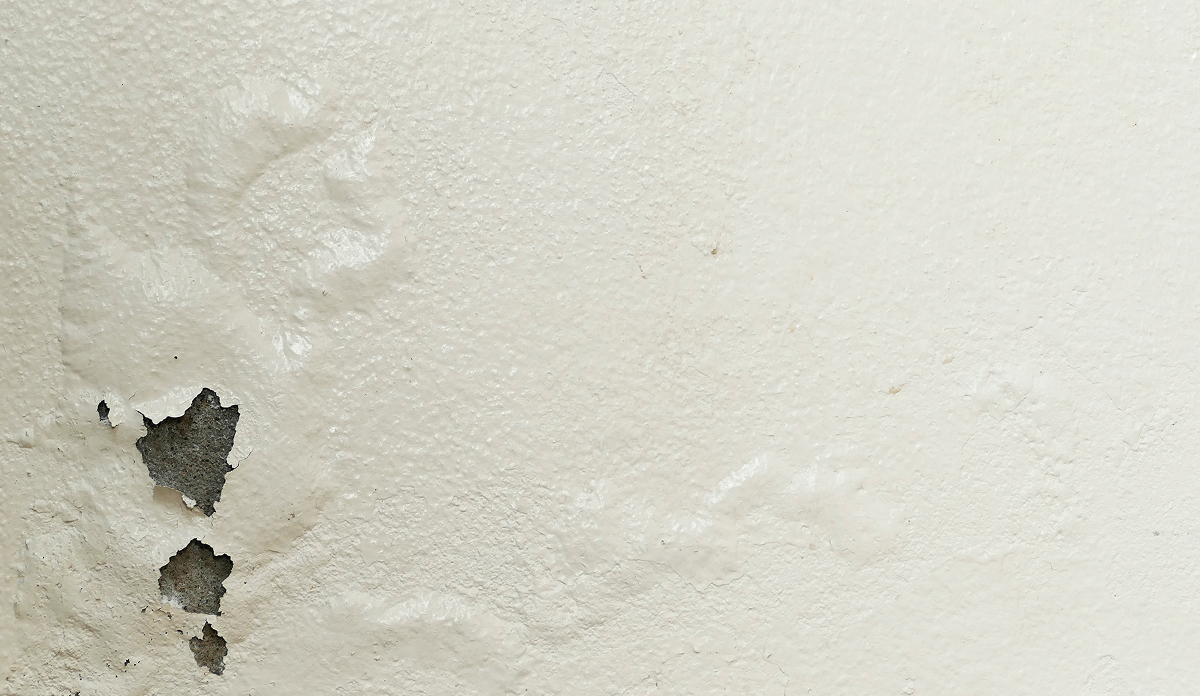
Credit: www.ringsend.com
The Science Of Paint Adhesion: Why Paint Sticks (or Doesn’t)
Paint is more than just a coat of color; it’s a complex system of pigments, binders, solvents, and additives. The binder is the critical component responsible for adhesion. It’s the “glue” that holds the pigment particles together and, more importantly, adheres them to the surface. When paint is applied, the solvent (water in latex paints, mineral spirits in oil-based paints) evaporates, leaving behind a solid film of binder and pigment. For this film to remain intact and adhere strongly, several factors must be in play.
The surface itself must be clean and porous enough to allow the binder to penetrate and create a mechanical bond. Surface tension also plays a role; if the paint has high surface tension, it might bead up rather than spread evenly, leading to poor contact and adhesion. The binder needs to form a continuous film that is flexible enough to withstand minor surface movements but strong enough to resist external forces like moisture or abrasion. When these conditions aren’t met, the bond between the paint and the surface, or between layers of paint, weakens, setting the stage for bubbling and peeling.
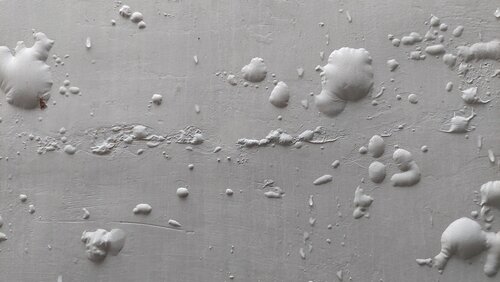
Credit: www.ultratechcement.com
Common Causes Of Paint Bubbling And Peeling
The appearance of bubbles and peeling paint on your walls isn’t a random occurrence. It’s a symptom, and like any symptom, it points to an underlying cause. Identifying these causes is paramount to fixing the problem effectively and preventing its recurrence.
Moisture Trapped Beneath The Paint Film
This is, by far, the most common reason for paint failure. Water is the enemy of paint adhesion. When moisture penetrates the paint film from behind, it breaks the bond between the paint and the substrate (the wall itself) or between different layers of paint.
- Leaks from Plumbing or Roofs: Hidden leaks within walls, from faulty plumbing pipes, or from a compromised roof can saturate the drywall or plaster. As the water evaporates, it pushes against the paint film, creating blisters. In severe cases, this moisture can also lead to mold growth, further damaging the surface.
- High Humidity and Condensation: Bathrooms, kitchens, and laundry rooms are prone to high humidity. Inadequate ventilation can lead to significant condensation forming on walls, especially during colder months when there’s a temperature differential between the interior and exterior. This moisture seeps into the paint.
- Rising Damp: In older homes, moisture from the ground can wick up through porous building materials like brick or plaster, a phenomenon known as rising damp. This moisture can travel up the wall, compromising the paint finish at lower levels.
- Inadequate Exterior Sealing: If the exterior of your home isn’t properly sealed or painted, water can penetrate the walls and find its way to the interior surface, causing the interior paint to bubble.
Poor Surface Preparation
Paint needs a clean, sound surface to adhere to. Skipping or rushing crucial preparation steps is a surefire way to invite paint failure down the line.
- Dirty or Greasy Surfaces: Walls that haven’t been properly cleaned before painting can have a layer of dust, grease, or grime. Paint simply cannot adhere effectively to these contaminants. This is particularly common in kitchens where cooking grease accumulates.
- Unprimed or Improperly Primed Surfaces: Priming is essential for several reasons: it seals porous surfaces, provides a uniform base for the topcoat, and enhances adhesion. Painting directly over glossy surfaces, stains, or new drywall without appropriate primer will almost certainly lead to peeling.
- Old, Peeling Paint Not Removed: If you’re painting over an existing layer of paint that is already loose or peeling, you’re essentially painting over a failing surface. The new paint will only be as strong as the old layer beneath it, and it will inevitably start to peel along with the old paint.
- Dust After Sanding: Sanding creates fine dust particles. If this dust isn’t thoroughly wiped away after sanding (using a damp cloth or tack cloth), it will prevent the primer or paint from making direct contact with the wall surface.
Incompatible Paint Layers
Paint formulations have evolved over the years, and not all types are compatible with each other. Applying one type of paint over another without the correct intermediary steps can lead to adhesion failure.
- Latex Over Oil-Based Paint: Latex (water-based) paint does not adhere well to oil-based paint. The flexible binders in latex paint can’t get a proper grip on the hard, non-porous surface of oil-based paint. This often results in the latex paint bubbling and peeling off in sheets.
- Oil-Based Over Latex Paint: While generally less problematic than the reverse, applying oil-based paint over latex can still cause issues if the latex paint isn’t completely cured or if the oil-based paint is too heavy. It can also lead to a less breathable surface.
- Using the Wrong Primer: Different primers are designed for different surfaces and paint types. Using a primer not suited for the existing surface or the intended topcoat will compromise adhesion. For example, using a standard latex primer over a glossy oil-based surface won’t provide adequate grip.
Application Errors
Even with the right materials and preparation, improper application techniques can lead to paint failure.
- Painting in Extreme Temperatures or Humidity: Most paints have optimal temperature and humidity ranges for application. Painting when it’s too cold, too hot, or too humid can affect how the paint cures and adheres. High humidity, in particular, can slow down drying and curing, increasing the risk of moisture issues.
- Applying Paint Too Thinly or Too Thickly: Applying paint too thinly may not provide adequate coverage or film integrity. Conversely, applying it too thickly can prevent proper drying and curing, leading to sagging, cracking, and potential adhesion problems as the surface dries unevenly.
- Insufficient Drying Time Between Coats: Each coat of paint needs adequate time to dry and cure before the next is applied. Rushing this process traps solvents and moisture, weakening the overall paint film and its bond to the surface.
Quality Of Paint And Materials
While less common as a sole cause, the quality of the paint and primer used can contribute to paint failure, especially when combined with other factors.
- Low-Quality Binders: Cheaper paints often use lower-quality binders, which have weaker adhesive properties. This means they are less forgiving of minor imperfections in surface preparation or environmental conditions.
- Old or Degraded Paint: Paint that has been stored for a very long time, especially if exposed to freezing temperatures, can degrade. Its chemical properties can change, affecting its ability to adhere and form a durable film.
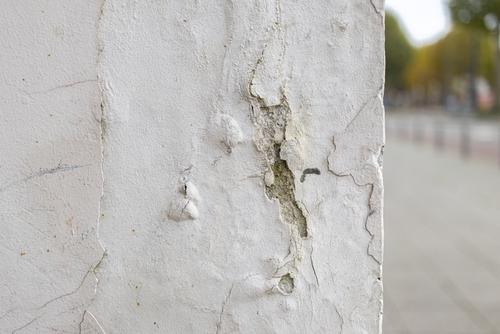
Credit: www.ultratechcement.com
Identifying The Root Cause: A Diagnostic Approach
Before you can effectively repair bubbling and peeling paint, you need to pinpoint the exact cause. This diagnostic process will save you time and money by ensuring you address the underlying problem, not just the symptom.
The Water Test: Is Moisture The Culprit?
The most telling sign of moisture-related paint failure is the location and nature of the bubbles.
- Location: Are the bubbles appearing in areas prone to moisture, such as near windows, bathrooms, kitchens, or on exterior walls that face prevailing winds or rain?
- Bubbles from Behind: If you gently poke a bubble, does it feel soft or damp? Is there any discoloration or mold growth visible beneath the paint layer? This strongly suggests moisture is seeping from behind the paint.
- Exterior Wall Issues: If the peeling is on an interior wall directly opposite an exterior wall, inspect the exterior for cracks, failing sealant around windows, or damaged siding.
Pro Tip: For suspected moisture issues, consider using a moisture meter. These devices can accurately measure the moisture content in drywall and plaster, confirming or ruling out water intrusion.
Inspecting Surface Preparation And Previous Work
Examine the condition of the paint layers and the surface itself.
- Adhesion Test: Try to scrape or peel a small section of the affected paint. Does it come off easily? Does it pull away cleanly, or does it take chunks of the substrate with it? If it pulls away easily, it indicates poor adhesion, likely due to surface contamination or lack of primer.
- Paint Type Check: If you’re unsure about the type of paint currently on the walls, you can perform a simple test. Moisten a cotton ball with denatured alcohol and rub it on an inconspicuous area. If the paint comes off onto the cotton ball, it’s likely latex. If it doesn’t, it’s probably oil-based. This helps determine compatibility for future painting.
- Glossy Surfaces: If the paint is peeling from a surface that appears very glossy and smooth, it might be that the previous paint was oil-based and not properly deglossed or primed before a latex topcoat was applied.
Evaluating Application And Material Quality
While harder to assess without prior knowledge, some signs can indicate application or material issues.
- Uneven Drying: If the paint seems to have dried unevenly, with some areas appearing thicker or stickier than others, it could point to over-application or poor drying conditions.
- Paint Film Integrity: Examine the peeling paint itself. Does it seem brittle and crumbly (potential quality issue) or flexible and rubbery (often related to moisture)?
Remediation: Fixing Bubbling And Peeling Paint
Once you’ve identified the cause, you can proceed with repairs. The repair process will vary depending on the severity and the underlying issue.
Addressing Moisture Problems
This is the most critical step. If you don’t fix the moisture source, any new paint job will eventually fail again.
- Identify and Repair Leaks: This might involve calling a plumber to fix leaky pipes, a roofer to repair roof damage, or a contractor to address issues with exterior siding or sealant.
- Improve Ventilation: In bathrooms and kitchens, ensure exhaust fans are working correctly and are used consistently. Consider installing a dehumidifier if persistent humidity is an issue.
- Address Rising Damp: This often requires professional intervention, such as installing a damp-proof course or improving exterior drainage.
Preparing The Surface For Repainting
This is a universal step for any paint repair.
- Remove Loose Paint: Using a putty knife or scraper, carefully remove all loose, bubbling, or peeling paint. Work outwards from the edge of the affected area until you reach sound paint.
- Sand the Edges: Feather the edges of the remaining paint by sanding them down to a smooth transition with the exposed surface. This prevents the new paint from showing ridges.
- Clean the Area: Wash the entire area with a mild detergent and water solution to remove dust, dirt, grease, and any residue from the scraping and sanding process. Rinse thoroughly and allow the surface to dry completely. If mold was present, use a solution of bleach and water (1 part bleach to 3 parts water) and rinse well.
- Repair Damage: Fill any gouges, holes, or cracks with appropriate spackle or joint compound. Allow it to dry, then sand smooth.
Priming And Repainting
With the surface prepared and moisture issues resolved, you can proceed with priming and painting.
- Apply a Quality Primer: This is non-negotiable. Use a high-quality primer specifically designed for the type of surface and the problem you’ve encountered.
- For moisture issues: Use a stain-blocking, moisture-resistant primer. These primers are formulated to seal porous surfaces and prevent residual moisture from affecting the topcoat.
- For adhesion issues (e.g., over oil-based paint): Use a bonding primer. These primers are designed to adhere strongly to difficult surfaces like glossy paint or laminate.
- For new drywall or repairs: Use a drywall primer/sealer to create a uniform surface.
- Allow Primer to Dry: Follow the manufacturer’s instructions for drying times. This is crucial for the primer to form a proper bond.
- Apply Topcoats: Apply two thin, even coats of your chosen paint. Avoid applying paint too thickly, as this can lead to drying issues. Ensure adequate drying time between coats.
Preventing Future Paint Failure: A Proactive Approach
The best way to deal with bubbling and peeling paint is to prevent it from happening in the first place. Implementing good practices during the initial painting process can save you significant headaches and expenses later on.
Meticulous Surface Preparation
This Cannot Be Overstated. Invest Time In Proper Preparation.
- Clean Thoroughly: Always wash walls to remove any dirt, grease, or grime, especially in kitchens and bathrooms.
- Scrape and Sand: Remove all loose paint and sand any glossy surfaces to create a better grip for the new paint.
- Dust Removal: Ensure all sanding dust is completely removed before priming.
- Use the Right Primer: Always prime new surfaces, repaired areas, and surfaces where paint adhesion might be an issue (like glossy paint or stained areas). Choose a primer that is compatible with both the surface and your topcoat.
Choose Quality Materials
- Invest in Good Paint: While budget is always a consideration, investing in higher-quality paints with superior binders and pigments will generally result in a more durable and longer-lasting finish.
- Select Appropriate Primer: Don’t skimp on primer. A good primer acts as the foundation for your paint job.
Proper Application Techniques
- Follow Manufacturer Guidelines: Pay close attention to the recommended application temperatures, humidity levels, and drying times on the paint and primer cans.
- Apply Even Coats: Avoid applying paint too thickly or too thinly. Two thin coats are almost always better than one thick coat.
- Use the Right Tools: Ensure your brushes and rollers are appropriate for the type of paint you are using and are in good condition.
Address Moisture Sources Promptly
- Ventilation is Key: Ensure adequate ventilation in moisture-prone areas like bathrooms and kitchens. Use exhaust fans and consider a dehumidifier if necessary.
- Exterior Maintenance: Regularly inspect and maintain the exterior of your home, including gutters, siding, and sealant around windows and doors, to prevent water intrusion.
Consider Paint Type Compatibility
- Know Your Paints: If painting over an existing surface, try to determine if it’s oil-based or latex. If unsure, use a bonding primer designed to adhere to most surfaces.
- Latex Over Latex, Oil Over Oil: Generally, it’s safest to apply latex over latex and oil over oil. If you must switch types, thorough preparation and the correct primer are essential.
Case Study: The Bathroom Re-paint That Went Wrong
Sarah decided to repaint her small, frequently used bathroom to freshen it up. The existing paint was a light blue, slightly glossy finish. She skipped cleaning, assuming it was clean enough, and directly applied a new coat of premium latex paint.
Within a few weeks, small bubbles started appearing around the shower area and near the window.
The Problem: Sarah’s mistake was twofold: she didn’t clean the greasy residue and soap scum that had accumulated on the walls, and she applied a latex paint directly over what was likely an oil-based or heavily sealed latex paint without proper preparation. The humidity from showers exacerbated the poor adhesion, causing moisture to get trapped and the paint to bubble.
The Fix: Sarah had to scrape off all the bubbling paint, sand the entire wall surface to degloss it, clean it thoroughly with a TSP (trisodium phosphate) substitute, rinse, and let it dry completely. She then applied a high-quality bonding primer suitable for glossy surfaces and moisture-prone areas. Once the primer was dry, she applied two coats of a mold-resistant, bathroom-specific latex paint. She also made sure to use the exhaust fan during and after showers. This time, the paint held firm.
Data Snapshot: Paint Failure Costs
The cost of paint failure extends beyond the price of paint and labor. While exact figures vary widely by region and the extent of damage, studies and industry reports consistently highlight the significant financial impact. According to a report by the Painting Contractors of America, improper surface preparation is cited as the leading cause of premature paint failure, leading to costly rework. For a typical 3-bedroom home, the cost of repainting due to failure can easily range from $3,000 to $10,000 or more, depending on the complexity of the repairs needed, such as fixing underlying water damage or structural issues. This underscores the economic importance of getting the paint job right the first time.
Frequently Asked Questions
Why Does Paint Bubble Immediately After Painting?
Bubbling that appears very soon after painting is often due to trapped solvents or moisture. If the paint was applied too thickly, the surface may have dried while the underlying layers were still wet. This trapped solvent or moisture can cause the paint film to blister as it tries to escape. Applying paint in very high humidity or direct, hot sunlight can also cause the surface to skin over too quickly, trapping moisture underneath.
Can I Just Paint Over Small Bubbles?
No, you should never paint over small bubbles without addressing the underlying cause. Painting over a bubble is like putting a band-aid on a serious wound. The bubble indicates a loss of adhesion or moisture issues. Painting over it will only temporarily hide the problem, and the bubble will likely return, possibly larger and more difficult to repair. You must remove the loose paint, prepare the surface, and reapply primer and paint.
How Does Temperature Affect Paint Bubbling?
Temperature significantly impacts paint adhesion and drying. Painting in extreme cold can slow down the curing process, preventing the paint from forming a strong, cohesive film. The binders may not fully harden, leading to a weak bond susceptible to damage. Conversely, painting in extreme heat can cause the paint to dry too quickly, especially on the surface. This can lead to a condition known as “mud cracking” or cause the paint to lose adhesion as it dries unevenly, sometimes resulting in blistering as trapped moisture or solvents escape. Always adhere to the temperature ranges recommended by the paint manufacturer.
Is Peeling Paint A Sign Of Lead Paint?
Peeling paint, especially in homes built before 1978, can be a sign of lead-based paint. Lead paint is hazardous, particularly when it deteriorates into dust or chips that can be ingested or inhaled. If you suspect lead paint, do not attempt to remove or disturb it yourself. Hire a certified lead abatement professional to test and safely remove the paint. Proper containment and disposal are crucial to prevent lead poisoning.
What Is The Difference Between Paint Bubbling And Cracking?
Bubbling is characterized by the formation of blisters or pockets where the paint has lost adhesion to the surface, often due to moisture or solvent entrapment. The paint lifts away from the substrate. Cracking, on the other hand, occurs when the paint film itself fails due to stress. This can be caused by the paint film becoming too brittle over time, expansion and contraction of the underlying surface due to temperature or humidity changes, or applying incompatible paint layers that pull against each other. Cracks can appear as hairline fissures or larger, alligator-like patterns. While both are forms of paint failure, they stem from different underlying issues.
The recurring issue of wall paint bubbling and peeling is a frustrating problem for homeowners, but it’s rarely an insurmountable one. By understanding the fundamental principles of paint adhesion and systematically diagnosing the root causes, most commonly moisture intrusion and inadequate surface preparation, you can effectively remediate the problem. The key lies in patience and thoroughness: remove all failing paint, prepare the surface meticulously, use high-quality primers and paints suited to the specific issue, and ensure proper ventilation and exterior maintenance. Proactive measures, from diligent cleaning and sanding to choosing the right materials and application techniques, are the most effective defense against future paint failures, safeguarding both the appearance and integrity of your home’s surfaces for years to come.