How to Cut a Groove in Wood with a Circular Saw: Expert Guide in 2026

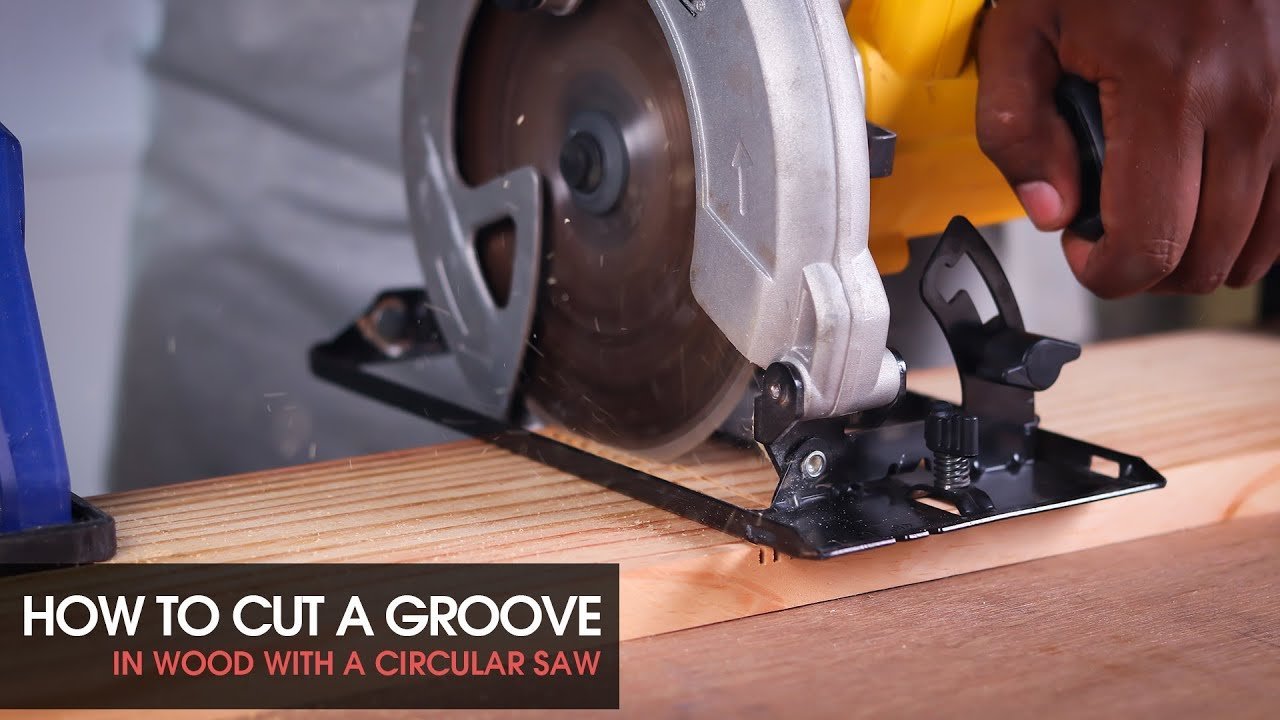
A circular saw rests on a wooden board featuring a clean, precise groove.

Cutting a groove in wood with a circular saw is a safe process when you set the blade depth to your target measurement and use a straight-edge guide to maintain a clean path. This method relies on making multiple passes to widen the cut to your target width, as a standard blade is usually thinner than the groove you need.

The final result depends on your choice of saw blade, the accuracy of your fence setup, and the feed rate you maintain. If you’re using a standard wood-cutting blade, the groove width remains limited to the kerf of the blade; if you need a wider groove, you must shift your guide for subsequent passes.

Who should cut grooves in wood
A woodworker prepares to cut a groove in wood using a circular saw.
Photo: www.youtube.com on Google

This article is for woodworkers and homeowners who need to create dadoes or channels in boards using only a standard circular saw. It serves the person who has a project requiring a specific groove width and wants to avoid buying an expensive table saw or a dedicated router. It assumes you already own a circular saw, a straight piece of timber or metal to use as a fence, and basic safety gear like eye and ear protection.

If you’re a beginner looking to create fine cabinetry or precise joinery, this guide might not be for you. Those tasks often require the extreme accuracy of a table saw or the versatility of a plunge router. This page is best for those doing general carpentry or rough shelving who need a functional, sturdy groove and are comfortable managing a power tool manually. We assume your circular saw is in good working order and the blade is sharp.

Variables that change the result

The most important factor is the blade depth setting. If you set the depth too deep, you risk cutting through the bottom of your workpiece, while too shallow a setting requires extra passes. Always verify your depth on a scrap piece of wood of the same thickness as your project board.

The type of blade you use significantly affects the quality of the finish. A cross-cut blade with more teeth leaves a smoother surface, while a rip blade with fewer teeth cuts faster but leaves a rougher edge. People often make the mistake of forcing the saw through the wood too quickly, which causes the blade to wander and creates a wavy, uneven groove that’s difficult to fix later.

Your choice of guide material matters for stability. If you use a flexible guide, your line will curve mid-cut. Use a rigid, straight edge like a piece of aluminum angle or a factory-edged board to ensure the saw base stays parallel to your path. Finally, the wood’s density determines your speed; harder woods like oak require a slower, more deliberate feed rate to prevent the motor from straining.

Step by step guide

  1. Unplug your saw and measure your desired groove width and depth.
  2. Adjust the blade depth so it extends exactly to your target groove depth below the base plate.
  3. Clamp a straight-edge guide to your workpiece, offset from the groove line by the exact distance between your blade and the edge of the saw’s base plate.
  4. Plug in the saw and hold it firmly with both hands, keeping the base plate flush against the guide.
  5. Make your first pass along the line, keeping the saw moving at a steady pace to prevent burning the wood.
  6. If the groove is too narrow, move your guide slightly and make a second pass to widen the cut.
  7. Use a chisel to clean out any remaining material or uneven spots at the bottom of the groove.
  8. Check your progress with a depth gauge or a small scrap piece of wood to ensure the fit is snug.

The judgement call that separates a professional result from a messy one is the precision of your initial guide setup. If you don’t account for the exact distance between your blade and the edge of the saw’s base plate, your groove will be off-center. Always test your offset on scrap wood first. If you lack experience with power tools, consult the Occupational Safety and Health Administration guidelines on safe circular saw operation before starting.

The variations at a glance

The Situation What to do What it takes What to watch for
Narrow groove Single pass 5 minutes Blade thickness
Wide groove Multiple passes 15 minutes Guide alignment
Hardwood Slow feed rate 20 minutes Smoke or burning
Softwood Steady speed 10 minutes Tear-out edges
Deep groove Multiple depth passes 25 minutes Blade binding

If your blade width is less than the groove, you must shift the fence by exactly half the difference to clean the wall. Attempting to force a single wide pass often results in a jagged, uneven floor.

When cutting hardwoods, prioritize heat management. If you see dark streaks or smell scorched fibers, reduce your feed rate by 30 percent immediately. Ignoring these signs glazes the wood, making it impossible to accept stain or finish later.

Pushing beyond this limit stresses the motor and risks a kickback event. If the saw begins to labor or the pitch of the motor drops, retract the blade and clear the debris. Always check that your guide remains locked, as vibration can shift the setting during longer, multi-pass operations.

Details of a high-quality cut
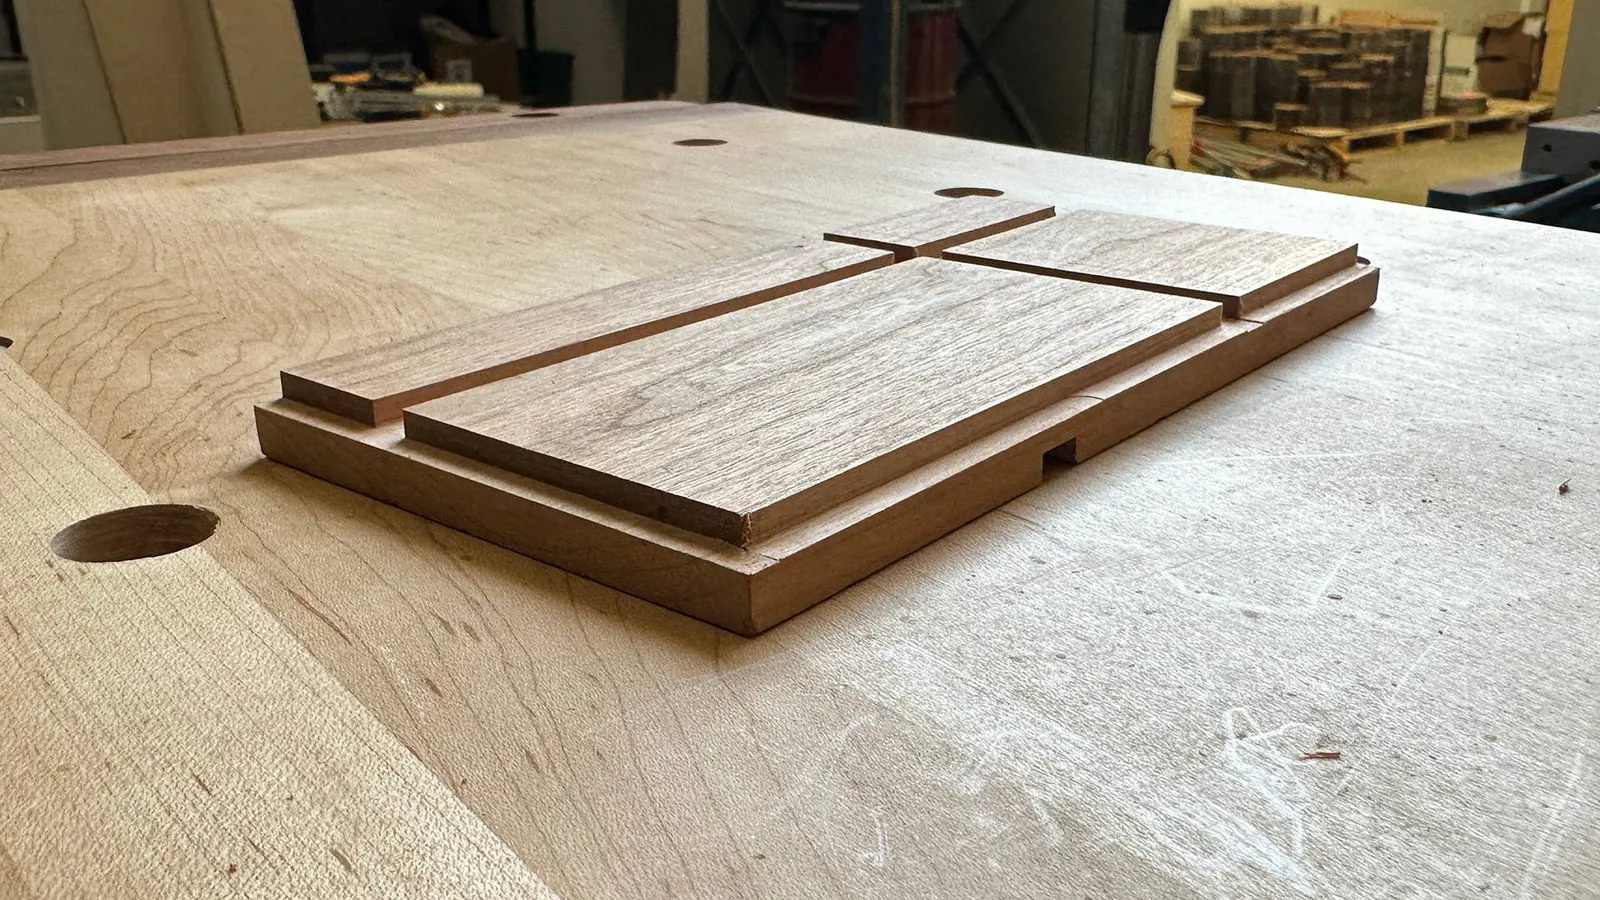
A detailed close-up shows the clean, sharp edges of a wood groove.
Photo: kmtools.com on Google

Proper preparation and setup

Experienced woodworkers always verify their guide alignment using a test cut on a piece of scrap wood. They ensure the saw base is clean and free of debris, which allows it to glide smoothly against the fence. Beginners often skip this, leading to gaps or crooked grooves. They also mark the start and stop points on the wood clearly, so they know exactly when to lift the saw.

Managing the cutting process

Pros maintain a consistent, moderate pressure throughout the cut. If you push too hard, the saw motor can bog down, which risks kickback and an uneven bottom. They also keep the saw’s cord out of the way, preventing it from snagging or pulling the tool off the line. Deliberately leaving the last millimeter of depth for a final cleanup pass ensures the bottom of the groove is perfectly flat.

Troubleshooting common issues

What you notice What it usually means What to do first How to stop it happening again
Wavy cut Guide moved Re-clamp guide Use heavier clamps
Burning marks Feed rate slow Increase speed Use sharp blade
Uneven depth Base not flat Reset depth Tighten depth knob
Rough edges Dull blade Change blade Use masking tape
Blade binding Saw tilted Straighten saw Use rigid guide

If your cuts still drift after checking the guide, inspect the saw’s baseplate for burrs. A single metal shaving trapped between the plate and your material acts as a pivot point, throwing your angle off by degrees.

When you see burning on hardwood, you’re likely lingering too long in one spot. If the wood smells like scorched sugar, increase your feed rate by twenty percent. Conversely, if you’re cutting soft pine and see smoke, your blade is likely gummed with resin. Clean the teeth with a solvent before blaming the motor.

Never force a blade that begins to bind mid-cut. If the saw kicks back, release the trigger immediately and pull the tool straight back along the existing kerf. Continuing to push only risks a permanent stall or a dangerous jump.

Rules for safe operation

You must follow all safety protocols outlined by your specific tool manufacturer to avoid injury or damage. The primary rule is to never reach under the wood while the blade is spinning. Always ensure the workpiece is clamped securely to a stable surface, as a moving board is the leading cause of accidental slips.

Never attempt to remove safety guards from your saw, as these are designed to protect you from flying debris and accidental contact. If the task requires specialized cuts or heavy-duty framing, consider hiring a licensed professional who possesses the proper equipment and training for the job.

The true cost of the task

The cost is mostly in your time and the wear on your saw blades. A typical circular saw blade lasts for many hours of cutting, but hitting a hidden nail or knot can dull it instantly. You should expect to spend between 30 and 60 minutes for a standard project, depending on how many adjustments you need to make.

If you already own the tools, the out-of-pocket cost is essentially zero. If you need to buy a new blade for a smoother finish, a quality carbide-tipped blade is quite affordable at most hardware retailers. This price changes based on the brand, tooth count, and material coating. Always check the current pricing at your local store before starting your project.

Maintenance and long-term care

After you finish the job, wipe the saw base and blade clean of sawdust to prevent rust.

You should inspect the blade teeth for chips or buildup of resin, which can make the saw work harder than necessary. If you notice a dark, sticky residue, use a standard blade cleaner or a mild solvent to wipe the teeth clean. A dull blade forces the motor to draw more amperage, which prematurely wears out the internal windings.

Store your saw in a dry, cool place to protect the motor from moisture. If the saw begins to smell like ozone or vibrates excessively, stop using it immediately and check the carbon brushes. Worn brushes cause arcing that can permanently scar the commutator. If the brushes are shorter than a quarter-inch, replace them before attempting another cut. Always retract the blade completely into the housing to prevent accidental damage or injury.

When to choose another method
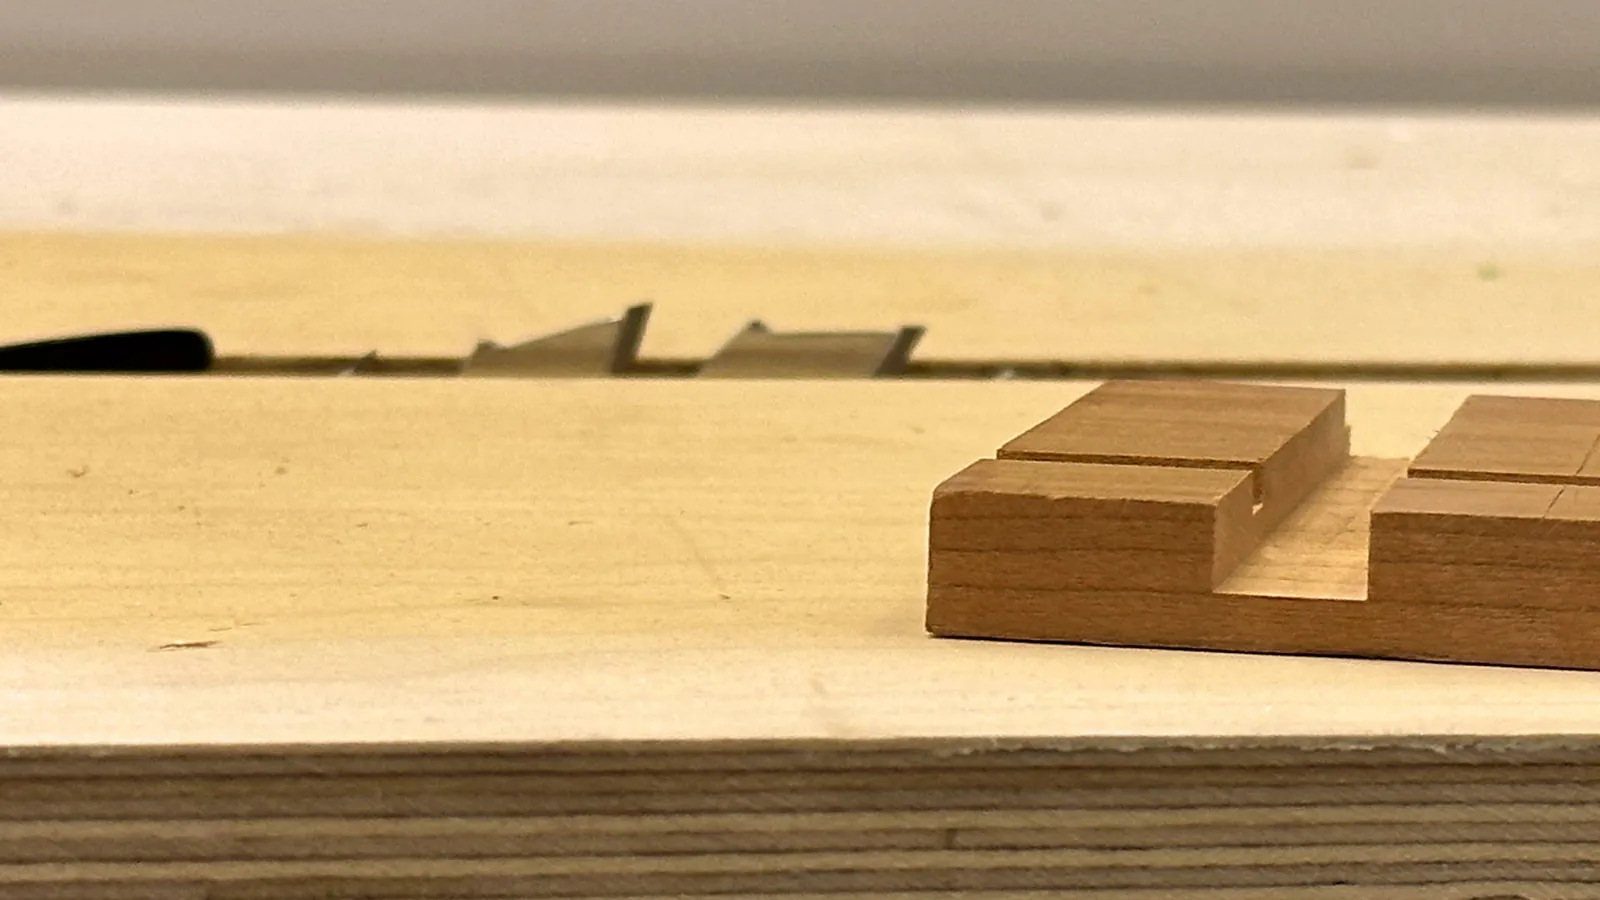
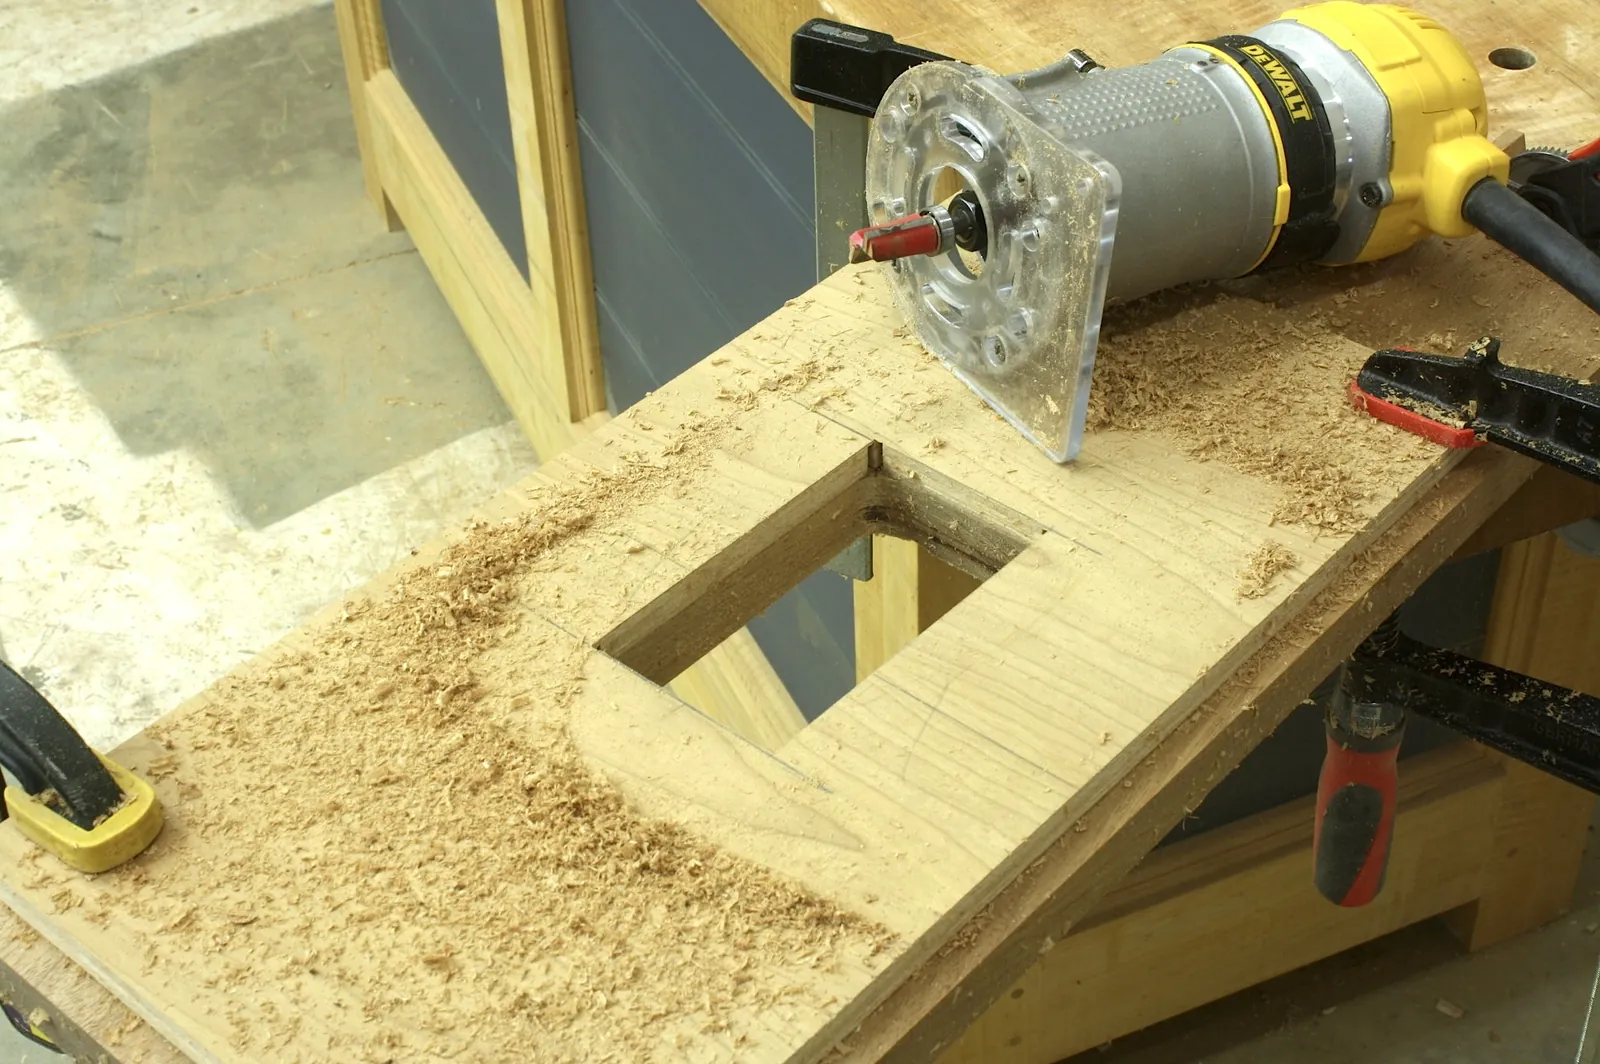
A professional router sits near intricate furniture, illustrating better alternatives for precise joints.
Photo: kmtools.com on Google

If you’re attempting to create precise dovetail joints or intricate furniture, a circular saw is the wrong tool. A router with a straight bit or a dedicated dado stack on a table saw will provide the professional-grade accuracy required for high-end cabinetry. Using a circular saw for these tasks often leads to frustration and wasted materials.

If you’re working with pieces narrower than four inches, a circular saw becomes dangerous because you can’t maintain a secure grip. In these cases, a miter saw or a hand-held trim router is the safer, more effective choice. Never force a tool to perform a task it wasn’t designed for, as this significantly increases the risk of kickback.

If your cut requires a tolerance tighter than 1/16 of an inch, switch to a stationary saw. A circular saw is built for rough carpentry, not the fine-tuned joinery found in heirloom pieces. If you try to force precision from a portable saw, you’ll likely end up with uneven edges that compromise the structural integrity of your build.

Frequently asked questions

Can I use a circular saw for deep grooves?

Yes, you can cut deep grooves by making multiple passes at increasing depths. Start with a shallow cut of about 1/4 inch, then adjust your depth for each subsequent pass until you reach your target depth. Always ensure your guide remains secure during each adjustment.

How long does it take to cut a groove?

It usually takes 15 to 30 minutes to set up your guide and make the required passes for a standard shelf groove. The total time depends on the length of the board and how many passes you need to reach your desired width and depth.

Is it safe to cut a groove in wood with a circular saw?

It’s safe if you use proper clamping and keep your hands away from the blade path. Always wear safety glasses and hearing protection, and ensure your saw’s safety guard is functioning correctly before you plug the tool into a power outlet.

What happens if the groove is too wide?

If your groove is too wide, you’ll need to fill it with a wood shim or start over with a new piece of wood. A loose fit will weaken your joint, so it’s better to test your width on scrap wood before cutting your final project board.

Does it matter which way the grain runs?

Yes, cutting across the grain often causes more tear-out than cutting with the grain. You can minimize this by applying masking tape over your cut line before you start, which helps hold the wood fibers in place while the blade passes through.

How do I know if my blade is sharp enough?

A sharp blade cuts smoothly without requiring excessive force or causing the wood to smoke. If you find yourself pushing hard to move the saw forward, or if the wood appears scorched, it’s time to replace or sharpen your blade.

Conclusion

Start by marking your cut lines clearly on the wood and verifying your saw’s depth setting on a scrap piece. You can expect a clean, functional groove if you keep the saw firm against your guide. If the saw begins to vibrate or pull, stop and inspect your setup immediately.
How to Cut a Square Hole in Wood With a Jigsaw: Pro Method in 2026

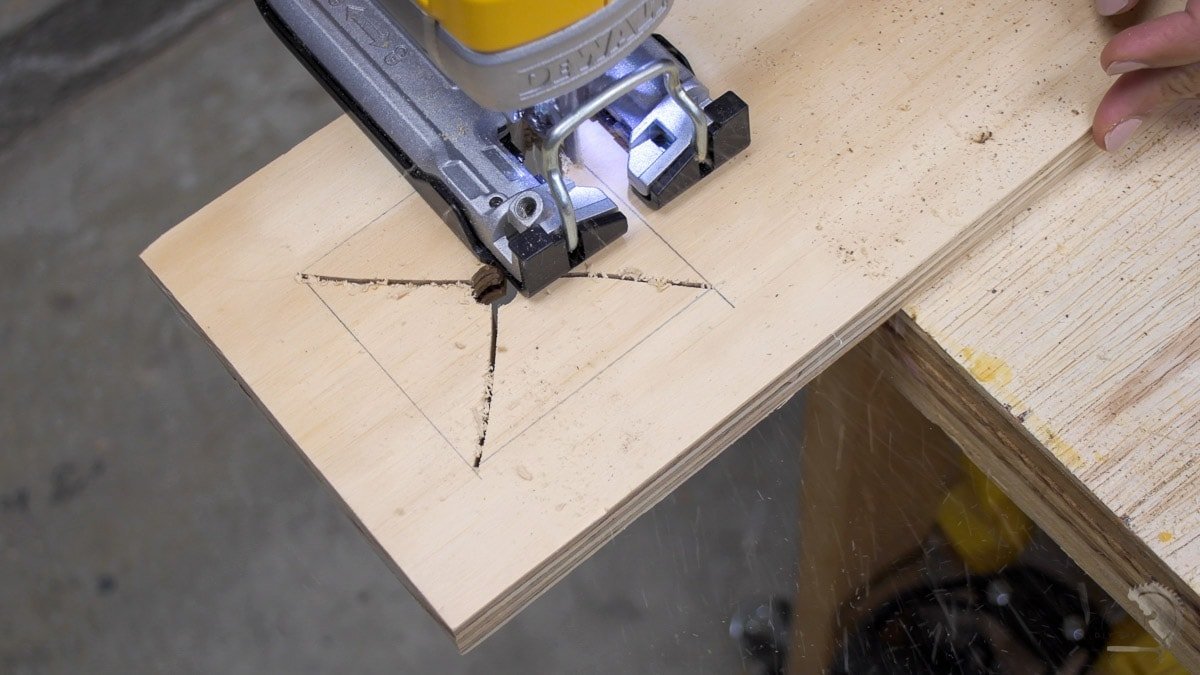
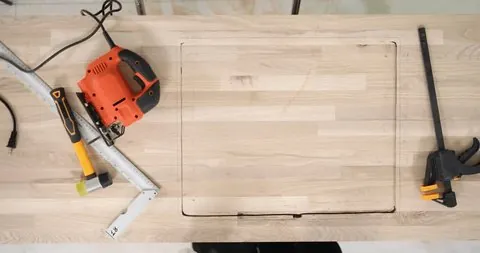
A jigsaw used to cut a precise square hole in a wood board.

To perform a clean cutout, you should drill a starter hole in each corner of your marked area and use a jigsaw to connect these lines, which is the best way to cut a square hole in wood. This method allows the blade to turn at each corner without overcutting the lines, ensuring the square remains crisp and accurate on all four sides.

The final result depends on your choice of blade, the speed of your stroke, and how firmly you hold the tool against the surface. If you’re using a thin plywood, you must support the underside to prevent splintering; if you’re working with thick hardwood, you should slow your feed rate to keep the blade from bending.

Why you need to cut a square hole

Marking a square outline on a wooden surface for a jigsaw project.
Photo: www.shutterstock.com on Google

This page serves woodworkers and homeowners who need to create precise openings in cabinets, countertops, or wall panels. These readers usually have a standard jigsaw and a drill but may lack the specialized plunge-cutting experience required for complex shapes. If you’re trying to cut a square hole in a delicate finished surface like laminate, this guide is for you because it emphasizes preventing surface damage.

If you’re a professional contractor looking for industrial CNC routing advice, this page isn’t for you. We assume you’re using a standard corded or cordless handheld jigsaw with a wood-cutting blade. You should already have your workspace cleared and your safety gear ready, as the technique requires steady hands and careful alignment. If you’re working with metal or stone, don’t follow these steps, as those materials require specific cooling lubricants and specialized diamond or carbide-tipped blades.

Factors that change your result

The thickness of your wood determines which blade length you need. If the blade is too short, it won’t clear the waste material, which causes the tool to bounce; if it’s too long, the tip may hit the floor or your workbench. Check the side of your blade packaging to ensure it exceeds the thickness of your board by at least 1 inch.

The blade tooth count, measured in teeth per inch (TPI), changes the finish quality. A high TPI blade (12–14) creates a smooth cut but works slowly, while a low TPI blade (6–8) cuts fast but leaves a rough edge. If you’re cutting a visible face, always use a high TPI blade to avoid tear-out.

Your jigsaw’s orbital setting is a major factor in speed. If you set the orbit to maximum, you’ll cut fast but leave a jagged edge; if you turn the orbit off, you’ll cut slower but achieve a much cleaner line. Most people leave this at a middle setting for general wood tasks.

Finally, the way you secure the workpiece matters most. If the wood isn’t clamped tightly to a stable surface, the vibration will cause the jigsaw to wander, leading to uneven lines. Always check that your clamps are clear of the path the jigsaw will take before you start.

Steps for a clean cutout

  1. Mark your square clearly on the wood using a pencil and a framing square to ensure all angles are 90 degrees.
  2. Drill a 1/2-inch starter hole inside each of the four corners, placing the edge of the hole just touching the inside of your pencil line.
  3. Insert your jigsaw blade into one of the starter holes, ensuring the tool is unplugged or the battery is removed before you begin.
  4. Set your jigsaw to a low-to-medium speed to maintain control as you start the cut along the first line.
  5. Cut from the center of one hole to the next, keeping the blade exactly on the waste side of your pencil line.
  6. Stop the jigsaw once you reach the next corner hole, then rotate the tool to align with the next line.
  7. Repeat this process for all four sides, being careful to keep the baseplate flat against the wood surface at all times.
  8. Remove the center waste piece once the final cut is finished, and use a file or sandpaper to smooth the edges.

The key to a professional finish is keeping the baseplate flat against the wood throughout the entire cut. If you tip the jigsaw, the blade will bend, and your hole won’t be square. The Consumer Product Safety Commission provides important guidance on maintaining proper control of power tools to avoid injury.

Performance variations at a glance

Situation What to do What it takes What to watch for
Thin plywood Use high TPI blade 10 minutes Wood splintering
Thick hardwood Use low TPI blade 20 minutes Blade bending
Finished laminate Use masking tape 15 minutes Surface chipping
Small squares Use fine scroll blade 15 minutes Tight corner turns
Soft pine Use medium TPI blade 10 minutes Blade overheating

When cutting plywood under 1/4 inch, run the blade at a lower speed to prevent the teeth from grabbing the veneer. If you notice tear-out on the underside, apply a sacrificial piece of scrap wood beneath your workpiece to stabilize the fibers.

For thick hardwoods exceeding two inches, use a skip-tooth blade to clear sawdust effectively. If the blade starts to wander or smoke, back off the feed rate immediately. Pushing too hard here ruins the temper of the steel, causing the blade to dull within minutes.

Laminate projects require a zero-clearance insert to support the brittle surface. If you lack one, place a layer of blue painter’s tape over the cut line to bridge the gap.

When navigating tight corners on small squares, stop the forward motion once the blade reaches the vertex. Rotate the piece slowly while the blade continues to oscillate. If you force the turn, the blade will twist, resulting in a permanent kink that renders the tool useless for future precision work.

Achieving a clean result

A clean square hole cut into wood with tape preventing splintering.
Photo: woodworkersedge.wordpress.com on Google

Preparation and technique

Experienced users always tape the cut line with painter’s tape before drawing their square. This simple step holds the wood fibers together and prevents the jigsaw blade from lifting the veneer or finish as it moves. Always check that your blade is sharp; a dull blade forces you to push harder, which increases the risk of the tool slipping off the line.

Controlling the tool

Beginners often try to force the jigsaw forward, but letting the tool do the work produces a much straighter cut. If you feel the jigsaw vibrating excessively, slow down your forward movement and ensure the baseplate isn’t bridging a gap. By maintaining a constant, slow pressure, you keep the blade perpendicular to the wood, which is essential for a square hole.

Common issues and solutions

What you notice What it usually means What to do first How to stop it
Rough edges Blade too coarse Switch to high TPI Use masking tape
Blade wanders Forcing the tool Reduce feed speed Check blade tension
Chipped finish No support below Use backing board Score line first
Burning marks Too much heat Reduce jigsaw speed Change to sharp blade
Uneven corners Blade bent Check baseplate level Use guide fence

Standards and rules

Always verify the safety requirements for your specific jigsaw model by checking the manufacturer’s user manual. These manuals define the maximum depth of cut and the recommended material types for your blade.

If you’re working in a building with specific fire codes, ensure that any holes you cut for electrical boxes meet the local building standards for fire-blocking. Most residential codes require a clearance of no more than 1/8 inch around electrical boxes to maintain a proper fire seal.

Never remove the safety guard from your jigsaw, as it’s designed to prevent contact with the moving blade.

If you can’t maintain a clear line of sight, stop the work and reposition your body. You should always keep your hands at least six inches away from the blade’s path. If the material vibrates excessively, use a clamp to secure it before cutting.

Cost and effort

The financial cost for this project is minimal if you already own the jigsaw, as you only need a new blade and some sandpaper. A pack of assorted jigsaw blades is quite inexpensive, depending on the brand and material quality.

The real cost is your time, as cutting a perfect square requires patience to avoid over-cutting the corners. Expect to spend at least forty-five minutes on each cut to ensure the blade stays perfectly vertical.

If you’re working on a high-value piece of furniture, the cost of a mistake is the price of the replacement wood. Most beginners rush the final inch of the cut, which causes the wood to splinter or the blade to snap. If you feel the jigsaw vibrating excessively, stop immediately and clear the sawdust from the kerf.

Always practice on a scrap piece of the same thickness first. If you’re using hardwood, use a down-cut blade to prevent surface tear-out. If you’re using plywood, use a fine-tooth blade and apply painter’s tape over the cut line.

Long-term maintenance

Once the hole is cut, lightly sand the inside edges with 220-grit paper to prevent splinters. If the wood is prone to moisture, apply a thin coat of wood sealer to the raw edge. This prevents swelling or warping that ruins the fit over time.

If you notice the edges becoming rough again, a quick pass with fine-grit sandpaper restores the finish without needing to re-cut the material. Should the hole become too large due to error, glue a thin strip of wood to the edge and sand it flush. This shrinks the opening back to the desired size.

Most people make the mistake of over-sanding, which creates an uneven gap. If you feel resistance, stop immediately. If the wood feels damp to the touch, wait twenty-four hours before applying any sealant. If the surface remains tacky after two hours, you have applied too much product; wipe the excess away with a clean cloth. Use a solvent-based sealer for exterior projects, but stick to water-based options for indoor furniture to avoid lingering fumes.

When to use a different method

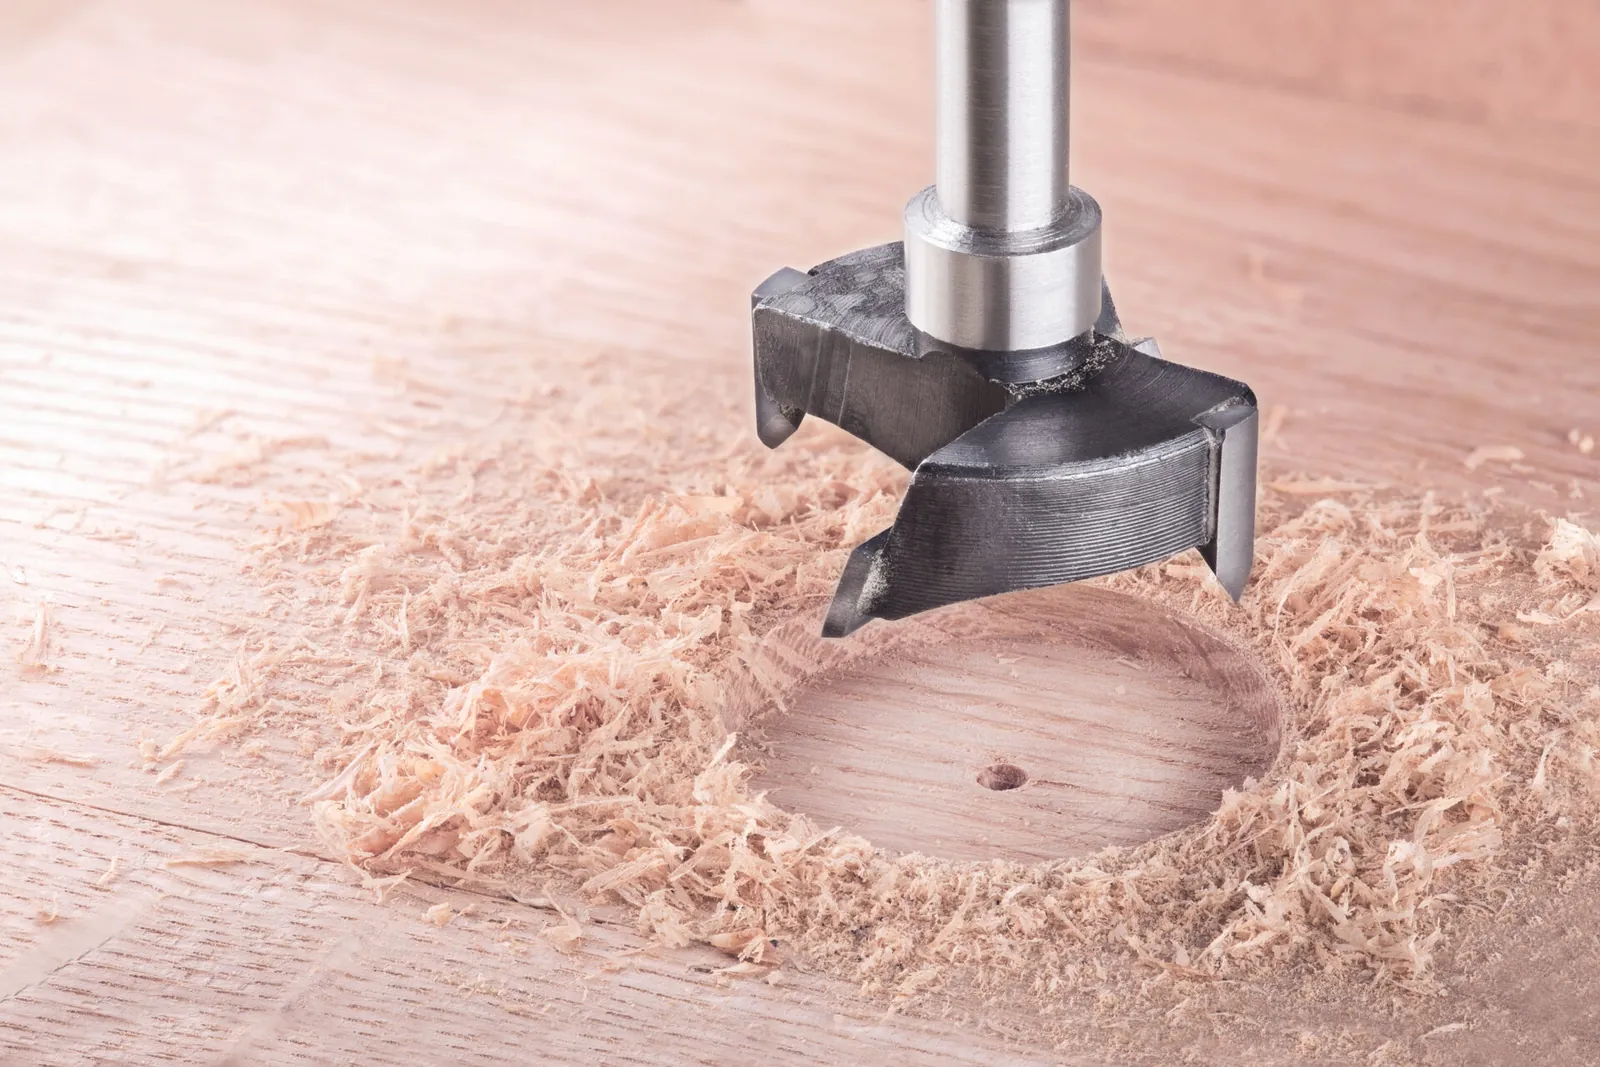
Drill bits and hole saws used for smaller openings in wood.
Photo: woodworkersinstitute.com on Google

If you’re cutting a hole smaller than 2 inches, a jigsaw is often too large to maneuver. You should use a drill with a hole saw or a spade bit instead to avoid splintering the surrounding material.

For very large openings in thick beams, a reciprocating saw or a circular saw may be necessary. These tools lack the precision of a jigsaw for square corners, so you must leave a margin of at least 1/4 inch to clean up the edges later with a sharp chisel.

If your project requires perfect, repeated square holes, use a router with a template. This provides a consistent result that handheld saws can’t match.

The mistake most beginners make is attempting to force a jigsaw into a tight radius. This usually snaps the blade or causes the tool to kick back. If your layout line requires a turn tighter than the width of your blade, stop immediately. Switch to a drill to create a relief hole, then finish the cut from the opposite direction to maintain control.

Related guides

Frequently asked questions

How long does it take to cut a square hole?

It takes about 15 to 20 minutes for a single hole, assuming you have already marked your lines and have the wood clamped. This time includes drilling the starter holes, making the cuts, and cleaning the edges with sandpaper.

Is it safe to use a jigsaw for this?

Yes, it’s safe if you keep both hands on the tool and wear protective eyewear at all times. Always ensure the workpiece is firmly clamped so it can’t move, and never reach near the blade while the tool is running.

What happens if I cut past the corner?

You’ll create an overcut that leaves a visible gap in your finished square. You can hide this by filling the gap with a mixture of wood glue and sawdust, but it’s best to stop the blade just before the corner and finish the turn by hand.

How do I stop the blade from bending?

You stop the blade from bending by slowing your feed rate and using a thicker, higher-quality blade. If you push the tool too fast, the blade will flex in the middle of the wood, causing the cut to be angled rather than straight.

Does the wood type matter?

Yes, harder woods require a slower cutting speed and a blade designed for hardwood to prevent burning. Softwoods cut quickly, but you must be careful not to tear the grain, so use a fine-tooth blade for the best results.

Can I use a jigsaw for a square hole in a wall?

Yes, you can use a jigsaw for drywall or wood panels, but you must check for wires or pipes behind the wall first. Use a stud finder and inspect the area before you begin to ensure you don’t hit any hidden utilities.

Conclusion

Start by marking your square on the wood and drilling the four corner holes. You should see the waste piece drop out cleanly once the final cut is made. If you feel the tool pulling or the motor straining, stop immediately and check if the blade is stuck or dull.

How to Cut a Groove in Wood With a Table Saw: Step by Step in 2026

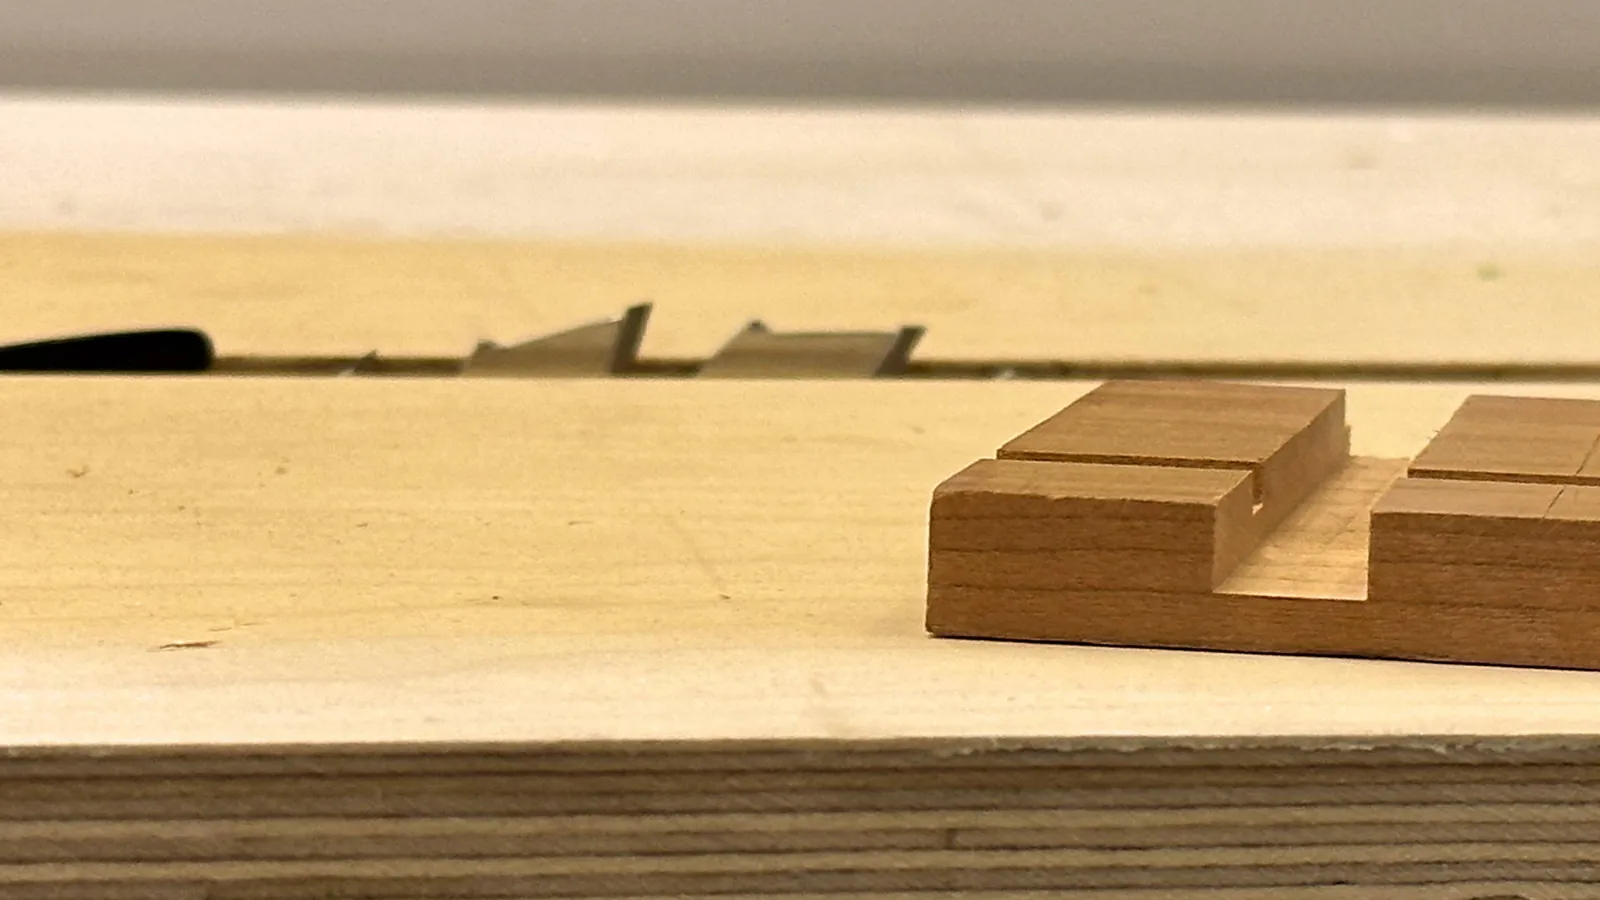
A woodworking table saw cutting a precise groove into a piece of oak.

Cutting a groove in wood with a table saw is achievable by using a dado blade set or by making multiple passes with a standard blade. This process requires a stable fence, a push stick for safety, and a flat surface to ensure the cut depth remains consistent across the board.

The final result changes based on the width of the groove you need and the thickness of the wood you’re working with. You’ll need to adjust your blade height for each pass if you aren’t using a dedicated dado stack.

Who should cut grooves in wood

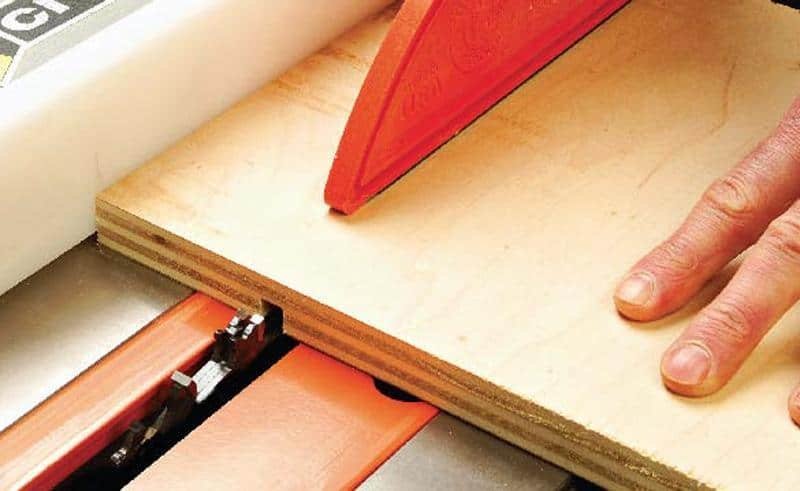
Woodworker hands guiding a wooden board through a table saw blade.
Photo: kmtools.com on Google

This guide serves woodworkers who have access to a standard table saw and need to create channels for joinery, such as housing shelves or inlaying materials. If you’re looking to create decorative profiles or complex moldings, this page may not cover the specialized tooling required for those tasks.

We assume the use of a standard table saw with a functioning fence and a miter gauge. You should also verify that your saw’s arbor is long enough to accept a dado stack if you choose that method; check your manual for the maximum blade width allowed. This guide isn’t for those using portable job-site saws that lack the power or arbor length for dado sets.

Factors that change your results

The depth and width of your cut are the primary variables that decide the outcome of your project. A shallow groove for a thin panel requires a different setup than a deep groove for a structural shelf. Always perform a test cut on a piece of scrap wood of the same thickness to verify your settings before cutting your final workpiece.

Blade type matters significantly when choosing your method. A flat-top grind blade leaves a square bottom, which is ideal for grooves. A standard alternate-top bevel blade will leave “ears” or peaks at the bottom of the groove, which may require manual cleaning with a chisel.

The material density also changes how you feed the wood. Hardwoods like oak or maple demand a slower feed rate to prevent burning, while softwoods like pine can be fed more quickly. If you hear the motor bogging down, you’re pushing too fast or the blade is dull.

The most common mistake people make is failing to account for the actual thickness of plywood. Many “half-inch” plywood sheets are actually slightly thinner, meaning a standard half-inch dado blade will result in a loose fit. Use a digital caliper to measure your material thickness exactly; this is the only way to ensure a tight, professional joint.

How to make the cut safely

  1. Unplug your saw and install your blade or dado stack to the desired width.
  2. Set the height of the blade to match the depth of the groove you need.
  3. Secure your fence at the correct distance from the blade to position the groove.
  4. If using a standard blade, mark the start and stop points of your groove on the wood.
  5. Put on your safety glasses and hearing protection; the Occupational Safety and Health Administration provides guidance on maintaining proper machine guarding to prevent injury.
  6. Turn on the saw and stand to the side of the blade path, never directly behind the wood.
  7. Push the wood firmly against the fence and down onto the table, moving it slowly over the blade.
  8. Use a push stick to complete the cut, keeping your hands well away from the blade at all times.
  9. If you’re making multiple passes, adjust the fence by the blade thickness after each pass until the groove is wide enough.
  10. Turn off the saw and wait for the blade to stop completely before removing your workpiece.

The judgement call that separates a quality job from a poor one is the snugness of the fit. If the piece you’re inserting into the groove falls out, the groove is too wide. If it requires heavy hammering, the groove is too tight and will cause the wood to split as it expands with humidity.

Comparison of cutting methods

Method Best Use Effort Level Result Quality
Dado Stack Wide grooves Low High
Standard Blade Narrow grooves Medium Medium
Multiple Passes Wide grooves High Variable

Use a dado stack if your project requires more than five identical grooves. It saves hours of labor and ensures every channel matches perfectly. If you only need one or two slots, the setup time for a stack often outweighs the benefits.

A standard blade works best for single, narrow cuts where precision depends on a clean, straight line. Avoid using it for wide channels unless you’re comfortable with the trial-and-error process of multiple passes.

Multiple passes introduce human error with every adjustment. If your groove width exceeds the blade thickness, you risk uneven walls or a loose fit for your joinery. Only choose this method if you lack a dado set and are prepared to test your fit on scrap wood first.

Details that define professional results

A close up of a sharp, clean groove cut into a walnut board.
Photo: www.youtube.com on Google

Preparation and test cuts

Experienced woodworkers always use a scrap piece to dial in the fit before the real wood touches the blade. They check that the fence is perfectly parallel to the blade, as even a slight angle causes the groove to widen or burn the wood. They also ensure the wood is perfectly flat; any cup or bow in the board will lead to an inconsistent groove depth.

Managing the cut

Professionals keep the wood pressed firmly against the table throughout the entire pass. They don’t lift the wood until it’s clear of the blade. They also use a sacrificial fence or zero-clearance insert to prevent tear-out on the edges of the groove. If the groove is long, they use outfeed support to keep the board level, which prevents the end of the cut from becoming uneven.

Troubleshooting common errors

What you notice What it usually means What to do first How to stop it
Burning marks Blade is dull Clean the blade Feed wood faster
Loose joint Wrong width Use shims Measure with calipers
Uneven depth Board was lifted Use featherboards Keep downward pressure
Tear-out Dull teeth Change blade Use zero-clearance
Split wood Fit too tight Sand the insert Test on scrap

If you see burning marks, check your feed rate. Moving the wood too slowly causes the blade to rub against the grain, generating friction that scorches the surface. Aim for a steady, confident pace.

Most woodworkers assume tear-out is inevitable, but it usually signals a gap between the blade and the table insert. If you can see daylight around the blade, your insert is too wide. Replace it with a zero-clearance version to support the wood fibers during the cut.

Always test your setup on scrap material identical to your project wood. If the wood splits during assembly, your joinery is too tight. Sand the inner faces lightly before applying glue to prevent internal pressure from cracking the grain.

Rules for safe operation

You must follow the manufacturer’s instructions regarding the maximum width of the dado stack your saw can handle. Exceeding this limit puts excessive strain on the arbor and risks mechanical failure. Always ensure the nut is fully tightened and that the blade is properly seated on the arbor before starting the motor.

If you’re working in a shop, ensure your dust collection system is active; fine wood dust is a health hazard and a fire risk. Never bypass the blade guard unless the specific operation makes it impossible to use.

If your saw isn’t equipped with a riving knife or splitter, the risk of kickback increases significantly. In such cases, stop and seek assistance from an experienced woodworker or use a different tool, like a router, which may be safer for certain groove profiles.

Understanding your costs

The cost of this process depends on your existing equipment. If you already own a table saw, the only variable cost is the potential purchase of a dado blade set, which is relatively inexpensive compared to buying specialized joinery tools. Using a standard blade costs nothing extra but requires more time spent on multiple passes and cleanup.

Time is the hidden cost. Making a wide groove with a single blade can take four or five times longer than using a dado stack. If you’re building a large project with many grooves, the time savings of a dado stack often justify the initial investment. Always compare the time you’ll spend on the project against the cost of the tooling before you decide which path to take.

Maintenance and long-term care

After you finish, clean the resin and sawdust from your blades using a dedicated blade cleaner. Resin buildup causes heat and friction, which ruins the cut quality and burns the wood. If you lack a specialized solvent, a light coating of mineral spirits applied with a soft nylon brush will dissolve stubborn pitch without damaging the steel. Store your dado stack in its provided case or on a wall-mounted rack to protect the carbide teeth from chipping.

Check your table saw’s alignment based on how frequently you use the tool and consult the owner’s manual for the recommended maintenance schedule. Use a dial indicator to ensure the fence is parallel to the blade and that the blade is square to the table.

If you notice the wood binding during a cut, check the alignment immediately. Binding often signals that your riving knife is misaligned or the fence has drifted. Correcting this early prevents dangerous kickback. A well-maintained saw provides clean, accurate grooves for years.

When to choose a different tool

A circular saw and straight-edge guide positioned on a large plywood sheet.
Photo: www.woodworkersjournal.com on Google

If you need to cut a groove in a very large piece of plywood that’s difficult to maneuver on a table saw, use a circular saw with a straight-edge guide instead. The table saw is best for smaller, manageable boards where the fence can provide constant support.

For stopped grooves that don’t run the full length of the board, a plunge router is the correct tool. If your project requires a groove that starts or ends in the middle of a board, don’t force it on the table saw. Attempting to perform stopped grooves on a table saw is dangerous and can lead to severe kickback.

Use a router with an edge guide to maintain control and safety. If you’re cutting a groove wider than half an inch, make multiple passes rather than trying to remove all the material at once. Forcing a deep cut in a single pass risks burning the wood and straining the motor. When the grain direction changes or you encounter knots, switch to a shallower depth of cut to prevent tear-out.

Frequently asked questions

How deep should a groove be?

A groove should typically be one-third to one-half the thickness of the material you’re inserting. This depth provides enough mechanical strength for the joint without weakening the structural integrity of the board holding the groove.

Can I use a regular blade for a wide groove?

Yes, you can use a regular blade by making multiple passes, though the result is less efficient than a dado stack. Move your fence by the thickness of the blade after every pass until you reach the desired width.

Is it safe to use a dado stack on any table saw?

No, only saws with a long enough arbor and sufficient motor power are safe for dado stacks. Check your owner’s manual to see if your specific model is rated for dado blades before installation.

Why does my wood burn when I cut a groove?

Burning usually happens because the blade is dull or the feed rate is too slow. Clean the pitch off your blade teeth and increase the speed at which you push the wood through the cut to reduce heat buildup.

How do I get a perfect fit for plywood?

Measure the actual thickness of your plywood with digital calipers, as it’s often thinner than the label states. Use shims with your dado stack to adjust the width until it matches your measured material thickness exactly.

What happens if the groove is too wide?

A groove that’s too wide results in a loose, weak joint that won’t hold under pressure. If this happens, you must either use a thicker piece of material or cut a new board to ensure a tight, structural fit.

Conclusion

Set up your saw with the blade height adjusted to your target depth and perform a test cut on scrap wood first. If the scrap piece fits perfectly, you’re ready to cut your final board. If the blade vibrates or the motor stalls, stop immediately and check your blade sharpness.

Adobe Pdf Printer Not Working

Adobe Pdf Printer Not Working

The Adobe PDF printer not working is a frustrating issue that can disrupt workflows for individuals and businesses alike. Whether you’re trying to save a document as a PDF, print a web page, or create a digital copy of a physical file, encountering errors with the Adobe PDF printer can halt productivity. This common problem can stem from a variety of sources, ranging from simple software glitches to more complex system conflicts. Understanding the potential causes and systematically troubleshooting them is key to getting your PDF creation capabilities back online.

This comprehensive guide will walk you through the most effective solutions for when your Adobe PDF printer is not functioning as expected. We will explore common error messages, delve into the underlying reasons for these failures, and provide step-by-step instructions to resolve them.

From checking printer statuses and updating drivers to repairing Adobe Acrobat installations and addressing Windows conflicts, you’ll find a wealth of actionable advice to get your Adobe PDF printer working again.

Key Takeaways

  • Restart and Update: Often, a simple restart of your computer and ensuring Adobe Acrobat/Reader and your operating system are up-to-date can resolve the issue.
  • Check Printer Status: Verify that “Adobe PDF” is listed as a valid printer and is not offline or set as the default if you’re experiencing conversion issues.
  • Repair Installation: Corrupted Adobe installation files are a frequent culprit; use the built-in repair function in Acrobat or Reader.
  • Driver Issues: Outdated or corrupted Adobe PDF printer drivers can cause failures. Reinstalling them is a common fix.
  • Windows Conflicts: Conflicts with other software, particularly antivirus programs or other PDF printers, can interfere with Adobe’s functionality.
  • System File Corruption: Underlying Windows system file issues can impact the PDF printer’s performance. Running SFC and DISM scans can help.
  • Permissions: Ensure that Adobe applications have the necessary permissions to create and save files.

Common Scenarios And Error Messages

When the Adobe PDF printer stops working, users often encounter specific error messages or observe consistent behaviors that indicate a problem. Recognizing these patterns can help in diagnosing the root cause more efficiently. Some of the most frequently reported issues include:

  • “Acrobat is not activated” or “Activation Error”: This usually indicates a licensing or installation problem with Adobe Acrobat. While not directly a printer issue, it can prevent the PDF printer from functioning if the core application is not properly licensed or activated.
  • “Adobe PDF printer is offline”: This message suggests that Windows perceives the Adobe PDF printer as unavailable. This can happen due to a service not running, a driver issue, or a conflict.
  • “The document could not be printed. Adobe PDF is not available. Either the printer was not installed correctly, or it is no longer on your computer”: This is a definitive error indicating that Windows cannot find or communicate with the Adobe PDF printer driver.
  • “Error 1001” or “Error 0”: These generic error codes can appear during the PDF creation process and often point to a corrupted installation, insufficient permissions, or a conflict with another application.
  • The “Save as PDF” or “Print to PDF” option is missing: In some cases, the Adobe PDF printer might disappear entirely from the list of available printers in application print dialogs.
  • Print jobs get stuck in the queue: Documents sent to the Adobe PDF printer may remain in the print queue indefinitely without being processed.

Understanding these common symptoms is the first step toward finding a solution. The following sections will break down the troubleshooting process into manageable steps.

Adobe Pdf Printer Not Working

Credit: helpx.adobe.com

Troubleshooting Steps For Adobe Pdf Printer Issues

Resolving issues with the Adobe PDF printer not working requires a systematic approach. We’ll start with the simplest solutions and progress to more complex ones.

Basic Checks And Quick Fixes

Before diving into deeper technical solutions, it’s crucial to perform a few fundamental checks. These often resolve the issue without requiring extensive troubleshooting.

Restarting Essential Components

  • Restart Your Computer: This is the most basic yet often effective solution. A simple reboot can clear temporary glitches in Windows, Adobe applications, and their associated services.
  • Restart Adobe Acrobat/Reader: Close the Adobe application completely (ensure it’s not running in the background via Task Manager) and then reopen it.
  • Restart the Print Spooler Service: The Windows Print Spooler is responsible for managing print jobs.
  • Press `Windows Key + R`, type `services.msc`, and press Enter.
  • Scroll down to “Print Spooler”.
  • Right-click on “Print Spooler” and select “Restart”. If “Restart” is greyed out, select “Start”.
  • If it was already running, try “Stop” and then “Start” again.

Verifying Printer Status In Windows

Ensure the Adobe PDF printer is recognized and configured correctly within your operating system.

  • Open the Control Panel and navigate to Devices and Printers (or Printers & Scanners in Windows 10/11).
  • Look for “Adobe PDF” in the list of installed printers.
  • Check if it’s offline: If you see a down arrow icon or status indicating “Offline”, right-click on the “Adobe PDF” printer and select “Use Printer Online”.
  • Set as Default (Optional but Recommended for Testing): While not always necessary, sometimes setting it as the default printer can help troubleshoot. Right-click “Adobe PDF” and select “Set as default printer”. Remember to change it back if this doesn’t solve the issue and you prefer another printer as default.
  • Check Printer Properties: Right-click “Adobe PDF”, select “Printer properties”. Ensure the correct port is selected (usually “Port: Adobe PDF Port:”) and that no unusual settings are configured.

Updating Software And Drivers

Outdated software is a leading cause of compatibility issues.

  • Update Adobe Acrobat/Reader:
  • Open your Adobe application.
  • Go to `Help > Check for Updates`.
  • Install any available updates and restart your computer.
  • Update Windows:
  • Go to Settings > Update & Security > Windows Update.
  • Click “Check for updates” and install all recommended and optional updates. Restart your computer afterward.

Repairing Adobe Acrobat/reader Installation

A corrupted installation of Adobe Acrobat or Reader is a very common reason for the PDF printer to fail. Fortunately, Adobe provides a built-in repair tool.

  • Open Control Panel and go to “Programs and Features” (or “Apps & features” in Windows 10/11).
  • Find “Adobe Acrobat [Version Number]” or “Adobe Reader [Version Number]” in the list.
  • Select the application and click “Change” or “Modify” at the top.
  • In the installation wizard that appears, choose the “Repair” option.
  • Follow the on-screen prompts to complete the repair process.
  • Restart your computer after the repair is finished.

In my experience, this repair function fixes a significant percentage of issues related to the Adobe PDF printer’s functionality, especially those manifesting as errors during the printing process or a missing printer.

Reinstalling The Adobe Pdf Printer Driver

If repairing the installation doesn’t work, the Adobe PDF printer driver itself might be corrupted or improperly registered. Reinstalling this specific driver can resolve the problem.

Uninstalling The Adobe Pdf Printer

  • Open Control Panel > Devices and Printers.
  • Right-click on “Adobe PDF”.
  • Select “Remove device”. Confirm the removal if prompted.
  • If prompted to “Print a test page” during removal, do so as it can help clear residual driver files.

Reinstalling The Adobe Pdf Printer Driver

The Adobe PDF printer driver is typically installed as part of Adobe Acrobat or Reader. The repair process often reinstalls it. However, if the driver is still missing or problematic after a repair, you might need to use Adobe’s specific tools or a manual process.

A common method involves using the “Acrobat Distiller” component, which is integral to the PDF printer.

  • Open Control Panel > Devices and Printers.
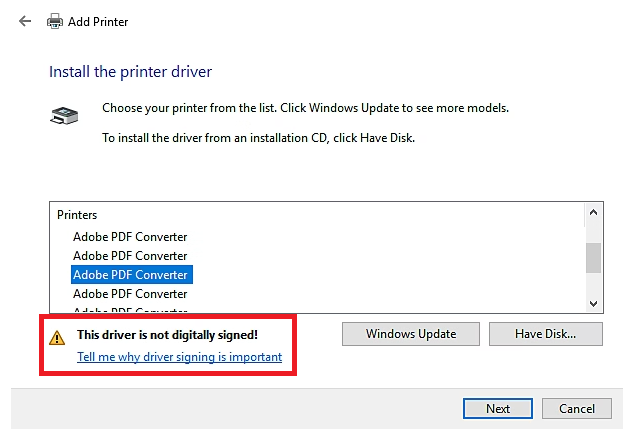
  • Click “Add a printer” at the top.
  • Select “The printer that I want isn’t listed”.
  • Choose “Add a local printer or network printer with manual settings” and click “Next”.
  • Select “Create a new port”. For the “Type of port”, choose “Local Port” and click “New Port”.
  • In the “Port Name” field, type `AdobePDF` and click “OK”.
  • Click “Next”.
  • In the “Manufacturer” list, select “Adobe Systems, Incorporated”.
  • In the “Printers” list, select “Adobe PDF”. If it’s not listed, you might need to click “Have Disk…” and browse to the Adobe installation directory to find the driver files (this is more advanced and may require locating specific `.inf` files).
  • Click “Next”.
  • Follow the remaining prompts to complete the installation. You may be asked to print a test page.

After reinstalling, restart your computer and test the Adobe PDF printer.

Addressing Conflicts With Other Software

Sometimes, other applications on your system can interfere with the Adobe PDF printer’s operation.

Antivirus And Security Software

Overly aggressive antivirus or security suites can sometimes mistakenly flag Adobe’s processes as malicious, blocking them from functioning correctly.

  • Temporarily Disable Antivirus: Try temporarily disabling your antivirus software and then attempt to print to the Adobe PDF printer. Important: Remember to re-enable your antivirus immediately after testing, whether it resolves the issue or not.
  • Add Exceptions: If disabling the antivirus helps, you may need to add Adobe Acrobat/Reader and the Adobe PDF printer process (`Acrobat.exe`, `AcroRd32.exe`, `Distiller.exe`) to your antivirus’s exclusion or whitelist list. Consult your antivirus software’s documentation for instructions.

Other Pdf Printers Or Virtual Printers

Having multiple virtual printers installed, especially other PDF creation tools, can sometimes lead to conflicts.

  • Remove Redundant Printers: If you have other PDF printers installed (e.g., “Microsoft Print to PDF”, “WPS Office PDF”, or other third-party PDF printers), try temporarily uninstalling them one by one to see if the conflict is resolved.
  • Check Default Printer Settings: Ensure that the “Adobe PDF” printer is correctly selected when you intend to use it, and that it’s not being overridden by another default printer.

Application-specific Issues

Occasionally, the problem might be specific to the application you are trying to print from.

  • Test with Different Applications: Try printing to the Adobe PDF printer from different programs (e.g., Notepad, Microsoft Word, a web browser). If it works in some applications but not others, the issue likely lies within the problematic application’s settings or its integration with the PDF printer.
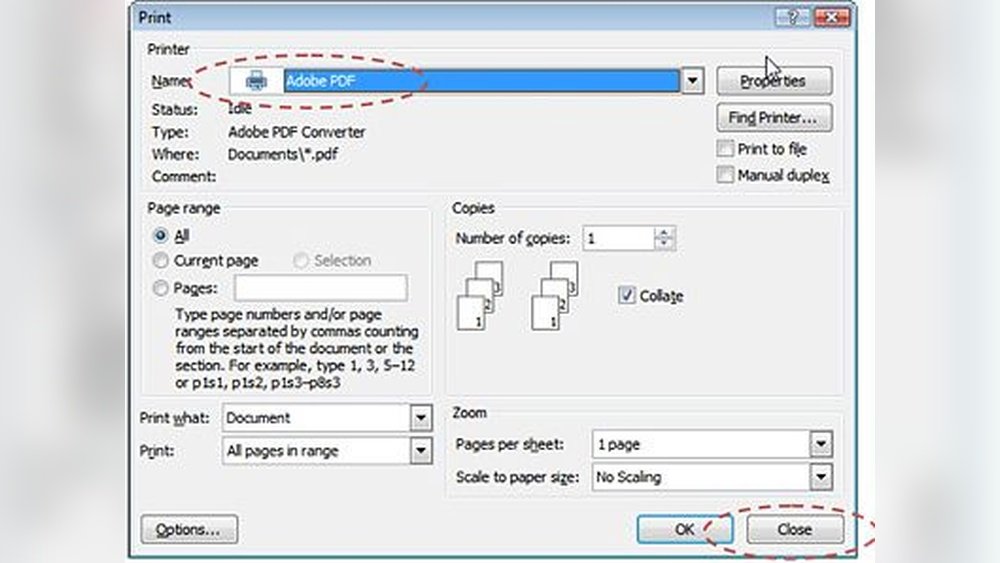
  • Check Application Settings: Within the application you’re using, review its print settings. Ensure that “Adobe PDF” is selected as the printer and that no specific print settings within that application are causing the failure. For example, in Microsoft Word, go to `File > Print`, select “Adobe PDF” from the printer list, and check the “Printer Properties” or “Page Setup” for any unusual configurations.

Advanced Troubleshooting: System Files And Permissions

If the basic and intermediate steps haven’t resolved the issue, you might be dealing with deeper system-level problems.

Running System File Checker (sfc) And Dism

Corrupted Windows system files can impact the functionality of various applications, including the Adobe PDF printer.

  • System File Checker (SFC):
  • Open Command Prompt as Administrator. Search for `cmd` in the Start menu, right-click “Command Prompt”, and select “Run as administrator”.
  • Type `sfc /scannow` and press Enter.
  • This command will scan for and attempt to repair corrupted Windows system files. It may take some time to complete.
  • Restart your computer after the scan finishes.
  • Deployment Image Servicing and Management (DISM): If SFC doesn’t fix the problem, DISM can perform a more thorough check and repair of the Windows image.
  • Open Command Prompt as Administrator.
  • Type `DISM /Online /Cleanup-Image /RestoreHealth` and press Enter.
  • This process can also take a significant amount of time.
  • After DISM completes, run `sfc /scannow` again.
  • Restart your computer.

Checking Folder Permissions

The Adobe PDF printer needs specific permissions to create and save PDF files in certain locations. Issues with permissions, especially if you’ve recently changed user account settings or security policies, can cause printing failures.

  • Navigate to the default save location for Adobe PDF documents (often `Documents\Adobe PDF`). If this folder doesn’t exist, try creating it.
  • Right-click on the folder, select “Properties”, then go to the “Security” tab.
  • Ensure your user account has “Full control” or at least “Write” permissions. If not, click “Edit”, select your user account, check the “Allow” box for “Full control”, and click “Apply” and “OK”.
  • Also, check permissions for the Adobe installation directory (e.g., `C: \Program Files\Adobe`).

Verifying Adobe Acrobat Distiller Settings

Adobe Acrobat Distiller is a crucial component that converts PostScript files into PDFs. If Distiller is not configured correctly or encounters issues, the PDF printer will fail.

  • Open Adobe Acrobat Distiller (search for it in the Start menu).
  • Go to Settings > Edit Adobe PDF Settings….
  • Ensure that the “Default Settings” are selected or that any custom settings are valid. If you suspect custom settings are the issue, try resetting them to default.
  • Check the “Watched Folders” settings. If folders are set up here, ensure they exist and that Adobe has permission to write to them. Sometimes, issues with watched folders can cause Distiller to hang. Try disabling watched folders temporarily.

Reinstalling Adobe Acrobat Or Reader Completely

If none of the above steps work, a complete uninstallation and fresh installation of Adobe Acrobat or Reader might be necessary. This ensures that all program files, registry entries, and associated components are removed and then reinstalled cleanly.

  • Uninstall Adobe Acrobat/Reader:
  • Go to Control Panel > Programs and Features.
  • Select your Adobe product and click “Uninstall”.
  • Follow the prompts.
  • Clean Up Remaining Files: After uninstalling, manually check and delete any remaining Adobe folders in `Program Files` and `ProgramData` (you may need to show hidden files). Also, use a registry cleaner tool (with caution and a backup) or manually search for and delete Adobe-related registry keys.
  • Download the Latest Version: Download the latest installer for Adobe Acrobat Reader DC (free) or Adobe Acrobat (paid) directly from the official Adobe website.
  • Install: Run the downloaded installer and follow the on-screen instructions.
  • Restart and Test: Restart your computer and check if the Adobe PDF printer is now working.
Adobe Pdf Printer Not Working

Credit: www.autodesk.com

Specific Scenarios And Solutions

Beyond general troubleshooting, certain specific situations might require tailored approaches.

Printing From Web Browsers

Many users try to print web pages to PDF. If this fails specifically in browsers like Chrome, Firefox, or Edge:

  • Browser Cache and Extensions: Clear your browser’s cache and cookies. Temporarily disable browser extensions, especially those that interact with printing or PDF handling, as they can sometimes conflict.
  • Browser Settings: Ensure that “Save as PDF” or “Adobe PDF” is selected as the printer in the browser’s print dialog. Some browsers have their own built-in “Print to PDF” function that might be overriding the system’s Adobe PDF printer. Check your browser’s print settings for options like “System Dialog” vs. “Save to PDF”.

Printing From Microsoft Office Applications

When printing Word documents, Excel spreadsheets, or PowerPoint presentations to PDF fails:

  • “Save As Adobe PDF” Add-in: Ensure the “Save As Adobe PDF” add-in is enabled in Microsoft Office applications.
  • Word/Excel/PowerPoint: Go to `File > Options > Add-ins`. In the “Manage” dropdown at the bottom, select “COM Add-ins” and click “Go”. Ensure “Adobe PDF” is checked. If it’s not listed, you may need to repair the Office installation or reinstall Adobe Acrobat.
  • Print to PDF Feature: Microsoft Office applications also have a built-in “Save as PDF” or “Export to PDF” feature. Try using this instead of the “Print” dialog to see if it works. This bypasses the Adobe PDF printer driver and uses Microsoft’s own PDF conversion engine.

Printing Large Or Complex Documents

For very large documents, complex graphics, or documents with many layers, printing to PDF can sometimes fail due to resource limitations or timeouts.

  • Print in Sections: If possible, try printing the document in smaller sections or batches.
  • Simplify Document: Before printing, try simplifying the document by flattening layers, reducing image resolution where appropriate, or removing unnecessary elements.
  • Increase System Resources: Close other resource-intensive applications running in the background to free up RAM and CPU power.

Issues After Windows Updates

Sometimes, a Windows update can introduce incompatibilities that affect the Adobe PDF printer.

  • Check for Adobe Updates: After a major Windows update, immediately check for and install any available updates for Adobe Acrobat/Reader. Adobe often releases patches to ensure compatibility.
  • Roll Back Update (Temporary): If the problem started immediately after a specific Windows update, you might consider temporarily rolling back that update via Settings > Update & Security > Windows Update > View update history > Uninstall updates. This should be a last resort and only done if you can pinpoint the update as the cause.
Adobe Pdf Printer Not Working

Credit: helpx.adobe.com

Comparison Of Pdf Creation Methods

When the Adobe PDF printer isn’t working, users often look for alternatives. Understanding these options can help maintain productivity.

MethodProsConsBest Use Case
**Adobe PDF Printer**High fidelity, integrates with Adobe suite, advanced options.Can be resource-intensive, prone to installation/driver issues.Creating professional PDFs from any application, complex documents.
**Microsoft Print to PDF**Built-in to Windows, simple to use, no extra installation needed.Limited customization, may not preserve complex formatting as well as Adobe.Quick conversion of documents, web pages, or basic files.
**Browser’s Save as PDF**Convenient for web pages, no extra software required.Primarily for web content, limited control over PDF settings.Saving web pages for later viewing or sharing.
**Application’s Export**Often high quality, integrated within the software (e.g., Office).Specific to the application, may not be available in all programs.Creating PDFs directly from Word, Excel, Photoshop, etc.

Frequently Asked Questions

Why Does My Adobe Pdf Printer Keep Going Offline?

The “offline” status typically means Windows cannot communicate with the printer service. This can be due to the Print Spooler service stopping, a corrupted driver, a conflict with other software (especially antivirus), or incorrect printer port settings. Restarting the Print Spooler service, ensuring the printer is set to “online” in devices, and checking for driver updates or reinstalling the driver are common solutions.

Can I Use The Adobe Pdf Printer On Macos?

Yes, Adobe Acrobat provides a PDF printer function on macOS as well, typically integrated through its print dialog. If you encounter issues, ensure Adobe Acrobat is up-to-date, check for macOS compatibility updates from Adobe, and verify that the “Save as PDF” option within the macOS print dialog is functioning correctly.

The troubleshooting steps might differ slightly, focusing more on application permissions and macOS system updates.

How Do I Fix “adobe Pdf Printer Is Not Installed”?

This error means Windows cannot find the necessary driver files. The solution usually involves reinstalling the Adobe PDF printer. This can often be achieved by repairing the Adobe Acrobat/Reader installation. If that fails, you may need to manually add the printer via Control Panel > Devices and Printers > Add a printer, selecting a local port named `AdobePDF`, and then choosing the “Adobe PDF” driver from the manufacturer list. A complete uninstallation and reinstallation of Adobe Acrobat/Reader is also a strong possibility.

What Is The Difference Between Adobe Pdf Printer And Microsoft Print To Pdf?

The Adobe PDF Printer is part of Adobe Acrobat or Reader, offering advanced features for creating high-fidelity PDFs with extensive control over compression, security, and metadata. It

Troubleshooting Kitchenaid Microwave

Troubleshooting Kitchenaid Microwave

When your KitchenAid microwave malfunctions, it can disrupt your kitchen routine significantly. From reheating leftovers to defrosting ingredients, these appliances are central to daily meal preparation. Fortunately, many common KitchenAid microwave issues are resolvable with some basic troubleshooting. This guide will walk you through identifying and fixing the most frequent problems, empowering you to get your appliance back in working order without necessarily calling for professional service.

Understanding the potential causes behind a malfunctioning microwave can save you time and money. Often, the issue stems from simple oversights like power supply problems, user errors, or minor component failures. By systematically approaching the troubleshooting process, you can pinpoint the root cause and implement the correct solution.

This article provides a comprehensive, step-by-step approach to diagnosing and resolving a wide array of KitchenAid microwave problems, ensuring you can confidently tackle most common issues.

Key Takeaways

  • Power Issues: Check the power cord, outlet, and circuit breaker before assuming a microwave fault.
  • Door Interlock Problems: A misaligned or faulty door latch is a common cause for a microwave not starting.
  • Turntable Malfunctions: Ensure the turntable motor, roller ring, and support are correctly positioned and clean.
  • Control Panel Errors: Resetting the microwave or checking for error codes can often resolve control panel issues.
  • Heating Element Failures: If the microwave runs but doesn’t heat, a faulty magnetron or high-voltage diode is a likely culprit, often requiring professional repair.
  • Ventilation and Noise: Ensure proper ventilation and check for loose components if the microwave is unusually loud.
  • Safety First: Always unplug the microwave before attempting any internal inspection or repair.
Troubleshooting Kitchenaid Microwave

Credit: danmarcappliance.com

Common Kitchenaid Microwave Problems And Solutions

KitchenAid microwaves, like any appliance, can develop issues over time. Understanding the symptoms and their potential causes is the first step toward a solution. This section details prevalent problems and offers practical troubleshooting steps.

Microwave Not Turning On

This is one of the most frustrating issues. Before assuming the microwave itself is broken, several external factors need to be checked.

Power Supply Checks

The most straightforward reason a microwave won’t turn on is a lack of power.

  • Check the Power Cord: Ensure the power cord is securely plugged into both the microwave and a functioning wall outlet. Look for any visible damage to the cord. If damaged, it should be replaced by a qualified technician.
  • Test the Outlet: Plug another small appliance, like a lamp or toaster, into the same outlet. If that appliance doesn’t work, the problem lies with the outlet or the circuit.
  • Inspect the Circuit Breaker/Fuse: Locate your home’s electrical panel. Find the breaker that controls the kitchen outlets. If it’s tripped (usually in the middle position or “off”), reset it by pushing it firmly to the “off” position and then back to “on.” If it’s a fuse, check if it’s blown and replace it if necessary. Note: If the breaker trips repeatedly, there might be an underlying electrical issue in your home’s wiring or the microwave itself, requiring professional diagnosis.

Door Latch And Interlock Switches

Microwaves are designed with safety interlock switches that prevent operation if the door is not fully closed and latched.

  • Door Alignment: Ensure the microwave door is closing properly. Sometimes, a misaligned door can prevent the interlock switches from engaging. Check for any obstructions or damage around the door frame and latches.
  • Interlock Switch Functionality: If the door appears closed but the microwave still won’t start, the interlock switches themselves might be faulty. These switches are typically located where the door latches engage. Testing these requires opening the microwave’s casing and using a multimeter, a task best left to those with electrical experience. Warning: Never attempt to bypass these switches, as they are critical safety components.

Control Panel Issues

A non-responsive control panel can also prevent the microwave from starting.

  • Power Surge/Interference: Sometimes, a power surge or electrical interference can cause the control panel to freeze or become unresponsive. A simple power reset can often resolve this. Unplug the microwave for at least 5-10 minutes, then plug it back in. This allows the internal electronics to reset.
  • Faulty Control Board: If a power reset doesn’t help, the control board itself might be damaged. This is a more complex repair that usually requires professional attention.

Microwave Runs But Doesn’t Heat

This is a common and concerning problem. The microwave appears to be working, the light comes on, the turntable spins, and you can hear it humming, but the food remains cold.

Magnetron Failure

The magnetron is the component that generates the microwaves. If it fails, heating will cease.

  • Symptoms: The microwave operates normally (lights, turntable, fan) but doesn’t heat food.
  • Diagnosis: This is difficult to diagnose without specialized equipment. However, if all other power and control issues have been ruled out, a faulty magnetron is a strong possibility.
  • Solution: Replacing a magnetron is a complex and potentially dangerous repair due to the high voltages involved. It is strongly recommended to have this done by a qualified appliance repair technician.

High-voltage Diode Or Capacitor Failure

These components work in conjunction with the transformer to supply the necessary high voltage to the magnetron. If either fails, the magnetron won’t receive adequate power.

  • Symptoms: Similar to magnetron failure, microwave runs but doesn’t heat. You might also hear unusual buzzing or humming sounds.
  • Diagnosis: Testing these components requires a multimeter and knowledge of high-voltage circuits.
  • Solution: Like magnetron replacement, these repairs involve high voltages and should only be performed by trained professionals.

Transformer Issues

The high-voltage transformer steps up the household voltage to the level required by the magnetron.

  • Symptoms: No heating, possibly accompanied by a loud humming or buzzing noise from the transformer itself. The fuse might also blow.
  • Diagnosis: A failed transformer is usually identifiable by its sound and the fact that the unit still receives power but produces no heat.
  • Solution: Transformer replacement is a significant repair and typically requires professional service.

Thermal Cut-off Switch

Some microwaves have a thermal cut-off switch that trips if the unit overheats. If this switch fails in the open position, it can prevent the microwave from heating even when cool.

  • Symptoms: The microwave may have stopped heating after a prolonged period of use or if it was operated with the door ajar.
  • Diagnosis: This switch can be tested with a multimeter for continuity.
  • Solution: If the switch is faulty, it can be replaced. This is a more accessible repair than magnetron or transformer issues, but still requires careful attention to safety.

Turntable Not Rotating

A functioning turntable ensures even cooking by rotating food through the microwave’s energy field. If it stops spinning, your food may be unevenly heated.

Obstructions And Improper Placement

The simplest cause is often the most overlooked.

  • Check for Debris: Ensure there’s no food debris or foreign objects preventing the turntable from moving freely.
  • Correct Placement: Make sure the glass tray is seated correctly on the roller ring and that the roller ring is properly positioned on the turntable motor shaft. The shaft has a specific shape (often a D-shape) that must align with the hole in the roller ring.

Roller Ring And Support Issues

The roller ring and its support are crucial for smooth rotation.

  • Cleanliness: The roller ring and the support it rests on can accumulate food particles. Clean them thoroughly.
  • Damage: Inspect the roller ring for broken wheels or cracks. If damaged, it needs to be replaced. The support underneath should also be free of debris and damage.

Turntable Motor Failure

The motor is located beneath the turntable support.

  • Symptoms: The turntable doesn’t spin, but the microwave heats food. The motor may make a faint humming sound or no sound at all.
  • Diagnosis: This can be tested by observing if the motor shaft turns when the microwave is operating. If it doesn’t, the motor is likely the issue.
  • Solution: Replacing the turntable motor is a moderately difficult repair. It involves accessing the underside of the microwave and disconnecting/reconnecting wires. If you’re comfortable with basic appliance repair, this is a DIY-possible fix, but always unplug the unit first. A replacement motor can be sourced from appliance parts suppliers.

Microwave Making Unusual Noises

Strange sounds can indicate anything from a minor issue to a serious component failure.

Humming Or Buzzing

A low humming is normal during microwave operation. However, unusually loud humming or buzzing can signal problems.

  • Magnetron or Transformer: As mentioned earlier, a loud hum can indicate issues with the magnetron or the high-voltage transformer, especially if the microwave isn’t heating.
  • Fan Motor: The cooling fan can become noisy if its bearings are worn or if it’s obstructed.
  • Turntable Motor: A struggling turntable motor might emit a buzzing sound.

Grinding Or Scraping

These noises often point to mechanical issues.

  • Fan Blade Obstruction: The cooling fan or the exhaust fan may have something caught in it, like a loose wire or debris.
  • Motor Bearings: Worn bearings in the fan motor or turntable motor can cause grinding sounds.
  • Turntable Mechanism: If the turntable or roller ring is misaligned or damaged, it can create scraping sounds.

Clicking Sounds

  • Door Interlock Switches: Faulty or improperly engaging door interlock switches can sometimes produce clicking noises.
  • Relays: Internal relays that control power to different components might click, but persistent or loud clicking could indicate a fault.

Troubleshooting Noises:

  • Identify the Source: Try to pinpoint where the noise is coming from (e.g., the back, the top, the inside).
  • Check Turntable: Remove the turntable and roller ring and run the microwave briefly. If the noise stops, the issue is likely with the turntable mechanism.
  • Check Fans: If the noise seems to come from the fan area, inspect the fan blades for obstructions.
  • Professional Diagnosis: For persistent or loud unusual noises, especially humming/buzzing when not heating, consult a professional. These can indicate high-voltage component failures.

Control Panel Or Display Issues

Problems with the buttons, touch screen, or digital display can make the microwave difficult or impossible to operate.

Unresponsive Buttons Or Touchscreen

  • Dirt and Grime: Food particles or grease can accumulate around buttons or on the touchscreen, interfering with their function. Clean the control panel thoroughly with a damp cloth and mild detergent.
  • Power Reset: As with “not turning on” issues, a power reset (unplugging for 5-10 minutes) can often resolve temporary electronic glitches affecting the control panel.
  • Internal Connection: The ribbon cable connecting the control panel to the main circuit board might have become loose. This requires opening the microwave casing and is best left to technicians.
  • Faulty Membrane Switch/Touchscreen: Over time, the internal circuitry of buttons or the touchscreen can wear out. Replacement of the control panel assembly may be necessary.

Display Not Working Or Flickering

  • Power Supply Fluctuation: Ensure the microwave is receiving stable power.
  • Loose Connection: Similar to unresponsive buttons, a loose connection to the display board can cause issues.
  • Faulty Display Board: The display itself or its driver circuitry might be damaged.
  • Error Codes: Some KitchenAid microwaves display error codes. Consult your user manual to decipher these codes, as they can point directly to the problem. For example, an F1 or F4 code might indicate a control board issue.

Sparks Or Arcing Inside The Microwave

This is a serious safety concern and should be addressed immediately.
Metal Objects Inside

  • Rule: Never place metal objects (utensils, foil, dishes with metallic trim) inside a microwave. Metal reflects microwaves and can cause sparks (arcing).
  • Solution: Remove any metal objects. If arcing occurs with no metal present, proceed to other causes.

Damaged Interior Walls Or Waveguide Cover

  • Waveguide Cover: The waveguide cover (usually a mica sheet or plastic shield) directs microwaves into the cooking cavity. If it’s dirty, burnt, or damaged, it can cause arcing.
  • Cleaning: Gently clean the waveguide cover with a damp cloth.
  • Replacement: If it’s significantly damaged or burnt, it needs replacement. This is a relatively simple DIY repair.
  • Interior Cavity Damage: Dents or holes in the interior metal walls can also lead to arcing.
  • Solution: Minor dents might be manageable, but significant damage often compromises the microwave’s safety and integrity, requiring professional assessment or replacement.

Faulty Stirrer Fan Or Magnetron

  • Stirrer Fan: Some microwaves use a metal stirrer fan (instead of a turntable) to distribute microwaves. If this fan is damaged or obstructed, it can cause arcing.
  • Magnetron Issues: A failing magnetron can sometimes arc.

Action: If you observe sparks or arcing, immediately stop the microwave, unplug it, and investigate. If the cause isn’t obvious (like forgotten metal), do not use the microwave until it has been inspected by a professional.

Microwave Smells Bad

Lingering odors can be unpleasant and sometimes indicate a problem.

Food Debris And Spills

  • Most Common Cause: Food splatters, grease, and spills left inside the microwave are the primary culprits for bad smells.
  • Solution: Thoroughly clean the interior, including the ceiling, walls, floor, and door seal, using a microwave-safe cleaner or a solution of water and vinegar or baking soda.

Burnt Food Or Components

  • Overheated Food: If food was cooked for too long or ignited, it can leave a persistent burnt smell.
  • Component Failure: A burning smell, especially accompanied by smoke or unusual operation, can indicate overheating internal components like the magnetron or transformer.
  • Solution: Clean thoroughly. If the smell persists or is accompanied by operational issues, unplug the unit and have it inspected.

Mold Or Mildew

  • Damp Environment: If the microwave is in a particularly humid area or hasn’t been used or cleaned for a long time, mold or mildew can develop, causing musty odors.
  • Solution: Clean with a vinegar solution, which helps kill mold and mildew. Ensure the microwave is dried thoroughly afterward.
Troubleshooting Kitchenaid Microwave

Credit: www.kitchenaid.com

Understanding Kitchenaid Microwave Error Codes

KitchenAid microwaves, particularly newer models with digital displays, may show error codes to indicate specific malfunctions. These codes are invaluable for diagnosis. While the exact codes can vary slightly by model, here are some common ones and their general meanings.

Always refer to your specific user manual for precise definitions for your model.

Common Error Code Meanings

  • F1 / F2 / F3 / F4: These often relate to control board issues. They can indicate a problem with the main electronic control unit (ECU) or its communication with other components.
  • F5: This code typically points to a door switch fault. It suggests one or more of the interlock switches are not functioning correctly.
  • F6 / F7: These can indicate a short circuit within the microwave’s high-voltage system or a problem with the power supply board.
  • F8 / F9: These might relate to fan motor issues or problems with the temperature sensor.
  • Error Codes Related to Heating: Some models might display codes specifically when the microwave runs but doesn’t heat, often pointing towards the magnetron, diode, or transformer circuit.

How To Use Error Codes For Troubleshooting

  • Identify the Code: Note the exact code displayed on your microwave.
  • Consult Your Manual: The most reliable source for understanding error codes is your KitchenAid microwave’s user manual. If you don’t have a physical copy, you can usually find a PDF version on the KitchenAid website by searching for your model number.
  • Perform a Power Reset: For many electronic error codes (like F1-F4), a simple power reset can clear a temporary glitch. Unplug the microwave for 5-10 minutes, then plug it back in and see if the code reappears.
  • Address Simple Causes: If an error code suggests a door switch issue (e.g., F5), visually inspect the door latches and switches for obvious damage or obstruction before assuming a component failure.
  • When to Call a Professional: If the error code persists after a reset, or if it points to a high-voltage component (like F6/F7 related to shorts or heating issues), it’s best to contact KitchenAid customer support or a certified appliance repair technician. Attempting to repair high-voltage components without proper training is dangerous.
Troubleshooting Kitchenaid Microwave

Credit: www.kitchenaid.com

Maintenance Tips For Preventing Kitchenaid Microwave Issues

Proactive maintenance is key to extending the lifespan of your KitchenAid microwave and preventing common problems. Regular care ensures optimal performance and safety.

Regular Cleaning Routine

A clean microwave operates more efficiently and hygienically.

  • Interior: Wipe down the interior surfaces weekly with a damp cloth and mild detergent. For stubborn stains, use a solution of water and vinegar or baking soda. Always ensure the microwave is unplugged before cleaning the interior.
  • Turntable and Roller Ring: Remove and wash the glass turntable and roller ring in warm, soapy water regularly. Ensure they are completely dry before reinserting.
  • Exterior: Clean the exterior with a damp cloth. Pay attention to the control panel and door seals to prevent grease buildup.
  • Ventilation Grills: Dust and debris can accumulate in the ventilation grills, hindering airflow and potentially causing overheating. Clean these periodically with a vacuum cleaner brush attachment or compressed air.

Proper Usage Habits

Using the microwave correctly minimizes stress on its components.

  • Use Microwave-Safe Cookware: Always use dishes labeled as microwave-safe. Avoid metal, aluminum foil, and dishes with metallic trim.
  • Avoid Overcooking: Do not operate the microwave empty or for excessively long periods beyond recommended cooking times, as this can strain the magnetron.
  • Cover Food: Covering food helps prevent splatters, keeping the interior cleaner and reducing the risk of burnt-on residue. Use microwave-safe lids, plastic wrap (vented), or paper towels.
  • Don’t Operate with Door Ajar: Ensure the door is fully closed and latched before starting the microwave. Operating with the door open can damage the appliance and is a safety hazard.

Periodic Checks

Simple visual inspections can catch potential problems early.

  • Door Seals: Check the door seals for any signs of wear, damage, or gaps. A damaged seal can lead to energy leakage and inefficient cooking.
  • Power Cord: Inspect the power cord for any fraying or damage.
  • Turntable Function: Periodically ensure the turntable is rotating smoothly.
  • Unusual Noises: Pay attention to any new or unusual sounds the microwave makes. Address them promptly.

By incorporating these maintenance practices into your routine, you can significantly reduce the likelihood of encountering common KitchenAid microwave problems and enjoy reliable performance for years to come.

When To Call A Professional Appliance Repair Service

While many microwave issues can be resolved with DIY troubleshooting, some problems require the expertise of a qualified technician. Knowing when to call for professional help is crucial for safety and effective repair.

Safety Concerns

  • Electrical Hazards: Microwaves contain high-voltage components (capacitors, transformers) that can store a dangerous electrical charge even when unplugged. If you are not experienced with electrical work, attempting internal repairs can be hazardous.
  • Arcing and Sparks: Persistent arcing, smoke, or a burning smell that isn’t resolved by simple cleaning or removing metal objects indicates a potentially serious internal fault that needs professional diagnosis.
  • Damaged Casing or Door: If the microwave’s outer casing is damaged, or if the door mechanism is severely compromised, it could affect the microwave’s structural integrity and safety.

Complex Component Failures

  • Magnetron Replacement: The magnetron is the heart of the microwave. Its replacement involves working with high voltages and requires specialized knowledge and tools.
  • High-Voltage Diode/Capacitor/Transformer: As discussed, these components operate at very high voltages. Failure in these parts necessitates professional repair.
  • Control Board Issues: While a power reset can fix minor glitches, persistent error codes related to the control board often indicate a need for component-level diagnosis or replacement by a technician.

Lack Of Tools Or Expertise

  • Multimeter Use: Testing internal components often requires a multimeter and understanding how to use it safely on high-voltage circuits.
  • Disassembly: Safely disassembling the microwave to access internal components requires specific tools and knowledge of how the appliance is put together.
  • Parts Sourcing: While many parts are available, identifying the exact correct replacement part can sometimes be challenging.

Cost-benefit Analysis

  • Repair vs. Replacement: For older microwaves or those with significant damage (e.g., multiple component failures, damaged cavity), the cost of professional repair might approach or exceed the cost of a new appliance. A technician can often advise on whether a repair is economically viable.
  • Warranty: If your KitchenAid microwave is still under warranty, contact KitchenAid customer service first. Attempting DIY repairs may void the warranty.

Pro Tip: Before calling a technician, try to accurately describe the problem, including any error codes displayed

Toilet Keeps Running On Off

Toilet Keeps Running On Off

The persistent hum and gush of a toilet that won’t stop running can be a surprisingly irritating and wasteful problem. Beyond the annoyance, a constantly running toilet can significantly inflate your water bill and, over time, contribute to unnecessary water consumption.

This issue, often stemming from a faulty component within the tank, is usually a straightforward fix that most homeowners can tackle themselves with a little guidance. Understanding the mechanics of your toilet tank and the common culprits behind this continuous flushing is the first step toward silencing the sound and restoring efficiency to your bathroom.

Key Takeaways

  • A running toilet is typically caused by a faulty flapper, a misaligned float, or an issue with the fill valve.
  • The flapper is the most common culprit, failing to create a proper seal and allowing water to continuously leak from the tank into the bowl.
  • The float mechanism, either a ball float or a cup float, regulates the water level in the tank; if it’s set too high or malfunctions, it can cause the fill valve to stay open.
  • The fill valve, also known as the ballcock, is responsible for refilling the tank after a flush; if it’s worn out or obstructed, it can leak water constantly.
  • Simple DIY repairs, such as adjusting the float, cleaning the flapper seat, or replacing the flapper or fill valve, can often resolve the issue.
  • Regular maintenance and periodic checks of toilet tank components can prevent a running toilet from developing in the first place.
Toilet Keeps Running On Off

Credit: www.watersmartsystems.com

Understanding Toilet Tank Mechanics

Before diving into troubleshooting, it’s helpful to understand the basic components within a toilet tank and how they work together. When you flush the toilet, the flush lever lifts a flapper at the bottom of the tank. This allows water to rush from the tank into the bowl, initiating the siphoning action that clears waste. As the tank empties, the float (either a ball or a cup) drops, signaling the fill valve (or ballcock) to open. The fill valve then allows fresh water into the tank until the float reaches a pre-set level, at which point it shuts off the fill valve. A small amount of water also flows through a refill tube into the overflow pipe to ensure the bowl refills correctly. A properly functioning toilet tank maintains a specific water level and stops the flow of water once this level is reached.

Toilet Keeps Running On Off

Credit: www.wikihow.com

Common Causes Of A Running Toilet

A toilet that continuously runs is almost always a sign that water is leaking from the tank into the bowl when it shouldn’t be. This leakage can occur for several reasons, usually related to the seals and valves within the tank.

Identifying the specific component causing the problem is key to an effective repair.

The Faulty Flapper: The Most Frequent Offender

The flapper is a rubber or plastic seal located at the bottom of the tank, covering the flush valve opening. Its primary job is to create a watertight seal, preventing water from escaping the tank into the bowl between flushes. When you flush, the flapper lifts, and when the tank refills, it reseals.

Why it fails:

  • Wear and Tear: Over time, the rubber can become stiff, brittle, or warped, losing its ability to form a tight seal. Mineral deposits from hard water can also accumulate on the flapper or its seat, preventing a proper seal.
  • Corrosion: If the flush valve seat (the surface the flapper seals against) becomes corroded or damaged, the flapper won’t be able to create a watertight connection.
  • Improper Fit: A flapper that is not the correct size or type for your toilet model might not seal effectively.
  • Chain Issues: The chain connecting the flush lever to the flapper can become too short, preventing the flapper from fully seating, or too long, holding the flapper slightly ajar.

How to test the flapper:

A simple food coloring test can often pinpoint a leaky flapper. Add a few drops of food coloring to the water in the tank. Wait for about 15-30 minutes without flushing. If the colored water appears in the toilet bowl, it indicates that the flapper is not sealing properly and water is leaking from the tank.

The Misbehaving Float: Overfilling The Tank

The float is a crucial component that regulates the water level in the tank. When the water reaches a certain height, the float rises and triggers the fill valve to shut off the water supply. There are two common types of floats: the traditional ball float on an arm and the more modern cup float that moves up and down the fill valve shaft.

Why it fails:

  • Incorrect Water Level: The most common issue with floats is that they are set too high. If the float causes the water level to rise above the overflow tube, water will constantly spill into the overflow pipe and down into the bowl, triggering the fill valve to run continuously to compensate.
  • Malfunctioning Float: In rare cases, the ball float can develop a leak and fill with water, making it too heavy to properly signal the fill valve to shut off. Similarly, a cup float might stick or not move freely on its shaft.
  • Obstruction: Sometimes, the float can get caught on other components within the tank, preventing it from rising to its correct position.

How to test the float:

Observe the water level in the tank after it has finished filling. The water level should be about an inch below the top of the overflow pipe. If the water level is at or above the overflow pipe, the float is set too high. You can often adjust the float by bending the arm (for ball floats) or by turning an adjustment screw or mechanism on the fill valve (for cup floats).

The Worn-out Fill Valve (ballcock)

The fill valve, often referred to as the ballcock, is the mechanism that refills the tank with water after each flush and shuts off the water supply when the correct level is reached. It works in conjunction with the float.

Why it fails:

  • Internal Seals: Over time, the internal seals and diaphragms within the fill valve can wear out or become clogged with sediment. This can prevent the valve from shutting off completely, allowing a continuous trickle of water into the tank and potentially the overflow tube.
  • Debris: Small particles of debris or mineral buildup can obstruct the valve mechanism, preventing it from closing properly.
  • Age: Like any mechanical part, fill valves have a lifespan. An older fill valve is more prone to failure.

How to test the fill valve:

If the flapper is sealing correctly and the float is set to the appropriate water level (below the overflow tube), but the toilet still runs, the fill valve is the likely culprit. You might hear a faint hissing sound even when the toilet isn’t actively flushing, indicating water is still entering the tank.

Troubleshooting A Running Toilet: A Step-by-step Guide

Tackling a running toilet is a common DIY plumbing task. By following these steps systematically, you can often identify and resolve the issue without needing to call a professional.

Step 1: Identify The Sound And Water Level

The first step is to listen. Is the sound of running water constant and significant, or is it a faint trickle? Also, note the water level in the tank.

  • High Water Level: If the water level is at or above the overflow pipe, the problem is likely with the float being set too high or a malfunctioning fill valve.
  • Normal Water Level: If the water level is correct but the toilet still runs, the most probable cause is a leaky flapper.

Step 2: Test The Flapper Seal

As mentioned earlier, the food coloring test is excellent for checking the flapper.

  • Remove the tank lid.
  • Add a few drops of food coloring to the water in the tank.
  • Replace the tank lid.
  • Wait for 15-30 minutes without flushing.
  • Check the toilet bowl for any signs of color.
  • If color appears: The flapper is leaking. Proceed to Step 3.
  • If no color appears: The flapper is likely sealing well, and the issue might be with the fill valve or chain. Proceed to Step 4.

Step 3: Address A Leaky Flapper

If the food coloring test indicated a leaky flapper, you have a few options:

  • Clean the Flapper and Seat:
  • Turn off the water supply to the toilet using the shut-off valve behind the toilet.
  • Flush the toilet to empty the tank.
  • Carefully remove the chain from the flapper.
  • Gently pull the old flapper off its mounting posts or clips.
  • Inspect the flapper for cracks, stiffness, or warping.
  • Inspect the flush valve seat (the rim the flapper rests on) for debris, mineral buildup, or damage.
  • Clean both the flapper and the seat with a soft cloth or sponge. For stubborn buildup, you can use a mild abrasive cleaner or vinegar, but be gentle to avoid scratching the seat.
  • Reattach the flapper. Ensure it sits correctly.
  • Reconnect the chain, adjusting its length so there’s only a slight slack (about half an inch) when the flapper is seated. Too much slack means the flapper won’t lift properly; too little means it won’t seat fully.
  • Turn the water supply back on and let the tank fill.
  • Listen for running water. If the sound stops, you’ve likely fixed the issue. You can re-do the food coloring test to confirm.
  • Replace the Flapper:

If cleaning doesn’t help, or if the flapper is visibly damaged, replacement is necessary.

  • Follow steps 1-5 above to remove the old flapper.
  • Take the old flapper to a hardware store or plumbing supply store to ensure you purchase an exact match or a universal flapper designed to fit most toilets. Universal flappers are readily available and effective.
  • Install the new flapper according to the manufacturer’s instructions.
  • Reconnect the chain with the correct slack.
  • Turn the water supply back on, let the tank fill, and check if the running has stopped.

Step 4: Adjust Or Replace The Float And Fill Valve

If the flapper seems to be sealing correctly, or if the water level is too high, focus on the float and fill valve.

  • Adjusting the Float:
  • Turn off the water supply.
  • Flush the toilet to empty the tank.
  • For ball floats: Locate the metal arm connecting the float ball to the fill valve. You can often gently bend this arm downwards to lower the water level. Make small adjustments.
  • For cup floats: Look for an adjustment screw on the side of the fill valve or a lever mechanism. Turn the screw or adjust the lever to lower the float’s resting position. Consult your toilet’s manual if unsure.
  • Turn the water supply back on and let the tank fill. Observe the water level. It should stop filling about 1 inch below the top of the overflow pipe.
  • If the water level is now correct and the running stops, you’ve solved the problem.
  • Replacing the Fill Valve:

If adjusting the float doesn’t work, or if the fill valve itself appears to be the issue (e. g. , it’s old, corroded, or the float is stuck), it’s time to replace it. This is a more involved but still manageable DIY task.

  • Turn off the water supply valve.
  • Flush the toilet to empty the tank.
  • Disconnect the water supply line from the bottom of the fill valve. You might need a wrench. Place a towel or bucket underneath to catch residual water.
  • Remove the old fill valve. This usually involves unscrewing a large nut on the underside of the tank.
  • Clean the area where the new fill valve will sit.
  • Install the new fill valve according to the manufacturer’s instructions. Ensure it’s seated correctly and the nut is tightened securely.
  • Reconnect the water supply line.
  • Turn the water supply back on slowly and check for leaks.
  • Let the tank fill. If the running has stopped, the repair is successful.
Toilet Keeps Running On Off

Credit: www.wikihow.com

Maintenance Tips To Prevent Future Issues

Preventative maintenance is key to avoiding the nuisance and expense of a running toilet. Regularly inspecting and maintaining your toilet’s internal components can save you time and water.

Regular Inspections

Make it a habit to glance inside your toilet tank every few months.

  • Check Water Level: Ensure the water level is consistently about an inch below the top of the overflow pipe.
  • Listen for Leaks: Pay attention to any sounds of running water when the toilet hasn’t been flushed.
  • Inspect Components: Look for signs of wear, corrosion, or mineral buildup on the flapper, chain, and fill valve.

Cleaning And Descaling

Hard water can wreak havoc on toilet mechanisms.

  • Flapper and Seat: Periodically clean the flapper and its seat to remove mineral deposits that can impede a proper seal.
  • Fill Valve: If you notice mineral buildup around the fill valve, gently clean it. For severe buildup, consider a vinegar soak or a specialized descaler, following product instructions carefully.

Flapper Chain Adjustment

The flapper chain is a common culprit for minor leaks.

  • Ensure there is just a slight amount of slack in the chain when the flapper is closed.
  • If the chain is too long, it can get caught under the flapper, preventing a seal.
  • If it’s too short, the flapper might be held slightly ajar, causing a constant leak.

Replacing Components Proactively

While it’s tempting to wait for a part to fail, consider replacing components proactively, especially if your toilet is older.

  • Flappers: They are inexpensive and relatively easy to replace. A worn-out flapper is one of the most common causes of running toilets. Replacing it every 5-7 years can prevent many issues.
  • Fill Valves: If your toilet is over 10-15 years old, the fill valve might be nearing the end of its life. Replacing it proactively can prevent future leaks and water waste.

When To Call A Professional Plumber

While most running toilet issues are DIY-friendly, there are instances where professional help is recommended.

  • Persistent Problems: If you’ve tried all the common fixes and the toilet continues to run, there might be a more complex issue, such as a crack in the tank or bowl, or a problem with the main water line connection.
  • Uncertainty: If you’re uncomfortable with any of the repair steps, particularly those involving the water supply line or more complex fill valve replacements, it’s best to call a plumber.
  • Multiple Toilets Affected: If you have multiple toilets running simultaneously, it could indicate a broader plumbing issue within your home’s system that requires professional diagnosis.
  • Damage to Fixtures: If you notice any visible damage to the toilet tank, bowl, or surrounding plumbing during your troubleshooting, stop and call a professional to avoid causing further damage.

A plumber has the expertise and specialized tools to quickly diagnose and resolve complex plumbing problems, ensuring the job is done correctly and safely.

Cost Comparison: Diy Vs. Professional Repair

The cost of fixing a running toilet can vary significantly depending on whether you tackle it yourself or hire a professional. This can help you gauge the potential savings of a DIY approach.

| Component/Service | DIY Cost Estimate (Parts) | Professional Service Cost (Estimate) | Notes

Ryobi Power Washer No Pressure

Ryobi Power Washer No Pressure

The hum of a power washer is a familiar sound for many homeowners, promising a quick and effective way to tackle stubborn grime on driveways, decks, and siding. However, what happens when that powerful spray suddenly dwindles to a trickle, or worse, nothing at all?

A Ryobi power washer that’s lost its pressure can be a frustrating experience, turning a straightforward cleaning task into a perplexing puzzle. Understanding the common culprits behind this issue is the first step toward restoring your machine’s performance and getting back to that satisfying blast of cleaning power.

This guide will explore the most frequent reasons why your Ryobi power washer might be experiencing a loss of pressure. We’ll dissect potential problems ranging from simple user errors and maintenance oversights to more complex mechanical issues. By systematically diagnosing these possibilities, you’ll be equipped to troubleshoot effectively, whether you’re dealing with a brand-new unit or a well-loved workhorse.

We aim to provide actionable steps and insights to help you bring your Ryobi power washer back to its peak performance, ensuring your outdoor cleaning projects are completed efficiently and effectively.

Key Takeaways

  • Clogged Nozzles and Filters: Debris is the most common cause of low pressure, affecting the spray tip and inlet filters.
  • Water Supply Issues: Insufficient water flow or kinks in the garden hose can starve the pump.
  • Pump Problems: Worn seals, air in the pump, or internal damage can significantly reduce pressure.
  • Hose and Connection Leaks: Compromised hoses or loose fittings allow pressurized water to escape.
  • Improper Assembly or Operation: Incorrect setup or using the wrong accessories can impact performance.
  • Engine/Motor Issues: For gas models, engine problems can lead to reduced pump output; for electric models, motor issues can have a similar effect.
  • Regular Maintenance is Crucial: Consistent cleaning of filters, checking for leaks, and proper storage prevent many pressure loss issues.

Understanding Power Washer Pressure

Before diving into the specifics of why a Ryobi power washer might lose pressure, it’s essential to understand what “pressure” means in this context. Power washer pressure is typically measured in pounds per square inch (PSI). This metric indicates the force with which the water is expelled from the nozzle. A higher PSI means a more powerful spray, capable of removing tougher dirt and grime. Ryobi offers a range of power washers, from electric models suitable for light-duty tasks with lower PSI ratings (e.g., 1300-2000 PSI) to gas-powered units designed for more demanding jobs with higher PSI ratings (e.g., 2000-3100+ PSI).

The GPM (gallons per minute) is another critical factor, representing the volume of water the machine dispenses. While PSI dictates the force, GPM influences how quickly you can cover an area. A good balance of both PSI and GPM is necessary for optimal cleaning performance. When a Ryobi power washer fails to deliver adequate pressure, it’s usually because either the PSI output is too low, the GPM is insufficient, or both. Identifying the root cause requires a systematic approach, starting with the simplest and most common issues.

Ryobi Power Washer No Pressure

Credit: www.youtube.com

Common Causes For Low Pressure In Ryobi Power Washers

A sudden or gradual decrease in pressure from your Ryobi power washer can be attributed to a variety of factors. These can range from simple, easily fixable problems to more complex internal issues requiring professional attention. Understanding these potential causes will help you diagnose the problem efficiently.

Clogged Nozzles And Spray Tips

The most frequent culprit behind a Ryobi power washer’s loss of pressure is a clogged nozzle or spray tip. These small openings are where the water is forced out at high velocity. Over time, sediment, dirt, rust particles, or mineral deposits from the water supply can accumulate inside, constricting the flow and reducing the spray’s force and pattern.

  • Types of Clogs: Clogs can be partial, leading to a weak or erratic spray, or complete, resulting in no spray at all. Different nozzle types (e.g., 0-degree, 15-degree, 25-degree, 40-degree, soap nozzle) can become clogged. The 0-degree nozzle, with its narrowest opening, is particularly susceptible.
  • Diagnosis: Observe the spray pattern. If it’s weak, erratic, or sprays in an unusual direction, a clogged nozzle is likely. You might also notice a significant drop in the overall force.
  • Solution:
  • Turn off and unplug/disconnect the power source.
  • Remove the spray wand.
  • Carefully detach the spray nozzle.
  • Inspect the nozzle opening for visible debris.
  • Use a thin, stiff wire (like a paperclip or a specialized nozzle cleaning tool) to gently dislodge any obstructions. Be careful not to enlarge the hole, as this can permanently alter the nozzle’s performance.
  • Rinse the nozzle thoroughly with water.
  • For stubborn clogs, soak the nozzle in a vinegar and water solution for a few hours.
  • Reinstall the clean nozzle and test the pressure.

Dirty Or Clogged Inlet Filters

The inlet filter (also known as the water filter or screen) is situated where the garden hose connects to the power washer. Its purpose is to prevent debris from entering the pump and causing damage. If this filter becomes clogged with sediment, sand, or other particles, it will restrict the amount of water reaching the pump, directly leading to reduced pressure.

  • Importance: This is a critical component for protecting the pump. Regular cleaning is essential for maintaining optimal water flow.
  • Diagnosis: A clogged inlet filter will often result in a noticeable drop in pressure, especially when the unit is first turned on. If the washer runs intermittently or struggles to maintain a consistent spray, the filter is a prime suspect.
  • Solution:
  • Turn off and unplug/disconnect the power source.
  • Disconnect the garden hose from the power washer.
  • Locate the inlet filter. It’s usually a small, mesh screen inside the water inlet connection.
  • Carefully remove the filter. Some models have a removable filter housing.
  • Rinse the filter thoroughly under running water. Use a soft brush to gently scrub away any embedded debris.
  • Inspect the filter for any tears or damage. If damaged, it should be replaced.
  • Reinsert the clean filter and reconnect the garden hose.

Insufficient Water Supply

Power washers are designed to work with a specific volume of water flow. If the water supply from your garden hose is inadequate, the pump will not receive enough water to operate at its designed pressure. This is often overlooked but is a significant cause of low pressure.

  • Factors Affecting Supply:
  • Low household water pressure: If your home’s overall water pressure is low, the power washer won’t receive sufficient input.
  • Kinked or undersized garden hose: A kinked hose restricts flow. Using a hose that is too narrow in diameter (e.g., less than 5/8 inch) or too long can also create resistance.
  • Partially closed faucet: Ensure the outdoor faucet is fully opened.
  • Diagnosis: The pressure might be low from the start, or it might fluctuate as the pump struggles to draw enough water. The machine might also make unusual noises.
  • Solution:
  • Check your home’s water pressure. You can use a water pressure gauge attached to a faucet. Most power washers require a minimum of 20-40 PSI input.
  • Ensure the garden hose is fully connected and not kinked.
  • Use a garden hose that is at least 5/8 inch in diameter and no longer than 50 feet. Longer or narrower hoses increase friction loss.
  • Confirm the outdoor faucet is fully open.
  • Consider using a dedicated water source if household pressure is consistently low.

Leaks In The System

Leaks are a major enemy of pressure. Any breach in the system, from the garden hose connection to the spray wand or the pump itself, will allow pressurized water to escape, significantly reducing the output force.

  • Common Leak Points:
  • Garden hose connections: Loose fittings at either the faucet or the power washer inlet.
  • Garden hose itself: Punctures or cracks in the hose.
  • High-pressure hose: Damage to the hose connecting the pump to the spray wand, including cuts, abrasions, or leaks at the fittings.
  • Spray wand and gun connections: Loose fittings or worn O-rings.
  • Pump seals: Internal leaks within the pump assembly.
  • Diagnosis: Listen for hissing sounds while the machine is running. Visually inspect all connections, hoses, and the pump housing for dripping water. Pay close attention to the high-pressure hose, as it’s often subjected to stress.
  • Solution:
  • Turn off and unplug/disconnect the power source.
  • Inspect all hose connections. Tighten any loose fittings.
  • Examine the garden hose and high-pressure hose for visible damage. Replace any damaged hoses immediately.
  • Check the O-rings at the spray wand and hose connections. Replace worn or damaged O-rings. Ryobi often provides spare O-rings with their units.
  • For leaks originating from the pump itself, it may indicate internal seal failure, which often requires professional repair or pump replacement.

Air In The Pump Or Hoses

If air enters the pump system, it can disrupt the smooth flow of water and lead to a loss of pressure. This is particularly common after the unit has been stored, refilled, or if there’s a leak allowing air to be drawn in.

  • How Air Enters:
  • Running the pump dry.
  • Loose connections allowing air ingress.
  • Improper startup procedure after storage.
  • Diagnosis: The spray might be intermittent, sputtering, or weak, often accompanied by gurgling sounds from the pump.
  • Solution: “Bleeding” the pump is usually necessary.
  • Ensure the water supply is fully connected and the faucet is on.
  • Disconnect the high-pressure hose from the pump outlet.
  • Turn on the power washer (electric) or start the engine (gas). Let it run for 15-30 seconds. You should see water being expelled forcefully from the pump outlet. This process pushes out any trapped air.
  • Turn off the power washer/engine.
  • Reconnect the high-pressure hose securely.
  • Turn on the water supply and power.
  • Squeeze the trigger on the spray gun to release any remaining air in the wand and hose.
  • Test the pressure.

Pump Issues

The pump is the heart of the power washer, responsible for generating high pressure. If the pump itself is damaged or worn, it will directly impact performance.

  • Common Pump Problems:
  • Worn seals or O-rings: Internal seals can degrade over time, leading to pressure loss.
  • Damaged pistons or plungers: These components are crucial for the pumping action. Wear or damage impairs their function.
  • Overheating: Repeated overheating can damage pump components.
  • Running dry: Operating the pump without adequate water flow can cause internal damage.
  • Diagnosis: If you’ve ruled out all other common issues (clogs, leaks, water supply) and the pressure remains low, the pump is a likely suspect. Unusual noises from the pump, such as grinding or knocking, can also indicate a problem.
  • Solution:
  • Minor seal issues might be repairable with a pump repair kit, though this requires mechanical skill.
  • Significant damage to the pump often necessitates replacement. Depending on the model and the cost of a new pump versus a new power washer, replacement might not always be cost-effective. Consult your Ryobi manual or a service center.

Issues With Gas Engines (ryobi Gas Power Washers)

For Ryobi gas-powered pressure washers, problems with the engine can indirectly affect pump performance. The engine drives the pump, so if the engine isn’t running optimally, the pump won’t receive the necessary power.

  • Common Engine Problems:
  • Fuel issues: Stale fuel, a clogged fuel filter, or carburetor problems can cause the engine to run poorly, leading to reduced power output.
  • Air filter: A dirty air filter restricts airflow to the engine, reducing its efficiency and power.
  • Spark plug: A fouled or worn spark plug can cause misfires and inconsistent engine operation.
  • Low oil level: Some engines have a low-oil shutdown sensor that can cause the engine to run poorly or shut off.
  • Diagnosis: The engine might be sputtering, running rough, lacking power, or difficult to start. The overall performance of the power washer will be diminished.
  • Solution:
  • Check and replace stale fuel.
  • Clean or replace the air filter.
  • Inspect and clean or replace the spark plug.
  • Ensure the oil level is correct.
  • Clean or replace the fuel filter.
  • For carburetor issues, cleaning or professional adjustment may be required.

Issues With Electric Motors (ryobi Electric Power Washers)

Electric Ryobi power washers rely on an electric motor to drive the pump. If the motor is malfunctioning, the pump won’t receive adequate power.

  • Common Motor Problems:
  • Overheating: The motor can overheat due to prolonged use, blocked vents, or internal issues, leading to reduced power or shutdown.
  • Electrical connection issues: Loose or damaged power cords or internal wiring can affect motor performance.
  • Faulty motor: In rare cases, the motor itself may fail.
  • Diagnosis: The motor might sound strained, run slower than usual, or the unit might shut off unexpectedly. Check for tripped circuit breakers or GFCIs.
  • Solution:
  • Ensure vents are clear and the unit is not overheating. Allow it to cool down.
  • Inspect the power cord and all electrical connections for damage.
  • Ensure you are using an appropriate gauge extension cord if needed (refer to the Ryobi manual).
  • If the motor is suspected to be faulty, professional diagnosis and repair or replacement are necessary.

Using The Wrong Accessories Or Detergent

While less common, using incorrect accessories or detergents can sometimes contribute to perceived pressure loss or inefficient cleaning.

  • Spray Nozzles: As mentioned earlier, using a nozzle with too wide an angle (e.g., 40-degree) for a task requiring high impact can make it seem like the pressure is low. Conversely, using a nozzle that’s too narrow for the machine’s intended flow rate can sometimes cause issues.
  • Detergent Siphoning Tube: If your Ryobi power washer uses a detergent siphon tube, ensure it’s properly submerged in the detergent solution and not clogged. A blocked tube will prevent detergent from being drawn, affecting cleaning effectiveness, though not directly pressure. Some models have specific settings for detergent use that need to be engaged.
  • High-Pressure Hose Compatibility: Ensure the high-pressure hose is designed for your specific Ryobi model and its pressure rating. Using an incompatible hose could be a safety hazard and affect performance.
Ryobi Power Washer No Pressure

Credit: www.youtube.com

Troubleshooting Checklist For Ryobi Power Washer Low Pressure

When your Ryobi power washer isn’t performing as expected, follow this systematic checklist to pinpoint the issue.

  • Check the Basics:
  • Is the water faucet fully open?
  • Is the garden hose kinked or damaged?
  • Is the garden hose diameter adequate (at least 5/8 inch)?
  • Is the extension cord (if electric) correctly sized and in good condition?
  • Is the power source (outlet, breaker, generator) providing sufficient power?
  • Inspect the Inlet:
  • Disconnect the garden hose.
  • Remove and thoroughly clean the inlet filter. Check for damage.
  • Examine the Nozzle and Wand:
  • Select a standard nozzle (e.g., 25-degree).
  • Remove the nozzle and check for visible obstructions.
  • Attempt to clear any debris using a cleaning tool or wire.
  • Inspect the O-ring at the base of the spray wand connection.
  • Check for Leaks:
  • Run the power washer briefly.
  • Listen for hissing sounds.
  • Visually inspect the high-pressure hose, wand connections, and pump housing for drips or sprays of water.
  • Tighten any loose fittings. Replace damaged hoses or O-rings.
  • Bleed the Pump:
  • If you suspect air in the system (after checking for leaks and ensuring water supply), disconnect the high-pressure hose from the pump.
  • Run the unit briefly to expel air.
  • Reconnect the hose securely.
  • Assess Engine/Motor Performance (Gas/Electric):
  • Gas: Check fuel quality, air filter, spark plug condition, and oil level. Ensure the engine is running smoothly at full throttle.
  • Electric: Ensure the motor isn’t overheating, check power cord integrity, and verify the unit is receiving stable power.
  • Consider Pump Condition:
  • If all the above steps fail to restore pressure, the issue likely lies within the pump itself (worn seals, internal damage). This may require professional service or pump replacement.

Example: A user with a Ryobi 1700 PSI electric power washer noticed a significant drop in pressure after washing their car. They followed the checklist: the faucet was fully open, the hose wasn’t kinked, and the inlet filter was clean. However, upon inspecting the spray nozzle, they found a small pebble lodged inside. After clearing the pebble and rinsing the nozzle, the pressure returned to normal.

Ryobi Power Washer No Pressure

Credit: www.youtube.com

Maintenance Tips To Prevent Pressure Loss

Proactive maintenance is the most effective way to prevent your Ryobi power washer from losing pressure and to extend its lifespan. Regular care ensures all components function optimally.

Regular Cleaning Of Filters

  • Inlet Filter: Clean this after every few uses, or more frequently if you’re drawing water from a source prone to sediment (like a rain barrel or unpaved area). A quick rinse under running water usually suffices.
  • Nozzles: Clean nozzles periodically, especially if you notice any reduction in spray quality. Store them in a clean, dry place.

Inspecting Hoses And Connections

  • Before Each Use: Briefly check the garden hose and high-pressure hose for cuts, abrasions, or bulges. Ensure all connections are snug.
  • After Use: Disconnect hoses and allow them to dry before storing to prevent mold and corrosion.

Proper Storage

  • Winterization (for gas models): If you live in an area with freezing temperatures, proper winterization is crucial. This typically involves draining all water from the pump and hoses and using a pump saver solution to prevent internal damage from ice expansion. Refer to your Ryobi manual for specific winterization instructions.
  • General Storage: Store your power washer in a clean, dry place, protected from extreme temperatures and direct sunlight. Ensure it’s stored upright on a level surface.

Using Pump Saver (especially For Gas Models)

  • Purpose: Pump saver fluids help to lubricate pump seals, prevent corrosion, and protect against freezing.
  • When to Use: It’s highly recommended for any period of storage longer than a few weeks, and essential for winter storage. Follow the product instructions carefully.

Checking Oil Levels (gas Models)

  • Ensure the engine oil level is maintained according to the manufacturer’s recommendations. Low oil can lead to engine malfunction and reduced power output.

Avoiding Pump Damage

  • Never run the pump dry. Always ensure a sufficient water supply before starting the engine or motor.
  • Avoid prolonged overheating. Don’t let the power washer run continuously for excessively long periods without a break, especially in hot weather.
  • Use the correct accessories. Ensure you’re using nozzles and hoses rated for your machine’s pressure.

Reviewing The Manual

  • Your Ryobi power washer’s owner’s manual is an invaluable resource. It contains specific maintenance schedules, troubleshooting tips, and safety warnings tailored to your model. Keep it accessible.

Data Point: According to industry best practices, cleaning the inlet filter after every 5-10 hours of use can significantly extend the life of the pump and prevent common pressure-related issues.

Ryobi Power Washer Models And Potential Issues

Ryobi offers a diverse range of power washers, from compact electric units ideal for patios and cars to robust gas models designed for tough driveways and siding. While the fundamental principles of pressure loss apply across the board, certain model types might exhibit specific tendencies.

Electric Power Washers (e.g., Ryobi 1600 Psi, 1700 Psi, 2000 Psi)

These Models Are Generally Simpler In Design, Lacking An

Greenworks Pressure Washer Troubleshooting

Greenworks Pressure Washer Troubleshooting

Greenworks pressure washers are renowned for their power, reliability, and user-friendliness, making them a popular choice for homeowners tackling everything from muddy driveways to grimy patio furniture. However, like any piece of machinery, they can occasionally encounter issues. Understanding common Greenworks pressure washer problems and their solutions can save you time, money, and frustration.

This guide provides a comprehensive troubleshooting approach to get your Greenworks pressure washer back to peak performance.

When your Greenworks pressure washer isn’t performing as expected, it’s easy to feel overwhelmed. Whether it’s a lack of pressure, inconsistent spraying, or the engine refusing to start, a systematic approach is key. This article will equip you with the knowledge to diagnose and resolve a wide range of issues, empowering you to maintain your equipment effectively and extend its lifespan.

We’ll cover everything from simple checks to more complex fixes, ensuring you can confidently address most common problems.

Key Takeaways

  • Low Pressure: Often caused by clogged nozzles, kinked hoses, faulty inlet filters, or issues with the unloader valve.
  • No Water Output: Check for water supply issues, air in the system, blocked inlet filters, or a tripped GFCI (for electric models).
  • Engine Won’t Start (Gas Models): Common culprits include no fuel, stale fuel, spark plug issues, blocked fuel lines, or problems with the carburetor.
  • Pump Issues: Leaks, overheating, or strange noises can indicate problems with seals, valves, or the need for lubrication.
  • Hose Problems: Kinks, leaks, or damage to the high-pressure hose can significantly impact performance.
  • Electrical Issues (Electric Models): Tripped GFCI outlets, faulty power cords, or internal motor problems can halt operation.
  • Regular Maintenance: Proactive care, including cleaning filters, checking oil, and proper winterization, is crucial for preventing most issues.
Greenworks Pressure Washer Troubleshooting

Credit: www.youtube.com

Common Greenworks Pressure Washer Problems And Solutions

Troubleshooting your Greenworks pressure washer effectively begins with understanding the most frequent issues users encounter. These problems can range from minor inconveniences to significant operational failures. By systematically working through potential causes, you can often identify and resolve the issue without needing professional assistance.

Lack Of Pressure Or Weak Spray

One of the most common complaints is a noticeable drop in pressure or a weak, inconsistent spray. This can significantly hinder your cleaning tasks. Several factors can contribute to this problem.

Clogged Nozzle

The spray nozzle is the focal point for pressure. Over time, debris, mineral deposits, or hardened detergent can accumulate and restrict water flow, leading to reduced pressure.

  • Diagnosis: Visually inspect the nozzle tip for any visible blockages.
  • Solution:
  • Carefully remove the nozzle from the spray wand.
  • Use a thin wire, paperclip, or a specialized nozzle cleaning tool to dislodge any debris.
  • Flush the nozzle with clean water.
  • If deposits are stubborn, soak the nozzle in a vinegar and water solution for a few hours before cleaning.
  • Reattach the nozzle and test the pressure.

Kinked Or Damaged Hose

A kink in either the garden hose supplying water or the high-pressure hose can severely restrict water flow and pressure. Damage to the high-pressure hose can also lead to leaks, further reducing effective pressure.

  • Diagnosis: Inspect the entire length of both hoses for any sharp bends, kinks, or visible damage like cuts or abrasions.
  • Solution:
  • Straighten any kinks in the hoses. Ensure they are laid out properly before operation.
  • For damaged high-pressure hoses, replacement is usually necessary for safety and performance. Never attempt to repair a damaged high-pressure hose, as it can burst under pressure.

Clogged Inlet Water Filter

The inlet filter, typically located where the garden hose connects to the pressure washer, prevents debris from entering the pump. A clogged filter will restrict water flow into the pump, resulting in low pressure.

  • Diagnosis: Disconnect the garden hose from the pressure washer and remove the filter screen.
  • Solution:
  • Remove the filter screen.
  • Rinse it thoroughly under running water. Use a soft brush if necessary to remove stubborn debris.
  • Inspect the filter for any tears or damage. If damaged, replace it.
  • Reinsert the clean filter and reconnect the garden hose.

Issues With The Unloader Valve

The unloader valve regulates water flow and pressure within the system. If it’s faulty, stuck, or improperly adjusted, it can lead to low pressure or inconsistent output. This is a more complex component and may require professional attention if basic troubleshooting doesn’t resolve the issue.

  • Diagnosis: Listen for unusual sounds from the unloader valve area. Check the adjustment screw if your model allows for it, but proceed with caution.
  • Solution:
  • Consult your Greenworks pressure washer’s manual for specific instructions on the unloader valve.
  • Ensure it’s correctly adjusted according to the manufacturer’s specifications.
  • If it appears damaged or stuck, it may need to be replaced.

Air In The System

Trapped air in the pump or hoses can disrupt water flow and cause intermittent pressure loss.

  • Diagnosis: You might hear sputtering or see air bubbles in the water stream.
  • Solution:
  • Ensure the water supply is fully on.
  • With the engine running (or motor on for electric models) and the spray gun trigger pulled, let the water run for a minute or two to purge any air.
  • Ensure all connections are tight to prevent air from being drawn into the system.

No Water Output

If your Greenworks pressure washer isn’t producing any water at all, it’s a more critical issue that requires immediate attention.

Insufficient Water Supply

The pressure washer needs an adequate supply of water to operate. If the garden hose is not fully connected, kinked, or the water source pressure is too low, the pump may not be able to draw water.

  • Diagnosis: Check the water source. Is the tap fully open? Is the garden hose connected securely at both ends?
  • Solution:
  • Ensure the water tap is fully open.
  • Verify the garden hose is connected securely to both the tap and the pressure washer inlet.
  • Remove any kinks from the garden hose.
  • Check the water pressure from your tap; it should be at least [mention a typical minimum, e.g., 20 PSI] for optimal performance.

Tripped Gfci Outlet (electric Models)

For electric Greenworks pressure washers, a Ground Fault Circuit Interrupter (GFCI) outlet is a safety feature that will shut off power if it detects an imbalance in the electrical current.

  • Diagnosis: Check the GFCI outlet the pressure washer is plugged into. Look for a “reset” button.
  • Solution:
  • Press the “reset” button on the GFCI outlet.
  • If it trips again immediately, there might be an issue with the pressure washer’s electrical cord or internal components, or the GFCI outlet itself may be faulty. Try plugging into a different GFCI outlet.

Blocked Inlet Filter

As mentioned previously, a severely blocked inlet filter can prevent any water from reaching the pump.

  • Diagnosis: Disconnect the garden hose and inspect the inlet filter.
  • Solution: Thoroughly clean the inlet filter as described in the “Lack of Pressure” section.

Air Lock In The Pump

If the pump has run dry or been stored improperly, air can become trapped, preventing water intake.

  • Diagnosis: Listen for unusual noises or lack of water flow.
  • Solution:
  • Ensure the unit is connected to a water source and the tap is fully open.
  • With the spray gun trigger pulled, allow the water to run for several minutes to expel any trapped air.
  • For gas models, ensure the engine is running smoothly.

Engine Won’t Start (gas Models)

Gas-powered Greenworks pressure washers offer portability and power, but starting issues are common.

No Fuel Or Stale Fuel

The most basic reason an engine won’t start is a lack of fuel or the use of old, degraded gasoline. Gasoline can go stale in as little as 30 days, especially if it contains ethanol, which absorbs moisture.

  • Diagnosis: Check the fuel tank. Does it contain fresh gasoline?
  • Solution:
  • Fill the fuel tank with fresh, unleaded gasoline (check your manual for the correct octane rating).
  • If the fuel is old, drain the fuel tank and carburetor bowl and refill with fresh fuel. Dispose of old fuel responsibly.
  • Consider using a fuel stabilizer if the pressure washer will be stored for extended periods.

Spark Plug Issues

A dirty, fouled, or improperly gapped spark plug can prevent the engine from igniting the fuel-air mixture.

  • Diagnosis: Remove the spark plug and inspect it. Look for signs of carbon buildup, damage, or incorrect gap.
  • Solution:
  • Clean the spark plug with a wire brush.
  • If it appears damaged or excessively worn, replace it with a new one recommended by Greenworks.
  • Ensure the spark plug gap is set correctly according to your owner’s manual.
  • Ensure the spark plug wire is securely attached.

Blocked Fuel Lines Or Filter

Debris or sediment in the fuel system can prevent fuel from reaching the carburetor.

  • Diagnosis: Inspect the fuel lines for kinks or blockages. Check the inline fuel filter if your model has one.
  • Solution:
  • Clean or replace any clogged fuel filters.
  • If fuel lines appear blocked, they may need to be replaced.

Carburetor Problems

The carburetor is responsible for mixing fuel and air. If it’s dirty or malfunctioning, the engine won’t start or run properly.

  • Diagnosis: This is a more complex issue. Symptoms can include flooding, sputtering, or an inability to idle.
  • Solution:
  • Try cleaning the carburetor using a carburetor cleaner spray.
  • For persistent issues, the carburetor may need to be rebuilt or replaced. This often requires specialized knowledge, so consulting your manual or a professional is recommended.

Air Filter Blockage

A dirty air filter restricts airflow to the engine, affecting the fuel-air mixture and potentially preventing starting.

  • Diagnosis: Locate and inspect the air filter.
  • Solution:
  • Remove the air filter.
  • Clean it according to your manual’s instructions (some are washable, others need replacement).
  • If the filter is heavily soiled or damaged, replace it.

Pump Issues

The pump is the heart of the pressure washer. Problems here can be serious and often require immediate attention to prevent further damage.

Leaking Pump Seals

Worn or damaged seals within the pump can cause water to leak out, reducing pressure and potentially damaging the pump housing if run dry.

  • Diagnosis: Visually inspect the pump assembly for drips or puddles of water.
  • Solution: Leaking pump seals typically require pump disassembly and replacement of the seals. This is often a job best left to a qualified service technician.

Overheating Pump

Running the pressure washer without sufficient water supply or for extended periods without breaks can cause the pump to overheat. Many models have thermal relief valves that will shut off the pump if it gets too hot.

  • Diagnosis: The pump housing will feel excessively hot to the touch. You might notice a decrease in pressure or the unit shutting down.
  • Solution:
  • Immediately turn off the pressure washer and disconnect the water supply.
  • Allow the unit to cool down completely.
  • Ensure an adequate water supply is connected and flowing before restarting.
  • Avoid prolonged use without breaks.

Unusual Pump Noises

Grinding, rattling, or knocking sounds from the pump can indicate internal damage, lack of lubrication, or issues with the connecting rod or crankshaft.

  • Diagnosis: Listen carefully to the source and type of noise.
  • Solution:
  • Check the oil level in the pump (if applicable to your model). Low oil can cause significant damage. Top up or change the oil as per the manual.
  • Ensure the pump is properly connected to the engine/motor.
  • If the noise persists, it may indicate internal pump damage requiring professional repair or replacement.

Electrical Issues (electric Models)

Electric Greenworks pressure washers rely on a stable power source. Electrical faults can be hazardous and require careful handling.

Faulty Power Cord Or Extension Cord

A damaged power cord or an undersized or damaged extension cord can lead to power loss, intermittent operation, or electrical hazards.

  • Diagnosis: Inspect the power cord and any extension cords for cuts, fraying, or damage.
  • Solution:
  • Never use a damaged power cord or extension cord. Replace them immediately.
  • Ensure any extension cord used is rated for outdoor use and is of sufficient gauge (thickness) for the amperage draw of the pressure washer. A common recommendation is 12-gauge for lengths up to 50 feet.

Internal Motor Problems

If the GFCI is not tripping and the power supply is confirmed to be adequate, the issue might lie within the electric motor itself.

  • Diagnosis: The motor may hum but not spin, or simply show no signs of life.
  • Solution: Internal motor issues typically require professional diagnosis and repair or replacement of the motor unit.

Detergent System Not Working

Many Greenworks pressure washers come with a detergent tank or siphon hose for applying cleaning solutions. If it’s not dispensing detergent, it can be frustrating.

Clogged Detergent Filter Or Siphon Tube

Debris or dried detergent can clog the filter at the end of the siphon tube or the tube itself.

  • Diagnosis: Check the detergent tank and siphon tube for blockages.
  • Solution:
  • Remove the siphon tube from the detergent tank.
  • Clean the filter at the end of the tube.
  • Flush the tube with water.
  • Ensure the detergent setting on your pressure washer is correctly selected (often requires using a low-pressure nozzle).

Incorrect Nozzle Selection

Most pressure washers only draw detergent when set to a low-pressure setting, usually indicated by a specific nozzle (often black) or a “soap” setting.

  • Diagnosis: Check which nozzle is currently attached and the pressure washer’s setting.
  • Solution:
  • Ensure you are using the correct low-pressure nozzle or have selected the “soap” setting on your unit.
  • Refer to your owner’s manual for specific instructions on detergent application.
Greenworks Pressure Washer Troubleshooting

Credit: www.youtube.com

Routine Maintenance For Preventing Problems

Proactive maintenance is the most effective way to prevent many common Greenworks pressure washer issues. Regular checks and cleaning can significantly extend the life of your equipment and ensure reliable performance.

Cleaning Filters Regularly

The inlet water filter and air filter (on gas models) are critical components that require frequent cleaning.

  • Inlet Water Filter: Clean after every few uses, or more often if you use the pressure washer in dusty or dirty environments. A clogged filter is a primary cause of low pressure.
  • Air Filter (Gas Models): Clean or replace the air filter according to the schedule in your owner’s manual, typically every 25-50 operating hours. A dirty air filter starves the engine of air, impacting performance and potentially causing starting problems.

Checking And Changing Oil

For gas-powered models, the engine oil and pump oil (if separate) are vital for lubrication and cooling.

  • Engine Oil (Gas Models): Check the engine oil level before each use and top up as needed. Change the oil according to the manufacturer’s recommended intervals (often every 50-100 operating hours).
  • Pump Oil: Some pumps require oil. Check the level periodically and change it as recommended. Using the correct type of oil is crucial. Greenworks often recommends specific synthetic pump oils.

Inspecting Hoses And Connections

Before each use, quickly inspect the garden hose, high-pressure hose, and all connections.

  • Hoses: Look for kinks, cracks, abrasions, or bulges.
  • Connections: Ensure all fittings are tight and free from leaks. Tighten hose clamps or threaded connections as necessary.

Proper Winterization (gas Models)

If you live in a climate with freezing temperatures, proper winterization is essential to prevent damage to the pump and other components.

  • Procedure: This typically involves running antifreeze through the pump to prevent ice expansion. Always follow the specific winterization steps outlined in your Greenworks owner’s manual. This usually includes:
  • Draining all water from the system.
  • Running a non-toxic RV/marine antifreeze through the pump.
  • Storing the unit in a dry, protected area.

Storing The Unit Properly

When not in use, store your pressure washer in a clean, dry place. Protect it from extreme temperatures and direct sunlight. Ensure hoses are coiled loosely to prevent kinks.

Greenworks Pressure Washer Troubleshooting

Credit: www.youtube.com

Troubleshooting Table: Quick Reference

Here’s a quick reference table to help you diagnose common Greenworks pressure washer issues.

| Problem | Possible Cause(s) | Solution(s)

Liftmaster Garage Door Opener Light Not Working

Liftmaster Garage Door Opener Light Not Working

A Liftmaster garage door opener light is more than just a convenience; it’s a crucial safety feature, illuminating your path and deterring potential intruders. When this light suddenly stops working, it can be a perplexing and even frustrating issue. Beyond the immediate inconvenience, a malfunctioning light can signal deeper problems within your opener system. Understanding the common culprits and how to troubleshoot them is essential for maintaining your garage door opener’s functionality and ensuring your home’s security.

This comprehensive guide will walk you through the most frequent reasons why your Liftmaster garage door opener light might not be working. From simple fixes like a burnt-out bulb to more complex electrical issues, we’ll cover the diagnostic steps and potential solutions.

We aim to empower you with the knowledge to tackle this problem head-on, saving you time, money, and unnecessary service calls.

Key Takeaways

  • Bulb Issues: The most common cause is a burnt-out or incompatible light bulb. Always check the bulb first and ensure it’s rated for garage door openers.
  • Power Supply Problems: Verify that the opener unit is receiving power by checking the circuit breaker and outlet.
  • Logic Board Faults: A malfunctioning logic board can prevent the light from activating, often requiring professional diagnosis.
  • Travel Limit Settings: Incorrectly set travel limits can sometimes interfere with the light’s operation.
  • Remote Control or Wall Button Issues: While less common for the light specifically, faulty remotes or buttons can sometimes affect overall opener function.
  • Wiring Connections: Loose or damaged wiring within the opener unit can lead to intermittent or complete light failure.
  • Obstruction Sensors: Although primarily for door movement, a fault in the safety sensors can, in rare cases, impact accessory functions.
Liftmaster Garage Door Opener Light Not Working

Credit: www.youtube.com

Troubleshooting A Non-working Liftmaster Garage Door Opener Light

When the light on your Liftmaster garage door opener fails to illuminate, it’s natural to feel a bit in the dark, quite literally. This issue can stem from a variety of sources, ranging from the incredibly simple to the more complex.

Before calling a technician, a systematic approach to troubleshooting can often pinpoint the problem and, in many cases, lead to a quick and easy fix. We’ll explore the most probable causes, starting with the easiest to check and progressing to those that might require a bit more attention.

Checking The Light Bulb And Socket

The simplest explanation is often the correct one. The light bulb in your garage door opener is subject to vibrations and heat, making it susceptible to burning out over time, much like any other light bulb in your home.

  • Inspect the Bulb: Visually examine the bulb. If the filament is broken or the glass appears blackened or scorched, the bulb has likely failed.
  • Test with a New Bulb: Replace the old bulb with a new one. Crucially, ensure the new bulb is specifically designed for garage door openers. Standard incandescent bulbs can overheat and potentially damage the opener’s housing or circuitry. LED bulbs are a popular and energy-efficient alternative, but verify they are rated for the opener’s voltage and wattage and are designed to withstand vibrations. The maximum wattage is typically 100 watts for incandescent or the equivalent for LED. Always consult your Liftmaster manual for specific recommendations.
  • Check the Socket: Sometimes, the issue isn’t the bulb itself but the connection within the socket. Look for any signs of corrosion, bent metal contacts, or debris inside the socket. If you see corrosion, you can try gently cleaning it with a pencil eraser or a small wire brush. Be sure to disconnect power to the opener before attempting any cleaning or inspection inside the socket.

Verifying Power To The Opener Unit

If a new bulb doesn’t resolve the issue, the next step is to ensure the opener unit itself is receiving adequate power. A lack of power will prevent any of its functions, including the light, from working.

  • Check the Circuit Breaker: Locate your home’s electrical panel and find the breaker that controls the garage door opener. If it’s tripped (usually in the middle position or fully off), reset it by pushing it firmly to the “off” position and then back to “on.” If the breaker trips again immediately, there’s an underlying electrical problem that requires professional attention.
  • Test the Outlet: If the breaker is fine, test the outlet the opener is plugged into. Use a known working lamp or a voltage tester to confirm that the outlet is supplying power. If the outlet is dead, the problem might be with the outlet itself, the wiring leading to it, or another tripped breaker further down the line.
  • Inspect the Power Cord: Ensure the opener’s power cord is not damaged, frayed, or kinked. A damaged cord can interrupt the flow of electricity.

Understanding Logic Board And Internal Wiring

The logic board is the brain of your garage door opener. It controls all its functions, including the light. If the logic board is faulty, it can cause a wide range of issues, including a non-working light.

  • Signs of a Faulty Logic Board: Sometimes, a failing logic board will exhibit other symptoms, such as erratic behavior, failure to respond to remotes, or diagnostic error codes (often indicated by flashing LEDs on the unit).
  • Wiring Connections: Inside the opener unit, various wires connect the components, including the light socket, the logic board, and the power source. Over time, these connections can become loose due to vibrations or might corrode. If you’re comfortable and have disconnected power, you can open the opener’s casing (refer to your manual for instructions) and visually inspect the wiring. Look for any wires that appear loose, disconnected, or damaged.
  • Professional Diagnosis: Diagnosing and replacing a logic board is typically a job for a qualified technician. They have the tools and expertise to test the board and ensure correct installation. Attempting to repair or replace it yourself without the proper knowledge can lead to further damage or safety hazards.

Travel Limit Settings And Light Behavior

While seemingly unrelated, the travel limit settings can sometimes influence the opener’s light behavior, particularly if they are improperly configured. Travel limits tell the opener when to stop moving the door upwards or downwards.

  • How Limits Affect Lights: Some Liftmaster models have a feature where the light automatically turns on when the door is in motion and turns off after a set period or when the door is fully closed. If the travel limits are misadjusted, the opener might not be correctly registering the door’s position, which could inadvertently affect the light’s timing or activation.
  • Resetting Limits: Consult your Liftmaster manual for specific instructions on how to adjust your model’s travel limits. Typically, this involves using buttons or adjustment screws on the motor unit. It’s a process that requires careful attention to detail to ensure the door operates safely and efficiently. If you’re unsure, it’s best to have a professional do this.

Safety Sensors And Their Impact

The safety sensors are vital for preventing the garage door from closing on an obstruction. While their primary function relates to door movement, a fault in these components can sometimes create unexpected issues with other opener functions.

  • Sensor Alignment: Ensure the safety sensors, located near the bottom of the garage door tracks, are clean, unobstructed, and properly aligned. A misalignment or blockage can cause the opener to behave erratically. Many openers have an LED indicator on each sensor; typically, one is solid, and the other blinks, or both are solid when aligned correctly.
  • Faulty Sensors: If the sensors are damaged or malfunctioning, they can send incorrect signals to the logic board, potentially affecting the opener’s overall operation, including accessory functions like the light. If you suspect a sensor issue, try cleaning them and checking their alignment. If the problem persists, they may need to be replaced.
Liftmaster Garage Door Opener Light Not Working

Credit: www.youtube.com

Advanced Troubleshooting And Potential Solutions

When the basic troubleshooting steps haven’t resolved the issue of a non-working Liftmaster garage door opener light, it’s time to delve into more advanced possibilities. These might involve specific features of your opener model, or issues that require a deeper understanding of its electrical components.

Understanding Opener Codes And Diagnostic Leds

Modern garage door openers, including many Liftmaster models, come equipped with diagnostic features that can help pinpoint problems. These often involve flashing LEDs on the motor unit that correspond to specific error codes.

  • Consult Your Manual: The most crucial step here is to refer to your specific Liftmaster model’s owner’s manual. It will contain a detailed list of diagnostic codes and what they signify. For instance, a certain number of flashes might indicate a problem with the logic board, a remote control signal, or even a power supply issue.
  • Interpreting Flashes: For example, if your opener flashes a specific sequence of lights, and your manual states this indicates a “logic board failure,” you know the issue lies with that component. If it indicates a “remote control issue,” you might focus on reprogramming or replacing your remote.
  • Common Codes: While specific codes vary by model, common patterns often relate to:
  • Power issues: Intermittent power loss.
  • Logic board errors: Internal component failure.
  • Remote control interference: Signal problems.
  • Safety sensor faults: Obstruction or misalignment.

Investigating Remote Control And Wall Button Functionality

While the light is an independent feature on many openers, the primary controls, the remote and the wall-mounted button, interface with the logic board. If these controls are malfunctioning, it could indirectly affect the light’s operation, especially if the light is programmed to activate with door movement initiated by these controls.

  • Test the Remote:
  • Battery: The simplest cause for a non-functional remote is a dead battery. Replace it with a fresh one, ensuring correct polarity.
  • Range: Try operating the opener from closer distances. If it works up close but not far away, the remote battery might be weak or there could be interference.
  • Reprogramming: If the remote seems unresponsive, try reprogramming it to the opener. Your manual will provide specific instructions for this process, which usually involves pressing a “learn” button on the motor unit.
  • Test the Wall Button:
  • Direct Activation: Press the wall-mounted button. If the door operates normally from the wall button but not the remote, the issue is likely with the remote or its reception.
  • Wiring: If the wall button itself doesn’t work, check the low-voltage wiring that connects it to the motor unit. Ensure the connections are secure at both the button and the opener. Look for any damage or breaks in the wire.

The Role Of The Receiver Logic Board

The receiver logic board is central to the opener’s operation. It processes signals from remotes and wall buttons and controls the motor, the light, and safety features. Issues with the logic board are often the most complex to diagnose and resolve.

  • Power Surges and Age: Logic boards can fail due to power surges, electrical shorts, or simply wear and tear over time. Components on the board can burn out, leading to a complete or partial loss of functionality.
  • Intermittent Issues: A failing logic board can cause intermittent problems. The light might work sometimes but not others, or the opener might behave erratically.
  • Professional Assessment: Unless you have significant experience with electronics and electrical systems, attempting to repair a logic board is not recommended. A qualified garage door technician can test the board, identify faulty components (though often replacement is more cost-effective), and install a new one safely.

Specific Liftmaster Features Affecting Lighting

Liftmaster offers various models with advanced features, some of which can influence how the light operates. Understanding these can be key to troubleshooting.

  • MyQ Technology: If your Liftmaster has MyQ technology, it allows for remote monitoring and control via a smartphone app. While primarily for door operation, the connectivity and associated app settings could, in rare instances, interact with accessory functions. Ensure your MyQ app is updated and that there are no unusual notifications or settings preventing the light from functioning.
  • Adjustable Light Settings: Some Liftmaster openers allow you to adjust the duration the light stays on. While this usually affects how long the light stays on *after* activation, an unusual setting or glitch in this feature could potentially lead to the light not turning on at all. Refer to your manual to check and reset these timer settings.
  • “Vacation Lock” or “Lockout” Mode: Many openers have a “lock” or “vacation” mode that disables remotes to enhance security when you’re away. If this mode is accidentally engaged, it might prevent remotes from activating the opener, and consequently, the light. Check your unit for a lock indicator or consult your manual on how to disable this mode.
Liftmaster Garage Door Opener Light Not Working

Credit: www.youtube.com

When To Call A Professional

While many garage door opener light issues can be resolved with basic DIY troubleshooting, some problems clearly indicate the need for professional assistance. Pushing your knowledge or skills beyond their limits can lead to further damage, void warranties, or create safety hazards.

Electrical Hazards

Working with electrical systems always carries inherent risks. Garage door openers are connected to your home’s main power supply, and improper handling can result in electric shock or fire.

  • Signs of Electrical Issues: If you notice burning smells, sparks, or if the circuit breaker repeatedly trips, do not attempt further DIY repairs. These are clear indicators of a serious electrical problem that requires the expertise of a qualified electrician or garage door technician.
  • Internal Wiring: While visual inspection of accessible wiring might be feasible, delving deep into the opener’s internal electrical components or the wiring within your garage walls should be left to professionals. They have the specialized tools and knowledge to work safely and effectively.

Logic Board And Motor Replacement

As discussed, the logic board is a complex electronic component. If diagnostics point to a faulty logic board or if the motor unit itself appears damaged or is making unusual noises, these are tasks best left to professionals.

  • Complexity of Repair: Replacing a logic board or motor involves precise electrical connections and potentially mechanical adjustments. Incorrect installation can lead to the opener malfunctioning, failing to operate safely, or even causing damage to the garage door itself.
  • Warranty Considerations: For openers still under warranty, attempting unauthorized repairs can void the warranty. A professional technician will be aware of warranty requirements and ensure any work performed aligns with them.

Safety And Mechanical Issues

Beyond electrical concerns, issues with the opener’s mechanical components or safety systems should be handled by experts.

  • Door Balance: If you suspect the garage door itself is unbalanced (i.e., it’s difficult to lift manually), this is a serious safety concern. An unbalanced door puts excessive strain on the opener and can lead to catastrophic failure. Never attempt to adjust garage door springs yourself, as they are under extreme tension and can cause severe injury.
  • Sensor Malfunctions: While you can check and clean safety sensors, persistent malfunctions or damage to these units often require professional diagnosis and replacement. These sensors are critical for preventing accidents.

When Diy Becomes Too Risky

In general, if at any point during your troubleshooting you feel uncomfortable, unsure, or unsafe, it’s time to stop and call a professional. The cost of a service call is often far less than the potential cost of repairing extensive damage or dealing with an injury caused by attempting a repair beyond your skill level. Reputable garage door service companies have trained technicians who can diagnose and fix the problem efficiently and safely.

Preventative Maintenance For Your Liftmaster Opener

Regular maintenance is key to ensuring the longevity and reliable operation of your Liftmaster garage door opener, including its lighting system. By performing simple checks and tasks periodically, you can often prevent minor issues from escalating into major problems.

Regular Bulb Checks And Replacements

As the most common culprit, the light bulb deserves regular attention.

  • Scheduled Inspection: Make it a habit to check the light bulb every few months. If it looks dim or you notice any flickering, it’s likely nearing the end of its lifespan.
  • Use Appropriate Bulbs: Always use bulbs specifically rated for garage door openers. These are designed to withstand vibrations and temperature fluctuations better than standard household bulbs. LED versions are highly recommended for their durability and energy efficiency. Check your manual for the maximum wattage and type allowed.

Cleaning And Inspecting Safety Sensors

The safety sensors are critical for preventing accidents and ensuring smooth operation.

  • Monthly Cleaning: Wipe down the lenses of the safety sensors with a soft, dry cloth at least once a month. Dust, cobwebs, or smudges can interfere with their alignment and function.
  • Alignment Checks: Periodically (every few months), check that the sensors are properly aligned. Most sensors have indicator lights that show their status. If the lights are not steady or indicate a misalignment, gently adjust them until they are correctly positioned.

Lubrication And General Opener Maintenance

Proper lubrication and general upkeep of the entire garage door system contribute to the opener’s overall health.

  • Lubricate Moving Parts: Apply a silicone-based lubricant or white lithium grease to the moving parts of the garage door itself, the hinges, rollers, and tracks, about twice a year. This reduces friction and strain on the opener motor. Do not lubricate the opener’s chain or screw drive unless specified by the manual, as this can attract dirt and debris.
  • Check Door Balance: Once or twice a year, test your door’s balance. Disengage the opener using the emergency release cord and try to lift the door manually. It should stay open midway without requiring excessive force or slamming shut. If it doesn’t, the spring system may need adjustment by a professional.
  • Inspect Drive Mechanism: Check the opener’s chain, belt, or screw drive for any signs of wear, damage, or excessive looseness. Ensure the chain or belt is properly tensioned according to your manual’s recommendations.

Electrical Connections And Power Source

While you shouldn’t tamper with internal wiring, you can perform basic checks on the power source.

  • Outlet and Cord Inspection: Regularly inspect the electrical outlet and the opener’s power cord for any signs of damage, fraying, or loose connections. Ensure the outlet is functioning correctly by plugging in another device.
  • Circuit Breaker Awareness: Be mindful of your circuit breaker. If it trips frequently, it indicates an electrical issue that needs professional attention rather than just resetting it repeatedly.

By incorporating these simple preventative maintenance steps into your routine, you can significantly reduce the likelihood of encountering problems like a non-working light and ensure your Liftmaster garage door opener performs reliably for years to come.

Frequently Asked Questions

Why Does My Liftmaster Garage Door Opener Light Flash But Not Turn On?

Flashing lights on a Liftmaster opener often indicate a diagnostic code. If the light flashes but doesn’t illuminate, it could signal a problem with the light bulb itself (even if new, it might be incompatible or faulty), a loose connection in the light socket, or an issue with the logic board that prevents it from sending power to the light.

Consult your owner’s manual for the specific meaning of the flashing pattern.

Can I Use A Regular Led Bulb In My Liftmaster Opener?

While many standard LED bulbs might fit, it’s crucial to use LED bulbs specifically designed for garage door openers. These are built to withstand vibrations and operate within the temperature range expected in an opener unit. Regular LEDs may not last as long or could potentially cause issues.

Always check your Liftmaster manual for recommended bulb specifications, including maximum wattage and type.

How Long Should The Garage Door Opener Light Stay On?

The duration the light stays on is typically adjustable on most Liftmaster models. The default setting is often around 4. 5 minutes, but many openers allow you to set this from a few seconds up to 20 minutes, or even continuously on some models.

You can usually adjust this setting via buttons or dip switches on the motor unit itself. Refer to your specific model’s manual for instructions on how to change the light timer settings.

What Does It Mean If My Liftmaster Opener Light Turns On By Itself?

If the light activates spontaneously without any command, it could be due to a few reasons. It might be a delayed timer setting that is about to expire, a faulty remote control that is sending a signal intermittently, interference from another device, or a problem with the opener’s logic board.

Sometimes, a power surge can also trigger unexpected behavior. Check for any active timer settings and consider reprogramming your remotes. If the issue persists, it may require professional diagnosis.

My Liftmaster Opener Light Works, But The Door Doesn’t. What’s Wrong?

This indicates that the opener unit is receiving power and its lighting circuit is functional, but there’s a separate issue preventing the door from moving. Common causes include a disengaged emergency release cord, a problem with the trolley or drive mechanism, a malfunctioning safety sensor that’s preventing closure, or an issue with the motor itself.

The flashing diagnostic lights on the unit can often provide clues to the specific problem.

When your Liftmaster garage door opener light falters, it’s a signal that warrants attention. While a simple burnt-out bulb is the most frequent culprit, a systematic approach to troubleshooting can reveal underlying issues that affect not just the illumination but potentially the entire functionality and safety of your garage door system.

By understanding the common causes, from power supply and bulb compatibility to logic board integrity and sensor alignment, you can effectively diagnose and, in many cases, resolve the problem. Remember to always prioritize safety, disconnect power when necessary, and consult your owner’s manual for model-specific guidance.

For complex electrical or mechanical issues, engaging a professional garage door technician ensures the problem is fixed correctly and safely, maintaining the security and convenience of your home.

Sun Joe Pressure Washer Wont Turn On

Sun Joe Pressure Washer Wont Turn On

When your trusty Sun Joe pressure washer refuses to power on, it can bring your weekend cleaning projects to an abrupt halt. Whether you’re tackling stubborn grime on your driveway, washing down your deck, or giving your car a thorough clean, a pressure washer that won’t start is a frustrating problem. Fortunately, most of the reasons behind this issue are relatively common and often fixable with a bit of troubleshooting. From simple electrical checks to more involved component inspections, understanding the potential culprits can save you time, money, and the hassle of a repair shop visit.

This comprehensive guide will walk you through the most frequent reasons why your Sun Joe pressure washer might not be turning on. We’ll cover everything from power supply issues and water flow problems to internal electrical faults and safety feature activations.

By systematically addressing each possibility, you’ll be well-equipped to diagnose the problem and get your Sun Joe back in action, restoring your cleaning power.

Key Takeaways

  • Power Supply is Paramount: Ensure the power cord is securely plugged into a working outlet and that the GFCI outlet hasn’t tripped. Check your circuit breaker.
  • Water is Essential: Verify the water supply hose is connected properly and the water source is turned on and providing adequate flow.
  • Safety First: Understand that safety features like the trigger lock and thermal overload protector can prevent operation if not disengaged or reset.
  • Internal Components: Issues with the on/off switch, capacitor, or motor can prevent the unit from starting and may require professional attention.
  • Maintenance Matters: Regular cleaning of the filter and proper storage can prevent many common startup problems.

Power Supply Issues: The Most Common Culprits

The most frequent reason a Sun Joe pressure washer won’t turn on is a problem with its power source. Before diving into more complex diagnostics, it’s crucial to rule out any issues related to electricity. This involves a systematic check of the power cord, the outlet, and the circuit breaker.

Checking The Power Cord And Connections

Your Sun Joe pressure washer relies on a continuous and stable flow of electricity. A damaged or improperly connected power cord can easily prevent the unit from receiving power.

  • Inspect for Damage: Carefully examine the entire length of the power cord for any signs of wear and tear. Look for cuts, nicks, fraying, or exposed wires. If you find any damage, do not use the pressure washer. The cord will need to be replaced, which is often a job for a qualified technician or can be done by ordering a specific replacement part from Sun Joe.
  • Secure Connection: Ensure the power plug is firmly and completely inserted into the electrical outlet. Sometimes, a loose connection is all it takes to interrupt the power flow.
  • Extension Cord Usage: If you are using an extension cord, ensure it is rated for outdoor use and is of the appropriate gauge for your pressure washer’s power requirements. Undersized or damaged extension cords can cause voltage drops, preventing the motor from starting or even damaging it. Sun Joe generally recommends avoiding extension cords if possible, but if one is necessary, use the shortest, heaviest-gauge cord available that meets the requirements.

Understanding Gfci Outlets And Circuit Breakers

Many modern homes, especially those with outdoor outlets, are equipped with Ground Fault Circuit Interrupter (GFCI) outlets. These outlets are designed to protect users from electric shock by cutting power if they detect an imbalance in the electrical current.

  • GFCI Tripping: Pressure washers, particularly electric models, can sometimes cause a GFCI outlet to trip due to their power draw or minor electrical fluctuations. Look for the ‘Test’ and ‘Reset’ buttons on the outlet. If the outlet has tripped, press the ‘Reset’ button firmly. If it trips again immediately, there might be an issue with the outlet itself, the pressure washer, or the circuit it’s connected to. You may need to try a different GFCI outlet or a standard outlet if available.
  • Circuit Breaker Check: Your home’s circuit breaker panel controls the power supply to different areas of your house. If the breaker connected to the outlet you’re using has tripped, the pressure washer will not receive power. Locate your breaker panel and check if the breaker is in the ‘off’ position or in a middle ‘tripped’ position. If it’s tripped, switch it fully to the ‘off’ position and then back to the ‘on’ position to reset it. If the breaker trips repeatedly, it indicates an overload or a short circuit, and you should consult an electrician.

Testing The Outlet

To definitively rule out the outlet as the problem, you can test it with another appliance.

  • Use a Known Working Device: Plug a different electrical device, such as a lamp or a small fan, into the same outlet. If the other device also fails to power on, the issue is with the outlet or the circuit. If the other device works, then the problem likely lies with your Sun Joe pressure washer itself.

Water Supply And Flow Issues

A pressure washer needs a consistent and sufficient supply of water to operate correctly. If the water flow is restricted or the source is inadequate, the pump can be damaged, or the unit may refuse to start as a safety precaution.

Verifying The Water Source And Hose Connection

The initial connection of water to your pressure washer is critical.

  • Turn on the Water Source: Ensure the faucet or spigot connected to your garden hose is fully turned on. Sometimes, a partially open valve is not enough to provide the necessary flow.
  • Secure Hose Connection: Check that the garden hose is securely attached to both the faucet and the water inlet on the pressure washer. Loose connections can lead to leaks and insufficient water pressure reaching the pump.
  • Hose Kinks and Obstructions: Straighten out the garden hose to ensure there are no kinks or bends that could restrict water flow. Also, check the hose for any internal blockages.

Understanding Minimum Water Requirements

Sun Joe pressure washers, like all pressure washers, have specific water flow requirements to operate safely and efficiently.

  • Flow Rate: Most Sun Joe electric models require a minimum water flow rate of around 1.5 to 2.0 gallons per minute (GPM). If your home’s water pressure is low, or if you’re using a very long or narrow garden hose, you might not be meeting this requirement.
  • Water Pressure: While flow rate is crucial, adequate water pressure from your source is also important. A typical home water pressure of 40-60 PSI is usually sufficient, but this can vary. You can measure your home’s water pressure using a simple gauge that attaches to a faucet.
  • The “Dry Start” Problem: Running a pressure washer without sufficient water can quickly damage the pump. Many Sun Joe models have internal mechanisms or rely on the user to prime the pump, which involves allowing water to flow through the system *before* turning on the power. Attempting to start the unit while it’s “dry” can trigger safety features or cause immediate damage.

Checking The Water Inlet Filter

The water inlet filter is a small mesh screen located where the garden hose connects to the pressure washer. Its purpose is to prevent debris from entering the pump and causing damage. A clogged filter can severely restrict water flow.

  • Locate and Remove: Disconnect the garden hose from the pressure washer. You should see the filter screen inside the inlet port. Some models may require you to unscrew a fitting to access it.
  • Clean the Filter: Gently remove the filter screen and rinse it thoroughly under running water. Use a soft brush to remove any stubborn debris or sediment.
  • Inspect for Damage: While cleaning, check the filter for any tears or holes. A damaged filter won’t effectively protect the pump.
  • Reinstall: Once clean and dry, carefully reinsert the filter into the inlet port and reattach the garden hose.

Safety Features And User Error

Sun Joe pressure washers are equipped with various safety features designed to protect both the user and the machine. Sometimes, these features can be the reason the unit won’t turn on, especially if they are engaged or activated.

The Trigger Lock Mechanism

Most pressure washers have a trigger lock on the spray gun handle. This is a safety feature to prevent accidental spraying when the unit is on.

  • Engagement: The trigger lock is usually a small plastic tab or lever located near the trigger. Ensure this lock is disengaged before attempting to start the pressure washer. If it’s engaged, the trigger cannot be pulled, and the machine will not operate.
  • Stuck Trigger Lock: In rare cases, the trigger lock mechanism might become jammed or stuck. Gently try to wiggle it free. If it’s severely stuck, it might require some lubrication or professional attention.

Thermal Overload Protector

Electric pressure washers generate heat, especially during operation. To prevent the motor from overheating and sustaining damage, many models include a thermal overload protector.

  • How it Works: This is an internal safety device that automatically shuts off the motor if it detects excessive heat. This can happen if the unit is run for too long without a break, if the air vents are blocked, or if there’s an issue causing the motor to work harder than usual.
  • Resetting the Protector: If the thermal overload protector has tripped, the pressure washer will stop working. Once the motor cools down sufficiently (this can take 15-30 minutes or longer), the protector usually resets automatically, allowing the unit to start again. Ensure the pressure washer is in a well-ventilated area and that the air vents are clear of debris when you resume operation. If it trips frequently, there’s likely an underlying issue causing overheating.

Priming The Pump

As mentioned earlier, many pressure washers require a process called priming before the first use or after the unit has been stored for a while. Priming ensures the pump is filled with water, which is essential for lubrication and operation.

  • The Priming Process:
  • Connect the garden hose to the water source and the pressure washer, ensuring the water source is turned on.
  • Connect the high-pressure hose and spray gun.
  • Do not plug in the power cord yet.
  • Squeeze the trigger on the spray gun. You should see water start to spray out, expelling any air from the system.
  • Continue holding the trigger until a steady stream of water flows without sputtering. This process might take 30 seconds to a minute.
  • Once primed, release the trigger, then plug in the power cord and turn on the pressure washer.
  • Skipping Priming: Failing to prime the pump can lead to the unit not starting, or worse, damage to the pump from running dry.
Sun Joe Pressure Washer Wont Turn On

Credit: www.youtube.com

Internal Electrical And Mechanical Faults

If you’ve exhausted all the external checks for power and water supply, the problem might lie within the pressure washer’s internal components. These issues often require more technical knowledge to diagnose and repair.

Faulty On/off Switch

The on/off switch is the primary control for powering the unit. If this switch malfunctions, the motor will not receive the signal to start.

  • Testing the Switch: This can be tricky without the right tools. If you suspect the switch, you might need to access the internal wiring. A multimeter can be used to test for continuity when the switch is in the ‘on’ position. If there’s no continuity, the switch is likely faulty and needs replacement.
  • Visual Inspection: Sometimes, the switch might appear physically damaged or loose.

Issues With The Motor Or Capacitor

The electric motor is the heart of your Sun Joe pressure washer. Problems with the motor itself or its starting components, like the capacitor, can prevent it from turning on.

  • Capacitor Failure: Many electric motors use a start capacitor to provide the initial jolt of energy needed to get the motor spinning. If the capacitor fails, the motor might hum or make a noise but won’t turn, or it may not do anything at all. Capacitors store electrical energy and can be dangerous if handled improperly. Replacement of a capacitor should only be done by someone with electrical experience.
  • Motor Windings: Less commonly, the motor windings themselves could be damaged or burnt out. This is a more serious issue and often means the motor needs to be replaced, which can be costly. Signs of a burnt-out motor might include a burning smell or visible scorch marks.

Pump Issues

While less likely to cause a complete “no power” situation, severe internal pump problems can sometimes prevent the motor from engaging properly, especially if the pump is seized.

  • Seized Pump: If the pump has been damaged by running dry, freezing, or debris, it might seize up. This puts an immense strain on the motor, which might trigger overload protection or prevent it from starting at all. You might notice extreme resistance if you try to turn the motor shaft by hand (with the unit unplugged, of course).

Maintenance And Storage Related Problems

Proper maintenance and storage are crucial for the longevity of any appliance, and pressure washers are no exception. Neglecting these aspects can lead to various issues, including startup problems.

Clogged Nozzles And Wands

While a clogged nozzle or wand won’t directly prevent the unit from *turning on*, it can cause a significant drop in pressure and, in some cases, lead to the unit shutting off prematurely due to back-pressure or overheating if the pump is struggling.

  • Cleaning: Regularly remove and clean the nozzle tips and the spray wand. Use a nozzle cleaning tool or a thin piece of wire to clear any debris. Flush them with water.
  • Impact on Startup: If the obstruction is severe enough, the pump might not be able to build pressure, potentially triggering safety cut-offs on some models or making it seem like the unit isn’t working correctly.

Freezing Damage

If your Sun Joe pressure washer is stored in an area that drops below freezing temperatures without being properly winterized, water left inside the pump and hoses can freeze and expand, causing significant damage.

  • Winterization: Before storing your pressure washer for the winter, it’s essential to drain all water from the system. This typically involves disconnecting hoses, running the unit briefly to expel remaining water, and sometimes using a pump saver solution.
  • Recognizing Damage: If you suspect freezing damage, you might see cracks in the pump housing or other components. This type of damage often requires professional repair or replacement of the affected parts.

General Wear And Tear

Like any mechanical device, components within your Sun Joe pressure washer can wear out over time.

  • Age of the Unit: An older pressure washer may experience failures simply due to the age of its electrical components, seals, or motor.
  • Usage Intensity: Frequent, heavy use will naturally lead to wear and tear faster than occasional light use.

Troubleshooting Steps: A Systematic Approach

When your Sun Joe pressure washer won’t turn on, following a structured troubleshooting process is key to identifying and resolving the issue efficiently.

Step 1: Initial Checks (power & Water)

This is where you start, as these are the most common and easiest issues to fix.

  • Power Source:
  • Is the power cord securely plugged into the outlet?
  • Is the outlet working? Test with another appliance.
  • Has the GFCI outlet tripped? Press the reset button.
  • Has the circuit breaker tripped? Reset it.
  • If using an extension cord, is it rated correctly and in good condition? Try plugging directly into the outlet if possible.
  • Water Source:
  • Is the faucet fully turned on?
  • Is the garden hose securely connected to the faucet and the pressure washer inlet?
  • Are there any kinks in the garden hose?
  • Is the water inlet filter clean?

Step 2: Engage Safety Features And Prime

Once you’ve confirmed basic power and water, check operational prerequisites.

  • Trigger Lock: Ensure the trigger lock on the spray gun is disengaged.
  • Prime the Pump: Follow the correct priming procedure for your Sun Joe model. Hold the trigger down until a steady stream of water emerges *before* plugging in the power.

Step 3: Listen And Observe

When you attempt to power on the unit (after completing the above steps), pay close attention to any sounds or visual cues.

  • Humming Sound: If you hear a humming sound but the motor doesn’t spin, it could indicate a faulty start capacitor or a seized motor/pump.
  • No Sound at All: If there’s absolutely no sound, it strongly suggests a power supply issue (cord, outlet, breaker, switch) or a completely dead motor.
  • Clicking Sound: A clicking sound might indicate a relay engaging or a safety switch trying to activate.
  • Burning Smell: This is a serious sign of an overheating motor or electrical short. Unplug the unit immediately.
Step 4: Check Overload Protector

If the unit worked previously but stopped, it might have tripped the thermal overload protector.

  • Cool Down: Unplug the unit and let it cool down for at least 30 minutes. Ensure it’s in a well-ventilated area.
  • Attempt Restart: After cooling, try turning it on again. If it trips again quickly, there’s an underlying issue causing overheating.

Step 5: Internal Component Checks (use Caution)

Warning: Proceed with these steps only if you are comfortable working with electrical components and have the necessary tools. Always unplug the pressure washer before opening any housing.

  • On/Off Switch: Use a multimeter to test the continuity of the switch.
  • Capacitor: Visually inspect the capacitor for any signs of bulging or leaking. Testing requires specialized knowledge.
  • Motor: Look for any obvious signs of damage or burnt wires.

Step 6: Consult The Manual And Support

Every Sun Joe pressure washer comes with an owner’s manual. This manual is an invaluable resource for specific troubleshooting steps tailored to your model.

  • Owner’s Manual: Refer to the troubleshooting section of your manual. It often lists common problems and solutions.
  • Sun Joe Support: If you cannot resolve the issue, contact Sun Joe customer support. They can provide further guidance, help diagnose the problem, and advise on repair or replacement options. You can often find support contact information on their official website. For example, their support page can be found at Sun Joe Support.

When To Call A Professional

While many Sun Joe pressure washer startup issues are user-fixable, some problems indicate a more significant internal fault that requires expert attention. Knowing when to hand over the reins can save you from further damage and potential injury.

Complex Electrical Issues

If you suspect a problem with the motor windings, internal wiring harness, or the main control board (if applicable to your model), it’s best to leave it to a professional. These components are critical to the unit’s operation, and incorrect manipulation can lead to severe damage or electrical hazards.

A qualified appliance repair technician or an authorized Sun Joe service center will have the diagnostic tools and expertise to handle these repairs safely.

Pump Damage Or Seizure

A seized pump is a serious mechanical issue. If the pump has been damaged by freezing, running dry for too long, or internal component failure, it can be extremely difficult and costly to repair. In many cases, replacing the entire pump assembly or even the whole unit might be more cost-effective than attempting a complex pump repair.

A professional can assess the extent of the damage and provide a realistic estimate for repair versus replacement.

Repeated Tripping Of Breakers Or Gfci

If the circuit breaker for your outlet trips repeatedly, or if a GFCI outlet consistently trips when you plug in the pressure washer, it indicates a persistent electrical fault. This could be a short circuit within the pressure washer, an issue with the power cord, or even a problem with the home’s wiring. It’s crucial to have an electrician diagnose and fix such issues to prevent fire hazards and ensure electrical safety.

Uncertainty And Safety Concerns

Ultimately, if you are ever unsure about diagnosing or repairing a problem, or if you feel uncomfortable working with electrical components or pressurized water systems, it is always safest to seek professional help. Safety should always be your top priority when working with high-pressure equipment.

Frequently Asked Questions

Why Does My Sun Joe Pressure Washer Make A Humming Noise But Won’t Start?

A humming noise without the motor spinning typically indicates that the motor is receiving power but is unable to start rotating. This is often caused by a faulty start capacitor, which provides the initial boost needed to get the motor turning. Less commonly, it could be due to a seized pump or a problem with the motor windings. If you suspect a capacitor issue, it’s best to have it diagnosed and replaced by a qualified technician, as capacitors can store a dangerous electrical charge.

Can I Use A Regular Extension Cord With My Sun Joe Electric Pressure Washer?

No, it is generally not recommended to use a regular or undersized extension cord with an electric pressure washer. Pressure washers draw a significant amount of power, and undersized cords can lead to voltage drops. This can prevent the motor from starting, cause it to run inefficiently, and potentially damage the motor over time. If an extension cord is absolutely necessary,