
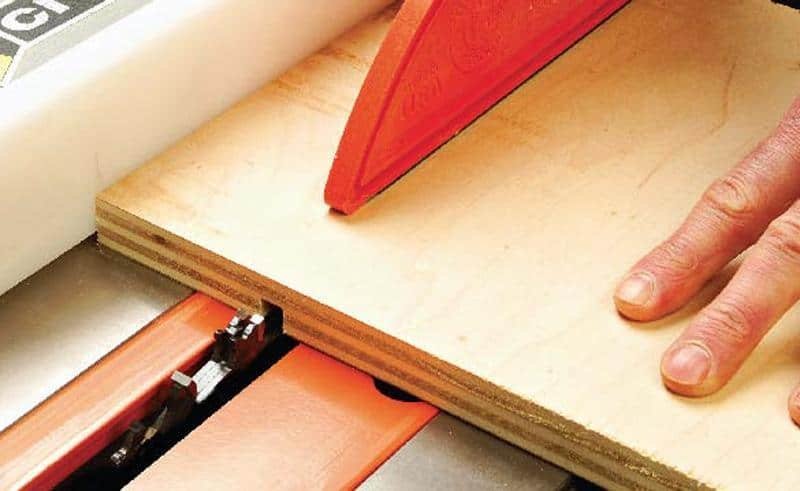
Cutting a groove in wood with a table saw is achievable by using a dado blade set or by making multiple passes with a standard blade. This process requires a stable fence, a push stick for safety, and a flat surface to ensure the cut depth remains consistent across the board.
The final result changes based on the width of the groove you need and the thickness of the wood you’re working with. You’ll need to adjust your blade height for each pass if you aren’t using a dedicated dado stack.
Who should cut grooves in wood
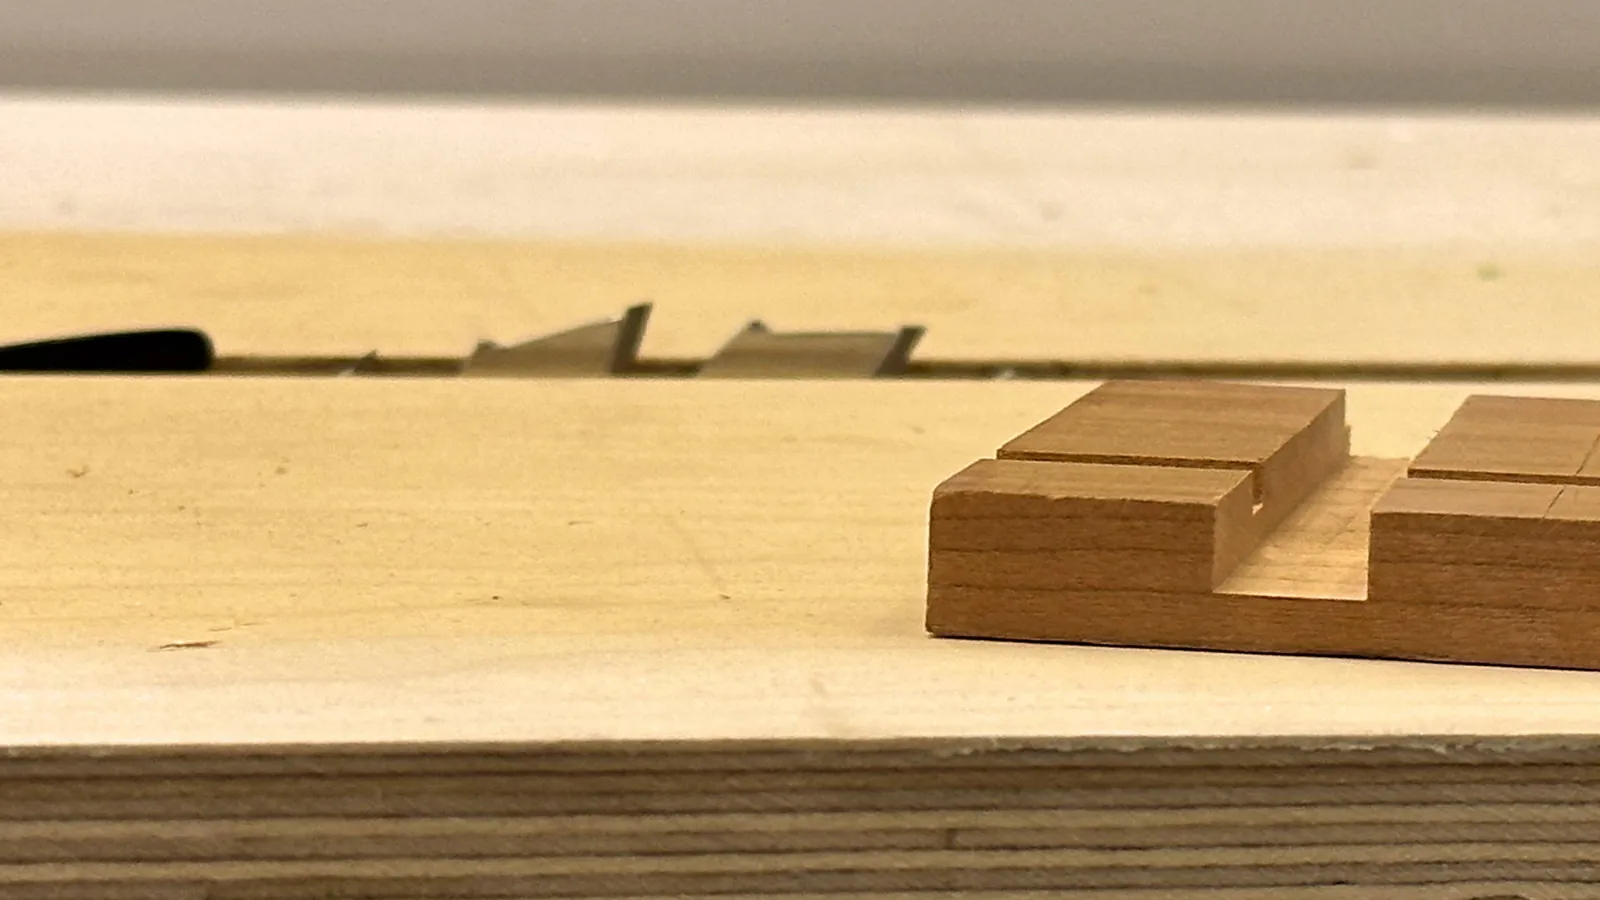
This guide serves woodworkers who have access to a standard table saw and need to create channels for joinery, such as housing shelves or inlaying materials. If you’re looking to create decorative profiles or complex moldings, this page may not cover the specialized tooling required for those tasks.
We assume the use of a standard table saw with a functioning fence and a miter gauge. You should also verify that your saw’s arbor is long enough to accept a dado stack if you choose that method; check your manual for the maximum blade width allowed. This guide isn’t for those using portable job-site saws that lack the power or arbor length for dado sets.
Factors that change your results
The depth and width of your cut are the primary variables that decide the outcome of your project. A shallow groove for a thin panel requires a different setup than a deep groove for a structural shelf. Always perform a test cut on a piece of scrap wood of the same thickness to verify your settings before cutting your final workpiece.
Blade type matters significantly when choosing your method. A flat-top grind blade leaves a square bottom, which is ideal for grooves. A standard alternate-top bevel blade will leave “ears” or peaks at the bottom of the groove, which may require manual cleaning with a chisel.
The material density also changes how you feed the wood. Hardwoods like oak or maple demand a slower feed rate to prevent burning, while softwoods like pine can be fed more quickly. If you hear the motor bogging down, you’re pushing too fast or the blade is dull.
The most common mistake people make is failing to account for the actual thickness of plywood. Many “half-inch” plywood sheets are actually slightly thinner, meaning a standard half-inch dado blade will result in a loose fit. Use a digital caliper to measure your material thickness exactly; this is the only way to ensure a tight, professional joint.
How to make the cut safely
- Unplug your saw and install your blade or dado stack to the desired width.
- Set the height of the blade to match the depth of the groove you need.
- Secure your fence at the correct distance from the blade to position the groove.
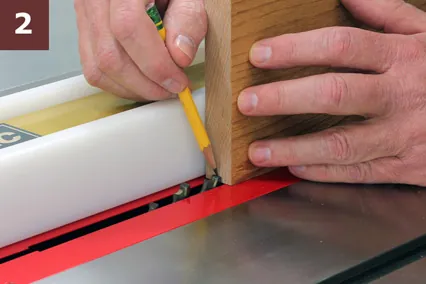
- If using a standard blade, mark the start and stop points of your groove on the wood.
- Put on your safety glasses and hearing protection; the Occupational Safety and Health Administration provides guidance on maintaining proper machine guarding to prevent injury.
- Turn on the saw and stand to the side of the blade path, never directly behind the wood.
- Push the wood firmly against the fence and down onto the table, moving it slowly over the blade.
- Use a push stick to complete the cut, keeping your hands well away from the blade at all times.
- If you’re making multiple passes, adjust the fence by the blade thickness after each pass until the groove is wide enough.
- Turn off the saw and wait for the blade to stop completely before removing your workpiece.
The judgement call that separates a quality job from a poor one is the snugness of the fit. If the piece you’re inserting into the groove falls out, the groove is too wide. If it requires heavy hammering, the groove is too tight and will cause the wood to split as it expands with humidity.
Comparison of cutting methods
| Method | Best Use | Effort Level | Result Quality |
|---|---|---|---|
| Dado Stack | Wide grooves | Low | High |
| Standard Blade | Narrow grooves | Medium | Medium |
| Multiple Passes | Wide grooves | High | Variable |
Use a dado stack if your project requires more than five identical grooves. It saves hours of labor and ensures every channel matches perfectly. If you only need one or two slots, the setup time for a stack often outweighs the benefits.
A standard blade works best for single, narrow cuts where precision depends on a clean, straight line. Avoid using it for wide channels unless you’re comfortable with the trial-and-error process of multiple passes.
Multiple passes introduce human error with every adjustment. If your groove width exceeds the blade thickness, you risk uneven walls or a loose fit for your joinery. Only choose this method if you lack a dado set and are prepared to test your fit on scrap wood first.
Details that define professional results
Preparation and test cuts
Experienced woodworkers always use a scrap piece to dial in the fit before the real wood touches the blade. They check that the fence is perfectly parallel to the blade, as even a slight angle causes the groove to widen or burn the wood. They also ensure the wood is perfectly flat; any cup or bow in the board will lead to an inconsistent groove depth.
Managing the cut
Professionals keep the wood pressed firmly against the table throughout the entire pass. They don’t lift the wood until it’s clear of the blade. They also use a sacrificial fence or zero-clearance insert to prevent tear-out on the edges of the groove. If the groove is long, they use outfeed support to keep the board level, which prevents the end of the cut from becoming uneven.
Troubleshooting common errors
| What you notice | What it usually means | What to do first | How to stop it |
|---|---|---|---|
| Burning marks | Blade is dull | Clean the blade | Feed wood faster |
| Loose joint | Wrong width | Use shims | Measure with calipers |
| Uneven depth | Board was lifted | Use featherboards | Keep downward pressure |
| Tear-out | Dull teeth | Change blade | Use zero-clearance |
| Split wood | Fit too tight | Sand the insert | Test on scrap |
If you see burning marks, check your feed rate. Moving the wood too slowly causes the blade to rub against the grain, generating friction that scorches the surface. Aim for a steady, confident pace.
Most woodworkers assume tear-out is inevitable, but it usually signals a gap between the blade and the table insert. If you can see daylight around the blade, your insert is too wide. Replace it with a zero-clearance version to support the wood fibers during the cut.
Always test your setup on scrap material identical to your project wood. If the wood splits during assembly, your joinery is too tight. Sand the inner faces lightly before applying glue to prevent internal pressure from cracking the grain.
Rules for safe operation
You must follow the manufacturer’s instructions regarding the maximum width of the dado stack your saw can handle. Exceeding this limit puts excessive strain on the arbor and risks mechanical failure. Always ensure the nut is fully tightened and that the blade is properly seated on the arbor before starting the motor.
If you’re working in a shop, ensure your dust collection system is active; fine wood dust is a health hazard and a fire risk. Never bypass the blade guard unless the specific operation makes it impossible to use.
If your saw isn’t equipped with a riving knife or splitter, the risk of kickback increases significantly. In such cases, stop and seek assistance from an experienced woodworker or use a different tool, like a router, which may be safer for certain groove profiles.
Understanding your costs
The cost of this process depends on your existing equipment. If you already own a table saw, the only variable cost is the potential purchase of a dado blade set, which is relatively inexpensive compared to buying specialized joinery tools. Using a standard blade costs nothing extra but requires more time spent on multiple passes and cleanup.
Time is the hidden cost. Making a wide groove with a single blade can take four or five times longer than using a dado stack. If you’re building a large project with many grooves, the time savings of a dado stack often justify the initial investment. Always compare the time you’ll spend on the project against the cost of the tooling before you decide which path to take.
Maintenance and long-term care
After you finish, clean the resin and sawdust from your blades using a dedicated blade cleaner. Resin buildup causes heat and friction, which ruins the cut quality and burns the wood. If you lack a specialized solvent, a light coating of mineral spirits applied with a soft nylon brush will dissolve stubborn pitch without damaging the steel. Store your dado stack in its provided case or on a wall-mounted rack to protect the carbide teeth from chipping.
Check your table saw’s alignment based on how frequently you use the tool and consult the owner’s manual for the recommended maintenance schedule. Use a dial indicator to ensure the fence is parallel to the blade and that the blade is square to the table.
If you notice the wood binding during a cut, check the alignment immediately. Binding often signals that your riving knife is misaligned or the fence has drifted. Correcting this early prevents dangerous kickback. A well-maintained saw provides clean, accurate grooves for years.
When to choose a different tool
If you need to cut a groove in a very large piece of plywood that’s difficult to maneuver on a table saw, use a circular saw with a straight-edge guide instead. The table saw is best for smaller, manageable boards where the fence can provide constant support.
For stopped grooves that don’t run the full length of the board, a plunge router is the correct tool. If your project requires a groove that starts or ends in the middle of a board, don’t force it on the table saw. Attempting to perform stopped grooves on a table saw is dangerous and can lead to severe kickback.
Use a router with an edge guide to maintain control and safety. If you’re cutting a groove wider than half an inch, make multiple passes rather than trying to remove all the material at once. Forcing a deep cut in a single pass risks burning the wood and straining the motor. When the grain direction changes or you encounter knots, switch to a shallower depth of cut to prevent tear-out.
Frequently asked questions
How deep should a groove be?
A groove should typically be one-third to one-half the thickness of the material you’re inserting. This depth provides enough mechanical strength for the joint without weakening the structural integrity of the board holding the groove.
Can I use a regular blade for a wide groove?
Yes, you can use a regular blade by making multiple passes, though the result is less efficient than a dado stack. Move your fence by the thickness of the blade after every pass until you reach the desired width.
Is it safe to use a dado stack on any table saw?
No, only saws with a long enough arbor and sufficient motor power are safe for dado stacks. Check your owner’s manual to see if your specific model is rated for dado blades before installation.
Why does my wood burn when I cut a groove?
Burning usually happens because the blade is dull or the feed rate is too slow. Clean the pitch off your blade teeth and increase the speed at which you push the wood through the cut to reduce heat buildup.
How do I get a perfect fit for plywood?
Measure the actual thickness of your plywood with digital calipers, as it’s often thinner than the label states. Use shims with your dado stack to adjust the width until it matches your measured material thickness exactly.
What happens if the groove is too wide?
A groove that’s too wide results in a loose, weak joint that won’t hold under pressure. If this happens, you must either use a thicker piece of material or cut a new board to ensure a tight, structural fit.
Conclusion
Set up your saw with the blade height adjusted to your target depth and perform a test cut on scrap wood first. If the scrap piece fits perfectly, you’re ready to cut your final board. If the blade vibrates or the motor stalls, stop immediately and check your blade sharpness.