Toilet Keeps Running Randomly

Toilet Keeps Running Randomly-FI

A persistently running toilet is more than just an annoyance; it’s a silent drain on your resources and a potential indicator of underlying plumbing issues. The constant swoosh of water can significantly inflate your water bill, and the sound itself can be incredibly disruptive.

While many homeowners might resign themselves to this watery predicament, understanding the common culprits behind a toilet that keeps running randomly is the first step toward a quiet, efficient bathroom and a healthier bank account. This common household problem often stems from a few key components within the toilet tank, and with a little troubleshooting, many can be resolved without the need for a professional plumber.

The good news is that most toilet running issues are relatively simple to diagnose and fix. The internal workings of a toilet tank, though appearing complex, rely on a few fundamental mechanisms to fill and flush correctly. When one of these parts malfunctions, it can lead to the continuous flow of water.

This guide will equip you with the knowledge to identify the cause of your phantom flushing and empower you to tackle the repair yourself, saving you both money and the stress of a constantly running commode.

Key Takeaways

  • Flapper Valve Issues: A worn-out or improperly seated flapper is the most common cause of a running toilet, allowing water to constantly leak from the tank into the bowl.
  • Fill Valve Malfunctions: A faulty fill valve can prevent the tank from shutting off water correctly after a flush, leading to continuous filling and running.
  • Float Assembly Problems: The float, which signals the fill valve to stop, can become stuck or misadjusted, causing the toilet to overfill.
  • Chain Length and Slack: An improperly adjusted chain connecting the flush lever to the flapper can lead to the flapper not sealing fully.
  • Water Level Too High: If the water level in the tank is set too high, it can spill into the overflow tube, causing the toilet to run.
  • Simple DIY Fixes: Many running toilet issues can be resolved with basic tools and replacement parts like flappers and fill valves.
Toilet Keeps Running Randomly

Credit: www.youtube.com

Understanding Toilet Tank Mechanics

Before diving into troubleshooting, it’s essential to grasp the basic function of a toilet tank. The tank holds a reservoir of water that is released into the bowl to create a powerful flush. Once the flush is complete, a refill mechanism ensures the tank is ready for the next use.

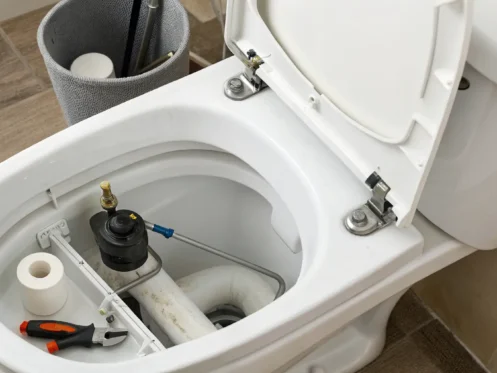
The key components within the tank are:

  • The Flapper: This is a rubber or plastic seal at the bottom of the tank that covers the flush valve opening. When you flush, the flapper lifts, allowing water to rush into the bowl. When the tank refills, the flapper reseals the opening.
  • The Flush Valve: This is the assembly at the bottom of the tank where the flapper sits. It’s the gateway for water to enter the bowl.
  • The Fill Valve (Ballcock): This mechanism controls the refilling of the tank. It opens to let water in when the tank is low and shuts off when the water reaches a predetermined level.
  • The Float: Attached to the fill valve, the float rises with the water level. When it reaches a certain height, it signals the fill valve to shut off. This can be a ball float or a cup float.
  • The Overflow Tube: A vertical pipe that prevents the tank from overflowing if the fill valve fails to shut off completely. Excess water flows down this tube into the toilet bowl.
  • The Flush Lever and Chain: The external lever is connected by a chain to the flapper. Pulling the lever lifts the chain, which lifts the flapper.

A toilet that keeps running randomly is usually experiencing a failure in one or more of these components, preventing the system from reaching a stable “off” state after a flush.

The Culprit: A Leaky Flapper Valve

The most frequent offender when a toilet runs continuously is a faulty flapper valve. This rubber seal is designed to create a watertight barrier at the bottom of the tank. Over time, rubber degrades, becomes brittle, or warps due to constant contact with water and cleaning chemicals.

Signs Of A Failing Flapper

  • Visible Wear and Tear: Inspect the flapper for cracks, tears, or a hardened, inflexible texture.
  • Discoloration or Buildup: Mineral deposits or residue from toilet bowl cleaners can prevent the flapper from sealing properly against the flush valve seat.
  • The “Dye Test”: A simple yet effective way to check for flapper leaks is the dye test. Add a few drops of food coloring or a dye tablet to the *tank* water (not the bowl). Wait 15-20 minutes without flushing. If the color appears in the *bowl*, your flapper is leaking.

Replacing A Flapper

Replacing a flapper is one of the easiest DIY plumbing tasks.

  • Turn off the water supply: Locate the shut-off valve behind the toilet, usually on the left side, and turn it clockwise until it stops. Flush the toilet to empty the tank.
  • Disconnect the old flapper: The flapper is typically attached to the overflow tube via two ears or clips. Unhook these. The chain connecting it to the flush lever may also need to be unhooked from the lever arm.
  • Install the new flapper: Most flappers are universal. Attach the new flapper to the overflow tube using its ears. Ensure it sits flat and squarely.
  • Connect the chain: Reconnect the chain to the flush lever arm. Crucially, adjust the chain length. There should be just a little slack, about 1/2 inch to 1 inch, when the flapper is seated. Too much slack, and the flapper won’t lift enough; too little slack, and it won’t allow the flapper to seal completely.
  • Turn on the water and test: Turn the water supply valve counter-clockwise. Let the tank fill. Flush the toilet to test the new flapper and chain adjustment. Perform the dye test again to confirm the seal is now watertight.

A new flapper typically costs between $5 and $15, making this a very cost-effective repair.

Toilet Keeps Running Randomly

Credit: www.wikihow.com

The Fill Valve: A Constant Flow Problem

If the flapper appears to be in good condition, the next likely suspect is the fill valve (also known as the ballcock). This component is responsible for refilling the tank after each flush and shutting off the water supply when the tank is full.

Common Fill Valve Failures

  • Stuck Float: The float, whether a ball or a cup mechanism, rises with the water. If it gets stuck in the “up” position, it won’t signal the fill valve to shut off, leading to continuous water flow.
  • Worn Seal or Diaphragm: Inside the fill valve, a seal or diaphragm controls water flow. If this part wears out, it can allow water to constantly trickle through, even when it should be closed.
  • Improper Adjustment: The fill valve is designed to shut off at a specific water level, usually about 1/2 to 1 inch below the top of the overflow tube. If it’s set too high, water will continuously spill into the overflow tube.

Troubleshooting And Replacing The Fill Valve

  • Check the Float: Gently push the float up. If the water flow stops or slows significantly, the float mechanism is likely the issue. If it’s a ball float, check if it has a leak and is filling with water, making it heavy and less effective. If it’s a cup float, ensure it moves freely up and down the shaft without obstruction.
  • Adjust the Water Level: Most modern fill valves have an adjustment screw or clip to set the float height. Adjust it so the water level is about 1/2 inch below the top of the overflow tube. If you have an older ball float, there might be an adjustment screw where the float arm connects to the fill valve.
  • Replacing the Fill Valve: If adjustment or cleaning doesn’t resolve the issue, the fill valve likely needs replacement.
  • Turn off water supply and flush the toilet to empty the tank.
  • Disconnect the refill tube from the overflow tube (it’s usually clipped on).
  • Disconnect the water supply line from the bottom of the fill valve.
  • Remove the old fill valve: There’s usually a large nut or locking ring at the bottom of the tank holding the valve in place. Unscrew this.
  • Install the new fill valve: Follow the manufacturer’s instructions. This typically involves inserting the new valve from above, securing it with the nut from below, and reconnecting the water supply line.
  • Reconnect the refill tube to the overflow tube.
  • Turn on the water and test. Adjust the float height as needed.

Replacement fill valves are readily available and range from $15 to $30.
Toilet Keeps Running Randomly

Credit: fusioncools.com

The Overlooked Overflow Tube And Water Level

The overflow tube plays a critical role in toilet safety, but it can also be the reason your toilet keeps running. As mentioned, if the water level in the tank is too high, it will spill directly into the overflow tube, creating a continuous flush cycle.

Why The Water Level Might Be Too High

  • Incorrect Fill Valve Adjustment: This is the most common reason. The fill valve simply isn’t shutting off at the correct level.
  • Faulty Fill Valve: Even if adjusted, a failing fill valve might not be able to stop the flow of water completely, leading to overfilling.
  • Incorrect Flapper Installation: If the flapper is installed too high or is the wrong size, it might not seal properly, causing a constant slight leak that the fill valve tries to compensate for, leading to overfilling.

Checking And Adjusting The Water Level

  • Observe the Water Line: After the toilet has finished its refill cycle, note where the water level sits relative to the overflow tube. The ideal level is about 1/2 to 1 inch below the top edge of the overflow tube.
  • Adjust the Fill Valve: As described in the previous section, most fill valves can be adjusted. Turn the adjustment screw or reposition the clip until the water stops filling at the desired level.
  • Dye Test (Again): If the water level is correct but the toilet still runs, it points back to a leaky flapper or a faulty fill valve that’s allowing a trickle.

The Chain Reaction: Flush Lever And Chain Issues

The connection between the flush lever and the flapper is through a chain. The length and tension of this chain are crucial for proper operation.

Problems With The Chain

  • Too Long: If the chain has too much slack, it won’t lift the flapper high enough to allow a full flush, or it might get caught under the flapper, preventing it from sealing properly. This is a very common cause of a toilet that runs intermittently or constantly.
  • Too Short: A chain that is too taut can hold the flapper slightly ajar, leading to a constant leak.
  • Kinks or Snags: A twisted or kinked chain can prevent the flapper from seating correctly.
  • Dislodged Hook: The chain might simply have come off the flush lever arm.

Adjusting The Chain

  • Check for Slack: With the tank lid off and the toilet refilled, observe the chain. There should be just a small amount of slack, enough to allow the flapper to rest fully on the flush valve seat, but not so much that it bunches up.
  • Adjust the Length: Most flush lever arms have multiple holes to attach the chain, allowing for easy length adjustment. If your chain has a clip, you can adjust the length by moving the clip to a different link. Aim for about 1/2 to 1 inch of slack when the flapper is closed.
  • Untangle: Ensure the chain is straight and not snagged on anything inside the tank.

Less Common Causes And Advanced Troubleshooting

While the flapper, fill valve, and chain account for the vast majority of running toilet issues, a few other less common problems can occur.

Tank-to-bowl Gasket Leak

The gasket that seals the tank to the bowl can degrade over time. If this seal fails, water can leak from the tank into the bowl, causing the fill valve to constantly try and replenish the lost water.

  • Symptoms: You might hear a faint hissing sound, or notice water pooling around the base of the toilet. The dye test (applied to the tank) would show color in the bowl, but the flapper would appear to be sealing perfectly.
  • Fix: This involves removing the tank from the bowl, replacing the large gasket at the bottom of the tank, and reassembling. This is a more involved DIY task, often requiring a specific tank-to-bowl gasket kit.

Cracked Tank Or Bowl

Though rare, a hairline crack in the porcelain of the tank or bowl can lead to slow leaks.

  • Symptoms: Similar to a gasket leak, but the source might be harder to pinpoint. Water might seep through the porcelain.
  • Fix: Small cracks can sometimes be temporarily sealed with epoxy, but it’s generally recommended to replace the entire tank or toilet. This is a job best left to professionals.

Issues With The Flush Valve Seat

The flush valve seat is the surface the flapper seals against. If this surface is corroded, warped, or has debris on it, the flapper won’t create a watertight seal.

  • Symptoms: The dye test will reveal a leak, but the flapper itself looks fine.
  • Fix: Sometimes, simply cleaning the flush valve seat thoroughly can resolve the issue. If it’s corroded or damaged, you might need to replace the entire flush valve assembly, which is a more complex repair.

Water Saving Tips And Maintenance

Preventing a running toilet in the first place is always better than fixing it. Regular maintenance can save you money and hassle.

  • Regular Inspections: Periodically check your toilet’s internal mechanisms for wear and tear. Perform the dye test every few months.
  • Avoid Harsh Cleaners: Some aggressive toilet bowl cleaners can accelerate the degradation of rubber parts like flappers. Opt for milder cleaners or natural alternatives.
  • Listen for Changes: Pay attention to any new sounds your toilet makes, such as hissing or gurgling, which might indicate an impending issue.
  • Know Your Parts: Familiarize yourself with the parts inside your toilet tank. Understanding their function makes troubleshooting much easier. Many manufacturers provide diagrams online for specific models.
  • Consider Water-Saving Technologies: If you’re replacing parts, consider upgrading to a modern, water-efficient fill valve or flapper.

Data Snapshot: The Cost Of A Running Toilet

The impact of a running toilet on your water bill can be significant. According to the U.S. Environmental Protection Agency (EPA), a continuously running toilet can waste up to 200 gallons of water per day.

Let’s break down the potential cost:

Toilet ConditionDaily Water Waste (Gallons)Monthly Water Waste (Gallons)Estimated Monthly Cost (at $4.50 per 1000 gallons)
Slightly Leaky Flapper501500$6.75
Moderately Running Toilet1003000$13.50
Continuously Running Toilet2006000$27.00

*Note: Water rates vary significantly by region. This is an illustrative example.*

This doesn’t even account for the potential increase in sewer charges, which are often based on water usage. A simple fix can therefore lead to substantial savings over time.

When To Call A Professional Plumber

While many running toilet issues are DIY-friendly, there are times when calling a professional is the wisest course of action.

  • Uncertainty: If you’ve tried the basic troubleshooting steps and are still unsure of the cause, a plumber has the expertise to diagnose the problem quickly.
  • Complex Repairs: Issues like a cracked tank, a damaged flush valve seat requiring replacement, or persistent leaks after multiple attempts at repair often necessitate professional intervention.
  • Multiple Leaks: If you suspect leaks in multiple areas or are dealing with a persistent problem that keeps recurring, a plumber can identify underlying systemic issues.
  • Lack of Tools or Time: If you don’t have the necessary tools or the time to dedicate to the repair, hiring a plumber ensures the job is done correctly and efficiently.

A plumber’s visit might cost anywhere from $100 to $300 or more, depending on your location and the complexity of the repair. However, this cost can be offset by the savings from a properly functioning, water-efficient toilet and the avoidance of potential water damage.

Common Toilet Brands And Their Parts

While many toilet parts are standardized, some manufacturers use proprietary designs. Knowing your toilet’s brand can be helpful when purchasing replacement parts.

BrandCommon Fill Valve TypeCommon Flapper TypeNotes
**Kohler**Fluidmaster or proprietarySpecific Kohler flappers, universal options availableOften uses a specific mounting style for fill valves.
**American Standard**Fluidmaster or proprietaryUniversal flappers, some specific modelsKnown for reliable, standard parts.
**Toto**Proprietary (often unique)Specific Toto flappers, some universal compatibilityToto is known for innovative designs, sometimes requiring specific parts.
**Mansfield**Fluidmaster or proprietaryUniversal flappersGenerally uses more standard components.
**Eljer**Fluidmaster or proprietaryUniversal flappersSimilar to American Standard in part compatibility.

When in doubt, taking a photo of your current parts or bringing the old part to the hardware store can ensure you get the correct replacement. You can often find model numbers on the back of the tank or inside the lid. For more detailed information on specific models, checking the manufacturer’s website is recommended. For instance, the EPA’s WaterSense program offers resources on toilet efficiency and troubleshooting.

Frequently Asked Questions

What Is The Most Common Reason A Toilet Runs Randomly?

The most frequent cause is a worn-out or improperly seated flapper valve. This rubber seal at the bottom of the tank degrades over time, allowing water to continuously leak from the tank into the bowl. This leak triggers the fill valve to constantly add water to the tank, resulting in the running sound.

How Can I Tell If My Toilet Flapper Is Bad?

The easiest method is the dye test. Add a few drops of food coloring to the water in the *tank*. Wait for about 15-20 minutes without flushing. If you see color appear in the toilet *bowl*, it means water is leaking past the flapper, indicating it needs replacement. You can also visually inspect the flapper for cracks, stiffness, or visible damage.

My Toilet Fills Up Too High And Runs Into The Overflow Tube. What’s Wrong?

This usually means the fill valve is not shutting off correctly or is adjusted improperly. The float mechanism attached to the fill valve might be stuck, or the valve itself might be failing, allowing too much water into the tank. Adjust the float so the water level sits about half an inch to an inch below the top of the overflow tube. If adjustment doesn’t work, the fill valve likely needs replacement.

Can A Toilet Run Constantly Even If The Flapper Looks Fine?

Yes, absolutely. While a bad flapper is common, a faulty fill valve can also cause a toilet to run constantly. The fill valve controls the water entering the tank. If its internal seal is compromised or the float mechanism is malfunctioning, it may fail to shut off the water supply completely, leading to continuous filling and running.

How Much Does It Typically Cost To Fix A Running Toilet?

If you perform the repair yourself, the cost is minimal, usually ranging from $5 to $30 for replacement parts like a flapper or fill valve. If you hire a professional plumber, expect to pay anywhere from $100 to $300 or more, depending on the complexity of the issue and your local labor rates.

A persistently running toilet is a common household nuisance that often stems from simple mechanical failures within the tank. By understanding the roles of the flapper, fill valve, float, and overflow tube, homeowners can effectively diagnose and often repair the issue themselves, leading to significant water and cost savings.

Regularly inspecting these components and addressing minor wear and tear promptly can prevent the annoyance and expense associated with a constantly flowing commode. If troubleshooting becomes too complex or the problem persists, don’t hesitate to consult a qualified plumber to ensure your plumbing system functions efficiently and reliably.
Most Common Frigidaire Microwave Problems

Most Common Frigidaire Microwave Problems

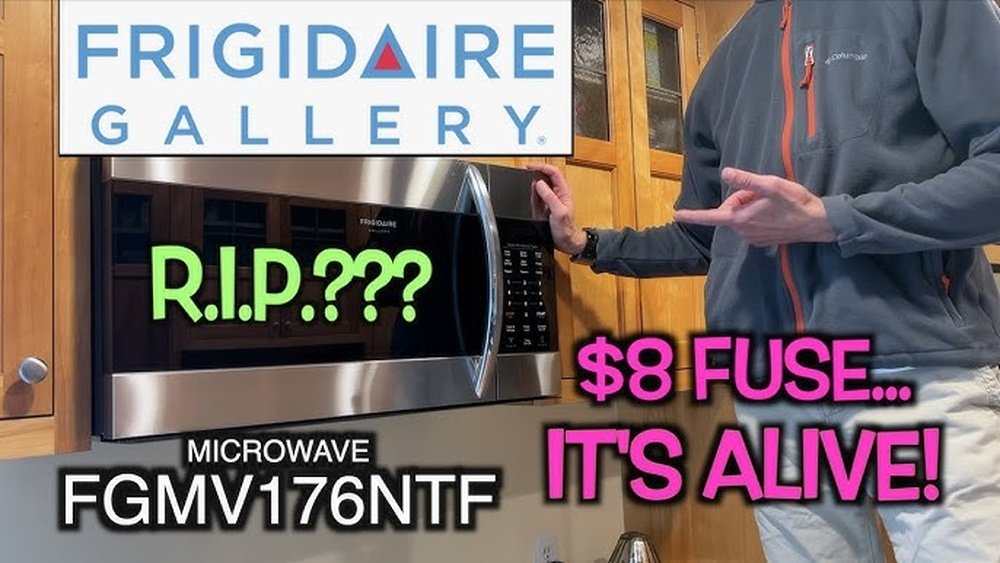
When your Frigidaire microwave suddenly stops heating, sparks, or refuses to turn on, it can disrupt your kitchen routine significantly. These appliances are staples in most households, used for everything from reheating leftovers to defrosting ingredients. Understanding the most common Frigidaire microwave problems can help you troubleshoot effectively, potentially saving you the cost and hassle of an immediate replacement.

Many issues stem from simple causes that can be fixed with basic maintenance or minor repairs, while others might indicate a more complex internal fault requiring professional attention.

This guide will walk you through the most prevalent issues homeowners encounter with Frigidaire microwaves. We’ll explore the symptoms, likely causes, and potential solutions for each problem, empowering you to diagnose and, where possible, resolve these common frustrations. From a malfunctioning turntable to a mysteriously silent appliance, we cover the spectrum of Frigidaire microwave quirks.

Key Takeaways

  • No Power: Often caused by a tripped circuit breaker, faulty outlet, or a problem with the power cord or door interlock switch.
  • Not Heating: Frequently linked to a faulty magnetron, diode, capacitor, or transformer. The door seals and interlock switches also play a crucial role.
  • Sparks or Arcing: Usually a result of metal objects inside, a damaged interior coating (mica sheet), or a faulty stirrer fan or waveguide cover.
  • Turntable Not Rotating: Can be due to a misaligned tray, a broken roller ring, a faulty turntable motor, or debris in the turntable support.
  • Display Issues: Problems with the control panel, touchpad, or internal display board can lead to a blank or malfunctioning screen.
  • Loud Noises: Humming, buzzing, or grinding noises often point to issues with the cooling fan, stirrer fan, or the magnetron.
  • Automatic Shut-off: May indicate overheating, a faulty door switch, or a problem with the main control board.
Most Common Frigidaire Microwave Problems

Credit: www.youtube.com

No Power To The Frigidaire Microwave

One of the most frustrating Frigidaire microwave problems is when it simply refuses to power on. You press the start button, and nothing happens, no lights, no display, no sound. This can leave you wondering if the entire appliance has failed.

Check The Power Source

Before assuming a major appliance failure, always start with the most basic checks.

  • Circuit Breaker: Microwaves draw a significant amount of power. It’s common for them to trip a circuit breaker, especially if other high-draw appliances are on the same circuit. Locate your home’s electrical panel and check if the breaker for the microwave’s circuit is in the “off” or middle position. If it is, reset it by flipping it fully to “off” and then back to “on.” If it trips again immediately, there might be a short circuit in the microwave or the wiring, and you should consult an electrician.
  • Power Outlet: Ensure the microwave is plugged securely into the outlet. Try plugging another small appliance, like a lamp or toaster, into the same outlet to verify that the outlet itself is working. If the outlet is dead, the problem lies with the outlet or its dedicated circuit, not the microwave.
  • Power Cord: Inspect the microwave’s power cord for any visible damage, such as cuts, fraying, or kinks. A damaged cord can prevent power from reaching the unit or pose a safety hazard. If the cord is damaged, it will need to be replaced by a qualified technician.

Faulty Door Interlock Switch

The door interlock switch is a critical safety component in all microwave ovens. It prevents the microwave from operating when the door is open and also signals the control board when the door is properly closed. If one or more of these switches fail, the microwave may not receive the signal that the door is shut, and thus, will not power on.

Microwaves typically have two or three interlock switches. They are often the first components to fail and can be a common culprit for a “no power” issue. Diagnosing these requires a multimeter to test for continuity when the door is closed and when it’s open. If a switch doesn’t register continuity correctly, it needs replacement. Warning: Always unplug the microwave before attempting to access or test internal components.

Internal Fuse

Like any electrical appliance, microwaves have an internal fuse designed to protect the unit from power surges or electrical faults. If this fuse blows, the microwave will lose all power. A blown fuse is often a symptom of a larger underlying problem, such as a faulty magnetron or a short circuit elsewhere in the appliance. Simply replacing the fuse without identifying and fixing the root cause will likely result in the new fuse blowing as well. Testing and replacing an internal fuse requires disassembling the microwave and should only be done by someone with electrical experience.

Frigidaire Microwave Not Heating

Perhaps the most common and problematic Frigidaire microwave issue is when it runs, the turntable spins, the light comes on, but it fails to heat food. This can be particularly baffling, as the appliance seems to be functioning normally.

The Magnetron: The Heart Of The Microwave

The magnetron is the component responsible for generating the microwaves that heat your food. It’s a high-voltage vacuum tube that converts electrical energy into microwave radiation. If the magnetron fails, the microwave will not heat.

Symptoms of a failing magnetron can include:

  • No heating at all.
  • Intermittent heating.
  • Unusual humming or buzzing noises coming from the unit when it’s supposed to be heating.
  • Flashes or sparks inside the cooking cavity (though this can also indicate other issues).

Replacing a magnetron is a complex and potentially dangerous repair. It involves working with very high voltages (even when unplugged, capacitors can retain a charge), so it’s generally recommended to have this done by a professional.

High-voltage Diode And Capacitor

The magnetron requires a very high voltage to operate, typically around 4,000 to 5,000 volts. This voltage is supplied by a high-voltage transformer, which then steps down to the magnetron via a high-voltage diode and a high-voltage capacitor.

  • High-Voltage Diode: This component acts as a rectifier, converting AC voltage from the transformer into DC voltage needed by the magnetron. If the diode fails (often by shorting), it can prevent the magnetron from receiving power or cause the transformer to overheat.
  • High-Voltage Capacitor: This stores the high voltage from the transformer and delivers it in pulses to the magnetron. A faulty capacitor (either open or shorted) will prevent proper operation.

Both the diode and capacitor work in conjunction with the transformer. If either fails, the microwave will likely stop heating. Warning: These components store a lethal electrical charge. Never attempt to test or replace them without proper knowledge and safety precautions, including ensuring the microwave is unplugged and the capacitor has been safely discharged.

Faulty High-voltage Transformer

The high-voltage transformer is responsible for stepping up the household voltage (e.g., 120V) to the very high voltage required by the magnetron. If the transformer fails, it can lead to a lack of heating. Symptoms might include a loud humming noise when the microwave is turned on, or a complete lack of heating. Like the magnetron, transformer replacement is a complex repair due to the high voltages involved.

Door Seal And Interlock Switches

While we mentioned interlock switches for the “no power” issue, they are also crucial for heating. If the door isn’t closing properly, or if one or more of the safety interlock switches are faulty, the microwave’s control board might detect the door as being open, preventing the magnetron from engaging.

This is a safety feature to ensure microwaves are contained within the oven cavity.

Inspect the door gasket for any damage, wear, or debris. Ensure the door latches are engaging correctly. If the switches are suspected, they can be tested with a multimeter.

Most Common Frigidaire Microwave Problems

Credit: www.youtube.com

Frigidaire Microwave Sparks Or Arcs

Seeing sparks or arcing inside your microwave is alarming and can be a sign of serious internal damage or misuse. It’s crucial to stop the microwave immediately if this occurs to prevent further damage or a potential fire.

Metal Objects Inside

The most common cause of sparking is accidentally placing metal objects inside the microwave cavity. This includes aluminum foil, metal utensils, dishes with metallic trim, twist ties, or even certain types of ceramic dishes. Metal reflects microwaves, causing electrical energy to build up and arc between the metal object and the microwave walls or other metal components.

Pro Tip: Always ensure all food containers and wraps are microwave-safe. If unsure, err on the side of caution and remove any metallic elements.

Damaged Mica Sheet Or Waveguide Cover

The waveguide cover is typically a thin, rectangular piece of mica or a similar material located on the inside wall of the cooking cavity. Its purpose is to protect the waveguide (the channel that directs microwaves from the magnetron into the cavity) from food splatters. Over time, this cover can become dirty, degraded, or damaged.

If the mica sheet is dirty, greasy, or has holes, it can cause arcing. Food particles can accumulate on it, becoming superheated and igniting, or the material itself can break down. A damaged waveguide cover needs to be replaced with a new, microwave-safe one.

Ensure you get the correct part for your Frigidaire model.

Stirrer Fan Or Motor Issues

Many microwaves have a stirrer fan (often located behind the waveguide cover) or a rotating antenna designed to distribute microwaves evenly throughout the cavity. If this fan is damaged, obstructed, or its motor is failing, it can lead to uneven microwave distribution and potentially cause arcing. A damaged stirrer fan can also sometimes manifest as a loud grinding noise.

Internal Component Failure

Less commonly, sparking can be a symptom of internal component failure, such as a faulty magnetron or issues with the high-voltage components (diode, capacitor, transformer). If you’ve ruled out external causes like metal objects or a dirty waveguide cover, an internal electrical fault is more likely.

Most Common Frigidaire Microwave Problems

Credit: www.appliancepartspros.com

Turntable Not Rotating

A properly rotating turntable ensures food is heated evenly by exposing all sides to the microwaves. If your Frigidaire microwave’s turntable has stopped spinning, your food might end up with hot spots and cold areas.

Misaligned Or Dirty Tray

The simplest explanation is often the correct one. The glass tray might be slightly out of place on its roller guide, or debris might be preventing it from seating correctly. Remove the tray and the roller ring, clean both, and then carefully reposition them. Ensure the central shaft is aligned with the notch in the tray.

Broken Roller Ring Or Support

The roller ring is a circular piece with small wheels that supports the glass tray and allows it to rotate smoothly. If one or more of the wheels on the ring are broken or missing, or if the ring itself is cracked, the tray may not spin correctly or might wobble. Similarly, the support mechanism or the motor shaft it connects to could be damaged.

Faulty Turntable Motor

Beneath the cooking cavity, there’s a small electric turntable motor that drives the rotation. If this motor fails, the turntable will stop spinning. You might hear a faint humming sound from the motor if it’s trying to work but can’t turn the tray, or it might be completely silent.

Replacing the turntable motor is usually a straightforward repair that involves accessing the bottom of the microwave. However, you’ll need to ensure you purchase the correct replacement motor for your specific Frigidaire model.

Debris In The Support Mechanism

Occasionally, small food particles or other debris can fall into the cavity and jam the turntable’s rotation mechanism or the motor shaft. A thorough cleaning of the cavity and the support area can sometimes resolve this.

Frigidaire Microwave Display Or Control Panel Issues

Problems with the display screen or the touchpad can make operating your microwave difficult, if not impossible.

Blank Display

A blank display can be caused by several factors:

  • Power Issue: As mentioned earlier, check the circuit breaker and power outlet.
  • Internal Fuse: A blown internal fuse will result in no power to any component, including the display.
  • Faulty Control Board: The main control board (also known as the power control board or main PCB) is the “brain” of the microwave. If it fails, the display may go blank.
  • Loose Connection: A wire or connector leading to the display panel might have become loose.

Unresponsive Touchpad Or Buttons

If the display is on but the touchpad or buttons don’t respond when pressed, it usually indicates a problem with the control panel assembly itself.

  • Dirt and Grime: Food debris can get lodged under the membrane of a touchpad, preventing it from registering presses. Try cleaning the control panel thoroughly with a damp cloth and mild detergent.
  • Damaged Membrane: The conductive pathways within the touchpad membrane can wear out or become damaged over time, leading to unresponsive areas.
  • Faulty Control Board: Similar to a blank display, a malfunctioning control board can also cause the touchpad to stop working.

Replacing a control panel or touchpad assembly can be a relatively simple repair, but it requires carefully disassembling the microwave’s housing to access the component.

Garbled Or Flickering Display

A garbled, flickering, or partially lit display often points to an issue with the display board itself or its connection to the main control board. Sometimes, this can be caused by voltage fluctuations or a failing component on the display assembly.

Loud Noises During Operation

Unusual noises coming from your Frigidaire microwave can be disconcerting and often signal an impending component failure.

Humming Or Buzzing

A low hum or buzz is normal during microwave operation, as it’s the sound of the magnetron and transformer working. However, if this sound becomes excessively loud, or if it occurs when the microwave isn’t supposed to be heating (e.g., just when the timer is running), it could indicate:

  • Failing Magnetron: A worn-out magnetron can produce a louder, more aggressive hum.
  • Faulty Transformer: The high-voltage transformer can also become noisy as it ages or if it’s under stress.
  • Cooling Fan Issues: The cooling fan is essential for preventing overheating of internal components like the magnetron. If the fan motor is failing, it can cause a loud humming or buzzing noise.

Grinding Or Rattling

A grinding, rattling, or clanking noise usually points to a mechanical issue:

  • Cooling Fan Obstruction: Something might be obstructing the blades of the cooling fan, causing it to rattle or grind.
  • Stirrer Fan Problems: As mentioned previously, issues with the stirrer fan or its motor can also produce grinding sounds.
  • Turntable Motor: A failing turntable motor might make grinding noises as it struggles to turn.
  • Loose Components: Internal components or mounting screws could have become loose over time, causing vibrations and rattling.

Microwave Shuts Off Unexpectedly

If your Frigidaire microwave starts its cycle and then abruptly stops before the timer is up, it can be due to a few reasons.

Overheating Protection

Most microwaves have a built-in thermal cutout switch or overheat protection. If the internal temperature of the microwave exceeds a safe limit, this switch will trip, cutting power to prevent damage. This can happen if:

  • The cooling fan is not working properly, leading to inadequate heat dissipation.
  • The microwave is being used for excessively long cycles without a break.
  • There’s a blockage in the air vents, preventing proper airflow.

Allow the microwave to cool down for at least 15-20 minutes before attempting to use it again. If the problem persists, investigate the cooling fan and vents.

Faulty Door Switch

A malfunctioning door interlock switch can also cause the microwave to shut off unexpectedly. If a switch becomes intermittent, it might signal to the control board that the door has been opened, even when it’s closed, triggering an automatic shutdown.

Control Board Malfunction

The main control board manages all the functions of the microwave. If it’s experiencing an internal fault or a short circuit, it can lead to erratic behavior, including unexpected shutdowns.

Frigidaire Microwave Troubleshooting Table

Here’s a quick reference table for common Frigidaire microwave problems and their likely causes:

| Problem | Likely Cause(s) | Potential Solution

Panasonic H98 Error Code Microwave Troubleshooting

Panasonic H98 Error Code Microwave Troubleshooting

The hum of a microwave is a familiar sound in kitchens worldwide, a testament to its convenience in reheating leftovers, defrosting ingredients, or preparing quick meals. When this essential appliance falters, displaying an error code, it can be a significant disruption.

Among the various Panasonic microwave models, the H98 error code is one that users may encounter. Understanding what this code signifies and how to troubleshoot it effectively can save you time, money, and the frustration of a malfunctioning appliance.

This guide aims to demystify the Panasonic H98 error code, providing a comprehensive walkthrough of its potential causes and step-by-step solutions. We will explore the common issues that lead to this error, from simple power fluctuations to more complex internal component failures.

By following the troubleshooting steps outlined, you can hopefully restore your Panasonic microwave to full working order or at least determine if professional repair is necessary.

Key Takeaways

  • The H98 error code on Panasonic microwaves typically indicates a door interlock switch issue or a problem with the main control board.
  • Power cycling the microwave is the first and simplest troubleshooting step.
  • Inspecting the door and its seals for damage is crucial, as this can affect switch operation.
  • While some issues like a faulty door switch can be replaced by a DIY enthusiast, complex electrical repairs require professional expertise.
  • Always unplug the microwave before attempting any internal inspection or repair.
  • Understanding the specific model of your Panasonic microwave is important, as troubleshooting steps can vary slightly.

Understanding The Panasonic H98 Error Code

The Panasonic H98 error code is a diagnostic indicator that appears on the microwave’s display panel when the appliance detects a specific malfunction. Unlike more general error codes, the H98 is often tied to a particular set of components or system behaviors. At its core, this error usually points to a problem with the door interlock system or the main control unit that manages the microwave’s operations.

The door interlock system is a critical safety feature. It comprises several switches that must be correctly engaged when the door is closed for the microwave to operate. These switches ensure that the microwave cavity is sealed before high-frequency energy (microwaves) is generated.

If any of these switches fail to register as closed, or if the control board receives an inconsistent signal from them, the H98 error can be triggered to prevent operation and protect the user from potential hazards.

Common Scenarios Leading To H98

Several common scenarios can precipitate the H98 error code. Often, it’s not a sudden, catastrophic failure but a gradual degradation of components or a response to external factors.

  • Door Misalignment or Damage: If the microwave door is not closing properly, perhaps due to a bent frame, worn hinges, or obstructed seals, the interlock switches may not be activated correctly. This can lead to the H98 error. Even minor misalignments can prevent the switches from making proper contact.
  • Faulty Door Interlock Switches: These microswitches are mechanical components that wear out over time. They can become stuck, lose their tension, or fail to send the correct electrical signal to the control board. A single faulty switch in the interlock system is a frequent cause of the H98 code.
  • Power Surges or Fluctuations: While less common for this specific code, sudden power interruptions or surges can sometimes cause electronic components, including the main control board, to glitch or reset incorrectly, leading to diagnostic errors like H98.
  • Internal Wiring Issues: Loose or damaged wiring connections between the door switches and the main control board can disrupt communication, signaling a fault.
  • Main Control Board Malfunction: The main control board, or PCB (Printed Circuit Board), is the brain of the microwave. If it malfunctions due to age, electrical stress, or manufacturing defects, it can misinterpret signals or fail to operate correctly, resulting in various error codes, including H98.
Panasonic H98 Error Code Microwave Troubleshooting

Credit: d3appliance.com

Step-by-step Troubleshooting For H98 Error

When faced with the H98 error, it’s essential to approach troubleshooting systematically. Starting with the simplest solutions and progressing to more complex checks can help identify the root cause efficiently. Remember, safety is paramount; always disconnect the microwave from the power outlet before attempting any internal inspections.

Step 1: Power Cycle The Microwave

This is the most basic troubleshooting step and can resolve temporary glitches in the microwave’s electronic system.

  • Unplug the microwave from the power outlet.
  • Wait for at least 5 to 10 minutes. This allows any residual power in the capacitors to dissipate and the control board to reset.
  • Plug the microwave back in.
  • Try operating the microwave to see if the H98 error code has disappeared.

If the error persists after a power cycle, it indicates a more persistent issue that requires further investigation.

Step 2: Inspect The Door And Seals

The microwave door is a critical component for the interlock system. Any issues with its closure can trigger the H98 error.

  • Visually inspect the door: Look for any signs of damage, such as cracks, warping, or bent edges.
  • Check the hinges: Ensure the door opens and closes smoothly without sticking. Loose or damaged hinges can cause misalignment.
  • Examine the door seals (gasket): Make sure the rubber or plastic seals around the door are intact, clean, and not torn or compressed. Debris or damage here can prevent a proper seal.
  • Test the door closure: Close the door firmly. Does it feel secure? Does it close flush with the microwave body? If it feels loose, wobbly, or doesn’t close completely, this is a strong indicator of a door-related problem.

If you find any damage to the door, seals, or hinges, this is a likely culprit. Depending on the severity and your comfort level, you might be able to replace these parts yourself or may need professional assistance.

Step 3: Check For Obstructions

Sometimes, foreign objects or food debris can get lodged between the door and the microwave frame, preventing the door from closing fully and thus not engaging the interlock switches.

  • Open the microwave door.
  • Carefully examine the entire perimeter where the door meets the microwave body.
  • Remove any food particles, packaging, or other debris. A soft cloth or brush can be helpful here.
  • Close the door and check if it now closes properly.

This is a simple yet often overlooked cause of door-related errors.

Step 4: Listen For Switch Engagement

The door interlock switches often make a distinct “click” sound when the door is closed and they are engaged.

  • With the microwave unplugged, open and close the door several times.
  • Listen carefully for the sound of switches engaging as the door closes. You might hear multiple clicks if there are several switches.
  • Try gently pushing on the door at different points as you close it. Does this affect the engagement sound?

If you don’t hear any clicks, or if the sounds are inconsistent, it suggests one or more of the interlock switches might be faulty or misaligned.

Step 5: Advanced Internal Inspection (requires Caution)

Warning: This step involves working with electrical components and should only be attempted if you have some experience with appliance repair and are comfortable working with electricity. Always unplug the microwave before proceeding.

  • Access the control panel and door switches: This typically involves removing screws located on the back or sides of the microwave, and sometimes around the control panel itself. Consult your microwave’s service manual or online videos specific to your Panasonic model for guidance.
  • Locate the door interlock switches: There are usually 2 or 3 switches located on the frame where the door latches.
  • Test the switches: Using a multimeter set to continuity mode, test each switch.
  • With the door open (switch not engaged), the switch should show no continuity.
  • With the door closed (switch engaged), the switch should show continuity.
  • If a switch shows continuity when it shouldn’t, or no continuity when it should, it is likely faulty and needs replacement.
  • Inspect wiring: Check all visible wires connected to the switches and the main control board for any signs of damage, fraying, or loose connections.
  • Inspect the main control board: Look for any signs of burnt components, discolored areas, or bulging capacitors, which can indicate a failure of the main board.

Note: If you are not comfortable with electrical testing or internal component access, it is best to stop here and call a qualified technician.

Panasonic H98 Error Code Microwave Troubleshooting

Credit: www.youtube.com

Identifying Faulty Door Interlock Switches

The door interlock switches are the most common culprits behind the H98 error code in Panasonic microwaves. These safety switches are designed to ensure the microwave is properly sealed before it operates. When one or more of these switches fail, the control board detects an unsafe condition and displays the H98 error.

Types Of Door Interlock Switches

Microwaves typically have multiple interlock switches, each serving a specific role in the safety mechanism:

  • Primary Interlock Switch: This is the first switch engaged when the door closes. It signals the microwave that the door is beginning to latch.
  • Secondary Interlock Switch: This switch is engaged once the door is fully latched. It confirms that the door is securely closed and sealed.
  • Tertiary (or Monitor) Interlock Switch: Some models have a third switch that acts as a monitor. It is designed to detect if the primary or secondary switches fail or become stuck in the closed position when the door is open, providing an extra layer of safety.

Symptoms Of Faulty Switches

A faulty door interlock switch can manifest in several ways, often preceding or coinciding with the H98 error:

  • Microwave fails to start: You press the start button, but nothing happens, and the H98 error appears.
  • Intermittent operation: The microwave might work for a while and then stop, displaying the error.
  • Sparks inside the microwave: In rare cases, a misaligned or faulty switch can allow microwaves to escape, causing arcing or sparking. This is a serious safety hazard.
  • No power at all: While less common for H98, a severely damaged switch could potentially disrupt the entire power circuit.

Testing Door Interlock Switches With A Multimeter

To accurately diagnose a faulty door switch, a multimeter is essential.

  • Ensure the microwave is unplugged.
  • Gain access to the switches: This usually involves removing the outer casing of the microwave. Refer to your model’s service manual for specific instructions.
  • Identify the switches: They are typically small, box-like components with lever actuators, located on the frame where the door latches.
  • Set your multimeter to continuity mode (often indicated by a speaker symbol or Ω).
  • Test each switch individually:
  • With the door open: The lever of the switch should be in its resting position. Test the continuity across the switch terminals. It should register no continuity (an open circuit).
  • With the door closed (or by manually pressing the switch lever): The lever should be depressed. Test the continuity across the terminals. It should register continuity (a closed circuit).
  • If a switch shows continuity when it should be open, or no continuity when it should be closed, it is faulty.

Pro Tip: Take clear photos or label wires before disconnecting them to ensure correct reassembly. If you are unsure about the process, consult a professional.

Panasonic H98 Error Code Microwave Troubleshooting

Credit: www.applianceaid.com

Troubleshooting The Main Control Board (pcb)

While door interlock switches are the most frequent cause of the H98 error, a malfunctioning main control board (PCB) can also be responsible. The PCB is the central hub that receives input from the user interface, monitors various components (including door switches), and controls the microwave’s functions, such as the magnetron, turntable motor, and fan.

Signs Of A Faulty Control Board

Identifying a faulty control board can be more challenging than diagnosing a simple switch. However, some indicators might suggest its failure:

  • Multiple error codes: If your microwave displays various error codes intermittently, it could point to a general issue with the control board.
  • Unresponsive buttons or display: If the control panel is erratic, buttons don’t work, or the display shows random characters, the PCB might be failing.
  • Microwave operates erratically: The microwave might turn on by itself, run for incorrect durations, or fail to heat properly, despite no obvious mechanical issues.
  • Burn marks or physical damage: Upon opening the microwave, visible burn marks, scorch spots, or damaged components (like capacitors) on the PCB are definitive signs of failure.
  • H98 persists after ruling out door switches: If you have meticulously tested and replaced all door interlock switches and the H98 error continues to appear, the control board becomes a primary suspect.

Testing The Control Board

Testing a control board is complex and often requires specialized knowledge and equipment.

  • Visual Inspection: As mentioned, look for any obvious signs of physical damage on the PCB.
  • Continuity Checks: A technician might perform continuity tests on specific circuits or components on the board. However, this requires a detailed understanding of the board’s schematic.
  • Voltage Checks: With the microwave plugged in (and extreme caution exercised), a technician can check if the control board is receiving the correct power supply voltages and if it’s sending the correct signals to other components.

Warning: Attempting voltage checks on a live microwave is extremely dangerous due to high voltages present, especially around the capacitor and transformer. This should only be performed by a qualified professional.

Replacing The Control Board

If the control board is confirmed to be faulty, it will need to be replaced.

  • Identify the exact part number: This is crucial. The part number is usually printed on the control board itself. Ensure it matches your specific Panasonic microwave model.
  • Order the replacement part: You can often find replacement boards through appliance parts distributors or directly from Panasonic if available.
  • Disconnect power and remove the old board: Carefully disconnect all wires and connectors, taking note of their positions. Remove the screws holding the board in place.
  • Install the new board: Mount the new PCB and reconnect all wires and connectors precisely as they were on the old board.
  • Reassemble the microwave: Replace the outer casing and any screws.
  • Test the microwave: Plug it in and check if the H98 error is gone and if the microwave operates correctly.

Control board replacement is generally a more expensive repair than replacing door switches, often necessitating professional installation due to the complexity and potential risks involved.

Other Potential Causes For H98

While door interlock switches and the main control board are the most common culprits for the H98 error, other less frequent issues can also trigger this code. Understanding these possibilities can further aid in comprehensive troubleshooting.

1. Door Latch Mechanism Issues

Beyond the electrical switches, the physical latch mechanism that physically secures the door can also be a source of problems.

  • Sticking Latch: The metal or plastic hook that engages with the door frame can become stiff or sticky due to accumulated grease, dirt, or corrosion. This can prevent it from fully retracting or extending, impacting how the door closes and engages the switches.
  • Worn or Broken Latch: Over time, the latch mechanism can wear down or even break. A worn latch might not provide enough force to properly engage the switches, or a broken one might fail to secure the door at all.

Troubleshooting:

  • Visually inspect the latch mechanism on the door.
  • Try lubricating it with a silicone-based lubricant (avoid oil-based lubricants that can attract dirt).
  • Gently clean any debris that might be hindering its movement.
  • If the latch appears broken or excessively worn, it will need replacement.

2. Issues With The Door Opening Mechanism

The internal components that allow the door to open smoothly can also play a role.

  • Stiff Door Release Button/Lever: If the button or lever used to open the microwave door is stiff or not returning to its original position properly, it can affect how the door closes and latches.
  • Internal Springs or Cables: Some door mechanisms rely on internal springs or cables. If these break or become dislodged, the door might not open or close correctly.

Troubleshooting:

  • Ensure the door release mechanism operates freely.
  • If it feels stiff, try cleaning and lubricating the area around the button or lever.
  • Damage to these internal parts often requires disassembly and professional repair.

3. Wiring Harness Problems

The wiring that connects the door switches to the main control board is crucial.

  • Loose Connections: Vibrations during operation or during installation can cause wire connectors to become loose at either the switch or the control board end. This interrupts the electrical signal.
  • Damaged Wires: Wires can become pinched, frayed, or broken, especially in areas where they flex during door operation. Rodents can also sometimes chew through wires.

Troubleshooting:

  • After unplugging the microwave, carefully inspect the wiring harness that runs from the door area to the control board.
  • Ensure all connectors are securely seated.
  • Look for any signs of cuts, abrasions, or pinching on the wires. If damaged, the affected section of the harness may need to be repaired or replaced.

4. Environmental Factors

While less common, extreme environmental conditions can sometimes contribute to electronic malfunctions.

  • Excessive Heat or Humidity: Prolonged exposure to high temperatures or humidity can degrade electronic components over time, potentially leading to failures.
  • Power Fluctuations: While a power cycle is a troubleshooting step, chronic unstable power supply (brownouts, frequent surges) can stress the control board and other components.

Troubleshooting:

  • Ensure the microwave is installed in a well-ventilated area, away from heat sources.
  • Consider using a surge protector for your appliance if you live in an area prone to power instability.

When To Call A Professional

While many minor issues can be resolved with DIY troubleshooting, there are clear indicators that it’s time to seek professional help. Attempting complex repairs without the necessary expertise can lead to further damage or, more importantly, pose a safety risk.

Indicators For Professional Service

  • Uncertainty or Lack of Experience: If you’re uncomfortable with electrical diagnostics, disassembling appliances, or handling potentially hazardous components (like capacitors), it’s best to call a professional.
  • Persistent Error After Basic Troubleshooting: If you’ve performed a power cycle, checked the door and seals, and the H98 error persists, it suggests a deeper issue that likely requires specialized tools and knowledge.
  • Visible Damage to Internal Components: If, upon opening the microwave, you see burnt parts, damaged wiring, or signs of corrosion on the control board, a professional can accurately diagnose the extent of the damage and perform the repair.
  • Need for Specialized Tools: Testing components like the magnetron or high-voltage capacitor requires specific tools and safety precautions that most homeowners don’t possess.
  • Safety Concerns: Microwaves contain high-voltage components that can store a lethal electrical charge even when unplugged. If you have any doubts about safety, always defer to a qualified appliance repair technician.
  • Cost-Benefit Analysis: For older or less expensive microwave models, the cost of professional repair might approach or exceed the price of a new appliance. A technician can provide an estimate to help you make an informed decision.

Finding A Qualified Technician

When seeking professional repair, look for:

  • Reputable Local Appliance Repair Services: Check online reviews, ask for recommendations from friends or neighbors.
  • Authorized Service Centers: For Panasonic appliances, an authorized service center may have technicians specifically trained on their products.
  • Clear Estimates: Ensure the service provider gives you a detailed estimate before commencing work, outlining parts and labor costs.

According to a report by the Association of Home Appliance Manufacturers (AHAM), the average repair cost for a microwave can range from $100 to $300, depending on the complexity and parts needed. For a control board replacement, it could be on the higher end of this spectrum.

Panasonic Microwave H98 Error Code: A Summary Table

To provide a quick reference, here’s a summary of common causes and troubleshooting steps for the Panasonic H98 error code.

Potential Cause Troubleshooting Steps Likelihood of Resolution (DIY) Estimated Repair Cost (Professional)
Temporary Electronic Glitch Perform a power cycle (unplug for 5-10 minutes, then plug back in). High N/A (if resolved)
Door Misalignment or Damage Inspect door, hinges, and seals for damage or obstruction. Ensure door closes firmly and flush. Medium (minor adjustments/cleaning); Low (if door frame is bent) $50 – $150 (for hinge/seal replacement)
Faulty Door Interlock Switch(es) Test switches with a multimeter for continuity. Replace faulty switches. Medium (requires multimeter and basic electrical knowledge) $75 – $200 (

Carrier Furnace Flash Codes

Carrier Furnace Flash Codes

When your Carrier furnace displays a series of blinking lights, it’s not just a random light show. These flash codes are a sophisticated diagnostic language, a direct line of communication from your heating system to you or your HVAC technician. Understanding these codes can transform a potentially stressful breakdown into a manageable troubleshooting session, saving you time, money, and unnecessary worry. Instead of guessing what might be wrong, you can pinpoint the issue with remarkable accuracy, allowing for quicker repairs and a more informed conversation with service professionals.

This guide will demystify the Carrier furnace flash codes, providing you with the knowledge to interpret these signals. We’ll explore what each code signifies, common causes behind them, and the steps you can take to address them. Whether you’re a homeowner looking to gain a better understanding of your HVAC system or an aspiring technician seeking to hone your diagnostic skills, this comprehensive resource will equip you with the expertise to decode your Carrier furnace’s messages.

Key Takeaways

  • Diagnostic Language: Carrier furnace flash codes are blinking light sequences on the control board that indicate specific operational faults.
  • Troubleshooting Tool: These codes are crucial for diagnosing problems quickly and efficiently, guiding both homeowners and technicians.
  • Common Codes: Familiarize yourself with the most frequent codes, such as those indicating ignition failure, flame rollout, or blower issues.
  • Control Board Location: The diagnostic LED is typically located on the furnace’s control board, usually behind an access panel.
  • Safety First: Always disconnect power before attempting any inspection or troubleshooting beyond simply observing the codes.
  • Professional Help: While codes provide guidance, complex issues or those involving gas or electrical components require a qualified HVAC technician.
  • Interpreting Blinks: Codes are read by counting the number of short and long blinks, or a sequence of blinks, that repeat.
Carrier Furnace Flash Codes

Credit: www.youtube.com

Understanding Carrier Furnace Control Boards And Diagnostic Leds

At the heart of every modern Carrier furnace lies its control board, often referred to as the bộ điều khiển chính or integrated furnace control (IFC). This sophisticated circuit board acts as the furnace’s brain, receiving input from various sensors and components, and then dictating the operation of the furnace. It manages everything from the thermostat’s call for heat to the ignition sequence, the gas valve, the blower motor, and safety limit switches.

The diagnostic LED (Light Emitting Diode) is a small, usually green, light integrated into this control board. Its primary function is to provide real-time status updates and, more importantly, to signal diagnostic information when a fault occurs. When the furnace operates normally, the LED might blink in a steady, slow pattern, indicating everything is functioning as expected. However, when a problem arises, this steady blink often changes into a specific, repeating sequence. This sequence is the flash code.

Locating The Control Board And Led

Accessing the control board and its diagnostic LED typically requires removing an access panel on the furnace cabinet. This panel is usually held in place by one or two screws. Once removed, you’ll see a network of wires connected to various components. The control board itself is a rectangular circuit board, often green or blue, with numerous chips, resistors, and connectors. The diagnostic LED is a small, pin-like component protruding from the board, often with a clear or colored plastic lens.

Pro Tip: Always ensure the furnace power switch is in the OFF position and has been for at least 30 seconds before opening any access panels. This is a critical safety measure to prevent electrical shock and damage to components.

How Flash Codes Work

Carrier furnaces use a standardized system for their flash codes, although specific models might have slight variations. The codes are typically communicated through a series of blinks. The pattern is crucial:

  • Number of Blinks: The sequence often involves a specific number of blinks.
  • Pause Between Blinks/Sequences: A short pause might differentiate individual blinks within a sequence, and a longer pause typically separates repeating code sequences.
  • Steady vs. Rapid Blink: A steady, slow blink usually indicates normal operation, while a rapid blink or a specific pattern of short and long blinks signifies an error.

Technicians and experienced homeowners learn to count these blinks and consult a legend or chart specific to their furnace model to interpret the meaning. This chart is often found on a sticker inside the furnace cabinet, near the control board, or within the furnace’s installation and service manual.

Common Carrier Furnace Flash Codes And Their Meanings

Carrier furnaces are known for their reliability, but like any complex mechanical system, they can encounter issues. The flash codes are designed to quickly point towards the root cause. While the exact codes can vary slightly between different Carrier furnace series (e.

g. , Infinity, Performance, Comfort), several common codes appear across many models. Understanding these prevalent codes can significantly speed up the diagnostic process.

Ignition And Flame Sensing Issues

These are among the most frequent problems encountered. They relate to the furnace’s ability to safely ignite the gas burner and detect the presence of a flame.

  • Code 1 (One Blink): This often signifies a normal, steady state or a warm-up delay. If the furnace is running, this is expected. If the furnace is not heating and shows one blink, it might indicate a thermostat issue or that the furnace is in a programmed delay.
  • Code 3 (Three Blinks): This is a critical code, typically indicating ignition failure or interrupted ignition. This means the furnace attempted to ignite the gas, but either the ignitor didn’t heat up properly, the gas valve didn’t open, or the flame sensor did not detect a flame after ignition.
  • Common Causes: Faulty ignitor (hot surface ignitor or spark ignitor), faulty gas valve, blocked gas orifice, or a problem with the flame sensor.
  • Code 4 (Four Blinks): This code usually points to a flame rollout or high limit switch tripped. Flame rollout is a dangerous condition where the flame exits the combustion chamber. This is a safety shutdown.
  • Common Causes: A blocked heat exchanger, a malfunctioning inducer motor (not venting exhaust properly), or a faulty high-limit switch itself. This code requires immediate attention due to safety concerns.
  • Code 5 (Five Blinks): This often indicates flame sensed when no heat demand is present. This is a safety issue where the furnace thinks there’s a flame but the thermostat isn’t calling for heat.
  • Common Causes: A faulty flame sensor, a sticking gas valve, or a problem with the control board.

Airflow And Blower Motor Issues

Proper airflow is essential for efficient and safe furnace operation. Codes related to airflow often indicate problems with the inducer motor or the circulation blower.

  • Code 7 (Seven Blinks): This commonly signals a blower failure or overheating. It means the circulation blower is not running or not running at the correct speed, leading to the furnace overheating and tripping its safety limits.
  • Common Causes: A failed blower motor, a faulty blower motor capacitor, a wiring issue to the blower, or a problem with the control board’s control of the blower.
  • Code 8 (Eight Blinks): This code often relates to the inducer motor not running correctly or failing to reach the necessary speed before ignition is attempted. The inducer motor is responsible for drafting combustion gases out of the furnace.
  • Common Causes: A faulty inducer motor, a blocked inducer motor vent, a cracked inducer motor housing, or wiring issues.

System And Electrical Faults

Some codes indicate more general system malfunctions or issues with electrical components.

  • Code 9 (Nine Blinks): This code can indicate a pressure switch malfunction. The pressure switch ensures the inducer motor is operating correctly to vent exhaust gases. If it doesn’t detect the correct pressure, it will prevent the furnace from running.
  • Common Causes: A faulty pressure switch, a blocked or kinked vent tube leading to the pressure switch, or a malfunctioning inducer motor.
  • Code 10 (Ten Blinks): This often signifies a shorted limit switch or overheating. Similar to code 4, it indicates a safety limit has been tripped due to excessive heat, but the nature of the fault might lie with the switch itself being shorted.
  • Common Causes: A faulty high-limit switch, a continuously running inducer motor, or a circulation blower failure.
  • Code 11 (Eleven Blinks): This code can indicate a control board failure or a wiring fault. If the control board itself is malfunctioning or if there’s a short in the wiring harness, it may generate this code.
  • Common Causes: A defective control board, loose or damaged wiring connections, or a short circuit in one of the furnace’s components.

Note: This list covers common codes. Always refer to your specific Carrier furnace model’s documentation for the most accurate interpretation.

Diagnosing The Problem: A Step-by-step Approach

Observing a flash code is the first step; understanding how to proceed is the next. A systematic approach can help you gather more information and decide whether a DIY fix is possible or if professional intervention is necessary.

Step 1: Identify The Flash Code

  • Locate the LED: Open the furnace access panel (after powering off the unit). Find the control board and the blinking LED.
  • Observe the Pattern: Carefully count the number of blinks and note any pauses. For example, a code might be “3 short blinks, pause, 3 short blinks.”
  • Consult the Legend: Look for a sticker on the inside of the furnace cabinet, near the control board, or consult your furnace’s manual. This legend will list the flash codes and their corresponding meanings. If you don’t have the manual, a quick online search for your specific Carrier furnace model number and “flash codes” should yield results.

Step 2: Assess The Situation And Safety

  • Power Cycle the Furnace: Sometimes, a temporary glitch can trigger a code. Turn off the furnace power at the thermostat and at the furnace’s power switch (usually a toggle switch near the unit). Wait about 60 seconds, then turn the power back on. Observe if the code reappears.
  • Visual Inspection (Power Off! ): With the power completely disconnected, visually inspect accessible components for obvious issues:
  • Debris: Check for excessive dust or debris around the burners, ignitor, flame sensor, and blower motor.
  • Wiring: Look for any loose, frayed, or burnt wires connected to the control board or sensors.
  • Vents: Ensure the furnace exhaust vent pipe is clear of obstructions (snow, nests, etc. ).
  • Condensate Drain: If you have a high-efficiency furnace, check that the condensate drain line is not clogged.

Step 3: Initial Troubleshooting Based On Code Type

If the code indicates an ignition or flame issue (e.g., Code 3 or 5):

  • Flame Sensor: This is a common culprit. It can become coated with soot, preventing it from properly detecting the flame. If you are comfortable and knowledgeable, you can attempt to clean it (ensure power is OFF). Gently remove the flame sensor (usually held by one screw), clean the metal rod with fine-grit sandpaper or steel wool, and reinstall it.
  • Ignitor: Hot surface ignitors can crack or fail. Visually inspect it for cracks. If it appears intact, its failure might be electrical, requiring a multimeter test (which should be done by a professional if you’re unsure).

If the code indicates an airflow or blower issue (e.g., Code 7 or 8):

  • Blower Compartment: Check for obvious obstructions in the blower wheel.
  • Filter: Ensure your furnace filter is clean. A severely clogged filter can restrict airflow and cause overheating, potentially leading to blower-related codes.

If the code indicates a limit switch or rollout issue (e.g., Code 4 or 10):

  • High-Limit Switch: These switches are safety devices. If tripped, they indicate the furnace has overheated. The cause of overheating (blocked vents, bad blower, etc.) Must be addressed. If the switch itself is faulty, it will need replacement.
  • Flame Rollout: This is a serious safety concern. Do not attempt to bypass safety features. This requires professional diagnosis of the combustion chamber and venting.

Step 4: When To Call A Professional

It’s crucial to recognize the limits of DIY troubleshooting. You should call a qualified HVAC technician if:

  • You are uncomfortable working with electrical components or gas lines.
  • The problem involves the gas valve or gas supply.
  • You suspect a heat exchanger issue (often accompanied by a burning smell or soot).
  • The flash code persists after a power cycle and basic checks.
  • The code indicates a serious safety concern like flame rollout.
  • You lack the necessary tools or expertise for further diagnosis (e.g., using a multimeter).

Example: A homeowner noticed their Carrier furnace was blowing cool air and displaying a three-blink code. After checking the furnace manual, they found this indicated an “ignition failure.” They confirmed the thermostat was set correctly and the furnace power was on. They decided to power cycle the unit, but the code returned. Upon further inspection (with power off), they noticed the ignitor glowed briefly but then shut off without igniting the gas. Recognizing this as potentially complex, they called an HVAC technician, who confirmed a faulty ignitor and replaced it, restoring heat.

Carrier Furnace Flash Codes

Credit: www.youtube.com

Common Component Failures Indicated By Flash Codes

Flash codes are incredibly useful because they often point directly to specific components that are malfunctioning. Understanding these common failure points can help you better grasp the diagnostic information provided by your Carrier furnace.

The Ignitor Assembly

The ignitor is responsible for generating the heat necessary to ignite the natural gas or propane mixture in the combustion chamber. Carrier furnaces typically use one of two types:

  • Hot Surface Ignitor (HSI): This is a silicon carbide or nitride element that heats up to glowing red temperatures, similar to a light bulb filament. Codes indicating ignition failure (like a three-blink code) can often be traced to a cracked or burnt-out HSI. These are consumable parts and have a finite lifespan.
  • Spark Ignitor: Some older or specific models might use a spark ignitor, which generates a high-voltage spark to ignite the gas, much like a gas grill ignitor. Failure here could be due to the ignitor itself, the transformer generating the spark, or the gap between the ignitor and the flame sensor being incorrect.

The Flame Sensor

The flame sensor is a crucial safety device. It’s a metal rod positioned in the path of the flame. Once the gas ignites, the flame heats the sensor. This heat causes a small electrical current to flow through the sensor and back to the control board.

If the control board detects this current, it knows a flame is present and continues to allow gas flow. If the sensor doesn’t detect heat (or flame) after ignition, the control board shuts off the gas valve for safety.

  • Common Failure: The most frequent issue with flame sensors is fouling from soot or combustion byproducts. This coating insulates the metal rod, preventing it from conducting the necessary electrical signal. A three-blink code (ignition failure) or a five-blink code (flame present when not demanded, sometimes due to a faulty sensor causing phantom readings) can often be resolved by cleaning the flame sensor. A severely damaged or corroded sensor may need replacement.

The Pressure Switch

The pressure switch monitors the operation of the inducer motor. This motor pulls air in to mix with fuel and pushes exhaust gases out of the furnace. The pressure switch has a small tube connected to the inducer motor housing.

When the inducer motor runs, it creates a specific pressure (or vacuum) that is detected by the switch.

  • Function: If the inducer motor fails to start, runs too slowly, or if the exhaust vent is blocked, the correct pressure won’t be generated. The pressure switch will not close (or open, depending on its design), and the control board will receive a signal indicating a problem, often resulting in a nine-blink code.
  • Troubleshooting: Issues can stem from a faulty switch, a blocked or kinked tube, or a problem with the inducer motor itself.

The High-limit Switch

The high-limit switch is another critical safety device designed to prevent the furnace from overheating. It’s typically located near the heat exchanger. If the temperature inside the furnace exceeds a safe threshold, this switch will open, cutting power to the burners and signaling the control board to shut down the heating cycle.

  • Indication: Codes like four blinks or ten blinks often point to the high-limit switch being tripped. It’s important to remember that the switch trips *because* of overheating; simply replacing the switch without addressing the root cause of the overheating (e.g., a dirty filter, failing blower motor, blocked ductwork) will lead to repeated failures. In some cases, the high-limit switch itself can fail and trip unnecessarily or become “shorted,” indicating a fault even when temperatures are normal.

The Blower Motor And Inducer Motor

These motors are vital for safe and efficient operation.

  • Inducer Motor: As mentioned, this motor drafts combustion gases. If it fails, the furnace won’t run, and you’ll likely see codes related to pressure switches or inducer failure (eight blinks).
  • Circulation Blower Motor: This motor pushes the heated air through your home’s ductwork. If it fails or runs too slowly, the furnace can overheat, triggering high-limit switches and potentially seven-blink codes. Problems can range from a failed motor winding to a faulty motor capacitor, which helps start and run the motor.

Carrier Furnace Flash Code Comparison Table

To provide a clearer overview, here’s a table summarizing some of the most common Carrier furnace flash codes, their typical meanings, and potential causes. Remember that specific model variations exist.

Flash Code (Blinks)Typical MeaningPotential CausesSeverity & Action
1Normal Operation / Warm-up DelayNone (if furnace is running)Normal.
3Ignition Failure / Interrupted IgnitionFaulty ignitor (HSI or spark), faulty gas valve, blocked gas orifice, faulty flame sensor, control board issue.**High.** Furnace not heating. Requires diagnosis of ignition components.
4Flame Rollout / High Limit TrippedBlocked heat exchanger, malfunctioning inducer motor, faulty high-limit switch, improper venting.**Critical Safety Hazard.** Do not operate. Flame exiting combustion chamber is dangerous. Requires immediate professional inspection.
5Flame Present When No Heat DemandFaulty flame sensor (reading phantom flame), sticking gas valve, control board issue.**High.** Safety shutdown. Indicates a potentially dangerous situation. Requires professional diagnosis.
7Blower Failure / OverheatingFailed circulation blower motor, faulty blower capacitor, wiring issue to blower, control board issue, clogged filter restricting airflow.**High.** Furnace may overheat, blower not circulating air. Check filter first. If persists, requires professional motor/electrical diagnosis.
8Inducer Motor Failure / Speed IssueFailed inducer motor, blocked inducer vent, cracked inducer housing, wiring issue.**High.** Furnace cannot safely vent exhaust gases. Requires professional diagnosis of inducer motor and venting system.
9Pressure Switch MalfunctionFaulty pressure switch, blocked/kinked vent tube, malfunctioning inducer motor.**High.** Furnace cannot verify safe venting. Requires professional diagnosis of pressure switch and inducer system.
10Shorted Limit Switch / OverheatingFaulty high-limit switch, continuous inducer operation, circulation blower failure.**High.** Indicates overheating. Address the cause of overheating. If switch is faulty, requires replacement.
11Control Board Failure / Wiring Fault / LockoutDefective control board, loose/damaged wiring, short circuit in system, repeated safety lockouts.**High.** System is locked out or control board is not functioning. Requires professional diagnosis, potentially control board replacement.

Advanced Troubleshooting And Maintenance Tips

Beyond simply reading the codes, proactive maintenance and a deeper understanding of your furnace can prevent issues and ensure longevity.

Regular Maintenance Schedule

  • Annual Professional Tune-Up: Schedule an annual inspection and cleaning with a qualified HVAC technician. They will check all components, clean burners and sensors, test safety controls, and ensure optimal performance. This is the single best way to prevent unexpected breakdowns and costly repairs.
  • Filter Replacement: This is a homeowner’s responsibility and a critical one. A dirty air filter restricts airflow, making your furnace work harder, reducing efficiency, and potentially causing overheating and tripping limit switches (leading to codes like 4, 7, or 10). Check your filter monthly and replace it as needed, typically every 1-3 months depending on the filter type and household conditions (pets, allergies, etc. ).

Does Mold Smell Go Away After Cleaning

Does Mold Smell Go Away After Cleaning

The musty, unpleasant odor of mold is often the first, and most persistent, sign of a hidden problem in a home or building. This damp, earthy smell can be incredibly off-putting, impacting comfort and even potentially signaling health concerns. Many homeowners and property managers immediately reach for cleaning supplies, hoping to eradicate both the visible mold and its accompanying stench. But a common question arises: does mold smell truly go away after cleaning? The answer is nuanced, depending on the thoroughness of the cleaning, the extent of the mold infestation, and the underlying causes of its growth.

Simply wiping down a surface where mold has appeared might offer temporary relief, but the persistent nature of the smell often indicates that the problem hasn’t been fully addressed. Mold is a living organism that thrives in moist environments, and its spores are microscopic, capable of spreading far beyond what is visible to the naked eye.

The smell itself is a byproduct of the mold’s metabolic processes, releasing volatile organic compounds (VOCs) into the air. Therefore, to truly eliminate the odor, the source of the mold must be identified and removed, and the conditions that allowed it to grow must be corrected.

This article will explore the complexities of mold smell, its relationship to cleaning efforts, and the steps necessary for its complete eradication.

Key Takeaways

  • Mold smell is a direct indicator of mold presence and its VOC emissions. The odor itself is a byproduct of mold’s metabolic processes.
  • Surface cleaning alone is often insufficient. If the root cause of moisture and the full extent of the mold colony are not addressed, the smell will likely return.
  • Complete mold removal requires identifying and eliminating the moisture source. This is the most critical step to prevent recurrence.
  • The type of mold and the materials affected influence smell persistence. Porous materials absorb odors more deeply.
  • Professional assessment is recommended for significant infestations. This ensures thorough removal and proper remediation.
  • Ventilation and air purification can help manage residual odors. However, they are supplementary to actual mold remediation.

Understanding The Science Behind Mold Odor

The distinctive smell associated with mold is not just an unpleasant sensory experience; it’s a chemical signal. Mold, a type of fungus, grows by breaking down organic matter. As it grows and reproduces, it releases microscopic spores into the air. Simultaneously, it produces volatile organic compounds (VOCs). These VOCs are gases that have a strong odor, often described as musty, earthy, or even like wet socks. The concentration and specific types of VOCs released can vary depending on the mold species, the substrate it’s growing on, and environmental conditions like humidity and temperature.

When you detect a mold smell, it signifies that mold is actively growing and releasing these VOCs. The intensity of the smell generally correlates with the size and activity level of the mold colony. A faint smell might indicate a small, early-stage infestation, while a strong, pervasive odor suggests a more significant problem that could be widespread. It’s important to understand that these VOCs can travel through the air, allowing you to smell mold even if you can’t see it directly. This makes the smell a crucial warning sign of potential mold growth within walls, under flooring, or in hidden damp areas.

Volatile Organic Compounds (vocs) And Their Role

VOCs are carbon-containing chemicals that readily evaporate at room temperature. In the context of mold, these compounds are metabolic byproducts. Common VOCs produced by mold include geosmin, which contributes to the earthy smell, and 2-methylisoborneol (MIB), which can smell like mildew. Other compounds can produce more acrid or pungent odors. The human nose is highly sensitive to these compounds, which is why even small amounts can be detected.

The release of VOCs is not constant; it can fluctuate based on the mold’s life cycle and environmental factors. For instance, increased humidity or temperature can accelerate mold growth and, consequently, increase VOC production and odor intensity. Conversely, drying out an area might reduce the immediate smell, but it doesn’t necessarily mean the mold has been eradicated.

The VOCs can linger in the air and on surfaces for some time.

Porous Vs. Non-porous Materials

The material on which mold grows significantly impacts how the smell behaves. Non-porous materials like glass, metal, and hard plastics are relatively easy to clean. Mold growing on these surfaces can often be wiped away, and the VOCs don’t deeply penetrate. Therefore, cleaning these surfaces thoroughly can effectively remove the source of the odor.

Porous materials, however, present a greater challenge. These include materials like drywall, wood, carpet, upholstery, and insulation. Mold can penetrate the surface of these materials, and its hyphae (root-like structures) can grow deep within them. When mold grows on or within porous materials, the VOCs are absorbed, making the smell much harder to eliminate. Even if the visible mold is scrubbed off, the odor molecules can remain trapped within the material’s fibers or structure. In such cases, simply cleaning may not be enough; the affected porous materials might need to be removed and replaced to completely get rid of the smell.

Does Mold Smell Go Away After Cleaning

Credit: www.wikihow.com

Why Surface Cleaning Often Fails To Eliminate Mold Smell

Many people assume that a quick scrub with household cleaners will solve the mold smell problem. While this might mask the odor temporarily or remove superficial mold growth, it rarely addresses the root cause or the full extent of the infestation. The persistence of the smell after cleaning is a strong indicator that the mold is still present, either in less accessible areas or within the materials themselves.

Incomplete Mold Removal

The most common reason for the smell returning is incomplete mold removal. Mold spores are microscopic and can spread through air currents, water droplets, or even on cleaning tools. If cleaning efforts don’t reach all the mold colonies, or if the cleaning tools themselves become contaminated, the mold will continue to grow and release VOCs. Especially in cases of hidden mold within wall cavities, under floorboards, or behind fixtures, surface cleaning is entirely inadequate.

Ignoring The Moisture Source

Mold requires moisture to grow. The smell will persist as long as the conditions that allowed the mold to thrive remain. Common moisture sources include:

  • Leaks: Plumbing leaks, roof leaks, or foundation leaks.
  • Condensation: On pipes, windows, or poorly insulated walls, especially in bathrooms and kitchens.
  • High Humidity: Inadequate ventilation in damp areas like basements, laundry rooms, and bathrooms.
  • Flooding: Water damage from storms or burst pipes.

If the source of moisture is not identified and repaired, the cleaned area will likely become re-colonized by mold, and the smell will inevitably return. Cleaning without addressing the underlying moisture issue is like trying to bail out a sinking boat without plugging the hole.

Residual Vocs And Mold Spores

Even after visible mold is removed, residual VOCs can remain trapped in the air and on surfaces, particularly within porous materials. These lingering compounds can continue to produce an odor. Furthermore, dormant mold spores, which are always present in the environment, can reactivate and begin growing again once conditions become favorable (i.e., when moisture returns). Therefore, the smell might fade slightly after cleaning but resurface with renewed intensity as the mold colony re-establishes itself.

The Illusion Of Cleanliness

Sometimes, the cleaning process itself can temporarily alter the air quality or mask odors. For example, the scent of cleaning products can overpower the musty smell for a short period. However, this is purely a masking effect. Once the cleaning product’s scent dissipates, the underlying mold odor will return if the mold itself has not been eliminated.

This can create a false sense of security, leading individuals to believe the problem is solved when it is not.

Does Mold Smell Go Away After Cleaning

Credit: www.wikihow.com

When Cleaning Works: Small, Non-porous Surface Mold

There are specific scenarios where cleaning *can* effectively eliminate mold smell. These typically involve small, superficial patches of mold on non-porous surfaces where the underlying moisture issue is easily resolved.

Identifying Suitable Scenarios

  • Small Spots on Tile or Grout: A few small, visible mold spots on bathroom tiles or grout lines can often be cleaned effectively.
  • Mold on Glass or Metal: Mold growth on shower doors, metal fixtures, or windowsills can usually be wiped away.
  • Minor Condensation-Related Growth: If mold has appeared due to brief periods of condensation on a non-porous surface and the condensation issue is quickly rectified (e.g., by improving ventilation), cleaning might suffice.

Effective Cleaning Techniques For Small Areas

For these limited cases, effective cleaning involves:

  • Safety First: Wear gloves, eye protection, and a mask (N95 respirator recommended) to avoid inhaling spores or coming into contact with cleaning solutions.
  • Cleaning Solution: Use a detergent and water solution for general cleaning. For tougher spots, a diluted bleach solution (1 part bleach to 10 parts water) can be effective on non-porous surfaces. However, avoid mixing bleach with ammonia or other cleaners, as this can create toxic fumes. Alternatively, specialized mold and mildew removers can be used.
  • Scrubbing: Use a brush or sponge to scrub the moldy areas thoroughly.
  • Rinsing and Drying: Rinse the area with clean water and dry it completely with a cloth or fan. Thorough drying is crucial.
  • Ventilation: Ensure the area is well-ventilated during and after cleaning.

Even in these seemingly simple cases, it’s essential to monitor the area for a few weeks to ensure the mold does not return. If it does, it suggests that either the cleaning wasn’t thorough enough, or there’s a hidden moisture source that needs attention.

Does Mold Smell Go Away After Cleaning

Credit: alen.com

When To Call The Professionals: Extensive Infestations

If you’re dealing with more than just a few small spots, or if the mold is growing on porous materials, it’s often time to bring in professional mold remediation specialists. These experts have the training, equipment, and experience to handle complex mold issues safely and effectively.

Signs You Need Professional Help

  • Large Areas of Mold: If mold covers an area larger than about 10 square feet (roughly 3 feet by 3 feet).
  • Mold on Porous Materials: Mold growing on drywall, wood, insulation, carpets, or ceiling tiles usually requires professional removal.
  • Hidden Mold: If you suspect mold is growing inside walls, under floors, or in HVAC systems (indicated by persistent smells and no visible source).
  • Health Concerns: If occupants of the building experience mold-related health symptoms like allergies, asthma exacerbation, or respiratory issues.
  • Water Damage: Following significant water damage from flooding or leaks, professional assessment and remediation are often necessary.
  • Persistent Odors: If you’ve attempted cleaning multiple times and the mold smell continues to return.

The Professional Remediation Process

Professional mold remediation typically involves several key steps:

  • Inspection and Assessment: Professionals use specialized equipment (like moisture meters and thermal cameras) to locate the extent of the mold and identify moisture sources.
  • Containment: The affected area is sealed off with plastic sheeting and negative air pressure to prevent mold spores from spreading to other parts of the building.
  • Mold Removal: Depending on the material, mold is either cleaned (on non-porous surfaces) or removed and discarded (on porous materials like drywall or insulation). This often involves specialized cleaning agents and HEPA vacuums.
  • Drying: Industrial dehumidifiers and air movers are used to thoroughly dry out the affected areas and materials.
  • Odor Removal: Techniques like ozone treatment or hydroxyl generators may be used to neutralize any remaining odors.
  • Reconstruction: Damaged materials are replaced, and the area is restored to its original condition.
  • Post-Remediation Verification: An independent third party may conduct air quality testing to ensure the mold levels are back to normal.

Cost Considerations

The cost of professional mold remediation can vary significantly based on the size and complexity of the infestation. For small jobs, it might range from a few hundred dollars. For larger, more extensive projects involving structural damage, costs can run into thousands or even tens of thousands of dollars.

It’s often worth obtaining quotes from multiple reputable remediation companies.

Factors Influencing Odor Persistence

Several factors contribute to how long a mold smell might linger, even after cleaning attempts. Understanding these can help manage expectations and guide remediation efforts.

Type Of Mold

Different species of mold produce different VOCs. Some molds might produce more potent or persistent odors than others. For example, Stachybotrys chartarum (often called “black mold”) is known for its musty smell, but many other common molds like Aspergillus and Penicillium also produce distinct odors.

Identifying the specific mold species can sometimes be helpful, though often the remediation approach is similar regardless of the type.

Extent Of Contamination

As previously mentioned, the size of the mold colony directly impacts the intensity and persistence of the odor. A small, isolated patch might produce a faint smell that dissipates relatively quickly once cleaned. However, a widespread infestation, especially one that has penetrated building materials, will release a significant amount of VOCs, leading to a much more persistent and pervasive odor.

Environmental Conditions

The environment in which the mold grows and where the cleaning occurs plays a role.

  • Humidity: High humidity levels can encourage mold growth and VOC release. Even after cleaning, if humidity remains high, the smell can return quickly.
  • Temperature: Warmer temperatures can accelerate mold growth and VOC production.
  • Airflow: Stagnant air can trap odors, making them linger longer. Good ventilation helps disperse VOCs, but it can also spread spores if not managed correctly during remediation.

Substrate Material (revisited)

The absorbent nature of porous materials cannot be overstated. Wood, drywall, insulation, and fabrics act like sponges for mold VOCs. Even if the mold itself is killed or removed, the odor molecules can remain embedded within the material’s structure. This is why smells can persist for weeks or months even after the visible mold is gone, especially if the affected materials are not replaced.

Strategies For Managing Lingering Odors

Even after successful mold remediation, a faint musty smell might linger for a period. This is often due to residual VOCs that are slowly dissipating. Several strategies can help manage and eliminate these lingering odors.

Ventilation Is Key

Continuous and adequate ventilation is crucial for dissipating trapped VOCs.

  • Open Windows and Doors: When weather permits and outdoor air quality is good, open windows and doors to allow fresh air to circulate.
  • Use Fans: Place fans strategically to improve airflow throughout the affected areas and exhaust stale air outside.
  • Run Exhaust Fans: Ensure bathroom and kitchen exhaust fans are working properly and use them regularly.

Air Purification

Air purifiers equipped with activated carbon filters are highly effective at removing VOCs and odors from the air. Activated carbon has a large surface area that adsorbs odor molecules. Look for purifiers specifically designed for odor removal and ensure they have a substantial carbon filter component. HEPA filters in these units can also capture any remaining airborne mold spores.

Deodorizing Treatments

For persistent odors, especially those embedded in materials, specialized deodorizing treatments might be necessary.

  • Ozone Generators: These devices produce ozone gas, which can neutralize odors by breaking down VOC molecules. However, ozone can be harmful to health and requires the area to be unoccupied during treatment, followed by thorough ventilation. They should only be used by professionals or with extreme caution.
  • Hydroxyl Generators: Similar to ozone, hydroxyl generators create hydroxyl radicals that break down odor-causing compounds. They are generally considered safer than ozone generators for use in occupied spaces, but professional application is still recommended.
  • Baking Soda or Activated Charcoal: For smaller areas or less intense odors, placing open containers of baking soda or activated charcoal can help absorb smells from the air.

Cleaning And Sealing Surfaces

After mold removal, thoroughly cleaning all affected surfaces again can help remove any remaining residue. For porous materials that were not replaced, sealing them with a mold-inhibiting primer and paint can encapsulate remaining odors and prevent future growth. This is particularly useful for basement walls or previously affected wooden structures.

Preventing Mold Recurrence And Odor

The most effective way to deal with mold smell is to prevent mold from growing in the first place. This involves controlling moisture and maintaining good indoor air quality.

Moisture Control: The Cornerstone Of Prevention

  • Fix Leaks Promptly: Regularly inspect plumbing, roofs, and foundations for leaks and repair them immediately.
  • Manage Humidity: Aim to keep indoor humidity levels between 30% and 50%. Use dehumidifiers in damp areas like basements and crawl spaces.
  • Ensure Proper Ventilation: Use exhaust fans in bathrooms and kitchens, and ensure attics and crawl spaces are adequately ventilated. Consider installing an Energy Recovery Ventilator (ERV) or Heat Recovery Ventilator (HRV) for continuous fresh air exchange.
  • Dry Wet Areas Quickly: Clean up spills and dry any wet areas within 24-48 hours to prevent mold from taking hold.
  • Insulate Properly: Insulate cold surfaces like pipes, windows, and exterior walls to prevent condensation.

Regular Inspections And Maintenance

Periodically inspect areas prone to moisture, such as bathrooms, kitchens, basements, and attics, for any signs of water damage or mold growth. Maintaining your HVAC system, including regular filter changes, also contributes to better indoor air quality and can help prevent moisture buildup.

Educating Occupants

Ensure everyone living or working in the building understands the importance of moisture control and prompt cleanup of spills. Simple habits like running the bathroom fan during and after showers can make a significant difference over time.

Frequently Asked Questions

How Long Does Mold Smell Typically Last After Cleaning?

The duration the smell lasts depends heavily on the effectiveness of the cleaning and the extent of the mold. If you’ve only cleaned a small, non-porous surface, the smell might disappear within hours or a day once the area is dry and ventilated.

However, if the mold was extensive or on porous materials, and the moisture source wasn’t fully addressed, the smell can linger for weeks or even months, or return shortly after cleaning.

Can Mold Smell Cause Health Problems Even If The Mold Is Cleaned?

Yes, the volatile organic compounds (VOCs) released by mold are what cause the smell, and these can continue to affect air quality even after visible mold is removed. Exposure to these VOCs can cause symptoms like headaches, dizziness, nausea, eye and respiratory irritation, and allergic reactions in sensitive individuals. If the cleaning was incomplete or the moisture source persists, mold can regrow, and the associated health risks will continue.

Is It Safe To Just Mask Mold Smell With Air Fresheners?

No, masking the smell with air fresheners or scented candles is not a safe or effective solution. It only covers up the odor temporarily and does nothing to address the underlying mold problem. The mold will continue to grow, and the VOCs will persist in the air, potentially exacerbating health issues and leading to more significant damage over time. It’s crucial to address the source of the smell.

What Is The Difference Between Mold Smell And Mildew Smell?

While often used interchangeably, “mold smell” and “mildew smell” technically refer to different types of fungi, though both are types of mold. Mildew typically grows on flat surfaces, often appearing as a white or grayish powdery coating, and generally has a less pungent, milder musty odor.

Molds can grow in more diverse environments, including within materials, and often produce a stronger, more pervasive musty or earthy smell due to a wider range of VOCs. For practical purposes in a home, both indicate a moisture problem that needs addressing.

Can I Use Essential Oils To Get Rid Of Mold Smell?

While some essential oils like tea tree oil have antimicrobial properties, using them to “get rid of mold smell” is generally not recommended as a primary solution. They might offer a temporary masking effect or slight surface-level antimicrobial action, but they won’t eliminate the mold colony or its source.

Overuse of essential oils can also impact indoor air quality and may not be suitable for individuals with respiratory sensitivities. The focus should always be on moisture control and proper mold remediation.

The persistence of mold smell after cleaning is a critical indicator that the job is not truly done. While a superficial clean might offer fleeting relief, the lingering musty odor is a persistent reminder that mold colonies may still be active, feeding on hidden moisture.

Addressing the root cause, the moisture source, and ensuring thorough removal of all mold, including its microscopic spores and odor-producing VOCs, is paramount. For minor issues on non-porous surfaces, diligent cleaning and drying might suffice, but for most situations, particularly those involving porous materials or extensive growth, professional remediation is the most reliable path to a truly odor-free and healthy environment.

Vigilance in moisture control and regular inspections remain the best defenses against the return of mold and its unwelcome smell.

Liftmaster Garage Door Opener Yellow Light Blinking

Liftmaster Garage Door Opener Yellow Light Blinking

The Liftmaster garage door opener yellow light blinking is a common issue that can leave homeowners puzzled and their garage doors inoperable. This blinking light, often accompanied by an unresponsive opener, signals a problem that needs attention. While it might seem daunting, understanding the underlying causes and troubleshooting steps can help you resolve the issue efficiently. This guide will walk you through the most frequent reasons for a blinking yellow light on your Liftmaster opener and provide practical solutions, drawing on expert advice and common repair scenarios.

Key Takeaways

  • A blinking yellow light on a Liftmaster garage door opener typically indicates an issue with the safety sensors or the logic board.
  • The most common cause is misaligned or obstructed safety eyes, preventing the door from closing.
  • Other potential culprits include loose wiring, remote control issues, travel limit settings, and internal component failure.
  • Troubleshooting involves a systematic approach, starting with the simplest checks like sensor alignment and obstructions.
  • Regular maintenance, including sensor cleaning and wiring checks, can prevent future issues.
  • When in doubt, consulting the Liftmaster manual or contacting a qualified technician is recommended for complex problems.

Understanding The Liftmaster Yellow Light Indicator

Liftmaster garage door openers use a system of indicator lights to communicate the status of the opener and signal potential problems. The yellow light, in particular, is often associated with the safety reversal system. This system is crucial for preventing the garage door from closing on an obstruction, such as a person, pet, or vehicle. When the yellow light blinks, it means the opener has detected an anomaly within this safety mechanism, preventing normal operation, especially the closing cycle.

The safety sensors, also known as photo-electric eyes, are mounted near the bottom of the garage door tracks on either side. They emit an invisible infrared beam. If this beam is broken or misaligned, the opener interprets it as an obstruction and stops the door’s closing motion. The blinking yellow light is the opener’s way of telling you that this safety circuit is not functioning correctly.

The Role Of Safety Sensors

The safety reversal system is mandated by federal law in the United States to prevent entrapment accidents. Liftmaster openers are designed with sophisticated sensors that monitor the path of the closing door. These sensors consist of a transmitter and a receiver. The transmitter emits an infrared beam, and the receiver detects it. If the beam is interrupted, the opener’s logic board receives this signal, and it will immediately stop the door from closing and often reverse it back to the fully open position. The blinking yellow light is a direct consequence of the opener not receiving a consistent signal from these safety sensors.

Other Potential Indicator Lights

It’s important to distinguish the yellow blinking light from other indicator lights Liftmaster openers might display. For instance, a red light often indicates the opener is in the process of closing or opening, or it might signal a different type of error. A green light might indicate a solid connection or a successful operation. Understanding these different signals can help in diagnosing the specific problem you’re facing. However, for issues related to the safety system and preventing closure, the blinking yellow light is the primary indicator.

Liftmaster Garage Door Opener Yellow Light Blinking

Credit: thriftygaragedoorrepair.ca

Common Causes For A Blinking Yellow Light

The blinking yellow light on your Liftmaster opener can stem from several common issues. Most of these are relatively straightforward to diagnose and fix, often requiring just a few simple steps.

1. Misaligned Safety Sensors

This is, by far, the most frequent reason for a blinking yellow light. The safety sensors are designed to be precisely aligned. Even a slight nudge or vibration can throw them off kilter. When they are misaligned, the beam from the transmitter does not reach the receiver, triggering the safety alert.

  • Diagnosis: Look at the sensors. They usually have a small LED light on each unit. If one or both lights are off, or if they are blinking independently (not a steady light indicating a good connection), misalignment is highly probable.
  • Solution: You’ll need to physically adjust the sensors. Loosen the mounting bracket on one or both sensors slightly. Gently move the sensor until its LED light becomes steady, indicating the beam is properly aligned. Once aligned, tighten the bracket. You might need to repeat this process until both sensors show a steady light.

2. Obstructions In The Sensor Path

Even if the sensors are perfectly aligned, anything blocking the infrared beam will trigger the safety mechanism. This could be a:

  • Debris: Dust, cobwebs, leaves, or even a stray piece of packaging material can accumulate around the sensors.
  • Tools or Equipment: Items stored near the garage door tracks, such as garden tools, sports equipment, or bicycles, can accidentally block the beam.
  • The Garage Door Itself: If the door is slightly ajar or if something is protruding from it, it could obstruct the beam as the door attempts to close.
  • Diagnosis: Visually inspect the area around the safety sensors and the entire path of the garage door.
  • Solution: Carefully remove any obstructions. Clean the sensor lenses with a soft, dry cloth. Ensure nothing is in the way of the beam’s path.

3. Loose Or Damaged Wiring

The safety sensors are connected to the garage door opener’s logic board via wires. If these wires become loose, are cut, or are damaged in any way, the signal from the sensors will not reach the opener, resulting in the blinking yellow light.

  • Diagnosis:
  • Check connections: Inspect the wiring terminals where the sensor wires connect to the opener motor unit. Ensure they are securely fastened.
  • Inspect wires: Follow the wires from the sensors to the opener. Look for any signs of fraying, cuts, or damage, especially where the wires run along the track or near moving parts of the opener.
  • Solution: If wires are loose, re-secure them to the terminals. If wires are damaged, they may need to be repaired or replaced. This can sometimes be a DIY task if you are comfortable with basic electrical work, but for safety, it’s often best to call a professional.

4. Faulty Logic Board

While less common than sensor issues, a malfunctioning logic board within the garage door opener unit can also cause the yellow light to blink. The logic board is the “brain” of the opener, processing all signals and commands. If it’s faulty, it might incorrectly interpret signals or fail to operate correctly.

  • Diagnosis: This is harder to diagnose without specialized tools. If you’ve exhausted all other possibilities, sensors are aligned, clean, wiring is intact, and no obstructions, the logic board might be the culprit.
  • Solution: A faulty logic board typically requires replacement. This is a job best left to a qualified garage door technician, as it involves working with the main electrical components of the opener.

5. Remote Control Or Wall Button Issues

Sometimes, the problem isn’t with the safety sensors but with the signal being sent to the opener. A malfunctioning remote control or a stuck wall button could be sending erratic signals.

  • Diagnosis: Try operating the garage door using a different remote control or the wall-mounted button. If the door operates normally with another control, the issue lies with the original remote. If neither works, and the yellow light is blinking, it’s less likely to be solely a remote issue.
  • Solution:
  • Remote: Replace the battery in the remote. If that doesn’t work, reprogram the remote to the opener. If it still malfunctions, the remote itself may need replacement.
  • Wall Button: Check if the wall button is sticking. Clean around it. If it’s consistently faulty, it may need to be replaced.

6. Travel Limit Settings

The travel limits determine how far the garage door opens and closes. If these settings are improperly configured, the opener might struggle to complete its cycle, sometimes triggering safety alerts. While less directly linked to a blinking yellow light than safety sensors, incorrect limits can cause unusual behavior.

  • Diagnosis: Observe the door’s movement. Does it stop short of fully closing or opening? Does it seem to struggle at a certain point?
  • Solution: Consult your Liftmaster manual to reset and adjust the travel limits. This usually involves pressing specific buttons on the motor unit and setting the desired open and close positions.
Liftmaster Garage Door Opener Yellow Light Blinking

Credit: www.ifixit.com

Troubleshooting Steps In Detail

When faced with a blinking yellow light, a systematic approach to troubleshooting is key. Start with the simplest and most common solutions and progress to more complex ones.

Step 1: Visual Inspection And Basic Checks

Before touching anything, take a moment to observe.

  • Check the Safety Sensors: Locate the two safety sensors near the bottom of the garage door tracks. Note the indicator lights on each. Are they on? Are they steady? If one is off or blinking erratically, this is your primary area of focus.
  • Look for Obstructions: Scan the entire path where the garage door travels. Check for anything that could be blocking the path of the infrared beam between the sensors. This includes debris, tools, toys, or even the garage door itself if it’s not fully open.
  • Examine Wiring: Quickly glance at the wires leading to the sensors and the opener unit. Do you see any obvious damage, such as cuts or frayed insulation? Are the connections at the opener unit secure?

Step 2: Cleaning And Aligning Safety Sensors

This is where you’ll spend most of your time if the initial inspection points to sensor issues.

  • Cleaning: Use a soft, dry microfiber cloth to gently wipe the lenses of both safety sensors. Avoid using harsh chemicals or abrasive materials, as they can damage the lenses. Sometimes, accumulated dust or grime is all that’s needed to disrupt the beam.
  • Alignment:
  • Identify the sensor with the steady light (if one has it) or the one that seems to be the issue.
  • Locate the mounting bracket. You may need a screwdriver to slightly loosen the screws holding the sensor in place.
  • Gently adjust the sensor’s position. You are looking for the point where the LED on the sensor becomes steady, indicating a proper connection with its counterpart.
  • Once you find the sweet spot, hold the sensor steady and tighten the mounting screws.
  • Repeat this process for the other sensor if necessary, ensuring both have steady indicator lights.
  • Test the opener by pressing the remote or wall button. If the yellow light stops blinking and the door operates, you’ve found your solution.

Step 3: Checking Wiring And Connections

If cleaning and alignment don’t resolve the issue, the next step is to delve into the wiring.

  • Secure Connections: Go to the garage door opener motor unit. You’ll see terminals where wires from the sensors connect. Ensure these wires are firmly attached. Sometimes, they can become loose over time. If they are just loose, re-inserting them firmly might solve the problem.
  • Inspect for Damage: Carefully trace the wires from the sensors to the motor unit. Look for any signs of wear and tear, such as cuts, nicks, or pinches. Pay close attention to areas where the wires might rub against metal tracks or other moving parts. If you find damaged wiring, repair it using appropriate electrical tape or connectors. For significant damage, you might need to replace the wire section. If you are not comfortable with electrical repairs, it’s best to call a professional.

Step 4: Testing Remote Controls And Wall Button

The problem might not be with the safety system at all, but with the input signal.

  • Remote Battery: If you’re using a remote, try replacing the battery. A weak battery can sometimes cause erratic signals.
  • Reprogramming: If a new battery doesn’t help, try reprogramming your remote to the opener. Consult your Liftmaster manual for specific instructions, as the process varies by model.
  • Wall Button Test: Use the wall-mounted button to try and operate the door. If the door works with the wall button but not the remote, the issue is likely with the remote. If neither works and the yellow light is still blinking, the problem is elsewhere.
  • Sticking Button: Ensure the wall button isn’t physically stuck or damaged.

Step 5: Resetting The Opener

Sometimes, a simple reset can clear minor glitches in the opener’s logic board.

  • Power Cycle: Disconnect the garage door opener from its power source (unplug it from the outlet). Wait for about 30 seconds to a minute, then plug it back in. This can sometimes reset the system and resolve temporary errors.
  • Resetting Limits: If you suspect travel limit issues, follow your manual’s instructions to reset and reprogram the open and close limits.

Step 6: When To Call A Professional

If you’ve gone through all these steps and the yellow light continues to blink, it’s time to consider calling a professional garage door technician. This often indicates a more serious issue, such as:

  • A faulty logic board within the opener.
  • A broken wire deep within the wall or ceiling that is difficult to access.
  • A malfunctioning internal component of the opener unit.

A technician has the expertise and tools to diagnose these more complex problems and perform the necessary repairs safely and effectively.

Liftmaster Garage Door Opener Yellow Light Blinking

Credit: www.youtube.com

Liftmaster Models And Specific Yellow Light Behavior

While the general principles apply across most Liftmaster models, there can be subtle differences in how the yellow light behaves or what it signifies depending on the specific opener series and its age. Newer models often have more advanced diagnostic capabilities.

Liftmaster Elite Series

The Elite Series (e. g. , models like the 8500W, 8550W) typically features advanced diagnostics. A blinking yellow light on these models often points directly to the safety sensor alignment or obstruction. These openers are designed to be more communicative about issues.

  • Example: If the sensors are misaligned on an 8550W, the yellow light will blink, and the opener will refuse to close. The diagnostic panel on some Elite models might even display a specific error code, providing a more precise clue.

Liftmaster Professional Series

Models in the Professional Series (e.g., PD752D, WD962) also rely heavily on the safety sensor system. The blinking yellow light follows the same logic: a disruption in the safety beam.

  • Data Point: According to Liftmaster’s support documentation, the most common cause for a blinking yellow light across their product lines remains safety sensor alignment. Statistics from repair services often indicate that over 70% of blinking yellow light issues are resolved by cleaning and aligning these sensors.

Older Liftmaster Models

Older Liftmaster openers might have simpler indicator systems. The blinking yellow light might be less sophisticated in its signaling.

  • Experience: In my experience with older models, a blinking yellow light could sometimes be triggered by intermittent wiring issues that newer models might self-correct or diagnose more granularly. The key is still to focus on the safety sensors and their connections first.

Understanding The Number Of Blinks

Some Liftmaster models use the number of blinks to indicate specific error codes. For instance, a specific number of yellow blinks might point to a motor issue, while another count could indicate a remote control pairing problem. Always refer to your specific Liftmaster model’s manual to decipher these blink codes.

  • Example: A Liftmaster 3240 might blink the yellow light 4 times to indicate a problem with the up-travel limit, whereas a different model might use the same blink pattern for a sensor fault.

Maintenance Tips To Prevent Issues

Preventative maintenance is key to ensuring your Liftmaster garage door opener functions smoothly and to avoid unexpected issues like the blinking yellow light.

Regular Sensor Checks

  • Monthly: Make it a habit to visually inspect your safety sensors monthly. Ensure they are free of obstructions and that their indicator lights are steady.
  • Cleaning: Clean the sensor lenses with a soft cloth at least every six months, or more often if you live in a dusty environment.

Wiring Inspection

  • Annually: Once a year, check the wiring connected to the sensors and the opener unit. Look for any signs of wear, damage, or loose connections. Gently tug on wires to ensure they are secure.

Lubrication And General Opener Maintenance

  • Lubricate Moving Parts: Periodically lubricate the garage door’s springs, rollers, and hinges. This reduces strain on the opener motor.
  • Check Door Balance: Ensure your garage door is properly balanced. A balanced door opens and closes smoothly with minimal effort. You can test this by disengaging the opener and trying to lift the door manually. It should stay open at any position without falling. If it’s heavy or slams shut, the springs may need adjustment, which can indirectly affect the opener.

Battery Replacement For Remotes

  • Proactive Replacement: Replace batteries in your remote controls every 6-12 months, even if they still seem to be working. This prevents the frustration of a dead remote when you need it most and can avoid intermittent signal issues.

When To Upgrade Your Liftmaster Opener

If you find yourself consistently troubleshooting your Liftmaster opener, or if it’s an older model (over 10-15 years old), it might be time to consider an upgrade. Newer openers offer enhanced safety features, quieter operation, better energy efficiency, and smart home integration.

Signs It’s Time For An Upgrade

  • Frequent Repairs: If you’re calling a technician more than once a year.
  • Outdated Technology: Lack of modern safety features like rolling codes or obstruction sensors.
  • Noise and Wear: The opener is excessively loud, or the door operation is jerky.
  • Lack of Smart Features: You desire integration with smart home systems (e.g., voice control, remote monitoring via smartphone).
  • Safety Concerns: Older models may not meet current safety standards.

Benefits Of Newer Models

Newer Liftmaster models, such as those in the MyQ® series, offer features like:

  • Smartphone Control: Monitor and control your garage door from anywhere via the MyQ app.
  • Real-time Alerts: Receive notifications when your garage door is opened or closed.
  • Enhanced Security: 10,000 different code combinations with Security+ 2.0® technology make unauthorized access extremely difficult.
  • Battery Backup: Ensure operation even during power outages.

Frequently Asked Questions

What Does A Blinking Yellow Light On A Liftmaster Mean?

A blinking yellow light on a Liftmaster garage door opener typically indicates an issue with the safety reversal system, most commonly the safety sensors (photo-electric eyes). It means the opener has detected a problem that prevents it from closing the garage door safely, usually due to misaligned or obstructed sensors.

How Do I Fix The Blinking Yellow Light On My Liftmaster?

The most common fix involves cleaning and realigning the safety sensors. Check for obstructions in their path, ensure wires are securely connected, and if necessary, reset the opener by unplugging it for a minute. If these steps don’t work, consult your manual or a professional.

Are The Safety Sensors The Only Reason For A Blinking Yellow Light?

While safety sensors are the most frequent cause, other issues can trigger a blinking yellow light. These include loose or damaged wiring, a faulty logic board in the opener, problems with the remote control or wall button, or incorrect travel limit settings.

How Often Should I Clean My Garage Door Opener’s Safety Sensors?

It’s recommended to clean the lenses of your safety sensors at least every six months. More frequent cleaning might be necessary if you live in a particularly dusty or dirty environment. Visually inspect them monthly for obstructions.

Can I Bypass The Safety Sensors If They Are Malfunctioning?

No, you should never bypass the safety sensors. They are a critical safety feature designed to prevent serious injury or damage. Bypassing them is dangerous and illegal in many areas. If the sensors are malfunctioning, they need to be repaired or replaced.

The Liftmaster garage door opener yellow light blinking is a signal that requires attention, but it’s often a solvable problem. By systematically troubleshooting the safety sensors, wiring, and other potential causes, you can often restore your garage door opener to full functionality. Remember that regular maintenance is your best defense against future issues, and when in doubt, always consult your owner’s manual or a qualified professional to ensure safety and proper operation.

Why Wall Paint Bubbles And Peels

Why Wall Paint Bubbles And Peels

The once pristine finish on your walls, a smooth canvas of color, has begun to betray you. Small blisters, then larger ones, appear, eventually leading to unsightly patches of peeling paint that mar the aesthetic of your home. This phenomenon, often dismissed as a minor annoyance, is a clear indicator of underlying issues that need to be addressed. Understanding why wall paint bubbles and peels is the first crucial step toward preventing it from happening again and restoring the integrity of your home’s surfaces.

Paint failure isn’t just about aesthetics; it can signal moisture problems, poor surface preparation, or the use of incompatible materials, all of which can lead to more significant structural damage if left unchecked. Whether you’re a seasoned DIYer or a homeowner looking to understand professional work, this guide will equip you with the knowledge to identify the root causes of paint failure and implement effective solutions.

We’ll explore the science behind paint adhesion, the common culprits behind bubbling and peeling, and the preventative measures you can take to ensure a durable, long-lasting finish.

Key Takeaways

  • Moisture is the primary culprit: Water trapped beneath the paint film is the most frequent cause of bubbling and peeling. This can stem from leaks, high humidity, or condensation.
  • Poor surface preparation is critical: Inadequate cleaning, sanding, or priming before painting will severely compromise paint adhesion.
  • Incompatible materials cause issues: Applying oil-based paint over latex, or vice-versa, without proper sealing can lead to adhesion problems.
  • Quality of paint matters: Lower-quality paints may have weaker binders, making them more susceptible to failure.
  • Environmental factors play a role: Extreme temperature fluctuations and direct sunlight can stress the paint film.
  • Proper application techniques are essential: Applying paint too thinly, too thickly, or in unfavorable weather conditions can lead to premature failure.
Why Wall Paint Bubbles And Peels

Credit: www.ringsend.com

The Science Of Paint Adhesion: Why Paint Sticks (or Doesn’t)

Paint is more than just a coat of color; it’s a complex system of pigments, binders, solvents, and additives. The binder is the critical component responsible for adhesion. It’s the “glue” that holds the pigment particles together and, more importantly, adheres them to the surface. When paint is applied, the solvent (water in latex paints, mineral spirits in oil-based paints) evaporates, leaving behind a solid film of binder and pigment. For this film to remain intact and adhere strongly, several factors must be in play.

The surface itself must be clean and porous enough to allow the binder to penetrate and create a mechanical bond. Surface tension also plays a role; if the paint has high surface tension, it might bead up rather than spread evenly, leading to poor contact and adhesion. The binder needs to form a continuous film that is flexible enough to withstand minor surface movements but strong enough to resist external forces like moisture or abrasion. When these conditions aren’t met, the bond between the paint and the surface, or between layers of paint, weakens, setting the stage for bubbling and peeling.

Why Wall Paint Bubbles And Peels

Credit: www.ultratechcement.com

Common Causes Of Paint Bubbling And Peeling

The appearance of bubbles and peeling paint on your walls isn’t a random occurrence. It’s a symptom, and like any symptom, it points to an underlying cause. Identifying these causes is paramount to fixing the problem effectively and preventing its recurrence.

Moisture Trapped Beneath The Paint Film

This is, by far, the most common reason for paint failure. Water is the enemy of paint adhesion. When moisture penetrates the paint film from behind, it breaks the bond between the paint and the substrate (the wall itself) or between different layers of paint.

  • Leaks from Plumbing or Roofs: Hidden leaks within walls, from faulty plumbing pipes, or from a compromised roof can saturate the drywall or plaster. As the water evaporates, it pushes against the paint film, creating blisters. In severe cases, this moisture can also lead to mold growth, further damaging the surface.
  • High Humidity and Condensation: Bathrooms, kitchens, and laundry rooms are prone to high humidity. Inadequate ventilation can lead to significant condensation forming on walls, especially during colder months when there’s a temperature differential between the interior and exterior. This moisture seeps into the paint.
  • Rising Damp: In older homes, moisture from the ground can wick up through porous building materials like brick or plaster, a phenomenon known as rising damp. This moisture can travel up the wall, compromising the paint finish at lower levels.
  • Inadequate Exterior Sealing: If the exterior of your home isn’t properly sealed or painted, water can penetrate the walls and find its way to the interior surface, causing the interior paint to bubble.

Poor Surface Preparation

Paint needs a clean, sound surface to adhere to. Skipping or rushing crucial preparation steps is a surefire way to invite paint failure down the line.

  • Dirty or Greasy Surfaces: Walls that haven’t been properly cleaned before painting can have a layer of dust, grease, or grime. Paint simply cannot adhere effectively to these contaminants. This is particularly common in kitchens where cooking grease accumulates.
  • Unprimed or Improperly Primed Surfaces: Priming is essential for several reasons: it seals porous surfaces, provides a uniform base for the topcoat, and enhances adhesion. Painting directly over glossy surfaces, stains, or new drywall without appropriate primer will almost certainly lead to peeling.
  • Old, Peeling Paint Not Removed: If you’re painting over an existing layer of paint that is already loose or peeling, you’re essentially painting over a failing surface. The new paint will only be as strong as the old layer beneath it, and it will inevitably start to peel along with the old paint.
  • Dust After Sanding: Sanding creates fine dust particles. If this dust isn’t thoroughly wiped away after sanding (using a damp cloth or tack cloth), it will prevent the primer or paint from making direct contact with the wall surface.

Incompatible Paint Layers

Paint formulations have evolved over the years, and not all types are compatible with each other. Applying one type of paint over another without the correct intermediary steps can lead to adhesion failure.

  • Latex Over Oil-Based Paint: Latex (water-based) paint does not adhere well to oil-based paint. The flexible binders in latex paint can’t get a proper grip on the hard, non-porous surface of oil-based paint. This often results in the latex paint bubbling and peeling off in sheets.
  • Oil-Based Over Latex Paint: While generally less problematic than the reverse, applying oil-based paint over latex can still cause issues if the latex paint isn’t completely cured or if the oil-based paint is too heavy. It can also lead to a less breathable surface.
  • Using the Wrong Primer: Different primers are designed for different surfaces and paint types. Using a primer not suited for the existing surface or the intended topcoat will compromise adhesion. For example, using a standard latex primer over a glossy oil-based surface won’t provide adequate grip.

Application Errors

Even with the right materials and preparation, improper application techniques can lead to paint failure.

  • Painting in Extreme Temperatures or Humidity: Most paints have optimal temperature and humidity ranges for application. Painting when it’s too cold, too hot, or too humid can affect how the paint cures and adheres. High humidity, in particular, can slow down drying and curing, increasing the risk of moisture issues.
  • Applying Paint Too Thinly or Too Thickly: Applying paint too thinly may not provide adequate coverage or film integrity. Conversely, applying it too thickly can prevent proper drying and curing, leading to sagging, cracking, and potential adhesion problems as the surface dries unevenly.
  • Insufficient Drying Time Between Coats: Each coat of paint needs adequate time to dry and cure before the next is applied. Rushing this process traps solvents and moisture, weakening the overall paint film and its bond to the surface.

Quality Of Paint And Materials

While less common as a sole cause, the quality of the paint and primer used can contribute to paint failure, especially when combined with other factors.

  • Low-Quality Binders: Cheaper paints often use lower-quality binders, which have weaker adhesive properties. This means they are less forgiving of minor imperfections in surface preparation or environmental conditions.
  • Old or Degraded Paint: Paint that has been stored for a very long time, especially if exposed to freezing temperatures, can degrade. Its chemical properties can change, affecting its ability to adhere and form a durable film.
Why Wall Paint Bubbles And Peels

Credit: www.ultratechcement.com

Identifying The Root Cause: A Diagnostic Approach

Before you can effectively repair bubbling and peeling paint, you need to pinpoint the exact cause. This diagnostic process will save you time and money by ensuring you address the underlying problem, not just the symptom.

The Water Test: Is Moisture The Culprit?

The most telling sign of moisture-related paint failure is the location and nature of the bubbles.

  • Location: Are the bubbles appearing in areas prone to moisture, such as near windows, bathrooms, kitchens, or on exterior walls that face prevailing winds or rain?
  • Bubbles from Behind: If you gently poke a bubble, does it feel soft or damp? Is there any discoloration or mold growth visible beneath the paint layer? This strongly suggests moisture is seeping from behind the paint.
  • Exterior Wall Issues: If the peeling is on an interior wall directly opposite an exterior wall, inspect the exterior for cracks, failing sealant around windows, or damaged siding.

Pro Tip: For suspected moisture issues, consider using a moisture meter. These devices can accurately measure the moisture content in drywall and plaster, confirming or ruling out water intrusion.

Inspecting Surface Preparation And Previous Work

Examine the condition of the paint layers and the surface itself.

  • Adhesion Test: Try to scrape or peel a small section of the affected paint. Does it come off easily? Does it pull away cleanly, or does it take chunks of the substrate with it? If it pulls away easily, it indicates poor adhesion, likely due to surface contamination or lack of primer.
  • Paint Type Check: If you’re unsure about the type of paint currently on the walls, you can perform a simple test. Moisten a cotton ball with denatured alcohol and rub it on an inconspicuous area. If the paint comes off onto the cotton ball, it’s likely latex. If it doesn’t, it’s probably oil-based. This helps determine compatibility for future painting.
  • Glossy Surfaces: If the paint is peeling from a surface that appears very glossy and smooth, it might be that the previous paint was oil-based and not properly deglossed or primed before a latex topcoat was applied.

Evaluating Application And Material Quality

While harder to assess without prior knowledge, some signs can indicate application or material issues.

  • Uneven Drying: If the paint seems to have dried unevenly, with some areas appearing thicker or stickier than others, it could point to over-application or poor drying conditions.
  • Paint Film Integrity: Examine the peeling paint itself. Does it seem brittle and crumbly (potential quality issue) or flexible and rubbery (often related to moisture)?

Remediation: Fixing Bubbling And Peeling Paint

Once you’ve identified the cause, you can proceed with repairs. The repair process will vary depending on the severity and the underlying issue.

Addressing Moisture Problems

This is the most critical step. If you don’t fix the moisture source, any new paint job will eventually fail again.

  • Identify and Repair Leaks: This might involve calling a plumber to fix leaky pipes, a roofer to repair roof damage, or a contractor to address issues with exterior siding or sealant.
  • Improve Ventilation: In bathrooms and kitchens, ensure exhaust fans are working correctly and are used consistently. Consider installing a dehumidifier if persistent humidity is an issue.
  • Address Rising Damp: This often requires professional intervention, such as installing a damp-proof course or improving exterior drainage.

Preparing The Surface For Repainting

This is a universal step for any paint repair.

  • Remove Loose Paint: Using a putty knife or scraper, carefully remove all loose, bubbling, or peeling paint. Work outwards from the edge of the affected area until you reach sound paint.
  • Sand the Edges: Feather the edges of the remaining paint by sanding them down to a smooth transition with the exposed surface. This prevents the new paint from showing ridges.
  • Clean the Area: Wash the entire area with a mild detergent and water solution to remove dust, dirt, grease, and any residue from the scraping and sanding process. Rinse thoroughly and allow the surface to dry completely. If mold was present, use a solution of bleach and water (1 part bleach to 3 parts water) and rinse well.
  • Repair Damage: Fill any gouges, holes, or cracks with appropriate spackle or joint compound. Allow it to dry, then sand smooth.

Priming And Repainting

With the surface prepared and moisture issues resolved, you can proceed with priming and painting.

  • Apply a Quality Primer: This is non-negotiable. Use a high-quality primer specifically designed for the type of surface and the problem you’ve encountered.
  • For moisture issues: Use a stain-blocking, moisture-resistant primer. These primers are formulated to seal porous surfaces and prevent residual moisture from affecting the topcoat.
  • For adhesion issues (e.g., over oil-based paint): Use a bonding primer. These primers are designed to adhere strongly to difficult surfaces like glossy paint or laminate.
  • For new drywall or repairs: Use a drywall primer/sealer to create a uniform surface.
  • Allow Primer to Dry: Follow the manufacturer’s instructions for drying times. This is crucial for the primer to form a proper bond.
  • Apply Topcoats: Apply two thin, even coats of your chosen paint. Avoid applying paint too thickly, as this can lead to drying issues. Ensure adequate drying time between coats.

Preventing Future Paint Failure: A Proactive Approach

The best way to deal with bubbling and peeling paint is to prevent it from happening in the first place. Implementing good practices during the initial painting process can save you significant headaches and expenses later on.

Meticulous Surface Preparation

This Cannot Be Overstated. Invest Time In Proper Preparation.

  • Clean Thoroughly: Always wash walls to remove any dirt, grease, or grime, especially in kitchens and bathrooms.
  • Scrape and Sand: Remove all loose paint and sand any glossy surfaces to create a better grip for the new paint.
  • Dust Removal: Ensure all sanding dust is completely removed before priming.
  • Use the Right Primer: Always prime new surfaces, repaired areas, and surfaces where paint adhesion might be an issue (like glossy paint or stained areas). Choose a primer that is compatible with both the surface and your topcoat.

Choose Quality Materials

  • Invest in Good Paint: While budget is always a consideration, investing in higher-quality paints with superior binders and pigments will generally result in a more durable and longer-lasting finish.
  • Select Appropriate Primer: Don’t skimp on primer. A good primer acts as the foundation for your paint job.

Proper Application Techniques

  • Follow Manufacturer Guidelines: Pay close attention to the recommended application temperatures, humidity levels, and drying times on the paint and primer cans.
  • Apply Even Coats: Avoid applying paint too thickly or too thinly. Two thin coats are almost always better than one thick coat.
  • Use the Right Tools: Ensure your brushes and rollers are appropriate for the type of paint you are using and are in good condition.

Address Moisture Sources Promptly

  • Ventilation is Key: Ensure adequate ventilation in moisture-prone areas like bathrooms and kitchens. Use exhaust fans and consider a dehumidifier if necessary.
  • Exterior Maintenance: Regularly inspect and maintain the exterior of your home, including gutters, siding, and sealant around windows and doors, to prevent water intrusion.

Consider Paint Type Compatibility

  • Know Your Paints: If painting over an existing surface, try to determine if it’s oil-based or latex. If unsure, use a bonding primer designed to adhere to most surfaces.
  • Latex Over Latex, Oil Over Oil: Generally, it’s safest to apply latex over latex and oil over oil. If you must switch types, thorough preparation and the correct primer are essential.

Case Study: The Bathroom Re-paint That Went Wrong

Sarah decided to repaint her small, frequently used bathroom to freshen it up. The existing paint was a light blue, slightly glossy finish. She skipped cleaning, assuming it was clean enough, and directly applied a new coat of premium latex paint.

Within a few weeks, small bubbles started appearing around the shower area and near the window.

The Problem: Sarah’s mistake was twofold: she didn’t clean the greasy residue and soap scum that had accumulated on the walls, and she applied a latex paint directly over what was likely an oil-based or heavily sealed latex paint without proper preparation. The humidity from showers exacerbated the poor adhesion, causing moisture to get trapped and the paint to bubble.

The Fix: Sarah had to scrape off all the bubbling paint, sand the entire wall surface to degloss it, clean it thoroughly with a TSP (trisodium phosphate) substitute, rinse, and let it dry completely. She then applied a high-quality bonding primer suitable for glossy surfaces and moisture-prone areas. Once the primer was dry, she applied two coats of a mold-resistant, bathroom-specific latex paint. She also made sure to use the exhaust fan during and after showers. This time, the paint held firm.

Data Snapshot: Paint Failure Costs

The cost of paint failure extends beyond the price of paint and labor. While exact figures vary widely by region and the extent of damage, studies and industry reports consistently highlight the significant financial impact. According to a report by the Painting Contractors of America, improper surface preparation is cited as the leading cause of premature paint failure, leading to costly rework. For a typical 3-bedroom home, the cost of repainting due to failure can easily range from $3,000 to $10,000 or more, depending on the complexity of the repairs needed, such as fixing underlying water damage or structural issues. This underscores the economic importance of getting the paint job right the first time.

Frequently Asked Questions

Why Does Paint Bubble Immediately After Painting?

Bubbling that appears very soon after painting is often due to trapped solvents or moisture. If the paint was applied too thickly, the surface may have dried while the underlying layers were still wet. This trapped solvent or moisture can cause the paint film to blister as it tries to escape. Applying paint in very high humidity or direct, hot sunlight can also cause the surface to skin over too quickly, trapping moisture underneath.

Can I Just Paint Over Small Bubbles?

No, you should never paint over small bubbles without addressing the underlying cause. Painting over a bubble is like putting a band-aid on a serious wound. The bubble indicates a loss of adhesion or moisture issues. Painting over it will only temporarily hide the problem, and the bubble will likely return, possibly larger and more difficult to repair. You must remove the loose paint, prepare the surface, and reapply primer and paint.

How Does Temperature Affect Paint Bubbling?

Temperature significantly impacts paint adhesion and drying. Painting in extreme cold can slow down the curing process, preventing the paint from forming a strong, cohesive film. The binders may not fully harden, leading to a weak bond susceptible to damage. Conversely, painting in extreme heat can cause the paint to dry too quickly, especially on the surface. This can lead to a condition known as “mud cracking” or cause the paint to lose adhesion as it dries unevenly, sometimes resulting in blistering as trapped moisture or solvents escape. Always adhere to the temperature ranges recommended by the paint manufacturer.

Is Peeling Paint A Sign Of Lead Paint?

Peeling paint, especially in homes built before 1978, can be a sign of lead-based paint. Lead paint is hazardous, particularly when it deteriorates into dust or chips that can be ingested or inhaled. If you suspect lead paint, do not attempt to remove or disturb it yourself. Hire a certified lead abatement professional to test and safely remove the paint. Proper containment and disposal are crucial to prevent lead poisoning.

What Is The Difference Between Paint Bubbling And Cracking?

Bubbling is characterized by the formation of blisters or pockets where the paint has lost adhesion to the surface, often due to moisture or solvent entrapment. The paint lifts away from the substrate. Cracking, on the other hand, occurs when the paint film itself fails due to stress. This can be caused by the paint film becoming too brittle over time, expansion and contraction of the underlying surface due to temperature or humidity changes, or applying incompatible paint layers that pull against each other. Cracks can appear as hairline fissures or larger, alligator-like patterns. While both are forms of paint failure, they stem from different underlying issues.

The recurring issue of wall paint bubbling and peeling is a frustrating problem for homeowners, but it’s rarely an insurmountable one. By understanding the fundamental principles of paint adhesion and systematically diagnosing the root causes, most commonly moisture intrusion and inadequate surface preparation, you can effectively remediate the problem. The key lies in patience and thoroughness: remove all failing paint, prepare the surface meticulously, use high-quality primers and paints suited to the specific issue, and ensure proper ventilation and exterior maintenance. Proactive measures, from diligent cleaning and sanding to choosing the right materials and application techniques, are the most effective defense against future paint failures, safeguarding both the appearance and integrity of your home’s surfaces for years to come.

Jelly Comb Mouse Not Working

Jelly Comb Mouse Not Working

The Jelly Comb mouse not working is a frustrating issue that can bring your productivity to a standstill. Whether you’re in the middle of a crucial work project, enjoying a gaming session, or simply browsing the web, a malfunctioning mouse can derail your entire digital experience. Jelly Comb, known for its range of affordable and functional computer peripherals, offers various mouse models, from wireless optical mice to ergonomic designs. When one of these devices suddenly stops responding, it’s essential to have a systematic approach to troubleshooting. This guide will walk you through the most common reasons why your Jelly Comb mouse might not be working and provide step-by-step solutions to get it back up and running. We’ll cover everything from simple fixes like checking batteries and connections to more complex software-related issues and hardware diagnostics.

Understanding the potential causes behind a non-responsive mouse is the first step toward a swift resolution. Often, the problem is a minor oversight, but sometimes it can point to a deeper issue with your computer’s operating system, drivers, or even the mouse hardware itself.

By systematically eliminating possibilities, you can save time and avoid unnecessary stress. This comprehensive guide aims to equip you with the knowledge and actionable steps to diagnose and resolve most Jelly Comb mouse problems, ensuring you can return to your tasks with minimal interruption.

Key Takeaways

  • Check Power & Connection: Ensure batteries are fresh and correctly inserted (wireless) or that the USB cable is securely plugged in (wired).
  • Test on Another Device: A simple test on a different computer can quickly determine if the issue lies with the mouse or your primary PC.
  • Inspect Sensor & Surface: Clean the optical sensor and try a different mousepad or surface to rule out tracking problems.
  • Restart Your Computer: A basic reboot can resolve many temporary software glitches affecting peripheral recognition.
  • Update/Reinstall Drivers: Outdated or corrupted drivers are a common culprit; re-installing or updating them can fix the problem.
  • Check Device Manager: Verify that the mouse is recognized by Windows and look for any error indicators.
  • Troubleshoot Wireless Interference: For wireless models, ensure there are no nearby devices causing signal disruption.
  • Consider Hardware Failure: If all else fails, the mouse itself might be defective and require replacement.
Jelly Comb Mouse Not Working

Credit: www.ifixit.com

Troubleshooting A Jelly Comb Wireless Mouse

Wireless mice offer the freedom of a clutter-free desk, but they also introduce a few potential points of failure that wired mice don’t have. The most common issues with Jelly Comb wireless mice revolve around power, connectivity, and interference. Addressing these systematically is key to restoring functionality.

Power Issues: Batteries And Charging

The most frequent reason a wireless mouse stops working is a lack of power. This can be due to dead batteries or, in the case of rechargeable models, a depleted battery that needs charging.

  • Check and Replace Batteries: For mice that use standard AA or AAA batteries, ensure they are inserted correctly with the positive and negative terminals aligned with the markings in the battery compartment. If the batteries are old, replace them with a fresh set. Even if you think the batteries are new, try a different set to rule out faulty batteries.
  • Verify Battery Contacts: Sometimes, the metal contacts inside the battery compartment can become dirty or corroded, preventing a good connection. Gently clean these contacts with a pencil eraser or a cotton swab lightly dampened with isopropyl alcohol. Ensure they are completely dry before inserting new batteries.
  • Rechargeable Models: If your Jelly Comb mouse has a built-in rechargeable battery, ensure it’s adequately charged. Connect the mouse to its charging cable and plug it into a powered USB port on your computer or a wall adapter. Allow sufficient time for charging, as indicated in the mouse’s manual. Some mice have an indicator light that shows charging status.

Connection Problems: Pairing And Dongle Issues

Wireless mice rely on a stable connection, typically established via a USB dongle or Bluetooth. Issues with the pairing process or the dongle itself can render the mouse inoperable.

  • USB Dongle (2.4GHz Wireless):
  • Secure Connection: Ensure the USB dongle is firmly plugged into a working USB port on your computer. Try a different USB port to rule out a faulty port.
  • Dongle Recognition: Check if your computer recognizes the dongle. Open Device Manager (Windows) or System Information (macOS) to see if the USB receiver is listed.
  • Re-pairing: Some Jelly Comb wireless mice require re-pairing with their dongle if the connection is lost. Consult your mouse’s manual for specific instructions, which often involve pressing a combination of buttons on the mouse while the dongle is plugged in.
  • Bluetooth Connection:
  • Bluetooth Enabled: Ensure Bluetooth is enabled on your computer. You can usually find this setting in your operating system’s Bluetooth or Network settings.
  • Pairing Mode: Put your Jelly Comb mouse into Bluetooth pairing mode. This typically involves holding down a dedicated Bluetooth button or a combination of buttons until an indicator light flashes.
  • Remove and Re-pair: If the mouse was previously paired but is now not working, try removing it from your computer’s list of Bluetooth devices and then re-pairing it from scratch.

Wireless Interference

Wireless devices, especially those operating on the 2. 4GHz frequency band (common for USB dongles), can be susceptible to interference from other electronic devices.

  • Minimize Obstructions: Ensure there are no physical obstructions between the mouse and its USB dongle or receiver. Thick desks, metal objects, or even the computer case itself can sometimes weaken the signal.
  • Reduce Competing Devices: Devices like wireless routers, cordless phones, microwaves, and other wireless peripherals can interfere with the mouse’s signal. Try temporarily turning off or moving these devices away from your mouse and computer.
  • USB Port Proximity: If using a USB dongle, try plugging it into a port that is closer to the mouse or using a short USB extension cable to position the dongle more favorably.

Troubleshooting A Jelly Comb Wired Mouse

Wired Jelly Comb mice are generally more reliable due to their direct connection, but they can still encounter issues. The primary culprits are usually the cable, the USB port, or software conflicts.

Cable And Connector Integrity

The physical connection is paramount for wired peripherals. Damage to the cable or the USB connector can prevent the mouse from functioning.

  • Inspect the Cable: Carefully examine the mouse’s USB cable for any signs of damage, such as cuts, kinks, fraying, or exposed wires. If the cable is visibly damaged, it’s a strong indicator that the mouse may be faulty.
  • Check the USB Connector: Ensure the USB connector at the end of the cable is clean and free from debris. Gently clean it with compressed air or a dry, soft brush if necessary.
  • Secure Connection: Make sure the USB connector is fully and securely plugged into the computer’s USB port.

Usb Port Issues

A faulty USB port on your computer can prevent the mouse from being recognized or receiving power and data.

  • Try Different USB Ports: Plug the Jelly Comb mouse into a different USB port on your computer. This helps determine if the issue is with a specific port or the mouse itself. Ports on the back of a desktop computer are often directly connected to the motherboard and can be more reliable than front-panel ports.
  • Test Other USB Devices: Plug another known-working USB device (like a USB flash drive or a different mouse) into the port you suspect might be faulty. If the other device also doesn’t work, the USB port is likely the problem.

Driver And Software Conflicts

While wired mice often use generic drivers that are built into the operating system, sometimes driver issues or software conflicts can arise.

  • Restart Your Computer: This is a fundamental troubleshooting step that can resolve many temporary glitches. A simple reboot can reset the USB bus and allow the operating system to re-detect the mouse.
  • Check Device Manager (Windows):
  • Right-click the Start button and select Device Manager.
  • Expand the Mice and other pointing devices category.
  • Look for your Jelly Comb mouse. If it has a yellow exclamation mark or a red ‘X’ next to it, there’s a driver or hardware issue.
  • Update Driver: Right-click the mouse and select Update driver. Choose Search automatically for drivers.
  • Uninstall Device: If updating doesn’t work, right-click the mouse and select Uninstall device. Then, disconnect and reconnect the mouse, or restart your computer, to allow Windows to reinstall the driver.
  • Check System Information (macOS):
  • Click the Apple menu > About This Mac > System Report.
  • Under Hardware, select USB.
  • Look for your Jelly Comb mouse in the USB Device Tree. If it’s listed, it’s recognized by the system. If not, there might be a connection or hardware issue.
Jelly Comb Mouse Not Working

Credit: www.youtube.com

General Troubleshooting Steps For All Jelly Comb Mice

Beyond the specific issues related to wireless or wired connections, several general troubleshooting steps apply to all Jelly Comb mice and can resolve a wide range of problems.

Test The Mouse On Another Computer

This is one of the most effective diagnostic steps. If your Jelly Comb mouse works perfectly on a different computer, the problem almost certainly lies with your original computer’s hardware, software, or operating system. Conversely, if the mouse fails to work on multiple computers, it strongly suggests a hardware defect with the mouse itself.

  • Procedure:
  • Disconnect the Jelly Comb mouse from your primary computer.
  • Connect it to a different computer (laptop, desktop, Mac, or PC).
  • Observe if the mouse cursor moves and if the buttons function correctly on the second computer.

Clean The Optical Sensor

The optical sensor on the underside of the mouse is responsible for tracking movement. Dust, hair, or debris can obstruct the sensor, leading to erratic cursor movement or a complete lack of response.

  • Cleaning Method:
  • Turn off your computer or disconnect the mouse to avoid accidental clicks.
  • Turn the mouse upside down.
  • Use a can of compressed air to blow away any visible dust or debris from the sensor lens.
  • For stubborn grime, you can use a dry cotton swab or a microfiber cloth. Avoid using liquids directly on the sensor.
  • Ensure the sensor area is completely dry before reconnecting or turning on the mouse.

Try A Different Surface Or Mousepad

The surface on which you use your mouse can significantly impact its tracking performance. Highly reflective, transparent, or uneven surfaces can confuse the optical sensor.

  • Recommended Surfaces:
  • A plain, light-colored mousepad.
  • A matte-finished desk surface.
  • Surfaces to Avoid:
  • Glass tables.
  • Highly polished or reflective surfaces.
  • Transparent materials.
  • Surfaces with complex patterns or textures.
  • Test: If you’re not using a mousepad, try using one. If you are, try a different one or a plain piece of paper to see if it improves tracking.

Check Mouse Software And Settings

Some Jelly Comb mice come with optional software that allows for customization of button assignments, DPI settings, and lighting. Issues with this software, or even basic mouse settings in your operating system, can cause problems.

  • Operating System Mouse Settings:
  • Windows: Go to Settings > Devices > Mouse. Check settings like pointer speed, double-click speed, and primary button. Ensure pointer trails are turned off, as they can sometimes cause confusion.
  • MacOS: Go to System Preferences > Mouse. Adjust tracking speed and scrolling options.
  • Jelly Comb Software: If you installed specific software for your Jelly Comb mouse, check its settings. Ensure no unusual configurations are enabled. Try uninstalling and reinstalling the software if you suspect it’s causing conflicts.
Jelly Comb Mouse Not Working

Credit: h30434.www3.hp.com

Advanced Troubleshooting And Potential Hardware Failure

If you’ve exhausted the common troubleshooting steps, it’s time to consider more advanced diagnostics or the possibility of a hardware failure.

Checking For Usb Power Issues

In rare cases, your computer’s USB ports might not be providing sufficient power, especially if multiple high-power devices are connected.

  • Disable USB Power Saving: Windows has a power-saving feature that can turn off USB ports to save energy. You can disable this for specific devices:
  • Open Device Manager.
  • Expand Universal Serial Bus controllers.
  • Right-click on entries like USB Root Hub or Generic USB Hub.
  • Select Properties.
  • Go to the Power Management tab.
  • Uncheck Allow the computer to turn off this device to save power.
  • Repeat for all relevant USB hub entries.
  • Restart your computer.
  • External USB Hubs: If you are using an unpowered USB hub, try connecting the mouse directly to the computer. If you are using a powered hub, ensure it’s properly plugged in and has sufficient power output.

Conflicts With Other Peripherals

Sometimes, other connected peripherals can cause conflicts, especially if they share similar drivers or interrupt requests.

  • Disconnect Other Devices: Temporarily disconnect all other non-essential USB devices (webcams, external hard drives, game controllers, other mice/keyboards) and see if the Jelly Comb mouse starts working. If it does, reconnect devices one by one to identify the conflicting peripheral.

Operating System Issues

A corrupted operating system file or a recent update can sometimes interfere with hardware detection.

  • System Restore (Windows): If the mouse stopped working after a recent software installation or update, you can try using System Restore to revert your computer to a previous state when the mouse was functioning correctly. Search for “Create a restore point” in the Windows search bar and follow the prompts.
  • Safe Mode: Booting your computer into Safe Mode loads only essential drivers and services. If the mouse works in Safe Mode, it indicates that a third-party application or driver is causing the conflict. You can then attempt to identify and remove the problematic software.

Potential Hardware Failure Of The Jelly Comb Mouse

Despite all troubleshooting efforts, it’s possible that the Jelly Comb mouse itself has failed. This is more likely if the mouse is old, has suffered physical damage (like a drop), or if it consistently fails to work on multiple computers.

  • Signs of Hardware Failure:
  • No visible lights on the mouse (even with fresh batteries or when plugged in).
  • Physical damage to the cable, casing, or buttons.
  • Consistent failure across multiple computers and operating systems.
  • Erratic behavior that cannot be resolved by any software or connection troubleshooting.
  • Warranty and Replacement: If your Jelly Comb mouse is still under warranty, contact the manufacturer or the retailer for a potential replacement or repair. Check the warranty period provided at the time of purchase.

Comparison: Jelly Comb Wireless Vs. Wired Mice

Choosing between a wireless and a wired Jelly Comb mouse depends on your priorities regarding convenience, performance, and potential troubleshooting. Both have their advantages and disadvantages.

FeatureJelly Comb Wireless MouseJelly Comb Wired Mouse
**Connectivity**USB Dongle (2.4GHz) or BluetoothUSB Cable
**Portability**High (no cables to manage)Moderate (cable can be cumbersome)
**Desk Clutter**LowModerate (cable management needed)
**Power Source**Batteries (disposable or rechargeable)Computer’s USB port
**Interference**Susceptible to wireless interferenceNot susceptible to wireless interference
**Latency**Generally low, but can be affected by interferenceTypically near-zero latency, ideal for gaming/precision
**Setup**May require pairing (especially Bluetooth)Plug-and-play
**Troubleshooting**Battery issues, pairing problems, interference, dongleCable damage, USB port issues, driver conflicts
**Reliability**Can be affected by battery life and signal strengthGenerally high, limited by physical cable integrity
**Cost**Often slightly more expensive due to wireless techTypically more affordable

Example Scenario: A graphic designer who values a clean workspace and moves between different workstations might prefer a Jelly Comb wireless mouse for its portability and lack of cables. However, a competitive gamer who demands the absolute lowest latency and highest reliability might opt for a Jelly Comb wired mouse, ensuring consistent performance without battery concerns or potential signal drops.

Jelly Comb Mouse Not Working: A Practical Example

Let’s consider a common scenario: Sarah, a freelance writer, finds her Jelly Comb wireless optical mouse suddenly stops responding mid-sentence.

  • Initial Reaction: Sarah first checks if the mouse is moving the cursor at all. It isn’t. She notices no lights are on the mouse.
  • Power Check: Her first thought is the batteries. She opens the battery compartment, flips the two AA batteries, and reinserts them. Still no response. She then remembers she has a pack of brand-new batteries and replaces the old ones with fresh ones. The mouse lights up, and the cursor starts moving again.
  • If Batteries Weren’t the Issue: Had replacing the batteries not worked, Sarah’s next step would be to check the USB dongle. She’d unplug it from her laptop’s side port and plug it firmly back in. If that failed, she’d try a different USB port on the laptop.
  • Surface and Sensor: If the mouse was still unresponsive, she would turn it over and gently blow compressed air at the optical sensor. She’d also try moving the mouse to a different surface, like a plain white sheet of paper, to rule out tracking issues with her patterned mousepad.
  • Testing on Another Device: If none of these steps resolved the issue, Sarah would connect the mouse and its dongle to her partner’s computer. If it worked there, she’d know the problem was with her laptop (likely a driver or USB port issue) and would proceed to check Device Manager and potentially reinstall drivers. If it *didn’t* work on the second computer, she would conclude the mouse hardware itself was likely faulty and consider a replacement.

This step-by-step approach, starting with the simplest and most common solutions, is crucial for efficiently diagnosing and fixing the “Jelly Comb mouse not working” problem.

Frequently Asked Questions

How Do I Reset My Jelly Comb Wireless Mouse?

Many Jelly Comb Wireless Mice Can Be Reset By Removing The Batteries For At Least 30 Seconds, Then Reinserting Them. For Mice That Use A Usb Dongle, Unplugging The Dongle For 30 Seconds And Then Plugging It Back In Can Also Help Re-establish The Connection. Some Models May Have A Specific Reset Button Or A Pairing Procedure Outlined In Their User Manual That Effectively Resets The Device’s Connection To Its Receiver. Always Refer To Your Specific Model’s Documentation For The Most Accurate Reset Instructions.

Why Is My Jelly Comb Mouse Cursor Jumping Or Moving Erratically?

Erratic Cursor Movement Is Often Caused By A Dirty Optical Sensor, An Unsuitable Surface, Or Wireless Interference. First, Clean The Optical Sensor On The Underside Of The Mouse Using Compressed Air Or A Dry Cotton Swab. Then, Try Using The Mouse On A Different Surface, Preferably A Plain, Matte Mousepad. If It’s A Wireless Mouse, Move It Closer To The Usb Dongle And Ensure There Are No Other Wireless Devices (like Routers Or Microwaves) Causing Interference. For Wired Mice, Ensure The Cable Is Not Damaged And Try A Different Usb Port.

My Jelly Comb Mouse Worked Yesterday, But Not Today. What Could Be The Cause?

This Sudden Failure Often Points To A Power Issue (for Wireless Mice) Or A Temporary Software Glitch. For Wireless Models, Try Replacing The Batteries With Fresh Ones Or Recharging The Battery If It’s A Rechargeable Model. For Both Wired And Wireless Mice, The First Step Should Be To Restart Your Computer. This Can Resolve Many Temporary Operating System Or Driver Issues That Might Prevent The Mouse From Being Recognized. If The Problem Persists After A Restart And Battery Check, Proceed To Check The Usb Connection And Drivers.

How Do I Update The Drivers For My Jelly Comb Mouse?

Most Jelly Comb Mice Use Generic Drivers That Are Built Into Windows And Macos. You Typically Don’t Need To Manually Install Specific Drivers Unless Your Mouse Model Came With Dedicated Software. If You Suspect A Driver Issue, The Best Approach Is Often To Let Windows Reinstall The Driver: Go To Device Manager, Right-click Your Mouse, Select Uninstall Device, And Then Disconnect And Reconnect The Mouse (or Restart Your Computer). Windows Will Attempt To Detect And Install The Appropriate Driver Automatically. If Your Mouse Came With Specific Software, Check The Manufacturer’s Website For Any Available Driver Or Firmware Updates.

Can A Jelly Comb Mouse Be Damaged By A Power Surge?

Yes, Like Any Electronic Device, A Jelly Comb Mouse, Particularly A Wired One, Can Potentially Be Damaged By A Power Surge. A Power Surge Can Occur During Electrical Storms Or Due To Issues With The Power Grid, Sending A Sudden Jolt Of Excess Electricity Through The Connected Devices. While Modern Computers Often Have Some Surge Protection Built Into Their Power Supplies And Usb Ports, A Significant Surge Can Still Cause Damage. Using A Quality Surge Protector For Your Entire Computer Setup Is The Best Way To Mitigate This Risk For All Your Peripherals And Computer Components. Wireless Mice Are Generally Less Susceptible

What Are Ikea Kitchen Cabinets Made Of

What Are Ikea Kitchen Cabinets Made Of-FI

The allure of a beautiful, functional kitchen is undeniable, and for many homeowners, IKEA kitchen cabinets represent an accessible entry point to achieving that dream. Renowned for their affordability, modularity, and stylish designs, IKEA kitchens have become a staple in homes worldwide. But beneath the sleek finishes and clever storage solutions lies a fundamental question for many potential buyers: what are IKEA kitchen cabinets actually made of? Understanding the materials used is crucial for assessing durability, longevity, maintenance requirements, and environmental impact. This deep dive will explore the core components of IKEA’s popular SEKTION cabinet system, examining the different types of wood, particleboard, laminate, and foil finishes that contribute to their overall construction and aesthetic appeal.

Key Takeaways

  • Core Construction: IKEA kitchen cabinets, primarily the SEKTION system, are largely constructed from particleboard and fiberboard, often coated with laminates, foils, or melamine.
  • Solid Wood Components: While not the primary structural material for carcases, solid wood is used for visible elements like doors, drawer fronts, and sometimes decorative trim, offering a premium look and feel.
  • Finishes Matter: The exterior finish (foil, laminate, paint, wood veneer) significantly impacts the cabinet’s appearance, durability, and how it should be cleaned and maintained.
  • Durability Factors: The density of the particleboard, the quality of the laminate/foil, and the construction method all play a role in the cabinet’s resistance to moisture, scratches, and general wear and tear.
  • Environmental Considerations: IKEA emphasizes sustainability, using recycled materials, certified wood, and low-VOC finishes in many of their cabinet components.
  • Cost vs. Material: The material choices directly influence the lower price point of IKEA cabinets compared to custom or high-end solid wood alternatives.
What Are Ikea Kitchen Cabinets Made Of

Credit: erinzubotdesign.com

Understanding The Sektion System: Ikea’s Cabinet Backbone

IKEA’s current kitchen cabinet system, known as SEKTION, replaced the older AKURUM system in 2015. SEKTION is designed for maximum flexibility and customization, allowing users to create unique layouts tailored to their specific kitchen space and needs. The core of the SEKTION system consists of cabinet boxes, doors, drawer fronts, shelves, and various internal organizers. While the exterior components like doors and drawer fronts often feature a variety of materials and finishes, the underlying cabinet carcases are typically made from a combination of engineered wood products.

Cabinet Carcase Construction

The primary material for the SEKTION cabinet boxes is particleboard. This engineered wood product is made by compressing wood particles (sawdust, wood chips, shavings) with a synthetic resin or binder under high pressure and temperature. IKEA sources its particleboard from certified sustainable forests, and it often contains a significant percentage of recycled wood.

  • Particleboard: This forms the bulk of the cabinet carcase, the sides, top, bottom, and back panels. It’s chosen for its cost-effectiveness, stability, and ability to hold screws well, which is crucial for assembling the modular units. The density and quality of the particleboard can vary, influencing its weight-bearing capacity and resistance to moisture. IKEA uses a specific grade of particleboard that balances these factors for everyday use.
  • Fiberboard (MDF/HDF): In some instances, particularly for thinner back panels or specific components, IKEA might use Medium-Density Fiberboard (MDF) or High-Density Fiberboard (HDF). These are also engineered wood products, but they are made from finer wood fibers, creating a denser, smoother surface than particleboard. MDF and HDF are known for their excellent workability and smooth finish, making them ideal for applications where a precise fit or a paintable surface is needed.
  • Moisture Resistance: It’s important to note that standard particleboard and MDF are susceptible to moisture damage. While IKEA applies finishes to protect the surfaces, prolonged exposure to water or high humidity can cause swelling and degradation. This is why proper installation, ventilation, and care are essential for the longevity of IKEA cabinets, especially in areas prone to moisture like under sinks.

Structural Integrity And Assembly

The SEKTION system relies on a robust assembly method to ensure structural integrity. The cabinet boxes are typically joined using cam lock fasteners and dowels. These methods allow for relatively easy assembly and disassembly, which is a hallmark of IKEA furniture. The back panels are often secured with small nails or screws, adding rigidity to the overall structure. The design prioritizes a balance between ease of assembly for the end-user and the strength required to support shelves, drawers, and the weight of kitchenware.

Exploring Ikea Cabinet Finishes: From Foil To Veneer

The most visible aspect of any kitchen cabinet is its finish. IKEA offers a wide array of finishes for its doors and drawer fronts, each providing a distinct look, feel, and level of durability. These finishes are applied over the core particleboard or fiberboard structure.

High Gloss / High Gloss Foil

High gloss finishes are a popular choice for a modern, sleek aesthetic. IKEA achieves this look primarily through high gloss foil.

  • Foil: This involves wrapping a thin layer of plastic film, often with a printed decorative layer, around the core material (usually particleboard or MDF). The foil is then heated and pressed to create a smooth, seamless surface. High gloss foils reflect light significantly, making kitchens appear brighter and more spacious.
  • Pros: Offers a very smooth, reflective surface; relatively affordable; available in a wide range of colors.
  • Cons: Can be prone to scratching and showing fingerprints; edges can be susceptible to chipping if impacted; repairs can be difficult.
  • Maintenance: Requires gentle cleaning with a soft, damp cloth. Avoid abrasive cleaners or sponges that can dull the finish or cause scratches.

Laminate Finishes

Laminates offer a durable and versatile option for cabinet fronts. IKEA uses different types of laminates depending on the desired look and performance.

  • Standard Laminate: This typically consists of layers of paper impregnated with melamine resin, fused together under heat and pressure. A decorative layer provides the color or pattern. Laminates are known for their resistance to scratches, stains, and heat.
  • Pros: Highly durable; resistant to scratches, stains, and heat; easy to clean; available in various textures and patterns (e.g., wood grain, solid colors).
  • Cons: Can sometimes look less “natural” than wood veneer; edges might be visible depending on the construction method.
  • Structure Laminate: Some IKEA doors feature a “structure laminate” which mimics the texture of wood grain or other natural materials. This adds a tactile element to the visual appeal, making the cabinets feel more realistic and less like a simple plastic coating.

Painted Finishes

For a classic look, IKEA offers cabinet doors with a painted finish. This usually involves applying paint to an MDF or particleboard substrate.

  • Painted MDF: MDF is an excellent substrate for painting due to its smooth, uniform surface. IKEA paints are typically applied in a controlled factory environment, ensuring a consistent and durable finish.
  • Pros: Offers a rich, deep color; can be matte or satin; provides a seamless look; generally more resistant to chipping than foil.
  • Cons: Can be more expensive than foil or basic laminate; deep scratches can be difficult to repair invisibly; requires careful cleaning to avoid damage.
  • Maintenance: Similar to high gloss, use a soft, damp cloth and mild detergent. Avoid harsh chemicals.

Wood Veneer

For a premium, natural wood look, IKEA utilizes wood veneers.

  • Wood Veneer: This involves a thin layer of real wood (like ash, oak, or birch) applied over a substrate, typically particleboard or MDF. This provides the aesthetic of solid wood at a lower cost and with greater stability.
  • Pros: Offers the authentic look and feel of real wood; each piece has unique grain patterns; can be sanded and refinished (though this is complex on cabinetry).
  • Cons: More expensive than foil or laminate; can be susceptible to fading from direct sunlight; requires careful maintenance to preserve the natural wood finish.
  • Maintenance: Typically requires cleaning with a damp cloth and occasional conditioning with a wood-specific polish, following IKEA’s specific care instructions for the veneer type.

Melamine Surfaces

Melamine is another common material used for finishes, especially on the interior surfaces of cabinets and sometimes on the exterior of more budget-friendly options. It’s a durable thermosetting plastic known for its resistance to stains and wear.

  • Melamine: Similar in application to foil, melamine is a resin-impregnated paper that is bonded to the substrate. It offers good durability and is easy to clean. Often used for the interior of cabinets and shelves due to its practicality and cost.
What Are Ikea Kitchen Cabinets Made Of

Credit: chrislovesjulia.com

Materials For Doors And Drawer Fronts: Beyond The Carcase

While the carcase forms the structural box, the doors and drawer fronts are the most prominent visual elements. IKEA offers a vast selection, utilizing various materials and finishes to cater to different styles and budgets.

Solid Wood Doors

While less common for the entire SEKTION system due to cost, IKEA does offer some doors and drawer fronts made from solid wood or featuring solid wood components. These are typically the most premium and expensive options.

  • Solid Wood: Often used for specific door styles (e.g., traditional shaker styles), solid wood (like oak, birch, or pine) provides a classic look and feel. Each piece has unique grain patterns and natural variations.
  • Pros: Highest aesthetic appeal; durable and long-lasting; can be painted or stained; feels substantial.
  • Cons: Most expensive option; can be susceptible to warping or cracking with significant changes in humidity; heavier than engineered wood options.
  • Examples: IKEA’s EKESTAD series has featured solid oak doors with a stained finish, offering a robust and traditional appearance.

Veneered Doors

As mentioned earlier, veneer doors combine the look of real wood with the stability of engineered boards.

  • Veneered Particleboard/MDF: A thin layer of real wood is glued onto a substrate. This is a cost-effective way to achieve a natural wood look.
  • Pros: Authentic wood appearance at a lower cost; more stable than solid wood.
  • Cons: The veneer layer is thin and can be damaged; repairs are difficult.
  • Examples: IKEA’s HÄGGEBY or VEDDINGE door styles might utilize veneers or foil finishes designed to mimic wood grain.

Foil-wrapped Doors

These are among the most common and affordable options.

  • Foil-Wrapped MDF/Particleboard: A decorative foil (often printed to resemble wood, solid color, or textured finish) is wrapped around the edges and surfaces of an MDF or particleboard core.
  • Pros: Wide variety of designs and colors; affordable; relatively easy to clean.
  • Cons: Edges can be prone to peeling or chipping over time, especially with moisture exposure; can look less premium than painted or veneered options.
  • Examples: The LERHYTTAN collection offers various finishes, some of which are foil-wrapped in different colors and styles, from matte black to light grey.

Painted Doors

Painted doors offer a smooth, consistent color finish.

  • Painted MDF: MDF is ideal for painting due to its smooth surface. The paint provides a durable, uniform color.
  • Pros: Consistent color; smooth finish; available in various colors (often matte or satin).
  • Cons: Can be more expensive than foil; deep scratches are hard to repair.
  • Examples: The AXSTAD matte collection, available in colors like matte white and matte dark grey, features painted MDF doors for a sleek, contemporary look.

Glass Doors

For display cabinets or to add visual lightness, IKEA offers glass-fronted doors.

  • Framed Glass Doors: These typically consist of a frame (made from various materials like painted MDF or veneer) with glass panels inserted. The glass itself can be clear, frosted, or patterned.
  • Pros: Adds visual interest and allows for display of items; can make a kitchen feel more open.
  • Cons: Requires keeping the contents tidy; glass can break; frames need cleaning.
What Are Ikea Kitchen Cabinets Made Of

Credit: www.housedigest.com

Comparison: Ikea Cabinet Materials Vs. Alternatives

Understanding IKEA’s material choices becomes clearer when compared to other kitchen cabinet options available on the market. The primary trade-off for IKEA’s affordability is the extensive use of engineered wood products rather than solid wood for the carcases.

FeatureIKEA Cabinets (SEKTION System)Custom Solid Wood CabinetsSemi-Custom Cabinets (e.g., KraftMaid, Merillat)
**Carcas Material**Primarily **particleboard** and **MDF/HDF**, finished with foil, laminate, or melamine.**Solid wood** (e.g., oak, maple, cherry, birch) for boxes and fronts.Often **plywood** or high-quality **particleboard/MDF** for carcases; solid wood or veneers for doors.
**Door/Drawer Fronts**Wide variety: foil, laminate, painted MDF, veneer, some solid wood accents.**Solid wood**, stained or painted.Solid wood, veneers, painted MDF.
**Durability**Good for typical use; susceptible to prolonged moisture. Finishes vary in scratch resistance.Excellent; highly durable if maintained.Very good; generally more durable than IKEA particleboard carcases.
**Cost****Most affordable**.**Most expensive**.Mid-to-high range.
**Moisture Resistance**Moderate; requires careful management, especially around sinks.Good, but can warp/swell with extreme humidity.Generally better than IKEA particleboard due to plywood carcases.
**Customization**High modularity, but limited to IKEA’s sizes and finishes.**Unlimited**; built to exact specifications.High degree of customization in sizes, styles, and finishes.
**Assembly**DIY-friendly flat-pack.Professional installation usually required.Often requires professional installation.
**Environmental**Focus on sustainable sourcing, recycled content, low-VOC finishes.Can be sustainable if sourced responsibly; natural material.Varies by manufacturer; many offer eco-friendly options.

Example Scenario: The Moisture Challenge

Consider a kitchen with a common issue: a leaky pipe under the sink.

  • IKEA Cabinets: If a leak occurs and isn’t immediately addressed, the particleboard carcase of an IKEA cabinet can absorb water, swell, and become structurally compromised. The laminate or foil finish might bubble or peel. Repair might involve replacing the entire cabinet box.
  • Custom Solid Wood/Plywood Cabinets: While solid wood can also be damaged by water, high-quality plywood carcases found in semi-custom or custom cabinets are generally more resistant to moisture absorption and swelling than IKEA’s particleboard. Prompt cleanup can often prevent significant damage.

This highlights that while IKEA cabinets offer excellent value, understanding their material limitations is key to ensuring their longevity, particularly in high-moisture areas.

Sustainability And Environmental Impact

IKEA places a strong emphasis on sustainability across its product lines, and kitchen cabinets are no exception. Their approach involves responsible sourcing, efficient manufacturing, and minimizing environmental impact.

Responsible Wood Sourcing

A significant portion of the wood fiber used in IKEA’s particleboard and MDF comes from certified sustainable forests. IKEA aims for all wood used in its products to be either recycled or sourced from forests that are managed responsibly, meeting criteria set by organizations like the Forest Stewardship Council (FSC).

  • FSC Certification: Products with FSC certification guarantee that the wood comes from responsibly managed forests that provide environmental, social, and economic benefits. IKEA has been a major user of FSC-certified wood for many years.

Recycled Materials

IKEA actively incorporates recycled materials into its products. The particleboard used in SEKTION cabinets often contains a substantial percentage of wood waste from other manufacturing processes or post-consumer recycled wood. This reduces the demand for virgin timber and diverts waste from landfills.

Low-voc And Safer Chemicals

Volatile Organic Compounds (VOCs) are chemicals emitted into the air from products and can impact indoor air quality. IKEA has committed to phasing out hazardous chemicals and reducing the use of VOCs in its products. The finishes, adhesives, and binders used in their cabinets are designed to meet stringent environmental and health standards.

This includes using water-based lacquers and low-emission particleboard.

Product Lifespan And Circularity

While not always the focus for budget-friendly kitchens, IKEA’s design philosophy also considers the product lifecycle. The modularity of the SEKTION system allows for easier replacement of individual parts (like a damaged door) rather than the entire kitchen. This can extend the usable life of the kitchen components.

IKEA also explores initiatives related to furniture take-back and refurbishment, contributing to a more circular economy.

Durability, Maintenance, And Longevity

The durability and longevity of IKEA kitchen cabinets are directly tied to their materials and how they are cared for. While they are built for everyday use, they require specific maintenance practices to ensure they last.

Factors Affecting Durability

  • Material Quality: The density and quality of the particleboard or MDF used for the carcase play a role. Higher density generally means better screw-holding power and resistance to sagging under load.
  • Finish Type: High gloss foils are prone to scratching, while painted finishes can chip. Laminates and melamine generally offer good scratch and stain resistance. Wood veneers require protection from UV light and moisture.
  • Edge Banding: The quality of the edge banding (the material applied to the exposed edges of panels) is critical. Poorly applied or damaged edge banding can allow moisture to seep into the core material.
  • Hardware: The quality of hinges and drawer runners (provided by partners like Blum) significantly impacts the user experience and long-term functionality. IKEA generally uses high-quality hardware.
  • Assembly: Correct assembly according to IKEA’s instructions is crucial. Properly tightened fasteners and correctly installed back panels contribute significantly to the cabinet’s rigidity and load-bearing capacity.

Maintenance Guidelines

  • Cleaning: For most IKEA cabinets (foils, laminates, painted), regular cleaning with a soft, damp cloth is sufficient. A mild detergent can be used for tougher spots, but avoid abrasive cleaners, scouring pads, or harsh chemicals (like ammonia or bleach), as these can damage the finish. Always wipe dry after cleaning.
  • Moisture Management: This is perhaps the most critical aspect. Wipe up spills immediately. Ensure good ventilation, especially around the dishwasher and sink areas. Use moisture-resistant mats under the sink and in front of the dishwasher.
  • Heat: Avoid placing heat-generating appliances (like kettles or toasters) directly on countertops adjacent to cabinet edges, as prolonged heat exposure can damage finishes.
  • Sunlight: Direct, prolonged sunlight can cause fading, particularly on wood veneer and some painted finishes.
  • Hardware Care: Hinges and drawer runners may require occasional cleaning and lubrication as per the manufacturer’s (often Blum’s) recommendations.

Expected Lifespan

With proper installation and diligent maintenance, IKEA kitchen cabinets can last 10-15 years or even longer for the carcases and well-maintained doors. The modular design also allows for easier upgrades; for instance, you could replace just the doors and drawer fronts after 10 years to refresh the kitchen’s look without replacing the entire cabinet structure. However, in high-traffic or high-moisture environments, or with less careful use, visible wear and tear might appear sooner.

Real-world Examples And Considerations

To truly understand the materials, consider how they perform in different kitchen scenarios.

Example 1: The Busy Family Kitchen

A family with young children will put their kitchen through its paces. Constant use, spills, and the occasional accidental bump are inevitable.

  • Materials Choice: In this scenario, opting for laminate or painted MDF doors with robust particleboard carcases would be advisable. These finishes tend to be more forgiving with scratches and easier to wipe clean than high gloss foils or delicate wood veneers. The SEKTION system’s ability to replace individual doors means a scratched door front can be swapped out without a complete renovation.
  • Longevity: With regular cleaning and prompt attention to spills, these cabinets can easily last through the demanding years of childhood and beyond. The key is consistent, gentle maintenance.

Example 2: The Rental Property Kitchen

For landlords or those outfitting a rental property, cost-effectiveness and ease of maintenance are paramount.

  • Materials Choice: IKEA’s foil-finished doors on standard particleboard carcases represent a highly cost-effective solution. The finishes are available in a wide range of neutral colors that appeal to many renters. The ease of assembly also keeps installation costs down.
  • Longevity: While perhaps not as durable as higher-end options under heavy, long-term use, these cabinets provide a functional and attractive kitchen for a reasonable period. If a door or drawer front gets significantly damaged, it’s relatively inexpensive to replace. The focus here is on providing good value and a clean aesthetic for potential tenants.

Example 3: The Design-conscious Homeowner

Someone prioritizing aesthetics might lean towards IKEA’s more premium finishes.

*

Why Ceiling Has Water Stains

Why Ceiling Has Water Stains

Water stains on your ceiling can be a perplexing and often alarming sight. What might initially appear as a minor cosmetic issue can signal a more significant problem lurking within your home’s structure. These unsightly blemishes are not just an aesthetic nuisance; they are often early warning signs of water damage, which, if left unaddressed, can lead to costly repairs, mold growth, and even structural compromise. Understanding the root causes of these stains is crucial for homeowners to act promptly and protect their property.

The appearance of a water stain, typically a yellow, brown, or even rusty-colored mark that may be accompanied by sagging drywall or peeling paint, indicates that water has saturated the ceiling material. This water could originate from various sources, both inside and outside your home.

Identifying the specific source is the first step toward effective remediation and prevention. Ignoring these signs is a gamble that can significantly increase the expense and complexity of repairs down the line. This article will comprehensively explore the myriad reasons why your ceiling might be showing water stains, offering detailed insights into diagnosis, potential solutions, and preventative measures to keep your home dry and sound.

Key Takeaways

  • Common Causes: Water stains on ceilings are primarily caused by leaks from plumbing (pipes, fixtures, appliances), roof issues (shingles, flashing, gutters), and condensation.
  • Diagnosis is Crucial: Identifying the source of the leak is the first and most critical step, as different causes require distinct repair methods.
  • Potential for Damage: Unresolved leaks can lead to mold growth, structural damage to the ceiling and framing, electrical hazards, and compromised insulation.
  • Repair Process: Repairs typically involve fixing the source of the leak, drying the affected area thoroughly, repairing or replacing damaged drywall, and repainting.
  • Prevention is Key: Regular maintenance of roofs, plumbing, and HVAC systems, along with proper insulation and ventilation, can prevent future water stains.
  • Professional Help: For complex or persistent leaks, consulting with a qualified plumber, roofer, or restoration specialist is highly recommended.
Why Ceiling Has Water Stains

Credit: roofingbylandmark.com

Plumbing Problems: The Silent Culprits

One of the most frequent culprits behind ceiling water stains is a problem within your home’s plumbing system. These issues can range from minor drips to major bursts, all of which can eventually find their way to your ceiling. Understanding the common plumbing sources is vital for accurate diagnosis.

Leaky Pipes

Supply lines and drainage pipes that run through your ceiling or the floor above can develop leaks over time. Copper pipes can corrode, PEX pipes can develop pinhole leaks, and older galvanized steel pipes are prone to rust and blockage. Even a slow, consistent drip from a tiny hole in a pipe can saturate the insulation and drywall above, eventually manifesting as a stain on the finished ceiling.

  • Supply Lines: These carry pressurized water to fixtures like sinks, toilets, and showers. A leak here can be more significant, as water is constantly under pressure, potentially leading to faster water damage.
  • Drainage Lines: These carry wastewater away from fixtures. Leaks from drain pipes are often due to cracked seals at joints or corrosion. While not under pressure, a persistent leak can still cause substantial damage.

Faulty Fixtures And Appliances

Many plumbing fixtures and appliances are located on upper floors or in attics, with their supply lines and connections directly above the ceiling below.

  • Toilets: A leaking toilet seal (wax ring) on the floor above can allow water to seep through the subfloor and into the ceiling.
  • Sinks and Showers: Leaks can occur at the connections of faucets, showerheads, or from the drain assembly beneath the sink or shower pan. A cracked shower pan or improperly sealed tile grout can also allow water to penetrate the subfloor.
  • Washing Machines: The supply hoses and drain connections for washing machines are common sources of leaks. A burst hose or a loose connection can release a significant amount of water quickly.
  • Dishwashers: Similar to washing machines, dishwashers have water supply and drain lines that can leak.
  • Refrigerators with Ice Makers: The small water line connected to a refrigerator’s ice maker can develop leaks or burst, especially in freezing temperatures.

Overflowing Toilets Or Sinks

While seemingly obvious, an overflowing toilet or sink, especially if it goes unnoticed for a period, can cause water to pool on the floor and find its way through gaps in the subfloor or around pipe penetrations, leading to ceiling stains.

This is more common if the overflow is occurring on a floor directly above the affected ceiling.

Why Ceiling Has Water Stains

Credit: www.uandscompanies.com

Roof And Exterior Issues: Water’s Journey In

The roof is your home’s first line of defense against the elements. When it fails, water can find numerous pathways to infiltrate your home, often traveling long distances before appearing as a ceiling stain.

Damaged Or Missing Shingles

The most direct route for water to enter is through compromised shingles. Cracked, curled, or missing shingles expose the underlayment and decking to moisture. Rainwater can then seep through these openings.

Compromised Flashing

Flashing is the thin, waterproof material (usually metal) installed around roof penetrations like chimneys, vents, skylights, and in valleys where two roof planes meet. If flashing is damaged, corroded, or improperly installed, it can create a direct channel for water to enter the attic and eventually the ceiling below.

Clogged Gutters And Downspouts

Gutters are designed to channel rainwater away from your home’s foundation. When they become clogged with leaves, debris, or ice, water can back up. This backed-up water can then overflow the gutter edge and saturate the fascia and soffit areas, potentially seeping into the attic or wall cavities and traveling down to the ceiling.

In extreme cases, ice dams can form, forcing water up and under shingles.

Ice Dams

In colder climates, ice dams can form along the eaves of a roof. These are ridges of ice that prevent melting snow from draining. The trapped water can then back up onto the roof and seep under shingles and through the roof decking.

Skylight Leaks

Skylights, while offering natural light, are essentially holes in your roof and are prone to leaks if not properly sealed and maintained. Issues can arise from cracked glass, faulty seals, or problems with the flashing around the skylight frame.

Attic Ventilation Problems

While not a direct entry point for rain, inadequate attic ventilation can exacerbate moisture problems. Poor ventilation can lead to excessive heat buildup in the summer and condensation in the winter. This condensation can drip onto ceiling joists and insulation, eventually causing stains.

Condensation And Humidity: The Invisible Threat

Sometimes, water stains aren’t from an external leak but from moisture that forms within your home’s structure due to temperature differences and high humidity.

Attic Condensation

Attics can become very cold in winter. If warm, moist air from the living space below rises into the attic and comes into contact with cold surfaces (like the underside of the roof decking or pipes), it can condense into water droplets.

This is particularly common if there are air leaks from the living space into the attic or if the attic insulation is insufficient or improperly installed. The resulting moisture can drip down onto ceiling joists and eventually cause stains.

Insufficient Insulation

Poorly insulated ceilings allow more heat transfer between the living space and the attic or the exterior. In winter, this can lead to cold spots on the ceiling surface, promoting condensation. In summer, it can lead to a hotter attic, potentially increasing the likelihood of condensation on any cool surfaces within it.

Hvac System Issues

  • Leaky Ductwork: If your home has ductwork running through the attic or above the ceiling, leaks in these ducts can release conditioned air. If the air is cold and moist, it can contribute to condensation on surrounding surfaces.
  • Clogged AC Drip Pan: The drip pan and drain line for your air conditioning unit can become clogged with debris or algae. If this happens, water can overflow the pan and drip onto the ceiling below, especially if the unit is located in an attic or above a finished ceiling.
Why Ceiling Has Water Stains

Credit: www.mrhandyman.com

Diagnosing The Stain: A Step-by-step Approach

Identifying the source of a ceiling water stain is the most critical step in resolving the issue. A systematic approach can help pinpoint the problem before it escalates.

Initial Inspection: What To Look For

  • Stain Appearance: Note the color, size, and shape of the stain. Is it fresh and actively wet, or old and dry? Rusty or dark stains might indicate a long-standing issue.
  • Location: Is the stain directly under a bathroom, kitchen, attic, or chimney? This can provide clues.
  • Sagging Drywall: If the ceiling material is bulging or sagging, it indicates a significant amount of water saturation and an immediate need for attention.
  • Mold or Mildew: The presence of black, green, or fuzzy spots around the stain is a clear sign of mold growth, which requires professional remediation.
  • Active Dripping: Is water actively dripping from the ceiling? This signifies an active leak that needs immediate containment.

Checking The Area Above

The most effective way to diagnose a ceiling stain is to inspect the area directly above it.

  • Attic Inspection: If there’s an attic above the stained ceiling, this is your primary area of investigation.
  • Look for Wet Insulation: Is the insulation damp or matted down?
  • Check Joists and Sheathing: Look for water marks, rot, or mold on the wooden framing and the underside of the roof decking.
  • Trace the Source: Examine pipes, ductwork, vents, and the underside of the roof for signs of leaks, condensation, or damage. Use a flashlight and wear protective gear.
  • Check Vent Boots and Flashing: Pay close attention to the seals around plumbing vents, exhaust fans, and skylights.
  • Floor Above Inspection: If the stain is on the first floor ceiling, inspect the floor above, particularly the area directly over the stain.
  • Check for Spills or Leaks: Look for any signs of water around toilets, sinks, bathtubs, showers, washing machines, or dishwashers.
  • Inspect Flooring: Are there any warped floorboards or signs of water damage around fixtures?
  • Check Underlayment: If possible, check the subfloor for dampness.

Using Simple Tests

  • The Dye Test: If you suspect a specific fixture (like a toilet or shower) is the source, you can use food coloring. Add a few drops of food coloring to the toilet tank or shower drain. If the stain reappears after a period, it strongly suggests that fixture is the culprit.
  • Monitoring Water Bills: A sudden, unexplained increase in your water bill can indicate a hidden plumbing leak somewhere in your system.

The Consequences Of Neglect: Beyond The Stain

A water stain on your ceiling is more than just an eyesore; it’s a symptom of an underlying problem that, if ignored, can lead to a cascade of detrimental effects. The moisture that causes the stain can compromise the integrity of your home in several significant ways.

Mold And Mildew Growth

Mold thrives in damp, dark environments. The moisture that causes ceiling stains provides the perfect breeding ground for mold and mildew. Once established, mold can spread rapidly within the ceiling cavity, insulation, and even into the living space.

  • Health Risks: Mold spores can trigger allergies, asthma attacks, and other respiratory problems. Some types of mold produce mycotoxins that can have more severe health impacts.
  • Structural Damage: Certain types of mold can feed on organic materials like wood and drywall, weakening these structural components over time.
  • Odor: Mold growth often produces a distinct, musty odor that can permeate your home.

Structural Damage

Sustained moisture exposure can degrade building materials.

  • Drywall Degradation: Drywall (plasterboard) is made of gypsum and paper. When it becomes saturated, it loses its structural integrity, leading to sagging, crumbling, and eventual collapse.
  • Wood Rot: Wooden ceiling joists, rafters, and framing can absorb moisture, leading to rot. Wood rot weakens these critical structural elements, potentially compromising the stability of your roof and upper floors.
  • Corrosion: Metal components within the ceiling cavity, such as electrical conduit or plumbing fixtures, can corrode when exposed to prolonged moisture.

Electrical Hazards

Water and electricity are a dangerous combination. If water leaks onto or near electrical wiring, junction boxes, or light fixtures within the ceiling cavity, it can create a serious fire hazard or electrocution risk.

  • Short Circuits: Water can cause short circuits, leading to sparks and potentially igniting surrounding materials.
  • Corrosion of Connections: Moisture can corrode electrical connections, leading to intermittent power issues or complete failure of lighting or ceiling fans.

Damaged Insulation

Ceiling insulation is designed to keep your home warm in winter and cool in summer. When insulation becomes wet, its effectiveness is severely diminished.

  • Reduced Thermal Performance: Wet insulation traps moisture and loses its ability to resist heat flow, leading to higher energy bills.
  • Mold Growth in Insulation: Insulation, especially fiberglass or cellulose, can become a prime location for mold growth when damp.
  • Weight and Sagging: Saturated insulation can become very heavy, contributing to the sagging of drywall.

Pest Infestations

Damp, damaged areas within your home can attract pests like rodents and insects seeking moisture and shelter.

Repairing Ceiling Water Stains: A Comprehensive Guide

Once the source of the leak has been identified and repaired, the process of fixing the water stain can begin. This typically involves several steps to ensure a lasting repair and prevent future issues.

Step 1: Addressing The Source Of The Leak

This is the most critical step. No amount of cosmetic repair will solve the problem if the underlying leak is not permanently fixed. This might involve:

  • Plumbing Repairs: Replacing a section of pipe, tightening a fitting, replacing a wax ring, or repairing a faulty fixture.
  • Roof Repairs: Replacing damaged shingles, repairing or replacing flashing, sealing roof penetrations.
  • Gutter Cleaning/Repair: Ensuring gutters are clear and properly sloped.
  • Condensation Control: Improving attic ventilation, adding insulation, or repairing HVAC leaks.

Step 2: Drying The Area

Before any repairs can be made to the ceiling itself, the affected area must be completely dried.

  • Ventilation: Open windows and use fans to increase air circulation in the room.
  • Dehumidifiers: Running a dehumidifier can significantly speed up the drying process, especially in humid conditions or enclosed spaces like attics.
  • Professional Drying Equipment: For severe water damage, professional restoration companies use specialized equipment like air movers and industrial dehumidifiers to ensure thorough drying and prevent mold growth. This process can take several days.

Step 3: Repairing Or Replacing Damaged Drywall

Once the area is dry, the damaged drywall can be addressed.

  • Minor Stains: If the stain is superficial and the drywall is not structurally compromised, you might be able to simply clean the area (if mold is present, use an appropriate mold cleaner) and then prime and paint.
  • Moderate Damage: If the drywall is soft, crumbling, or shows signs of sagging, the affected section will need to be cut out and replaced.
  • Cut Out Damaged Section: Use a utility knife or drywall saw to carefully cut out the stained and damaged portion of the drywall. Ensure you cut back to solid, undamaged material.
  • Install New Drywall: Cut a new piece of drywall to fit the opening. Secure it to the ceiling joists using drywall screws. You may need to add wood bracing if the new piece doesn’t align perfectly with existing joists.
  • Tape and Mud: Apply drywall tape over the seams and cover it with joint compound (mud). Apply multiple thin coats, allowing each coat to dry and sanding lightly between coats until the patch is smooth and level with the surrounding ceiling.
  • Severe Damage: If the damage is extensive, or if structural elements like joists are compromised, a larger section of the ceiling may need to be replaced, potentially requiring professional assistance.

Step 4: Priming And Painting

After the new drywall (or repaired section) is smooth and ready, it needs to be primed and painted.

  • Stain-Blocking Primer: It is essential to use a high-quality stain-blocking primer (like KILZ or Zinsser B-I-N) specifically designed for water stains. These primers seal the stain and prevent it from bleeding through the new paint. Apply at least one, preferably two, coats of primer.
  • Paint: Once the primer is dry, apply your ceiling paint. You may need to paint the entire ceiling to ensure a uniform color match, as freshly patched areas can sometimes look slightly different.

Preventing Future Water Stains: Proactive Home Maintenance

The best way to deal with water stains is to prevent them from happening in the first place. Regular maintenance and attention to potential problem areas can save you significant time, money, and stress.

Regular Roof Inspections And Maintenance

Your roof is your home’s primary shield against water.

  • Annual Inspections: Inspect your roof at least once a year, and after major storm events. Look for missing, cracked, or curling shingles, damaged flashing, and debris buildup.
  • Gutter Cleaning: Clean your gutters and downspouts at least twice a year (spring and fall) to ensure proper water flow away from your home. Consider gutter guards to minimize debris accumulation.
  • Trim Overhanging Branches: Tree branches can damage shingles or clog gutters. Keep them trimmed back from your roofline.

Plumbing System Upkeep

  • Inspect Visible Pipes: Periodically check exposed pipes under sinks and in basements or crawl spaces for signs of corrosion, leaks, or condensation.
  • Water Pressure: High water pressure can put extra strain on your plumbing system. Consider installing a pressure-reducing valve if your home’s pressure is too high (typically above 80 psi).
  • Appliance Hoses: Regularly inspect hoses for washing machines and dishwashers. Replace rubber hoses with more durable braided stainless steel hoses, and replace them every 5-10 years regardless of appearance.
  • Know Your Shut-Off Valve: Familiarize yourself with the location of your main water shut-off valve in case of a major leak or burst pipe.

Hvac And Appliance Maintenance

  • AC Tune-Ups: Have your air conditioning system serviced annually by a professional. This includes checking and cleaning the drip pan and drain line.
  • Humidifier Checks: If you have a whole-house humidifier, ensure it’s functioning correctly and not leaking.
  • Appliance Seals: Check seals on washing machines, dishwashers, and refrigerators to ensure they are intact and not leaking.

Insulation And Ventilation

  • Attic Insulation: Ensure your attic is adequately insulated according to local building codes. Proper insulation acts as a thermal barrier, reducing temperature differences that lead to condensation.
  • Attic Ventilation: Verify that your attic has proper ventilation (soffit vents, ridge vents, or gable vents) to allow moist air to escape. This helps prevent condensation buildup.
  • Seal Air Leaks: Seal any gaps or cracks between your living space and the attic, such as around light fixtures, plumbing vents, and attic hatches.

Bathroom And Kitchen Precautions

  • Check Grout and Caulking: Regularly inspect the grout and caulking around tubs, showers, and sinks. Re-caulk or re-grout as needed to prevent water from seeping beneath tiles.
  • Monitor Humidity: Use exhaust fans during and after showers or baths to reduce humidity levels. Consider a whole-house dehumidifier if your home consistently has high humidity.

When To Call A Professional

While some minor ceiling stains can be addressed with DIY repairs, there are several situations where calling a professional is the safest and most effective course of action.

Complex Or Persistent Leaks

If you’ve tried to locate the source of a leak but can’t find it, or if the leak continues after initial repairs, it’s time to bring in an expert. Plumbers have specialized tools like moisture meters and thermal cameras that can detect hidden leaks.

Roofers are essential for diagnosing and repairing roof-related water intrusion.

Significant Structural Damage

If the water damage has caused sagging drywall, compromised ceiling joists, or visible rot, professional assessment and repair are necessary to ensure the structural integrity of your home is restored.

Suspected Mold Growth

If you see or smell mold, it’s crucial to address it promptly and correctly. Mold remediation can be complex and requires specialized knowledge and equipment to ensure it’s removed safely and effectively without spreading spores. Certified mold remediation specialists can handle this.

Electrical Concerns

If water has come into contact with electrical wiring or fixtures, do not attempt repairs yourself. Immediately shut off the power to the affected area at the circuit breaker and call a licensed electrician.

Extensive Water Damage

For large-scale water intrusion, such as from a burst pipe or severe storm damage, professional water damage restoration companies have the equipment and expertise to dry out your home thoroughly, preventing further damage and mold growth.

Frequently Asked Questions

What Is The First Thing I Should Do When I See A Water Stain On My Ceiling?

The very first thing you should do is investigate the area directly above the stain. Look for any obvious signs of leaks from plumbing fixtures, appliances, or the roof. If you can identify the source, turn off the water supply to that fixture or area if possible, and begin the drying process. If the stain is actively dripping or you suspect an electrical issue, shut off the power to that section of your home and call a professional immediately.

How Can I Tell If The Water Stain Is From A Plumbing Leak Or A Roof Leak?

The location of the stain can be a significant clue. Stains