Furnace Not Turning On

Furnace Not Turning On

A sudden chill can be more than just uncomfortable; it can be a sign of a serious problem with your home’s heating system. When your furnace fails to turn on, it leaves you in the dark, or rather, the cold.

This is a common household issue, especially during the peak of winter, and understanding the potential causes can save you time, money, and a lot of inconvenience. From simple tripped breakers to more complex mechanical failures, a furnace that won’t ignite requires a systematic approach to diagnose and resolve.

This guide aims to equip you with the knowledge to troubleshoot your furnace when it decides to go on strike. We’ll explore the most frequent culprits behind a furnace that refuses to start, offering step-by-step solutions for homeowners and highlighting when it’s time to call in the professionals.

By understanding the inner workings and common pitfalls of your heating system, you can better assess the situation and ensure your home stays warm and cozy throughout the colder months.

Key Takeaways

  • Power Supply Issues: The most common reason a furnace won’t turn on is a lack of power, often due to a tripped circuit breaker, a blown fuse, or a faulty switch.
  • Thermostat Problems: A malfunctioning thermostat, incorrect settings, or low batteries can prevent the furnace from receiving the signal to heat.
  • Safety Features: Furnaces have built-in safety mechanisms, like a tripped limit switch or a blocked flue, that will prevent operation if a dangerous condition is detected.
  • Ignition System Failures: Problems with the pilot light, ignitor, or flame sensor can stop the furnace from igniting the gas.
  • Airflow Blockages: Dirty air filters or blocked vents can trigger safety shutdowns or prevent the system from cycling properly.
  • Mechanical Component Failure: Internal parts like the blower motor, inducer motor, or gas valve can fail, requiring professional repair.
  • When to Call a Pro: Minor issues like resetting a breaker or changing a filter can often be handled by a homeowner, but complex electrical or mechanical problems necessitate calling a qualified HVAC technician.
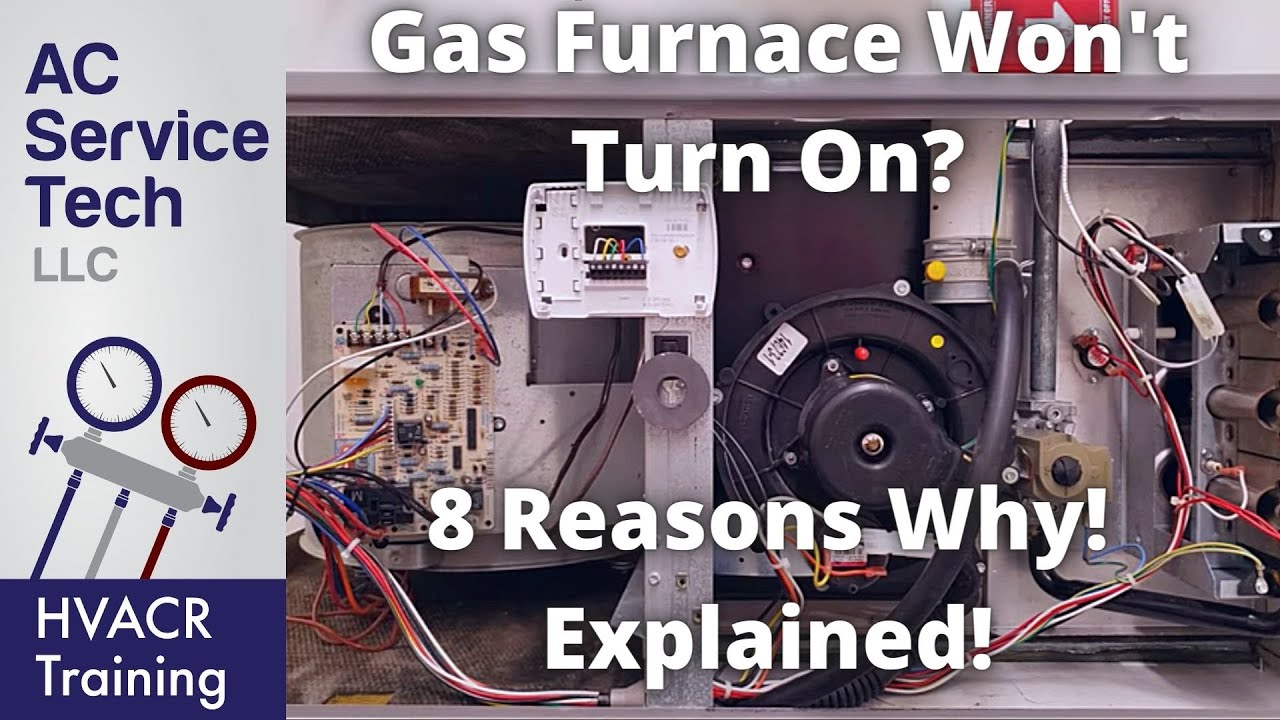
Furnace Not Turning On

Credit: www.youtube.com

Power Supply: The First Check

The most straightforward reason your furnace might not be turning on is a simple interruption in its power supply. Before diving into more complex diagnostics, it’s crucial to rule out any issues with the electricity reaching your heating system. This is often the easiest fix and can save you the cost of a service call.

Checking The Circuit Breaker Or Fuse

Furnaces, like other major appliances, are typically connected to a dedicated circuit breaker or fuse in your home’s electrical panel. Over time, power surges or system malfunctions can cause this breaker to trip or the fuse to blow, effectively cutting off power to the furnace.

How to Check:

  • Locate Your Electrical Panel: This is usually found in a basement, garage, utility room, or hallway closet.
  • Identify the Furnace Breaker: Look for a breaker labeled “Furnace,” “Heating,” “HVAC,” or a similar designation. Sometimes, it might be grouped with other appliances. If you’re unsure, you can try flipping breakers one by one, but be cautious.
  • Inspect the Breaker: A tripped breaker will typically be in a middle position between “On” and “Off,” or it might appear to be in the “Off” position. If it’s tripped, firmly push it to the “Off” position, and then flip it back to the “On” position.
  • Check Fuses (if applicable): Older homes might have fuses instead of breakers. If you find a blown fuse (the wire inside will be broken or discolored), replace it with a new one of the exact same amperage. Never use a fuse with a higher rating, as this is a fire hazard.

Pro Tip: If the breaker trips again immediately after resetting, or if you repeatedly blow fuses, this indicates a more serious electrical problem within the furnace or its wiring that requires professional attention. Do not keep resetting it, as this can cause further damage or pose a safety risk.

Inspecting The Furnace Power Switch

Many furnaces have a separate power switch, often located on the unit itself or on an adjacent wall. This switch is usually a simple on/off toggle or a pull-chain switch. It’s designed to provide a local disconnect for safety during maintenance.

How to Check:

  • Locate the Switch: This is typically found near the furnace itself, often on the side of the unit or on a nearby wall. It might be a standard light switch or a red emergency shut-off button.
  • Ensure it’s in the “On” Position: If the switch is off, simply flip it to the “On” position.
  • Listen for the Furnace: After turning the switch on, listen to see if the furnace begins its startup sequence.

Warning: If this switch has been accidentally bumped or turned off, it’s an easy fix. However, if it’s consistently in the “Off” position without explanation, there might be an underlying issue that caused it to be shut down.

Furnace Not Turning On

Credit: www.hurleyanddavid.com

Thermostat Troubles: The Brain Of Your System

The thermostat is the command center for your heating system. If it’s not functioning correctly, or if it’s set improperly, your furnace will never receive the signal to turn on, even if all other components are working perfectly.

Incorrect Thermostat Settings

This might sound obvious, but it’s a surprisingly common oversight. People often forget to adjust their thermostat settings after a period of not using the heat, or they might inadvertently change a setting.

How to Check:

  • Verify the Mode: Ensure the thermostat is set to “Heat” mode, not “Cool” or “Fan Only.”
  • Check the Temperature Setting: Make sure the desired temperature is set higher than the current room temperature. For example, if it’s 68°F in your home and you set the thermostat to 65°F in heat mode, it won’t turn on because the desired temperature has already been reached. Increase the setpoint to a warmer temperature (e.g., 72°F) to initiate heating.
  • Look for a Schedule: If you have a programmable or smart thermostat, check its schedule. It’s possible that the current time falls within a scheduled “off” or “eco” period. You may need to temporarily override the schedule or adjust it.

Low Or Dead Thermostat Batteries

Many modern thermostats, especially digital and smart models, rely on batteries to maintain their settings and operate. If these batteries are low or dead, the thermostat may not be able to communicate effectively with the furnace.

How to Check:

  • Look for a Battery Indicator: Most digital thermostats have a battery icon that shows the charge level. If it’s flashing or empty, the batteries need replacing.
  • Replace Batteries: Carefully remove the thermostat cover (it usually snaps off or has small screws). Replace the old batteries with new ones of the correct type and size.
  • Test the System: After replacing the batteries, allow the thermostat a minute to power up, then set it to heat and check if the furnace responds.

Example: I once visited a client in the middle of a blizzard who claimed their furnace was dead. After checking the breaker and verifying the thermostat settings, I noticed the low battery indicator. Swapping out two AA batteries took less than a minute, and the heat immediately kicked back on, much to their relief.

Faulty Thermostat

If the settings are correct, the batteries are fresh, and the thermostat is still not calling for heat, the thermostat itself might be malfunctioning. The internal components can wear out over time, or a wiring issue could be present.

How to Check (Advanced Homeowner/Professional):

  • Check for Power: Many thermostats have a common wire (C-wire) that provides continuous power. If this connection is loose or broken, the thermostat might not function.
  • Test Thermostat Signals: A qualified HVAC technician can use a multimeter to test if the thermostat is sending the correct voltage signals to the furnace when calling for heat.

If you suspect a faulty thermostat, replacement is usually the solution. For smart thermostats, ensure it’s properly connected to your Wi-Fi network and that the app is functioning correctly.

Safety First: Furnace Safety Mechanisms

Modern furnaces are equipped with numerous safety features designed to prevent damage to the unit and, more importantly, to protect your home and family from potential hazards like gas leaks or carbon monoxide. When these safety devices detect an issue, they will prevent the furnace from operating.

The Limit Switch

The limit switch, or high-limit switch, is designed to prevent the furnace from overheating. It monitors the temperature inside the furnace’s heat exchanger. If the temperature exceeds a safe threshold, the limit switch will shut off the furnace to prevent damage.

Common Causes for Tripped Limit Switch:

  • Blocked Airflow: A dirty air filter or blocked vents can restrict airflow, causing the furnace to overheat.
  • Faulty Blower Motor: If the blower motor isn’t circulating air properly, heat can build up inside the exchanger.
  • Over-Sized Furnace: A furnace that is too powerful for the home can heat up too quickly, triggering the limit switch.

How to Check (After Addressing Potential Causes):

  • Check Air Filter and Vents: Ensure your air filter is clean and that all supply and return vents are open and unobstructed.
  • Listen to the Blower: When the furnace *should* be running, listen for the blower motor. If you don’t hear it, or if it sounds strained, it might be the culprit.
  • Resetting the Limit Switch: In some cases, the limit switch can be manually reset. It often looks like a small button on the switch itself. However, it’s crucial to identify and fix the underlying cause of the overheat before resetting. If the problem persists, the switch itself might be faulty.

The Flame Sensor

The flame sensor is a critical safety component that ensures gas is only flowing when a flame is present. It sits in the path of the pilot light or main burner flame. If it detects a flame, it sends a signal to the gas valve allowing gas to continue flowing.

If it doesn’t detect a flame (e. g. , the pilot light is out, or the burners aren’t igniting), it will shut off the gas supply.

Common Causes for Flame Sensor Issues:

  • Dirty or Fouled Sensor: Soot or debris can accumulate on the flame sensor, preventing it from accurately detecting the flame.
  • Misalignment: The sensor might be slightly out of position, not directly in the flame.
  • Faulty Sensor: The sensor itself may have failed.

How to Check and Clean:

  • Locate the Flame Sensor: It’s usually a thin metal rod positioned directly in front of the main burner assembly or pilot light.
  • Carefully Remove: Gently unscrew or unclip the sensor from its bracket.
  • Clean Gently: Use fine-grit sandpaper or a soft cloth with a bit of steel wool to gently clean off any soot or corrosion. Avoid using harsh chemicals.
  • Reinstall: Re-secure the sensor in its original position, ensuring it’s properly aligned with the burner.
  • Test the System: Turn the furnace back on and see if it ignites.

Warning: If you smell gas at any point during this process, immediately turn off the furnace, leave the area, and call your gas company or emergency services.

Rollout Switch And Vent Safety

Furnaces have safety switches that monitor for “rollout,” which is when the flame incorrectly burns outside the combustion chamber. This can happen due to a blocked flue or a malfunctioning inducer motor. There are also safety checks for the flue itself to ensure proper venting of combustion gases.

How to Check:

  • Inspect the Flue: Ensure the exhaust vent pipe (usually on the exterior of your house or on the roof) is not blocked by snow, ice, debris, or animal nests.
  • Check the Inducer Motor: This small motor is responsible for drawing exhaust gases out of the furnace and pushing them up the flue. If it’s not running or is making unusual noises, it could be the cause.

If you suspect a problem with the rollout switch or flue venting, it’s best to contact an HVAC professional. These are critical safety systems, and improper venting can lead to dangerous carbon monoxide buildup.

Furnace Not Turning On

Credit: www.youtube.com

Ignition System Problems: No Spark, No Heat

The ignition system is responsible for lighting the gas that heats your home. If this system fails, the furnace will not produce heat, even if it’s receiving power and calling for heat. There are two main types of ignition systems: standing pilot lights and electronic ignition.

Standing Pilot Light Issues

Older furnaces often use a standing pilot light, which is a small flame that is always on, ready to ignite the main burners when the thermostat calls for heat.

Common Problems:

  • Pilot Light Out: The pilot light may have gone out due to a draft, a dirty thermocouple, or a problem with the gas supply.
  • Faulty Thermocouple: The thermocouple is a safety device that senses the pilot flame. If it’s dirty, worn out, or misaligned, it won’t signal the gas valve to stay open, and the pilot light will go out or fail to stay lit.
  • Dirty Pilot Orifice: The small opening where the pilot gas flows can become clogged.

How to Re-light a Standing Pilot:

  • Locate the Pilot Assembly: Find the small gas tube and burner assembly near the main burners.
  • Follow Manufacturer Instructions: Most furnaces have instructions printed on a label near the gas control valve. Typically, you’ll need to:
  • Turn the gas control knob to “Pilot.”
  • Push and hold the knob down to allow gas to flow to the pilot.
  • Light the pilot with a long lighter or match.
  • Continue holding the knob down for 30-60 seconds after the pilot ignites to heat the thermocouple.
  • Slowly release the knob. If the pilot stays lit, turn the knob to “On.”
  • If it Won’t Stay Lit: If the pilot light goes out as soon as you release the knob, the thermocouple is likely the issue. It may need cleaning or replacement.

Electronic Ignition Failures

Modern furnaces use electronic ignition systems, which are more energy-efficient as they only ignite the burners when needed. There are two main types:

  • Intermittent Pilot Ignition (IPI): A pilot flame is ignited electronically only when the thermostat calls for heat.
  • Hot Surface Ignitor (HSI): A silicon carbide or nitride element heats up to a glowing red temperature, igniting the main burners directly. This is the most common type in newer furnaces.

Common Problems with Electronic Ignition:

  • Faulty Hot Surface Ignitor: The HSI can crack or burn out over time. When it fails to heat up to the required temperature, it won’t ignite the gas. You might see it glow faintly or not at all.
  • Ignition Control Module Failure: This module controls the ignition sequence. If it malfunctions, it can prevent the ignitor from activating or fail to signal the gas valve.
  • Flame Sensor Issues (as described above): A dirty or faulty flame sensor can also prevent ignition, even if the ignitor is working.

How to Check an HSI:

  • Observe the Startup Sequence: When the thermostat calls for heat, listen and watch. You should hear the inducer motor start, followed by a clicking sound (if applicable) and then the glow of the HSI. After a brief pause, the main burners should ignite.
  • Visual Inspection: If the HSI doesn’t glow, or glows very dimly, it’s likely faulty and needs replacement. This is a common DIY replacement for many homeowners, but requires careful handling as HSIs are fragile.
  • Professional Diagnosis: If the HSI appears to be working but the burners aren’t igniting, the issue could be with the gas valve, flame sensor, or control board, requiring a technician.

Airflow And Filtration: Keeping Things Moving

Proper airflow is essential for your furnace to operate efficiently and safely. Restricted airflow can lead to overheating, reduced performance, and premature component failure. The most common culprits are dirty air filters and blocked vents.

Dirty Air Filters

The air filter in your furnace traps dust, pollen, and other airborne particles, preventing them from reaching the furnace’s internal components and circulating throughout your home. A clogged filter significantly restricts airflow.

Signs of a Clogged Filter:

  • Reduced heating performance (less warm air coming from vents).
  • Furnace overheating and shutting off prematurely.
  • Visible dirt buildup around the filter housing.
  • Increased energy bills due to the furnace working harder.

Replacement Schedule:

  • Standard fiberglass filters: Replace every 1-2 months.
  • Pleated media filters: Replace every 3-6 months.
  • High-efficiency filters: Can last 6-12 months, but check manufacturer recommendations.

How to Replace:

  • Turn Off Furnace Power: Always shut off power to the furnace at the breaker or switch before changing the filter.
  • Locate the Filter: It’s usually in the return air duct, near the furnace, or sometimes in a wall or ceiling return vent.
  • Note Airflow Direction: Filters have an arrow indicating the direction of airflow. Ensure the new filter is installed correctly.
  • Remove Old Filter: Slide out the old, dirty filter.
  • Install New Filter: Slide in the new filter, making sure it’s snug and the arrow points in the correct direction.
  • Restore Power: Turn the furnace power back on.

Data Point: According to the U.S. Department of Energy, regularly changing your furnace filter can improve efficiency by 5% to 15%.

Blocked Vents And Ducts

Even with a clean filter, blocked vents or obstructions in your ductwork can impede airflow. This includes furniture blocking registers, closed dampers, or debris accumulated within the ducts.

How to Check:

  • Inspect All Vents: Walk through your home and ensure all supply and return air vents are clear of furniture, rugs, curtains, or any other obstructions.
  • Check Dampers: Some duct systems have manual dampers that can be opened or closed. Ensure these are in the open position for heating season.
  • Listen for Airflow: Feel the airflow coming from each supply vent. Uneven or weak airflow from multiple vents could indicate a larger ductwork issue.

Blower Motor Issues

The blower motor is responsible for circulating the heated air throughout your home. If the blower motor fails, you won’t get any air movement, even if the furnace heats up.

Signs of Blower Motor Failure:

  • No air coming from vents at all.
  • Unusual noises (grinding, squealing) from the furnace.
  • The furnace heats up, but the blower doesn’t kick on.

Diagnosis and Repair: Blower motor issues often require professional diagnosis. The motor might need cleaning, lubrication, or replacement. Sometimes, a faulty capacitor can prevent the motor from starting.

Internal Component Failures: When Parts Wear Out

Over time, the various mechanical and electrical components within your furnace can wear out or fail. These issues often require specialized knowledge and tools to diagnose and repair.

Gas Valve Malfunction

The gas valve controls the flow of natural gas or propane to the burners. If it fails, it can prevent gas from reaching the burners, even if the ignition system is trying to light it.

Symptoms:

  • The ignitor glows or pilot lights, but the burners never ignite.
  • A faint smell of gas when the furnace attempts to start (though this can also indicate a leak, which is an emergency).

Diagnosis and Repair: Gas valves are complex and potentially dangerous components. Any suspected issue requires immediate attention from a qualified HVAC technician.

Inducer Motor Failure

As mentioned earlier, the inducer motor is crucial for expelling combustion gases. If it fails, safety switches will typically prevent the furnace from operating to avoid dangerous exhaust gas buildup.

Symptoms:

  • The furnace doesn’t start its heating cycle.
  • You might hear a clicking sound, but the inducer motor doesn’t spin.
  • Error codes displayed on the furnace control board.

Diagnosis and Repair: A technician can test the motor and its electrical connections. Replacement is often necessary if the motor has failed.

Control Board Issues

The control board (or circuit board) is the “brain” of the furnace, orchestrating the entire startup and operation sequence. If it malfunctions, it can cause a wide range of problems, including the furnace not turning on at all.

Symptoms:

  • No response when the thermostat calls for heat.
  • Furnace starts and stops erratically.
  • Error codes displayed (if your furnace has a diagnostic panel).
  • Specific components not receiving power.

Diagnosis and Repair: Diagnosing control board issues involves checking voltage signals to various components. Replacement is usually the solution if the board is faulty, and this is a job for a professional.

When To Call A Professional Hvac Technician

While some furnace issues are simple enough for a homeowner to address, many require the expertise of a trained professional. It’s crucial to know when to stop troubleshooting yourself and call in the experts to ensure safety and proper repair.

Safety Concerns

Any situation involving potential gas leaks, electrical shorts, or carbon monoxide concerns should be immediately handled by a professional. If you smell a strong gas odor, evacuate your home and call your
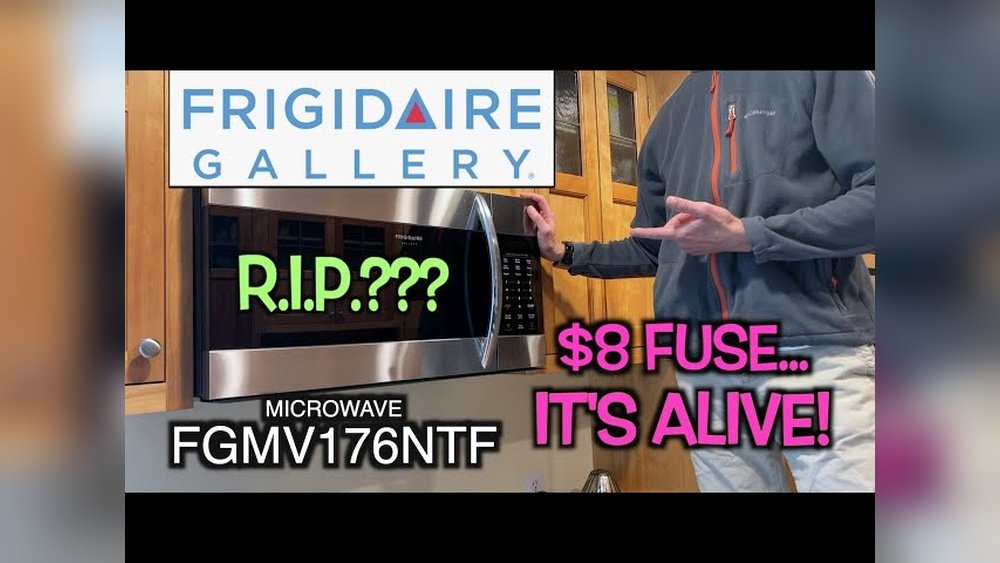
Frigidaire Microwave Keeps Blowing Fuse

Frigidaire Microwave Keeps Blowing Fuse

A Frigidaire microwave is a staple in many kitchens, offering convenience and speed for meal preparation. However, when this essential appliance starts blowing fuses, it can bring your culinary routine to a grinding halt. This recurring issue isn’t just an annoyance; it’s a clear signal that something is amiss within the microwave’s electrical system. Understanding the potential causes behind a Frigidaire microwave keeps blowing fuse is crucial for diagnosing the problem, ensuring safety, and determining whether a simple fix or professional repair is needed.

Blowing fuses in a microwave, especially a Frigidaire, typically points to an electrical overload or a short circuit. These safety mechanisms are designed to prevent damage to the appliance and, more importantly, to protect your home from potential fire hazards.

While a single blown fuse might be a fluke, repeated occurrences demand attention. This comprehensive guide will explore the common culprits behind a Frigidaire microwave blowing its fuse, offering detailed explanations, troubleshooting steps, and advice on when to call in the experts.

We’ll cover everything from simple user errors to more complex internal component failures, empowering you to tackle this frustrating problem effectively.

Key Takeaways

  • Blown fuses in a Frigidaire microwave indicate an electrical issue, often an overload or short circuit, designed to protect the appliance and prevent fires.
  • Common causes range from external factors like faulty outlets and surge protectors to internal component failures such as the door interlock switches, magnetron, high-voltage diode, or transformer.
  • User error, like operating the microwave with metal inside or attempting to cook improperly shielded food, can also trigger fuse blowouts.
  • Troubleshooting steps should begin with simple checks of the power source and microwave door, progressing to more involved internal diagnostics if necessary.
  • Safety is paramount when dealing with microwave repairs due to high-voltage components; always unplug the appliance before attempting any internal inspection.
  • For persistent or complex issues, professional repair is often the safest and most effective solution.
Frigidaire Microwave Keeps Blowing Fuse

Credit: www.youtube.com

Understanding Microwave Fuses And Their Purpose

Every electrical appliance has a fuse, and microwaves are no exception. A fuse is essentially a safety device containing a metal wire designed to melt and break an electrical circuit when the current flowing through it exceeds a safe level.

This prevents damage to the appliance’s internal components and, critically, mitigates the risk of electrical fires.

A microwave oven operates with a high-power electrical system. When you plug it in, electricity flows through various components to generate the microwave energy that heats your food. The fuse is strategically placed in this circuit. If a component malfunctions and draws excessive current, or if there’s a direct short circuit, the fuse will blow, instantly cutting off power.

Types Of Fuses In Microwaves

Frigidaire microwaves, like most others, typically have at least one main fuse. This primary fuse is usually located on the main control board or near the power input. Some models might have additional fuses for specific circuits, such as the lighting or turntable motor, though the main fuse is the one most likely to blow if there’s a significant electrical fault.

The specific type and rating of the fuse are critical; using an incorrect replacement fuse can be extremely dangerous. Always refer to your Frigidaire microwave’s user manual or the fuse itself for the correct amperage and voltage rating.

Why Fuses Blow: Overload Vs. Short Circuit

It’s important to distinguish between an electrical overload and a short circuit, as both can cause a fuse to blow but stem from different problems.

  • Overload: This occurs when a circuit attempts to draw more electrical current than it is designed to handle. In a microwave, an overload might happen if a component is failing and drawing excessive power, or if multiple high-power appliances are drawing from the same circuit. It can also happen if the microwave is attempting to operate under conditions it’s not designed for, such as trying to heat something that’s not suitable for microwave cooking.
  • Short Circuit: A short circuit is a more serious condition where electricity flows along an unintended path, often bypassing the normal load. This usually happens when a wire’s insulation is damaged, allowing two conductors to touch, or a conductor to touch a metal casing. Short circuits result in a sudden, massive surge of current, causing the fuse to blow almost instantaneously.
Frigidaire Microwave Keeps Blowing Fuse

Credit: www.reddit.com

Common Causes For A Frigidaire Microwave Blowing A Fuse

When your Frigidaire microwave repeatedly blows its fuse, it’s rarely a random occurrence. Several specific issues can trigger this protective shutdown. Identifying the root cause is the first step toward a solution.

Internal Component Failures

Many fuse-blowing incidents are due to the failure of one or more internal components within the microwave. These are often the most complex issues to diagnose and repair.

High-voltage Transformer Failure

The high-voltage transformer is a critical component that steps up the household voltage (e.g., 120V) to the several thousand volts required by the magnetron to generate microwaves. If this transformer overheats, its internal windings can short out. This creates a massive current draw, immediately blowing the fuse to protect the rest of the system and prevent a fire. Signs of a failing transformer can include a humming noise when the microwave is supposed to be operating, a burning smell, or visible signs of overheating.

Magnetron Malfunction

The magnetron is the heart of the microwave, responsible for producing the microwave energy. Like any electronic component, it can fail over time. A failing magnetron might start drawing excessive current, or it could develop an internal short. This sudden increase in current will blow the fuse. Symptoms of a failing magnetron can be inconsistent heating, unusual noises during operation, or the fuse blowing shortly after starting a cooking cycle.

High-voltage Diode Or Capacitor Issues

Microwaves use a high-voltage diode and a high-voltage capacitor as part of the system that powers the magnetron. The diode rectifies the AC voltage from the transformer into DC, and the capacitor stores this high-voltage DC power. If either the diode or the capacitor fails (e.g., the capacitor shorts out or the diode breaks down), it can cause a direct short circuit across the high-voltage system, leading to the fuse blowing. These components operate at extremely high voltages, making them dangerous to handle even when the microwave is unplugged.

Control Board Or Transformer Failure

While less common than magnetron or transformer issues, the main control board or its associated control transformer can also fail. A short within the control board itself, or a failure in the smaller transformer that powers the control circuitry, can draw excessive current and blow the fuse. This might be accompanied by erratic display behavior or the microwave not responding to button presses.

Door Interlock Switch Problems

Microwave ovens have door interlock switches that serve a crucial safety function: they prevent the microwave from operating unless the door is securely closed. There are typically multiple interlock switches. If one of these switches fails, becomes misaligned, or is damaged, it can send incorrect signals to the control board, or it might create a short circuit. In some cases, a faulty interlock switch can cause the microwave to attempt to draw power even when the door is open, or it might malfunction in a way that shorts the high-voltage circuit, leading to a blown fuse.

Faulty Power Cord Or Internal Wiring

The power cord itself can be a source of problems. If the cord is frayed, damaged, or has internal breaks, it can lead to short circuits. Similarly, internal wiring within the microwave can become loose, pinched, or its insulation can degrade over time, creating a path for electricity to short circuit. This is particularly true around the high-voltage components. A visual inspection of the power cord and any accessible wiring can sometimes reveal obvious damage.

External Electrical Issues

Sometimes, the problem isn’t with the microwave itself but with the electrical outlet or the circuit breaker it’s plugged into.

Faulty Wall Outlet

A damaged or worn wall outlet can cause poor electrical connections, leading to arcing and increased resistance, which can sometimes manifest as blown fuses. If the outlet’s internal contacts are loose or corroded, they might not be able to handle the microwave’s power draw.

Overloaded Circuit

Microwave ovens are high-power appliances, often drawing 1000 watts or more. If the electrical circuit the microwave is plugged into is already heavily loaded with other high-draw appliances (like toasters, coffee makers, or hair dryers), it can lead to an overload. While this typically trips the circuit breaker, in some scenarios, it might cause a fuse to blow within the microwave if the surge is significant and rapid.

Surge Protector Issues

While surge protectors are designed to protect electronics, a faulty surge protector or one that is overloaded can sometimes cause issues. If the surge protector itself has failed or is struggling to deliver consistent power, it might contribute to fuse blowouts in connected appliances. It’s always recommended to plug high-power appliances like microwaves directly into a wall outlet, or at least use a heavy-duty surge protector specifically rated for such devices.

User Error And Improper Usage

While less common for recurring fuse issues, certain user mistakes can trigger a fuse blowout.

Using Metal Inside The Microwave

Placing metal objects (utensils, foil, metallic-trimmed dishes) inside the microwave can cause arcing, which is a rapid discharge of electricity. This arcing can draw excessive current and blow the fuse. It can also damage the magnetron.

Operating With The Door Ajar

If the microwave is operated with the door not fully latched, the interlock switches may not engage correctly, potentially leading to electrical faults or the appliance attempting to operate in an unsafe state, which could blow a fuse.

Troubleshooting Steps For A Frigidaire Microwave Blowing A Fuse

When your Frigidaire microwave keeps blowing its fuse, a systematic troubleshooting approach can help pinpoint the issue. Remember to prioritize safety at all times.

Step 1: Safety First, Unplug The Microwave

Before you do anything else, unplug the Frigidaire microwave from the wall outlet. This is non-negotiable. Microwaves contain high-voltage components that can store a dangerous electrical charge even after being unplugged. Never attempt any internal inspection or repair while the appliance is connected to power.

Step 2: Check The Power Source

Start with the simplest potential causes outside the microwave itself.

  • Test the Outlet: Plug a different, known-working small appliance (like a lamp or phone charger) into the same outlet. If that appliance doesn’t work, the outlet may be faulty or the circuit breaker may have tripped. Check your home’s circuit breaker panel and reset any tripped breakers. If the outlet is indeed dead, try plugging the microwave into a different outlet in your home.
  • Inspect the Power Cord: Visually examine the microwave’s power cord for any signs of damage, fraying, or kinks. If you see any damage, this could be the culprit.
  • Bypass Surge Protector: If the microwave is plugged into a surge protector or extension cord, try plugging it directly into the wall outlet. Faulty or overloaded surge protectors can cause issues.

Step 3: Examine The Door And Interlock Switches

The door and its associated switches are critical safety features and common failure points.

  • Check Door Alignment: Ensure the microwave door closes properly and latches securely. Look for any signs of damage to the door itself or the frame. A misaligned door can prevent the interlock switches from engaging correctly.
  • Inspect Door Latches: Make sure the latches are not bent or broken. If they appear damaged, they may need replacement.
  • Listen for Switch Operation: When you open and close the door, you should hear distinct clicks as the interlock switches engage and disengage. If you don’t hear them, or if they sound damaged, the switches may be faulty. Note: Testing the interlock switches themselves requires disassembly and a multimeter, which should only be done by someone comfortable with electrical testing.

Step 4: Observe The Fuse Blowing Behavior

Pay close attention to *when* the fuse blows. This can provide valuable clues.

  • Immediately Upon Plugging In: If the fuse blows the instant you plug the microwave in, it suggests a severe short circuit, likely in the main power supply components like the transformer, capacitor, or diode, or possibly a major short in the control board.
  • When Starting a Cook Cycle: If the fuse blows only after you press “Start” or a few seconds into the cooking cycle, it could indicate a problem with the magnetron, the high-voltage transformer, or the high-voltage capacitor/diode trying to power the magnetron.
  • During Specific Power Levels: If it blows only at certain power levels (e.g., high power but not defrost), it might point to a specific component struggling under load.

Step 5: Internal Component Inspection (advanced)

Warning: This step involves working with high-voltage components and requires caution. If you are not experienced with electrical repairs, it is best to skip this and call a professional.

If you are comfortable and have the necessary tools (like a multimeter), you can attempt to inspect internal components.

  • Access the Internals: After ensuring the microwave is unplugged and has sat for a while (to discharge the capacitor), carefully remove the outer casing. Refer to your Frigidaire model’s service manual if available.
  • Visual Inspection: Look for any obvious signs of damage:
  • Burn marks: On circuit boards, wiring, or around components.
  • Bulging or leaking capacitors: The high-voltage capacitor should be perfectly cylindrical.
  • Damaged wiring: Wires that are frayed, melted, or disconnected.
  • Signs of overheating: Discoloration on the transformer or other components.
  • Component Testing (Requires Multimeter):
  • High-Voltage Diode: Test for continuity. It should conduct in one direction but not the other. A shorted diode will read very low resistance in both directions.
  • High-Voltage Capacitor: Test for shorts. It should not show continuity between its terminals. A charged capacitor can be dangerous; ensure it’s discharged properly before testing.
  • Magnetron: This is harder to test definitively without specialized equipment, but sometimes internal shorts can be detected with a multimeter.
  • Transformer: Check for continuity in the primary and secondary windings. Look for signs of internal shorts.

Step 6: Replacing The Fuse (temporary Measure)

If you’ve identified a potential issue but aren’t ready for a full repair, or if you suspect an intermittent external cause, you might consider replacing the fuse. Crucially, use only the exact same type and rating of fuse specified for your Frigidaire model. Installing a higher-rated fuse is extremely dangerous and can lead to fire or severe damage. Replacing the fuse will tell you if the problem is resolved or if it blows again immediately, confirming a persistent fault.

Frigidaire Microwave Keeps Blowing Fuse

Credit: atoz1.com

Common Frigidaire Microwave Models And Fuse Issues

While specific models may have unique quirks, the underlying principles of why a Frigidaire microwave blows a fuse remain consistent across their product lines, from countertop models to over-the-range units. Understanding common failure points in popular Frigidaire series can offer targeted insights.

Frigidaire Gallery Series

The Frigidaire Gallery series often features advanced functionalities and over-the-range designs. Models like the FGMO30S8KMA or similar variants can experience fuse issues due to the complexity of their control boards and integrated ventilation systems. If a Gallery model blows a fuse, focus on:

  • Control Board: The sophisticated digital controls are susceptible to power surges or component failure.
  • Ventilation Fan Motor: If the fan motor draws excessive current, it could contribute to an overload, though this is less common for main fuse blowouts than high-voltage component issues.
  • Door Interlock Switches: These are critical for all models, ensuring safe operation, especially in over-the-range units where they are frequently used.

Frigidaire Professional Series

The Professional series aims for robust performance. Models might include built-in units or larger capacity countertop microwaves. For these, potential fuse issues might relate to:

  • High-Power Components: These units often have more powerful magnetrons and transformers to handle larger cooking tasks, increasing the stress on these components.
  • Wiring Harnesses: With larger chassis, wiring can be more susceptible to pinching or wear over time, potentially leading to shorts.

Frigidaire Standard Countertop Models

Simpler, more budget-friendly countertop models (e.g., older FFCM models) tend to have fewer complex electronics. Fuse blowouts in these units are more likely attributable to:

  • Basic Component Failure: Magnetron, transformer, or diode failure are prime suspects.
  • Power Cord Issues: Due to simpler construction, external factors like power cord damage might be more readily apparent.

Example: Frigidaire Ffmo1611l Fuse Problem

Let’s consider a hypothetical scenario with a Frigidaire FFMO1611L countertop microwave. A user reports that their microwave blows the fuse whenever they try to heat food for more than 30 seconds.

  • Initial Checks: The user confirms the outlet is fine and the power cord looks intact. They also ensure the door closes securely.
  • Observation: The fuse blows consistently after about 30 seconds of operation, regardless of the food being heated. This timing suggests the issue occurs once the high-voltage system is fully engaged and under load.
  • Hypothesis: This points strongly towards a component within the high-voltage circuit: the magnetron, high-voltage transformer, or the capacitor/diode assembly.
  • Internal Inspection (Professional): A technician would likely disconnect power, discharge the capacitor, and then test the continuity of the diode, capacitor, and transformer windings. They might also inspect the magnetron for signs of damage. If the transformer shows signs of overheating or the diode tests as shorted, that would be the likely cause.
  • Repair: Depending on the diagnosis, the faulty component would be replaced. For instance, if the high-voltage diode is found to be shorted, replacing it along with the fuse might resolve the issue.

Data Table: Common Microwave Component Failure Likelihood

ComponentLikelihood of Causing Fuse BlowoutTypical SymptomsRepair Difficulty
High-Voltage TransformerHighHumming, burning smell, fuse blows immediatelyHigh
MagnetronHighInconsistent heating, fuse blows after startingHigh
High-Voltage DiodeMediumFuse blows immediately or shortly after startingMedium
High-Voltage CapacitorMediumFuse blows immediately or shortly after startingMedium
Door Interlock SwitchesMediumFuse blows intermittently, or microwave won’t startMedium
Control BoardLowErratic display, fuse blows immediatelyHigh
Power Cord / WiringLowVisible damage, fuse blows immediatelyLow

*Note: Repair difficulty is subjective and depends on user’s technical skill and access to parts/manuals.*

When To Call A Professional Repair Service

Deciding whether to attempt a repair yourself or call a professional is a crucial step. While some issues are straightforward, others involve significant risks.

Safety Concerns

As repeatedly mentioned, microwaves contain high-voltage components (transformer, capacitor, magnetron) that can store a lethal electrical charge. Even when unplugged, a capacitor can hold enough electricity to cause serious injury or death. If you are not experienced in working with high-voltage electronics, do not attempt internal repairs. A professional technician has the training and tools to safely discharge these components and diagnose problems.

Complexity Of The Problem

If the troubleshooting steps suggest an internal component failure beyond simple visual inspection (like testing diodes, capacitors, or transformers with a multimeter), it’s often best left to the experts. Diagnosing issues with the control board or complex circuitry requires specialized knowledge and diagnostic equipment.

Cost-effectiveness

Consider the age and original cost of your Frigidaire microwave. If it’s an older model, the cost of professional repair (parts and labor) might approach or exceed the price of a new microwave. For newer, higher-end models, repair is often more justifiable.

Get a quote from a repair service before committing.

Availability Of Parts

For some older Frigidaire models, obtaining specific replacement parts might be difficult or expensive. A professional repair service will have access to parts suppliers and can advise on availability.

Warranty Considerations

If your Frigidaire microwave is still under warranty, attempting any self-repair could void the warranty. Always check your warranty terms and contact the manufacturer or an authorized service center first.

When to definitely call a professional:

  • You suspect a problem with the high-voltage system (transformer, capacitor, diode, magnetron).
  • You see signs of burning, melting, or significant damage inside the microwave.
  • The microwave blows the fuse immediately upon being plugged in.
  • You are uncomfortable or unsure about any step of the troubleshooting or repair process.
  • The appliance is still under warranty.

A qualified appliance repair technician can diagnose the issue accurately and perform the necessary repairs safely. You can often find local services through online searches, asking for recommendations, or checking with the retailer where you purchased the microwave.

Frequently Asked Questions

Is It Safe To Replace A Blown Fuse In My Frigidaire Microwave Myself?

### It can be safe if you follow strict precautions. First and foremost, always unplug the microwave from the wall outlet and wait at least 10-15 minutes for any stored charge in the capacitor to dissipate. Use only the **exact

Best Ergonomic Chairs Under 300

Best Ergonomic Chairs Under 300

The quest for a comfortable and supportive workspace doesn’t have to break the bank. Many professionals believe that achieving true ergonomic bliss requires investing hundreds, if not thousands, of dollars in a chair. However, the reality is that excellent ergonomic support is accessible even on a tighter budget.

With careful research and an understanding of what truly matters in an ergonomic chair, you can find a model that cradles your back, promotes good posture, and enhances your productivity without exceeding a $300 price point.

This guide is designed to help you navigate the market and identify the best ergonomic chairs under $300. We’ll explore the essential features to look for, debunk common myths, and highlight some of the top contenders that offer exceptional value.

Whether you’re a remote worker, a student, or simply someone who spends a significant amount of time at a desk, investing in an ergonomic chair is an investment in your long-term health and well-being. Don’t let a limited budget deter you from creating a workspace that supports you, rather than strains you.

Key Takeaways

  • Prioritize Lumbar Support: Look for adjustable lumbar support that can be positioned to match the natural curve of your lower back.
  • Adjustability is Crucial: Features like seat height, armrest height and width, seat depth, and recline tension are vital for personalized comfort.
  • Material Matters for Comfort: Mesh offers breathability, while padded fabric or leather can provide more cushioning, depending on your preference.
  • Understand Weight Limits and Durability: Check the chair’s weight capacity and read reviews regarding its long-term build quality.
  • Research and Reviews are Your Best Friends: Consult user reviews and professional assessments to gauge a chair’s real-world performance and longevity.
  • Consider Your Specific Needs: Your height, weight, and any pre-existing back conditions will influence which chair is best for you.

Understanding Ergonomic Chair Essentials Under $300

When searching for an ergonomic chair under $300, it’s crucial to focus on the features that deliver the most significant impact on comfort and support. Not all chairs marketed as “ergonomic” live up to the name, especially at lower price points. However, by understanding the core principles of ergonomics and knowing what to look for, you can make an informed decision. The goal is to find a chair that promotes proper posture, reduces muscle strain, and enhances circulation, all of which contribute to better health and productivity during long work sessions.

Lumbar Support: The Foundation Of Back Health

Lumbar support is arguably the most critical feature of any ergonomic chair. It refers to the part of the chair that supports the natural inward curve of your lower spine. Without adequate lumbar support, your spine can flatten, leading to slouching and increased pressure on your lower back.

  • Adjustable Lumbar Support: The best chairs offer adjustable lumbar support. This means you can move the support up or down to align with your spine’s curve and adjust its depth (how much it pushes forward) to achieve the perfect level of pressure. In the sub-$300 category, you might find chairs with fixed lumbar support that’s molded into the backrest. While not ideal, some designs are well-contoured and can still provide decent support for many users. If you find a chair with fixed support, try to sit in it to see if the curve naturally fits your back.
  • Integrated vs. Add-on Support: Some chairs have lumbar support built directly into the backrest’s structure, while others might offer a separate cushion or adjustable mechanism. For chairs under $300, integrated support is more common.

Seat Adjustability: Finding Your Perfect Fit

The seat of an ergonomic chair plays a vital role in comfort and preventing pressure points. Several adjustments are key:

  • Seat Height: This is a standard feature on almost all office chairs. The ideal height allows your feet to rest flat on the floor with your knees bent at approximately a 90-degree angle. Your thighs should be roughly parallel to the floor. This adjustment is typically made via a pneumatic lever under the seat.
  • Seat Depth: This feature, also known as seat slide, allows you to adjust how far forward or backward the seat pan extends. Proper seat depth ensures that there’s a gap of about two to four fingers between the front edge of the seat and the back of your knees. This prevents pressure on the back of your thighs, which can impede circulation. While less common in budget chairs, some models under $300 offer this functionality.
  • Seat Cushioning: The cushion should be firm enough to provide support but soft enough to be comfortable for extended periods. Avoid seats that are too hard or too soft, as both can lead to discomfort. High-density foam is generally a good indicator of quality cushioning.

Armrest Adjustability: Supporting Your Shoulders And Arms

Armrests, or armrests, are designed to support your forearms, allowing your shoulders to relax and preventing strain in your neck and upper back.

  • Height Adjustment: This is the most common and essential armrest adjustment. It should allow you to position the armrests so your elbows are bent at roughly 90 degrees, with your forearms resting comfortably and parallel to the floor.
  • Width Adjustment: Some chairs offer armrests that can be moved inwards or outwards. This is beneficial for users with broader or narrower shoulders, ensuring the armrests are positioned correctly without forcing your arms into an unnatural position.
  • Pivoting (In/Out) and Forward/Backward Adjustment: Higher-end chairs offer more advanced armrest adjustments, like pivoting inwards or outwards, or sliding forward and backward. These are less common in the sub-$300 range but can be found on some models. For budget chairs, prioritizing height adjustability is key.

Backrest And Tilt Mechanism: Flexibility And Support

The backrest of an ergonomic chair should conform to the natural S-shape of your spine.

  • Recline and Tilt: Most ergonomic chairs offer a recline function, allowing you to lean back. The tilt tension control lets you adjust how much effort is required to recline. A synchro-tilt mechanism, where the backrest reclines at a higher ratio than the seat, is a desirable feature as it maintains a more ergonomic posture even when reclining. Simpler tilt-only mechanisms tilt the entire chair as one unit.
  • Locking Positions: Some chairs allow you to lock the backrest in several upright or reclined positions, offering more versatility.
  • Backrest Height and Angle: While less common for adjustment on budget chairs, the overall height and angle of the backrest are important for providing adequate upper back and shoulder support.

Material And Breathability

The materials used in an ergonomic chair significantly impact comfort, especially during long sitting periods.

  • Mesh: Mesh backrests are highly popular for their breathability, which helps keep you cool and prevents sweating. Mesh seats are also available, offering similar ventilation. However, mesh seats might not provide as much cushioning as padded options.
  • Fabric: Fabric upholstery, often polyester or nylon blends, can offer good comfort and durability. It provides more cushioning than mesh but can be warmer.
  • Leather/Faux Leather: While often associated with higher-end chairs, some budget-friendly options feature faux leather. It can offer a premium look and feel but is less breathable than mesh or fabric, potentially leading to discomfort in warmer climates or during extended use.

Top Ergonomic Chairs Under $300: Our Top Picks

Finding the best ergonomic chairs under $300 involves balancing essential features with cost-effectiveness. While you might not get every premium feature, several models excel at providing crucial ergonomic support. We’ve identified some of the most highly-regarded options that consistently receive positive reviews for their comfort, adjustability, and value. Remember that prices can fluctuate, so it’s always wise to check current pricing.

1. Clatina Mellet Ergonomic Chair

The Clatina Mellet Ergonomic Chair is frequently cited as one of the best value ergonomic chairs available. It strikes an excellent balance between adjustability and price, making it a strong contender for those on a budget.

  • Key Features:
  • Adjustable Lumbar Support: This chair features adjustable lumbar support that you can move up and down and adjust for depth, a feature often missing in chairs at this price point.
  • Adjustable Headrest: The integrated headrest is also adjustable in height and angle, providing crucial neck support.
  • 3D Armrests: The armrests are adjustable in height, width, and pivot (in/out), offering significant flexibility for comfortable arm positioning.
  • Mesh Back and Seat: The breathable mesh backrest and seat promote airflow, keeping you cool during long work sessions.
  • Recline and Tilt Lock: It offers a good recline range with multiple locking positions and adjustable tilt tension.
  • Why it Stands Out: The level of adjustability, particularly the 3D armrests and adjustable lumbar support, is exceptional for its price. It offers a near-customizable fit that rivals chairs costing significantly more.
  • Considerations: Some users find the seat cushion to be a bit firm initially, but it tends to soften over time. Ensure your body type aligns with the general dimensions; it’s best suited for average-sized individuals.

2. Ticova Ergonomic Office Chair

The Ticova Ergonomic Office Chair has gained popularity for its robust build and comprehensive ergonomic features, often punching above its weight class in terms of quality and support.

  • Key Features:
  • Adjustable Lumbar Support: Features a unique “four-point” adjustable lumbar support system that allows for precise positioning and pressure.
  • Adjustable Headrest: The headrest is adjustable in height and angle for optimal neck and head support.
  • 4D Armrests: Offers 4-dimensional armrest adjustment (height, width, forward/backward, and pivot), providing exceptional versatility.
  • Thick Padded Seat: Unlike many mesh-seated options, the Ticova features a high-density foam seat cushion that provides plush comfort and support.
  • Smooth Recline and Tilt Lock: A smooth recline mechanism with multiple locking positions and adjustable tilt tension is included.
  • Why it Stands Out: The combination of a comfortable, padded seat and highly adjustable armrests (4D) makes this a standout choice for those who prioritize plushness alongside ergonomic function. The unique lumbar support system is also a significant advantage.
  • Considerations: The seat might be slightly warm for those who prefer maximum breathability compared to a full mesh seat. The overall aesthetic is functional rather than overtly stylish.

3. Hbada Ergonomic Office Chair

Hbada is a brand known for offering stylish and functional office furniture at competitive prices. Their ergonomic offerings often blend modern design with practical ergonomic features.

  • Key Features:
  • Adjustable Lumbar Support: Typically includes adjustable lumbar support, though the depth adjustment might be less pronounced than on other models.
  • Adjustable Armrests: Offers height and width adjustable armrests.
  • Mesh Back: Features a breathable mesh backrest for good ventilation.
  • Comfortable Seat: The seat is usually well-padded with high-density foam.
  • Simple Tilt Mechanism: Often employs a straightforward tilt mechanism, which is effective for basic reclining.
  • Why it Stands Out: The Hbada chair often scores high on aesthetics, making it a good choice if you want a chair that looks good in your home office. It provides solid basic ergonomic support at a very competitive price point.
  • Considerations: The lumbar support might not be as customizable as on the Clatina or Ticova. Armrest adjustability is usually limited to height and width.

4. Ergohuman / Eurotech (entry-level Models)

While many Ergohuman and Eurotech chairs exceed the $300 mark, there are occasional entry-level models or sales that bring them within reach. These brands are renowned for their high-quality ergonomic designs.

  • Key Features (typical of entry-level):
  • BIFMA Certified: Often meets safety and durability standards set by the Business and Institutional Furniture Manufacturers Association.
  • Adjustable Lumbar Support: Usually includes a form of adjustable lumbar support.
  • Adjustable Armrests: Typically offers at least height and width adjustment.
  • Mesh Back and Seat: Many models feature breathable mesh.
  • Synchro-Tilt Mechanism: Higher quality tilt mechanisms that promote better posture.
  • Why it Stands Out: If you can find one within budget, these brands offer superior build quality and often more refined ergonomic adjustments than other options. They are built for durability and long-term use.
  • Considerations: Finding these specific models under $300 can be challenging and may require diligent searching for sales or refurbished options. Full adjustability might be limited on the most basic versions.

5. Sihoo Ergonomic Office Chair

The SIHOO Ergonomic Office Chair is another strong contender in the budget-friendly ergonomic market, often praised for its comfort and solid construction.

  • Key Features:
  • Adjustable Lumbar Support: Offers adjustable lumbar support, allowing users to fine-tune the fit.
  • Adjustable Headrest: A supportive and adjustable headrest is included.
  • Adjustable Armrests: Typically provides 3D armrest adjustability (height, width, and pivot).
  • Mesh Back: Utilizes a breathable mesh backrest.
  • Comfortable Seat Cushion: Features a high-density foam seat for good support.
  • Why it Stands Out: The SIHOO chair provides a comprehensive set of ergonomic features, including good lumbar and headrest support, at a very accessible price. It’s a well-rounded option that caters to a wide range of users.
  • Considerations: While generally well-built, the materials might not feel as premium as on more expensive chairs. Long-term durability can vary, so checking recent reviews is advisable.

Ergonomic Chair Comparison Table (under $300)

To help you visualize the differences between these top contenders, here’s a comparison table highlighting key ergonomic features. Prices are approximate and subject to change.

FeatureClatina Mellet Ergonomic ChairTicova Ergonomic Office ChairHbada Ergonomic Office ChairSIHOO Ergonomic Office Chair
**Approximate Price**$200 – $280$250 – $300$180 – $250$220 – $290
**Lumbar Support**Adjustable (Depth & Height)Adjustable (4-point)Adjustable (Height)Adjustable (Height & Depth)
**Headrest**Adjustable (Height & Angle)Adjustable (Height & Angle)Adjustable (Height & Angle)Adjustable (Height & Angle)
**Armrest Adjustability**3D (Height, Width, Pivot)4D (Height, Width, Fwd/Back, Pivot)2D (Height, Width)3D (Height, Width, Pivot)
**Backrest Material**MeshMeshMeshMesh
**Seat Material**MeshHigh-Density FoamHigh-Density FoamHigh-Density Foam
**Recline Mechanism**Synchro-TiltSynchro-TiltBasic TiltSynchro-Tilt
**Weight Capacity**~250 lbs~300 lbs~250 lbs~300 lbs
**Warranty**Typically 1-2 yearsTypically 1-2 yearsTypically 1 yearTypically 1 year

*Note: Warranty information and weight capacities can vary by retailer and specific model version.*

Best Ergonomic Chairs Under 300

Credit: leveringstudio.com

Beyond The Features: Factors For A Healthy Workspace

While specific features like lumbar support and adjustability are paramount, several other factors contribute to creating a truly ergonomic workspace that supports your health and well-being, especially when working with a budget. These elements often go hand-in-hand with choosing the right chair but also involve the surrounding environment.

Proper Setup And Usage

Even the best ergonomic chair won’t provide optimal benefits if it’s not set up correctly. In my experience, many users overlook the importance of proper chair setup.

  • Desk Height: Ensure your desk height complements your chair. When sitting with your feet flat and knees at 90 degrees, your forearms should be parallel to the floor when resting on the desk or armrests. If your desk is too high, you might find yourself hunching your shoulders.
  • Monitor Placement: The top of your monitor should be at or slightly below eye level, about an arm’s length away. This prevents neck strain. Use monitor stands or books if necessary.
  • Keyboard and Mouse: Position your keyboard and mouse close enough so you don’t have to reach. Your wrists should remain straight and relaxed. Consider a keyboard tray if your desk is too high.
  • Regular Movement: No chair can replace the need for regular movement. Aim to stand up, stretch, and walk around for a few minutes every 30-60 minutes. This improves circulation and reduces muscle stiffness.

Understanding Your Body Type And Needs

Ergonomics is not one-size-fits-all. What works perfectly for one person might not be ideal for another. Consider your individual characteristics:

  • Height and Weight: Taller individuals may need chairs with higher backrests and deeper seats, while shorter individuals might struggle with seat height or depth. Heavier individuals should pay close attention to the chair’s weight capacity and build quality.
  • Pre-existing Conditions: If you have existing back pain, neck issues, or other musculoskeletal problems, consult with a healthcare professional or an ergonomist. They can provide specific recommendations tailored to your condition. While budget chairs can offer relief, they might not be sufficient for severe issues.
  • Sitting Habits: Are you someone who tends to perch on the edge of your seat, or do you lean back frequently? Understanding your typical sitting posture can help you choose a chair that supports those habits better.

Durability And Long-term Value

When buying a chair under $300, it’s essential to consider its long-term value. A chair that costs less but needs replacement after a year or two is not as cost-effective as a slightly more expensive one that lasts five years or more.

  • Read Reviews Carefully: Pay attention to reviews that mention durability, issues with parts breaking, or a decline in comfort over time. Look for patterns in complaints.
  • Check Warranty Information: While limited on budget chairs, a 1-2 year warranty is better than none. It indicates the manufacturer’s confidence in their product.
  • Build Quality Indicators: Look for chairs with sturdy bases (often metal rather than plastic), smooth-operating gas lifts, and robust mechanisms.

The Role Of Movement And Breaks

It’s crucial to reiterate that even the most ergonomic chair is only part of the solution. Prolonged static sitting, regardless of how supportive the chair is, can be detrimental.

  • The 20-20-20 Rule: For eye strain, look at something 20 feet away for 20 seconds every 20 minutes.
  • Micro-Breaks: Incorporate short breaks every 30 minutes to stand, stretch your legs, and move your arms and shoulders.
  • Active Sitting: Consider incorporating active sitting techniques, even in a supportive chair. This involves subtle movements and changes in posture throughout the day. Some chairs are designed to encourage this more than others.

Common Ergonomic Chair Myths Debunked

The world of office furniture is rife with misconceptions, especially concerning ergonomic chairs and their pricing. Understanding these myths can help you make a more informed decision and avoid overspending or settling for less than you need.

Myth 1: “ergonomic Chairs Are Prohibitively Expensive.”

This is perhaps the most pervasive myth. While high-end ergonomic chairs from brands like Herman Miller or Steelcase can cost well over $1000, there are numerous excellent options available for under $300. These budget-friendly chairs may not have every single bell and whistle, but they offer the core ergonomic features, like adjustable lumbar support, seat height, and decent armrests, that make a significant difference. The key is knowing which features are essential and which are luxuries.

Myth 2: “only Mesh Chairs Are Truly Ergonomic And Breathable.”

Mesh is popular for its breathability, and it’s a great choice for many, especially in warmer environments. However, it’s not the only material that can be comfortable or supportive. High-density foam cushions found in fabric or even some faux leather seats can provide excellent comfort and support without trapping heat if they are well-designed. The quality of the foam and the upholstery material plays a significant role. For some, a well-padded seat might be more comfortable than a firm mesh seat.

Myth 3: “all Chairs Labeled ‘ergonomic’ Are Genuinely Ergonomic.”

Unfortunately, “ergonomic” can sometimes be used as a marketing buzzword. A chair might have a slightly curved backrest and be labeled as ergonomic without offering any real adjustability or proper support. It’s crucial to look beyond the label and examine the chair’s

Dishwasher Making Loud Grinding Noise

Dishwasher Making Loud Grinding Noise

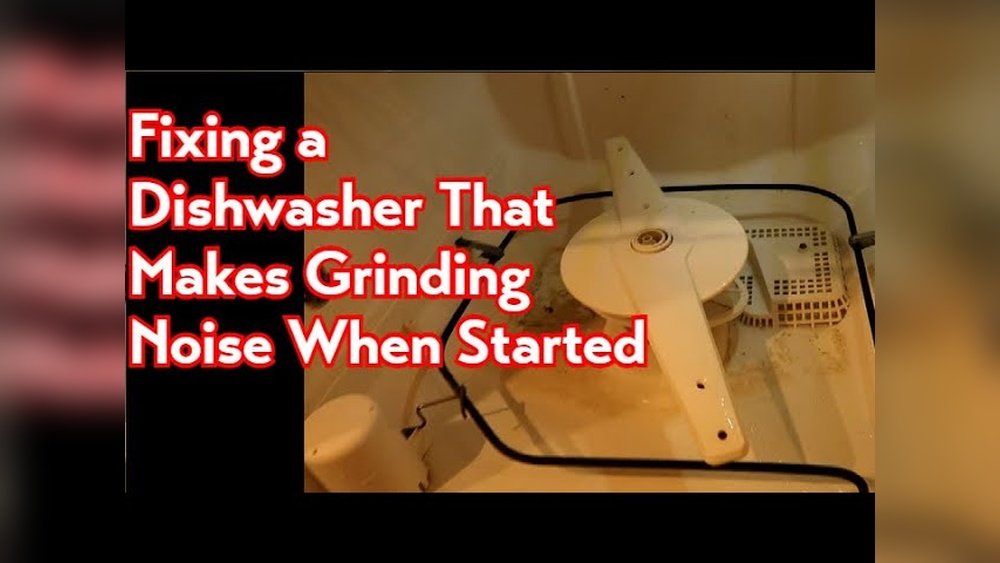
A dishwasher making a loud grinding noise can be unsettling, turning a simple chore into a source of anxiety. That persistent, metallic scraping or jarring rumble suggests something is amiss within the appliance’s intricate workings. While dishwashers are designed for quiet efficiency, various components can degrade or become obstructed over time, leading to these disruptive sounds. Understanding the potential causes is the first step toward diagnosing the problem and restoring peace to your kitchen.

Ignoring a grinding noise isn’t advisable, as it often indicates an issue that could worsen, potentially leading to more significant damage or a complete appliance failure. Fortunately, many common causes are relatively simple to identify and fix, often requiring nothing more than basic maintenance or the replacement of a minor part.

This guide will walk you through the most frequent culprits behind a noisy dishwasher, offering practical solutions to get your appliance humming smoothly again.

Key Takeaways

  • A loud grinding noise in a dishwasher often points to obstructions in the wash arms, issues with the pump or motor, or problems with the filter or drain system.
  • Regular maintenance, such as cleaning the filter and spray arms, can prevent many common grinding noises.
  • Identifying the exact location and timing of the noise is crucial for accurate diagnosis.
  • Many issues, like debris in the pump or worn-out seals, can be DIY fixes, but complex motor or pump problems may require professional help.
  • Always disconnect power to the dishwasher before attempting any internal inspection or repair.
  • A worn wash arm bearing or a hardened food particle lodged in the impeller are frequent, fixable causes of grinding.
  • The drain pump is another common source of grinding, especially if foreign objects enter it.
Dishwasher Making Loud Grinding Noise

Credit: www.youtube.com

Common Causes Of Dishwasher Grinding Noises

When your dishwasher starts sounding like a rock tumbler, it’s usually a sign that something is physically interfering with its moving parts. The most common culprits involve obstructions or wear in the components responsible for circulating water and draining it away.

Pinpointing the source of the sound is key to effective troubleshooting.

Debris In The Wash Arms

The wash arms are responsible for spraying water onto your dishes. They have small holes, or nozzles, through which water is propelled. Over time, small food particles, broken glass shards, or other debris can get lodged in these nozzles or the central bearing where the arm rotates.

  • How it causes noise: If a piece of debris obstructs a nozzle, it can alter the water pressure and flow, causing the arm to spin erratically. More critically, if larger debris gets into the wash arm bearing (the part that allows it to spin freely), it can cause significant friction and a distinct grinding sound as the arm rotates. This is particularly noticeable during the wash cycles when water pressure is high.
  • Identification: Listen carefully during the wash cycle. If the grinding seems to move with the spinning of the wash arm, this is a likely cause. You can also try to manually spin the wash arms when the dishwasher is off and dry. If they feel stiff or catch on something, debris is probably the issue.
  • Fix: Most wash arms can be easily removed. Consult your dishwasher’s manual for specific instructions. Once removed, rinse them thoroughly under a tap to dislodge any debris. Use a toothpick or a thin wire to clear any stubborn blockages in the nozzles. Inspect the central bearing for any foreign objects and clean it. If the bearing itself appears worn or damaged, the wash arm may need replacement.

Obstructions In The Filter And Drain System

The dishwasher filter is designed to catch food particles and prevent them from recirculating and clogging the drain. However, if the filter is not cleaned regularly, it can become overwhelmed, forcing larger debris into the drain pump or sump area. The drain pump is a crucial component that expels dirty water from the dishwasher.

  • How it causes noise: When the drain pump tries to push water out, and there’s a significant obstruction, like a piece of glass, a cherry pit, or even a small utensil, in its impeller or housing, it will often produce a loud grinding or scraping noise. This is because the impeller blades are hitting the foreign object. Similarly, if the sump area, where water collects before draining, is full of debris, it can interfere with the pump’s operation.
  • Identification: This noise is usually most prominent during the drain cycles, when the pump is actively working to remove water. If the grinding occurs only when water is leaving the machine, the filter and drain system are prime suspects. You might also notice that the dishwasher isn’t draining properly.
  • Fix: The first step is to clean the dishwasher filter. Most filters are located at the bottom of the dishwasher tub and can be unscrewed or unclipped. Rinse it thoroughly under running water. For more significant obstructions, you may need to access the drain pump. This typically involves removing the lower access panel of the dishwasher. With the power disconnected, you can often reach the pump impeller through the sump area or by removing the pump itself. Carefully remove any foreign objects. If the impeller is damaged, the pump will need to be replaced.

Worn Or Damaged Pump Impeller

The pump impeller is a rotating component, often made of plastic or metal, that is connected to the motor. It’s responsible for drawing water in and pushing it through the spray arms, as well as expelling water during the drain cycle. Over time, these impellers can wear down, chip, or break.

  • How it causes noise: A worn or damaged impeller will not spin smoothly. Its blades might be uneven, chipped, or bent, causing them to hit the pump housing or create uneven water flow, leading to a grinding or rattling noise. If a piece of the impeller breaks off, it can also become lodged in the pump mechanism, causing a severe grinding sound.
  • Identification: This noise is often continuous during cycles where the pump is active (both wash and drain). It may sound like a consistent, rhythmic grinding or rattling. If you can access the pump and spin the impeller by hand (with power off), you might feel resistance or notice looseness if it’s worn or damaged.
  • Fix: Replacing a pump impeller is often part of replacing the entire wash pump or drain pump assembly, depending on the dishwasher’s design. This is a more involved repair and may require professional assistance. If you are comfortable with appliance repair, you can order the specific part for your model and follow detailed repair guides, ensuring you disconnect power and water supply first.

Issues With The Circulation Pump Motor

The circulation pump motor is the powerhouse that drives the wash arms, ensuring water is forcefully sprayed onto your dishes. It’s a more robust motor than the drain pump and is vital for the cleaning process.

  • How it causes noise: The motor itself contains bearings that allow the shaft to spin freely. If these bearings wear out or become damaged, they can produce a loud grinding, whining, or rumbling sound. This noise is usually constant when the motor is running, regardless of whether it’s circulating water or attempting to drain. Sometimes, foreign debris can also get into the motor housing, causing mechanical interference.
  • Identification: This is often one of the loudest and most concerning noises, typically present throughout the wash cycle. It might be a deep grinding or a high-pitched whine that changes slightly with the motor’s speed.
  • Fix: Repairing a circulation pump motor is generally not cost-effective. The usual solution is to replace the entire circulation pump assembly. This is a complex repair that often requires significant disassembly of the dishwasher. It is highly recommended to have a qualified appliance technician perform this repair due to the electrical and plumbing connections involved.

Hardened Food Particles Or Small Objects In The Sump

The sump is the lowest part of the dishwasher tub where water collects before being pumped out. While the filter is meant to catch debris, very small or dense particles can sometimes bypass it or accumulate over time.

  • How it causes noise: If hard food particles, such as fruit seeds, small bones, or even tiny pieces of plastic or glass, settle in the sump, they can be caught by the pump’s impeller as it draws water. This can cause a grinding or clicking noise as the impeller repeatedly strikes the hard object.
  • Identification: The noise will likely occur during the drain cycles, as this is when the pump is actively drawing from the sump. It might be intermittent or continuous depending on how the debris is positioned relative to the impeller.
  • Fix: After cleaning the main filter, inspect the sump area. You may need to remove a secondary filter or even the pump to get a clear view. Use a flashlight to look for any debris. Small, hard objects can often be removed with pliers or by carefully flushing the area. If the object is lodged deep within the pump mechanism, it might require pump removal for extraction.

Worn Wash Arm Bearings

While debris can cause issues, the bearings that allow the wash arms to rotate can also wear out over time. These bearings are often made of plastic or nylon and are designed for smooth, low-friction rotation.

  • How it causes noise: As these bearings age, they can become dry, cracked, or worn down. This increased friction can lead to a squeaking or grinding sound as the wash arm spins. The noise might be more pronounced at higher water pressures.
  • Identification: Listen for a grinding or squeaking sound that seems to emanate directly from the spinning wash arm itself. If you can manually rotate the arm and feel resistance or hear the noise, the bearing is a strong candidate.
  • Fix: In many cases, the wash arm bearing is integrated into the wash arm assembly. Replacing the entire wash arm is often the simplest solution. These are generally inexpensive and relatively easy to replace by unclipping or unscrewing the old arm and attaching the new one.
Dishwasher Making Loud Grinding Noise

Credit: www.youtube.com

Troubleshooting Steps For A Grinding Dishwasher

When faced with an unusually noisy dishwasher, a systematic approach to troubleshooting is essential. Rushing into repairs without proper diagnosis can lead to unnecessary expense and effort. Follow these steps to narrow down the possibilities and identify the root cause of the grinding noise.

Step 1: Identify The Type And Timing Of The Noise

The first and most crucial step is to observe the noise carefully. When does it occur? What does it sound like?

  • During wash cycles: If the grinding happens while the dishwasher is actively spraying water, it’s likely related to the circulation pump or the wash arms.
  • During drain cycles: If the noise is loudest when the dishwasher is trying to empty, the drain pump or obstructions in the drain line are the most probable causes.
  • Throughout the entire cycle: A persistent grinding that occurs regardless of the cycle phase might indicate a problem with the main motor or a more serious issue within the pump assembly.
  • Sound characteristics: Is it a metallic scraping, a dull thud, a high-pitched whine, or a rhythmic rattle? A metallic scrape often suggests debris hitting metal, while a dull thud might be a larger object. A whine usually points to motor bearings.

Pro Tip: Record the sound on your phone. This can be helpful if you need to describe the problem to a repair technician or look for similar sound examples online.

Step 2: Safety First – Disconnect Power

Before attempting any inspection or physical manipulation inside the dishwasher, it is imperative to disconnect the power supply.

  • Locate the circuit breaker that controls your dishwasher and switch it off.
  • Alternatively, unplug the dishwasher from the wall outlet if it’s accessible.
  • Never attempt to inspect or repair internal components while the appliance is connected to electricity.

Step 3: Inspect And Clean The Filter And Sump Area

This is often the easiest and most common fix for grinding noises, especially those occurring during draining.

  • Locate the filter: It’s typically at the bottom of the dishwasher tub, often under the lower spray arm. It might be a cylindrical filter, a flat screen, or a combination.
  • Remove the filter: Most filters twist out or unclip. Refer to your owner’s manual if unsure.
  • Clean thoroughly: Rinse the filter under running water. Use a soft brush to remove any caked-on debris.
  • Inspect the sump: With the filter removed, look into the sump area. Use a flashlight to check for any visible debris like glass shards, bones, pits, or utensils. Remove anything you find.

Step 4: Examine The Wash Arms

Debris can also affect the wash arms, leading to noise and reduced cleaning performance.

  • Check for obstructions: Ensure no food particles are blocking the spray holes.
  • Inspect for damage: Look for cracks or signs of wear on the arms themselves.
  • Manually rotate: Try spinning the upper and lower wash arms by hand. They should move freely. If they feel stiff, catch, or make noise, there might be debris caught in their bearings or the arm itself might be warped.
  • Clean/Remove: If debris is found, try to clear it. If the arm is damaged or its bearing seems faulty, consider replacing the wash arm. This is usually a simple DIY task.

Step 5: Access And Inspect The Drain Pump

If the noise persists, particularly during draining, the drain pump is the next likely suspect.

  • Remove the lower access panel: This panel is usually at the bottom front of the dishwasher. It might be held by screws or clips.
  • Locate the drain pump: It’s typically connected to the sump area and the drain hose.
  • Check for obstructions: With the power still disconnected, you might be able to reach the pump’s impeller with your finger or a tool to feel for obstructions. Be cautious of sharp objects. Some pumps have a removable cover for easier access to the impeller.
  • Spin the impeller (if accessible): If you can reach it, try to spin the impeller. It should move relatively freely but might offer some resistance from the motor magnets. If it’s stiff, blocked, or wobbles excessively, it’s likely damaged.

Step 6: Consider Professional Diagnosis

If you’ve gone through the steps above and the grinding noise continues, or if you’re uncomfortable accessing internal components, it’s time to call a professional.

  • Qualified technician: A certified appliance repair technician has the tools, expertise, and experience to diagnose more complex issues like motor problems or internal pump damage.
  • Provide details: When you call, clearly explain the type of noise, when it occurs, and what troubleshooting steps you’ve already taken. This will help the technician prepare and diagnose the issue more efficiently.

Common Grinding Noise Scenarios And Solutions

Let’s explore some specific scenarios you might encounter and the most likely solutions. Understanding these patterns can save you time and help you identify the problem more quickly.

Scenario 1: Grinding During Drain Cycle Only

This is a classic indicator of an issue with the drain pump or the path it takes to expel water.

  • Most Likely Cause: A foreign object (e.g., a piece of glass, a cherry pit, a small utensil, a bone fragment) is lodged in the drain pump impeller or the pump housing.
  • Secondary Causes:
  • The drain pump impeller itself is damaged or worn.
  • A blockage in the drain hose preventing water flow, causing the pump to strain.
  • Accumulation of hard debris in the sump area that the pump impeller is hitting.
  • Solution Path:
  • Clean the filter and sump: This is always the first step. Ensure no debris is visible.
  • Inspect the drain pump: Remove the lower access panel. Locate the drain pump. Check for obstructions by carefully probing the impeller area. If accessible, try to remove the pump for a more thorough inspection and cleaning.
  • Check the drain hose: Ensure it’s not kinked or blocked. Disconnect it from the dishwasher and try to blow through it or run water through it to check for clogs.
  • Replace the drain pump: If the impeller is damaged or you cannot remove the obstruction, the drain pump assembly will likely need replacement. This is often a manageable DIY repair for those with some mechanical aptitude.

Scenario 2: Grinding During Wash Cycle Only

If the noise is prominent when water is being sprayed, the focus shifts to the components responsible for water circulation.

  • Most Likely Cause: Debris caught in the wash arm nozzles or the wash arm bearing, causing it to spin unevenly or with friction.
  • Secondary Causes:
  • The circulation pump motor bearings are failing.
  • A piece of debris has found its way into the circulation pump impeller.
  • The wash arm itself is damaged or warped, causing it to hit the tub interior.
  • Solution Path:
  • Inspect and clean wash arms: Remove the wash arms and thoroughly clean all nozzles. Check the central bearing for debris or damage. Ensure the arms spin freely when clean.
  • Listen closely to the circulation pump: If the wash arms are clean and the noise persists, try to pinpoint the sound to the circulation pump area (usually located centrally underneath the tub). A grinding or whining sound directly from this area often points to motor bearing failure.
  • Inspect circulation pump impeller: This is more involved than the drain pump. It might require removing the circulation pump assembly. Look for any foreign objects jamming the impeller.
  • Replace circulation pump motor/assembly: If the motor bearings are shot or the impeller is damaged, the entire circulation pump assembly typically needs replacing. This is a more complex repair, often best left to professionals.

Scenario 3: Constant Grinding Throughout The Cycle

A grinding noise that is present regardless of the cycle phase is more concerning and can indicate a more significant mechanical issue.

  • Most Likely Cause: Failure of the main circulation pump motor bearings. These motors often serve a dual purpose or are robust enough that their failure impacts multiple stages.
  • Secondary Causes:
  • Severe damage to the drain pump that affects its operation even when not actively draining.
  • A large, foreign object lodged in a way that interferes with both circulation and draining pumps.
  • Internal damage to the pump housing or seals.
  • Solution Path:
  • Isolate the sound source: Try to determine if the sound is louder from the circulation pump area or the drain pump area.
  • Thorough inspection: Perform a comprehensive inspection of both pumps, checking for debris, damage to impellers, and signs of wear.
  • Professional diagnosis: Given the persistent nature of the noise, this scenario often requires expert diagnosis. The technician will likely need to dismantle parts of the dishwasher to pinpoint the exact source of the internal grinding. Replacement of the circulation pump motor or potentially both pumps might be necessary.
Dishwasher Making Loud Grinding Noise

Credit: fredsappliance.com

Maintenance Tips To Prevent Grinding Noises

Preventative maintenance is key to extending the life of your dishwasher and avoiding disruptive noises. By incorporating a few simple habits into your routine, you can significantly reduce the likelihood of encountering grinding issues.

Regular Filter Cleaning

The dishwasher filter is your first line of defense against debris entering the pump system.

  • Frequency: Aim to clean your filter at least once a month. If you frequently run the dishwasher with heavily soiled dishes or notice residue, clean it more often.
  • Process: Remove, rinse under running water, and use a soft brush to scrub away any food particles or grease. Ensure it’s properly reinstalled. A clogged filter forces the pump to work harder and can lead to debris bypassing it.

Inspecting And Cleaning Spray Arms

Clogged spray arms not only reduce cleaning efficiency but can also contribute to uneven spinning and noise.

  • Frequency: Check your spray arms every 2-3 months or if you notice poor washing performance.
  • Process: Remove the spray arms (usually by unscrewing or unclipping). Use a toothpick, needle, or thin wire to clear any debris from the spray nozzles. Rinse thoroughly. Check the central bearing for smooth rotation.

Pre-rinsing Dishes (when Necessary)

While modern dishwashers are designed to handle food soil, excessively large or hard food scraps can cause problems.

  • What to scrape: Scrape off large chunks of food, bones, seeds, and fibrous material like celery strings.
  • Avoid over-rinsing: You don’t need to pre-rinse dishes to the point where they are spotless. Modern detergents and enzymes need some food soil to work effectively. The goal is to remove large, problematic items.

Checking For Foreign Objects

Occasionally, small items like utensils, bottle caps, or plastic pieces can fall into the dishwasher.

  • Visual inspection: Periodically look around the bottom of the dishwasher tub and around the heating element for any foreign objects.
  • Secure utensils: Ensure silverware is properly placed in the basket so it doesn’t fall through.

Using The Right Detergent And Rinse Aid

Using the correct amount and type of dishwasher detergent is important for optimal performance and can indirectly help prevent issues.

  • Avoid excessive suds: Too much detergent can lead to over-sudsing, which can stress components.
  • Rinse aid: Using rinse aid helps water sheet off dishes, improving drying and reducing the chance of residue buildup.

When To Call A Professional Appliance Repair Service

While many dishwasher problems can be tackled with basic DIY troubleshooting, some situations warrant professional intervention. Recognizing when to call an expert can save you time, prevent further damage, and ensure a safe and effective repair.

Complex Mechanical Failures

If your troubleshooting points to a failure in the main circulation pump motor or the gearbox (in some models), these are often complex components.

  • Motor Bearings: As discussed

Liftmaster Garage Door Opener Control Panel Working

Liftmaster Garage Door Opener Control Panel Working

The humble garage door opener control panel, often overlooked, is the central nervous system of your automated garage access. It’s the interface that translates your commands into action, orchestrating the smooth ascent and descent of your garage door. Understanding how this seemingly simple device works, its various components, and common troubleshooting steps can save you time, money, and frustration.

From the basic push-button to sophisticated multi-function panels, each plays a crucial role in the daily convenience and security of your home.

Key Takeaways

  • Core Functionality: The control panel acts as the user interface, receiving signals from remotes or wired buttons and transmitting them to the garage door opener motor.
  • Essential Components: Key parts include the learn button, indicator lights, lock/vacation mode buttons, and sometimes integrated keypads or motion sensors.
  • Signal Transmission: It communicates with the motor unit via wired connections or, in the case of wireless keypads, through radio frequency signals.
  • Troubleshooting: Many common issues, like unresponsive buttons or blinking lights, can be resolved by checking power, resetting the unit, or re-syncing remotes.
  • Maintenance: Regular cleaning and periodic checks of connections ensure optimal performance and longevity.
  • Advanced Features: Modern panels offer features like vacation locking, motion-activated lighting, and smartphone integration for enhanced security and convenience.
Liftmaster Garage Door Opener Control Panel Working

Credit: agad.gov.pl

Understanding The Liftmaster Garage Door Opener Control Panel

The control panel, often referred to as the wall control, wall station, or multi-function control panel, is typically mounted inside your garage near the entry door. Its primary role is to provide a convenient and secure way to operate your garage door opener.

While some older systems might only have a simple button, most modern LiftMaster panels offer a range of features designed to enhance user experience and security.

The fundamental principle behind any garage door opener control panel is signal reception and transmission. When you press a button on the panel or a remote, a signal is sent. The control panel receives this signal and interprets it, then sends a corresponding command to the garage door opener motor unit, which is usually mounted on the ceiling. This command instructs the motor to either open, close, or stop the door.

The Anatomy Of A Liftmaster Control Panel

LiftMaster offers a variety of control panels, but they generally share common components that enable their functionality. Understanding these parts is key to diagnosing issues and appreciating the panel’s capabilities.

  • Learn Button: This is arguably the most critical button on the panel for programming. It’s typically a colored button (often red, orange, or purple, depending on the model) located near the antenna or on the back of the unit. Pressing and releasing this button puts the opener into a learning mode, allowing it to accept signals from new remote controls or keypads. Holding it down for an extended period can sometimes clear all previously programmed remotes.
  • Indicator Lights: Most panels feature one or more LED lights. These lights serve as visual indicators for various states:
  • Power Indicator: A steady light usually signifies that the control panel and opener are receiving power.
  • Status Lights: Blinking lights can indicate specific conditions, such as a safety sensor obstruction, a programming mode, or an error state. The pattern and color of the blinking lights are often detailed in the owner’s manual and are crucial for diagnostic purposes.
  • Connectivity Lights: Some advanced panels may have lights indicating Wi-Fi or Bluetooth connectivity status.
  • Lock/Vacation Mode Button: This button is a security feature designed to prevent accidental or unauthorized operation of the garage door. When activated, it typically disables the remote control signals, allowing only the wall control panel to operate the door. This is particularly useful when you are away on vacation or want to ensure the garage door remains closed and secure.
  • Door Control Button(s): This is the primary button used to open, close, or stop the garage door. On simpler panels, it might be a single button. On more advanced multi-function panels, there might be separate buttons for open, close, and stop, or a single button that cycles through these functions.
  • Integrated Keypad (Optional): Some control panels have a built-in keypad, allowing you to open and close the garage door using a personal identification number (PIN). This eliminates the need for a remote control when you are inside the garage or have your keys with you.
  • Motion Detector (Optional): Higher-end models may include a motion detector that can activate garage lights when movement is detected, enhancing safety and convenience.

How The Panel Communicates With The Opener

The communication pathway between the control panel and the garage door opener motor unit is generally straightforward, though the specifics can vary by model.

Wired Connections

For panels mounted directly on the wall, a low-voltage wire typically runs from the control panel to the motor unit. This wire carries the electrical signals that activate the opener’s functions. The wire is usually a two-conductor thermostat wire, readily available at hardware stores. The integrity of this connection is paramount. If the wire is damaged, cut, or improperly connected, the control panel will not function.

When you press a button on the wired control panel, it completes a circuit. The opener motor unit detects this completed circuit and interprets the specific signal to perform the requested action (open, close, stop). For instance, pressing the “open” button might send a specific voltage pulse through the wire, while the “close” button sends a different pulse.

Wireless Communication (for Keypads)

If you have a separate wireless keypad that communicates with the control panel or directly with the motor unit, the communication relies on radio frequency (RF) signals.

  • Signal Generation: When you enter your PIN on the keypad and press the enter button, the keypad generates a unique RF signal.
  • Signal Transmission: This signal is transmitted wirelessly.
  • Signal Reception: The garage door opener motor unit (or sometimes the control panel itself, which then relays the signal) is equipped with an RF receiver tuned to the specific frequency and code transmitted by the keypad.
  • Signal Decoding: Upon receiving the signal, the opener decodes it. If the code matches a programmed code, the opener executes the command.

The range of wireless communication can be affected by factors like interference from other wireless devices, the strength of the keypad’s battery, and the distance between the keypad and the receiver.

Common Liftmaster Control Panel Issues And Troubleshooting

Garage door opener control panels, like any electronic device, can sometimes encounter problems. Fortunately, many common issues are relatively easy to diagnose and fix without needing professional assistance.

Panel Is Unresponsive (no Lights, No Action)

This is one of the most common and frustrating problems. If your control panel is completely dead, meaning no lights are on and pressing buttons does nothing, the issue is likely related to power supply.

  • Check the Power Outlet: Ensure the garage door opener motor unit is plugged into a working electrical outlet. Test the outlet with another appliance, like a lamp or vacuum cleaner, to confirm it has power.
  • Inspect the Circuit Breaker: Check your home’s electrical panel to see if the circuit breaker for the garage has tripped. If it has, reset it. If it trips again immediately, there might be an electrical fault requiring professional attention.
  • Examine the Wiring: For wired control panels, carefully inspect the low-voltage wire running from the panel to the motor unit. Look for any signs of damage, such as cuts, nicks, or corrosion. Ensure the connections at both the panel and the motor unit are secure. Loose connections are a frequent culprit.
  • Reset the Opener: Sometimes, a simple reset can resolve glitches. Unplug the garage door opener motor unit from the power outlet for about 30 seconds, then plug it back in. This will reset the opener’s internal electronics.

Buttons On The Panel Don’t Work, But Remotes Do

If your remote controls are functioning correctly, but the buttons on the wall-mounted control panel are not responding, the problem is likely isolated to the control panel itself or its wiring.

  • Test the Lock/Vacation Mode: First, ensure that the Lock or Vacation mode is not accidentally activated. This feature disables remotes but should still allow the wall panel to function. However, some models might behave differently, so it’s worth checking.
  • Inspect Panel Wiring: The low-voltage wire connecting the panel to the motor unit is the most probable cause.
  • Loose Connections: At the motor unit, the wires from the wall control connect to specific terminals. Ensure these wires are firmly attached. Sometimes, the insulation might need to be stripped back slightly to ensure good contact.
  • Damaged Wire: If the wire appears damaged anywhere along its run, it may need to be replaced. You can test sections of the wire with a multimeter if you’re comfortable with basic electrical testing.
  • Corroded Terminals: Check the terminals on the back of the control panel and the motor unit for any signs of corrosion. Clean them gently with a pencil eraser or fine-grit sandpaper if necessary.
  • Replace the Control Panel: If you’ve confirmed the wiring is intact and connections are secure, and the lock mode isn’t active, the control panel itself might be faulty and require replacement.

Control Panel Lights Are Blinking

Blinking lights on a LiftMaster control panel are usually diagnostic indicators. The specific pattern of blinking (e. g. , number of flashes, color) often corresponds to a particular error code.

  • Consult Your Manual: The most accurate way to interpret blinking lights is to refer to your specific LiftMaster model’s owner’s manual. It will provide a detailed list of error codes and their meanings. You can usually find these manuals on the LiftMaster website.
  • Common Blinking Light Causes:
  • Safety Sensor Obstruction: If the safety sensors at the bottom of the garage door tracks are blocked, dirty, or misaligned, the opener will often refuse to close the door and may trigger blinking lights on the control panel. Check the sensors for obstructions and ensure the indicator lights on the sensors themselves are steady.
  • Travel Limit Issues: The opener needs to know how far to open and close the door. If the travel limits become unset or corrupted, the opener may not function correctly, leading to blinking lights. These limits are usually reset via the motor unit.
  • Programming Mode: If the learn button was accidentally pressed and held, the opener might be in a programming mode, indicated by blinking lights. Usually, pressing the learn button briefly or waiting a few minutes will clear this.
  • Internal Error: In some cases, blinking lights can indicate an internal error within the motor unit itself.

Remote Controls Not Working With The Panel

If your remote controls suddenly stop working, but the wall control panel still functions, the issue is likely with the remote programming or the opener’s receiver.

  • Re-Sync Remotes: The most common solution is to re-program the remotes.
  • Locate the Learn button on the motor unit (or sometimes on the control panel itself, depending on the model).
  • Press and release the Learn button. An indicator light should illuminate.
  • Within 30 seconds, press and hold the button on your remote control that you want to use to operate the door.
  • Release the button when the opener’s lights flash or the opener clicks. This confirms the remote has been programmed.
  • Test the remote. You may need to repeat this process for each remote.
  • Clear All Remotes: If multiple remotes stop working, you might need to clear all previously programmed remotes and start fresh. To do this, press and hold the Learn button on the motor unit for about 6-10 seconds until the indicator light goes out. Then, re-program each remote individually.
  • Antenna Issues: Ensure the antenna wire hanging from the motor unit is not cut, damaged, or obstructed. Sometimes, simply repositioning the antenna can improve reception.
  • Remote Battery: Check and replace the battery in the remote control. A weak battery can prevent the remote from transmitting a strong enough signal.

Control Panel Buttons Need To Be Held Down To Operate

This behavior, where you have to continuously press and hold a button for the door to move, is usually an indication that the safety reversing sensors are not functioning correctly.

  • Check Safety Sensors: The opener interprets this as a safety feature, if the sensors detect an obstruction, holding the button is required to override and close the door.
  • Obstructions: Ensure nothing is blocking the path of the safety sensors (usually located a few inches off the ground on either side of the garage door tracks).
  • Alignment: The sensors must be perfectly aligned. If one sensor’s indicator light is off or blinking, they are likely misaligned. Adjust them until both lights are steady.
  • Cleanliness: Dust or dirt on the sensor lenses can interfere with the beam. Wipe them clean with a soft cloth.
  • Wiring: Check the wiring to the safety sensors for damage or loose connections.

Advanced Features And Their Functionality

Modern LiftMaster control panels go beyond simple open/close functionality, offering features that enhance security, convenience, and energy efficiency.

Multi-function Control Panels

These panels often replace the basic push-button with a more sophisticated interface. They might include:

  • Illuminated Buttons: Easier to locate in a dimly lit garage.
  • Diagnostic LEDs: Provide more detailed error information than simple blinking lights.
  • Programmable Outputs: Some panels allow you to connect additional accessories, like external lights or gate openers, controlled via the panel or a remote.
  • Motion-Activated Lighting Control: Integrated motion sensors can turn on garage lights automatically when you enter the garage, providing illumination and a deterrent against intruders.

Smart Control Panels And Myq® Technology

LiftMaster’s MyQ® technology is a significant advancement, allowing users to monitor and control their garage door opener remotely via a smartphone app. Smart control panels are the gateway to this functionality.

  • Remote Monitoring: Check the status of your garage door (open or closed) from anywhere using your smartphone.
  • Remote Operation: Open or close your garage door from afar, useful if you forgot to close it or need to grant access to someone.
  • Alerts and Notifications: Receive real-time alerts on your phone when the garage door is opened or closed, or if it’s left open for an extended period.
  • Integration with Smart Home Systems: MyQ® can often integrate with other smart home platforms like Amazon Key, Google Assistant, and Apple HomeKit, allowing for voice control and automation routines.

To use these features, the smart control panel needs to be connected to your home’s Wi-Fi network. The setup process typically involves downloading the MyQ® app and following on-screen instructions to pair the panel with your network and account.

Programming And Security Features

  • Vacation/Lock Mode: As mentioned, this disables remote operation, enhancing security when you’re away.
  • Personal Access System (PAS): Some systems use a Personal Access System (PAS) keypad, which requires a unique PIN to operate the garage door. This adds a layer of security, especially if multiple people need access without individual remotes.
  • Rolling Code Technology: Most modern LiftMaster openers use Security+ 2.0® technology, which employs rolling codes. Each time you press the remote button, a new code is generated. This prevents potential thieves from capturing a single code and using it to open your garage. The control panel and the motor unit must be synchronized to recognize these rolling codes.
Liftmaster Garage Door Opener Control Panel Working

Credit: pinnaclepeo.com

Maintenance And Longevity Of Your Control Panel

Proper maintenance can significantly extend the lifespan and ensure the reliable performance of your LiftMaster control panel and associated garage door opener system.

Regular Cleaning

  • Dust and Debris: Dust, dirt, and cobwebs can accumulate on the control panel’s buttons and casing, potentially interfering with their operation or causing aesthetic issues.
  • Cleaning Method: Use a soft, dry microfiber cloth to wipe down the panel regularly. For stubborn grime, slightly dampen the cloth with water. Avoid using harsh chemicals, abrasive cleaners, or excessive moisture, as these can damage the electronic components. Ensure the panel is completely dry before use.

Checking Connections

  • Wired Panels: Periodically (e.g., every 6-12 months), check the wire connections at both the control panel and the motor unit. Ensure they are secure and free from corrosion. Loose connections are a common cause of intermittent or complete failure.
  • Wireless Keypads: For wireless keypads, check the battery life. Most keypads have an indicator light that signals a low battery, but it’s good practice to replace the battery annually or as recommended by the manufacturer.

Testing Safety Features

  • Safety Reversing Sensors: Regularly test the safety reversing sensors. Place a solid object (like a 2×4 piece of wood) in the path of the closing door. The door should stop immediately upon contact and reverse direction. If it doesn’t, the sensors need adjustment or repair. This is a critical safety check.
  • Force Adjustment: While not directly part of the control panel, the opener’s force settings ensure the door doesn’t exert too much force when opening or closing. Test this by placing a piece of cardboard in the door’s path; the door should reverse upon hitting it. Consult your manual for instructions on how to check and adjust force settings.

Software Updates (for Smart Panels)

If you have a smart control panel with MyQ® technology, ensure it remains connected to your Wi-Fi network. Firmware updates are sometimes released by LiftMaster to improve performance, add features, or patch security vulnerabilities. These updates usually occur automatically when the device is connected to the internet, but it’s good practice to ensure your MyQ® app is also kept up-to-date.

Comparing Liftmaster Control Panel Types

LiftMaster offers a range of control panels catering to different needs and budgets. Understanding the distinctions can help you choose the right one for your home or troubleshoot based on your existing model.

Basic Push-button Controls

These are the simplest form, often found in older installations or as a secondary control.

  • Functionality: Single button to open, close, and stop the door.
  • Installation: Wired directly to the motor unit.
  • Pros: Inexpensive, simple to operate, reliable.
  • Cons: Limited features, no diagnostic capabilities, no advanced security.

Multi-function Control Panels

These offer enhanced features over basic buttons.

  • Functionality: May include illuminated buttons, lock mode, diagnostics, and sometimes control for integrated lighting.
  • Installation: Typically wired.
  • Pros: More convenient, better diagnostics, enhanced security features (lock mode).
  • Cons: More expensive than basic buttons, still requires wiring.

Smart Control Panels With Myq®

These are the most advanced options, integrating with smartphone apps and smart home ecosystems.

  • Functionality: Remote monitoring and control, alerts, integration with other smart devices.
  • Installation: Wired connection to the motor unit, plus Wi-Fi setup.
  • Pros: Maximum convenience and control, enhanced security through remote monitoring, potential for home automation.
  • Cons: Most expensive option, requires a stable Wi-Fi connection, potential for network-related issues.

Here’s a simplified comparison:

FeatureBasic Push-ButtonMulti-Function PanelSmart Control Panel (MyQ®)
**Primary Function**Open/Close/StopOpen/Close/Stop, LockOpen/Close/Stop, Lock, Remote Control
**Remote Access**NoNoYes (via smartphone app)
**Diagnostics**MinimalBasic LEDsAdvanced app diagnostics
**Smart Home Ready**NoNoYes
**Installation**WiredWiredWired + Wi-Fi
**Cost**LowMediumHigh

Installation Considerations For New Control Panels

If you’re replacing an old control panel or installing a new one, proper installation is crucial for optimal performance and safety.

  • Compatibility Check: Ensure the new control panel is compatible with your existing LiftMaster garage door opener motor unit. Check the model number of your opener and consult LiftMaster’s compatibility charts or your owner’s manual. Older openers might use Security+ 315 MHz or 390 MHz frequencies, while newer ones use Security+ 2.0® (multiple frequencies). The control panel must match the opener’s frequency and security protocol.
  • Mounting Location: Choose a convenient and accessible location inside the garage, typically near the main entry door. The panel should be mounted at a height that is easily reachable by all household members, including children (though keeping it out of reach of very young children is advisable for safety). Ensure the location is within the range of the opener’s antenna if it’s a wireless control, or within reach of the necessary wiring if it’s a wired model.
  • Wiring (for Wired Panels):
  • Use the correct gauge wire (typically 2-conductor, 22-gauge thermostat wire).
  • Run the wire neatly along walls or ceilings, securing it with staples or clips. Avoid sharp bends or kinks.
  • Ensure the wire does not interfere with the garage door’s movement or the

Frigidaire Microwave Keeps On Tripping The Circuit Breaker

Frigidaire Microwave Keeps On Tripping The Circuit Breaker

A Frigidaire microwave is a staple in many kitchens, offering convenience and speed for meal preparation. However, when this essential appliance repeatedly trips the circuit breaker, it can be a significant source of frustration and disruption. This isn’t just an inconvenience; it signals an underlying electrical issue that needs prompt attention to ensure safety and prevent further damage to your appliance or home’s electrical system. Understanding the potential causes behind a tripping breaker is the first step toward a swift and effective resolution.

This common problem can stem from various sources, ranging from simple user errors to more complex internal malfunctions within the microwave itself or issues with your home’s wiring. Overloading the circuit, a faulty microwave component, or even a problem with the breaker itself can all contribute.

Identifying the exact culprit requires a systematic approach, beginning with basic checks and progressing to more in-depth troubleshooting. This guide will walk you through the most common reasons why your Frigidaire microwave keeps tripping the circuit breaker and provide actionable steps to diagnose and fix the issue.

Key Takeaways

  • A Frigidaire microwave tripping a circuit breaker is often caused by overloading the circuit, a faulty power cord, an internal component failure, or a problem with the circuit breaker itself.
  • Always start troubleshooting by unplugging the microwave and checking the circuit breaker’s position.
  • Overloading can occur when the microwave runs on a circuit shared with other high-power appliances.
  • Inspect the power cord and plug for any signs of damage, as this can create a short circuit.
  • Internal issues like a magnetron failure, door switch malfunction, or control board problems can draw excessive current.
  • If basic troubleshooting fails, it’s crucial to contact a qualified appliance repair technician or an electrician.
  • Regular maintenance and proper usage can help prevent future tripping incidents.
Frigidaire Microwave Keeps On Tripping The Circuit Breaker

Credit: www.youtube.com

Understanding Circuit Breakers And Microwave Power Consumption

Before diving into specific troubleshooting steps, it’s essential to grasp how circuit breakers function and why microwaves are particularly prone to tripping them. A circuit breaker is a safety device designed to protect electrical circuits from damage caused by overcurrents or short circuits. When an excessive amount of electrical current flows through a circuit, the breaker “trips,” interrupting the flow of electricity and preventing potential hazards like fires.

Microwaves are powerful appliances that draw a significant amount of electricity, especially during operation. They typically have a power rating ranging from 700 to 1200 watts or more. This high power draw means they require a dedicated or lightly loaded circuit to operate safely without tripping the breaker.

Many older homes, or even some newer ones with less robust electrical planning, might have microwaves plugged into circuits shared with other appliances, such as refrigerators, toasters, or coffee makers. When the microwave activates, its substantial power demand, combined with the existing load on the circuit, can easily exceed the breaker’s safe limit, causing it to trip.

The National Electrical Code (NEC) in the United States generally recommends that individual appliances drawing over 1500 watts should be on their own dedicated circuit. While many microwaves fall below this threshold, their intermittent but high power draw makes them prime candidates for causing breaker trips, especially when sharing circuits. Understanding this power dynamic is crucial for diagnosing why your Frigidaire microwave is causing electrical interruptions.

Frigidaire Microwave Keeps On Tripping The Circuit Breaker

Credit: www.reddit.com

Common Causes For A Frigidaire Microwave Tripping The Circuit Breaker

Several factors can lead to your Frigidaire microwave repeatedly tripping the circuit breaker. These range from simple external issues to more complex internal faults. Identifying the specific cause is key to resolving the problem safely and effectively.

Overloading The Circuit

This is perhaps the most frequent reason a microwave trips a breaker. Microwaves require a substantial amount of electricity to operate. If the circuit your Frigidaire microwave is plugged into is already powering other high-draw appliances simultaneously, the total current demand can exceed the circuit’s capacity.

  • Shared Circuits: Many kitchens have outlets on shared circuits. If your microwave shares a circuit with a refrigerator, dishwasher, toaster oven, or even a powerful coffee maker, running the microwave while these are active can overload the system.
  • Appliance Wattage: Different microwave models have varying wattage. A higher wattage microwave will draw more current. When combined with other appliances, even moderately rated ones, the cumulative draw can be significant. For instance, a 1000-watt microwave draws approximately 8.3 amps at 120 volts (Watts / Volts = Amps). If this is on a 15-amp circuit with a refrigerator drawing an additional 5 amps, the total can approach or exceed the breaker’s limit, especially during the microwave’s initial power surge.
  • Extension Cords: Using an inadequate extension cord or daisy-chaining multiple cords can also contribute to overloading and pose a fire hazard. Microwaves should ideally be plugged directly into a wall outlet.

Faulty Power Cord Or Plug

The power cord and plug are the direct link between your microwave and the electrical outlet. Any damage or defect in these components can create a short circuit, drawing excessive current and tripping the breaker.

  • Physical Damage: Inspect the entire length of the power cord for cuts, abrasions, or kinks. Pay close attention to the areas where the cord enters the microwave and the plug.
  • Damaged Plug: Check the plug itself for bent or broken prongs, scorch marks, or loose connections. A damaged plug can lead to poor contact and potential arcing, which can trip the breaker.
  • Internal Wire Damage: Sometimes, the wires inside the cord can become frayed or broken due to repeated bending or stress, even if the outer insulation appears intact. This internal damage can cause intermittent shorts.

Internal Component Failure

Microwaves are complex appliances with numerous electrical components. The failure of any one of these can lead to an abnormal current draw, triggering the circuit breaker.

  • Magnetron Failure: The magnetron is the component responsible for generating microwaves. If it fails or begins to malfunction, it can draw excessive current. This is a common and often expensive repair.
  • High Voltage Diode or Capacitor Issues: These components are part of the microwave’s high-voltage system. If a diode shorts or a capacitor fails to discharge properly, it can create a direct path for excessive current.
  • Door Switch Malfunction: Microwaves have safety interlock switches on the doors. If these switches become faulty, stuck, or shorted, they can cause the microwave to draw more power than it should, or even operate when the door is not fully closed, leading to a breaker trip.
  • Control Board Problems: The electronic control board manages all the microwave’s functions. A short circuit or component failure on the control board can lead to erratic behavior and excessive power draw.
  • Cooling Fan Motor: The fan motor circulates air to cool internal components. If the motor seizes or develops a short, it can draw too much current.

Problem With The Circuit Breaker Itself

While less common, the circuit breaker might be the source of the problem. Breakers can wear out over time or become faulty, making them overly sensitive.

  • Aging Breaker: Circuit breakers have a lifespan. An older breaker might trip at a lower amperage than its rating, especially if it has been tripped frequently.
  • Faulty Breaker: Manufacturing defects or internal damage can cause a breaker to malfunction, leading to nuisance tripping.
  • Incorrect Breaker Rating: The breaker installed on the circuit might have too low an amperage rating for the intended load, including the microwave.

Ground Fault Issues

A ground fault occurs when electrical current unintentionally flows to the ground. This can happen due to damaged wiring within the microwave or faulty insulation. A ground fault can draw significant current and immediately trip the breaker as a safety measure.

Troubleshooting Steps: Diagnosing The Issue

When your Frigidaire microwave trips the circuit breaker, a systematic approach to troubleshooting is essential. Start with the simplest potential causes and gradually move towards more complex ones. Always prioritize safety by unplugging the appliance before performing any physical checks.

Step 1: Reset The Circuit Breaker

The first and simplest step is to check the circuit breaker panel.

  • Locate the Panel: Find your home’s main electrical panel, usually located in a basement, garage, utility room, or closet.
  • Identify the Tripped Breaker: Look for a breaker that is in the “off” position or in a middle position between “on” and “off.”
  • Reset the Breaker: Firmly push the breaker handle all the way to the “off” position, and then flip it back to the “on” position. You should hear a click.
  • Test the Microwave: Plug the microwave back in and try running it for a short period. If it trips again immediately, the problem is likely with the microwave or the circuit itself. If it runs, the issue might have been a temporary overload.

Step 2: Check For Circuit Overload

If resetting the breaker doesn’t solve the problem, the next step is to assess if the circuit is overloaded.

  • Identify Other Appliances on the Circuit: Determine which other outlets and appliances are connected to the same circuit as the microwave. This often requires consulting your home’s electrical panel diagram or systematically unplugging devices from nearby outlets and testing the microwave.
  • Disconnect Other Appliances: Unplug all other appliances from the same circuit. This includes refrigerators, dishwashers, coffee makers, toasters, and any other high-wattage devices.
  • Test the Microwave Alone: Plug the Frigidaire microwave back in and try running it. If it operates without tripping the breaker, the circuit is likely overloaded.
  • Solutions for Overload:
  • Relocate Appliances: Move some of the high-draw appliances to different circuits.
  • Stagger Usage: Avoid running the microwave simultaneously with other power-hungry appliances.
  • Upgrade Circuit: If the circuit is consistently overloaded, consider having an electrician install a new, dedicated circuit for the microwave or an existing appliance that frequently shares the load. This is often the most effective long-term solution.

Step 3: Inspect The Power Cord And Plug

A damaged power cord or plug is a common cause of short circuits.

  • Unplug the Microwave: Ensure the microwave is completely disconnected from the power outlet.
  • Visual Inspection: Carefully examine the entire length of the power cord. Look for:
  • Cuts, nicks, or abrasions in the insulation.
  • Areas where the cord is frayed or appears damaged.
  • Kinks or sharp bends that could have damaged internal wires.
  • Examine the Plug: Inspect the prongs of the plug for:
  • Bent or broken prongs.
  • Signs of melting or scorching.
  • Loose connections where wires meet the plug.
  • Check the Outlet: Ensure the wall outlet itself is not damaged, loose, or showing signs of scorching.
  • Action if Damaged: If you find any damage to the power cord, plug, or outlet, do not use the microwave. The power cord cannot typically be repaired; the microwave will need professional servicing or replacement. If the outlet is damaged, have it replaced by a qualified electrician.

Step 4: Test With A Different Outlet/circuit

To rule out issues with the specific outlet or circuit wiring, try plugging the microwave into a different, known-good outlet on a different circuit.

  • Find a Suitable Outlet: Choose an outlet in another room that is on a different circuit breaker. Ensure this outlet is also suitable for a high-wattage appliance.
  • Plug In and Test: Connect the microwave to this new outlet and try running it.
  • Interpret Results:
  • If it works: The original outlet or circuit likely has an issue (either overloading, faulty wiring, or a problem with the breaker itself).
  • If it trips again: The problem is almost certainly with the microwave itself.

Step 5: Listen For Unusual Sounds Or Smells

While troubleshooting, pay attention to any unusual sensory cues.

  • Smells: A burning smell, especially when operating the microwave or even when it’s plugged in, often indicates an electrical fault, such as a short circuit or a failing component.
  • Sounds: Grinding, buzzing, or popping sounds coming from the microwave can also signal internal problems.

If you detect any burning smells or strange noises, unplug the microwave immediately and do not attempt to use it further. This is a strong indicator of a serious internal fault.

Frigidaire Microwave Keeps On Tripping The Circuit Breaker

Credit: www.youtube.com

Internal Microwave Faults: When To Call A Professional

If you’ve completed the external troubleshooting steps and the Frigidaire microwave continues to trip the circuit breaker, the issue almost certainly lies within the appliance itself. Attempting to repair internal microwave components can be dangerous due to high voltages, even when unplugged.

It is strongly recommended to contact a qualified appliance repair technician. However, understanding the potential internal culprits can help you communicate the problem effectively.

Common Internal Faults Causing Tripping

  • Faulty Magnetron: The magnetron is the heart of the microwave, generating the radio waves that heat food. If it develops an internal short or fails, it can draw a massive amount of current, instantly tripping the breaker. Symptoms might include the microwave running but not heating, or tripping the breaker immediately upon activation.
  • Short in High-Voltage Components: The high-voltage transformer, capacitor, and diode work together to step up the voltage for the magnetron. A failure in any of these components, particularly a short circuit in the capacitor or diode, can cause a severe overcurrent. These components store dangerous amounts of electricity even after the microwave is unplugged, highlighting the need for professional handling.
  • Defective Door Interlock Switches: Microwaves have multiple safety interlock switches that detect when the door is closed. If one or more of these switches fail, become misaligned, or short out, they can bypass safety mechanisms and cause the microwave to draw excessive power. This is a critical safety issue.
  • Control Board Malfunction: The electronic control board or its associated wiring harness can develop shorts or component failures. This can lead to erratic operation and improper power management, resulting in breaker trips.
  • Cooling Fan Motor Issues: The fan motor cools the magnetron and other components. If the motor seizes due to wear or develops an electrical short, it can draw excessive current.
  • Internal Wiring Shorts: Over time, wires inside the microwave can become damaged, frayed, or insulation can degrade, leading to unintended contact and short circuits. This can happen due to vibration, heat, or manufacturing defects.

When Diy Stops And Professional Help Begins

Pro Tip: Never attempt to open the microwave casing yourself unless you have specific training in appliance repair and understand the risks associated with high-voltage capacitors. Even when unplugged, capacitors can retain a dangerous electrical charge for an extended period.

If you suspect an internal fault, the safest and most practical course of action is to:

  • Contact Frigidaire Support: Reach out to the manufacturer’s customer service for potential warranty information or authorized repair centers. You can find contact details on the Frigidaire website or in your appliance manual.
  • Hire a Qualified Appliance Repair Technician: Look for reputable local technicians experienced with Frigidaire appliances. They have the specialized tools and knowledge to safely diagnose and repair internal issues.
  • Consider Replacement: For older microwaves or those with significant internal damage (like a failed magnetron), the cost of repair might approach or exceed the price of a new unit. A technician can provide an estimate to help you make an informed decision.

Preventing Future Tripping Issues

Once your Frigidaire microwave is fixed or you’ve identified the cause, implementing preventative measures can help avoid future circuit breaker trips and ensure the longevity of your appliance.

Proper Usage And Placement

  • Dedicated Circuit: The ideal solution is to have your microwave on a dedicated electrical circuit. If this isn’t feasible, ensure the circuit it shares is not burdened with other high-wattage appliances. Consult an electrician about the possibility of installing one.
  • Avoid Overcrowding: Do not place items directly in front of the microwave’s air vents. Proper ventilation is crucial for preventing overheating, which can stress components and potentially lead to electrical issues.
  • Direct Plug-In: Always plug the microwave directly into a wall outlet. Avoid using extension cords, power strips, or adapters, as these can introduce resistance, cause voltage drops, and contribute to overloading. If an extension cord is absolutely necessary for temporary use, ensure it is a heavy-duty cord rated for the microwave’s wattage and is as short as possible.

Regular Maintenance And Cleaning

  • Cleanliness: Regularly clean the interior and exterior of the microwave. Food debris can accumulate and potentially interfere with door seals or vents, and in rare cases, could cause minor electrical issues if it contacts sensitive components.
  • Inspect the Cord: Periodically check the power cord and plug for any signs of wear or damage. Address any issues promptly.
  • Door Seal Integrity: Ensure the microwave door closes properly and the seals are intact. A damaged or misaligned door can affect the operation of the safety interlock switches.

Understanding Appliance Power Needs

  • Wattage Awareness: Be mindful of the wattage of your microwave and other appliances. When planning kitchen activities, try to stagger the use of high-power devices. For example, run the microwave while the dishwasher is not actively heating or the oven is not in use.
  • Circuit Load Calculation: If you are unsure about your kitchen’s electrical load, consult an electrician. They can assess your current setup and recommend upgrades if necessary. According to the U.S. Department of Energy, kitchens typically require multiple circuits to handle the demand from various appliances.

Addressing Minor Issues Promptly

  • Listen and Look: Pay attention to any unusual sounds, smells, or operational quirks from your microwave. Addressing minor issues early can prevent them from escalating into problems that trip breakers.
  • Breaker Sensitivity: If your breaker trips frequently even with no apparent overload, the breaker itself might be faulty or too sensitive. Consider having an electrician inspect or replace it.

By following these preventative tips, you can significantly reduce the likelihood of your Frigidaire microwave tripping the circuit breaker and ensure it operates safely and efficiently.

Frigidaire Microwave Models And Common Issues

While the core principles of troubleshooting a tripping circuit breaker apply to most microwave ovens, certain Frigidaire models might exhibit specific tendencies or common failure points. Understanding these can sometimes narrow down the diagnostic process. However, it’s important to note that specific model-related issues are often anecdotal unless widely documented by the manufacturer or repair communities.

Popular Frigidaire Microwave Series

Frigidaire offers a range of microwave ovens, including:

  • Frigidaire Gallery Series: Often featuring higher-end designs and advanced functionalities.
  • Frigidaire Professional Series: Geared towards performance and durability.
  • Standard Frigidaire Models: Reliable, everyday appliances found in many homes.

Each series might have different internal component suppliers or design variations that could influence potential failure modes. For example, models with more complex electronic controls might be more susceptible to control board issues than simpler, dial-operated units.

Common Failure Points Across Models

Across various Frigidaire microwave models, some components are more prone to failure than others, leading to electrical issues:

  • Magnetron: As mentioned previously, magnetron failure is a common issue across many brands, including Frigidaire. This is often due to age, manufacturing defects, or power surges.
  • High-Voltage Capacitor/Diode: These components are stressed during operation and can fail, causing shorts.
  • Door Switches: Frequent use and the slam of microwave doors can wear out the interlock switches over time.
  • Control Panel Membrane: The touch-sensitive control panels can degrade due to moisture, heat, or wear, sometimes leading to short circuits or erratic behavior.

Example Case Study: A Frigidaire Gallery over-the-range microwave model (e.g., FGMV17WNVF) was reported to repeatedly trip the breaker shortly after starting. After confirming the circuit wasn’t overloaded and the power cord was intact, a technician found that one of the door interlock switches had failed internally, creating a short. Replacing the switch resolved the issue. This highlights how a seemingly minor component can cause a major electrical problem.

Resources For Model-specific Information

If you are experiencing persistent issues, it can be helpful to:

  • Consult the User Manual: Your Frigidaire microwave’s manual may contain a troubleshooting section specific to your model.
  • Online Forums and Support: Websites dedicated to appliance repair or Frigidaire’s official support pages might have discussions or FAQs related to common problems with specific model numbers. Searching online for your exact model number along with “trips breaker” can sometimes yield relevant information from other users or technicians.

While model-specific quirks exist, the fundamental troubleshooting steps outlined in this guide remain the most effective starting point for diagnosing why your Frigidaire microwave keeps tripping the circuit breaker.

Frequently Asked Questions

Why Does My Frigidaire Microwave Trip The Breaker As Soon As I Turn It On?

This usually indicates a severe electrical fault within the microwave, such as a short circuit in the high-voltage components (transformer, capacitor, diode), the magnetron, or a faulty power cord. It could also be a failed door interlock switch causing an immediate overload. The immediate trip suggests a direct path for excessive current flow.

Can A Bad Outlet Cause My Frigidaire Microwave To Trip The Breaker?

Yes, a damaged or faulty wall outlet can contribute to tripping the breaker. Issues like loose wiring connections within the outlet box, internal damage to the outlet itself, or scorching can create resistance or short circuits

Jvc Tv Remote Not Working

Jvc Tv Remote Not Working

When your JVC TV remote suddenly stops responding, it can be a frustrating interruption to your entertainment. Whether you’re trying to change channels, adjust the volume, or access smart features, a non-functional remote renders your television significantly less useful. This common issue can stem from a variety of sources, ranging from simple battery problems to more complex internal malfunctions.

Understanding the potential causes and systematically troubleshooting them is key to getting your JVC TV remote working again without unnecessary hassle or expense.

This comprehensive guide will walk you through a series of diagnostic steps and potential solutions designed to address a non-working JVC TV remote. We’ll cover everything from the most basic checks, like battery replacement and line-of-sight issues, to more advanced troubleshooting that might involve resetting your TV or even considering remote replacement.

By following these steps, you can confidently identify and resolve the problem, restoring full control over your JVC television experience.

Key Takeaways

  • Battery Check: The most frequent cause of a non-working remote is dead or improperly inserted batteries. Always start by replacing them with fresh ones and ensuring correct polarity.
  • Obstructions & Line of Sight: Ensure there are no physical obstructions between the remote and the TV’s infrared sensor. The remote needs a clear path to communicate.
  • Remote Reset: A simple power cycle of both the remote (by removing batteries) and the TV can often resolve temporary glitches.
  • TV Sensor Issues: The infrared sensor on the TV itself can sometimes be the culprit, either due to dirt or malfunction.
  • Pairing Problems: For smart remotes or Bluetooth remotes, re-pairing the remote with the TV is a common fix.
  • Remote Damage: Physical damage or liquid spills can render a remote unusable, often requiring replacement.
  • Universal Remote as a Backup: If your original remote is beyond repair, a universal remote can be a cost-effective alternative.
Jvc Tv Remote Not Working

Credit: www.youtube.com

Understanding How Your Jvc Tv Remote Works

Before diving into troubleshooting, it’s helpful to understand the basic technology behind your JVC TV remote. Most JVC TV remotes, particularly older models, utilize infrared (IR) technology. This means the remote emits invisible beams of light that carry specific commands to a sensor on the front of your television. For this system to work, there must be a clear line of sight between the remote and the TV’s IR receiver, and the remote’s signal needs to be strong enough to be detected.

More modern JVC smart TVs often come with Bluetooth remotes or radio frequency (RF) remotes. These do not require a direct line of sight and can often operate through cabinets or from further distances. However, they rely on a pairing process with the TV. If this pairing is lost, or if the Bluetooth/RF module in either the remote or the TV experiences an issue, the remote will stop working.

The commands sent by the remote are essentially digital codes. When you press a button, the remote generates a specific code corresponding to that action (e. g. , power on, volume up, channel down). The TV’s internal processor receives this code and executes the command.

Issues can arise if the remote isn’t sending the correct code, or if the TV isn’t receiving or interpreting it properly.

Jvc Tv Remote Not Working

Credit: www.amazonforum.com

Step 1: The Basics, Batteries And Obstructions

The overwhelming majority of issues with any remote control, including JVC TV remotes, can be traced back to two simple factors: batteries and line of sight. It’s crucial to address these first before moving on to more complex solutions.

Replacing The Batteries

This is the most common culprit. Remote control batteries drain over time, and even new batteries can sometimes be faulty or have a weak charge.

  • Identify the Battery Compartment: Locate the battery cover on the back of your JVC remote. It usually slides off or has a small latch.
  • Remove Old Batteries: Carefully remove the existing batteries. Note their orientation (+ and – ends).
  • Insert New Batteries: Insert a fresh set of high-quality alkaline batteries of the correct size (usually AA or AAA). Pay close attention to the polarity markings inside the compartment. Incorrectly inserted batteries will prevent the remote from working.
  • Test the Remote: Try pressing a few buttons. If the remote now works, the issue was simply depleted batteries.

Pro Tip: If you’ve just replaced batteries and the remote still isn’t working, try the old batteries again. Sometimes, new batteries can be faulty. Also, ensure the battery contacts inside the remote are clean and free of corrosion. You can gently clean them with a pencil eraser or a cotton swab dipped in isopropyl alcohol (ensure it dries completely before reinserting batteries).

Ensuring Clear Line Of Sight

For IR remotes, a direct, unobstructed path to the TV is essential.

  • Check for Obstructions: Look for anything placed between the remote and the front of your JVC TV. This could include soundbars, decorative items, plants, or even the TV’s own stand.
  • Aim Correctly: Ensure you are pointing the remote directly at the infrared receiver window on the TV. This is usually a small, dark, often translucent plastic area located on the front bezel of the TV, typically near the power indicator light. Consult your JVC TV manual if you’re unsure of its exact location.
  • Distance: While less common, being too far away can weaken the IR signal. Try moving closer to the TV to see if the remote starts working.

If your JVC TV uses a Bluetooth or RF remote, line of sight is not a requirement, so this step would not apply.

Step 2: Power Cycling And Resetting

Sometimes, electronic devices can experience temporary glitches that disrupt communication between components. A simple power cycle can often resolve these issues for both the remote and the TV.

Power Cycling The Remote

This is a quick way to reset the remote’s internal electronics.

  • Remove Batteries: Take all batteries out of the JVC remote.
  • Press Buttons: Press and hold each button on the remote for about 10-15 seconds. This helps discharge any residual power.
  • Wait: Leave the batteries out for at least 1-2 minutes.
  • Reinsert Batteries: Put fresh batteries back into the remote, ensuring correct polarity.
  • Test: Try using the remote again.

Power Cycling The Jvc Tv

This process can clear temporary errors in the TV’s receiver or software that might be preventing it from responding to remote commands.

  • Turn Off TV: If possible, turn off the TV using the power button on the TV itself (not the remote). If the TV is already unresponsive, you can skip this step.
  • Unplug TV: Disconnect the power cord from the wall outlet or power strip.
  • Wait: Leave the TV unplugged for at least 60 seconds. This allows all residual power to dissipate.
  • Press TV Power Button (Optional but Recommended): While the TV is unplugged, press and hold the physical power button on the TV for about 15-30 seconds. This further helps to discharge any remaining power.
  • Plug In TV: Reconnect the power cord to the wall outlet.
  • Turn On TV: Turn the TV on using the physical power button on the television.
  • Test Remote: Once the TV has fully booted up, try using the JVC remote.
Jvc Tv Remote Not Working

Credit: www.youtube.com

Step 3: Checking The Tv’s Infrared (ir) Sensor

The IR sensor on your JVC TV is the component that receives signals from the remote. If this sensor is dirty, blocked, or malfunctioning, it won’t be able to interpret the commands.

Cleaning The Ir Sensor

Dust, smudges, or even protective film can interfere with the IR sensor’s ability to receive signals.

  • Locate the Sensor: As mentioned earlier, find the IR receiver window on the front of your TV. It’s usually a small, dark plastic area.
  • Gentle Cleaning: Use a soft, dry microfiber cloth to gently wipe the sensor area. If there’s stubborn grime, you can lightly dampen the cloth with water or a screen-safe cleaning solution. Avoid using harsh chemicals or abrasive materials, as they can damage the sensor or the TV’s finish.
  • Check for Blockages: Ensure nothing is physically covering the sensor, such as a poorly placed sticker, a piece of tape, or a component of a wall mount.

Testing The Ir Sensor With A Camera

You can perform a simple test using your smartphone camera to see if the remote is emitting an IR signal.

  • Open Camera App: Launch the camera application on your smartphone.
  • Point Remote: Aim the front of your JVC TV remote (where the IR emitter is located) towards the camera lens.
  • Press a Button: Press and hold a button on the remote (e.g., the power button).
  • Observe Screen: Look at your phone’s screen. If the remote is working, you should see a faint purplish or pinkish light flashing from the remote’s emitter through the camera view.
  • If you see the light: This indicates the remote is sending a signal. The problem likely lies with the TV’s sensor or its internal processing.
  • If you do NOT see the light: This suggests the remote itself is not transmitting. The issue is likely with the remote’s batteries, internal components, or the emitter itself.

Note: Some smartphone cameras (especially front-facing cameras) have IR filters that might block the view. If you don’t see a light with one camera, try the main rear-facing camera or another phone’s camera.

Step 4: Addressing Smart Remote Pairing And Software Issues

If you have a JVC smart TV, your remote might use Bluetooth or RF technology, which requires pairing with the TV. If this connection is lost, the remote won’t function. Software glitches on either the remote or the TV can also cause problems.

Re-pairing The Bluetooth/rf Remote

The specific steps for re-pairing vary by JVC TV model. Always refer to your TV’s user manual for precise instructions. However, the general process often involves:

  • Bring Remote Close: Ensure the remote is within a few feet of the TV.
  • Enter Pairing Mode: This usually involves pressing and holding a specific combination of buttons on the remote simultaneously. Common combinations include:
  • Power button + Back button
  • Home button + Back button
  • Volume Down + Mute button
  • Dedicated Pairing button (if available)
  • Check your manual for the exact button sequence.
  • Follow On-Screen Prompts: Your JVC TV should display a message indicating it’s searching for the remote or prompting you to confirm pairing. Follow any on-screen instructions.
  • Confirmation: The TV will usually confirm when the pairing is successful.
  • Test: Try using the remote’s functions.

Example: For some JVC smart TV models, pressing and holding the “Home” button and the “Back” button for 5-10 seconds while the TV is on will initiate the pairing process.

Updating Tv Software/firmware

Outdated software on your JVC TV can sometimes cause compatibility issues with accessories like remotes.

  • Check for Updates: Navigate to your TV’s Settings menu. Look for options like System, Support, About, or Software Update.
  • Scan for Updates: Select the option to check for available updates.
  • Install Updates: If an update is found, follow the on-screen prompts to download and install it. This process requires a stable internet connection and may take some time. The TV will likely restart multiple times.
  • Test Remote: After the update is complete and the TV has rebooted, test your remote.

Factory Resetting The Tv (last Resort)

If other software-related troubleshooting fails, a factory reset of your JVC TV can resolve persistent issues. Warning: This will erase all your personalized settings, downloaded apps, and logged-in accounts, returning the TV to its out-of-the-box state.

  • Access Settings: Go to your TV’s Settings menu.
  • Find Reset Option: Look for options like System, Support, Reset, or Factory Reset.
  • Confirm Reset: You will likely need to enter a PIN (often 0000 or 1234 if you haven’t set one) and confirm that you want to proceed.
  • Re-setup TV: After the reset, your TV will restart, and you’ll need to go through the initial setup process again, including connecting to Wi-Fi and signing into your accounts.
  • Re-pair Remote: You will almost certainly need to re-pair your smart remote after a factory reset.
  • Test Remote: Once the TV is set up, test the remote.

Step 5: Potential Hardware Issues And Troubleshooting

If the simpler solutions haven’t worked, it’s possible there’s a hardware problem with either the remote or the TV.

Testing The Remote On Another Device (if Applicable)

If you have another JVC TV or a compatible device that uses a similar remote system, you could try testing your remote on that device. This helps isolate whether the problem is with the remote itself or your specific TV.

However, this is often impractical due to model variations.

Checking The Tv’s Ir Receiver Port

While less common, the IR receiver port on the TV itself could be damaged or have a loose connection internally.

  • Visual Inspection: Carefully inspect the area around the IR receiver on the TV. Look for any visible cracks, damage, or signs of impact.
  • Internal Connection (Advanced): For users comfortable with electronics, opening the TV casing (while unplugged and discharged) to check for loose wires connected to the IR receiver board might be an option. This is not recommended for the average user and can void your warranty. If you suspect this, it’s best to contact a professional technician.

Jvc Remote Control Lifespan And Wear

Like any electronic device, remote controls have a finite lifespan. Buttons can become worn out, internal circuitry can fail, or components can degrade over time.

  • Button Malfunction: If only specific buttons on your remote aren’t working, it might indicate wear or debris under those particular buttons.
  • Physical Damage: Dropping the remote, exposure to liquids, or significant impact can cause internal damage that isn’t always visible.

Step 6: When To Consider Replacement Or Alternatives

If you’ve exhausted all troubleshooting steps and your JVC TV remote still isn’t working, it’s likely time to consider replacing it or opting for an alternative control method.

Ordering A Replacement Jvc Remote

  • Original Equipment Manufacturer (OEM): The most straightforward option is to purchase an official JVC replacement remote. You can usually find these through:
  • The JVC official website.
  • Authorized JVC parts distributors.
  • Major online retailers (Amazon, eBay, etc. ).
  • Crucially, you will need your JVC TV’s model number (usually found on a sticker on the back of the TV) to ensure you order the correct, compatible remote.
  • Aftermarket Remotes: Various companies produce aftermarket remotes designed to work with JVC TVs. These can sometimes be cheaper but may lack some of the specific functions of the original remote. Ensure the product description explicitly states compatibility with your TV model.

Data Point: The cost of an OEM JVC replacement remote can range from $20 to $60, depending on the model and features. Aftermarket options might be available for $10-$30.

Using A Universal Remote Control

A universal remote is programmed to control multiple devices from different brands, including your JVC TV.

  • Setup: Most universal remotes require a setup process where you enter specific codes for your TV brand or use an auto-scan feature.
  • Compatibility: Ensure the universal remote explicitly lists compatibility with JVC televisions. Popular brands include Logitech Harmony (though discontinued, still widely used and supported), GE, RCA, and One For All.
  • Features: While universal remotes can be highly functional, they might not replicate every single button or smart feature of the original JVC remote (e.g., voice control, specific app buttons).
  • Advantages: A significant advantage is consolidating multiple remotes into one. They can also be a cost-effective solution if your original remote is expensive or hard to find.

Comparison Table: Original JVC Remote vs. Universal Remote

FeatureOriginal JVC RemoteUniversal Remote
**Compatibility**Guaranteed for your specific JVC TV modelRequires programming/code entry; check compatibility
**Functionality**All original functions, including smart featuresMay not replicate all specific functions/buttons
**Setup**Usually plug-and-play (or simple pairing for smart)Requires setup (code entry, auto-scan)
**Cost**Varies ($20-$60+)Varies ($10-$100+), can be cheaper for basic models
**Consolidation**Controls only the JVC TVCan control multiple devices (TV, Blu-ray, soundbar)
**Availability**Can sometimes be difficult to find for older modelsWidely available

Utilizing Smartphone Apps As Remotes

Many modern JVC smart TVs offer companion apps that can turn your smartphone or tablet into a fully functional remote control.

  • App Requirements: These apps typically require your TV and smartphone to be connected to the same Wi-Fi network.
  • Features: Smartphone remote apps often provide features beyond a standard remote, including:
  • Full navigation (directional pad, OK button)
  • Keyboard input for searching and entering text
  • Voice control (if supported by the app and TV)
  • Quick access to apps and settings
  • Finding the App: Search your smartphone’s app store (Google Play Store for Android, Apple App Store for iOS) for “JVC TV Remote” or check the JVC support website for recommendations specific to your TV model. For example, the official “JVC Remote Control” app or similar third-party apps are often available.
  • Example: A user with a JVC LT-50CF890 might download the official JVC app, connect it to the same Wi-Fi as their TV, and then use their phone to navigate menus, launch Netflix, and control playback.

In my experience, these smartphone apps are incredibly useful, especially when the physical remote is missing or malfunctioning, offering a robust and often superior control interface for smart TV functions.

Frequently Asked Questions

Why Did My Jvc Tv Remote Suddenly Stop Working?

Sudden failures are most commonly caused by dead batteries, followed by obstructions blocking the infrared signal (for IR remotes), or a lost Bluetooth/RF pairing (for smart remotes). Less common causes include a dirty or malfunctioning IR sensor on the TV, or a temporary software glitch in the TV or remote.

How Do I Know If My Jvc Tv Remote Is Sending A Signal?

You can test this using your smartphone’s camera. Open the camera app, point the front of the remote (where the emitter is) at the lens, and press a button. If the remote is working, you should see a faint purplish light flashing on your phone screen. If you don’t see a light, the remote is likely not transmitting, and the issue is probably with the batteries or the remote itself.

My Jvc Smart Remote Won’t Pair. What Should I Do?

Ensure the remote is close to the TV, that the TV is powered on, and that you are using the correct button combination to enter pairing mode (refer to your TV manual). Try power cycling both the remote (remove batteries for a minute) and the TV (unplug it for a minute).

If it still fails, the remote itself might be faulty, or there could be an issue with the TV’s Bluetooth receiver.

Can I Use A Universal Remote If My Jvc Remote Is Broken?

Yes, a universal remote is an excellent alternative. You’ll need to ensure the universal remote is compatible with JVC TVs and program it using the provided codes or auto-scan feature. While it may not have every single button of the original remote, it should cover all essential functions like power, volume, channels, and menu navigation.

Is It Worth Repairing A Broken Jvc Tv Remote?

For most standard JVC remotes, repair is often not cost-effective. The cost of replacement parts and labor can easily exceed the price of a new original or universal remote. Simple fixes like battery replacement are always worth trying. However, if the remote suffered significant physical damage (like a drop or liquid spill), replacement is usually the most practical solution.

A non-working JVC TV remote can be a significant annoyance, but as this guide has shown, most issues are resolvable with systematic troubleshooting. Starting with the simplest explanations, batteries and obstructions, and progressing through power cycles, sensor checks, and pairing procedures often restores functionality.

Remember to consult your specific JVC TV model’s user manual for detailed instructions, especially regarding pairing smart remotes or accessing system settings. If all else fails

Ceiling Cracks Causes And Solutions

Ceiling Cracks Causes And Solutions

A hairline fracture spiderwebbing across your living room ceiling can be alarming. While often minor, ceiling cracks can sometimes signal underlying structural issues that require immediate attention. Understanding the various causes, from simple settling to more serious water damage or foundation problems, is crucial for homeowners. This article will guide you through identifying different types of cracks, pinpointing their origins, and implementing the most effective solutions to restore the integrity and appearance of your ceiling.

Key Takeaways

  • Settling and drying of building materials are the most common causes of hairline cracks, particularly in newer homes.
  • Temperature fluctuations can cause materials to expand and contract, leading to stress and cracking.
  • Water damage from leaks in plumbing, roofs, or bathrooms is a serious cause that requires immediate repair of the source and the ceiling.
  • Foundation movement is a significant structural issue that manifests as larger, often diagonal or stair-step cracks.
  • Poor installation of drywall or joint compound can lead to cracks along seams.
  • Simple hairline cracks can often be repaired with spackling and paint, while larger or structural cracks require professional assessment and repair.
  • Regular home maintenance and prompt attention to small issues can prevent minor cracks from becoming major problems.
Ceiling Cracks Causes And Solutions

Credit: dailyideabook.com

Common Causes Of Ceiling Cracks

Ceiling cracks are a prevalent issue in homes, ranging from minor cosmetic imperfections to indicators of more significant structural concerns. Understanding the root cause is the first step toward an effective and lasting solution. The materials used in home construction, environmental factors, and the age of the building all play a role in their formation.

Natural Settling And Drying

One of the most frequent culprits behind ceiling cracks is the natural settling and drying of a house. This is especially true for newly constructed homes. As wood framing dries out over time, it shrinks. This shrinkage can cause minute shifts in the building’s structure, leading to stress on the drywall and the joint compound used to finish the seams. These cracks typically appear as fine, hairline fractures, often along the drywall seams or around light fixtures. They are usually not indicative of a serious problem and are considered a normal part of a home’s aging process.

Temperature And Humidity Fluctuations

Buildings are constantly subjected to changes in temperature and humidity. Materials like wood, drywall, and even concrete expand when warm and humid, and contract when cold and dry. This constant cycle of expansion and contraction puts stress on the building’s components. Over time, this repeated stress can cause materials to crack, especially at points where different materials meet or where there are existing weak spots. In attics, extreme temperature swings can also affect the structural integrity of the joists and beams, indirectly causing ceiling stress.

Structural Movement And Foundation Issues

More concerning causes of ceiling cracks involve structural movement, often stemming from issues with the home’s foundation. If a foundation settles unevenly, it can cause significant stress to propagate upwards through the walls and into the ceiling. These cracks are typically larger, wider, and may appear in patterns that indicate a larger problem. Diagonal cracks that run from a corner of a window or door frame upwards towards the ceiling, or stair-step cracks in masonry walls, are often signs of foundation settlement. These types of cracks require immediate professional assessment by a structural engineer or foundation repair specialist.

Water Damage And Leaks

Water damage is another common and potentially serious cause of ceiling cracks. Leaks can originate from various sources:

  • Roof leaks: Damaged shingles, flashing, or ice dams can allow water to penetrate the attic and drip onto the ceiling drywall.
  • Plumbing leaks: Leaky pipes within the ceiling cavity, often above bathrooms or kitchens, can saturate the drywall, causing it to sag and crack.
  • Condensation: In humid environments, condensation can form on pipes or ductwork, leading to moisture buildup.
  • Overflows: Bathtub or sink overflows from an upper floor can seep through to the ceiling below.

Water-damaged drywall becomes soft, weak, and discolored. It may initially sag, forming a bulge, before eventually cracking and even collapsing. Addressing the source of the leak is paramount before any ceiling repairs can be made.

Poor Installation Or Material Defects

Sometimes, cracks are the result of improper installation techniques or defective materials.

  • Drywall seams: If drywall panels are not properly supported, taped, or if the joint compound is applied too thinly or too thickly, cracks can form along the seams as the house settles or experiences minor vibrations.
  • Fasteners: Nails or screws used to attach drywall can sometimes loosen over time, especially if the wood framing shrinks. The slight movement around these fasteners can create small radiating cracks.
  • Material quality: While less common, using low-quality joint compound or drywall that is damaged before installation can contribute to cracking issues.

Types Of Ceiling Cracks And What They Indicate

The appearance and location of a ceiling crack can offer valuable clues about its cause. Distinguishing between minor cosmetic issues and serious structural problems is essential for homeowners to determine the appropriate course of action.

Hairline Cracks

Hairline cracks are the most common type, appearing as thin, superficial lines on the ceiling surface. They are typically less than 1/16th of an inch wide and do not extend through the entire thickness of the drywall.

  • Causes: Usually attributed to the normal settling of a house, minor temperature fluctuations, or the drying of new construction materials.
  • Indication: Generally not a cause for alarm. They are often cosmetic and can be easily repaired.
  • Appearance: Often appear along drywall seams, around light fixtures, or vents.

Spiderweb Cracks

Spiderweb cracks are a series of fine cracks radiating outwards from a central point, resembling a spider’s web.

  • Causes: Often caused by a localized impact or stress point. This could be from something hitting the ceiling, or a fastener (like a nail or screw) that has popped loose and is causing stress around it. In some cases, they can also be an indicator of significant pressure being exerted on the ceiling from above, such as from heavy attic storage or water saturation.
  • Indication: While often superficial, they warrant closer inspection to rule out underlying pressure or impact damage. If they are accompanied by sagging, water stains, or appear in conjunction with larger cracks, they could be part of a more significant issue.

Sagging And Bulging Cracks

When a section of the ceiling appears to sag or bulge downwards, often with a crack running through the lowest point, it’s a more serious concern.

  • Causes: Almost always indicative of water damage. The drywall has become saturated, losing its rigidity and pulling away from the joists. The weight of the absorbed water causes the material to deform.
  • Indication: Urgent attention is required. The source of the water leak must be identified and repaired immediately. The damaged drywall will likely need to be replaced entirely.

Diagonal Or Stair-step Cracks

Cracks that run diagonally across the ceiling, or form a stair-step pattern where they meet wall seams, are often linked to structural issues.

  • Causes: Typically point to foundation settlement or structural shifting within the building’s frame. The uneven movement of the foundation puts immense stress on the entire structure, including the ceiling.
  • Indication: These are serious structural concerns that require professional evaluation by a structural engineer. Ignoring these can lead to more extensive and costly damage over time.

Cracks Along Drywall Seams

Cracks that specifically run along the taped and finished seams between drywall panels are common.

  • Causes: Can be due to inadequate taping during installation, shrinkage of the drywall or framing, or movement at the joint. If the tape is pulling away or bubbling, it often indicates moisture issues or poor adhesion.
  • Indication: Often cosmetic, but if they are widening, accompanied by sagging, or if the tape is visibly failing, it might signal underlying moisture or movement issues.
Ceiling Cracks Causes And Solutions

Credit: www.handysquad.com

Solutions For Ceiling Cracks: From Diy To Professional Repair

The approach to fixing ceiling cracks varies significantly depending on the cause and severity. Minor cosmetic cracks can often be tackled by a handy homeowner, while more substantial issues require professional expertise.

Repairing Hairline And Minor Cracks (diy)

For superficial hairline cracks that are not associated with water damage or structural issues, a straightforward repair process can restore the ceiling’s appearance.

  • Preparation:
  • Clean the area: Wipe down the crack and surrounding area to remove dust and debris.
  • Widen the crack slightly (optional but recommended): Using a putty knife or utility knife, lightly score along the crack. This creates a small V-groove that allows the filler to penetrate better and adhere more strongly.
  • Sand lightly: If there are any loose paint flakes or rough edges, lightly sand the area.
  • Applying Filler:
  • Spackling compound or joint compound: For very fine cracks, a lightweight spackling compound is sufficient. For slightly wider cracks, a pre-mixed joint compound works well.
  • Application: Using a flexible putty knife (a 3-4 inch wide one is ideal), apply the compound generously into the crack, pressing it in to ensure it fills the void.
  • Smooth: Scrape off any excess compound, leaving a smooth, level surface that is flush with the ceiling. You may need to apply a second thin coat after the first has dried if there is any shrinkage.
  • Sanding:
  • Drying time: Allow the compound to dry completely according to the manufacturer’s instructions (this can take several hours).
  • Sanding: Once dry, lightly sand the repaired area with fine-grit sandpaper (120-220 grit) until it is perfectly smooth and level with the surrounding ceiling. Be careful not to oversand, which can create a noticeable depression. Wipe away dust with a damp cloth.
  • Priming and Painting:
  • Prime: Apply a coat of ceiling primer over the repaired area. This seals the compound and ensures the paint adheres evenly.
  • Paint: Once the primer is dry, paint the entire ceiling with your chosen ceiling paint, feathering the edges to blend the new paint with the old. You may need two coats for a seamless finish.

Addressing Water Damage And Leaks

When water damage is the cause, the repair process involves two critical stages: fixing the leak and repairing the ceiling.

  • Identify and Repair the Leak: This is the absolute first priority.
  • Roof leaks: Inspect the attic for wet insulation, water stains on the underside of the roof decking, or visible damage to shingles or flashing. Repair or replace damaged roofing materials.
  • Plumbing leaks: Check pipes in the attic, basement, or wall cavities for drips or corrosion. Tighten fittings, replace damaged sections of pipe, or address faulty seals.
  • Bathroom/kitchen leaks: Inspect grout, caulk, and seals around tubs, showers, sinks, and toilets. Check for leaks in supply lines or drain pipes.
  • Professional Help: For complex plumbing or roofing issues, always call a qualified professional (plumber or roofer).
  • Dry the Area: Ensure the affected ceiling area and any saturated materials (like insulation) are completely dry before proceeding with repairs. This may involve using fans and dehumidifiers for several days. If mold is present, it must be treated and remediated by professionals.
  • Repair the Ceiling:
  • Remove damaged material: Cut away the wet, sagging, or cracked drywall. You may need to replace a large section depending on the extent of the damage.
  • Inspect joists: Check the ceiling joists for rot or damage. Treat or repair as necessary.
  • Install new drywall: Cut and fit a new piece of drywall to replace the removed section. Secure it to the joists with drywall screws.
  • Tape, mud, and sand: Apply drywall tape over the seams, followed by multiple thin coats of joint compound, sanding between each coat.
  • Prime and paint: Once the joint compound is dry and smooth, prime and paint the repaired area to match the rest of the ceiling.

Dealing With Structural Cracks And Foundation Issues

Cracks indicating foundation movement or significant structural stress are the most serious and require expert intervention.

  • Professional Assessment:
  • Structural Engineer: The first step is to hire a structural engineer. They can assess the extent of the structural problem, determine the cause (e.g., soil instability, poor drainage, inadequate support), and recommend the appropriate repair methods.
  • Foundation Repair Specialist: Based on the engineer’s report, a reputable foundation repair company can implement the necessary solutions.
  • Potential Solutions (depending on assessment):
  • Foundation Underpinning: Installing piers or piles to transfer the building’s load to more stable soil layers.
  • Concrete Repair: Injecting epoxy or polyurethane into cracks in the foundation walls or slab.
  • Drainage Improvements: Regrading the soil around the foundation, installing French drains, or improving gutter systems to direct water away from the house.
  • Reinforcement: Adding steel beams or carbon fiber straps to reinforce weakened structural elements.
  • Ceiling Repair Post-Structural Fix:
  • Once the underlying structural issue is resolved and the building has stabilized, the ceiling cracks can be repaired using the methods described for minor cracks (filling, sanding, priming, painting).
  • However, if the structural movement was significant, larger sections of drywall may need to be replaced, and the finishing process might be more extensive to ensure a smooth, seamless repair.

Drywall Seam And Fastener Issues

Cracks specifically along drywall seams or around fasteners often relate to installation quality or material movement.

  • Re-taping seams: If tape is peeling or cracking, carefully remove the old tape and joint compound. Re-tape the seam using drywall tape (paper or fiberglass mesh) and apply multiple thin coats of joint compound, feathering the edges smoothly. Sand and paint as usual.
  • Popped fasteners: If screws or nails have backed out, drive them back in slightly below the surface of the drywall. Apply joint compound over the fastener heads, feathering the edges. Sand and paint once dry. In some cases, it might be necessary to re-secure the drywall to the joists.
  • Using mesh tape: For areas prone to movement, consider using fiberglass mesh tape, which is self-adhesive and can be more flexible than paper tape.
Ceiling Cracks Causes And Solutions

Credit: www.crackedslab.com

Maintaining Your Ceilings To Prevent Future Cracks

Preventive maintenance is key to minimizing the occurrence and severity of ceiling cracks. Regular checks and timely interventions can save homeowners significant cost and hassle down the line.

Regular Inspections

  • Scheduled checks: Make it a habit to inspect your ceilings at least twice a year, perhaps during spring and fall cleaning. Pay close attention to areas prone to issues, such as bathrooms, kitchens, attics, and areas around chimneys or vents.
  • Look for early signs: Be vigilant for any new hairline cracks, slight discoloration, or minor sagging. Addressing these small issues early is far easier and cheaper than waiting for them to worsen.
  • Attic inspections: Regularly check your attic for signs of leaks, moisture, or condensation. Ensure proper ventilation is in place to prevent moisture buildup. Check that insulation isn’t blocking vents.

Managing Moisture And Humidity

  • Ventilation: Ensure bathrooms and kitchens are equipped with working exhaust fans that vent *outside* the house. Run them during and for at least 15-20 minutes after showering or cooking to remove excess moisture.
  • Attic ventilation: Proper attic ventilation (soffit vents, ridge vents, gable vents) is crucial for regulating temperature and preventing moisture buildup, which can lead to condensation and rot.
  • Humidity control: In very humid climates, consider using a dehumidifier in the attic or basement, and ensure your home’s overall humidity levels are kept within a comfortable range (typically 30-50%).
  • Fix leaks promptly: Immediately address any plumbing leaks, roof issues, or condensation problems. Don’t let small drips go unnoticed.

Addressing Temperature Extremes

  • Insulation: Ensure your attic and walls are adequately insulated. Proper insulation helps regulate indoor temperatures, reducing the expansion and contraction cycles that stress building materials.
  • Draft sealing: Seal air leaks around windows, doors, and electrical outlets to prevent drafts and maintain consistent indoor temperatures.

Load Management In Attics

  • Avoid overloading: Be mindful of the weight you store in your attic. Excessive weight can put undue stress on ceiling joists, potentially leading to sagging or cracking. Consult your home’s building plans or a structural engineer if you plan on significant storage or renovations in the attic.
  • Distribute weight: If storing items, distribute the weight evenly across the joists rather than concentrating it in one area.

Professional Maintenance

  • Roof checks: Have your roof inspected periodically by a professional, especially after severe weather events.
  • Gutter cleaning: Keep gutters clean and ensure they are properly directing water away from the foundation.
  • HVAC servicing: Regular maintenance of your heating, ventilation, and air conditioning (HVAC) system can help prevent leaks or condensation issues related to ductwork.

When To Call A Professional

While many minor ceiling cracks can be a DIY fix, knowing when to escalate the issue to a professional is crucial for your home’s safety and integrity.

Signs You Need Professional Help

  • Widespread cracking: If you notice numerous cracks appearing across multiple rooms or ceilings simultaneously.
  • Large or widening cracks: Cracks wider than 1/4 inch, or those that are visibly getting larger over time, often indicate a more serious underlying issue.
  • Sagging or bulging ceilings: Any visible downward bowing of the ceiling material is a strong indicator of water damage or structural stress that needs immediate professional attention.
  • Diagonal or stair-step cracks: These patterns are classic signs of foundation settlement or structural movement.
  • Water stains or active leaks: If you see brown stains, or if water is actively dripping from the ceiling, it signifies a leak that must be professionally diagnosed and repaired before any cosmetic fixes are attempted.
  • Sound issues: If you hear creaking or popping sounds from the ceiling area that seem excessive or new.
  • Lack of confidence: If you are unsure about the cause or the appropriate repair method, it’s always best to consult a professional to avoid making the problem worse.

Types Of Professionals To Contact

  • General Contractor: For general repairs, especially after water damage has been addressed, a contractor can manage the drywall repair, painting, and finishing.
  • Plumber: Essential for diagnosing and repairing leaks originating from plumbing systems.
  • Roofer: Necessary for investigating and fixing leaks originating from the roof.
  • Structural Engineer: The go-to professional for assessing foundation issues, significant structural movement, or any crack that raises concerns about the building’s integrity.
  • Foundation Repair Specialist: Companies specializing in foundation repair implement the solutions recommended by structural engineers.

A proactive approach, coupled with prompt professional intervention when needed, is the most effective strategy for managing ceiling cracks and maintaining a safe, beautiful home.

Frequently Asked Questions

What Is The Difference Between A Cosmetic Crack And A Structural Crack?

Cosmetic cracks are typically fine, hairline fractures that appear on the surface of the paint or drywall finish. They are usually caused by normal settling, minor temperature fluctuations, or the drying of building materials. These cracks do not affect the structural integrity of the house and can often be repaired with simple filling and painting.

Structural cracks, on the other hand, are usually wider, deeper, and may appear in patterns like diagonal lines or stair-steps, particularly where ceilings meet walls or around openings. They often indicate underlying issues such as foundation settlement, water damage compromising structural elements, or significant stress on the building’s frame.

These require professional assessment and repair.

How Quickly Should I Address A Ceiling Crack?

The urgency depends on the type of crack. For hairline cracks that appear dry and stable, you can typically schedule a repair at your convenience. However, any crack associated with water damage (indicated by discoloration, sagging, or active leaks) requires immediate attention. You must first address the source of the leak. Cracks that are wide, deepening, or show diagonal/stair-step patterns should be inspected by a professional structural engineer or foundation specialist as soon as possible, as they can signal serious safety concerns.

Can Minor Ceiling Cracks Be Caused By Vibrations?

Yes, minor vibrations can contribute to the formation or worsening of hairline cracks, especially in drywall seams. Common sources of vibrations include heavy traffic near the home, construction work nearby, or even the operation of large appliances within the home. These vibrations can cause slight movements in the building’s structure, which can stress the drywall and joint compound, leading to superficial cracks, particularly along taped seams where the compound might be less flexible.

Is It Safe To Sleep Under A Ceiling With Cracks?

It is generally safe to sleep under a ceiling with minor, dry hairline cracks, especially if they are not accompanied by sagging or water stains. These are typically cosmetic. However, if the crack is wide, actively widening, accompanied by sagging or bulging, or shows signs of water damage, it is advisable to avoid the area directly underneath until it has been professionally inspected and deemed safe. A sagging ceiling indicates a potential for collapse, which poses a significant safety risk.

How Much Does It Typically Cost To Repair Ceiling Cracks?

The cost of repairing ceiling cracks varies widely based on the cause, size, and method of repair.

  • DIY Repair: For simple hairline cracks, the cost is

Door Frame Separating From Wall

A door frame separating from the wall is a common yet concerning structural issue that can compromise both the aesthetic appeal and the functional integrity of your home. It’s a problem that often starts subtly, perhaps with a small gap appearing near the top or sides of the door jamb, and can escalate into a more significant structural concern if left unaddressed. Understanding the root causes, recognizing the warning signs, and knowing how to approach repairs are crucial for homeowners looking to maintain their property’s value and safety.

This issue isn’t just about a cosmetic flaw; it can signal underlying problems with your home’s foundation, framing, or even moisture damage. Ignoring these signs can lead to more extensive and costly repairs down the line, potentially affecting the stability of the entire wall section.

This comprehensive guide will explore the various reasons why a door frame might start to separate from the wall, detail how to identify the problem, and outline the steps involved in effectively addressing it, ensuring your home remains secure and visually appealing.

Key Takeaways

  • Door frame separation from the wall is a structural concern that can stem from various causes, including foundation settling, moisture damage, improper installation, or loose fasteners.
  • Early detection is key; small gaps, sticking doors, and visible cracks are common warning signs.
  • The severity of the separation dictates the repair approach, ranging from simple re-fastening to more complex structural reinforcement.
  • Moisture issues are a frequent culprit, leading to wood rot and material breakdown, necessitating thorough drying and potential replacement of damaged components.
  • Foundation settlement can cause uneven stress on door frames, leading to separation and requiring professional assessment.
  • Proper door frame installation techniques, including adequate shimming and secure fastening, are vital for long-term stability.
  • Addressing the root cause is as important as the repair itself to prevent recurrence.

Understanding The Causes Of Door Frame Separation

The separation of a door frame from its surrounding wall is rarely a random event. It’s typically a symptom of an underlying issue that is exerting stress or causing material degradation. Identifying the precise cause is the first and most critical step in determining the appropriate repair strategy.

Without addressing the root problem, any fix will likely be temporary.

Foundation Settling And Movement

One of the most common and significant causes of door frame separation is foundation settling. All homes, especially those built on certain soil types or in areas with significant freeze-thaw cycles, experience some degree of foundation movement over time. When the foundation settles unevenly, it puts stress on the entire structure, including the walls and door frames.

  • Uneven Settlement: If one side of the foundation settles more than the other, it can cause the walls to shift and warp. This movement can pull the door frame away from the rough opening it’s secured within.
  • Structural Stress: The weight of the house is distributed through the foundation. Any compromise in this distribution, due to soil erosion, water saturation, or inadequate support, can lead to differential settlement. This stress translates upwards, impacting framing members and subsequently the door frame.
  • Signs to Watch For: Beyond door frame issues, foundation settling can manifest as cracks in drywall, sloping floors, and sticking windows. If you notice these other symptoms concurrently, foundation movement is a strong possibility.

Moisture Damage And Wood Rot

Wood, the primary material for most door frames, is susceptible to moisture. Prolonged exposure to water can lead to swelling, warping, and eventually wood rot, significantly weakening the frame and its connection to the wall.

  • Sources of Moisture: Common sources include leaky plumbing within walls, poorly sealed windows adjacent to the door, roof leaks that allow water to seep down framing, and groundwater intrusion around the foundation. In bathrooms or laundry rooms, high humidity can also contribute over time.
  • Swelling and Warping: When wood absorbs moisture, it expands. As it dries, it may shrink unevenly, leading to warping. This constant cycle of expansion and contraction weakens the wood fibers and can create gaps between the frame and the wall.
  • Wood Rot: Fungal decay (rot) consumes the wood, turning it soft, crumbly, and structurally unsound. Rotted sections of the frame lose their ability to hold nails or screws securely, allowing the frame to pull away from the wall. This is particularly dangerous as it can affect the structural integrity of the door opening.
  • Identifying Rot: Look for spongy or soft wood, discoloration (darkening or white patches), and a musty odor. Probe suspect areas with a screwdriver to check for softness.

Improper Installation And Fastening

Even with a sound foundation and dry materials, a door frame can separate from the wall if it wasn’t installed correctly in the first place. Poor craftsmanship or inadequate fastening are common culprits.

  • Insufficient Fasteners: The frame needs to be securely attached to the wall studs using appropriate nails or screws. If too few fasteners are used, or if they are too short, the frame may not be held firmly in place.
  • Inadequate Shimming: Shims are thin pieces of wood used to ensure the door frame is plumb, level, and square within the rough opening. If shims are missing, incorrectly placed, or not secured properly, the frame can shift over time, creating gaps.
  • Movement During Installation: If the wall structure was still settling or curing when the door frame was installed, or if the frame wasn’t braced properly during installation, it might not have been secured to a stable framing member, leading to future separation.
  • Expansion/Contraction of Building Materials: Over time, building materials naturally expand and contract with temperature and humidity changes. If the frame isn’t allowed some flexibility or isn’t robustly secured, these natural movements can contribute to separation.

Structural Issues In Wall Framing

Sometimes, the problem isn’t directly with the door frame itself but with the underlying wall structure. Issues with the studs, header, or subfloor can indirectly cause the door frame to become dislodged.

  • Loose Studs: The studs are the vertical framing members that provide support for the walls. If studs around the door opening become loose, warped, or damaged, they can no longer provide a stable anchor point for the door frame.
  • Header Problems: The header is the horizontal beam above the door that supports the weight of the wall and roof above. If the header sags, cracks, or is improperly installed, it can cause the entire door opening to shift, leading to frame separation.
  • Subfloor Issues: In some cases, problems with the subfloor, especially if it’s rotting or has become detached from the floor joists, can affect the stability of the wall framing above, indirectly impacting the door frame.

Identifying The Signs Of A Separating Door Frame

Recognizing the early warning signs of a door frame separating from the wall is crucial for timely and less invasive repairs. These signs can range from subtle visual cues to functional problems with the door itself. Proactive inspection can save significant time and money.

Visual Cues And Gaps

The most obvious indicator is the appearance of visible gaps between the door frame (jamb) and the surrounding wall surface (drywall or plaster).

  • Location of Gaps: These gaps often appear along the top of the frame, above the header, or down the sides, near the vertical jambs. They might be thin lines initially, widening over time.
  • Cracks in Paint or Drywall: As the frame pulls away, the paint and caulk sealing the gap will crack. You might also see hairline cracks extending into the drywall around the door frame, indicating stress on the wall surface.
  • Uneven Reveal: The “reveal” is the consistent spacing between the door slab and the frame when the door is closed. If this spacing becomes uneven, wider on one side than the other, or wider at the top than the bottom, it suggests the frame is no longer square and plumb within the opening.

Door Functionality Issues

A separating door frame often directly impacts how the door operates, leading to functional problems that are hard to ignore.

  • Sticking or Binding Doors: As the frame warps or moves out of square, it can bind against the door slab. You might notice the door becoming difficult to open or close, requiring extra force. It might scrape against the top or side of the frame.
  • Difficulty Latching or Locking: If the frame shifts significantly, the strike plate (the metal plate on the jamb where the latch bolt enters) may no longer align with the door’s latch. This makes it difficult or impossible to close the door fully, latch it, or lock it securely.
  • Visible Sagging: In severe cases, the entire door frame, especially the header portion, might appear to sag downwards, pulling away from the wall and making the door significantly out of level.

Loose Trim And Molding

The trim or molding (casing) that surrounds the door frame is typically attached to the frame itself. As the frame separates from the wall, the trim may loosen or pull away.

  • Gaps Behind Trim: You might notice small gaps appearing between the trim and the wall surface, indicating that the frame behind it is no longer held tightly against the studs.
  • Loose or Wobbly Trim: The trim itself might feel loose or wobbly when touched, as its connection to the wall structure has been compromised by the frame’s movement.

Sound And Drafts

Separation can also lead to changes in sound transmission and air leakage.

  • Increased Sound Transmission: Gaps in the frame create pathways for sound to travel more easily between rooms or from the outside. You might notice increased noise levels from adjacent areas.
  • Drafts: Air can leak through the gaps around the frame, leading to noticeable drafts, especially during windy conditions. This can impact energy efficiency and comfort.

Repairing A Door Frame Separating From The Wall

The approach to repairing a door frame separating from the wall depends heavily on the cause and the severity of the separation. Minor issues might be fixable with basic DIY skills, while significant structural problems will require professional expertise.

Addressing Minor Gaps And Loose Trim

For small, cosmetic gaps where the underlying structure is still sound, a simpler repair might suffice.

  • Cleaning and Re-caulking: Thoroughly clean the gap, removing any loose paint, caulk, or debris. Apply a high-quality paintable caulk to fill the gap, smoothing it with a damp finger or tool for a clean finish. Once dry, repaint to match the surrounding wall.
  • Re-securing Trim: If the trim has pulled away slightly, you may be able to re-secure it by driving finish nails through the trim into the underlying frame or shims. Be careful not to split the wood. Use a nail set to sink the nail heads slightly below the surface, then fill the holes with wood filler or putty before painting.

Re-fastening And Reinforcing The Frame

If the frame has pulled away due to loose fasteners or minor settling, re-securing it might be the solution.

  • Locate Studs and Shim Locations: Identify the wall studs and the locations of the original shims behind the door frame. You can often do this by gently tapping along the wall or using a stud finder.
  • Drill Pilot Holes: To prevent splitting the wood, drill pilot holes through the door jamb and into the studs or shims.
  • Drive Long Screws: Use long, sturdy screws (e.g., 2.5 to 3-inch wood screws) to securely re-fasten the jamb to the framing members. Drive the screws through the jamb and into the studs. If shims are present and provide a solid connection, you can screw through the jamb and shims into the studs. Ensure the screws are long enough to get a good purchase on the framing.
  • Check for Plumb and Level: As you drive screws, periodically check that the frame remains plumb and level. You may need to adjust the frame slightly before fully tightening the screws.
  • Countersink and Conceal: Countersink the screw heads slightly below the wood surface. Fill the holes with wood filler, sand smooth once dry, and then caulk and paint to conceal the repairs.

Repairing Moisture Damage And Wood Rot

Moisture-related issues require a more involved approach, focusing on eliminating the source of water and replacing damaged materials.

  • Identify and Fix the Moisture Source: This is the most critical step. Whether it’s a leaky pipe, faulty window seal, or roof issue, the source of water must be found and repaired permanently.
  • Dry the Area Thoroughly: Ensure the affected wood and surrounding areas are completely dry before proceeding. This may involve using fans, dehumidifiers, or allowing ample time for natural drying.
  • Remove Damaged Wood: Carefully cut away and remove all rotted or severely damaged sections of the door frame and any affected shims or sub-framing.
  • Replace Damaged Components: Replace the removed sections with new, pressure-treated wood or a suitable wood substitute. Ensure the new pieces are properly shaped and fitted.
  • Treat Remaining Wood: For areas that were damp but not rotted, consider applying a wood hardener and sealant to improve their durability and resistance to future moisture.
  • Reassemble and Secure: Once new wood is in place, reassemble the frame, ensuring it is properly shimmed, plumb, level, and securely fastened to the wall studs as described previously.
  • Caulk and Seal: Meticulously caulk and seal all exterior joints and potential entry points for water to prevent future moisture intrusion.

Addressing Foundation Issues

If the door frame separation is due to foundation settling, the repair of the frame itself is often secondary to addressing the underlying foundation problem.

  • Professional Assessment: It is highly recommended to have a structural engineer or a reputable foundation repair specialist assess the situation. They can determine the cause and extent of the foundation movement.
  • Foundation Repair: Depending on the diagnosis, foundation repair might involve underpinning, mudjacking, epoxy injections, or other stabilization techniques.
  • Frame Realignment and Repair: Once the foundation is stabilized, the door frame may need to be removed, repaired, or replaced, and then reinstalled correctly. This often involves carefully trimming the opening, ensuring the frame is plumb and level, and securely fastening it to the now-stable framing. Sometimes, the wall itself may require minor structural repairs to accommodate the stabilized foundation.

When To Call A Professional

While minor cosmetic fixes can often be handled by a DIYer, several situations warrant calling in a professional contractor or structural engineer:

  • Significant Gaps or Sagging: If the gaps are large (more than 1/4 inch) or the frame is visibly sagging.
  • Suspected Foundation Issues: Any indication of foundation movement (cracked walls, uneven floors) alongside frame separation.
  • Extensive Wood Rot: If rot has spread significantly, compromising the structural integrity of the frame or surrounding studs.
  • Lack of Confidence or Experience: If you are uncomfortable with structural repairs, lack the necessary tools, or are unsure about the best approach.
  • Recurring Problems: If the issue has been repaired before and is happening again, it suggests a deeper, unresolved cause.

A professional can accurately diagnose the root cause, perform the necessary structural repairs, and ensure the door frame is correctly installed and secured, providing a lasting solution.

Door Frame Separating From Wall

Credit: leveledconcrete.com

Comparing Repair Methods And Materials

Choosing the right repair method and materials is crucial for a durable fix. The decision often hinges on the cause of the separation, the extent of the damage, and budget considerations. Here’s a look at common approaches and materials.

Fasteners: Nails Vs. Screws

The choice of fastener significantly impacts the strength and longevity of the repair.

FeatureFinish NailsWood Screws
**Holding Power**Moderate; relies on friction and wood embedding.High; threads provide superior grip and resistance to pulling out.
**Installation**Faster, requires a hammer or nail gun.Slower, requires a drill/driver.
**Removability**Difficult to remove without causing damage.Relatively easy to remove and re-tighten.
**Concealment**Easy to conceal with putty/filler.Requires deeper countersinking for effective concealment.
**Best Use**Securing trim, temporary holds.**Securing door frames to studs**, structural repairs.

Recommendation: For re-fastening a door frame to wall studs, long wood screws are strongly recommended due to their superior holding power, which is essential for preventing future separation. Finish nails are better suited for attaching trim *to* the frame.

Wood Types For Replacement

When replacing rotted or damaged sections of a door frame, the type of wood matters.

Wood TypePropertiesBest For
**Pine (Untreated)**Readily available, inexpensive, easy to work with. Prone to rot and insect damage if not treated or sealed.Interior trim, temporary repairs in dry areas.
**Fir/Spruce**Stronger and more dimensionally stable than pine. Still susceptible to rot without protection.General framing, door jambs in moderately protected areas.
**Hardwoods (Oak, Maple)**Very durable, dense, and resistant to wear. More expensive and harder to work with.High-traffic areas, premium door frames where durability is paramount.
**Pressure-Treated Lumber**Chemically treated to resist rot, decay, and insects. Can be heavier and may have a greenish tint (though newer treatments are clearer).Areas prone to moisture, exterior frames, sub-framing near potential water sources. **Essential for rot repair.**
**Composite/PVC**Impervious to moisture and rot, dimensionally stable. Can be more expensive, may require special adhesives/fasteners.Areas with chronic moisture issues, replacing severely rotted sections where moisture resistance is key.

Recommendation: For replacing sections affected by rot, pressure-treated lumber is the preferred choice for its inherent resistance to decay and pests. For interior jambs in dry areas, kiln-dried pine or fir is acceptable if properly sealed.

Sealants And Fillers

Proper sealing and filling are critical for both aesthetics and preventing future moisture ingress.

  • Caulk: Use 100% silicone caulk for areas requiring high flexibility and water resistance (e.g., around exterior trim). For interior gaps between trim and drywall or frame, paintable acrylic latex caulk is suitable. Ensure it’s applied smoothly and tools correctly.
  • Wood Filler/Putty: For filling nail holes or minor imperfections in wood, stainable wood filler is ideal for natural wood finishes. For painted surfaces, epoxy-based wood fillers offer superior durability and water resistance, especially for larger repairs or rot-damaged areas.
  • Epoxy Consolidants: These liquid resins penetrate porous, weakened wood and harden it, effectively strengthening areas that have been affected by moisture but not fully rotted. They act as a primer and stabilizer before applying wood filler.

Preventing Future Door Frame Separation

Once a door frame has been repaired, taking preventative measures is key to avoiding the problem from recurring. Prevention often involves diligent maintenance and addressing potential issues before they escalate.

Regular Inspections

Make it a habit to periodically inspect your door frames and surrounding walls. Look for:

  • New cracks in paint or drywall.
  • Changes in door operation (sticking, difficulty latching).
  • Visible gaps forming between the frame and the wall.
  • Signs of moisture around windows, doors, or in basements/crawl spaces.

Early detection allows for minor, less costly interventions.

Managing Moisture

Controlling moisture is paramount in preventing wood rot and frame degradation.

  • Seal Exterior Entry Points: Ensure weather stripping around doors is intact and that caulking around frames and windows is sound. Reapply as needed.
  • Proper Drainage: Ensure gutters and downspouts are clear and directing water away from the foundation. Check that grading around your home slopes away from the foundation walls.
  • Ventilation: Ensure adequate ventilation in bathrooms, kitchens, and basements to prevent moisture buildup from condensation and humidity. Use exhaust fans.
  • Address Leaks Promptly: Fix any plumbing leaks or roof leaks immediately. Even small drips can cause significant damage over time.

Maintaining Structural Integrity

  • Monitor Foundation: Be aware of any signs of foundation settlement. If you suspect issues, consult a professional sooner rather than later.
  • Avoid Overloading: Be mindful of excessive weight placed on walls or floors, which can contribute to structural stress.

Quality Installation Practices

When installing new doors or frames:

  • Use Proper Fasteners: Ensure the frame is securely fastened to solid framing members (studs, headers) using appropriate length and type of screws.
  • Correct Shimming: Use shims correctly to ensure the frame is plumb, level, and square, and secure them properly.
  • Seal Appropriately: Caulk and seal all necessary joints to prevent moisture intrusion.

Frequently Asked Questions

Ryobi Pressure Washer Wont Start

Ryobi Pressure Washer Wont Start

A Ryobi pressure washer is a powerful tool for tackling tough cleaning jobs around your home, from dirty driveways and decks to siding and outdoor furniture. However, like any piece of machinery, it can sometimes refuse to start, leaving you frustrated and your cleaning tasks incomplete. This guide will walk you through the most common reasons why your Ryobi pressure washer might not be starting and provide step-by-step solutions to get it up and running again.

The troubleshooting process for a non-starting pressure washer typically involves checking fuel, air, and spark systems, as well as ensuring proper operational procedures are followed. Understanding the basic mechanics of your pressure washer, whether it’s gas-powered or electric, is crucial.

For gas models, this often means looking at the engine’s components, while electric models require checking power sources and electrical connections. By systematically addressing potential issues, you can often resolve the problem yourself without needing professional assistance, saving you time and money.

Key Takeaways

  • Fuel Issues: Ensure you are using fresh gasoline, the correct fuel-to-oil ratio for 2-stroke engines, and that the fuel line and filter are clear.
  • Air Intake: Check that the air filter is clean and unobstructed to allow sufficient airflow to the engine.
  • Spark Plug: A dirty, fouled, or improperly gapped spark plug is a frequent culprit for no-start conditions.
  • Water Supply & Pressure: Verify the water source is adequate, the garden hose is connected securely, and the unloader valve is functioning correctly.
  • Safety Features: Confirm that safety mechanisms, such as the trigger lock and low oil shutdown (if applicable), are not preventing startup.
  • Carburetor Problems: A clogged carburetor is a common issue, especially after long periods of disuse.
  • Prime and Choke: Understand the correct procedure for priming and using the choke for cold starts.
Ryobi Pressure Washer Wont Start

Credit: www.youtube.com

Common Ryobi Pressure Washer Starting Problems And Solutions

When your Ryobi pressure washer refuses to fire up, it can be a perplexing issue. The good news is that most starting problems stem from a few key areas. We’ll break down these common culprits and provide clear, actionable steps to diagnose and fix them.

Fuel System Troubleshooting

The engine needs a proper mixture of fuel and air to combust. If any part of the fuel delivery system is compromised, your pressure washer won’t start.

Using Fresh And Correct Fuel

Gasoline degrades over time, especially when stored for extended periods. Stale fuel can gum up the carburetor and prevent the engine from running.

  • Use Fresh Gasoline: Always use gasoline that is less than 30 days old. If you suspect the fuel is stale, drain the tank and refill it with fresh gasoline.
  • Fuel Stabilizer: For longer storage, use a fuel stabilizer like STA-BIL to prevent degradation. This is a crucial preventative measure.
  • Ethanol Content: Be mindful of ethanol content in gasoline. Many small engines perform best with ethanol-free gasoline or a blend with no more than 10% ethanol (E10). High ethanol blends can damage fuel lines and internal engine components over time. Consult your Ryobi manual for specific recommendations.
  • 2-Stroke vs. 4-Stroke: Ryobi offers both 2-stroke and 4-stroke engines on their pressure washers. Crucially, 2-stroke engines require a specific fuel-to-oil mixture. Using straight gasoline in a 2-stroke engine will cause severe engine damage. Always use a high-quality 2-stroke oil mixed at the ratio specified in your owner’s manual (commonly 40:1 or 50:1).

Checking The Fuel Tank And Lines

A blocked fuel path will starve the engine.

  • Fuel Tank Vent: Ensure the fuel cap vent is not blocked. A blocked vent can create a vacuum in the tank, preventing fuel from flowing.
  • Fuel Filter: Locate the fuel filter, usually found where the fuel line exits the tank. If it appears dirty or clogged, replace it. This is a small, inexpensive part that can prevent many starting issues.
  • Fuel Lines: Inspect the fuel lines for kinks, cracks, or blockages. Disconnect the fuel line from the carburetor (have a rag ready for spills) and ensure fuel flows freely from the tank when the valve is open. If no fuel flows, the issue could be a blocked fuel tank outlet or a faulty fuel shut-off valve.

Carburetor Issues

The carburetor precisely mixes air and fuel. It’s a common failure point, especially if the pressure washer has been stored with old fuel in it.

  • Clogged Jets: Over time, fuel can leave deposits that clog the tiny jets inside the carburetor. This is the most frequent cause of a no-start condition after storage.
  • Cleaning the Carburetor: For minor clogs, you might try a carburetor cleaner spray. For more severe clogs, the carburetor may need to be removed, disassembled, cleaned thoroughly (often with compressed air and specialized tools), and reassembled. If you’re not comfortable with this, consider taking it to a service center.
  • Idle Speed Adjustment: While less likely to prevent starting altogether, an improperly adjusted idle screw can cause rough running or stalling.

Air Intake System

The engine needs air to mix with fuel for combustion. A restricted airflow will prevent it from starting.

Air Filter Maintenance

The air filter protects the engine from dirt and debris. A clogged filter restricts airflow.

  • Inspection: Remove the air filter cover and inspect the air filter. If it’s visibly dirty, clogged with debris, or oily, it needs cleaning or replacement.
  • Cleaning: Foam air filters can often be washed with soap and water, then dried thoroughly before reinstallation. Paper filters usually need to be replaced if dirty.
  • Operation: Never run the pressure washer without an air filter, as this can allow damaging debris into the engine.

Ignition System Problems

Even with the correct fuel and air mixture, the engine won’t start if it doesn’t have a spark.

Spark Plug Issues

The spark plug ignites the fuel-air mixture. A faulty spark plug is a very common reason for a gas engine not starting.

  • Removal and Inspection: Carefully remove the spark plug using a spark plug wrench. Inspect its condition. Look for signs of fouling (black, sooty deposits), oiliness, or damage to the electrode.
  • Cleaning and Gapping: If the plug is fouled, you can try cleaning it with a wire brush and carburetor cleaner. Ensure the electrode gap is set to the manufacturer’s specification (check your manual). You can measure this with a feeler gauge.
  • Replacement: Spark plugs are inexpensive. If in doubt, or if cleaning doesn’t help, replace the spark plug with a new one of the correct type specified for your Ryobi model. This is often the easiest and quickest fix for starting problems.
  • Testing for Spark: To test if the ignition system is producing a spark, reconnect the spark plug wire to the plug, but leave the plug itself grounded against the engine block (use insulated pliers to hold it). Have someone pull the starter rope. You should see a strong, blue spark jump across the electrode. If the spark is weak, yellow, or non-existent, the problem could be the spark plug, ignition coil, or a faulty kill switch.

Ignition Coil And Kill Switch

The ignition coil generates the high voltage needed for the spark plug. The kill switch, often integrated into the engine housing or a separate wire, grounds the ignition system to stop the engine.

  • Kill Switch: Ensure the kill switch is in the “run” or “on” position. Sometimes, a loose wire from the kill switch can cause intermittent spark issues or prevent starting. Trace the kill switch wire back to the ignition coil; if it’s damaged or disconnected, it could be the problem.
  • Ignition Coil: If you have good spark from the plug and are sure the kill switch is functional, a faulty ignition coil might be the issue, though this is less common than spark plug problems.

Water System And Pressure Issues

While not directly related to the engine *starting*, issues with the water supply or pressure can sometimes mimic starting problems or prevent the engine from running smoothly once it does fire up.

Water Supply

The pressure washer needs a consistent and adequate water supply to operate.

  • Source: Ensure you are connected to a reliable water source, such as a garden spigot.
  • Hose Connection: Make sure the garden hose is securely connected to both the spigot and the pressure washer’s inlet. A loose connection can lead to low water flow.
  • Water Flow Rate: Ryobi pressure washers require a minimum water flow rate to prevent overheating and damage. Check your manual for the required GPM (gallons per minute). If your water source has low pressure or flow, the machine may not start or may run poorly. You might need a larger diameter garden hose (e.g., 5/8″ or 3/4″) for optimal flow.
  • Intake Filter: Some models have a filter screen at the water inlet. Ensure this is clean and free of debris.

Unloader Valve And Pressure Issues

The unloader valve regulates water pressure and flow.

  • Stuck Unloader Valve: If the unloader valve is stuck or malfunctioning, it can prevent water from circulating properly, potentially causing the engine to stall or not start. This is more common after the machine has been used.
  • Thermal Relief Valve: Many Ryobi pressure washers have a thermal relief valve that opens to release hot water and prevent overheating. If this valve is faulty, it can cause a loss of pressure and potentially affect starting.

Operational Procedures And Safety Features

Sometimes, the issue isn’t a mechanical fault but a misunderstanding of how to operate the machine or a safety feature preventing startup.

Priming The Pump

Gasoline engines require a specific procedure to start, especially when cold.

  • Priming Bulb: Many Ryobi engines have a primer bulb. Press the primer bulb 3-5 times until you see fuel moving within it. This draws fuel into the carburetor.
  • Choke Operation: For cold starts, the choke should be in the “choke” or “closed” position. This enriches the fuel-air mixture. Once the engine starts, gradually move the choke to the “run” or “open” position as the engine warms up. Never use the choke for a hot restart; the engine is already warm and will flood.
  • Throttle Setting: Ensure the throttle is set to the “start” or “fast” position as recommended in your manual.

Safety Interlocks

Ryobi pressure washers are equipped with safety features to protect the user and the machine.

  • Trigger Lock: The trigger lock mechanism on the spray gun must be engaged when not actively spraying. If the trigger is not fully released or the lock is engaged improperly, it might prevent the engine from starting or running. Ensure the trigger is relaxed.
  • Low Oil Shutdown (4-Stroke Engines): Some 4-stroke Ryobi engines have a low oil sensor. If the oil level is too low, this sensor will prevent the engine from starting. Check the oil level and add the correct type of oil if necessary. Refer to your manual for the correct oil type and capacity.
  • Tip Holder/Nozzle: While unlikely to prevent starting, ensure that no nozzle is stuck in the spray gun, which could restrict water flow and indirectly affect engine operation.

Engine-specific Problems

Beyond the common issues, certain engine problems can prevent starting.

Flooded Engine

A flooded engine occurs when too much fuel enters the combustion chamber, preventing ignition. This often happens if the choke is left on too long, or if the primer bulb is overused.

  • Symptoms: You might smell raw gasoline. The engine may sputter but not fire, or it might not crank over at all.
  • Fixing a Flooded Engine:
  • Turn the choke to the “run” or “open” position.
  • Move the throttle to the fastest setting.
  • Pull the starter rope several times (5-10) to clear excess fuel.
  • Attempt to start the engine again. If it starts, immediately move the choke to the “run” position if it was partially closed.
  • If it still doesn’t start, you may need to remove the spark plug, dry it, and pull the starter rope a few more times to help ventilate the cylinder before reinserting the dry spark plug and trying again.

Internal Engine Damage

In rare cases, the engine itself may have internal damage, such as a seized piston or damaged valves, which would prevent it from starting. This is usually the result of severe lack of maintenance, improper fuel use (especially in 2-stroke engines), or catastrophic failure.

If you suspect internal engine damage, professional repair is likely required.

Ryobi Pressure Washer Wont Start

Credit: www.allpartsinc.com

Troubleshooting Table: Ryobi Pressure Washer Won’t Start

Here’s a quick reference table to help you diagnose common starting issues.

Symptom Possible Cause Action to Take
Engine Cranks But Won’t Fire Stale Fuel Drain and refill with fresh gasoline. Add fuel stabilizer.
Clogged Air Filter Clean or replace the air filter.
Faulty Spark Plug Remove, clean, gap, or replace the spark plug. Test for spark.
Engine Won’t Crank Low Oil Level (4-stroke) Check oil level and add correct oil if low.
Safety Feature Engaged Ensure trigger lock is disengaged, kill switch is ‘on’.
Engine Starts Then Stalls Clogged Carburetor Clean carburetor jets or consider professional cleaning/rebuild.
Insufficient Water Supply Ensure adequate water flow and pressure. Check inlet filter.
Choke Not Adjusted Properly Gradually move choke to ‘run’ position as engine warms.
Engine Smells of Gas Flooded Engine Turn choke to ‘run’, throttle to fast, pull starter rope multiple times.
Carburetor Leak/Overflow Inspect carburetor for damage or faulty float.

Maintenance Tips To Prevent Starting Issues

Preventative maintenance is key to ensuring your Ryobi pressure washer starts reliably every time you need it.

Regular Cleaning

  • Air Filter: Clean or replace the air filter regularly, especially if you operate in dusty conditions. A dirty air filter is one of the most common causes of poor performance and starting problems.
  • Spark Arrestor Screen: Some Ryobi engines have a spark arrestor screen in the muffler. This can become clogged with carbon deposits. Check and clean it periodically according to your manual’s instructions.
  • Exterior: Keep the exterior of the pressure washer clean. Dirt and debris can clog cooling fins or get into engine components.

Fuel Management

  • Use Fresh Fuel: As mentioned, always use fresh gasoline and store it properly.
  • Fuel Stabilizer: Use a fuel stabilizer, especially if the pressure washer will be stored for more than a month. This is arguably the single most important preventative measure for gas engines.
  • Drain Fuel for Storage: For long-term storage (over 3-6 months), it’s best to either use a fuel stabilizer and run the engine for a few minutes to circulate it through the system, or to drain the fuel tank and carburetor completely. To drain the carburetor, run the engine until it stops from lack of fuel, or disconnect the fuel line and let it drain.

Oil Checks (4-stroke Engines)

  • Regular Checks: For 4-stroke engines, check the oil level before each use. Low oil levels can trigger the safety shutoff.
  • Oil Changes: Change the oil according to the manufacturer’s recommended intervals (usually annually or after a certain number of operating hours).

Seasonal Maintenance

  • Pre-Season Check: Before the start of the pressure washing season, give your machine a thorough check: fresh fuel, clean air filter, good spark plug, and check all fluid levels.
  • Post-Season Storage: Properly prepare your pressure washer for winter storage. This typically involves draining fuel or using a stabilizer, cleaning the unit, and storing it in a dry, protected location.
Ryobi Pressure Washer Wont Start

Credit: www.youtube.com

Understanding Different Ryobi Pressure Washer Models

Ryobi offers a range of pressure washers, from compact electric models to powerful gas-powered units. The troubleshooting steps can vary slightly.

Electric Pressure Washers

Electric models are generally simpler and have fewer starting issues related to fuel or ignition.

  • Power Source: Ensure the unit is plugged into a properly grounded outlet with an appropriate gauge extension cord (if needed). Check the GFCI (Ground Fault Circuit Interrupter) on the outlet or extension cord; it may have tripped.
  • Circuit Breaker: Check your home’s circuit breaker; it may have tripped if the pressure washer drew too much power.
  • Hose Connections: Ensure both the water inlet and high-pressure outlet hoses are securely connected. Some electric models have a “water flow sensor” that prevents startup if water isn’t flowing, protecting the pump.
  • Overheating: Some electric models have thermal overload protection that will shut the unit down if it overheats. Allow it to cool down before attempting to restart.

Gas-powered Pressure Washers

These models require more maintenance and have more potential starting points for issues, as detailed extensively in the previous sections. Key differences to note are:

  • Engine Type: Be aware if you have a 2-stroke or 4-stroke engine, as this dictates fuel mixture requirements.
  • Carburetor: Gas engines are more prone to carburetor issues due to fuel gumming.
  • Oil Level: 4-stroke engines require regular oil checks.

When To Seek Professional Help

While most Ryobi pressure washer starting problems can be resolved with basic troubleshooting, there are times when professional assistance is necessary.

  • Persistent Issues: If you’ve gone through all the troubleshooting steps and the pressure washer still won’t start, it may indicate a more complex internal problem.
  • Internal Engine Damage: If you suspect internal engine damage (e.g., strange noises during attempted startup, inability to pull the starter cord, visible damage), do not attempt further repairs yourself.
  • Carburetor Rebuild: While some users can rebuild a carburetor, it requires specific tools and knowledge. If you are uncomfortable with this task, a small engine repair shop can handle it.
  • Ignition System Issues: If you’ve tested the spark plug and confirmed it’s good, but still have no spark, the issue might be with the ignition coil or other electrical components that require specialized diagnosis.

A qualified small engine mechanic or an authorized Ryobi service center can diagnose and repair more complex issues, ensuring your pressure washer is running safely and efficiently.

Frequently Asked Questions

Why Does My Ryobi Pressure Washer Start Then Immediately Die?

This is often caused by a fueling issue or an improper choke setting. If the engine starts but dies quickly, it means it’s getting some fuel and spark, but not enough to sustain operation. Check that you are using fresh fuel and that the air filter is clean. If you just started a cold engine, ensure you are gradually moving the choke from the “closed” to the “open” (run) position as the engine warms up. If you’re trying to restart a warm engine, ensure the choke is fully in the “run” position. A partially clogged carburetor can also cause this symptom.

My Ryobi Pressure Washer Won’t Start After Sitting All Winter. What Should I Do?

The most common reason for this is stale fuel. Gasoline degrades over time and can turn into a gummy varnish that clogs the fuel system, especially the carburetor.

  • Drain the old fuel from the tank and carburetor.
  • Refill with fresh gasoline.
  • Add a fuel stabilizer to the new fuel.
  • Clean or replace the air filter.
  • Check and clean/gap the spark plug.
  • Follow the correct priming and choke procedure for starting.

Is It Okay To Use Ethanol-free Gasoline In My Ryobi Pressure Washer?

Yes, it is generally recommended, especially if your Ryobi model’s manual advises against high ethanol blends. Ethanol can attract moisture and degrade rubber and plastic components in the fuel system over time. Ethanol-free gasoline is often more stable and better for small engines. Always consult your specific Ryobi owner’s manual for fuel recommendations.

How Do I Know If My Spark Plug Is Bad?

You can tell if a spark plug is bad by visual inspection and testing for spark.

  • Visual Inspection: Look for black, sooty deposits (fouling), oiliness, or physical damage to the electrode. If the porcelain insulator is cracked, it’s definitely bad.
  • Testing for Spark: Remove the spark plug, reconnect the wire, and ground the plug against the engine block. Pull the starter cord and look for a strong, blue spark across the electrode. A weak, yellow spark or no spark at all indicates a problem with the