Ikea Kitchen Cabinet Installation Cost

Ikea Kitchen Cabinet Installation Cost

The allure of a beautiful, functional kitchen is undeniable. For many, IKEA represents the perfect blend of Scandinavian design, affordability, and DIY potential. While the allure of assembling your own cabinets is strong, the reality for many homeowners is that IKEA kitchen cabinet installation is a significant undertaking. Understanding the cost of IKEA kitchen cabinet installation is crucial for budgeting and setting realistic expectations. This cost isn’t just about the price of the cabinets themselves; it encompasses professional labor, potential modifications, and the overall complexity of your kitchen layout.

When contemplating a kitchen renovation, the IKEA kitchen system, known as SEKTION, offers a modular and customizable solution. However, the decision to tackle the installation yourself or hire professionals can dramatically impact your project’s final cost. Professional installation, while adding to the overall expense, can save you considerable time, frustration, and potential costly mistakes. This article will break down the various factors influencing IKEA kitchen cabinet installation costs, providing a comprehensive guide to help you budget effectively for your dream kitchen.

Key Takeaways

  • The average cost for professional IKEA kitchen cabinet installation typically ranges from $150 to $250 per linear foot, but can vary significantly based on complexity.
  • DIY installation can save on labor costs but requires significant time, tools, and skill, with potential for costly errors.
  • Cabinet assembly is a separate cost from installation, often done by the homeowner or a hired assembler.
  • Factors influencing cost include kitchen size and layout, cabinet complexity, type of installation (e.g., standard, custom), additional services (electrical, plumbing), and regional labor rates.
  • Budgeting an additional 10-20% for unforeseen issues and materials is highly recommended.
  • IKEA’s own installation service provides a baseline cost but may not cover all custom needs or complex situations.
Ikea Kitchen Cabinet Installation Cost

Credit: www.airtasker.com

Understanding The Ikea Kitchen System (sektion)

The IKEA SEKTION system is the foundation of their kitchen offerings, replacing the older AKURUM system. SEKTION is designed for maximum flexibility, allowing users to create custom configurations using a wide array of cabinet boxes, drawers, doors, and interior organizers. This modularity is a key selling point, but it also means that the installation process can be more intricate than with pre-assembled cabinets.

Cabinet Box Assembly

Before installation can even begin, the cabinet boxes need to be assembled. This involves connecting the sides, top, bottom, and back panels. While IKEA provides detailed instructions, this step alone can be time-consuming, especially for a large kitchen. The cost here is primarily your time and effort if you choose to do it yourself. If you opt for an assembly service, expect to pay anywhere from $30 to $75 per cabinet box, depending on the size and complexity. This is a crucial distinction from the actual *installation* cost.

Wall And Base Cabinet Installation

The core of the installation process involves securely mounting the assembled cabinet boxes to the walls and ensuring they are level and plumb. Base cabinets sit on the floor and are typically secured to the wall studs. Wall cabinets are hung from the wall, requiring sturdy support and precise alignment. This is where the majority of the professional labor costs are incurred.

Drawer And Door Installation

Once the cabinet boxes are in place, the drawers and doors are attached. This involves installing drawer slides, hinges, and then carefully aligning the doors and drawer fronts to achieve a seamless look. This step requires precision to ensure even gaps and proper functionality. IKEA’s hinges are generally adjustable, allowing for fine-tuning.

Ikea Kitchen Cabinet Installation Cost

Credit: www.youtube.com

Factors Influencing Ikea Kitchen Cabinet Installation Cost

The price tag for IKEA kitchen cabinet installation is not a fixed number. It’s a dynamic figure influenced by several key variables. Understanding these will help you get more accurate quotes and budget more effectively.

Kitchen Size And Layout

This is arguably the most significant factor. A larger kitchen with more cabinets and longer runs of countertops will naturally require more labor and time to install. The complexity of the layout also plays a role. For example:

  • Galley kitchens might have simpler installation paths.
  • L-shaped or U-shaped kitchens can present more corner challenges and require more precise measurements and cuts.
  • Kitchens with islands add another layer of complexity, involving not just cabinet installation but potentially plumbing or electrical work for sinks or cooktops.

The amount of linear footage of cabinetry is a common metric used by installers to estimate costs.

Cabinet Complexity And Customization

While SEKTION is modular, the degree of customization can affect installation time.

  • Standard cabinet configurations are generally more straightforward to install.
  • Custom additions, such as specialized corner solutions (e.g., carousel or magic corner units), pull-out pantries, or integrated appliance cabinets, require more intricate work and potentially custom cutting or fitting.
  • The number of drawers versus doors can also impact the time, as drawers often involve more precise slide installation.

Type Of Installation Service

You have several options for who installs your IKEA cabinets, each with a different cost structure.

Diy Installation

Pros:

  • Significant cost savings on labor.
  • Complete control over the process.
  • Sense of accomplishment.

Cons:

  • Time-consuming and physically demanding.
  • Requires a good set of tools (which may need to be purchased or rented).
  • High risk of errors leading to costly repairs or rework.
  • May void warranties if not installed to IKEA’s specifications.

The “cost” here is your time, effort, and potential for mistakes. For a basic kitchen, a DIYer might spend 40-80 hours.

Hiring Independent Installers

This is a popular option, often more affordable than IKEA’s own service or larger contracting companies.

Pros:

  • Potentially lower cost than IKEA’s service.
  • Often more flexible scheduling.
  • Installers may have specific IKEA experience.

Cons:

  • Varying levels of experience and quality.
  • Requires thorough vetting and checking references.
  • No single point of accountability if issues arise (you deal directly with the individual).
  • Costs can range from $50 to $100+ per hour per installer, or a flat project fee.

Ikea’s Installation Service

IKEA partners with third-party companies to offer installation services.

Pros:

  • Convenience, a single point of contact.
  • Installers are often trained on IKEA systems.
  • Can sometimes be bundled with delivery.

Cons:

  • Can be more expensive than independent installers.
  • Scheduling can be rigid.
  • May have limitations on custom work or complex electrical/plumbing.

IKEA’s service typically charges a percentage of the cabinet cost (often around 20-30%) or a fixed rate per linear foot.

General Contractors

Hiring a general contractor to manage the entire kitchen renovation, including IKEA cabinet installation.

Pros:

  • Comprehensive project management.
  • Handles all aspects, including electrical, plumbing, flooring, etc.
  • Single point of accountability for the entire project.

Cons:

  • Most expensive option.
  • May not have specific IKEA expertise unless requested.

A general contractor’s fee is usually layered on top of all subcontractor costs.

Additional Services And Modifications

The installation of cabinets often goes hand-in-hand with other tasks that add to the overall project cost.

  • Electrical Work: Moving outlets, adding new circuits for appliances, installing under-cabinet lighting.
  • Plumbing Work: Moving water lines for sinks, installing dishwashers.
  • Drywall Repair/Patching: Necessary if old cabinets are removed or if walls need to be modified.
  • Countertop Installation: While often a separate cost, the cabinet installation must be precise to accommodate countertops.
  • Appliance Installation: Integrating new appliances within the cabinet framework.
  • Custom Modifications: Cutting cabinets for soffits, bulkheads, or non-standard appliance fits.

These services are almost always additional costs beyond the basic cabinet installation.

Regional Labor Rates

Labor costs vary significantly by geographic location. Major metropolitan areas generally have higher labor rates than rural areas due to the increased cost of living and demand for skilled tradespeople. For instance, hiring an installer in New York City will likely cost more than hiring one in a small town in the Midwest.

The Importance Of A Detailed Quote

When seeking quotes, ensure they are detailed and specific. A good quote should outline:

  • Cost per linear foot or hourly rates for installers.
  • What is included (e.g., assembly, mounting, leveling, hardware installation).
  • What is excluded (e.g., electrical, plumbing, demolition, countertop templating).
  • Estimated timeline.
  • Payment terms.

*Example:* A quote might state “$175 per linear foot for standard IKEA cabinet installation, including box assembly, mounting, and door/drawer alignment. Electrical, plumbing, and countertop installation are separate costs.”

Ikea Kitchen Cabinet Installation Cost

Credit: www.nbcnews.com

Estimating Ikea Kitchen Cabinet Installation Costs

To provide a clearer picture, let’s break down potential cost scenarios. These are estimates and can fluctuate widely.

Cost Breakdown By Installation Type

Here’s a comparative look at the potential costs for a moderately sized kitchen (e. g. , 100 linear feet of cabinets).

Installation Type Estimated Labor Cost Range (100 linear feet) Key Considerations
DIY $0 (plus tool costs, approx. $200-$500 if needed) Requires significant time commitment (40-80+ hours), skill, and risk of errors.
Independent Installer $5,000 – $10,000+ ($50-$100+ per linear foot) Varies greatly by skill and location. Requires thorough vetting.
IKEA’s Installation Service $5,000 – $10,000+ (often 20-30% of cabinet cost, or $150-$250 per linear foot) Convenient, but can be pricier. Check specific service provider’s terms.
General Contractor $10,000 – $20,000+ (includes management fee on top of subcontractor costs) Most expensive, but offers full project oversight.

Note: These figures are for labor only and do not include the cost of the IKEA cabinets themselves, countertops, appliances, or any necessary electrical/plumbing work.

Cost Influenced By Cabinet Type

The type of IKEA cabinets chosen can also subtly influence installation cost, mainly due to complexity.

  • Standard Base Cabinets: Relatively straightforward, lower end of installation cost per unit.
  • Standard Wall Cabinets: Require secure mounting, slightly more involved than base cabinets.
  • Corner Cabinets (e.g., with carousels or pull-outs): These are more complex, requiring precise alignment and fitting of moving parts. Installers may charge a premium.
  • Appliance Garage Cabinets or Integrated Appliance Cabinets: Often require custom fitting and precise measurements, increasing labor time.
  • Drawers: While assembly is separate, installing drawer slides accurately can add time compared to simple shelves.

Real-world Example: A Small Kitchen Project

Consider a small kitchen requiring approximately 60 linear feet of cabinetry.

  • Cabinets Cost: $4,000 (example price)
  • Independent Installer Quote: $7,200 ($120 per linear foot)
  • IKEA Installation Service Quote: $8,400 (approx. 21% of cabinet cost)
  • Additional Electrical (under-cabinet lighting): $800
  • Plumbing (sink relocation): $600
  • Contingency (15%): $1,770 (based on subtotal of cabinets + installation + electrical + plumbing)

Total Estimated Project Cost: ~$22,770

This example highlights how installation is a significant portion of the overall kitchen project cost, often rivaling or exceeding the cost of the cabinets themselves.

The Ikea Installation Process: What To Expect

Understanding the typical steps involved in professional IKEA cabinet installation can help you prepare your home and manage expectations.

Pre-installation Preparation

  • Clearing the Space: You’ll need to completely empty the kitchen, or at least the work area, to give installers ample room to move and work. This includes removing appliances, backsplashes, and potentially old countertops if they are being replaced.
  • Wall Preparation: Ensure walls are sound and ready for mounting. Installers will need to locate studs accurately. If significant drywall repair is needed, this should be addressed beforehand or factored into the quote.
  • Delivery Coordination: Ensure your IKEA cabinets have been delivered and are accessible. Check for any damaged items *before* the installers arrive.
  • Finalizing Plans: Have your final IKEA kitchen planner printout or design ready for the installers. Confirm any specific placement requests.

During Installation

  • Layout and Marking: Installers will use your plan to mark the wall and floor for cabinet placement, ensuring everything is level and plumb.
  • Cabinet Assembly (if not pre-assembled): If you haven’t assembled the boxes yourself, the installers will do this first.
  • Mounting Base Cabinets: Securing the base cabinets to wall studs and to each other.
  • Mounting Wall Cabinets: Hanging wall cabinets securely, ensuring they are level and aligned with base cabinets. This is a critical step for safety and aesthetics.
  • Installing Doors, Drawers, and Hardware: Attaching hinges, drawer slides, and then the doors and drawer fronts. Adjusting them for proper alignment.
  • Installing Interior Accessories: Placing shelves, drawer organizers, etc.
  • Basic Cleanup: Most installers will do a basic sweep or vacuum of the work area.

Post-installation Steps

  • Inspection: Thoroughly inspect all cabinets, doors, drawers, and hardware. Open and close everything to ensure smooth operation. Check for any scratches or damage.
  • Countertop Templating: If you’re getting new countertops, this is usually the next step after base cabinets are installed.
  • Appliance Installation: Installing appliances into their designated spots.
  • Backsplash Installation: Adding the backsplash.
  • Final Plumbing and Electrical: Connecting sinks, faucets, dishwashers, and any lighting.

A professional installation service should provide a warranty on their workmanship. Always clarify this.

Tips For Hiring Ikea Kitchen Cabinet Installers

Finding the right installer is crucial for a smooth and successful project. Here are some tips:

1. Get Multiple Quotes

Don’t settle for the first quote you receive. Aim for at least three detailed quotes from different sources (independent installers, IKEA service, potentially a general contractor). This allows you to compare pricing, scope of work, and timelines.

2. Verify Experience With Ikea Systems

Specifically ask potential installers if they have direct experience installing IKEA kitchens. IKEA’s SEKTION system has specific mounting methods and hardware that differ from custom cabinetry. An installer familiar with these nuances can work more efficiently and avoid common pitfalls. Look for portfolios or examples of their IKEA kitchen work.

3. Check Reviews And References

Before hiring anyone, check online reviews (Google, Yelp, Houzz) and ask for references from past clients. Speaking directly with previous customers can provide invaluable insights into their reliability, quality of work, and professionalism.

4. Ensure Licensing And Insurance

Verify that the installer or company you hire is properly licensed and insured. General liability insurance protects you in case of accidental damage to your home or injury to the workers. Licensing requirements vary by location, but it’s a good indicator of professionalism.

5. Understand What’s Included (and Excluded)

As mentioned earlier, a detailed written contract or quote is essential. Ensure it clearly outlines:

  • All tasks included in the installation.
  • Any demolition or removal of old cabinets.
  • Responsibility for debris removal.
  • Warranty on labor.
  • Payment schedule.
  • Estimated start and completion dates.

6. Ask About Tools And Equipment

Professional installers should come equipped with all necessary tools, including a stud finder, level, drill, saw (if modifications are needed), and safety equipment. If they expect you to provide any tools, clarify this upfront.

7. Discuss Potential Issues

Talk to installers about potential challenges in your specific kitchen layout (e. g. , uneven walls, plumbing obstacles). A good installer will anticipate these and discuss solutions.

*Pro Tip:* Consider installers who specialize in IKEA kitchens. They often have a streamlined process and understand the system’s quirks better than general carpenters.

Common Pitfalls And How To Avoid Them

Even with professional help, some common issues can arise during IKEA kitchen cabinet installation. Awareness can help you prevent or address them.

1. Inaccurate Measurements And Planning

  • Pitfall: Underestimating the space, miscalculating cabinet sizes, or failing to account for appliance dimensions.
  • Avoidance: Use IKEA’s online planner meticulously. Double-check all measurements yourself before finalizing the design and ordering. If using a contractor, ensure they take precise measurements of your space.

2. Poorly Secured Cabinets

  • Pitfall: Cabinets not securely fastened to wall studs, especially wall cabinets, leading to sagging or potential detachment. This is a major safety hazard.
  • Avoidance: Ensure your installer is locating studs accurately and using appropriate heavy-duty screws. For wall cabinets, check that they are mounted to more than just drywall anchors. IKEA provides specific mounting hardware recommendations.

3. Misaligned Doors And Drawers

  • Pitfall: Doors and drawers that don’t close properly, have uneven gaps, or rub against each other.
  • Avoidance: This is often due to imprecise installation of hinges or drawer slides, or cabinets not being perfectly level. Most IKEA hinges are adjustable, but it requires patience and a keen eye. Ensure the installer takes the time for fine-tuning.

4. Ignoring Electrical And Plumbing Needs

  • Pitfall: Realizing mid-installation that outlets need to be moved, new circuits are required for appliances, or plumbing needs rerouting.
  • Avoidance: Plan for all electrical and plumbing needs during the design phase. Hire licensed electricians and plumbers *before* cabinet installation begins if significant modifications are necessary.

5. Underestimating The Timeline

  • Pitfall: Expecting a kitchen to be installed in a weekend when it requires multiple days or even weeks, especially if other trades are involved.
  • Avoidance: Get a realistic timeline from your installer and add buffer time. Factor in potential delays caused by material delivery issues or unforeseen complications.

6. Not Budgeting For Contingencies

  • Pitfall: Running out of budget due to unexpected costs like repairs, additional materials, or scope changes.
  • Avoidance: Always add a contingency fund of 10-20% to your total budget. This buffer is crucial for covering unforeseen expenses that inevitably arise in renovation projects.

When To Consider Professional Installation

While DIY is tempting for cost savings, there are specific scenarios where professional installation is highly recommended, bordering on essential:

1. Complex Kitchen Layouts

If your kitchen has numerous corners, angles, or non-standard shapes, the precision required for a professional look can be challenging for the average DIYer. Installers have the experience to handle these complexities efficiently.

2. Lack Of Time Or Experience

If you have a demanding job or limited DIY experience, attempting a full kitchen installation can lead to significant stress and potentially costly mistakes. Hiring professionals frees up your time and leverages their expertise.

3. Major Electrical Or Plumbing Modifications

If your renovation involves moving sinks, installing new appliances that require different electrical hookups, or adding extensive under-cabinet lighting, it’s best to have licensed professionals handle these tasks alongside the cabinet installation.

4. Desire For A Flawless Finish

If achieving a high-end, seamless look is your priority, professional installers often have the tools, techniques, and experience to deliver that polished result, especially when it comes to perfectly aligned doors and drawers.

5. Large-scale Projects

For extensive kitchen renovations involving many cabinets, islands, and integrated features, the sheer volume of work makes professional installation a more practical choice.

Budgeting For The Total Ikea Kitchen Project

It’s vital to remember that IKEA cabinet installation cost is just one piece of the puzzle. A complete kitchen renovation budget should account for:

  • IKEA Cabinets: The boxes, doors, drawer fronts, shelves, and hardware.
  • IKEA Interior Organizers: Drawers, shelves, pull-outs, etc.
  • Countertops: Material cost (laminate, quartz, granite, etc.) And
Smoke Detector Keeps Beeping

Smoke Detector Keeps Beeping

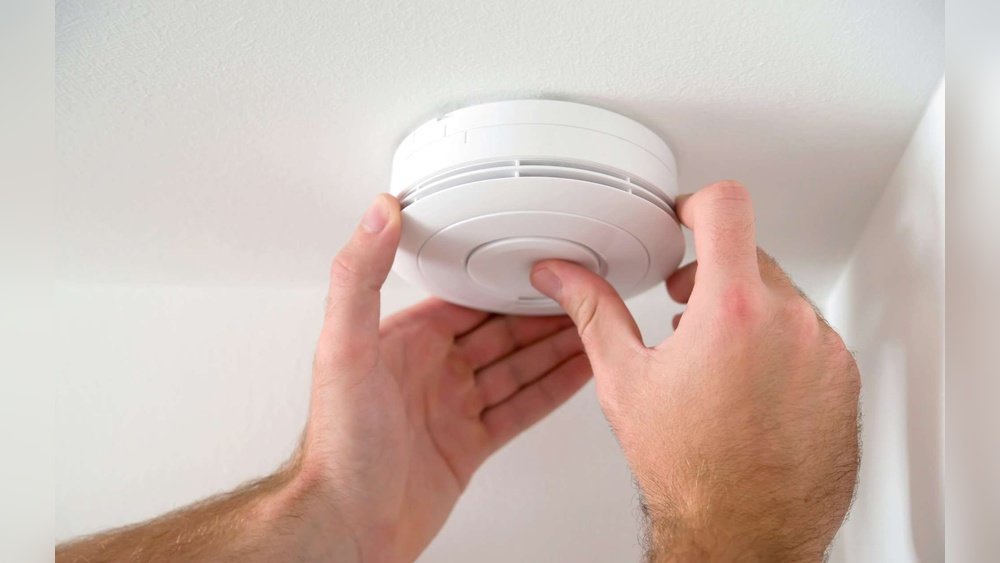
The persistent, piercing chirp of a smoke detector can transform a peaceful home into a scene of escalating frustration. Whether it’s a single, insistent beep every 30 seconds, a rapid series of alarms, or a more complex pattern, a malfunctioning smoke detector is more than just an annoyance; it’s a potential safety hazard.

Understanding why your smoke detector is acting up is the first step toward restoring peace of mind and ensuring your home remains protected. These devices are designed to be sensitive, and their alerts, while sometimes misleading, are ultimately there to safeguard lives.

This guide will walk you through the common reasons behind a smoke detector’s incessant beeping, offering practical solutions and expert advice to help you diagnose and fix the problem. We’ll cover everything from simple battery replacements to more complex issues like sensor malfunctions and environmental factors, ensuring you can confidently address whatever is causing your smoke alarm to sound off.

Key Takeaways

  • Battery Issues: Low batteries are the most common cause of smoke detector chirping, often signaled by a single beep every 30-60 seconds. Always replace batteries with high-quality alkaline or lithium types.
  • End of Life: Smoke detectors have a lifespan of 8-10 years. A consistent, rapid beeping can indicate the unit needs replacement.
  • Environmental Factors: Dust, humidity, steam, and even insects can trigger false alarms. Regular cleaning and proper placement are crucial.
  • Power Surges/Outages: Intermittent power can cause battery-powered or hardwired alarms to malfunction and chirp.
  • Alarm Interconnection: If alarms are interconnected, one faulty unit can trigger others. Identify the primary source of the alarm.
  • Device Malfunction: In rare cases, the detector itself may be faulty and require replacement.
  • Testing and Resetting: Regularly test your alarms and know how to reset them after addressing an issue.
Smoke Detector Keeps Beeping

Credit: inspiredhousewife.com

Understanding Smoke Detector Chirps Vs. Alarms

It’s crucial to differentiate between a full-blown alarm and a chirping sound. A full alarm is typically a loud, continuous, and urgent series of sounds, indicating the presence of smoke or carbon monoxide. A chirp, on the other hand, is a shorter, intermittent sound, usually occurring every 30 to 60 seconds. This chirp is almost always a trouble signal, alerting you to a condition that prevents the detector from functioning correctly, rather than an immediate fire threat.

The Purpose Of Chirping Signals

Smoke detectors are sophisticated devices designed to monitor air quality. When they detect a problem that compromises their ability to perform their primary function, detecting smoke, they emit a chirp. This signal is a preventative measure. It’s the device’s way of saying, “I’m not working at full capacity, and you need to address this.” Ignoring these chirps means you are potentially disabling your home’s most vital fire safety system.

Common Chirp Patterns And What They Mean

While manufacturers may have slightly different chirp patterns, some are widely recognized:

  • Single Chirp Every 30-60 Seconds: This is the most common signal and almost always indicates a low battery. Even if the battery is new, it might be a lower-quality one, or the battery contact might be dirty.
  • Rapid, Repeated Chirps (e.g., 3 chirps, pause, 3 chirps): This pattern can sometimes indicate contamination of the sensing chamber (dust, insects) or a malfunction.
  • Different Chirp Patterns: Some advanced detectors use distinct chirp patterns to signal specific issues like end-of-life warnings or fault conditions. Always consult your smoke detector’s manual for precise interpretations of its alert sounds.
Smoke Detector Keeps Beeping

Credit: www.youtube.com

Why Is My Smoke Detector Chirping? Common Culprits

The reasons behind a smoke detector’s chirping are varied, ranging from simple fixes to more complex issues. Identifying the specific cause is key to resolving the problem effectively.

1. The Low Battery Signal

This is, by far, the most frequent reason for smoke detector chirping. Modern smoke detectors are designed to alert you well before the battery completely dies.

  • Battery Depletion: Over time, the battery simply loses its charge. The detector’s internal monitoring system detects this drop in voltage and triggers the chirp to signal the need for a battery replacement. This usually happens every 30 to 60 seconds.
  • Battery Type and Quality: Using the wrong type of battery (e.g., rechargeable instead of alkaline, or a low-quality battery) can lead to premature depletion and chirping. Always use high-quality alkaline or lithium batteries as recommended by the manufacturer.
  • Battery Connection: Sometimes, a battery might be inserted incorrectly, or the contacts might be dirty or corroded, preventing a good connection. This can mimic a low battery situation.

Pro Tip: When replacing batteries, consider using lithium batteries. They offer a longer lifespan (up to 10 years) and perform better in extreme temperatures, reducing the frequency of battery changes and potential chirping.

2. End-of-life Warning

Smoke detectors, like all electronic devices, have a finite lifespan. The internal components degrade over time, making them less reliable. Most manufacturers recommend replacing smoke detectors every 8 to 10 years.

  • Built-in Expiration: Many newer detectors have a built-in mechanism that triggers a specific chirp pattern (often different from the low battery chirp) to indicate they have reached their operational limit. This is a critical safety feature.
  • Identifying the Age: Look for a manufacture date or expiration date printed on the back or side of your smoke detector. If the date is 8-10 years or older, replacement is necessary, regardless of other symptoms.

3. Environmental Factors Causing False Alarms Or Chirps

The sensitive sensors in smoke detectors can be triggered or affected by various environmental conditions.

  • Dust and Debris: Accumulations of dust, cobwebs, or small insects inside the sensing chamber can obstruct airflow or interfere with the sensor’s ability to detect smoke particles accurately. This can lead to false alarms or malfunction chirps.
  • Humidity and Steam: High levels of humidity, such as those found in bathrooms or kitchens during cooking, can sometimes trigger a smoke detector. While this usually results in a full alarm, persistent high humidity or steam can sometimes cause erratic behavior, including chirping.
  • Temperature Fluctuations: Extreme temperature changes, especially rapid ones, can affect the performance of the smoke detector’s electronics and sensors, potentially leading to chirping. Avoid placing detectors near heating vents, air conditioners, or in uninsulated attics or garages where temperatures can fluctuate wildly.
  • Chemical Fumes: Aerosol sprays, paint fumes, or cleaning products can sometimes trigger the sensor, leading to an alarm or chirp.

4. Power Issues (for Hardwired Alarms)

Hardwired smoke detectors are connected to your home’s electrical system and usually have a battery backup. Issues with the power supply can cause them to chirp.

  • Power Surges or Brownouts: Intermittent power supply, such as flickering lights or brief power outages, can cause hardwired alarms to reset or malfunction, often resulting in a chirp.
  • Circuit Breaker Tripped: If the circuit breaker controlling the smoke detector has tripped, the unit will lose main power and rely solely on its battery. If the battery is also low, this can lead to consistent chirping.
  • Loose Wiring: In older installations, loose wire connections in the junction box or at the detector itself can cause intermittent power loss and chirping. This is a more serious issue requiring professional attention.

5. Interconnected Alarm Systems

Many homes have interconnected smoke detectors, meaning if one alarm detects smoke, all alarms in the system will sound. When one unit chirps, it can sometimes trigger other units to chirp as well, making it difficult to pinpoint the source.

  • Identifying the Initiating Unit: Often, the alarm that is experiencing the problem will have a flashing indicator light that is different from the others. The unit that is actually malfunctioning is usually the one that needs attention.
  • System-Wide Issues: In rare cases, a fault in the interconnect wiring or a surge affecting the entire system can cause multiple units to chirp.

6. Device Malfunction Or Fault

While less common than battery or environmental issues, the smoke detector itself can simply malfunction.

  • Sensor Failure: The photoelectric or ionization sensor within the detector could fail.
  • Internal Circuitry Problems: A fault in the electronic components of the device can lead to erratic behavior, including chirping.
  • Damage: Physical damage to the unit, such as being dropped or hit, can cause internal issues.

Troubleshooting Steps For A Chirping Smoke Detector

When faced with a chirping smoke detector, a systematic approach can help you pinpoint and resolve the issue.

Step 1: Identify The Chirping Unit

If you have multiple smoke detectors, try to identify which specific unit is chirping.

  • Listen Carefully: Walk around your home and listen to pinpoint the source of the sound.
  • Look for Flashing Lights: Many detectors have an LED indicator light. A unit that is chirping due to a fault or low battery often has a distinct flashing pattern (e.g., a red light flashing rapidly or slowly). Consult your manual to understand the light codes.
  • Isolate the Unit: If you suspect a particular unit, you may need to temporarily remove it from its base or disconnect its power source (if hardwired) to confirm it’s the source of the chirp.

Step 2: Address The Battery

For most battery-powered or battery-backup alarms, the battery is the first suspect.

  • Replace the Battery: Even if you think the battery is new, replace it with a fresh, high-quality battery of the type specified by the manufacturer (usually AA or 9V alkaline or lithium).
  • Clean Battery Contacts: Remove the battery and gently clean the metal contacts inside the detector and on the battery itself with a pencil eraser or a slightly damp cloth. Ensure they are dry before reinserting the battery.
  • Check Battery Installation: Ensure the battery is inserted correctly, with the positive (+) and negative (-) terminals aligned properly.
  • Test the Unit: After replacing the battery, press and hold the “Test” button for a few seconds. The alarm should sound loudly. If it doesn’t, there might be another issue.

Step 3: Clean The Smoke Detector

Dust and insects are common culprits for sensor contamination.

  • Vacuuming: Use the soft brush attachment of your vacuum cleaner to gently vacuum the exterior vents and openings of the smoke detector. This helps remove loose dust and cobwebs.
  • Compressed Air: For more stubborn dust or potential insect intrusion, you can use a can of compressed air. Hold the can upright and spray short bursts into the sensing chamber openings from a distance of a few inches. Never use a vacuum cleaner hose directly on the sensor openings, as this can create static electricity or damage the delicate components.
  • Frequency: Clean your smoke detectors at least twice a year, or more often if you live in a dusty environment or have pets.

Step 4: Check Environmental Conditions

Consider the location and environment of the chirping detector.

  • Humidity: If the detector is in a bathroom or kitchen, ensure it’s not overly exposed to steam or humidity. Consider relocating it if it’s too close to the shower or stove. Many manufacturers recommend placing alarms at least 10 feet away from cooking appliances.
  • Temperature: Ensure the detector is not located near heating or cooling vents, fireplaces, or in areas with extreme temperature fluctuations.
  • Airborne Particles: Avoid using aerosol sprays or strong cleaning agents near the detector. If you’ve recently painted or used such products, air out the room thoroughly.

Step 5: Troubleshoot Hardwired Alarms

If your alarm is hardwired, the power source is another area to investigate.

  • Check the Circuit Breaker: Locate your home’s electrical panel and check if the breaker for the smoke detector circuit has tripped. If it has, reset it. If it trips again immediately, there’s an electrical fault that requires professional attention.
  • Verify AC Power: Ensure the detector’s power indicator light (usually a steady green light) is on, indicating it’s receiving AC power. If it’s off, there might be an issue with the wiring or the power supply.
  • Check Interconnection: If you have interconnected hardwired alarms, the issue might be with the interconnect wire. This is a task best left to a qualified electrician.

Step 6: Reset The Smoke Detector

Sometimes, a simple reset can clear temporary glitches.

  • Battery-Powered Units: Remove the battery and press the “Test” button for about 15-20 seconds to discharge any residual power. Reinsert the battery and press “Test” again.
  • Hardwired Units:
  • Turn off the power to the smoke detector at the circuit breaker.
  • Remove the detector from its mounting bracket.
  • Disconnect the wiring harness.
  • Remove the backup battery.
  • Press and hold the “Test” button for about 20-30 seconds.
  • Reinstall the battery, reconnect the wiring harness, and reattach the detector to its bracket.
  • Turn the power back on at the circuit breaker.
  • Press the “Test” button to ensure it’s functioning correctly.

Step 7: Consult The Manual And Manufacturer

Every smoke detector model is slightly different. The user manual is your best resource for understanding specific chirp patterns, troubleshooting steps, and maintenance recommendations for your particular device. If you no longer have the manual, you can usually find a digital version on the manufacturer’s website by searching for your model number.

Smoke Detector Keeps Beeping

Credit: www.propertyzest.com.au

When To Call A Professional

While many smoke detector issues can be resolved with simple DIY steps, there are times when professional help is necessary.

  • Persistent Chirping After All Steps: If you’ve tried all the troubleshooting steps above, including battery replacement, cleaning, and resetting, and the detector continues to chirp, it likely has an internal fault.
  • Electrical Issues: If you suspect problems with the wiring, circuit breaker, or AC power supply for hardwired alarms, do not attempt to fix it yourself. Electrical work can be dangerous and should only be performed by a licensed electrician.
  • Interconnected System Faults: Diagnosing and repairing faults within an interconnected alarm system can be complex. An electrician or a specialized low-voltage technician can safely address these issues.
  • Frequent False Alarms: If your detector frequently goes into full alarm without any visible smoke, it might be faulty, improperly placed, or too sensitive for its environment. A professional can assess the situation and recommend solutions, which might include relocation or replacement with a different type of detector.
  • Uncertainty or Discomfort: If you are uncomfortable performing any of the troubleshooting steps or are unsure about the cause of the problem, it’s always best to err on the side of caution and call a professional.

Smoke Detector Types And Their Chirping Tendencies

Different types of smoke detectors operate on different principles and may have unique troubleshooting needs.

Ionization Smoke Detectors

These detectors use a small amount of radioactive material to ionize the air between two electrically charged plates. When smoke particles enter the chamber, they disrupt the flow of ions, triggering the alarm.

  • Chirping Causes: Primarily low battery, end-of-life, and contamination. They can be sensitive to rapid temperature changes.
  • Troubleshooting: Similar to general guidelines, battery replacement, cleaning, and checking for age.

Photoelectric Smoke Detectors

These detectors use a light beam and a sensor. In a normal state, the light beam shines away from the sensor. When smoke enters the chamber, it scatters the light beam, directing it onto the sensor and triggering the alarm.

  • Chirping Causes: Low battery, end-of-life, contamination (dust can obscure the light path or trigger the sensor), and sometimes high humidity.
  • Troubleshooting: Battery replacement, thorough cleaning (as dust can be a significant issue), and ensuring proper placement away from kitchens and bathrooms.

Dual-sensor Smoke Detectors

These combine both ionization and photoelectric technologies, offering a broader range of detection capabilities.

  • Chirping Causes: Similar to both types, plus potential issues with the electronic integration between the two sensors.
  • Troubleshooting: Follow the general guidelines, but pay close attention to the manufacturer’s specific instructions for dual-sensor units.

Carbon Monoxide (co) Alarms Vs. Smoke Detectors

It’s important to distinguish between smoke detectors and combination smoke/CO alarms. While they serve similar purposes, a CO alarm specifically detects the presence of carbon monoxide, a colorless, odorless, and deadly gas.

  • CO Alarm Chirping: A chirping sound from a CO alarm (or a combination unit) can indicate low battery, end-of-life, or a malfunction. However, a CO alarm will also typically emit a different, more urgent alarm pattern (often a series of four beeps) if it detects dangerous levels of carbon monoxide.
  • Immediate Action for CO Alarms: If your CO alarm sounds, evacuate the premises immediately and call emergency services (like the fire department) from a safe location. Do not attempt to troubleshoot until the area is cleared and deemed safe.

Best Practices For Smoke Detector Maintenance

Regular maintenance is key to ensuring your smoke detectors function correctly when you need them most.

Regular Testing

  • Monthly Testing: Test all smoke detectors in your home at least once a month. Press and hold the “Test” button until the alarm sounds. This verifies the battery, electronics, and horn are working.
  • After Battery Replacement: Test the unit immediately after replacing the battery.
  • After Power Outages: Test hardwired units after any significant power interruption.

Battery Replacement Schedule

  • Annual Replacement: Even if your detector doesn’t chirp, it’s a good practice to replace the batteries in all smoke detectors once a year. A common reminder is to do it when you change your clocks for daylight saving time.
  • Use Quality Batteries: Always opt for high-quality alkaline or lithium batteries from reputable brands.

Cleaning Schedule

  • Semi-Annual Cleaning: Clean your smoke detectors twice a year. Use a vacuum cleaner with a soft brush attachment or compressed air to remove dust and debris from the vents.

Replacement Schedule

  • 8-10 Year Replacement: Mark the installation date on your detectors and replace them every 8 to 10 years, or as recommended by the manufacturer. Don’t rely solely on chirping to signal replacement; proactive replacement is safer.

Data: Smoke Detector Usage And Effectiveness

Understanding the impact of smoke detectors highlights their importance. According to the National Fire Protection Association (NFPA):

  • In fires where the smoke alarm was present but not functioning, nearly half (46%) of the associated deaths occurred. This underscores the critical need for properly maintained detectors.
  • When smoke alarms were present and functioning, nearly two-thirds (62%) of home fire fatalities occurred in homes that did not have working smoke alarms to provide an early warning.
  • Battery-operated smoke alarms were found to be twice as likely to fail to function as hardwired alarms, often due to dead or missing batteries. This statistic emphasizes the importance of regular battery checks and replacements.

These figures from a leading fire safety organization like the NFPA clearly demonstrate that working smoke alarms significantly increase survival rates during home fires.

Comparison: Battery Types For Smoke Detectors

Battery TypeTypical Lifespan (in Smoke Detector)ProsConsBest For
**Alkaline (AA/9V)**6-12 monthsWidely available, relatively inexpensiveShorter lifespan, performance degrades in extreme temperaturesStandard replacement, budget-conscious users
**Lithium (AA/9V)**5-10 yearsVery long lifespan, stable voltage output, better in extreme tempsHigher initial cost, less common in some regionsLong-term reliability, reduced maintenance
**Rechargeable**Varies (requires frequent charging)ReusableCan lose charge over time, may not provide stable voltage for alarmsGenerally **not recommended** for smoke alarms

Note: Always refer to your smoke detector’s manual for the manufacturer’s recommended battery type. Using the wrong type can lead to malfunction or reduced performance.

Frequently Asked Questions

Why Does My Smoke Detector Chirp Only At Night?

This is often due to temperature fluctuations. As the house cools down overnight, the battery’s performance can be slightly affected, triggering a low-battery chirp. It can also be that the quiet of the night makes the chirp more noticeable. Replacing the battery with a fresh, high-quality one is usually the solution.

Can A Power Flicker Cause My Smoke Detector To Chirp?

Yes, especially for hardwired smoke detectors. A brief power interruption or surge can cause the unit to momentarily lose power or reset, often resulting in a chirp signal. If the unit has a battery backup and the battery is also low, this can exacerbate the issue.

My Smoke Detector Chirps, But The “test” Button Doesn’t Make It Alarm. What’s Wrong?

If The “test” Button Doesn’

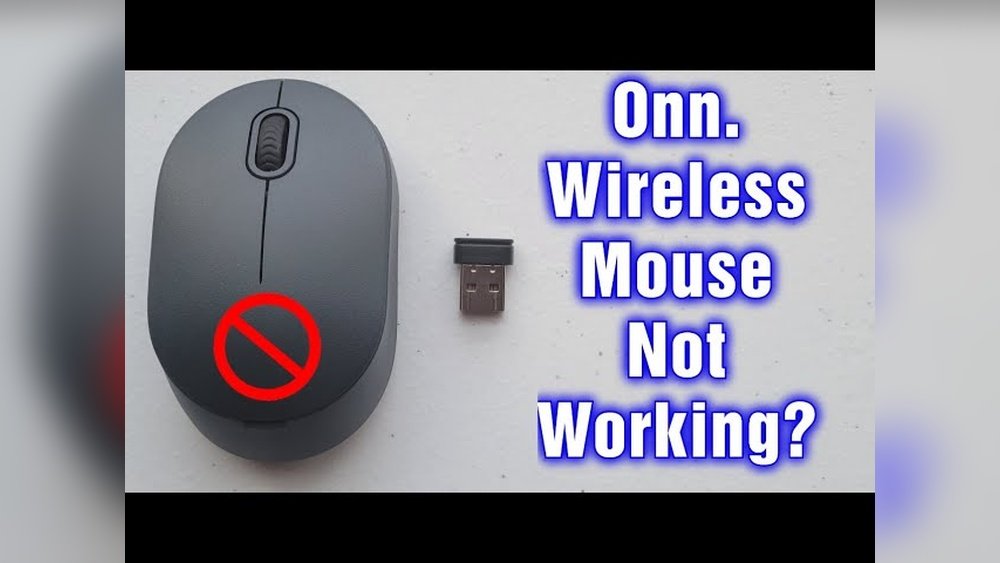
Onn Wireless Mouse Not Working

Onn Wireless Mouse Not Working

The frustration of a wireless mouse suddenly ceasing to function can bring productivity to a grinding halt. Whether you’re deep into a critical project, enjoying a gaming session, or simply browsing the web, an unresponsive mouse is a significant roadblock. The Onn wireless mouse, a popular choice for its affordability and accessibility, is no exception to occasional technical hiccups. While generally reliable, users sometimes encounter the dreaded scenario where their Onn wireless mouse is not working.

This guide aims to be your comprehensive troubleshooting manual. We’ll meticulously explore the common reasons why your Onn wireless mouse might be failing to respond and provide step-by-step solutions to get you back up and running swiftly. From simple fixes like checking batteries to more involved software adjustments, we’ll cover every potential culprit.

Our goal is to empower you with the knowledge to diagnose and resolve most issues independently, saving you time and the potential cost of a replacement.

Key Takeaways

  • Battery Power is Paramount: Always start by checking and replacing the batteries in your Onn wireless mouse, as low or dead batteries are the most frequent cause of malfunction.
  • Connection Issues are Common: Ensure the USB receiver is securely plugged in and try a different USB port. For Bluetooth models, re-pairing the mouse is often necessary.
  • Software Glitches Can Occur: Restarting your computer and checking for driver updates can resolve many software-related problems.
  • Interference Can Disrupt Signals: Keep the mouse and receiver away from other wireless devices that might cause interference.
  • Physical Obstructions Matter: Ensure a clear line of sight between the mouse and its receiver, and clean the optical sensor for optimal performance.
  • Hardware Malfunction is Possible: If all troubleshooting steps fail, the mouse itself might be defective.
Onn Wireless Mouse Not Working

Credit: www.youtube.com

Common Causes For An Onn Wireless Mouse Not Working

When your Onn wireless mouse suddenly stops responding, it can be a perplexing issue. Several factors, ranging from simple power problems to more complex software conflicts, can contribute to this malfunction. Understanding these common causes is the first step toward effective troubleshooting.

Insufficient Or Dead Batteries

This is, by far, the most common reason for any wireless mouse, including Onn models, to stop working. Wireless mice rely entirely on battery power to transmit signals to the computer.

  • Low Battery Indicator: Some Onn wireless mice may have a small LED light that indicates battery status. If this light is dim, flashing, or off when it’s usually on, it’s a strong sign the batteries are low.
  • Gradual Performance Degradation: Before completely failing, a mouse with low batteries might exhibit erratic behavior, such as jerky cursor movement or delayed clicks.
  • Sudden Cessation: Often, the mouse will simply stop responding without any prior warning once the batteries are completely depleted.

It’s crucial to use high-quality alkaline batteries for optimal performance and longevity. Cheap or old batteries may not provide sufficient power, leading to premature failure.

Loose Or Faulty Usb Receiver Connection

For non-Bluetooth Onn wireless mice, a small USB receiver (dongle) is responsible for communicating with your computer. A poor connection or a damaged receiver can prevent the mouse from working.

  • Unseated Dongle: The USB receiver might have been accidentally dislodged from its port, especially if the computer has been moved or bumped.
  • Damaged USB Port: The USB port on your computer could be faulty, preventing any device from connecting properly.
  • Receiver Damage: The USB receiver itself might be physically damaged, bent pins, or internal issues could render it inoperable.

Interference From Other Wireless Devices

Wireless technology relies on radio frequencies to operate. When multiple devices use similar frequencies, interference can occur, disrupting the signal between your Onn mouse and its receiver.

  • Common Sources of Interference:
  • Other wireless mice or keyboards
  • Wireless speakers
  • Wi-Fi routers and modems
  • Microwave ovens
  • Cordless phones
  • Bluetooth devices

The closer these interfering devices are to your mouse and its receiver, the higher the likelihood of signal disruption.

Software Or Driver Issues

While less common for basic plug-and-play devices like many Onn wireless mice, software glitches or outdated drivers can sometimes cause connectivity problems.

  • Driver Conflicts: Occasionally, a newly installed program or a Windows update might conflict with the mouse’s existing drivers.
  • Corrupted Drivers: Drivers can become corrupted over time, leading to erratic behavior or complete failure.
  • Operating System Glitches: A temporary glitch within the operating system itself can sometimes prevent peripheral devices from being recognized.

Physical Obstructions Or Sensor Issues

The optical sensor on the underside of your mouse needs a clear view of the surface to track movement. Debris or damage to this sensor can cause it to malfunction.

  • Dirty Sensor: Dust, hair, or other debris can accumulate on the optical sensor, blocking its view and preventing accurate tracking.
  • Surface Issues: Highly reflective surfaces (like glass or polished metal) or uneven textures can sometimes confuse the optical sensor.
  • Physical Damage: Dropping the mouse can damage the sensor or internal components, leading to a non-functional device.

Bluetooth Connectivity Problems (for Bluetooth Models)

If your Onn mouse uses Bluetooth instead of a USB receiver, the troubleshooting steps will differ slightly, focusing on the Bluetooth pairing process.

  • Pairing Issues: The mouse may have lost its pairing with your computer.
  • Bluetooth Adapter Issues: The computer’s Bluetooth adapter might be disabled, malfunctioning, or have outdated drivers.
  • Interference: Similar to USB receivers, Bluetooth signals can also be subject to interference from other wireless devices.
Onn Wireless Mouse Not Working

Credit: www.youtube.com

Troubleshooting Steps: Getting Your Onn Wireless Mouse Working Again

When your Onn wireless mouse refuses to cooperate, a systematic approach to troubleshooting is the most effective way to identify and resolve the issue. Start with the simplest solutions and progress to more complex ones.

Step 1: Check And Replace Batteries

This is the golden rule of wireless peripheral troubleshooting. Always start here.

  • Locate the Battery Compartment: Most Onn wireless mice have a small compartment on the underside, usually accessed by sliding a cover.
  • Remove Old Batteries: Eject the existing batteries.
  • Insert Fresh Batteries: Ensure you are using brand new, high-quality alkaline batteries of the correct type (usually AA or AAA). Pay close attention to the positive (+) and negative (-) terminal orientations as indicated inside the compartment.
  • Replace the Cover: Securely close the battery compartment.
  • Test the Mouse: See if the cursor moves or if the mouse responds to clicks.

Pro Tip: If your mouse has a power switch, ensure it’s in the “ON” position. Sometimes this switch can be accidentally toggled off.

Step 2: Verify Usb Receiver Connection (for Non-bluetooth Models)

A secure connection between the USB receiver and your computer is vital.

  • Remove the Receiver: Gently pull the USB receiver out of its current port.
  • Inspect the Port: Check the USB port for any visible debris or damage.
  • Try a Different USB Port: Plug the receiver into a different USB port on your computer. Sometimes, a specific port can malfunction. Prioritize ports directly on the motherboard (usually the back of a desktop PC) over front-facing ports or USB hubs, as these often provide more stable power.
  • Ensure a Secure Fit: Make sure the receiver is plugged in firmly and completely.
  • Test the Mouse: Check if the mouse is now working.

If you are using a USB hub, try plugging the receiver directly into the computer to rule out the hub as the source of the problem.

Step 3: Re-establish Bluetooth Connection (for Bluetooth Models)

If your Onn mouse uses Bluetooth, the pairing process needs to be correct.

  • Turn Off Mouse Bluetooth: If your mouse has a Bluetooth switch, turn it off.
  • Remove Mouse from Computer’s Bluetooth Devices:
  • Windows: Go to Settings > Bluetooth & devices > Devices. Find your Onn mouse in the list, click the three dots (or the device name), and select “Remove device.”
  • MacOS: Go to System Settings (or System Preferences) > Bluetooth. Find your Onn mouse, hover over it, and click the ‘x’ or “Forget Device.”
  • Turn On Mouse Bluetooth: Turn the mouse’s Bluetooth switch back on and put it into pairing mode (refer to your mouse’s manual for specific instructions, often involves holding down a button).
  • Scan for Devices on Computer:
  • Windows: Go to Settings > Bluetooth & devices > Add device > Bluetooth. Wait for your mouse to appear and select it to pair.
  • MacOS: Ensure Bluetooth is on. Your mouse should appear in the list of nearby devices. Click “Connect” next to it.
  • Test the Mouse: Verify if the connection is successful and the mouse is responsive.

Step 4: Minimize Wireless Interference

Interference can significantly degrade or block the signal from your mouse.

  • Physical Proximity: Move your Onn wireless mouse and its USB receiver away from other wireless devices, especially Wi-Fi routers, cordless phones, and other peripherals operating on similar frequencies.
  • Line of Sight: Ensure there is a clear, unobstructed path between the mouse and its USB receiver. Thick objects, metal surfaces, and even your own body can sometimes block the signal.
  • Reduce Device Count: Temporarily turn off or disconnect other unnecessary wireless devices to see if the mouse starts working. If it does, you’ve identified an interfering device.
  • USB 3.0 Interference: In some cases, USB 3.0 ports and devices can emit radio frequency interference that affects 2.4 GHz wireless devices. Try plugging the receiver into a USB 2.0 port if available.

Step 5: Clean The Optical Sensor

A dirty or obstructed sensor is a common culprit for tracking issues.

  • Turn Off the Mouse: Ensure the mouse is powered off or remove the batteries.
  • Locate the Sensor: Find the small optical lens on the underside of the mouse.
  • Use Compressed Air: Hold a can of compressed air upright and use short bursts to blow away any dust or debris from the sensor area.
  • Use a Cotton Swab: If compressed air isn’t sufficient, lightly dampen a cotton swab with isopropyl alcohol (rubbing alcohol) and gently clean the sensor lens. Ensure it dries completely before powering the mouse back on. Never use water or harsh chemicals.
  • Check the Surface: Ensure the surface you are using the mouse on is clean and not overly reflective or transparent. A mousepad is often the best solution.

Step 6: Restart Your Computer

A simple reboot can resolve temporary software glitches that might be preventing the mouse from being recognized.

  • Save Your Work: Ensure all your open documents and applications are saved.
  • Restart: Go to the Start menu (Windows) or Apple menu (macOS) and select “Restart.”
  • Test After Reboot: Once your computer has fully rebooted, check if the Onn wireless mouse is now working.

Step 7: Update Or Reinstall Mouse Drivers

While many Onn mice are plug-and-play, ensuring the correct drivers are installed can sometimes help.

  • Check Device Manager (Windows):
  • Right-click the Start button and select “Device Manager.”
  • Expand the “Mice and other pointing devices” section.
  • Look for your Onn wireless mouse. If it has a yellow exclamation mark next to it, there’s a driver issue.
  • Right-click the mouse and select “Update driver.” Choose “Search automatically for drivers.”
  • If that doesn’t work, right-click again, select “Uninstall device,” then restart your computer. Windows will attempt to reinstall the driver automatically upon reboot.
  • Check Manufacturer’s Website: Although Onn products are often basic, sometimes a support section on the Walmart website (where Onn products are primarily sold) might offer basic driver downloads or troubleshooting guides. Search for your specific Onn mouse model.

Note: For most basic Onn wireless mice, Windows will use a generic HID (Human Interface Device) driver, which is usually built into the operating system. Advanced driver management is less common.

Step 8: Test The Mouse On Another Computer

To determine if the issue lies with the mouse itself or your computer, test it on a different system.

  • Connect to Another PC/Mac: Take your Onn wireless mouse and its USB receiver (or ensure it’s paired if Bluetooth) to another computer.
  • Install/Pair: Allow the second computer to detect and install drivers (if necessary) or pair the Bluetooth mouse.
  • Test Functionality: See if the mouse works correctly on this alternative system.
  • If it works: The problem is likely with your original computer’s software, drivers, USB ports, or operating system configuration.
  • If it doesn’t work: The problem is very likely with the mouse itself (hardware failure).

Step 9: Check For Physical Damage

Inspect the mouse for any signs of physical damage that could be causing the malfunction.

  • Cracks or Breaks: Look for any cracks in the casing, especially around the USB receiver port (if applicable) or the sensor area.
  • Loose Parts: Gently shake the mouse to see if any internal components feel loose.
  • Damaged Scroll Wheel or Buttons: Ensure the buttons and scroll wheel move freely and don’t feel jammed or broken.

If significant physical damage is apparent, especially after a drop, the mouse may be beyond repair.

Onn Wireless Mouse Models And Specific Issues

Onn offers a range of wireless mice, from simple, budget-friendly optical mice to more ergonomic designs and even Bluetooth-enabled options. While the general troubleshooting steps apply broadly, specific models might have nuances.

Basic Onn Optical Wireless Mouse (usb Receiver)

These are the most common type. They typically come with a small USB dongle.

  • Key Component: USB Receiver (Dongle).
  • Common Issues: Battery depletion, loose dongle connection, interference.
  • Troubleshooting Focus: Ensure fresh batteries, try different USB ports for the dongle, move away from other wireless devices.

Onn Ergonomic Wireless Mouse

Designed for comfort, these often have a slightly different shape but function similarly to basic models, usually relying on a USB receiver.

  • Key Component: USB Receiver (Dongle).
  • Common Issues: Similar to basic models, but ensure the larger form factor isn’t causing accidental button presses or blocking the sensor inadvertently.
  • Troubleshooting Focus: Battery checks, dongle connection, sensor cleanliness.

Onn Bluetooth Wireless Mouse

These mice connect directly to your computer’s built-in Bluetooth, eliminating the need for a USB receiver.

  • Key Component: Bluetooth Module (in mouse and computer).
  • Common Issues: Pairing failures, Bluetooth adapter disabled on the computer, interference with other Bluetooth devices.
  • Troubleshooting Focus: Re-pairing the mouse, checking computer’s Bluetooth settings, ensuring Bluetooth drivers are up-to-date on the computer.

Example: A user reports their Onn Bluetooth mouse disconnects frequently. After confirming batteries are new, they check their computer’s Bluetooth settings and find the adapter was accidentally turned off. Re-enabling it and re-pairing the mouse resolves the intermittent connectivity.

Onn Wireless Vertical Mouse

These ergonomic mice promote a more natural handshake posture. They typically use a USB receiver.

  • Key Component: USB Receiver (Dongle).
  • Common Issues: Battery issues, dongle connection problems. The vertical design itself rarely causes functional issues unless there’s physical damage.
  • Troubleshooting Focus: Battery replacement, ensuring the dongle is securely connected, testing on a different surface if tracking is poor.

Comparing Wireless Mouse Technologies

Understanding the underlying technology can help diagnose issues. Most Onn wireless mice use one of two primary connection methods:

Feature2.4 GHz Wireless (USB Receiver)Bluetooth Wireless
**Connection**Dedicated USB receiver (dongle)Built-in Bluetooth on computer
**Setup**Plug-and-play; receiver plugs into USB portPairing required via computer’s Bluetooth settings
**Port Usage**Requires one USB portDoes not require a USB port
**Interference**Can be affected by other 2.4 GHz devicesCan be affected by other Bluetooth and 2.4 GHz devices
**Power Consumption**Generally efficient, but varies by modelCan be very power-efficient, especially Bluetooth 5.0+
**Latency**Often lower latency, preferred for gamingLatency can vary; generally good for productivity
**Device Pairing**Receiver is pre-paired or requires simple syncRequires manual pairing process via OS settings
**Typical Onn Use**Basic optical mice, ergonomic miceSome newer Onn models, often marketed for versatility

Data Point: A study by TechInsights indicated that while both 2.4 GHz and Bluetooth offer convenience, Bluetooth 5.0 and later versions provide significant improvements in range, speed, and power efficiency compared to earlier iterations. This means newer Bluetooth Onn mice might offer a more robust connection if your computer also supports modern Bluetooth standards.

Onn Wireless Mouse Not Working

Credit: www.youtube.com

Advanced Troubleshooting And Potential Hardware Failure

If you’ve exhausted the basic and intermediate troubleshooting steps, it’s time to consider more complex issues or the possibility of a hardware defect.

Checking Mouse Polling Rate And Sensitivity Settings

While most Onn mice are plug-and-play and don’t offer extensive customization, some might have subtle settings accessible through generic Windows/macOS mouse settings.

  • Windows: Go to Settings > Bluetooth & devices > Mouse. Here you can adjust pointer speed and check other basic settings. You can also access “Additional mouse options” which opens a classic Control Panel window with tabs for Pointer Options, Buttons, Wheel, etc. Ensure the “Pointer speed” isn’t set too low or high, and check that “Enhance pointer precision” is enabled or disabled based on your preference (sometimes toggling this can help).
  • MacOS: Go to System Settings > Mouse. Adjust tracking speed and scrolling speed.

Note: Onn mice typically lack dedicated software for DPI (dots per inch) or polling rate adjustments, unlike premium gaming mice.

Conflict With Other Input Devices

Occasionally, having multiple pointing devices connected simultaneously can cause conflicts.

  • Disconnect Other Devices: Temporarily disconnect any other mice, trackpads, drawing tablets, or game controllers.
  • Test Onn Mouse: See if the Onn mouse works correctly with all other input devices disconnected.
  • Reintroduce Gradually: If it works, reconnect your other devices one by one, testing the Onn mouse after each addition, to identify which device might be causing the conflict.

Checking System Power Management Settings (windows)

Windows has power-saving features that can sometimes disable USB devices to conserve energy.

  • Open Device Manager: Right-click the Start button and select “Device Manager.”
  • Locate USB Controllers: Expand the “Universal Serial Bus controllers” section.
  • Check USB Root Hub Properties: Right-click on entries like “USB Root Hub (USB)” or similar. Select “Properties.”
  • Power Management Tab: Go to the “Power Management” tab.
  • Disable Power Saving: Uncheck the box that says “Allow the computer to turn off this device to save power.”
  • Repeat: Repeat this process for all relevant USB Root Hub entries.
  • Restart: Restart your computer and test the mouse.

Hardware Failure: When The Mouse Itself Is The Problem

If you’ve tried the mouse on another computer and it still doesn’t work, or if you notice physical damage, it’s highly probable that the mouse hardware has failed.

  • Common Failure Points:
  • Internal Switch Failure: The microswitches under the mouse buttons can wear out or fail.
  • Optical Sensor Failure: The sensor itself can become damaged or stop functioning.
  • Internal Circuitry Damage: A drop or impact can damage the internal circuit board.
  • Battery Contact Corrosion: Old batteries can sometimes leak, corroding the contacts in the battery compartment, preventing power flow.

Example: A user’s Onn mouse suddenly stopped clicking. After trying new batteries and different USB ports, they noticed the left-click button felt mushy and unresponsive. Testing on another computer confirmed the issue. This points to a likely failure of the internal mouse switch.

Given the affordability of Onn wireless mice, repair is often not economically viable. If hardware failure is confirmed, the most practical solution is replacement.

Maintaining Your Onn Wireless Mouse For Longevity

Preventing issues is often easier than fixing them. Proper care and maintenance can extend the life of your Onn wireless mouse and ensure consistent performance.

Regular Cleaning

  • Sensor: As detailed earlier, periodically clean the optical sensor with compressed air or a dry cotton swab.
  • Exterior: Wipe down the mouse body with a slightly damp microfiber cloth to remove oils and dirt. Avoid harsh cleaning agents

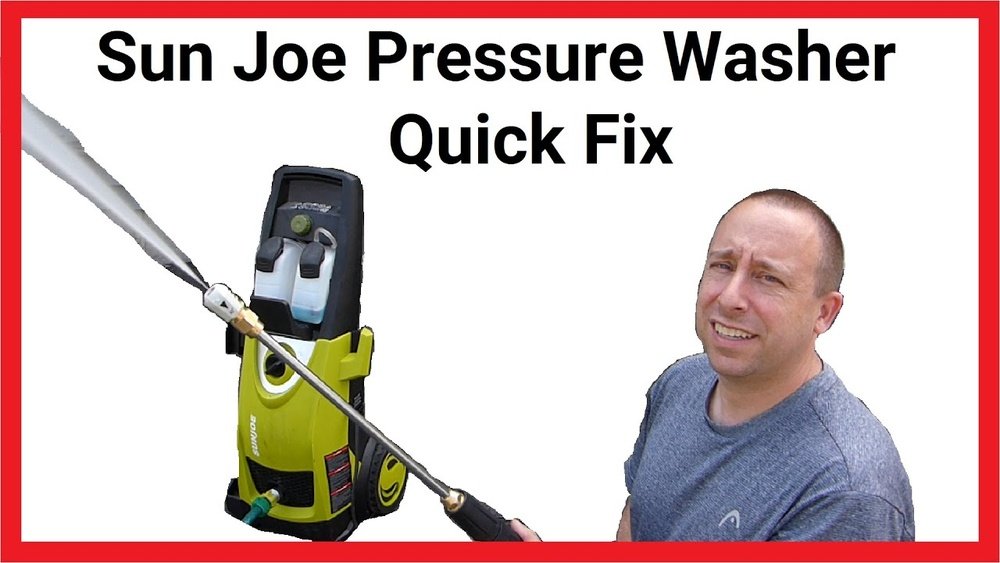
Sun Joe Pressure Washer Troubleshooting

Sun Joe Pressure Washer Troubleshooting

A Sun Joe pressure washer is a powerful tool for tackling tough cleaning jobs around your home, from grimy driveways to mildewed siding. However, like any piece of machinery, they can sometimes encounter issues. When your Sun Joe pressure washer isn’t performing as expected, it’s easy to feel frustrated. The good news is that many common problems have straightforward solutions that you can often fix yourself without needing to call a professional or replace the unit entirely. Understanding the potential pitfalls and how to address them can save you time, money, and a lot of hassle, ensuring your Sun Joe continues to be a reliable workhorse for all your outdoor cleaning needs.

This guide provides a comprehensive troubleshooting roadmap for common Sun Joe pressure washer problems. We’ll cover everything from starting issues and low pressure to leaks and unusual noises, offering practical, step-by-step solutions. By addressing these issues systematically, you can quickly get your Sun Joe back in action and restore the sparkle to your property.

Key Takeaways

  • No Power/Won’t Start: Check the GFCI outlet, power cord, and the pressure washer’s ON/OFF switch. Ensure the water supply is on and the hose is securely connected.
  • Low Water Pressure: Inspect the water inlet filter, garden hose, nozzle, and wand for blockages. Ensure adequate water supply and that the pump is primed.
  • Leaks: Identify the source of the leak, it could be from loose hose connections, a damaged O-ring, a faulty pump seal, or a cracked component.
  • Unusual Noises: Humming could indicate a blocked pump or motor issues. Knocking or rattling might point to internal pump problems or loose parts.
  • Detergent Not Dispensing: Verify the detergent tank is filled, the siphon tube is submerged, and the correct nozzle setting is used.
  • Engine/Motor Overheating: Ensure proper ventilation, check for debris, and allow the unit to cool down during prolonged use.
  • Safety First: Always disconnect power and water before performing any maintenance or troubleshooting.
Sun Joe Pressure Washer Troubleshooting

Credit: www.youtube.com

Common Sun Joe Pressure Washer Problems And Solutions

When your Sun Joe pressure washer falters, it’s crucial to approach the problem methodically. Many issues stem from simple oversights or easily fixable component problems. This section breaks down the most frequent challenges and provides clear, actionable steps to resolve them.

No Power Or Won’t Start

This is perhaps the most common and frustrating issue. A pressure washer that refuses to turn on can halt your cleaning project before it even begins. Several factors can contribute to this problem, ranging from simple electrical issues to more involved mechanical ones.

Electrical Checks

For electric Sun Joe models, the power supply is the first place to investigate.

  • GFCI Outlet: Most Sun Joe electric pressure washers are equipped with a Ground Fault Circuit Interrupter (GFCI) plug for safety. Ensure the GFCI outlet you are using is functioning correctly. You can test it by pressing the ‘TEST’ button; it should trip. Then, press the ‘RESET’ button to restore power. If it doesn’t reset or trip, the outlet itself may need replacement.
  • Power Cord: Inspect the entire length of the power cord for any visible damage, cuts, or fraying. A damaged cord is a serious safety hazard and can prevent the unit from receiving power. If damage is found, do not use the pressure washer and contact Sun Joe customer support for a replacement cord or advice.
  • Extension Cord (If Used): If you are using an extension cord, ensure it is rated for outdoor use and has a sufficient gauge (thickness) for the amperage draw of your pressure washer. Overheating can occur if the extension cord is too thin or too long, leading to a power interruption. Consult your Sun Joe manual for recommended extension cord specifications.
  • ON/OFF Switch: Confirm that the ON/OFF switch on the pressure washer itself is in the ‘ON’ position. Sometimes, it can be accidentally bumped to the ‘OFF’ position.

Water Supply And Connections

Even if the electrical components are fine, a lack of water can prevent the pressure washer from starting or operating correctly.

  • Water Source: Ensure your garden hose is connected to a water source that is turned on. A common mistake is forgetting to open the spigot fully.
  • Hose Connections: Check that both the garden hose connected to the water inlet and the high-pressure hose connected to the outlet are securely tightened. Loose connections can restrict water flow.
  • Water Inlet Filter: Most Sun Joe models have a filter screen at the water inlet to prevent debris from entering the pump. If this filter is clogged, it will severely restrict water flow. Unscrew the garden hose from the inlet, remove the filter screen, and clean it under running water. Reinstall it securely.

Motor And Pump Priming

Some models require priming, especially after being stored or if the water supply has been interrupted.

  • Priming Procedure: Refer to your Sun Joe manual for the specific priming instructions for your model. Generally, this involves ensuring the water supply is on and the trigger on the spray gun is held down for about 30 seconds to a minute until water flows steadily through the pump and out the wand. This purges any air from the system.

Low Water Pressure Or Weak Spray

Experiencing a weak spray when you expect a powerful blast can be disappointing. Low pressure can be caused by several factors, most of which are related to water flow or blockages.

Water Inlet Issues

The initial flow of water into the pressure washer is critical.

  • Adequate Water Supply: Ensure the water source provides sufficient flow rate (gallons per minute, GPM) and pressure (PSI). A standard garden hose connected to a low-pressure spigot won’t provide enough water for the pressure washer to operate at its full potential. Check your home’s water pressure and GPM if you suspect this is the issue.
  • Garden Hose Diameter: Use a garden hose with an adequate diameter (typically 5/8 inch or larger) and keep its length as short as feasible. Long or narrow hoses can create a significant pressure drop before the water even reaches the pressure washer.
  • Kinks in the Hose: Inspect the garden hose for any kinks or bends that could restrict water flow.

Nozzle And Wand Blockages

The nozzle and wand are the final points of water exit, and any obstruction here will directly impact pressure.

  • Clogged Nozzle: The small orifices in the spray nozzles are prone to clogging from mineral deposits or debris. Remove the nozzle from the spray wand and inspect it. Use a thin wire or a nozzle cleaning tool (often included with the pressure washer) to clear any blockages. Rinse thoroughly.
  • Wand Obstruction: While less common, check the end of the spray wand for any debris that might be lodged inside.

Pump And Internal Issues

If external factors seem fine, the problem might lie within the pump itself.

  • Air in the Pump: As mentioned in the “Won’t Start” section, air trapped in the pump can significantly reduce pressure. Ensure the unit is properly primed.
  • Worn Pump Seals: Over time, pump seals can wear out, leading to internal leaks and reduced pressure. If you suspect this, and other troubleshooting steps haven’t worked, it might indicate a need for pump repair or replacement.
  • Unloader Valve Malfunction: The unloader valve regulates water flow and pressure. If it’s stuck or malfunctioning, it can cause low pressure. This is a more complex component to diagnose and may require professional assistance.

Detergent Siphon Tube

Ensure the detergent siphon tube is not blocked and is properly submerged in the detergent solution. A blocked tube can create a vacuum effect, reducing overall water flow.

Leaks From The Unit

Leaks can occur from various points on a pressure washer and, besides being messy, can indicate a problem that needs addressing.

Hose Connections

The most common source of leaks is at the hose connections.

  • High-Pressure Hose: Check the connection point where the high-pressure hose attaches to the pressure washer’s outlet and the spray gun. Ensure the fittings are tightened securely. If the leak persists, inspect the O-rings at these connections for damage, wear, or missing seals. Replace any damaged O-rings.
  • Garden Hose: Similarly, check the connection of the garden hose to the water inlet on the pressure washer. Tighten the fitting and inspect the O-ring within the hose connector.

Pump And Internal Leaks

Leaks originating directly from the pump housing or motor area are more serious.

  • Pump Seals: A leak from the pump shaft seal indicates internal wear and likely requires pump repair or replacement.
  • Cracked Housing: In rare cases, the pump housing or motor casing might develop a crack due to impact or freezing. Such leaks usually necessitate replacement of the affected component.

Water Outlet/wand Leaks

  • Spray Gun or Wand: Leaks can also occur from the spray gun itself or where the wand attaches to the spray gun. Check the trigger mechanism and the connection point for worn O-rings or internal component damage. Many spray guns have replaceable O-ring kits.

Pro Tip: When checking for leaks, it’s often helpful to run the pressure washer briefly (with caution) and pinpoint the exact source of the water. Remember to disconnect power and water before attempting any repairs.

Unusual Noises

Strange sounds from your Sun Joe pressure washer can be indicators of underlying mechanical issues.

Humming Or Buzzing Sound

If the motor hums but doesn’t spin, or if there’s a persistent buzzing, it often points to a blockage or an electrical issue.

  • Pump Blockage: The pump may be partially or fully blocked, preventing the motor from turning it. Follow the steps for checking water supply and filters.
  • Motor Issue: For electric models, a humming sound without operation could indicate a seized motor or a problem with the capacitor. This often requires professional diagnosis.
  • Priming Failure: If the unit is trying to prime but can’t draw water, the motor might hum as it strains. Ensure water is flowing freely.

Knocking Or Rattling Sounds

These noises usually suggest something is loose internally or there’s a problem within the pump’s mechanics.

  • Loose Parts: Ensure all external connections and components are secure.
  • Pump Cavitation: If the pump is running without enough water (starving), it can cause cavitation, leading to knocking sounds. This is detrimental to the pump and should be addressed immediately by ensuring adequate water supply and priming.
  • Internal Pump Damage: Worn pistons, connecting rods, or valves within the pump can cause knocking or rattling. This typically indicates significant internal wear and may require pump replacement.

Detergent Not Dispensing

Many users rely on their pressure washer’s detergent dispenser for enhanced cleaning power. If it’s not working, your cleaning might be less effective.

Checking The Detergent System

  • Detergent Level: Ensure the detergent tank is filled with a Sun Joe-approved pressure washer detergent. Using the wrong type of cleaner can damage the system.
  • Siphon Tube: The clear plastic siphon tube draws detergent from the tank into the pump. Check that this tube is securely attached at both ends and that it reaches the bottom of the detergent tank. Make sure the intake filter on the end of the tube is not clogged.
  • Nozzle Selection: Many Sun Joe pressure washers require a specific “soap” nozzle (usually black and with a wider spray pattern) for the detergent to be siphoned. Ensure you are using the correct nozzle for detergent application. The high-pressure nozzles are typically for rinsing only.
  • Water Flow: Detergent is usually siphoned when the pressure is lower, often with the soap nozzle attached. Ensure there is adequate water flow to the unit.

System Blockage

Over time, detergent residue can dry and clog the siphon tube or the detergent injector.

  • Cleaning the Siphon Tube: Remove the siphon tube and clean it thoroughly with warm water. You can use a small brush or pipe cleaner to ensure it’s clear.
  • Flushing the System: After using detergent, it’s good practice to flush the system by running plain water through it for a few minutes. This helps prevent residue buildup. If you suspect a clog within the unit’s detergent pathway, you may need to consult the manual or contact Sun Joe support.

Engine/motor Overheating

Overheating can damage the motor or engine and lead to shutdowns.

Electric Motors

  • Ventilation: Ensure the air intake vents on the motor housing are not blocked by dirt, debris, or being pressed against a surface. Adequate airflow is crucial for cooling.
  • Prolonged Use: Electric motors can overheat during extended, continuous use, especially under heavy load. Allow the unit to cool down periodically, particularly on very hot days or when tackling demanding tasks.
  • Voltage Drop: An undersized or faulty extension cord can cause a voltage drop, making the motor work harder and generate more heat.

Gas Engines (for Gas Models)

  • Oil Level: For gasoline-powered Sun Joe models, ensure the engine oil level is correct. Low oil can cause overheating.
  • Air Filter: A dirty air filter restricts airflow to the engine, causing it to run inefficiently and potentially overheat. Clean or replace the air filter as per your manual’s recommendations.
  • Cooling Fins: Check the engine’s cooling fins for dirt and debris. Keep them clean to allow for proper heat dissipation.
Sun Joe Pressure Washer Troubleshooting

Credit: www.youtube.com

Maintenance Tips To Prevent Future Issues

Preventative maintenance is key to ensuring your Sun Joe pressure washer operates reliably and lasts longer. Regular upkeep can save you from many of the troubleshooting scenarios outlined above.

Regular Cleaning And Storage

  • Post-Use Rinse: After each use, disconnect the hoses and rinse the exterior of the pressure washer to remove dirt and grime.
  • Filter Maintenance: Regularly clean the water inlet filter. This is one of the most critical maintenance steps to prevent pressure issues and pump damage.
  • Proper Storage: Store your Sun Joe pressure washer in a clean, dry place. Protect it from freezing temperatures, as water left in the pump can freeze and cause significant damage. Use pump saver fluid if storing in freezing conditions, following manufacturer guidelines.
  • Hose Inspection: Periodically inspect both the garden hose and the high-pressure hose for cracks, leaks, or wear.

Seasonal Checks

  • Before First Use: Before the start of the cleaning season, check all connections, ensure the water supply is adequate, and prime the unit. Inspect the power cord and hoses for any signs of damage sustained during storage.
  • End of Season: At the end of the season, thoroughly clean the unit, flush the detergent system, and prepare it for storage. If it’s a gas model, follow the recommended procedures for storing the engine.

Using The Right Accessories

  • Nozzles: Use the appropriate nozzle for the task. Using a high-pressure nozzle for a light-duty task can be inefficient and potentially damage surfaces. Conversely, using a low-pressure (soap) nozzle for heavy-duty cleaning will yield poor results.
  • Detergents: Always use detergents specifically designed for pressure washers. Household cleaners can damage the pump and seals.
Sun Joe Pressure Washer Troubleshooting

Credit: manuals.plus

Sun Joe Pressure Washer Common Issues Comparison

Understanding how different issues manifest can help in quicker diagnosis. Here’s a comparison of common problems, their likely causes, and typical solutions.

Symptom Likely Cause(s) Primary Solution(s)
No Power / Won’t Start GFCI tripped, power cord issue, switch off, no water supply, clogged inlet filter Reset GFCI, inspect cord, turn switch on, ensure water is on, clean inlet filter
Low Water Pressure Clogged nozzle/wand, kinked hose, low water supply, clogged inlet filter, air in pump Clean nozzle/wand, straighten hose, check water source, clean inlet filter, prime unit
Leaks Loose hose connections, damaged O-rings, worn pump seals, cracked housing Tighten connections, replace O-rings, service/replace pump, repair/replace housing
Unusual Noises (Humming) Pump blockage, motor seized, priming failure Clear pump, check motor, ensure water supply/prime
Unusual Noises (Knocking) Pump cavitation, internal pump damage Ensure adequate water supply, service/replace pump
Detergent Not Dispensing Nozzle selection, clogged siphon tube, low detergent level, system blockage Use soap nozzle, clean siphon tube, refill tank, flush system

Frequently Asked Questions

How Often Should I Clean The Water Inlet Filter On My Sun Joe Pressure Washer?

It’s recommended to clean the water inlet filter after every few uses, or more frequently if you are using water from a source that is known to be dirty or contain sediment. A clogged filter is one of the most common causes of low pressure and can strain the pump. You can find instructions on how to remove and clean the filter in your Sun Joe pressure washer’s owner’s manual.

What Kind Of Detergent Should I Use With My Sun Joe Pressure Washer?

You should only use detergents specifically formulated for pressure washers. These cleaners are designed to be compatible with the seals and pump components of pressure washing equipment. Using household cleaners, bleach, or other chemicals not intended for pressure washers can cause irreparable damage to the pump and void your warranty. Always check the detergent bottle label to ensure it is safe for pressure washer use. Sun Joe also offers its own line of pressure washer detergents.

Can I Use My Sun Joe Pressure Washer In The Rain?

While many Sun Joe electric pressure washers are designed for outdoor use, operating any electrical equipment in heavy rain poses safety risks. If the unit is plugged in, and rain is directly hitting the electrical components or connections, there is a risk of electric shock. Light drizzle might be manageable if all connections are secure and properly insulated, but it’s generally best to avoid using electrical appliances outdoors during rain or wet conditions. Always ensure your GFCI outlet and plug are functioning correctly if you must use it in damp conditions.

My Sun Joe Pressure Washer Keeps Shutting Off. What Could Be The Problem?

If your Sun Joe pressure washer is shutting off intermittently, it could be due to overheating. Electric models have thermal protection that will shut the motor down if it gets too hot. Ensure the unit has adequate ventilation and is not being overworked. Check for clogged air vents on electric models or ensure sufficient oil and clean air filters on gas models. Another possibility is a tripped GFCI outlet or a faulty extension cord that is causing power interruptions. Allow the unit to cool down completely before attempting to restart it.

How Do I Know If I Need To Replace The Pump On My Sun Joe Pressure Washer?

Signs that your pump may need replacement include persistent low water pressure that cannot be resolved by cleaning filters or nozzles, loud knocking or grinding noises coming from the pump area, or visible leaks from the pump housing itself that indicate damaged seals. If you’ve tried all other troubleshooting steps and the unit still doesn’t perform correctly, especially if it’s an older unit, pump failure is a strong possibility. Consult your owner’s manual or contact Sun Joe customer support for repair or replacement options.

By understanding these common issues and their solutions, you can maintain your Sun Joe pressure washer effectively. Regular checks, proper usage, and timely attention to minor problems will ensure your equipment remains a powerful and reliable asset for keeping your property looking its best.

Removing Sour Milk Smell Fridge

Removing Sour Milk Smell Fridge

The sharp, unmistakable odor of sour milk in a refrigerator is more than just unpleasant; it’s a potent signal that something has gone wrong. Whether it’s a forgotten carton, a spoiled ingredient, or a temporary power outage, that acrid smell can permeate every corner of your appliance, clinging stubbornly to shelves, drawers, and even the very walls of your fridge.

Tackling this pervasive odor requires a systematic approach, combining immediate cleanup with long-term deodorizing strategies to restore freshness and ensure food safety. Ignoring it can lead to cross-contamination and make your kitchen an unwelcome environment.

This comprehensive guide will walk you through the essential steps to effectively remove sour milk smell from your refrigerator. From identifying the source to implementing powerful cleaning agents and preventative measures, you’ll learn how to banish that foul odor for good and maintain a consistently clean and hygienic appliance.

We’ll explore the science behind odor absorption, the best natural and commercial solutions, and tips to prevent future occurrences.

Key Takeaways

  • Immediate Action is Crucial: The sooner you address spilled or spoiled milk, the easier it will be to remove the odor.
  • Thorough Cleaning is Non-Negotiable: Simply wiping the surface isn’t enough; you need to deep clean all accessible parts of the refrigerator.
  • Natural Deodorizers are Effective: Baking soda, vinegar, and activated charcoal are potent, safe, and readily available options for absorbing odors.
  • Commercial Cleaners Offer Strength: For stubborn smells, specialized refrigerator cleaners can provide a powerful solution.
  • Prevention is Key: Proper food storage, regular cleaning, and monitoring expiration dates can prevent sour milk smells from developing.
  • Identify the Source: Always locate the origin of the smell to ensure complete removal.
Removing Sour Milk Smell Fridge

Credit: www.frizzlife.com

Understanding The Sour Milk Odor

The pungent smell of sour milk is primarily due to the bacterial fermentation of lactose, the sugar found in milk. As bacteria break down lactose, they produce lactic acid, which gives sour milk its characteristic tangy taste and sharp odor. When milk spills or spoils inside a refrigerator, these bacteria multiply rapidly, especially in the enclosed, often damp environment. The smell isn’t just airborne; it can seep into porous materials like rubber seals, plastic drawers, and even the insulation if left unaddressed for too long.

The effectiveness of odor removal depends heavily on the concentration of the spill, the duration it remained uncleaned, and the type of materials within the refrigerator. Plastics, for instance, are more porous and prone to absorbing odors than glass or metal. The temperature fluctuations within a fridge, especially if there was a power interruption, can also accelerate bacterial growth and odor production. Understanding these factors helps in choosing the most effective cleaning and deodorizing methods.

Step-by-step Guide To Removing Sour Milk Smell

Eliminating a sour milk odor requires a methodical approach. It’s not just about masking the smell; it’s about neutralizing the source and cleaning the affected areas thoroughly.

1. Empty And Inspect The Refrigerator

The first and most critical step is to remove everything from the refrigerator. This allows for a complete inspection and ensures that no contaminated items remain.

  • Discard Spoiled Items: Carefully examine all food items, especially dairy products, meats, and anything that might have come into contact with the spill. Discard anything that shows signs of spoilage or is past its expiration date. When in doubt, throw it out.
  • Isolate Potentially Contaminated Items: If you’re unsure about certain items, place them in a sealed bag outside the refrigerator while you clean. You can assess them later once the fridge is fresh.
  • Check for the Source: Look for visible spills on shelves, drawers, walls, and especially the drip tray or drain hole, which are common culprits for trapped liquids and odors.

2. Remove And Clean Removable Parts

Once empty, take out all shelves, drawers, and any other removable components. These are often the areas where milk can accumulate and hide.

  • Wash with Hot, Soapy Water: Use a basin or your sink to wash these parts thoroughly with hot water and a grease-cutting dish soap.
  • Scrub Stubborn Stains: For any dried milk residue, use a non-abrasive sponge or cloth to scrub gently. Avoid harsh scouring pads that could scratch the plastic.
  • Rinse Thoroughly: Ensure all soap residue is rinsed away, as this can also contribute to unwanted smells.
  • Dry Completely: Before returning them to the fridge, dry all parts thoroughly with a clean towel or allow them to air dry completely. Moisture can promote mold and mildew growth, creating new odor problems.

3. Deep Clean The Interior

With the removable parts out, it’s time to tackle the interior of the refrigerator itself. This is where the odor has likely spread.

  • Prepare Your Cleaning Solution: You have several effective options, ranging from natural to commercial cleaners.
  • Vinegar Solution: Mix equal parts white vinegar and warm water. Vinegar is acidic and a natural disinfectant that helps neutralize odors.
  • Baking Soda Paste: Mix baking soda with a little water to create a paste. This is excellent for scrubbing tougher spots.
  • Mild Dish Soap Solution: A solution of warm water and a few drops of mild dish soap can also be effective for general cleaning.
  • Commercial Refrigerator Cleaner: If the smell is particularly stubborn, a cleaner specifically designed for refrigerators can be used. Always follow the manufacturer’s instructions and ensure it’s food-safe.
  • Wipe Down All Surfaces: Using a clean sponge or cloth, wipe down every interior surface: walls, ceiling, floor, and door seals. Pay special attention to corners and crevices.
  • Address Door Seals: The rubber seals around the refrigerator door can trap spills and odors. Use your cleaning solution and a toothbrush or cloth to carefully clean the folds of the seals.
  • Clean the Drip Tray/Drain Hole: If your refrigerator has a removable drip tray, clean it thoroughly. If there’s a drain hole, use a pipe cleaner or a thin wire to ensure it’s clear of any blockages.

4. Rinse And Dry The Interior

After cleaning, it’s essential to rinse away any cleaning solution residue.

  • Rinse with Clean Water: Use a cloth dampened with plain water to wipe down all interior surfaces again. This removes any lingering cleaning agents and helps neutralize any remaining odors from the cleaning solution itself (like vinegar).
  • Dry Thoroughly: Use clean, dry towels to dry the interior completely. Leave the refrigerator door open for a few hours if possible to allow for air circulation and complete drying.
Removing Sour Milk Smell Fridge

Credit: breastfeeding.support

Effective Deodorizing Strategies

Once the refrigerator is clean, the lingering sour milk smell might still be present. Deodorizing involves using substances that absorb or neutralize airborne odors.

Natural Deodorizers

These are safe, readily available, and often highly effective at absorbing odors without introducing harsh chemicals.

  • Baking Soda: This is a classic odor absorber.
  • Method: Place an open box or a shallow dish filled with baking soda inside the refrigerator. For a more potent effect, spread baking soda on a baking sheet to maximize surface area.
  • Frequency: Replace the baking soda every 1-3 months, or more frequently if dealing with a strong odor.
  • White Vinegar: Its acidic nature helps neutralize alkaline odor molecules.
  • Method: Pour white vinegar into a shallow bowl or cup and place it inside the refrigerator.
  • Duration: Leave it in for at least 24-48 hours, replacing it daily if the smell is strong. The vinegar smell itself will dissipate quickly once removed.
  • Activated Charcoal: This is a highly porous material known for its exceptional ability to absorb odors and impurities.
  • Method: Place a container of activated charcoal (available in pet stores or online) in the fridge. Ensure it’s designed for odor absorption and not for water filtration, which might contain other additives.
  • Effectiveness: Activated charcoal can be very effective and lasts longer than baking soda.
  • Coffee Grounds: Both fresh and used dried coffee grounds can absorb odors.
  • Method: Spread dry, used coffee grounds on a plate or in a shallow bowl.
  • Caution: This method can impart a coffee aroma, which might be preferable to sour milk but should be considered.
  • Oats: Uncooked oats can also absorb odors.
  • Method: Place a bowl of uncooked oats inside the refrigerator.

Commercial Deodorizers

If natural methods aren’t sufficient, commercial products can offer a stronger solution.

  • Odor Absorbing Gels and Packs: Many brands offer specialized refrigerator deodorizers in gel or solid pack forms. These are designed for long-term odor absorption and are often more potent than baking soda.
  • Ozone Generators (Use with Extreme Caution): Some professional cleaning services use ozone generators. While highly effective at neutralizing odors, ozone can be harmful to humans and pets and can damage rubber components if used improperly or for too long. Never use an ozone generator in a refrigerator with food inside, and always follow manufacturer instructions meticulously.

Using Essential Oils (with Caution)

While not primarily for absorption, some essential oils can help refresh the air.

  • Method: Place a few drops of lemon, tea tree, or peppermint oil on a cotton ball and place it in a small dish inside the fridge.
  • Caution: Use sparingly, as strong scents can interfere with the natural aroma of foods. Ensure the oil doesn’t come into direct contact with food items.
Removing Sour Milk Smell Fridge

Credit: www.allrecipes.com

Addressing Persistent Odors And Stubborn Stains

Sometimes, the sour milk smell is deeply ingrained, especially if the spill was left for an extended period or if the refrigerator’s materials are particularly porous.

Re-cleaning And Deodorizing Cycles

If the smell persists after the initial deep clean and deodorizing, repeat the process.

  • Repeat Cleaning: Go back through the cleaning steps, perhaps using a stronger solution like a diluted bleach solution (1 tablespoon bleach per gallon of water) for the interior walls and shelves if your refrigerator manufacturer permits it. Always rinse thoroughly after using bleach and ensure good ventilation.
  • Extended Deodorizing: Leave multiple deodorizing agents in the fridge simultaneously (e.g., baking soda and activated charcoal). Replace them every few days.

Tackling Specific Areas

  • Door Seals: If the odor seems concentrated in the door seals, use an old toothbrush dipped in vinegar or a specialized rubber cleaner to get into the folds. Some people find success using a mild bleach solution (again, check your manual and rinse thoroughly).
  • Condensation or Drip Pan: This is a common hiding spot for spoiled liquids. Consult your refrigerator’s manual on how to access and clean the drip pan. It often requires pulling the unit away from the wall. Ensure the refrigerator is unplugged before attempting this.
  • Ventilation System: If your fridge has a fan or ventilation system, check if any milk residue has entered the vents. Gently clean accessible areas with a damp cloth.

The Power Of Sunlight

If possible and practical, removing the shelves and drawers and placing them in direct sunlight can be a powerful natural deodorizer. UV rays from the sun have natural antibacterial and deodorizing properties. This is a step best taken on a warm, sunny day.

Data-driven Insights On Odor Absorption

Different materials absorb odors at varying rates. Understanding this can help in choosing the best approach.

MaterialOdor Absorption TendencyCleaning DifficultyBest Cleaning Approach
**Glass**LowLowMild soap and water, vinegar solution
**Metal**LowLowMild soap and water, baking soda paste
**Plastic**HighMediumStronger soap, vinegar, baking soda; may require repeated treatment
**Rubber Seals**HighHighSpecialized cleaner, diluted vinegar, careful scrubbing
**Insulation**Very High (if exposed)Very HighProfessional cleaning or replacement may be needed

*Source: Analysis based on material properties and common cleaning practices.*

This table highlights why plastic components and rubber seals often require the most attention when dealing with persistent odors. Their porous nature means they can trap odor molecules more effectively than smooth surfaces like glass.

Maintaining A Fresh Fridge: Prevention Strategies

The best way to deal with a sour milk smell is to prevent it from happening in the first place. Implementing good habits can save you a lot of trouble.

Regular Cleaning Schedule

  • Weekly Wipe-Downs: Dedicate a few minutes each week to quickly wipe down shelves and check for spills. This prevents small messes from becoming big problems.
  • Monthly Deep Clean: Aim for a more thorough cleaning of the interior and removable parts at least once a month.
  • Quarterly Drip Pan Check: Make it a habit to check and clean the drip pan every 3-4 months.

Proper Food Storage

  • Airtight Containers: Store leftovers and opened food items in airtight containers. This not only prevents spills but also stops odors from spreading.
  • Check Expiration Dates: Regularly review the contents of your refrigerator and discard items nearing or past their expiration dates.
  • Designated Areas: Store dairy products, especially milk and cheese, in the coldest part of the refrigerator, typically the back of the bottom shelf, to maximize freshness.

Temperature Control

  • Optimal Temperature: Ensure your refrigerator is set to the correct temperature, ideally between 35°F and 40°F (1.7°C and 4.4°C). Colder temperatures slow down bacterial growth.
  • Avoid Overpacking: Overfilling the refrigerator can obstruct airflow, leading to uneven cooling and potential warm spots where bacteria can thrive.
  • Minimize Door Openings: Keep the refrigerator door closed as much as possible to maintain a consistent temperature.

Using Odor Absorbers Proactively

  • Baking Soda: Keep an open box or dish of baking soda in the fridge at all times. Replace it every 1-3 months. This acts as a continuous, low-level odor absorber.
  • Activated Charcoal: Consider using activated charcoal for ongoing odor control, especially if you frequently store strong-smelling foods.

Troubleshooting Common Issues

Even with the best preventative measures, specific problems can arise.

The Smell Returns Quickly

  • Incomplete Cleaning: The source of the odor might not have been entirely removed. Re-inspect thoroughly, paying attention to hidden areas like the drip tray or behind drawers.
  • Porous Materials: If the smell is deeply absorbed into plastic or rubber, it may take multiple cleaning and deodorizing cycles to fully eliminate.
  • Mold/Mildew: Check for any signs of mold or mildew, which can create their own foul odors. Clean these areas meticulously.

Stains Remain After Cleaning

  • Specialized Cleaners: For stubborn stains on plastic, a dedicated plastic cleaner or a paste of baking soda and hydrogen peroxide might help lift the discoloration. Always test in an inconspicuous area first.
  • Acceptance: In some cases, particularly with older refrigerators and deep stains on plastic, complete stain removal may not be possible. Focus on ensuring the area is clean and odor-free.

New Fridge Smells

Sometimes, new refrigerators have a plastic or chemical smell. This is different from sour milk but can be addressed similarly:

  • Ventilation: Leave the doors open for 24-48 hours before use.
  • Baking Soda/Vinegar: Place bowls of baking soda or vinegar inside for a few days.
  • Manufacturer Instructions: Always check the owner’s manual for specific instructions regarding initial setup and odor removal for new appliances.

Case Study: The Persistent Pungency

Sarah, a busy professional, discovered a carton of milk had leaked significantly in the back of her refrigerator. She managed to wipe up the visible spill but noticed a faint sour smell the next day. Within 48 hours, the odor had become quite pronounced, permeating even the sealed containers.

Initial Action: Sarah emptied the fridge, discarded the spoiled milk and a few other items that seemed affected. She washed the shelves and drawers with dish soap and water.

The Problem: Despite her efforts, the sour smell lingered. She tried an open box of baking soda, but it only slightly reduced the intensity.

Expert Advice & Deeper Cleaning: After researching, Sarah realized the spill likely reached the drip tray and possibly the rubber seals. She consulted her refrigerator’s manual, unplugged the unit, and carefully pulled it out to access the drip tray. She found a significant amount of dried milk residue. She cleaned the tray thoroughly with a vinegar-water solution and used an old toothbrush to scrub the door seals. She also placed bowls of both baking soda and activated charcoal inside.

Resolution: After several days with the improved cleaning routine and multiple deodorizers, the sour milk smell finally dissipated completely. Sarah learned the importance of checking less obvious areas and using multiple deodorizing agents for stubborn odors. She now performs a quick weekly check and a monthly deep clean to prevent such issues.

Frequently Asked Questions

Is It Safe To Use Bleach To Clean My Refrigerator?

While diluted bleach can be effective at disinfecting and removing odors, you must use it with extreme caution. Always check your refrigerator manufacturer’s manual first, as some materials may be damaged by bleach. If you do use it, dilute it significantly (e.

g. , 1 tablespoon bleach per gallon of water), ensure thorough rinsing with clean water afterward, and allow for ample ventilation. Never mix bleach with ammonia or other cleaning products, as this can create toxic fumes.

How Long Does A Sour Milk Smell Typically Last?

The duration depends heavily on the severity of the spill and how quickly it was addressed. A small, fresh spill might be gone after a thorough cleaning and a day or two with a deodorizer. However, a large spill left for days could take multiple deep cleaning sessions and weeks of consistent deodorizing to fully eliminate.

Persistent odors may require professional intervention or, in rare cases, replacement of heavily affected components.

Can A Sour Milk Smell Damage My Refrigerator?

The smell itself is a byproduct of bacterial activity and won’t directly damage the refrigerator’s components. However, the bacteria that cause the smell can potentially grow and spread, affecting the freshness of other foods. If the spill leads to mold or mildew growth, this can be more problematic and may require more intensive cleaning.

The main concern is food safety and maintaining a hygienic environment.

What’s The Difference Between Cleaning And Deodorizing?

Cleaning involves physically removing dirt, grime, spills, and bacteria using soap, water, or specific cleaning agents. Deodorizing, on the other hand, focuses on neutralizing or absorbing airborne odors that remain after cleaning. While cleaning removes the source of the smell, deodorizing tackles the lingering scent molecules.

Both steps are crucial for complete odor removal.

Should I Use Commercial Cleaners Or Natural Remedies?

Both can be effective. Natural remedies like baking soda and vinegar are safe, inexpensive, and often sufficient for mild to moderate odors. They are excellent for regular maintenance and proactive deodorizing. Commercial cleaners or specialized products might be necessary for very stubborn or deeply ingrained smells, offering a more potent solution.

For everyday freshness, a combination of regular cleaning with natural deodorizers is often the most practical and effective approach.

Successfully banishing the sour milk smell from your refrigerator is achievable with a combination of diligent cleaning, effective deodorizing, and consistent preventative measures. By understanding the nature of the odor and employing the right techniques, you can restore freshness to your appliance and ensure a safe, pleasant environment for your food.

Remember that regular maintenance is your best defense against future odor issues, turning a potentially daunting task into a manageable part of your kitchen upkeep routine.

How To Fix Wall Cracks Without A Contractor

How To Fix Wall Cracks Without A Contractor

Cracks in your walls can be more than just an eyesore; they can be indicators of underlying issues that, if left unaddressed, could lead to more significant structural problems. While calling a contractor might seem like the only solution, many common wall cracks can be effectively repaired with basic DIY skills and readily available materials.

This guide will walk you through identifying different types of wall cracks, understanding their potential causes, and providing step-by-step instructions on how to fix them yourself, saving you time and money.

Key Takeaways

  • Assess the crack: Differentiate between cosmetic, structural, and settlement cracks to determine the best repair method and whether professional help is needed.
  • Gather your tools: Essential supplies include spackle or joint compound, putty knives, sandpaper, primer, and paint. For larger cracks, you’ll also need drywall tape, a utility knife, and potentially a patching compound.
  • Prepare the area: Clean the crack thoroughly, remove loose debris, and create a clean surface for the repair material to adhere to.
  • Choose the right filler: Use spackle for small hairline cracks, joint compound with drywall tape for larger cracks, and specialized patching compounds for significant damage.
  • Apply and smooth: Apply filler in thin, even layers, allowing each layer to dry completely. Sand smooth between layers to achieve a seamless finish.
  • Prime and paint: Once the filler is dry and smooth, prime the repaired area and then paint to match the surrounding wall.
  • Monitor for recurrence: Especially for settlement cracks, keep an eye on the repaired area for any signs of the crack reappearing, which might indicate a persistent underlying issue.

Understanding Wall Cracks: Types And Causes

Before you can fix a wall crack, it’s crucial to understand what you’re dealing with. Not all cracks are created equal, and their appearance, location, and behavior can provide valuable clues about their origin and the necessary repair strategy.

Cosmetic Cracks

These are typically hairline cracks that run horizontally or vertically and are generally superficial. They often appear in drywall or plaster and are usually caused by minor settling of the house, changes in temperature and humidity, or the natural aging of building materials.

  • Causes:
  • Building Settling: Houses, especially newer ones, naturally settle over time as the foundation adjusts to the ground. This movement can cause minor stress on drywall seams and corners, leading to fine cracks.
  • Humidity and Temperature Fluctuations: Wood framing and drywall can expand and contract with changes in temperature and humidity. This constant movement can stress joints and create small cracks.
  • Poor Installation: In some cases, hairline cracks can result from improper taping or mudding of drywall seams during the initial installation.

Settlement Cracks

These cracks are often wider than cosmetic ones and can appear in various patterns, including stair-step cracks in plaster or masonry, or diagonal cracks in drywall. They are usually a sign of more significant movement within the house’s structure, often related to the foundation.

  • Causes:
  • Foundation Movement: Issues like soil erosion, water damage around the foundation, or changes in soil moisture content can cause the foundation to shift or settle unevenly. This is a common cause of wider, more concerning cracks.
  • Expansive Soils: Soils that expand when wet and contract when dry can put immense pressure on foundations, leading to cracks.
  • Structural Overload: In rare cases, overloading a structural element can lead to cracks.

Structural Cracks

These are the most serious type of wall cracks. They are typically wide, deep, and may show signs of movement, such as one side of the crack being higher than the other (a step crack). They can appear horizontally, vertically, or diagonally and often indicate a significant problem with the building’s structural integrity.

  • Causes:
  • Foundation Failure: Significant or uneven foundation settlement.
  • Water Damage: Water penetrating and weakening structural elements like beams or joists.
  • Wood Rot or Insect Damage: Decay or infestation in wooden structural components.
  • Improper Load Bearing: Issues with how weight is distributed within the structure.

When to Call a Professional:

If you identify structural cracks, or if settlement cracks are wide (more than 1/4 inch), growing, or accompanied by other signs like sticking doors or windows, warped floors, or visible foundation damage, it is imperative to consult a structural engineer or a qualified contractor. Attempting to repair these yourself without addressing the root cause can be dangerous and ineffective. For the purpose of this guide, we will focus on fixing cosmetic and minor settlement cracks.

How To Fix Wall Cracks Without A Contractor

Credit: royalbuildernyc.com

Preparing For Your Wall Crack Repair Project

Proper preparation is key to a successful DIY wall crack repair. Rushing this stage can lead to a subpar finish or a repair that doesn’t last. This involves gathering the right tools and materials, and most importantly, preparing the crack itself.

Essential Tools And Materials

The specific tools and materials you’ll need depend on the size and type of crack you’re addressing.

For Hairline and Small Cracks (up to 1/4 inch):

  • Spackling Compound (Spackle): Lightweight, easy to sand, ideal for small cosmetic repairs.
  • Putty Knife: A flexible metal blade for applying and smoothing spackle. A 1.5-inch or 3-inch size is usually sufficient.
  • Fine-grit Sandpaper: 120-220 grit for smoothing the dried spackle.
  • Sanding Block: For even sanding.
  • Damp Cloth: For cleaning dust.
  • Primer: To seal the repaired area before painting.
  • Paint: Matching your wall color.

For Larger Cracks (1/4 inch to 1/2 inch):

  • All-Purpose Joint Compound (Mud): Dries harder than spackle, better for larger gaps and seams. You can buy it pre-mixed or as a powder to mix with water.
  • Drywall Tape: Paper or fiberglass mesh tape designed for drywall seams and cracks. Paper tape is generally preferred for strength.
  • Putty Knife or Drywall Taping Knife: A wider knife (6-inch or 8-inch) is helpful for applying and feathering joint compound.
  • Utility Knife: For trimming excess tape or cleaning edges.
  • Medium-grit Sandpaper: 100-150 grit for initial smoothing, followed by fine-grit.
  • Primer and Paint.

For Very Large Cracks or Holes (over 1/2 inch):

  • Patching Compound: Often a thicker, cement-based compound that shrinks less than joint compound.
  • Scrap Piece of Drywall: For larger holes, a small piece of drywall might be needed as backing.
  • Screws or Nails: To secure a drywall patch.
  • Drywall Saw: If cutting out a damaged section.
  • Larger Taping Knives (8-12 inches).
  • Drywall Tape.

Preparing The Crack Surface

This is arguably the most critical step for ensuring a lasting repair.

  • Clean the Area: Use a damp cloth to wipe away any dust, dirt, or cobwebs from around the crack.
  • Remove Loose Material:
  • For Hairline Cracks: Use the edge of your putty knife or a utility knife to gently scrape along the crack. The goal is to remove any flaking paint or debris and create a slightly wider, V-shaped groove. This gives the spackle or compound something to grip.
  • For Larger Cracks: Use a utility knife or a small screwdriver to carefully remove any loose plaster or drywall material from inside and along the edges of the crack. You want to expose solid material.
  • Vacuum Debris: Use a shop vacuum or a vacuum cleaner attachment to remove all dust and debris from the crack and surrounding area.
  • Score the Edges (Optional but Recommended for Larger Cracks): For cracks wider than 1/8 inch, lightly scoring the edges with a utility knife can help create a better bond for the joint compound.
How To Fix Wall Cracks Without A Contractor

Credit: brickporchrepairexperts.com

Fixing Hairline And Small Cracks (diy Level 1)

Hairline cracks are the most common and usually the easiest to repair. They don’t require specialized tools and can often be fixed in under an hour, not including drying time.

Using Spackling Compound

Spackle is a lightweight, pre-mixed filler that’s ideal for small, superficial cracks in drywall or plaster.

  • Apply the Spackle: Load a small amount of spackle onto your putty knife. Hold the knife at a slight angle to the wall and press the spackle firmly into the crack. Use smooth, even strokes to fill the groove completely.
  • Smooth the Excess: For hairline cracks, you can often use the edge of your putty knife to scrape away most of the excess spackle, leaving just enough to fill the crack. For slightly wider cracks, apply the spackle and then smooth it over with a wider putty knife, feathering the edges to blend with the wall. The goal is to leave as little excess material as possible.
  • Allow to Dry: Spackle dries relatively quickly, typically within 30 minutes to a couple of hours, depending on the humidity and thickness. It will turn from a wet, pasty color to a chalky white when dry.
  • Sand Smooth: Once completely dry, use a sanding block with fine-grit sandpaper (150-220 grit) to gently sand the repaired area until it’s smooth and flush with the surrounding wall. Avoid over-sanding, which can create a depression.
  • Clean Dust: Wipe the area with a damp cloth to remove all sanding dust.
  • Prime and Paint: Apply a coat of primer to the repaired spot. Once the primer is dry, paint the area with your matching wall color. You may need two coats of paint for complete coverage.

Pro Tip: For very fine cracks, you might find it easier to apply spackle with your fingertip (wearing a disposable glove) and then smooth it with a damp sponge for a perfectly flush finish.

How To Fix Wall Cracks Without A Contractor

Credit: objectstorage.us-ashburn-1.oraclecloud.com

Repairing Larger Cracks (diy Level 2)

Cracks wider than 1/8 inch, especially those that might have resulted from minor settling, require a bit more reinforcement. Using drywall tape and joint compound provides a stronger, more durable repair.

Using Joint Compound And Drywall Tape

This method is similar to how drywall seams are finished and is effective for cracks up to about 1/2 inch wide.

  • Prepare the Crack: As described in the preparation section, clean the crack and remove any loose debris. Slightly widen the crack into a V-groove using a utility knife.
  • Apply First Coat of Joint Compound: Using a 4-inch or 6-inch taping knife, apply a thin, even layer of all-purpose joint compound over the crack, extending about 2 inches on either side. Press the compound firmly into the groove.
  • Embed the Drywall Tape:
  • Paper Tape: Cut a piece of paper drywall tape slightly longer than the crack. Center it over the crack and press it firmly into the wet joint compound. Use your taping knife to smooth the tape, ensuring it’s fully embedded and free of wrinkles or air bubbles. Scrape away excess compound.
  • Fiberglass Mesh Tape: Apply the mesh tape directly over the crack, ensuring it adheres well. Then, apply a thin layer of joint compound over the tape, embedding it.
  • Allow to Dry: Joint compound takes longer to dry than spackle, typically 24 hours, especially for thicker applications. It will turn from gray to off-white when dry.
  • Apply Second Coat: Once the first coat is completely dry, lightly sand any ridges or rough spots. Apply a second, wider coat of joint compound, extending about 4-6 inches on either side of the crack. Use your taping knife to feather the edges smoothly into the surrounding wall. The goal is to create a subtle, almost invisible transition.
  • Allow to Dry: Let the second coat dry completely.
  • Apply Third Coat (if needed): For a perfectly smooth finish, a third, even wider coat of joint compound may be necessary. Apply it thinly, feathering the edges even further (8-10 inches on either side). This helps to blend the repair seamlessly.
  • Sand Smooth: Once the final coat is dry, use medium-grit sandpaper (100-150 grit) to knock down any high spots, followed by fine-grit sandpaper (150-220 grit) for a smooth finish. Be careful not to sand through the tape or the compound down to the original wall.
  • Clean Dust: Wipe the area thoroughly with a damp cloth.
  • Prime and Paint: Apply primer over the entire repaired area, extending slightly beyond the feathered edges. Once dry, paint with your wall color, likely requiring two coats.

Example: When repairing a stair-step crack in plaster, it’s crucial to chase the crack slightly with a utility knife to remove any loose plaster and create a clean channel before applying joint compound and tape. This ensures the new material bonds securely to the solid plaster beneath.

Fixing Larger Holes And Significant Cracks (diy Level 3)

For cracks that are wider than 1/2 inch or have caused sections of drywall to crumble, a more robust repair is needed. This might involve patching compounds or even replacing small sections of drywall.

Using Patching Compounds

Patching compounds are designed for larger repairs and typically shrink less than standard joint compound.

  • Prepare the Area: Clean out the crack or hole thoroughly. If there are loose edges, carefully trim them away with a utility knife or drywall saw to create clean, straight edges.
  • Apply Patching Compound: Using a wider taping knife (6-inch or 8-inch), apply a generous amount of patching compound directly into the crack or hole. Press it in firmly to ensure it fills the void completely.
  • Smooth and Feather: Smooth the surface with your knife, feathering the edges out onto the surrounding wall. For deep cracks, you may need to apply the compound in multiple layers, allowing each to dry partially before applying the next.
  • Reinforce (if necessary): For cracks wider than 1/2 inch, consider embedding drywall tape (paper or fiberglass mesh) into the first layer of patching compound, similar to the method described for larger cracks.
  • Allow to Dry: Patching compounds can take several hours to dry, depending on thickness and environmental conditions.
  • Sand Smooth: Once completely dry, sand the repaired area smooth using medium-grit sandpaper, followed by fine-grit sandpaper.
  • Prime and Paint: Prime the area and then paint to match.

Drywall Patching For Larger Damage

If a section of drywall is significantly damaged or crumbling, you might need to cut out the damaged portion and replace it with a new piece of drywall.

  • Cut Out Damaged Area: Use a drywall saw or utility knife to cut a neat square or rectangular hole around the damaged area, ensuring you cut into solid drywall.
  • Create a Backing (if needed): For simple patches, you can sometimes use a piece of wood as a backing. Cut a piece of wood (like a 1×2 furring strip) that is longer than the hole. Insert it behind the drywall and screw it into the existing drywall from the front. This provides something for your new drywall patch to attach to.
  • Cut the Patch: Cut a piece of new drywall to fit the hole precisely.
  • Install the Patch:
  • With Backing: Place the new drywall patch into the hole and screw it into the wooden backing.
  • Without Backing (for smaller holes): If the hole is small enough that the edges of the existing drywall are stable, you can use drywall tape around the perimeter of the patch and the hole.
  • Tape and Mud: Apply joint compound over the seams between the patch and the existing wall. Embed drywall tape into the compound. Apply at least two more coats of joint compound, feathering the edges each time, allowing drying and light sanding between coats.
  • Finish: Once the final coat is smooth and dry, prime and paint the patched area.

Data Point: According to industry estimates, the average cost for professional drywall repair can range from $100 to $400 for small jobs, making DIY repairs a significant cost-saving option.

Comparing Repair Materials And Methods

Choosing the right material and method for your wall crack repair is essential for a lasting result. Here’s a comparison of common options:

Repair Material/Method Best For Pros Cons Ease of Use
Spackling Compound Hairline cracks, small nail holes Lightweight, easy to sand, quick drying, inexpensive Shrinks significantly, not durable for larger cracks or stress points Very Easy
All-Purpose Joint Compound Cracks up to 1/2 inch, drywall seams Dries harder than spackle, good adhesion, versatile Longer drying time, requires sanding, can be messy Easy to Moderate
Patching Compound Larger cracks, holes, gouges Dries harder, minimal shrinkage, durable Can be harder to sand, longer drying time Moderate
Drywall Tape (Paper or Fiberglass) Reinforcing cracks and seams Adds strength and prevents re-cracking Requires careful application to avoid bubbles/wrinkles Moderate (when used with joint compound)
Self-Adhesive Patch Kits Small to medium holes (up to 4 inches) Quick and easy, no separate tape needed May not provide as smooth a finish as traditional methods, can be visible under paint if not applied carefully Easy

When To Consider Specialized Products

While spackle and joint compound are staples, some situations call for specialized products:

  • Flexible Crack Filler: For areas prone to movement, like corners or near windows, a flexible caulk or filler designed for expansion and contraction can be more durable than rigid compounds.
  • Quick-Setting Compounds: For urgent repairs or when you need to move quickly, quick-setting joint compounds (which harden chemically rather than by drying) can be a lifesaver, though they require faster work and can be harder to sand.

Finishing Touches: Priming And Painting

The final steps in your wall crack repair are crucial for making the repair disappear visually and protecting it from future damage.

The Importance Of Priming

Never skip priming after a wall repair. Here’s why:

  • Uniformity: Spackle and joint compound have a different porosity than drywall paper or plaster. Without primer, the repaired area will absorb paint differently, resulting in a visible sheen difference or uneven color, even if the color matches perfectly.
  • Adhesion: Primer creates a uniform surface that helps the paint adhere better, ensuring a more durable finish.
  • Coverage: Primer helps achieve better coverage with your topcoat of paint, often reducing the number of paint coats needed.

Application: Apply a thin, even coat of a good quality primer (water-based is usually fine for interior repairs) over the entire patched area, extending slightly beyond the feathered edges. Allow it to dry completely according to the manufacturer’s instructions.

Matching And Applying Paint

  • Color Matching: The best way to ensure a perfect match is to use leftover paint from when the room was originally painted. If that’s not available, you can take a small chip of paint from an inconspicuous area of the wall to a paint store for color matching. Keep in mind that paint colors can change slightly over time due to fading.
  • Application: Once the primer is dry, apply your first coat of paint. Use a brush for edges and corners and a roller for the larger flat areas. Aim for even coverage.
  • Second Coat: Allow the first coat to dry completely, then apply a second coat if needed for full coverage and to ensure the patched area is indistinguishable from the rest of the wall.

In my experience, painting technique matters. Rolling with light, even pressure and overlapping strokes helps blend the new paint into the existing finish, making the repair less noticeable.

Frequently Asked Questions

What Are The Signs That A Wall Crack Is Serious And Needs A Professional?

Serious cracks often exhibit several warning signs: they are wider than 1/4 inch, they are growing over time, they run horizontally across a wall (especially if they are long), they are accompanied by diagonal or stair-step patterns in brickwork or plaster, or they coincide with other issues like sticking doors/windows, sagging floors, or foundation cracks. Any crack that suggests movement in the building’s structure warrants professional evaluation.

How Long Does It Take For Joint Compound To Dry?

The drying time for joint compound varies significantly based on thickness, humidity, and temperature. A thin coat might dry in a few hours, while a thicker application, especially in humid conditions, can take 24 hours or even longer

Peeling Paint On Walls Moisture Vs Poor Workmanship

Peeling Paint On Walls Moisture Vs Poor Workmanship

The sight of paint peeling from your walls can be disheartening. It detracts from the aesthetic appeal of your home and can signal underlying issues that, if left unaddressed, could lead to more significant problems. When you notice this flaking, bubbling, or chipping paint, the immediate question becomes: what’s causing it? Two primary culprits often emerge: moisture and poor workmanship. Distinguishing between these two is crucial, as the solutions and potential damage vary significantly.

Moisture-related paint failure often points to persistent water intrusion, whether from leaks, condensation, or high humidity. This type of damage can compromise the structural integrity of your walls over time. On the other hand, poor workmanship suggests issues with the application process itself, improper surface preparation, the wrong primer, or low-quality materials.

While less structurally damaging, it still requires remediation and can be frustratingly persistent if not fixed correctly. Understanding the nuances of each cause will empower you to identify the root problem and implement the most effective repair strategy, saving you time, money, and future headaches.

Key Takeaways

  • Identify the Cause: Peeling paint is primarily caused by either excess moisture or poor application workmanship.
  • Moisture Indicators: Look for dampness, mold, mildew, efflorescence (white powdery residue), and paint bubbling or blistering, especially near water sources or in humid areas.
  • Workmanship Indicators: Observe for issues like poor adhesion, paint chipping shortly after application, uneven textures, or visible brush/roller marks that weren’t intended.
  • Moisture Remediation is Key: If moisture is the culprit, fixing the water source is paramount before repainting. This might involve repairing leaks, improving ventilation, or addressing condensation.
  • Workmanship Requires Redoing: Poorly applied paint often needs to be stripped and reapplied correctly, focusing on proper surface preparation and material selection.
  • Professional Assessment: For complex or persistent issues, consulting a professional painter or building inspector is recommended.
Peeling Paint On Walls Moisture Vs Poor Workmanship

Credit: birlanu.com

Understanding Peeling Paint: The Moisture Connection

Moisture is a relentless enemy of painted surfaces. When water gets behind or beneath the paint film, it weakens the bond between the paint and the substrate (the wall material). This weakening manifests as peeling, blistering, and bubbling. The presence of moisture can originate from various sources, and identifying the specific entry point is critical for a lasting repair.

Sources Of Moisture Intrusion

Several common scenarios lead to moisture-related paint failure:

  • Leaks: This is perhaps the most obvious source. Leaks can come from plumbing issues within walls (e.g., leaky pipes), roof leaks that penetrate the ceiling and walls, or damaged gutters and downspouts that direct water against the exterior walls, which can seep through. Even a slow, persistent drip can cause significant damage over time.
  • Condensation: High humidity levels, especially in bathrooms, kitchens, and laundry rooms, can lead to condensation forming on cooler wall surfaces. This is particularly common in older homes with poor insulation or inadequate ventilation. When warm, moist air comes into contact with a cold wall, water droplets form. Over time, this constant moisture can break down the paint’s adhesion.
  • Infiltration from Exterior: Water can penetrate walls from the outside. Cracks in the exterior siding, brickwork, or stucco, damaged seals around windows and doors, or improper grading around the foundation can allow rainwater to enter the wall cavity. If the wall’s “breathing” capacity is compromised (e.g., by a vapor barrier on the wrong side of the insulation), this moisture can become trapped and push outwards, affecting the interior paint.
  • Groundwater and Rising Damp: In basements and lower levels, moisture can wick up from the ground through porous building materials like concrete or brick. This is known as rising damp and can cause significant peeling and deterioration of paint and plaster.

Visual Clues Of Moisture Damage

When moisture is the culprit, the peeling paint often exhibits specific characteristics:

  • Blistering and Bubbling: Paint may form small or large blisters that eventually pop, leaving bare patches. This occurs as water vapor gets trapped beneath the paint film and expands.
  • Soft or Spongy Substrate: If you gently press on the affected area, the wall material itself might feel soft, damp, or spongy, indicating saturation.
  • Mold and Mildew: The persistent dampness creates an ideal environment for mold and mildew growth. You might see black, green, or greyish splotches on or behind the peeling paint. This is a strong indicator of chronic moisture issues.
  • Efflorescence: On masonry surfaces (like brick or concrete), moisture can draw salts from the material to the surface. As the water evaporates, it leaves behind a white, powdery residue known as efflorescence. This often appears around water entry points and can precede or accompany paint peeling.
  • Sagging or Warping: In severe cases, especially with plaster or drywall, prolonged exposure to moisture can cause the material itself to sag or warp, leading to larger areas of peeling paint and structural concerns.

Pro Tip: Always check the surrounding areas for signs of moisture, even if the peeling seems isolated. Water can travel within wall cavities, so the source might be higher up, further away, or on the other side of the wall.

Peeling Paint On Walls Moisture Vs Poor Workmanship

Credit: construction.groupeberkem.com

The Role Of Poor Workmanship In Peeling Paint

While moisture is a common and often insidious cause, faulty application techniques and substandard materials can also lead to paint peeling, sometimes even shortly after the job is completed. Unlike moisture damage, which often involves a compromised substrate, poor workmanship issues are primarily related to the paint film’s integrity and its adhesion to the surface.

Common Workmanship Errors

Several mistakes during the painting process can result in premature paint failure:

  • Inadequate Surface Preparation: This is arguably the most frequent cause of peeling due to workmanship. Walls must be clean, dry, and sound before painting.
  • Failure to Clean: Dirt, grease, dust, or old, loose paint left on the surface prevents new paint from adhering properly.
  • Insufficient Sanding/Scraping: Glossy surfaces or old, flaky paint must be sanded or scraped back to a sound layer to provide a good “key” for the new paint to grip.
  • Ignoring Repairs: Cracks, holes, or damaged plaster should be filled and smoothed. Painting over imperfections means the new paint adheres to a weak or uneven surface.
  • Incorrect Primer Use: Primer is designed to seal the surface, improve adhesion, and provide a uniform base for the topcoat.
  • Skipping Primer: Applying paint directly to certain surfaces (like new drywall, stained wood, or glossy paint) without a suitable primer can lead to poor adhesion and eventual peeling.
  • Using the Wrong Primer: Different surfaces require different types of primers. For example, a stain-blocking primer is needed for water stains, while a bonding primer might be necessary for slick surfaces. Using a general-purpose primer where a specialized one is needed can result in failure.
  • Applying Paint in Unsuitable Conditions: Environmental factors play a significant role in paint adhesion and drying.
  • Painting Over Damp Surfaces: Applying paint to a surface that is still wet or damp (from cleaning, humidity, or residual moisture) traps moisture, leading to blistering and peeling.
  • Extreme Temperatures: Painting in excessively hot, cold, or humid conditions can affect the paint’s ability to dry and cure properly, compromising its integrity. Manufacturers usually specify ideal temperature and humidity ranges.
  • Using Low-Quality Materials: While sometimes cost-effective in the short term, using cheap paint or supplies can lead to premature failure. Lower-quality paints may have weaker binders, less pigment, and poorer adhesion properties.
  • Improper Paint Application: Techniques matter. Applying paint too thickly can prevent proper drying and curing. Inconsistent application, such as heavy brush strokes or roller marks that haven’t been smoothed out, can create weak points.

Signs Of Workmanship-related Peeling

When poor workmanship is the cause, you might observe these symptoms:

  • Peeling Soon After Painting: If paint starts peeling within weeks or months of being applied, it strongly suggests an application error rather than a long-term moisture issue.
  • Paint Chips Come Off Cleanly: Often, the paint chips will come away cleanly, revealing a smooth, unprepared surface underneath, rather than a damp or degraded substrate.
  • Adhesion Issues on Specific Surfaces: Peeling might be concentrated on areas that were particularly difficult to prepare, like previously glossy surfaces or areas with existing coatings.
  • Uneven Texture or Finish: While not directly causing peeling, issues like visible brush marks or an uneven sheen can sometimes accompany poor application that *does* lead to peeling.
  • Lack of Primer Undercoat: If you scrape away the peeling paint and see no sign of a primer layer, especially on surfaces that typically require one, it points to a skipped step.

Example: A homeowner paints a bathroom wall that was previously glossy without sanding or using a bonding primer. Within a few months, the paint starts peeling in large sheets, particularly in the high-moisture areas around the shower. This is a classic sign of poor surface preparation and primer selection.

Peeling Paint On Walls Moisture Vs Poor Workmanship

Credit: www.realsimple.com

Differentiating Between Moisture And Workmanship

Distinguishing between peeling caused by moisture and that caused by poor workmanship is the most critical step in addressing the problem effectively. A misdiagnosis will lead to wasted effort and money, as the underlying issue won’t be resolved. Here’s a breakdown of how to tell them apart:

Diagnostic Questions And Observations

When examining peeling paint, ask yourself the following questions and look for specific clues:

  • Where is the peeling occurring?
  • Moisture: Often found near bathrooms, kitchens, laundry rooms, basements, exterior walls (especially those with poor drainage or siding issues), ceilings below bathrooms or roofs, or around windows and doors.
  • Workmanship: Can occur anywhere, but is often more prevalent on surfaces that were particularly challenging to prepare (e.g., glossy paint, previously damaged areas) or where application might have been rushed.
  • What does the substrate look like under the peeling paint?
  • Moisture: May appear damp, discolored (water stains), show signs of mold or mildew, or feel soft/spongy. You might see efflorescence on masonry.
  • Workmanship: Often looks relatively dry and sound, possibly just dusty or with residual (but dry) old paint. The underlying surface might appear unprepared (e.g., glossy).
  • What is the pattern of the peeling?
  • Moisture: Tends to be blistering or bubbling, often starting from the substrate and pushing outwards. It can be widespread in humid areas or localized around leaks.
  • Workmanship: Can be chipping, flaking, or peeling in sheets, often related to adhesion failure at the paint-surface interface.
  • How old is the paint job?
  • Moisture: Can cause peeling at any age, but often develops over time as moisture accumulates.
  • Workmanship: Peeling that occurs very soon after painting (weeks to months) is a strong indicator of application error.
  • Are there other signs of water damage nearby?
  • Moisture: Look for damp spots on ceilings, musty odors, warped baseboards, or visible mold growth elsewhere.
  • Workmanship: Less likely to have associated water damage signs unless the poor workmanship coincidentally occurred in an area with existing moisture problems.

Comparison Table: Moisture Vs. Poor Workmanship

To simplify the diagnostic process, consider this table:

FeatureMoisture DamagePoor Workmanship
**Location**Bathrooms, kitchens, basements, leaks, exterior wallsCan be anywhere, often on difficult-to-prep surfaces
**Substrate Condition**Damp, discolored, moldy, soft, efflorescenceUsually dry, appears unprepared (glossy, dusty)
**Peeling Pattern**Blistering, bubbling (from substrate outwards)Chipping, flaking, peeling sheets (adhesion failure)
**Timing**Can occur at any age, often develops over timeOften occurs soon after painting (weeks/months)
**Associated Issues**Mold, mildew, dampness, musty odors, structural damageLess likely to have associated moisture damage signs
**Primary Cause**Water intrusion, high humidity, condensationImproper prep, wrong primer, bad application, poor materials
**Solution Focus**Fix water source, ventilate, dry out, then repaintStrip paint, proper prep, correct primer, reapply

Case Study: The Bathroom Battle

Consider two scenarios:

  • Sarah’s Bathroom: Sarah notices peeling paint above her shower. The paint is bubbling, and when she touches it, the wall feels slightly damp. There’s a faint musty smell, and she sees a small patch of black mold. The peeling is concentrated in the area of highest humidity. This strongly indicates moisture damage due to inadequate ventilation and possibly condensation.
  • Mark’s Living Room: Mark had his living room repainted last month. Now, he sees paint flaking off near a window. The paint chips come away easily, revealing a glossy surface underneath. There’s no dampness or mold. Mark recalls the painter didn’t do much preparation beyond a quick wipe-down. This points to poor workmanship, specifically inadequate surface preparation (failure to degloss or prime the glossy surface).

The Process Of Remediation: Fixing The Problem

Once you’ve confidently diagnosed the cause, the remediation process can begin. The approach differs significantly depending on whether moisture or poor workmanship is the culprit.

Remediation For Moisture Damage

Addressing moisture-related peeling requires a two-step approach: first, eliminate the source of the water, and second, repair and repaint the affected area.

  • Identify and Repair the Water Source: This is non-negotiable.
  • Leaks: Fix any plumbing leaks, roof issues, or exterior water intrusion problems. This might involve calling a plumber, roofer, or masonry specialist.
  • Condensation/Humidity: Improve ventilation. Install or upgrade exhaust fans in bathrooms and kitchens. Consider using a dehumidifier in chronically damp areas. Ensure attics and crawl spaces are properly ventilated. Improve insulation to reduce cold surfaces where condensation forms.
  • Exterior Water: Ensure proper grading slopes away from the foundation. Clean and repair gutters and downspouts. Seal cracks in exterior walls.
  • Dry Out the Area: Allow the affected wall materials (drywall, plaster, wood) to dry completely. This can take days or even weeks, depending on the extent of saturation. Using fans and dehumidifiers can speed up the process. Do not paint over damp surfaces.
  • Remove Damaged Paint: Scrape away all loose, peeling, or blistering paint using a putty knife or scraper. Feather the edges of the remaining paint by sanding.
  • Address Mold/Mildew: If mold or mildew is present, clean the area thoroughly with a mold remover or a bleach solution (1 part bleach to 10 parts water). Wear protective gear (gloves, mask, eye protection). Ensure the area is completely dry afterward. For extensive mold, consult a professional remediation service.
  • Repair Substrate: Fill any holes or cracks with appropriate spackle or joint compound. Sand smooth once dry. If the drywall or plaster is significantly damaged or soft, it may need to be replaced.
  • Prime: Apply a high-quality stain-blocking primer (especially if water stains are present) or a mold-inhibiting primer. Ensure the primer is suitable for the substrate and the intended topcoat. Allow the primer to dry completely according to the manufacturer’s instructions.
  • Repaint: Apply two coats of a good quality interior paint. Consider using a paint with mildew-resistant properties in high-humidity areas like bathrooms.

Remediation For Poor Workmanship

If the peeling is due to faulty application, the process involves removing the compromised paint layer and reapplying it correctly.

  • Remove All Loose Paint: Scrape away all peeling, chipping, or flaking paint thoroughly. Unlike moisture issues, the focus here is on removing any paint that isn’t firmly adhered.
  • Prepare the Surface: This is the crucial step.
  • Clean: Wash the walls to remove dirt, grease, and any residue from scraping. Allow to dry completely.
  • Sand: If the previous paint was glossy, lightly sand the entire surface to dull the sheen and create a better grip for the new paint. If there were significant imperfections, you might need to sand more thoroughly. Wipe away all sanding dust.
  • Repair: Fill any cracks or holes with spackle or joint compound. Sand smooth once dry.
  • Prime Appropriately: Apply a quality primer suitable for the surface and the type of paint you will be using. If you sanded a glossy surface, a bonding primer is often recommended. If you are painting over repaired areas or dark colors, a stain-blocking or universal primer might be best. Ensure the primer is completely dry.
  • Repaint: Apply two coats of your chosen paint, following the manufacturer’s recommendations for application temperature and drying times. Ensure even application and avoid applying the paint too thickly.

When To Call A Professional

While minor peeling can often be a DIY fix, certain situations warrant professional help:

  • Extensive Damage: If large areas of paint are peeling or the underlying material (drywall, plaster) is severely damaged.
  • Suspected Mold: If you suspect significant mold growth, a professional mold remediation company is necessary for safe and effective removal.
  • Unclear Cause: If you can’t pinpoint the source of moisture or are unsure about the best repair method.
  • Recurring Problems: If the peeling keeps returning despite your repair efforts, indicating a persistent underlying issue that requires expert diagnosis.
  • Lack of Time or Confidence: If you lack the time, tools, or confidence to undertake the repairs yourself.

A professional painter has the experience to correctly diagnose the cause, prepare surfaces properly, and apply paint for a durable finish. A building inspector or moisture detection specialist can be invaluable for complex water intrusion problems.

Preventing Future Paint Peeling

Prevention is always better than cure. By understanding the common causes of peeling paint, you can take proactive steps to protect your walls and maintain a beautiful finish.

Moisture Prevention Strategies

  • Ventilation is Key: Ensure adequate ventilation in moisture-prone areas. Use exhaust fans during and after showering/cooking, and ensure they vent *outside*, not into the attic. Keep bathroom doors slightly ajar after showers.
  • Control Humidity: Use dehumidifiers in basements or other damp areas. Aim for indoor humidity levels between 30-50%.
  • Maintain Exterior: Regularly inspect and maintain your home’s exterior. Clean gutters and downspouts, ensure they direct water away from the foundation. Seal cracks in siding, brickwork, and around windows and doors. Ensure proper grading around your home.
  • Insulate Properly: Good insulation helps prevent cold interior surfaces, reducing condensation. Pay attention to areas prone to condensation, like window frames and exterior walls.
  • Prompt Leak Repair: Address any suspected plumbing leaks immediately. Even small drips can cause significant moisture buildup over time.

Workmanship Prevention Strategies

  • Don’t Skimp on Prep: Always prioritize surface preparation. Clean, scrape, sand, and repair as needed before applying any primer or paint. This is the foundation of a lasting paint job.
  • Use Quality Materials: Invest in good quality paint and primer. While more expensive upfront, they offer better adhesion, durability, and coverage, ultimately saving you money in the long run.
  • Choose the Right Primer: Select a primer specifically designed for the surface you are painting and the conditions it will face. Don’t skip priming when recommended.
  • Paint in Ideal Conditions: Adhere to the paint manufacturer’s guidelines regarding temperature and humidity. Avoid painting in direct, hot sunlight or when surfaces are damp.
  • Apply Correctly: Follow application instructions. Apply paint evenly, avoiding excessively thick coats. Allow adequate drying time between coats.
  • Hire Reputable Professionals: If hiring a painter, get multiple quotes, check references, and ensure they have a clear understanding of proper preparation techniques. Look for painters who emphasize surface prep.

In my experience, taking the time to properly prepare a surface and address any underlying moisture issues before painting is the single most important factor in achieving a durable and attractive finish that won’t peel prematurely.

Frequently Asked Questions

What Is The Difference Between Paint Blistering And Peeling?

Blistering typically refers to the formation of small, raised bubbles in the paint film, often caused by trapped moisture vapor expanding as it heats up or evaporates. Peeling is the subsequent detachment of this compromised paint layer from the surface.

While blistering is a *symptom* often caused by moisture, peeling is the *result*, the paint coming off. Poor workmanship can also cause peeling without significant blistering if adhesion is simply lost.

Can I Paint Over Peeling Paint Without Fixing The Cause?

No, you absolutely should not paint over peeling paint without addressing the underlying cause. Painting over peeling paint is a temporary cosmetic fix at best. If the cause is moisture, the moisture will continue to compromise the new paint layer, leading to blistering and peeling again, potentially trapping moisture and causing more damage to the substrate. If the cause is poor adhesion from bad prep, the new paint will likely fail for the same reason. The only correct approach is to remove the failing paint, fix the root cause, prepare the surface, and then repaint.

How Long Does It Take For Paint To Fail Due To Moisture

Microphone Detected But Not Working

Microphone Detected But Not Working

The frustration of a microphone detected but not working can halt productivity, disrupt online communication, and even ruin creative projects. You’ve plugged it in, the system recognizes its presence, but no sound registers. This common issue plagues users across various operating systems and applications, from casual video calls to professional audio recording. Understanding the root causes and systematically troubleshooting them is key to getting your audio back online.

This comprehensive guide will walk you through the most frequent reasons why your microphone might be detected but unresponsive and provide actionable steps to resolve the problem. We’ll cover everything from simple software glitches to more complex hardware and driver issues, ensuring you can pinpoint and fix the problem efficiently.

Key Takeaways

  • Check Physical Connections: Ensure the microphone is securely plugged into the correct port and that any mute switches are disengaged.
  • Verify Software Permissions: Confirm that applications have the necessary permissions to access your microphone in your operating system’s privacy settings.
  • Select the Correct Input Device: Make sure your operating system and the specific application you’re using have your intended microphone selected as the default input device.
  • Update or Reinstall Drivers: Outdated, corrupted, or incompatible microphone drivers are a frequent culprit. Updating or reinstalling them can resolve detection issues.
  • Test in Multiple Applications: Isolating the problem to a single app versus a system-wide issue is crucial for effective troubleshooting.
  • Examine Mute Switches and Volume Levels: Both physical mute buttons on the microphone and software volume sliders can cause silence.
  • Consider Hardware Malfunction: If all software troubleshooting fails, the microphone itself might be faulty.
Microphone Detected But Not Working

Credit: www.youtube.com

Understanding The “detected But Not Working” Phenomenon

When your computer or device shows that a microphone is connected, it means the operating system has recognized the hardware and assigned it a basic level of functionality. However, this detection is only the first step. For the microphone to actually capture and transmit audio, several other components and settings must be correctly configured. These include:

  • Driver Software: These are small programs that allow your operating system to communicate effectively with the microphone hardware.
  • Permissions: Modern operating systems have robust privacy controls that require explicit permission for applications to access your microphone.
  • Input Device Selection: Your system might have multiple audio input devices. You need to ensure the correct one is chosen.
  • Application Settings: Specific applications, especially communication and recording software, often have their own audio input settings that can override system defaults.
  • Volume and Mute Controls: Both physical controls on the microphone and software-based volume sliders can prevent audio from being transmitted.

The “detected but not working” state typically arises when one or more of these critical links in the audio chain are broken or misconfigured. The hardware is seen, but the pathway for audio data to flow is blocked.

Microphone Detected But Not Working

Credit: www.youtube.com

Initial Checks: The Simplest Solutions First

Before diving into complex diagnostics, it’s always best to start with the most straightforward potential fixes. These often resolve the issue quickly and save you significant time.

Physical Connections And Mute Switches

The most common reason for a microphone being detected but not working is a simple physical issue.

  • Secure Connection: Ensure the microphone’s cable is firmly plugged into the correct port on your computer. For USB microphones, try a different USB port. If it’s a 3.5mm jack, ensure it’s in the microphone input (usually pink) and not the headphone jack.
  • Check for Mute Buttons: Many microphones, especially USB models and headsets, have a physical mute button directly on the device or its cable. Make sure this button is not engaged. Look for an illuminated light indicating mute status.
  • Inspect the Cable: Examine the microphone’s cable for any visible damage, kinks, or fraying. A damaged cable can prevent audio transmission even if the microphone is detected.

Basic Volume And Input Levels

Even if detected, a microphone won’t work if its volume is turned down to zero or muted at the software level.

  • System Volume Mixer:
  • Windows: Right-click the speaker icon in the taskbar and select “Open Volume mixer.” Ensure the slider for your microphone is not at zero and not muted. You can also access this via Settings > System > Sound > Input. Select your microphone and check its properties for volume levels.
  • MacOS: Go to System Settings > Sound > Input. Select your microphone and ensure the “Input volume” slider is not at the far left.
  • Application Volume Settings: Many applications (Zoom, Discord, OBS Studio, etc.) Have their own internal volume controls for microphone input. Open the audio settings within the specific application you are using and verify that the microphone volume is set appropriately and not muted.

Software-related Troubleshooting

When physical checks don’t resolve the problem, the issue often lies within your operating system’s software configuration or driver management.

Microphone Privacy Settings And Permissions

Modern operating systems prioritize user privacy, meaning applications must be explicitly granted permission to access hardware like microphones.

  • Windows:
  • Go to Settings > Privacy & security > Microphone.
  • Ensure “Microphone access” is turned On.
  • Scroll down to “Let apps access your microphone” and ensure this is also turned On.
  • Further down, under “Let desktop apps access your microphone,” ensure this is toggled On. This is crucial for many traditional applications.
  • Review the list of individual apps below and ensure the specific application you’re using has permission enabled.
  • MacOS:
  • Go to System Settings > Privacy & Security > Microphone.
  • You will see a list of applications that have requested microphone access.
  • Find the application you are using and ensure the toggle switch next to it is turned On. You may need to restart the application after changing this setting.

Pro Tip: Sometimes, revoking and re-granting permission can resolve glitches. Turn off the permission, restart the application and your computer, then turn the permission back on.

Selecting The Correct Input Device

Your computer might have multiple audio input devices connected (e. g. , built-in microphone, headset microphone, external microphone). The system and individual applications need to know which one to use.

  • Windows:
  • Go to Settings > System > Sound.
  • Under the “Input” section, use the dropdown menu for “Choose your input device” to select your specific microphone.
  • Speak into the microphone. You should see the “Test your microphone” meter react.
  • MacOS:
  • Go to System Settings > Sound > Input.
  • From the list of devices, select your desired microphone.
  • Speak into the microphone, and observe the “Input level” meter.

Application-Specific Selection: Many applications allow you to override system defaults. Within the application’s audio or voice settings, look for an option to select the “Audio Input Device” or “Microphone.” Ensure your desired microphone is selected here. For example, in Zoom, this is found under Settings > Audio > Microphone.

Audio Troubleshooter (windows)

Windows includes a built-in troubleshooter that can automatically detect and fix common audio problems.

  • Go to Settings > System > Sound.
  • Scroll down to “Advanced” and click on “Troubleshoot” under the “Troubleshoot common sound problems” section.
  • Alternatively, go to Settings > Update & Security > Troubleshoot > Additional troubleshooters and run the “Recording Audio” troubleshooter.
  • Follow the on-screen prompts to let Windows attempt to identify and resolve issues with your microphone.

Updating, Reinstalling, Or Rolling Back Drivers

Drivers are the communication bridge between your hardware and operating system. Corrupted, outdated, or incorrect drivers are a very common cause of “detected but not working” issues.

Updating Drivers

  • Windows:
  • Right-click the Start button and select “Device Manager.”
  • Expand the “Audio inputs and outputs” section.
  • Right-click on your microphone and select “Update driver.”
  • Choose “Search automatically for drivers.” Windows will attempt to find and install the latest driver.
  • If that doesn’t work, you can try “Browse my computer for drivers” and then “Let me pick from a list of available drivers on my computer.” Sometimes, a slightly older, stable driver is better.
  • Manufacturer’s Website: For many external microphones (especially USB ones), the best drivers are available directly from the manufacturer’s website. Search for your microphone model and download the latest drivers or control software.

Reinstalling Drivers

If updating doesn’t help, or if you suspect the driver is corrupted, reinstalling it can be effective.

  • Open Device Manager (as described above).
  • Right-click on your microphone and select “Uninstall device.”
  • If prompted, check the box to “Delete the driver software for this device.”
  • Click “Uninstall.”
  • Restart your computer. Windows will typically attempt to automatically reinstall a generic driver upon reboot.
  • If you downloaded specific drivers from the manufacturer, install those after restarting.

Rolling Back Drivers (windows)

If the problem started immediately after a driver update, you might need to roll back to a previous version.

  • Open Device Manager.
  • Right-click on your microphone and select “Properties.”
  • Go to the “Driver” tab.
  • If the “Roll Back Driver” button is available (not greyed out), click it and follow the prompts.

Checking For Software Conflicts

Sometimes, other audio software or background processes can interfere with microphone functionality.

  • Close Unnecessary Applications: Ensure no other applications that might use the microphone (e.g., other communication apps, recording software) are running in the background.
  • Antivirus/Security Software: In rare cases, overly aggressive security software might block microphone access. Temporarily disable your antivirus or firewall to see if it resolves the issue. If it does, you’ll need to configure your security software to allow microphone access for your specific applications.
  • Audio Enhancement Features: Some operating systems and audio drivers come with “enhancement” features (like noise suppression, echo cancellation, or spatial sound). These can sometimes cause problems.
  • Windows: In Sound settings > Input, click on your microphone, then select “Device properties.” Look for an “Enhancements” tab or similar. Try disabling all enhancements.
  • MacOS: Check the specific application’s audio settings for any built-in enhancements.
Microphone Detected But Not Working

Credit: github.com

Advanced Troubleshooting And Hardware Considerations

If software fixes haven’t yielded results, it’s time to consider more advanced possibilities, including hardware issues.

Testing The Microphone On Another Device

This is a crucial step to determine if the problem lies with the microphone itself or your computer.

  • Connect the microphone to a different computer, laptop, or even a smartphone (using appropriate adapters if necessary).
  • Test the microphone using a simple recording application or a communication tool on that other device.
  • If it works on another device: The issue is almost certainly with your original computer’s settings, drivers, or hardware ports.
  • If it does NOT work on another device: The microphone itself is likely faulty and may need repair or replacement.

Checking For Microphone-specific Software

Many higher-end microphones, especially USB microphones and headsets, come with dedicated control panel software from the manufacturer. This software often includes its own settings for input levels, mute status, and sometimes even firmware updates.

  • Ensure you have the latest version of this software installed.
  • Open the software and check all its settings, paying close attention to mute toggles, input volume, and any sample rate or format settings that might be incompatible with your system.
  • Check if the manufacturer provides firmware updates for the microphone through its software.

Testing Different Usb Ports And Cables

If you’re using a USB microphone:

  • Try All USB Ports: Connect the microphone to every available USB port on your computer. Some ports might offer more power or stable connections than others. Avoid using USB hubs initially, as they can sometimes introduce issues.
  • Test a Different Cable: If your USB microphone has a detachable cable, try using a different USB cable of the same type (e.g., USB-A to USB-C, USB-A to Micro-USB). Cables can fail internally without showing external damage.

Investigating System Audio Settings (advanced)

Sometimes, deeper system settings can be misconfigured.

  • Windows:
  • Right-click the speaker icon in the taskbar and select “Sounds.”
  • Go to the “Recording” tab.
  • Right-click on your microphone in the list and select “Properties.”
  • General Tab: Ensure the device is enabled.
  • Listen Tab: Uncheck “Listen to this device” unless you specifically need to monitor your own voice directly. This can sometimes cause feedback or echo.
  • Levels Tab: Verify volume and mute status.
  • Advanced Tab:
  • Under “Default Format,” try different sample rates and bit depths (e.g., 16-bit, 44100 Hz or 48000 Hz are common).
  • Under “Exclusive Mode,” try unchecking “Allow applications to take exclusive control of this device” and also try unchecking “Give exclusive mode applications priority.” This setting dictates whether applications can “lock” the device for their sole use.
  • Spatial Sound Tab: Ensure any spatial sound enhancements are turned off for the microphone input.
  • MacOS: While macOS offers fewer granular audio settings than Windows, ensure that no unusual configurations are present in Audio MIDI Setup (found in Applications > Utilities). Generally, stick to the default settings unless you have a specific reason to change them.

Hardware Failure

If you’ve exhausted all software troubleshooting steps, tested the microphone on another device, and confirmed it doesn’t work anywhere, it’s highly probable that the microphone hardware has failed. This could be due to:

  • Internal Component Failure: Capacitors, circuits, or the microphone capsule itself may have broken.
  • Physical Damage: Dropping the microphone or exposing it to moisture can cause irreparable damage.
  • Wear and Tear: Like any electronic device, microphones have a lifespan.

In such cases, the only solution is to repair the microphone (if possible and cost-effective) or purchase a new one.

Real-world Scenarios And Examples

Let’s look at a couple of common situations where a microphone might be detected but not work.

Scenario 1: The New Usb Microphone On A Laptop

Problem: Sarah buys a new, highly-rated USB podcasting microphone for her Windows laptop. She plugs it in, Windows installs a generic driver, and the microphone appears in Device Manager and Sound settings. However, when she tries to record a voice note or join a Zoom call, there’s no audio input.

Troubleshooting Steps:

  • Physical Check: Sarah confirms the USB cable is secure and checks for a physical mute button (none on this model).
  • System Settings: She checks Windows Sound settings and confirms the USB microphone is selected as the input device. The test meter doesn’t move.
  • Privacy Settings: She navigates to Settings > Privacy & security > Microphone and finds that “Let desktop apps access your microphone” was turned off by default during a recent Windows update. She enables it.
  • Application Test: She re-tests the microphone in her voice recording app. It still doesn’t work.
  • Manufacturer Software: Sarah realizes the microphone likely has specific drivers and software. She visits the manufacturer’s website, downloads, and installs the latest driver package.
  • Resolution: After installing the manufacturer’s drivers and restarting her computer, the microphone test meter finally registers sound, and she can successfully record audio. The issue was the lack of specific drivers and the OS-level restriction on desktop app access.

Scenario 2: Headset Microphone Stops Working After An Update

Problem: Mark’s gaming headset microphone, which has always worked fine on his macOS computer, suddenly stops registering audio after a macOS system update. The headset itself (for audio output) still works, and the microphone is listed in the Sound preferences.

Troubleshooting Steps:

  • Physical Check: Mark ensures the headset is plugged in correctly and checks for any inline mute switches.
  • System Selection: He confirms the headset microphone is selected as the input device in System Settings > Sound > Input.
  • Application Permissions: He goes to System Settings > Privacy & Security > Microphone and sees that the gaming application he uses has microphone permission enabled. He tries toggling it off and on again, then restarts the app. Still no luck.
  • Driver Check (macOS): MacOS typically handles headset drivers automatically. However, sometimes an update can cause a temporary incompatibility. Mark restarts his Mac.
  • Test in Another App: He opens QuickTime Player and tries to record audio using the headset microphone. It works! This indicates the issue is specific to the gaming application.
  • Application Settings: Mark delves into the gaming application’s specific audio settings. He discovers that a recent update reset the audio input device selection within the game itself. He manually re-selects his headset microphone within the game’s options.
  • Resolution: The microphone now works correctly in the gaming application. The problem was an application-specific setting that was reset by the system update, not a system-wide microphone failure.

Comparison Of Common Microphone Types And Issues

Different types of microphones can present unique troubleshooting challenges.

Microphone TypeCommon ConnectionPotential IssuesTroubleshooting Focus
**3.5mm Jack Mic**Analog (TRS/TRRS)Incorrect port (mic vs. headphone), poor connection, internal sound card issues.Ensure correct port, check sound card drivers, test with adapter if TRRS.
**USB Microphone**USB (Type-A, C)Driver issues, USB port power/stability, cable failure, manufacturer software.Update/reinstall drivers, try different USB ports, check manufacturer software/firmware.
**XLR Microphone**Analog (XLR)Requires audio interface/mixer, phantom power issues, interface drivers.Verify phantom power (+48V), check interface connections, update interface drivers.
**Bluetooth Microphone**Wireless (BT)Pairing issues, interference, battery level, BT driver problems.Re-pair device, check battery, update Bluetooth drivers, ensure clear line-of-sight.
**Webcam Microphone**IntegratedDisabled in BIOS/UEFI, privacy settings, driver conflicts with webcam.Check privacy settings, update webcam drivers, ensure not disabled in system settings.

Frequently Asked Questions

Why Does My Microphone Work In One App But Not Another?

This usually indicates that the application where it’s not working either doesn’t have the correct microphone selected in its own audio settings, or it lacks the necessary microphone permissions within your operating system’s privacy settings. Always check both the application’s internal settings and your OS’s privacy controls for that specific application.

How Do I Know If My Microphone Is Physically Broken?

The most reliable way to test for physical failure is to connect the microphone to a completely different computer or device. If it doesn’t work on multiple devices, it’s very likely that the microphone hardware itself is faulty. Check its cable for damage and, if possible, test with a different compatible cable.

What Is Phantom Power, And Do I Need It?

Phantom power (typically +48V) is a DC electrical current sent from an audio interface or mixer through the microphone cable to condenser microphones that require external power to operate their internal electronics. Dynamic microphones generally do not require phantom power.

If you have a condenser microphone and your audio interface/mixer is detecting it but you get no sound, ensure phantom power is enabled for the relevant input channel. Consult your microphone and interface manuals.

Can A Windows Or Macos Update Break My Microphone?

Yes, operating system updates can sometimes introduce compatibility issues with existing hardware drivers or change default privacy settings. If your microphone stops working immediately after an OS update, the first steps should be to check system privacy settings (especially microphone permissions), ensure your microphone is still selected as the default input, and then look for updated drivers from the microphone manufacturer.

How Do I Reset My Microphone Settings To Default?

On Windows, you can often achieve this by going to Settings > System > Sound > Input, selecting your microphone, clicking “Device properties,” and then looking for an “Enhancements” tab to disable all enhancements. You can also go to Device Manager, uninstall the microphone device (and delete driver software if prompted), then restart your PC to let Windows reinstall a default driver. On macOS, you can try removing the microphone from System Settings > Sound > Input and then re-adding it, or resetting related preference files (though this is a more advanced step).

Getting your microphone to work when it’s detected but unresponsive involves a systematic approach, starting with the simplest checks and progressing to more complex software and hardware diagnostics. By carefully following these steps, you can usually identify the bottleneck in your audio

Liftmaster Garage Door Opener Wall Control Not Working

Liftmaster Garage Door Opener Wall Control Not Working

When your Liftmaster garage door opener wall control suddenly stops responding, it can be a significant inconvenience. This usually happens without warning, leaving you unable to open or close your garage door from the most convenient access point. While it might seem like a complex electrical issue, many common causes are relatively straightforward to diagnose and fix. Understanding these potential problems and the steps to resolve them can save you time, money, and the frustration of being locked out or unable to secure your home.

This guide will walk you through the most common reasons why your Liftmaster wall control might not be working, offering practical solutions and troubleshooting steps. We’ll cover everything from simple connection issues and battery problems to more complex wiring and logic board diagnostics.

By systematically addressing each possibility, you can regain full functionality of your garage door opener system and ensure your home’s security and convenience are restored.

Key Takeaways

  • Loose Connections: Ensure wires are securely attached to the wall control and the garage door opener motor unit.
  • Power Issues: Check the power supply to the opener and the wall control, including circuit breakers and GFCI outlets.
  • Battery Problems: If your wall control has battery backup, test or replace the batteries.
  • Wiring Faults: Inspect the low-voltage wires connecting the wall control to the opener for damage, breaks, or short circuits.
  • Remote Interference: Other electronic devices can sometimes interfere with the opener’s signal.
  • Faulty Wall Control Unit: The control panel itself may be damaged or malfunctioning and require replacement.
  • Logic Board Issues: In rare cases, the garage door opener’s logic board may be the source of the problem.
  • Safety Sensor Malfunction: While primarily for the door itself, a safety sensor issue can sometimes prevent wall control operation.

Understanding Your Liftmaster Wall Control

Liftmaster garage door opener wall controls, often referred to as multi-function control panels or Smart Control Panels, are designed to offer more than just a simple open/close button. Modern Liftmaster wall controls can include features like:

  • Manual Open/Close: The primary function.
  • Vacation Lock: Disables all remote operation for enhanced security.
  • Light Control: Allows you to manually turn the opener’s light on or off.
  • Diagnostic LEDs: Provide status information and error codes.
  • Connectivity Features: Some models can connect to Wi-Fi for smartphone control via apps like MyQ.

These controls communicate with the garage door opener’s logic board using low-voltage wiring. When you press a button on the wall control, it sends a signal through these wires. The logic board then interprets this signal and commands the motor to operate the door. Understanding this basic communication flow is crucial for troubleshooting.

Types Of Liftmaster Wall Controls

Liftmaster offers various wall control models, each with slightly different features and wiring configurations. Common types include:

  • Basic Push-Button Controls: Simple, often just one button.
  • Multi-Function Control Panels: Offer more features like vacation lock and light control.
  • Smart Control Panels: Integrate with MyQ technology for smartphone access.

The specific model you have will influence the troubleshooting steps, particularly regarding diagnostic lights and advanced features. You can usually find your model number on the back of the control panel or in your garage door opener’s manual.

How The Wall Control Communicates

The wall control operates on a low-voltage circuit. Typically, two wires run from the wall control to the motor unit of the garage door opener. One wire acts as a common ground, and the other carries the signal when a button is pressed. The logic board on the motor unit receives this signal.

  • Wire 1 (Common): Usually connected to a terminal marked “COM” or a similar designation on both the wall control and the motor unit.
  • Wire 2 (Wall Button): Connected to a terminal specifically for the wall button, often marked “WB,” “W,” or “Push Button.”

When the button is pressed, it momentarily completes a circuit between these two wires. The opener’s logic board detects this change and initiates the door’s movement. If this circuit is broken, or if the signal cannot be properly sent or received, the wall control will appear non-functional.

Liftmaster Garage Door Opener Wall Control Not Working

Credit: www.youtube.com

Common Causes For A Non-working Liftmaster Wall Control

When your Liftmaster wall control stops working, it’s usually due to one of several common issues. Diagnosing these requires a systematic approach, starting with the simplest checks.

Loose Or Disconnected Wires

This is by far the most frequent culprit. The low-voltage wires connecting the wall control to the motor unit can become loose over time due to vibrations, improper installation, or accidental tugging.

  • At the Wall Control: Carefully remove the wall control panel from its mounting bracket. You may need a flathead screwdriver to gently pry it off. Once exposed, check the terminals where the wires connect. Ensure they are securely fastened under the screws or pushed firmly into the terminal block. If using push-in terminals, ensure the wire is fully inserted.
  • At the Motor Unit: Locate the terminal block on the garage door opener motor unit, usually near where the wires enter the unit. Inspect the connections for the wall button and common wires. They should be tight and free of corrosion.

Pro Tip: If you find a wire is loose, gently strip a small amount of insulation from the end if it looks corroded or damaged, and re-secure it firmly. Ensure no bare wires are touching each other or any metal parts of the opener, as this can cause a short circuit.

Power Supply Issues

If the wall control is completely dead, no lights, no response, the problem might stem from the opener’s power supply.

  • Circuit Breaker: Check your home’s electrical panel. The garage door opener is typically on a dedicated circuit. Ensure the breaker hasn’t tripped. If it has, reset it. If it trips again immediately, there’s a more serious electrical issue that requires professional attention.
  • GFCI Outlet: Some garages have Ground Fault Circuit Interrupter (GFCI) outlets. If your opener is plugged into one, check if it has tripped. Press the “Reset” button on the outlet. If it continues to trip, the outlet or the opener may have a fault.
  • Opener Unit Power: Ensure the opener unit itself is receiving power. Look for any status lights on the motor unit. If the opener has no power, the wall control won’t work.

Damaged Or Broken Wires

The low-voltage wires running from the wall control to the motor unit are often routed through walls, ceilings, or along beams. They can be susceptible to damage.

  • Physical Damage: Inspect the entire length of the wire if possible. Look for cuts, nicks, kinks, or areas where the wire might have been pinched by a door, vehicle, or other object. Pay close attention to where the wire enters the wall and the motor unit.
  • Rodent Damage: In some areas, rodents can chew through wires, causing breaks or shorts.
  • Corrosion: If the wires run through a damp area, corrosion can build up on the copper strands, increasing resistance and potentially breaking the connection.

If you suspect damaged wiring, you can test continuity using a multimeter. Disconnect the wires from both the wall control and the motor unit. Test the resistance between the two ends of each wire. A continuous circuit should show very low resistance (close to 0 ohms). Any significant resistance or an open circuit (infinite resistance) indicates a break.

Faulty Wall Control Unit

Despite robust construction, wall control units can fail due to internal component failure, water damage, or wear and tear.

  • Internal Failure: Electronic components within the control panel can degrade over time or fail unexpectedly.
  • Water Damage: If the control panel is exposed to moisture, it can corrode internal components and lead to malfunction.
  • Physical Damage: Accidental impact can damage the buttons or internal circuitry.

Testing for a Faulty Unit: The best way to confirm if the wall control itself is faulty is to bypass it. You can do this by temporarily shorting the wall button terminals on the motor unit. Using a screwdriver or a piece of wire, momentarily touch the two terminals where the wall button wires connect (typically “COM” and “WB”). If the door operates when you short these terminals, it strongly suggests the wall control unit is the problem. If the door *does not* operate, the issue lies elsewhere in the wiring or the opener’s logic board.

Remote Interference Or Pairing Issues

While less common for wall controls, sometimes other electronic devices operating on similar frequencies can cause intermittent issues.

  • Frequency Interference: Devices like some wireless doorbells, security systems, or even certain types of lighting can operate on frequencies that might interfere with the garage door opener’s radio receiver.
  • Receiver Malfunction: The radio receiver in the motor unit might be experiencing issues, preventing it from communicating with any remote devices, including the wall control if it has wireless capabilities.

If your wall control has diagnostic lights, consult your Liftmaster manual to see if any codes indicate a receiver issue. Sometimes, simply re-pairing your remotes and the wall control to the opener can resolve communication glitches. This process usually involves pressing and releasing a “Learn” or “Program” button on the motor unit, followed by pressing a button on the remote or wall control.

Logic Board Problems

The logic board within the garage door opener motor unit is the “brain” of the system. If it malfunctions, it can affect the operation of all connected components, including the wall control.

  • Component Failure: Capacitors, relays, or microprocessors on the logic board can fail due to power surges, age, or manufacturing defects.
  • Firmware Glitches: In rare cases, software-related issues on the logic board could cause unexpected behavior.

Diagnosing a faulty logic board is more complex and often requires a technician. Signs might include erratic behavior of the opener, failure to respond to any commands (wall control, remotes, keypads), or specific error codes displayed on diagnostic lights. If you’ve ruled out all other possibilities, the logic board is a likely suspect.

Replacement of a logic board can be expensive, sometimes approaching the cost of a new opener.

Safety Sensor Malfunction (indirect Impact)

The safety sensors are crucial for preventing the garage door from closing on an obstruction. They are located near the bottom of the garage door tracks. While they primarily affect the door’s closing function and remote operation, a severe malfunction can sometimes indirectly impact the wall control’s ability to initiate any movement.

  • Misalignment: The sensors might be slightly out of alignment, preventing the door from closing.
  • Obstruction: Something might be blocking the infrared beam between the sensors.
  • Damaged Sensors: One of the sensors or its wiring could be damaged.

If the safety sensors are not functioning correctly, the opener might refuse to operate *at all*, including from the wall control. Check the indicator lights on the sensors; they usually have LEDs that show their status. If the lights indicate a problem (e.

g. , one is off or flashing inconsistently), troubleshoot the sensors first. Clean the lenses, ensure they are aligned, and check their wiring.

Liftmaster Garage Door Opener Wall Control Not Working

Credit: www.youtube.com

Troubleshooting Steps: A Systematic Approach

To effectively diagnose why your Liftmaster wall control isn’t working, follow these steps systematically. This approach prioritizes the easiest and most common solutions first.

Step 1: Visual Inspection And Basic Checks

  • Check the Wall Control Panel: Is there any light on the panel? If it has a display, are there any error messages? If it’s completely dark, proceed to power checks.
  • Check the Garage Door Opener Unit: Are there any status lights illuminated on the motor unit? Refer to your Liftmaster manual to understand what these lights indicate.
  • Inspect Nearby Obstructions: Ensure nothing is physically blocking the garage door’s travel path or interfering with the wall control’s mounting.

Step 2: Test Power To The Opener

  • Circuit Breaker: Locate your home’s electrical panel and check the breaker for the garage door opener. Reset it if tripped.
  • GFCI Outlet: If your opener is plugged into a GFCI outlet, press the “Reset” button.
  • Test with Another Device: Plug a known working device (like a lamp) into the same outlet the opener uses. If the device doesn’t work, the outlet or circuit is the problem.

Step 3: Inspect Wiring Connections

  • At the Wall Control: Gently remove the wall control cover. Check that the wires connected to the terminals are secure. Ensure the correct wires are in the correct terminals (typically COM and WB).
  • At the Motor Unit: Locate the terminal block on the opener. Verify that the wires from the wall control are firmly attached to the correct terminals.
  • Wire Condition: Visually inspect the visible portions of the wire for any signs of damage, cuts, or fraying.

Step 4: Test The Wall Button Circuit (bypass Method)

This is a critical step to isolate the wall control unit itself.

  • Safety First: Ensure the garage door is fully closed or that there is ample clearance underneath it.
  • Locate Terminals: On the motor unit’s logic board, find the terminals for the wall button and common wire (often labeled “WB” and “COM”).
  • Temporarily Short: Using a screwdriver or a short piece of wire, carefully touch the two terminals simultaneously for a second or two.
  • Observe:
  • If the garage door operates, the wiring and logic board are likely fine, and the wall control unit itself is faulty.
  • If the garage door does not operate, the problem lies with the wiring, the motor unit’s logic board, or the power supply**.

Step 5: Test Wires With A Multimeter (advanced)

If the bypass test indicated a wiring or logic board issue, a multimeter can help pinpoint the problem.

  • Disconnect: Disconnect the wires from both the wall control and the motor unit.
  • Test Continuity: Set your multimeter to the continuity or resistance setting. Test each wire individually by placing the probes at each end.
  • Good Wire: Should show very low resistance (near 0 ohms) or beep continuously on continuity setting.
  • Bad Wire: Will show high resistance or no continuity (open circuit).
  • Test for Shorts: Ensure no bare wires are touching each other or any metal components. Test for continuity between the two wires themselves; there should be none.

Step 6: Consider Other Factors

  • Safety Sensors: If the door won’t close or operate intermittently, check your safety sensors. Ensure they are aligned and their indicator lights are on.
  • Remote Interference: Temporarily turn off or move any nearby electronic devices that might cause interference.
  • Logic Board: If all wiring is good and the bypass test fails, the logic board is the most likely culprit.
Liftmaster Garage Door Opener Wall Control Not Working

Credit: www.youtube.com

Replacing A Faulty Liftmaster Wall Control

If your troubleshooting confirms that the wall control unit itself is the issue, replacing it is usually a straightforward DIY task.

Choosing The Right Replacement

It’s essential to purchase a compatible Liftmaster wall control. You can find the model number of your existing control on the back or side. Alternatively, you can find the model number of your garage door opener and search for compatible wall controls. Liftmaster offers various models, including:

  • 880LM: Multi-Function Control Panel
  • 881LM: Smart Control Panel (for MyQ connectivity)
  • 882LM: Multi-Function Control Panel (newer version)

Ensure the replacement unit has the features you need. If you want to use the MyQ app for smartphone control, you’ll need a smart control panel and ensure your opener’s logic board is MyQ compatible (usually indicated by a yellow, purple, red/orange, or green “Learn” button).

Installation Process

  • Safety First: Disconnect power to the garage door opener at the circuit breaker. This is crucial to prevent electrical shock.
  • Remove Old Unit: Gently pry the old wall control off its mounting bracket using a flathead screwdriver. Note which wires are connected to which terminals. You might want to take a picture before disconnecting.
  • Disconnect Wires: Unscrew the terminals or release the wires from the old unit.
  • Mount New Unit: Install the new mounting bracket, then snap the new wall control panel into place.
  • Connect Wires: Connect the wires to the corresponding terminals on the new wall control. Ensure a secure connection. Typically, one wire goes to “COM” and the other to “WB” (Wall Button).
  • Restore Power: Reconnect power to the garage door opener at the circuit breaker.
  • Test the New Control: Press the button on the new wall control to ensure it operates the garage door.
  • Program Remotes (If Necessary): If you replaced the control panel with a different model or if your opener requires it, you may need to reprogram your remote controls and keyless entry. Refer to your garage door opener’s manual for the specific programming steps, which usually involve pressing the “Learn” button on the motor unit.

Example: Let’s say you have a Liftmaster 880LM that stopped working. After confirming power and wiring are good, you decide to replace it. You purchase a new 880LM. You disconnect the wires from the old unit, noting the “red wire to COM” and “white wire to WB” connections. You snap off the old unit, snap on the new one, reattach the red wire to COM and the white wire to WB, restore power, and test. If the new unit works, the old one was indeed faulty.

When To Call A Professional

While many garage door issues can be resolved with DIY troubleshooting, some situations warrant professional assistance.

  • Electrical Concerns: If you are uncomfortable working with electrical wiring or suspect a significant electrical fault (e.g., breaker repeatedly tripping), it’s best to call a qualified electrician or garage door technician.
  • Logic Board Failure: Diagnosing and replacing a logic board can be complex. If you’ve ruled out other issues and suspect the logic board, a professional can confirm and perform the replacement.
  • Damaged Tracks or Springs: Issues with the garage door itself, such as broken springs or damaged tracks, are dangerous and should only be handled by trained professionals.
  • Complex Wiring Issues: If your wiring runs through difficult-to-access areas or you suspect extensive damage, a professional has the tools and expertise to diagnose and repair it efficiently.
  • Persistent Problems: If you’ve followed all troubleshooting steps and the problem persists, a professional technician can offer advanced diagnostic capabilities and solutions.

According to the International Door Association (IDA), improper installation or repair of garage door systems can lead to serious injury. Always prioritize safety and consult professionals for tasks beyond your comfort level or expertise.

Maintaining Your Liftmaster Wall Control And Opener

Regular maintenance can prevent many common issues, including wall control malfunctions.

  • Monthly:
  • Test Safety Sensors: Place a solid object (like a 2×4 piece of wood) in the path of the closing door. The door should stop and reverse immediately.
  • Check Balance: Manually disconnect the opener and try to lift the door. It should stay open mid-way. If it’s too heavy or drifts down, the springs may need adjustment.
  • Annually:
  • Inspect Wiring: Check all wiring connections for the opener, wall control, and sensors for security and corrosion.
  • Lubricate Moving Parts: Apply lubricant to the rollers, hinges, and tracks (avoid the chain or belt).
  • Tighten Hardware: Ensure all nuts and bolts on the opener and door are secure.
  • Test Wall Control: Ensure the wall control responds promptly.

By performing these simple maintenance tasks, you can extend the life of your garage door opener system and minimize the chances of encountering a non-working wall control.

Frequently Asked Questions

My Liftmaster Wall Control Has A Light, But It’s Flashing A Specific Pattern. What Does This Mean?

Flashing lights on a Liftmaster wall control, especially on models like the Smart Control Panel (881LM), often indicate diagnostic codes. These codes can signal various issues, such as safety sensor problems, remote control errors, or logic board faults. You’ll need to consult your specific Liftmaster model’s owner’s manual to decipher the meaning of the flashing pattern. The manual will provide a table or list correlating light patterns to specific error conditions and troubleshooting steps.

Can I Use A Universal Wall Control With My Liftmaster Opener?

While universal *remotes* exist, universal *wall controls* are less common and often not recommended for Liftmaster systems. Liftmaster wall controls are designed to communicate with their specific opener logic boards using proprietary signals and wiring configurations. Using an incompatible wall control may result in it not working at all, or worse, causing damage to your opener’s logic board. It’s always best to use an official Liftmaster replacement part or a control specifically listed as compatible with your opener model.

How Do I Reset My Liftmaster Wall Control?

Many Liftmaster wall controls do not have a dedicated “reset” button in the way a router or modem does. However, you can effectively reset the control by disconnecting power to the entire garage door opener system for a minute or two. Go to your circuit breaker panel and switch off the breaker that powers the opener. After waiting, switch it back on. This power cycle can often clear temporary glitches in the opener’s logic board that might be

Stop Range Hood Rattling

Stop Range Hood Rattling

The persistent hum of a poorly functioning range hood can transform a peaceful kitchen into an irritating auditory environment. While range hoods are essential for maintaining air quality and removing cooking odors and grease, a rattling sound can significantly detract from their utility and your kitchen’s ambiance.

This noise often stems from loose components, motor issues, or improper installation. Addressing a rattling range hood promptly not only restores tranquility to your kitchen but also prevents potential damage and ensures the appliance functions at peak efficiency.

Understanding the root cause of the rattle is the first step toward a quiet kitchen. This guide will equip you with the knowledge to diagnose and fix common range hood noises, from simple fixes like tightening screws to more complex motor-related issues.

We’ll explore the various parts of a range hood, common points of failure that lead to rattling, and provide step-by-step instructions for troubleshooting and repair, ensuring your kitchen remains a place of culinary creation, not mechanical annoyance.

Key Takeaways

  • Identify the Source: Rattling can originate from the fan blades, motor, housing, ductwork, or even loose filters.
  • Safety First: Always disconnect power to the range hood before attempting any inspection or repair.
  • Simple Fixes: Many rattles are resolved by tightening loose screws, securing the housing, or cleaning and re-seating filters.
  • Fan Blade Issues: Bent or unbalanced fan blades are a common cause of vibration and noise.
  • Motor Problems: A failing motor bearing or loose motor mounts will produce significant rattling.
  • Ductwork Resonance: Improperly secured or vibrating ductwork can transmit noise throughout the kitchen.
  • Professional Help: For complex issues involving electrical components or if you’re uncomfortable with DIY repairs, consult a qualified appliance technician.
Stop Range Hood Rattling

Credit: www.youtube.com

Understanding Your Range Hood Components

Before diving into troubleshooting, it’s crucial to understand the basic components of a range hood that can contribute to rattling. Each part plays a role in the hood’s operation, and any malfunction or looseness can manifest as noise.

The Blower Motor And Fan Assembly

At the heart of every range hood is the blower motor, which powers the fan. The fan, often a squirrel-cage or propeller type, is responsible for drawing air out of the kitchen.

  • Motor: The electric motor spins a shaft. If the motor bearings are worn out, they can cause a grinding or rattling sound as they spin unevenly. Loose motor mounts can also allow the entire motor assembly to vibrate against the housing.
  • Fan Blades: The fan itself, attached to the motor shaft, can become unbalanced due to accumulated grease, debris, or physical damage. Even a slight imbalance can cause significant vibration at high speeds, leading to rattling. Bent or warped blades are particularly prone to this.

The Housing And Casing

The range hood’s outer casing encloses all the internal components. This housing is typically made of metal and is mounted to the cabinetry or wall.

  • Structural Integrity: If the housing itself is loose, or if screws holding it together or to the mounting surface have vibrated loose over time, the entire unit can rattle. This is especially true for older or lower-quality models.
  • Internal Baffles and Dampers: Some hoods have internal baffles or dampers designed to manage airflow. If these are not securely fastened, they can vibrate and create noise.

Filters And Grease Traps

Range hoods use filters to trap grease and other airborne particles. These are usually located at the bottom of the hood, directly above the cooking surface.

  • Mesh or Baffle Filters: These metal filters are designed to be removable for cleaning. If they are not properly seated or if their retaining clips are loose, they can vibrate against the hood’s interior or exterior, producing a distinct rattling sound.
  • Charcoal Filters (Recirculating Hoods): Hoods that recirculate air (ductless) often have charcoal filters. While less prone to rattling than metal filters, loose charcoal filter housings could potentially vibrate.

Ductwork And Venting System

For ducted range hoods, the ductwork is the pathway for air to travel from the hood to the outside. The connection between the hood and the ductwork, as well as the ductwork itself, can be sources of rattling.

  • Connection Point: The flange where the hood connects to the ductwork needs to be secure. If there’s any gap or looseness, air turbulence can cause rattling at this junction.
  • Duct Material and Support: Flexible ducting, if not properly installed and secured, can flap and vibrate. Rigid ductwork, if not adequately supported, can also resonate with the fan’s vibrations. The damper at the exterior vent, designed to prevent backdrafts, can also become loose and rattle.

Common Causes Of Range Hood Rattling And How To Fix Them

Identifying the specific component causing the rattle is key to an effective repair. The following sections break down the most frequent culprits and provide actionable solutions.

Loose Mounting Screws And Housing Vibration

One of the simplest yet most common causes of range hood rattling is loose mounting hardware. Over time, the constant vibration from the fan can loosen the screws that secure the hood to the underside of the cabinet or the wall.

Diagnosis:

Gently try to wiggle the range hood. If it moves excessively or you can feel play in the mounting points, loose screws are a likely cause. Inspect the exterior of the hood for any visible gaps or unevenness that might indicate shifting.

Solution:

  • Disconnect Power: Crucially, turn off the power to the range hood at the circuit breaker.
  • Access Mounting Screws: Depending on your hood’s design, the mounting screws might be accessible from the front (behind a decorative panel), from the sides, or from underneath. Consult your owner’s manual if unsure.
  • Tighten Screws: Use an appropriate screwdriver or drill bit to firmly tighten all mounting screws. Be careful not to overtighten, which could strip the screw threads or damage the mounting surface.
  • Test: Restore power and run the fan on different speeds. Listen to see if the rattling has stopped.

Pro Tip: If the existing screw holes seem stripped or enlarged, consider using slightly longer or wider screws, or inserting wood anchors if mounting into cabinetry for a more secure fit.

Rattling Fan Blades And Motor Assembly

The fan blades and the motor they are attached to are the primary moving parts. Any issue with their balance or mounting will directly translate into noise.

Unbalanced Or Dirty Fan Blades

Grease, dust, and food debris can accumulate on fan blades, creating an imbalance. Even a small amount of buildup on one side can cause the blade to wobble as it spins.

Diagnosis:

With the power OFF, carefully remove the filters. Shine a flashlight into the fan housing. Look for visible buildup on the fan blades. You might also be able to gently spin the fan by hand to feel for any obstructions or unevenness.

Solution:

  • Clean the Blades: Use a degreaser spray and a cloth or brush to thoroughly clean the fan blades. Ensure all debris is removed.
  • Inspect for Damage: Check the fan blades for any signs of bending, cracking, or warping. If blades are damaged, they may need to be replaced.
  • Reassemble: Once clean and dry, reassemble the filters and other components.
  • Test: Turn the power back on and test the fan.

Loose Motor Mounts

The motor is typically secured to the hood’s internal frame with mounting brackets or screws. If these become loose, the motor can vibrate against the housing.

Diagnosis:

With the power OFF and filters removed, look for the motor assembly. Gently try to move the motor. If it shifts or you can see loose bolts or brackets connecting it to the hood frame, this is likely the cause.

Solution:

  • Disconnect Power: Ensure the power is OFF.
  • Access Motor: You may need to remove additional panels or components to get clear access to the motor mounts.
  • Tighten Fasteners: Use a wrench or screwdriver to tighten any bolts or screws securing the motor to its mount. If the mounts themselves appear worn or damaged, they may need replacement.
  • Test: Reassemble any removed parts, restore power, and test the fan.

Vibrating Filters And Grease Traps

Removable filters are a frequent source of rattling because they are not permanently fixed and can easily become dislodged or vibrate against the hood’s structure.

Diagnosis:

Open the range hood and gently tap or wiggle the filters. If they move easily or sound loose, they are a prime suspect. Check the clips or latches that hold them in place.

Solution:

  • Remove and Inspect Filters: Take out all filters. Clean them if they are dirty.
  • Check Retaining Clips/Latches: Examine the clips or latches that secure the filters. Ensure they are fully engaged and not bent or broken. Sometimes, bending a clip slightly outwards can provide a tighter fit.
  • Re-seat Filters: Carefully place the filters back into their positions, ensuring they snap securely into place. You might hear a click or feel them lock.
  • Test: Run the fan to see if the rattling is gone.

Example: A user on a home improvement forum reported that their range hood started rattling after cleaning. They discovered that one of the mesh filters hadn’t been fully pushed back into its slot, causing it to vibrate against the metal housing. A simple push to seat it properly resolved the issue.

Ductwork Resonance And Loose Connections

For ducted hoods, the ventilation system can transmit or even create rattling noises. The connection point between the hood and the duct, as well as the ductwork itself, needs to be secure.

Diagnosis:

Listen carefully to where the noise seems to originate. If it sounds like it’s coming from the wall or ceiling where the ductwork is located, or if the rattling intensifies when the fan is on, the ducting is a likely culprit.

Check the area where the hood connects to the duct for any visible gaps or loose tape.

Solution:

  • Secure Hood-to-Duct Connection:
  • Disconnect Power: Turn off power at the breaker.
  • Access Connection: You may need to remove a cover plate or reach behind the hood to access where it meets the duct.
  • Tighten Clamps: Ensure the hose clamp or collar connecting the hood to the ductwork is tight. If it’s loose, tighten it with a screwdriver.
  • Seal Gaps: If there are any small gaps, use high-temperature aluminum foil tape (not duct tape) to seal them.
  • Support Ductwork:
  • Inspect Supports: If you can access the ductwork (in an attic, crawl space, or basement), check if it is properly supported by straps or hangers.
  • Add Supports: If the ductwork is sagging or appears loose, add appropriate supports every few feet to prevent vibration.
  • Check Exterior Vent Damper: The flapper or damper on your exterior vent can sometimes become loose or obstructed, causing rattling. Ensure it moves freely and seals properly when the fan is off.
  • Test: Restore power and test.

Internal Component Rattles (less Common)

Sometimes, the rattling might come from internal components other than the motor or fan blades, such as loose baffles, wire harnesses, or even debris that has fallen into the housing.

Diagnosis:

After checking the more common causes, if the rattle persists, a thorough internal inspection is needed. This often requires partial disassembly of the hood.

Solution:

  • Disconnect Power: Turn off the power at the breaker.
  • Disassemble Carefully: Refer to your owner’s manual for instructions on how to safely remove covers or internal components.
  • Inspect for Loose Parts: Look for any loose wires, brackets, screws, or baffles. Use electrical tape to secure loose wire harnesses and tighten any loose screws.
  • Remove Debris: Check for any foreign objects or accumulated debris that might be rattling around.
  • Reassemble: Put everything back together carefully, ensuring all parts are secure.
  • Test: Restore power and test the fan.
Stop Range Hood Rattling

Credit: homeinvibe.com

Troubleshooting A Rattling Range Hood: A Step-by-step Guide

Here’s a structured approach to systematically diagnose and fix a rattling range hood, moving from the simplest checks to more involved repairs.

Step 1: Initial Observation And Safety Precautions

Before touching anything, take a moment to observe.

  • When does it rattle? Does it happen on all fan speeds, or only specific ones? Does it start immediately, or after a few minutes?
  • Where does the sound seem to come from? Try to pinpoint the general area (front, back, top, bottom).
  • Safety First: Always disconnect the power to the range hood at the circuit breaker before attempting any inspection or repair. Failure to do so can result in serious electrical shock or injury.

Step 2: Check The Filters

This is the easiest and most common fix.

  • Remove Filters: Take out all the grease filters.
  • Inspect Filters and Housing: Look for damage to the filters or their securing clips. Clean the filters.
  • Re-seat Filters: Push each filter firmly back into its designated slot, ensuring it’s fully engaged and secure. Listen for a click or feel it lock in place.
  • Test: Restore power and run the fan. If the rattle is gone, you’ve found your culprit. If not, proceed to the next step.

Step 3: Inspect The Housing And Mounting

A loose hood will vibrate.

  • Gently Wiggle the Hood: With the power OFF, try to move the hood assembly. If there’s significant play, the mounting screws are likely loose.
  • Locate and Tighten Screws: Identify the mounting screws (usually underneath the cabinets or behind a decorative panel). Use a screwdriver to tighten all of them securely.
  • Test: Restore power and test the fan.

Step 4: Examine The Fan Blades And Motor Area

This requires a bit more investigation.

  • Disconnect Power: Ensure power is OFF.
  • Remove Filters: Take out the filters for better access.
  • Inspect Fan Blades: Shine a light into the fan housing. Check for debris buildup or damage to the fan blades. Clean them thoroughly if necessary.
  • Check Motor Mounts: Look for the motor. Gently try to move it. If it’s loose, tighten the bolts or screws securing it to the hood frame.
  • Test: Reassemble filters, restore power, and test.

Step 5: Investigate Ductwork And Vent Connection (ducted Hoods Only)

If the above steps don’t resolve the issue, and you have a ducted hood, the problem might be external.

  • Disconnect Power: Ensure power is OFF.
  • Check Hood-to-Duct Seal: Examine the connection point where the hood meets the ductwork. Tighten any clamps and seal any gaps with aluminum foil tape.
  • Inspect Duct Support: If accessible, check that the ductwork is properly supported and not vibrating. Add hangers if needed.
  • Check Exterior Vent: Inspect the external vent cover for obstructions or a loose damper.
  • Test: Restore power and test.

Step 6: Consider Internal Components And Professional Help

If the rattling persists after these checks, the issue might be more complex, such as worn motor bearings or internal component failure.

  • Worn Motor Bearings: These often produce a grinding or high-pitched squeal in addition to rattling. This typically requires motor replacement.
  • Internal Debris: Sometimes, small objects or significant buildup can fall into areas where they shouldn’t.

When to Call a Professional:

If you’re uncomfortable performing any of these steps, especially those involving accessing the motor or internal components, or if you suspect a serious mechanical issue like worn bearings, it’s time to contact a qualified appliance repair technician. They have the tools and expertise to diagnose and fix complex problems safely.

Stop Range Hood Rattling

Credit: branohome.com

When To Replace Your Range Hood

While most rattling issues can be resolved with maintenance or minor repairs, there comes a point where replacement might be the more practical and cost-effective solution.

Signs Your Range Hood Needs Replacement

  • Persistent, Loud Rattling: If the noise is extremely loud, constant, and unaffected by tightening or cleaning, it could indicate a failing motor or structural damage that’s not worth repairing.
  • Inadequate Ventilation: If the hood, despite being functional, no longer effectively removes smoke and odors, its motor or fan may be significantly weakened.
  • Age and Efficiency: Older range hoods (10-15 years or more) are often less energy-efficient and may lack modern features. Replacing them can lead to energy savings and improved performance.
  • Excessive Rust or Damage: If the hood’s metal is heavily rusted, corroded, or physically damaged, it compromises its integrity and appearance.
  • Cost of Repair vs. Replacement: If a major component like the motor needs replacement, the repair cost might approach or exceed the price of a new, more efficient unit. For example, a replacement motor could cost $100-$300, while a new mid-range range hood might be $200-$500.

Benefits Of Upgrading

  • Improved Air Quality: Newer models often have more powerful motors and better-designed fans for superior ventilation.
  • Reduced Noise Levels: Modern range hoods are engineered for quieter operation. Look for models with lower sone ratings (a measure of loudness).
  • Enhanced Features: Upgraded hoods may include LED lighting, variable speed controls, dishwasher-safe filters, and quieter operation.
  • Energy Efficiency: Newer appliances typically consume less electricity.

Range Hood Maintenance For Preventing Rattles

Regular maintenance is the best defense against a rattling range hood. By incorporating simple checks into your cleaning routine, you can prevent many common noise issues.

Regular Cleaning Schedule

  • Filters: Clean or replace grease filters monthly, or more often if you cook frequently with high grease output. For dishwasher-safe filters, run them through the dishwasher as needed.
  • Exterior and Interior Surfaces: Wipe down the exterior and accessible interior surfaces of the hood weekly or bi-weekly to prevent grease buildup.
  • Fan Blades: Annually, or if you notice any buildup, clean the fan blades thoroughly. This requires disconnecting power and may involve some disassembly.

Periodic Inspections

  • Filter Fit: Each time you clean or replace filters, ensure they are securely seated.
  • Mounting Screws: Every six months, give the range hood a gentle wiggle to check for looseness. Tighten mounting screws if necessary.
  • Duct Connection (Ducted Hoods): Annually, check the connection between the hood and the ductwork for any signs of looseness or leaks.

Understanding Sone Ratings

When considering a new range hood or diagnosing noise issues, understanding sone ratings is helpful. A sone is a unit of perceived loudness. A lower sone rating indicates a quieter appliance. For context, a refrigerator typically operates around 1 sone, while a normal conversation is about 2 sones. Many modern range hoods aim for 1-4 sones on their lowest settings.

A comparison of noise levels can illustrate the difference:

Appliance/ActivityApproximate Sone Rating
Refrigerator1 sone
Quiet Library1-2 sones
Normal Conversation2 sones
Modern Range Hood (Low)1-3 sones
Modern Range Hood (High)4-7 sones
Vacuum Cleaner8-10 sones

*Source: Based on general acoustics data and appliance industry standards.*

By implementing these maintenance practices, you can significantly reduce the likelihood of encountering a rattling range hood and ensure your kitchen remains a pleasant space.

Frequently Asked Questions

Why Is My Range Hood Rattling Only On The Highest Speed?

This often indicates that the fan or motor is unbalanced at higher rotational speeds. Grease buildup, bent fan blades, or a motor that is slightly loose can cause significant vibration only when the motor is working hardest. Check for debris on the fan blades and ensure the motor is securely mounted.

Can A Loose Light Bulb Cause My Range Hood To Rattle?

While less common, if a light fixture or bulb is not securely fastened within the housing, the vibration from the fan could cause it to rattle against the metal casing. Ensure all light bulbs and their retaining rings are tight.

How Do I Know If The Rattling Is From The Motor Or The Fan Blades?

Diagnosing this can be tricky without direct inspection. If you clean the fan blades thoroughly and the rattling persists, the issue is more likely with the motor itself (bearings, mounts) or internal components. If cleaning the blades resolves the noise, then blade imbalance was the cause.

A grinding or squealing sound alongside rattling often points to motor bearing issues.

Is It Safe To Run A Rattling Range Hood?

It is generally safe to run a rattling range hood for short periods, but it’s not recommended. The vibration can worsen the problem over time, potentially leading to more severe damage to the motor or fan assembly. It also indicates the