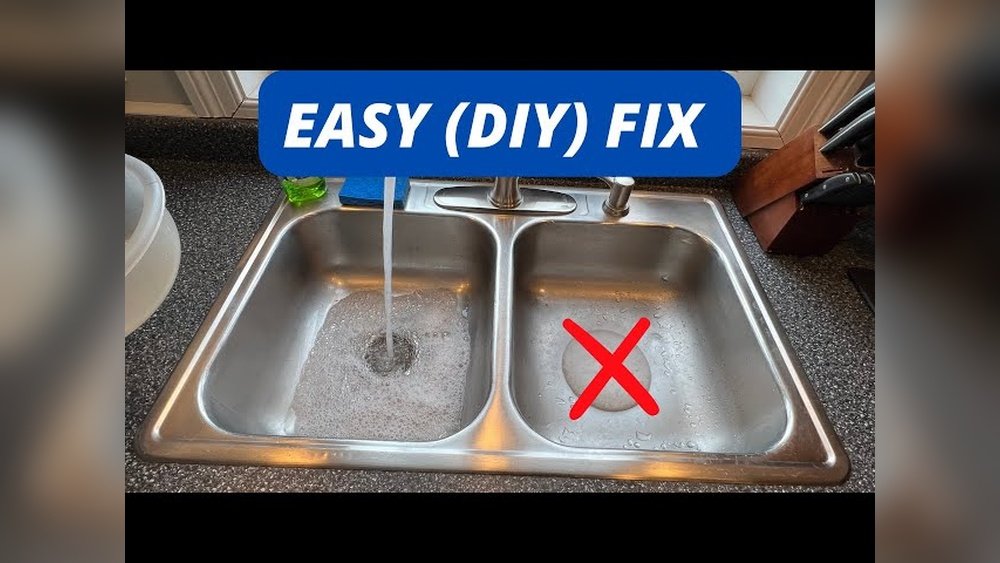
Sink Draining Slowly But Not Clogged

Sink Draining Slowly But Not Clogged

A sink draining slowly but not completely clogged is a common household frustration. It’s that maddening trickle of water that refuses to vanish, leaving you with a murky pool and a growing sense of unease. While a full blockage might be obvious, this semi-clogged state can be more insidious, often developing gradually and leaving homeowners puzzled about the root cause and the best course of action.

Ignoring this symptom can lead to more severe plumbing issues down the line, including potential water damage and more costly repairs.

Understanding why your sink is draining slowly, even when it’s not entirely blocked, is the first step toward a swift and effective solution. This phenomenon typically points to a partial obstruction or a problem with the drainage system’s airflow or slope.

It could be anything from a buildup of soap scum and hair in the trap to a more complex issue with the main drain line or even a vent pipe problem. This article will explore the common culprits behind a slow-draining sink and provide practical, actionable steps to diagnose and resolve the issue, ensuring your plumbing flows freely once more.

Key Takeaways

  • Partial Obstructions: Slow draining often indicates a partial blockage caused by grease, food debris, hair, soap scum, or foreign objects accumulating in the P-trap or further down the drainpipe.
  • Vent Pipe Issues: A clogged or improperly functioning vent pipe can disrupt airflow, creating a vacuum that impedes water flow and causes slow draining.
  • Improper Pipe Slope: If drainpipes aren’t installed with the correct downward slope, gravity can’t effectively carry waste away, leading to slow drainage.
  • Garbage Disposal Problems: A malfunctioning or overloaded garbage disposal can contribute to slow draining, especially in kitchen sinks.
  • DIY Solutions: Simple remedies like using a plunger, baking soda and vinegar, or a drain snake can often resolve minor slow-drain issues.
  • Professional Help: Persistent or complex slow-drain problems may require a plumber to inspect pipes, clear deep blockages, or address vent pipe or slope issues.

Common Causes Of A Slow-draining Sink

When water doesn’t drain as quickly as it should, it’s easy to assume a complete clog. However, many issues can cause a slow drain without a total blockage. These problems often stem from gradual build-up, minor obstructions, or underlying plumbing system faults. Recognizing these causes is crucial for targeted troubleshooting.

The Infamous P-trap Buildup

The P-trap is the U-shaped pipe located directly beneath your sink. Its primary purpose is to hold a small amount of water, creating a seal that prevents sewer gases from entering your home. This design, while effective, also makes it a prime location for debris to accumulate.

  • Grease and Food Scraps: In kitchen sinks, grease, oils, and small food particles can solidify and adhere to the inside of the P-trap. Over time, this layer thickens, narrowing the pipe’s diameter and restricting water flow.
  • Hair and Soap Scum: Bathroom sinks are notorious for accumulating hair and soap scum. Hair, in particular, acts like a net, catching other debris. Soap scum, a waxy residue from soap, can also build up, creating a sticky barrier.
  • Foreign Objects: Small items like jewelry, bottle caps, or even dental floss can accidentally fall into the sink and get lodged in the P-trap, partially obstructing the flow.

When these substances build up, they don’t necessarily create a complete blockage. Instead, they reduce the pipe’s effective diameter, forcing water to navigate through a narrower passage, thus slowing down the draining process significantly.

Hair And Soap Scum In The Vanity Trap

Similar to kitchen sinks, bathroom sinks are highly susceptible to hair and soap scum accumulation. The vanity trap, which is essentially the P-trap for your bathroom sink, can become significantly narrowed over time by these common culprits. Hair, being a strong and fibrous material, can weave itself into a dense mat, trapping soap residue and other small particles.

This creates a semi-solid mass that severely impedes water flow. The waxy nature of soap scum further exacerbates the problem by coating the pipe walls and reducing the available space for water to pass. This is often the primary reason why bathroom sinks drain so slowly after a period of use.

Issues With The Main Drain Line

While the P-trap is the most common culprit for a single slow-draining sink, problems further down the line can also manifest as a slow drain. The main drain line is the larger pipe that collects waste from multiple fixtures in your home and carries it to the sewer or septic system.

  • Partial Blockages: If the main drain line has a partial clog, it can affect multiple fixtures. However, sometimes a localized issue within the main line, such as a build-up of sludge or roots intruding into the pipe, can affect the drainage of a specific branch, making a single sink drain slowly.
  • Pipe Slope: Drainpipes are designed to be installed with a specific downward slope (typically ¼ inch per foot) to ensure gravity effectively pulls wastewater towards the sewer. If the slope is insufficient, or if the pipe has sagged over time due to ground settling or improper installation, wastewater can pool in low spots, leading to slow drainage and the gradual build-up of debris. This is a more structural issue that often requires professional attention.

Blocked Or Inefficient Vent Pipes

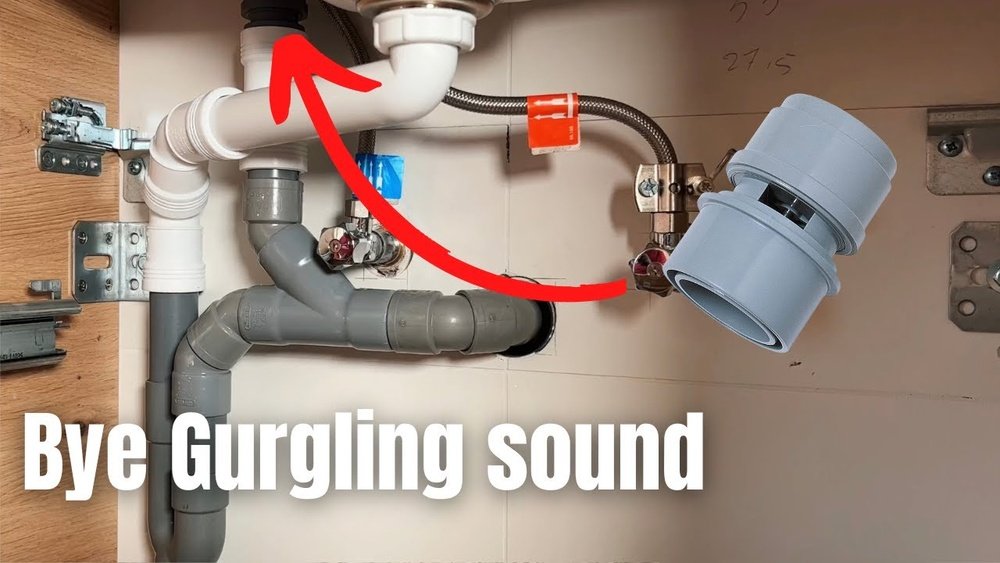
Your home’s plumbing system relies on a network of vent pipes to equalize air pressure. These vents, which typically extend through the roof, allow air to enter the system, preventing a vacuum from forming that would otherwise hinder water flow and cause gurgling sounds.

  • Clogged Vents: Leaves, bird nests, or other debris can block the opening of vent pipes on the roof. A blocked vent prevents air from entering the system, creating a vacuum behind the draining water. This vacuum effectively “holds back” the water, causing it to drain slowly.
  • Improper Venting: In older homes or after renovations, vent pipes might be improperly installed, too small, or not strategically placed, leading to inadequate airflow.

When a vent pipe is blocked, you might notice other symptoms besides slow draining, such as gurgling sounds from drains, especially after flushing a toilet or running a shower.

Garbage Disposal Malfunctions

For kitchen sinks equipped with a garbage disposal, a malfunctioning unit can be the cause of slow draining.

  • Overloading: If too much food waste is put into the disposal at once, or if fibrous or hard materials are ground, the disposal can become jammed or overwhelmed. This can prevent water from passing through it effectively.
  • Clogged Grind Chamber: Even if the disposal seems to be running, food particles can accumulate in the grind chamber or the discharge pipe leading from the disposal to the main drain. This partial blockage will slow down the drainage of the sink.
  • Motor Issues: A failing motor might not grind food waste effectively, leaving larger particles that can contribute to clogs.

If your garbage disposal is running but the sink is draining slowly, it’s a strong indicator that the issue lies within the disposal itself or its connection to the drainpipe.

Diagnosing The Slow Drain: Step-by-step

Before calling a plumber, several diagnostic steps can help pinpoint the cause of your slow-draining sink. These methods range from simple observation to basic troubleshooting techniques.

Observe The Symptoms Carefully

The first step in diagnosis is to pay close attention to the exact nature of the slow drain.

  • Which Fixtures are Affected? Is it just one sink, or are multiple fixtures in the house draining slowly? If it’s only one sink, the problem is likely localized to that fixture or its immediate drainpipe. If multiple sinks, tubs, or toilets are affected, the issue might be with the main drain line or a shared vent.
  • When Did it Start? Did the slow draining begin suddenly or gradually? A sudden onset might indicate a foreign object falling into the drain, while a gradual decline usually points to a build-up of grease, hair, or soap scum.
  • Are There Other Symptoms? Listen for gurgling sounds from the drain when water is running or when a toilet is flushed. This often indicates an issue with the vent system. Notice any foul odors emanating from the drain? This can also be a sign of trapped waste or sewer gas escaping due to a lack of proper water seal, often related to vent problems.
  • Water Backflow: Does water back up into the sink when another fixture (like a dishwasher or washing machine) is used? This is a strong indicator of a blockage in the main drain line.

Test With Water And Observe

A simple test can provide further clues.

  • Clear the Sink: Remove any standing water from the sink.
  • Run Hot Water: Run hot water directly into the drain for a minute or two. Observe how quickly it drains. If hot water helps significantly, it might suggest a build-up of grease or soap scum that is being softened and partially cleared by the heat.
  • Pour a Bucket of Water: Fill a bucket with water and quickly dump it into the sink. If the water drains immediately, the issue might be minor. If it backs up and drains slowly, it indicates a more significant obstruction.

Check The P-trap

The P-trap is the most accessible part of the drain system and a frequent site of blockages.

  • Place a Bucket: Position a bucket or large bowl directly underneath the P-trap to catch any water and debris.
  • Loosen the Slip Nuts: Most P-traps are connected with slip nuts. Loosen these nuts by hand or with a pipe wrench if necessary. Be gentle, as older pipes can be brittle.
  • Inspect and Clean: Once the trap is removed, empty its contents into the bucket. Inspect the trap for any visible obstructions like hair, food particles, or foreign objects. Clean it thoroughly with a brush and hot, soapy water.
  • Check Connecting Pipes: While the trap is off, use a flashlight to look into the pipes leading to and from the trap for any visible build-up.
  • Reassemble: Reassemble the P-trap, ensuring the nuts are snug but not overly tightened to avoid cracking. Run water to check for leaks.

Examine The Stopper Mechanism

Many sinks, especially bathroom vanities, have pop-up stoppers. These can become entangled with hair and soap scum, hindering drainage.

  • Remove the Stopper: Most pop-up stoppers can be lifted straight out after disengaging a clevis strap or pivot rod connected to the drainpipe. This connection is usually located beneath the sink.
  • Clean the Stopper and Drain Opening: Clean the stopper thoroughly. Then, use a bent wire hanger or a pair of tweezers to pull out any hair or debris that has accumulated in the drain opening itself.
  • Test Drainage: With the stopper removed, run water to see if the drainage improves. If it does, the stopper mechanism or the area around it was the primary issue.

Diy Solutions For Slow Drains

Once you’ve diagnosed the likely cause, you can attempt several DIY methods to clear a slow-draining sink before resorting to professional help.

The Plunger Method

A plunger is a surprisingly effective tool for dislodging partial clogs.

  • Create a Seal: Ensure there’s enough water in the sink to cover the rubber cup of the plunger. If it’s a double sink, block the other drain with a wet cloth or stopper to create a strong seal.
  • Position the Plunger: Place the plunger cup firmly over the drain opening, creating a tight seal.
  • Plunge Vigorously: Push and pull the plunger handle up and down rapidly for about 15-20 seconds. The goal is to use the pressure and suction to dislodge the obstruction.
  • Check Drainage: Remove the plunger and see if the water drains faster. You may need to repeat the process several times. If successful, flush the drain with hot water to wash away any remaining debris.

Pro Tip: For sinks with an overflow opening, cover it securely with a wet rag before plunging. This prevents air from escaping and ensures maximum pressure is applied to the clog.

Baking Soda And Vinegar

This classic, eco-friendly combination can help break down grease and soap scum.

  • Remove Standing Water: Bail out any standing water from the sink.
  • Add Baking Soda: Pour about ½ cup of baking soda directly into the drain.
  • Add Vinegar: Follow with about ½ cup of white vinegar. The mixture will immediately start to fizz and bubble.
  • Cover the Drain: Immediately cover the drain opening with a stopper or cloth to direct the reaction downwards into the pipe.
  • Let it Sit: Allow the mixture to work for at least 30 minutes, or preferably an hour.
  • Flush with Hot Water: Remove the cover and flush the drain thoroughly with a pot of boiling or very hot water. This helps to dissolve the loosened grime and flush it away.

This method is best for minor build-ups of grease and soap scum and may need to be repeated.

Using A Drain Snake (auger)

A drain snake, also known as a plumbing auger, is a flexible metal cable that can be fed into the drainpipe to physically break up or pull out obstructions.

  • Access the Pipe: You can typically insert the snake through the drain opening or, more effectively, through the removed P-trap.
  • Feed the Snake: Gently push the snake into the pipe until you feel resistance. This is likely the clog.
  • Work the Clog: Turn the handle of the snake (if it has one) while applying gentle pressure. This helps the auger head to break through or hook onto the obstruction. You might need to retract and re-feed the snake a few times.
  • Retrieve Debris: If you feel you’ve hooked something, slowly pull the snake back out, bringing the debris with it.
  • Flush the Drain: Once the obstruction is cleared, reassemble any removed parts (like the P-trap) and flush the drain thoroughly with hot water.

Warning: Be careful not to force the snake, as this could damage older pipes or push a clog further down.

Chemical Drain Cleaners (use With Caution)

While readily available, chemical drain cleaners should be used as a last resort for DIY fixes and with extreme caution.

  • Potential for Damage: Many chemical cleaners contain harsh acids or alkalis that can corrode pipes, especially older metal or plastic ones, and damage septic systems.
  • Safety Hazards: They can cause severe burns to skin and eyes and release toxic fumes. Always wear protective gloves and eyewear, and ensure good ventilation.
  • Effectiveness: They are often more effective on complete clogs than partial ones and may not fully resolve slow-draining issues caused by grease or hair build-up.
  • Follow Instructions: If you choose to use one, strictly follow the manufacturer’s instructions regarding dosage, application time, and flushing procedures. Never mix different chemical cleaners.

In my experience, chemical cleaners are often a temporary fix at best and can create more problems than they solve. It’s generally better to try mechanical methods first.

Sink Draining Slowly But Not Clogged

Credit: www.thespruce.com

When To Call A Professional Plumber

Some slow-drain issues are beyond the scope of simple DIY fixes and require the expertise and specialized tools of a licensed plumber.

Persistent Or Recurring Slow Drains

If you’ve tried multiple DIY methods and the sink continues to drain slowly, or if the problem keeps returning, it indicates a more significant underlying issue. This could be a deep clog in the main line, a problem with pipe slope, or a vent system issue that requires professional diagnosis.

Multiple Fixtures Affected

As mentioned earlier, if several sinks, toilets, or showers in your home are draining slowly or experiencing backups, it strongly suggests a problem with the main sewer line connecting your house to the municipal sewer or your septic tank. Clearing main line blockages often requires professional equipment like powerful drain augers or hydro-jetting services.

Suspected Vent Pipe Problems

If you hear persistent gurgling sounds from drains, experience slow draining accompanied by sewer odors, or notice other plumbing fixtures acting strangely (e. g. , toilets bubbling when the sink is used), it’s highly likely that your plumbing vent system is compromised.

A plumber can inspect vent pipes, clear obstructions, and ensure proper airflow.

Concerns About Pipe Slope Or Damage

If your house is older, or if you suspect recent ground movement, the slope of your drainpipes might be compromised. Improper slope prevents waste from draining effectively, leading to recurring slow drains and build-up. A plumber can assess the pipe slope and recommend solutions, which might involve re-grading or even replacing sections of pipe. Similarly, if you suspect tree root intrusion into your sewer lines, a common cause of main line clogs, a plumber can use specialized cameras to diagnose and remove the roots.

Garbage Disposal Issues Requiring Expertise

While basic troubleshooting of a garbage disposal is possible, more complex problems like motor failure, internal component damage, or persistent clogging after grinding require professional attention. A plumber can diagnose the issue, repair or replace the unit, and ensure it’s correctly connected to the drainage system.

Example: A homeowner in a suburban neighborhood noticed their kitchen sink draining slowly. They tried plunging and the baking soda/vinegar method without success. The problem persisted for several weeks. Upon calling a plumber, it was discovered that tree roots had infiltrated the main sewer line about 30 feet from the house, causing a partial blockage that slowed drainage from all fixtures connected to that line. The plumber used a powerful auger to clear the roots, restoring proper drainage.

Preventative Maintenance For Free-flowing Drains

The best way to deal with a slow-draining sink is to prevent the problem from occurring in the first place. Regular maintenance can save you time, money, and frustration.

Kitchen Sink Best Practices

  • Scrape Plates: Scrape food scraps into the trash or compost bin before rinsing dishes.
  • Avoid Pouring Grease: Never pour cooking grease, oil, or fats down the kitchen sink. Collect them in a container and dispose of them in the trash once solidified.
  • Use a Sink Strainer: A mesh strainer will catch larger food particles, hair, and other debris, preventing them from entering the drain. Empty the strainer regularly.
  • Run Cold Water with Disposal: If you use a garbage disposal, always run cold water for about 30 seconds before and after grinding food waste. Avoid putting fibrous materials (celery, corn husks), coffee grounds, eggshells, or grease down the disposal.
  • Periodic Flushing: Once a month, pour a pot of boiling water down the kitchen sink to help melt away any accumulated grease.

Bathroom Sink Best Practices

  • Hair Catchers: Use a mesh hair catcher over the drain to trap hair before it enters the pipe. Clean it after each use.
  • Be Mindful of Small Items: Avoid letting small items like cotton swabs, dental floss, or jewelry fall down the drain.
  • Rinse Soap: Rinse soap residue down the drain with water after each use to prevent build-up.
  • Occasional Hot Water Flush: Periodically flush the bathroom sink drain with hot water to help dissolve soap scum.

General Plumbing Maintenance

  • Regular P-Trap Cleaning: Even without a slow drain, consider removing and cleaning the P-trap of each sink once or twice a year as a preventative measure.
  • Check Vent Screens: If you can safely access your roof, check the screens on your plumbing vent pipes for any debris and clear them as needed.
  • Professional Inspections: Consider having a plumber perform a routine inspection of your plumbing system every few years, especially in older homes. They can identify potential issues like sagging pipes or early signs of vent blockages.

Comparison: Diy Vs. Professional Solutions

Choosing between tackling a slow drain yourself or hiring a professional involves weighing costs, time, and potential risks.

FeatureDIY Solutions (Plunger, Baking Soda, Snake)Professional Plumber
**Cost**Low (cost of tools/materials)Moderate to High (labor + specialized tools)
**Time Investment**Moderate (can take multiple attempts)Low to Moderate (efficient with expertise)
**Effectiveness**Good for minor clogs/build-upsHigh, effective for all types of blockages
**Risk of Damage**Low to Moderate (potential pipe damage)Very Low (experienced professionals)
**Tools Required**Basic household tools, drain snakeAdvanced augers, cameras, hydro-jetters
**Best For**Minor grease, soap scum, hair clogsMajor clogs, main line issues, vent problems
**Prevention**Limited effectivenessCan advise on and perform preventative maintenance

Example: A homeowner with a slow bathroom sink drain spent $10 on a drain snake and an hour trying to clear it. They successfully removed a significant amount of hair and soap scum, solving the problem for $10 and one hour of their time. Conversely, another homeowner with a similar issue opted for a plumber, costing $150 for a 30-minute service call that included clearing the hair with a professional auger. While the DIY route saved money, the plumber offered a quicker, guaranteed fix.

Frequently Asked Questions

Why Does My Sink Drain Slowly After Using The Garbage Disposal?

This usually indicates that the garbage disposal itself is not fully clearing the waste, or that debris is accumulating in the disposal’s discharge pipe or the P-trap immediately following it. Food particles, especially fibrous ones, can create
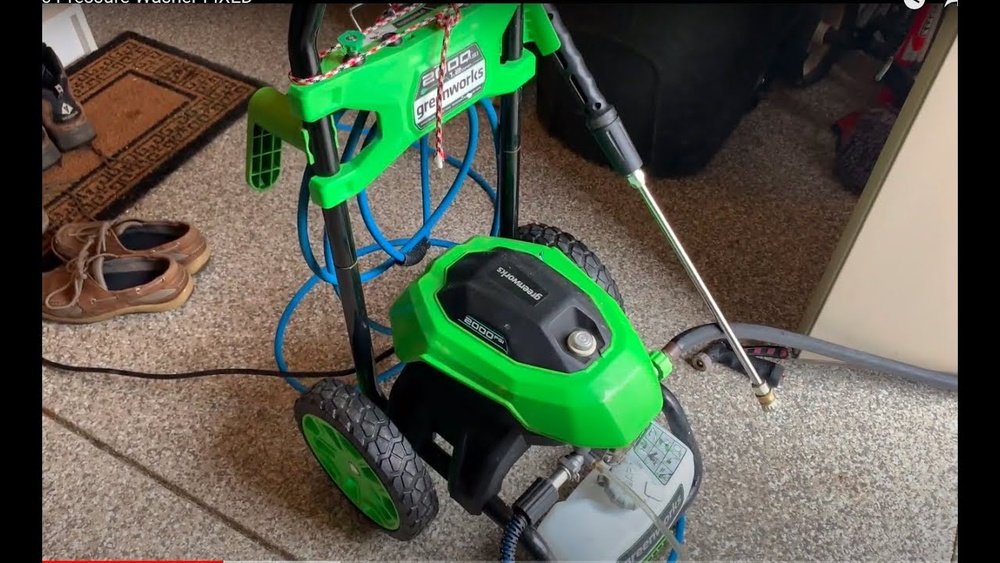
Greenworks Pressure Washer Not Working

Greenworks Pressure Washer Not Working

When your Greenworks pressure washer fails to start or perform as expected, it can be a frustrating experience, especially when you have cleaning tasks that require immediate attention. These machines are designed for efficiency and power, making them invaluable tools for everything from washing cars and decks to cleaning siding and driveways. However, like any mechanical equipment, they can encounter issues. Understanding the common problems and their solutions is key to getting your Greenworks pressure washer back up and running quickly.

This comprehensive guide will walk you through the most frequent reasons why a Greenworks pressure washer might not be working, covering both electric and gas models. We’ll explore troubleshooting steps for power issues, water flow problems, starting difficulties, and pressure fluctuations.

By systematically addressing each potential cause, you can diagnose the problem and implement the necessary fixes, saving you time and the expense of unnecessary repairs or replacements.

Key Takeaways

  • Power Source Issues: For electric models, check the power outlet, extension cord, and GFCI reset. For gas models, inspect the fuel level, spark plug, and carburetor.
  • Water Supply Problems: Ensure the water source is adequate, the inlet hose is free of kinks, and the filter is clean.
  • Starting Difficulties: For gas engines, verify fuel-to-air mixture, choke setting, and oil levels. For electric models, ensure the unit is properly primed.
  • Low Pressure: Check for blockages in the nozzle, hose, or filter. Inspect for leaks and ensure the engine or motor is running at optimal speed.
  • Safety Features: Understand how safety features like low-oil shutdown (gas) or GFCI protection (electric) might be preventing operation.
  • Maintenance is Crucial: Regular cleaning of filters, spark plugs, and proper fuel storage can prevent many common issues.
Greenworks Pressure Washer Not Working

Credit: www.youtube.com

Troubleshooting Power Issues On Electric Greenworks Pressure Washers

Electric pressure washers offer convenience and ease of use, but they are entirely dependent on a stable power supply. When your electric Greenworks pressure washer won’t turn on, the initial investigation should focus on the electrical components. These issues are often the simplest to resolve with basic checks.

Checking The Power Outlet And Extension Cord

The most fundamental reason an electric device won’t power on is a lack of electricity reaching it. Start by verifying that the power outlet you are using is functional. Plug in another small appliance, like a lamp or a phone charger, to confirm the outlet is live. If the outlet is dead, you may need to check your home’s circuit breaker or fuse box.

If the outlet is working, the next suspect is the extension cord. Not all extension cords are created equal, and using an undersized or damaged cord can prevent your pressure washer from receiving sufficient power, or even cause it to shut down as a safety measure. Greenworks pressure washers, especially higher-powered models, require heavy-duty extension cords rated for outdoor use and capable of handling the amperage draw. Look for cords labeled for 12-gauge or 10-gauge wire, and ensure they are rated for at least 15 amps. Inspect the cord for any cuts, nicks, or damaged prongs. A frayed cord is a fire hazard and should be replaced immediately.

Understanding Gfci Protection

Many electric pressure washers, including Greenworks models, are equipped with a Ground Fault Circuit Interrupter (GFCI) for safety. This is a crucial safety device designed to shut off power if it detects an imbalance in the electrical current, which can happen if water comes into contact with electrical components. You’ll often find a GFCI button (usually labeled “Test” and “Reset”) directly on the power cord of the pressure washer or at the outlet itself.

If your pressure washer suddenly stops working, or won’t start at all, check the GFCI. Press the “Reset” button firmly. If it clicks and stays in, power should be restored. If it trips again immediately, there might be a more serious electrical issue with the pressure washer itself or a fault in the GFCI mechanism. In some cases, the GFCI outlet in your home might have tripped; check your main electrical panel for any tripped breakers.

Inspecting The Power Switch And Internal Components

If the outlet, extension cord, and GFCI are all functioning correctly, the issue might lie within the pressure washer’s own power switch or internal wiring. First, ensure the power switch on the unit is in the “On” position. Sometimes, it can be accidentally bumped or not fully engaged.

For more advanced troubleshooting, you might need to inspect the internal wiring. This step requires a degree of electrical knowledge and caution. If you are not comfortable working with electrical components, it’s best to consult the Greenworks user manual or contact their customer support. However, a visual inspection might reveal loose wires or signs of damage. Ensure all connections are secure. If you suspect a faulty motor or internal switch, professional repair might be necessary.

Greenworks Pressure Washer Not Working

Credit: www.youtube.com

Diagnosing Starting Problems On Gas Greenworks Pressure Washers

Gas-powered Greenworks pressure washers offer more portability and power, but their internal combustion engines introduce a new set of potential starting issues. Unlike electric models, a gas engine requires a precise blend of fuel, air, and spark to ignite.

Fuel And Oil Levels

The most basic, yet often overlooked, reason a gas engine won’t start is a lack of fuel or oil.

  • Fuel: Ensure the fuel tank is filled with fresh gasoline. Stale gasoline, typically older than 30 days, can degrade and cause starting problems due to gumming up the fuel system. Always use gasoline with an octane rating recommended in your owner’s manual, and avoid using E85 or gas with more than 10% ethanol, as this can damage engine components.
  • Oil: Many gas pressure washers have a low-oil shutdown sensor. This safety feature prevents the engine from running without sufficient oil, which could cause catastrophic damage. Check the oil level using the dipstick and add the recommended type and amount of oil if it’s low.

The Spark Plug And Ignition System

The spark plug is vital for igniting the fuel-air mixture in the engine cylinder. If the spark plug is fouled, damaged, or not receiving a strong spark, the engine will not start.

  • Removal and Inspection: Carefully remove the spark plug using a spark plug wrench. Inspect it for signs of wear, carbon buildup, or damage to the electrode.
  • Cleaning and Gap Adjustment: If it appears dirty, you can try cleaning it with a wire brush and carb cleaner. Ensure the gap between the electrodes is set to the manufacturer’s specifications (found in your manual).
  • Testing for Spark: Reconnect the spark plug wire to the plug, but keep the plug itself grounded against the engine block (use insulated pliers to hold it). Have someone pull the starter cord while you observe. You should see a strong, blue spark jumping across the electrode. A weak or yellow spark indicates an issue with the ignition coil or other ignition components, which may require professional attention.
  • Replacement: If the spark plug is damaged or shows significant wear, it’s best to replace it with a new one that matches the specifications in your manual.

Carburetor Issues

The carburetor is responsible for mixing the right amount of fuel and air for combustion. If the carburetor is dirty, clogged, or misadjusted, it can prevent the engine from starting or running smoothly. This is particularly common if the pressure washer has been stored for an extended period with fuel left in the tank.

  • Fuel Stoppage: Over time, fuel can leave deposits and varnish in the carburetor’s tiny passageways, restricting fuel flow.
  • Cleaning: For minor clogs, you can try using a carburetor cleaner spray. For more stubborn blockages, the carburetor may need to be removed, disassembled, cleaned thoroughly with specialized solvents, and reassembled. If you are not experienced with carburetor repair, it’s advisable to seek professional help or consult a service manual.
  • Primer Bulb: Many gas pressure washers have a primer bulb. Pressing this several times before starting helps draw fuel into the carburetor. If the primer bulb is cracked or doesn’t seem to be working, it will hinder starting.

Air Filter And Fuel Lines

A clogged air filter restricts airflow to the engine, preventing proper combustion. Check the air filter, typically located in a housing on the side of the engine. If it’s dirty, clean or replace it according to the manufacturer’s instructions. A dirty air filter is a common culprit for poor performance and starting issues.

Inspect the fuel lines for any kinks, cracks, or blockages. Ensure the fuel shut-off valve (if present) is in the “On” position.

Greenworks Pressure Washer Not Working

Credit: www.youtube.com

Addressing Water Flow And Pressure Problems

Once you’ve confirmed your Greenworks pressure washer is receiving power (electric) or its engine is running (gas), the next common set of problems relates to water flow and pressure output. Low pressure or no water flow can stem from issues with the water supply, blockages, or leaks.

Water Supply And Inlet Hose

The pressure washer is only as good as the water supply it receives.

  • Water Source: Ensure your water source (e.g., garden hose bib) is turned on fully and providing adequate water flow. Most pressure washers require a minimum water flow rate of 3-5 gallons per minute (GPM). A low flow rate from your faucet will result in low pressure from the washer.
  • Inlet Hose: Check the inlet hose connecting the water source to the pressure washer. Ensure it’s not kinked, twisted, or crushed, as this restricts water flow. Also, make sure the hose is securely attached to both the faucet and the pressure washer inlet.
  • Water Filter: Most Greenworks pressure washers have an inlet water filter (usually a mesh screen) located where the garden hose connects to the unit. This filter prevents debris from entering the pump and causing damage. If this filter is clogged with sediment or debris, it will severely restrict water flow. Remove the filter and clean it thoroughly under running water.

Nozzle And High-pressure Hose Issues

Blockages can occur at various points in the water path.

  • Nozzle: The nozzle tip is the most common place for a blockage. Tiny particles of dirt or mineral deposits can clog the small opening. Try clearing the nozzle with a thin wire or a dedicated nozzle cleaning tool. Many pressure washers come with a small brush for this purpose. Ensure you are using the correct nozzle for the task; some high-pressure nozzles can be easily blocked if used incorrectly or if debris gets into them.
  • High-Pressure Hose: While less common, debris can also get lodged within the high-pressure hose itself. If you suspect a blockage, disconnect the hose from both the pump and the spray gun and try to flush it with water.
  • Unloader Valve: The unloader valve regulates water flow and pressure. If it’s stuck or malfunctioning, it can lead to low pressure or inconsistent output. This is a more complex component to diagnose and often requires professional attention.

Leaks In The System

Leaks can significantly reduce the pressure output of your pressure washer.

  • Hose Connections: Check all connections for leaks: where the garden hose connects to the inlet, where the high-pressure hose connects to the pump and spray gun, and around the spray gun itself. Tighten any loose fittings.
  • Hose Damage: Inspect the high-pressure hose for any cuts, abrasions, or bulges, which indicate internal damage and potential leaks. A damaged hose should be replaced immediately for safety reasons, as they can burst under pressure.
  • Pump Seals: Internal leaks within the pump seals can also cause pressure loss. If you notice water leaking directly from the pump housing, it may indicate a worn seal that requires pump repair or replacement.

Common Issues With Greenworks Pressure Washer Spray Guns And Wands

The spray gun and wand assembly are your primary interface with the cleaning power of the pressure washer. Problems here can manifest as low pressure, inconsistent spray, or the inability to spray altogether.

Trigger Lock And Safety Latch

Most spray guns feature a trigger lock or safety latch to prevent accidental spraying. Ensure this safety mechanism is fully disengaged before attempting to squeeze the trigger. Sometimes, the lock can get stuck or not fully release, making it seem like the gun isn’t working. Try manipulating the lock a few times to free it up.

Clogged Spray Gun Or Wand

Similar to the nozzle, the spray gun and wand can also become clogged.

  • Spray Gun Inlet: Debris can enter the spray gun through the high-pressure hose connection. Check the inlet screen on the spray gun for any blockages.
  • Wand Passage: The wand itself has an internal passage. If a significant blockage occurs further up the system, it could affect the spray gun’s operation. Flushing the wand from both ends (if possible) can help clear minor obstructions.

Worn O-rings And Seals

Over time, the O-rings and seals within the spray gun and wand can wear out. This can lead to internal leaks, reducing the pressure that reaches the nozzle and causing a weak or inconsistent spray. If you notice water leaking from the handle of the spray gun or where the wand connects to the gun, worn seals are a likely cause. Replacing these seals is often a straightforward repair that can restore proper function.

Internal Valve Issues

The spray gun contains internal valves that control water flow when the trigger is engaged. If these valves become worn or are obstructed by debris, they may not open or close properly. This can result in either a constant dribble of water or a complete failure to spray, even when the trigger is pulled.

Diagnosing and repairing internal gun valves usually requires disassembly and is best handled by experienced users or professionals.

Maintaining Your Greenworks Pressure Washer For Longevity

Preventive maintenance is the most effective way to avoid issues with your Greenworks pressure washer. Regular care ensures optimal performance and significantly extends the life of the machine.

Cleaning Filters Regularly

As mentioned, the inlet water filter is critical. Make it a habit to clean this filter after every few uses, or more often if you’re using a water source prone to debris. A clogged filter is a primary cause of low pressure and can put undue strain on the pump. Some models may also have additional filters, such as within the spray gun or on the engine’s air intake. Consult your owner’s manual for specific filter locations and cleaning instructions.

Proper Fuel Management (gas Models)

For gas-powered models, fuel management is paramount.

  • Fresh Fuel: Always use fresh gasoline. If you store gasoline, use a fuel stabilizer to prevent it from degrading.
  • Storage: If storing the pressure washer for more than a month, it’s best to run the engine dry of fuel to prevent carburetor gumming. Alternatively, drain the fuel tank and carburetor.
  • Ethanol Concerns: Be mindful of ethanol content in gasoline, as higher concentrations can damage seals and internal components over time.

Engine Oil And Spark Plug Care (gas Models)

Regularly check and change the engine oil according to the manufacturer’s recommended schedule. Using the correct type and grade of oil is essential for engine lubrication and cooling. Inspect the spark plug periodically. Cleaning it or replacing it if it shows signs of wear can prevent starting issues and ensure efficient combustion.

Winterization And Storage

Proper winterization is crucial if you live in a climate with freezing temperatures.

  • Flush the System: Run fresh water through the pump to flush out any remaining dirty water.
  • Pump Saver: Use a pressure washer pump saver or RV antifreeze. This fluid prevents water from freezing inside the pump, which could cause cracks and severe damage. Follow the product’s instructions for application.
  • Storage Location: Store the pressure washer in a clean, dry place, protected from extreme temperatures and moisture.

General Cleaning And Inspection

After each use, rinse off any dirt or debris from the exterior of the pressure washer. Inspect hoses, connections, and the spray gun for any signs of wear or damage. Keeping the machine clean and visually inspecting it regularly can help you spot potential problems before they escalate.

Understanding Safety Features That Might Prevent Operation

Greenworks, like all reputable manufacturers, incorporates various safety features into their pressure washers to protect both the user and the equipment. While essential, these features can sometimes be the reason a unit isn’t working, leading users to believe there’s a malfunction when it’s actually a safety mechanism engaging.

Gfci Protection (electric Models)

As discussed earlier, the Ground Fault Circuit Interrupter (GFCI) is a critical safety feature on electric pressure washers. Its primary function is to prevent electric shock by quickly cutting power if it detects an electrical imbalance, typically caused by water intrusion. If the GFCI on the power cord or outlet trips, the pressure washer will immediately stop working. Resetting the GFCI is the first step in troubleshooting. If it repeatedly trips, it signals a potential electrical fault within the unit or a problem with the power source, and further investigation or professional help is needed.

Low-oil Shutdown Sensor (gas Models)

Gasoline engines on pressure washers are often equipped with a low-oil shutdown sensor. This is a vital protective feature designed to prevent engine damage due to insufficient lubrication. If the oil level in the engine drops below a safe operating threshold, the sensor will automatically shut down the engine. If your gas Greenworks pressure washer won’t start or stops running unexpectedly, checking the oil level is a primary troubleshooting step. Ensure the oil is filled to the manufacturer’s recommended level.

Thermal Overload Protector (electric Models)

Some electric pressure washers have a thermal overload protector. This feature is designed to shut off the motor if it overheats due to prolonged use, restricted water flow, or other operational stresses. If the motor gets too hot, the protector will trip, stopping the unit. Once the motor cools down sufficiently (usually after 15-30 minutes), the protector may reset, allowing the pressure washer to be restarted. If the unit repeatedly overheats, it indicates an underlying issue such as insufficient water supply, a clogged filter, or a problem with the motor itself that needs addressing.

Water Filter And Low Water Flow Protection

While not always a direct “safety feature” in the same vein as electrical or engine protection, many pumps are sensitive to low water flow or debris. If the inlet water filter is severely clogged, or if the water supply pressure is too low, the pump can be starved of water. This can lead to overheating, cavitation (formation of vapor bubbles that can damage pump components), and reduced performance. Some advanced units might have sensors that detect low water flow and shut down the pump to prevent damage. Ensuring a robust water supply and a clean inlet filter is essential for both performance and the longevity of the pump.

Frequently Asked Questions

My Greenworks Electric Pressure Washer Won’t Turn On At All. What’s The First Thing I Should Check?

The very first things to check are the power source. Ensure the power outlet is working by plugging in another appliance. Then, inspect your extension cord for damage and ensure it’s rated for the amperage of your pressure washer. Finally, locate and press the “Reset” button on the GFCI (Ground Fault Circuit Interrupter) on the power cord or outlet. If any of these are faulty, it will prevent the unit from powering on.

My Greenworks Gas Pressure Washer Is Running, But There’s No Water Coming Out. What Could Be The Problem?

If the engine is running but no water is dispensing, the issue is likely with the water supply or a blockage. Check that the water source is fully open and providing adequate flow. Ensure the inlet hose is not kinked. Crucially, remove and clean the inlet water filter at the connection point to the pressure washer. Also, check the nozzle tip for any clogs and clear it if necessary.

The Pressure From My Greenworks Pressure Washer Seems Much Lower Than Usual. What Should I Do?

Low pressure can be caused by several factors. Start by checking for blockages in the nozzle tip and cleaning it. Inspect the high-pressure hose and all connections for any leaks. Ensure the inlet water filter is clean and that your water source is providing sufficient flow. If the unit is a gas model, confirm the engine is running at full throttle. A worn unloader valve or internal pump seals could also be the cause, which may require professional service.

How Often Should I Change The Oil In My Gas Greenworks Pressure Washer?

Refer to your specific Greenworks pressure washer’s owner’s manual for the exact oil change interval, as it can vary by model. Generally, for most gas engines, an oil change is recommended after the first 5 hours of use (initial break-in period) and then every 50-100 hours of operation or annually, whichever comes first. Using the correct type and grade of oil is crucial for engine health.

My Electric Greenworks Pressure Washer Keeps Tripping The Gfci. What Does This Mean?

A GFCI (Ground Fault Circuit Interrupter) tripping repeatedly indicates an electrical fault. This could be due to water getting into the motor housing, a short in the power cord, a faulty switch, or an issue within the motor itself. While you should always try resetting it, if it trips again immediately, do not continue to try and reset it. This is a safety mechanism to prevent electrical shock. It’s advisable to stop using the unit and consult the owner’s manual for specific troubleshooting steps or contact Greenworks customer support for assistance.

When your Greenworks pressure washer encounters issues, remember that most problems have straightforward solutions. By systematically working through potential causes, from simple power and water supply checks to more involved maintenance and safety feature considerations, you can often diagnose and fix the problem yourself.

Regular maintenance, such as cleaning filters, managing fuel correctly, and inspecting for wear, plays a significant

Fix Gurgling Sound Kitchen Sink

Fix Gurgling Sound Kitchen Sink

The dreaded gurgling sound emanating from your kitchen sink can be more than just an annoyance; it’s often a clear indicator of a plumbing problem brewing beneath the surface. This unsettling noise, reminiscent of a stomach rumbling or a choked drain, typically signifies an issue with your drainage system’s air pressure or a partial blockage. Ignoring it can lead to slow drains, unpleasant odors, and potentially more severe plumbing emergencies down the line. Understanding the root causes and how to address them is crucial for maintaining a healthy and functional kitchen.

This comprehensive guide will equip you with the knowledge to diagnose and fix that gurgling kitchen sink. We’ll explore the common culprits, from simple vent stack issues to more complex drain clogs, and provide step-by-step solutions you can tackle yourself.

By the end, you’ll be well-prepared to silence that disruptive gurgle and ensure your kitchen plumbing runs smoothly.

Key Takeaways

  • Gurgling sounds in a kitchen sink usually indicate a venting problem or a partial blockage in the drainpipe.
  • The plumbing vent system allows air into the pipes, preventing vacuum locks and enabling smooth water flow. Blocked vents disrupt this process, causing gurgling.
  • Common causes of blocked vents include debris like leaves, nests, or even snow and ice accumulation on the roof.
  • Partial clogs in the P-trap or further down the drain line can trap air, leading to gurgling as water tries to force its way through.
  • Simple DIY solutions involve checking and clearing the vent stack, and using plungers or drain snakes to address minor clogs.
  • For persistent or severe issues, it’s advisable to call a professional plumber.
  • Regular maintenance, such as occasional flushing with hot water and baking soda, can help prevent future gurgling.

Understanding Your Kitchen Sink’s Plumbing System

Before we dive into troubleshooting, it’s essential to grasp the basic workings of your kitchen sink’s plumbing. Your sink is connected to a network of pipes that carry wastewater away from your home. This system relies on two key components: the drain pipes and the vent pipes.

The Role Of Drain Pipes

The drain pipes are responsible for transporting water and waste from your sink, shower, or toilet to the main sewer line or septic tank. These pipes are typically made of PVC, cast iron, or copper and are designed with a specific downward slope to facilitate gravity-driven flow. A crucial element within the drain system is the P-trap, a U-shaped section of pipe located directly beneath your sink. The P-trap’s primary function is to hold a small amount of water, creating a water seal that prevents sewer gases from entering your home and causing unpleasant odors.

The Importance Of The Vent System

The vent system, often overlooked, is equally vital for proper drainage. It’s a network of pipes that extends from your drainpipes up through your roof. The primary purpose of the vent system is to allow air into the drainage system. As water flows down the drain, it creates a vacuum. Without a vent, this vacuum would suck water out of the P-traps, allowing sewer gases to escape into your home. The vent pipe equalizes the air pressure within the system, ensuring that water flows smoothly and that the P-trap’s water seal remains intact.

When you hear gurgling from your kitchen sink, it’s often a sign that this delicate balance of air pressure and water flow has been disrupted.

Fix Gurgling Sound Kitchen Sink

Credit: www.robinsonsplumbingservice.com

Common Causes Of A Gurgling Kitchen Sink

The unsettling gurgle is a symptom, and like any symptom, it points to an underlying cause. Identifying this cause is the first step toward a permanent fix. Most gurgling issues stem from either a problem with the vent system or a blockage in the drain line.

Issues With The Plumbing Vent Stack

The vent stack is the vertical pipe that runs from your plumbing system up to the roof. Its opening on the roof is crucial for allowing fresh air in and sewer gases out.

  • Obstructions: The most frequent culprit for vent issues is an obstruction. Leaves, twigs, bird nests, or even snow and ice can accumulate in the vent opening on your roof, blocking the flow of air. This blockage creates a vacuum effect as water drains, causing the water to struggle and gurgle as it tries to push past the obstruction. In my experience, checking the roof vent is often the quickest way to resolve a gurgling sink.
  • Improper Venting: In some cases, especially in older homes or after renovations, the plumbing system might not have been vented correctly. This can lead to chronic air pressure problems and consistent gurgling sounds, even without a visible blockage.
  • Cracked or Damaged Vents: While less common, a cracked vent pipe can sometimes allow water to enter the vent system, or it can compromise the air pressure balance.

Partial Clogs In The Drain Line

A complete blockage will usually result in no drainage at all, but a partial clog is a prime suspect for gurgling. These clogs don’t completely stop water flow but significantly impede it, creating turbulence and trapping air.

  • P-Trap Blockages: The P-trap, due to its U-shape, is a common spot for debris to accumulate. Grease, food particles, hair, and other waste can build up here, creating a partial obstruction. As water attempts to drain, it can push air back up through the trap, causing the gurgling sound.
  • Main Drain Line Obstructions: If the clog is further down the line, in the main horizontal drainpipe or even the vertical stack, it can affect multiple fixtures. However, a localized clog can still cause gurgling specifically in the kitchen sink as air is forced back up the pipe. Grease buildup is a particularly notorious cause of main drain line clogs.
  • Roots Intrusion: For homes with underground sewer lines, tree roots can infiltrate the pipes, causing partial blockages and significant damage over time. This is a more serious issue that often requires professional intervention.

Other Less Common Causes

While less frequent, other factors can contribute to sink gurgling:

  • Sewer Line Issues: Problems with the main sewer line connecting your home to the municipal system or septic tank can manifest as gurgling in lower-level fixtures like kitchen sinks.
  • Faulty Fixtures: In rare instances, a malfunctioning sink stopper or drain assembly might contribute to air pressure issues.
Fix Gurgling Sound Kitchen Sink

Credit: www.youtube.com

Troubleshooting Steps: Diagnosing The Gurgle

Before reaching for the phone to call a plumber, several troubleshooting steps can help you pinpoint the source of the gurgling sound. These methods range from simple visual checks to more involved manual clearing.

Checking The Sink Drain And P-trap

The most accessible part of your drainage system is the sink drain and the P-trap beneath it.

  • Visual Inspection: Remove the sink stopper and visually inspect the drain opening. Use a flashlight to look down into the pipe for any obvious debris.
  • Manual Removal of Debris: If you see visible gunk or hair, try to remove it with a bent coat hanger or a pair of pliers. Be gentle to avoid damaging the pipes.
  • Inspect the P-Trap: Place a bucket underneath the P-trap to catch any water and debris. Loosen the slip nuts connecting the trap to the wall pipe and the tailpiece from the sink. Carefully remove the U-shaped section. Clean out any accumulated sludge, grease, or foreign objects. Reassemble the trap, ensuring the slip nuts are tightened securely but not overly so, and run water to check for leaks.

Testing The Vent System

The vent system is crucial, and problems here are common causes of gurgling.

  • Accessing the Roof Vent: This step requires caution and should only be attempted if you are comfortable working at heights. Safely access your roof and locate the vent pipe opening. It’s usually a PVC pipe sticking a few feet above the roofline.
  • Clearing Obstructions: Carefully remove any leaves, debris, or nests you find. You can use a garden hose to flush out the vent pipe, ensuring the water flows freely down. If the opening is blocked by ice, wait for it to melt or carefully use a mild de-icer.
  • Checking for Airflow: With the sink’s water running, try to feel for air movement coming from the vent opening. A strong airflow indicates the vent is likely clear.

Using A Plunger And Drain Snake

If you suspect a partial clog but can’t access the P-trap or clear the vent, plungers and drain snakes are your next best tools.

  • The Plunger Method:
  • Ensure there’s enough water in the sink to cover the plunger’s rubber cup.
  • If you have a double sink, block the other drain with a wet rag to create a seal.
  • Place the plunger firmly over the drain opening, creating a tight seal.
  • Pump the plunger vigorously up and down for about 15-20 seconds.
  • Quickly pull the plunger away to break the seal.
  • Repeat the process several times. The forceful suction and pressure can dislodge partial clogs.
  • The Drain Snake (Auger):
  • Feed the snake’s cable into the drain opening.
  • When you encounter resistance, you’ve likely hit the clog.
  • Crank the handle to rotate the snake’s head, breaking up or snagging the obstruction.
  • Slowly pull the snake back out, cleaning off any debris.
  • Repeat as necessary until the clog is cleared. You may need to remove the P-trap to feed the snake directly into the pipe behind it.
Fix Gurgling Sound Kitchen Sink

Credit: mytrustedexpert.com

Diy Solutions For A Gurgling Sink

Once you’ve identified the likely cause, you can proceed with DIY solutions. Remember to always prioritize safety and consult a professional if you’re unsure.

Clearing A Blocked Vent Stack

If your troubleshooting points to a blocked vent stack, here’s how to address it:

Step-by-step Vent Clearing

  • Safety First: Ensure you have a stable ladder and wear appropriate footwear. If your roof is steep or you’re uncomfortable, skip this step and call a professional.
  • Locate the Vent Opening: Find the PVC pipe extending from your roof. It’s usually near the kitchen or bathroom plumbing.
  • Remove Visible Debris: Use your hands or a small trowel to clear away leaves, twigs, or any other obstructions from the top of the pipe.
  • Flush with Water: Connect a garden hose to a nearby outdoor spigot and run water down the vent pipe. If the blockage is minor, the water should flow freely. If it backs up, the obstruction is deeper.
  • Use a Plumber’s Snake (Optional): If flushing doesn’t work, you can carefully feed a plumber’s snake down the vent pipe from the roof. Rotate the snake to break up the clog. This can be tricky and requires careful handling to avoid damaging the pipe or losing the snake.
  • Check Airflow: After clearing, run water in your sink. You should no longer hear gurgling, and the water should drain freely.

Pro Tip: Consider installing a vent guard or cap on your roof vent pipe. These inexpensive devices prevent debris from entering while allowing air to pass through, significantly reducing the risk of future blockages.

Tackling Clogs With Plungers And Snakes

When the issue lies within the drain pipes, these tools can be effective.

Effective Plunging Techniques

  • Choose the Right Plunger: A cup plunger is generally suitable for sinks. Ensure it has a good seal.
  • Create a Seal: Fill the sink with enough water to cover the plunger cup. For double sinks, seal the other drain.
  • Forceful Action: Apply firm, steady pressure with the plunger. The key is the up-and-down motion that creates both pressure and suction.
  • Persistence: Repeat the plunging process for several minutes. Sometimes, it takes multiple attempts to dislodge a stubborn clog.

Using A Drain Snake Effectively

  • Access Point: For sink clogs, you’ll often get better results by removing the P-trap and inserting the snake directly into the pipe leading to the wall.
  • Gentle Insertion: Feed the snake cable slowly into the pipe. Avoid forcing it, which could damage the pipes.
  • Break or Retrieve: Once you feel resistance, turn the handle to rotate the snake. This will either break up the clog or hook onto it, allowing you to pull it out.
  • Clean Up: After removing the clog, run hot water down the drain to flush away any remaining debris. Clean your snake thoroughly.

Natural And Chemical Drain Cleaners: Pros And Cons

While DIY methods are often preferred, you might consider drain cleaners. However, they come with significant caveats.

Natural Cleaning Methods

  • Baking Soda and Vinegar: Pour about 1/2 cup of baking soda down the drain, followed by 1/2 cup of white vinegar. The mixture will fizz. Let it sit for 30 minutes to an hour, then flush with hot water. This can help break down minor grease and grime.
  • Boiling Water: Pouring a kettle of boiling water down the drain can help melt away grease buildup. Be cautious with PVC pipes, as excessive heat can damage them.

Chemical Drain Cleaners

  • Effectiveness: Chemical cleaners can be effective at dissolving clogs, particularly those caused by hair or grease.
  • Risks:
  • Pipe Damage: Many harsh chemicals can corrode metal pipes over time and damage PVC.
  • Environmental Impact: They are often harmful to the environment.
  • Safety Hazards: They can cause severe burns if they come into contact with skin or eyes.
  • Ineffectiveness: They may not work on all types of clogs and can sometimes solidify further down the pipe, creating a worse problem.
  • Plumber Danger: If chemicals don’t clear the clog, they remain in the pipes, posing a hazard to plumbers who may need to work on them.

Warning: Always follow the manufacturer’s instructions precisely if you choose to use a chemical drain cleaner. Never mix different chemical cleaners, as this can create toxic fumes. It’s generally advisable to exhaust other options before resorting to chemical cleaners.
When To Call A Professional Plumber

There are certain situations where attempting a DIY fix can do more harm than good, making it essential to call a professional.

Signs You Need A Plumber

  • Persistent Gurgling: If you’ve tried the DIY methods and the gurgling persists, it suggests a more complex issue like a deep clog, main line problem, or improper venting that requires expert tools and knowledge.
  • Multiple Fixtures Affected: If gurgling or slow draining is occurring in multiple sinks, toilets, or showers in your home, it likely indicates a blockage in the main sewer line.
  • Sewage Odors: Strong sewage smells, especially when combined with gurgling, can signal a serious vent or sewer line problem.
  • Water Backups: If wastewater is backing up into your sink or other fixtures, it’s a clear sign of a significant blockage that needs immediate professional attention.
  • Lack of Confidence or Tools: If you’re uncomfortable working with plumbing, lack the necessary tools (like a powerful drain auger), or suspect a major issue, it’s always best to let a professional handle it.

What A Plumber Can Do

Professional plumbers have specialized equipment, such as video inspection cameras, that can precisely locate blockages and assess pipe condition. They also have powerful hydro-jetting equipment that can effectively clear even the toughest clogs without damaging pipes. For vent issues, they can accurately diagnose problems with the entire venting system and make necessary repairs or modifications.

Preventative Maintenance For Your Kitchen Sink

The best way to deal with a gurgling sink is to prevent it from happening in the first place. Regular maintenance can keep your drains clear and your vent system functioning optimally.

Regular Cleaning Habits

  • Avoid Pouring Grease Down the Drain: This is perhaps the single most important preventative measure. Pour grease into a disposable container and discard it in the trash.
  • Use a Sink Strainer: A good quality strainer will catch food particles and debris before they enter the drain. Empty the strainer regularly.
  • Run Hot Water Regularly: After washing greasy dishes, run hot water down the drain for a minute or two to help flush away any residue.
  • Occasional Baking Soda Flush: Once a month, pour about 1/2 cup of baking soda down the drain, followed by hot water. This helps keep the pipes clean and fresh.

Maintaining The Vent System

  • Seasonal Roof Checks: If you have easy and safe access to your roof, perform a visual check of your vent pipe opening at least twice a year, especially after autumn when leaves fall heavily, or in spring when debris can accumulate.
  • Address Drainage Issues Promptly: If you notice any slow draining, don’t wait for it to become a major clog. Address it early with plunging or snaking.

Understanding Your Plumbing System

Educating yourself about your home’s plumbing, including the location of your main shut-off valve and the general layout of your drain and vent pipes, can be invaluable in emergencies.

Common Scenarios And Solutions

Let’s look at a few typical scenarios that lead to a gurgling kitchen sink and the most effective solutions.

Scenario 1: Gurgling Only When The Dishwasher Runs

This is a classic indicator that the dishwasher is draining into the same line as the sink, and there’s a partial clog or venting issue affecting that shared line.

  • Diagnosis: The dishwasher pumps water forcefully. If it causes gurgling, the drain is struggling to keep up, often due to a clog or inadequate venting for that specific branch of the drain system.
  • Solution: The most likely fix is to clear the partial clog in the drain line between the sink and the main stack, or to ensure the vent serving this line is clear. Using a drain snake from the sink’s P-trap is often effective.

Scenario 2: Gurgling Occurs When Flushing A Toilet

If flushing a toilet causes your kitchen sink to gurgle, it points to a problem further down in the main drain line or the main vent stack serving multiple fixtures.

  • Diagnosis: The act of flushing a toilet sends a significant volume of water and air through the system. If this causes gurgling in the sink, it means the main line is partially blocked, and the displaced air and water are being forced back up the nearest available opening, your sink drain.
  • Solution: This almost always requires a professional plumber. They can use video inspection to locate the blockage in the main sewer line and employ methods like hydro-jetting to clear it. DIY attempts with a standard drain snake are unlikely to reach or effectively clear a main line clog.

Scenario 3: Gurgling And Slow Draining With No Obvious Cause

You’ve plunged, snaked, and checked the P-trap, but the gurgling and slow draining persist.

  • Diagnosis: This suggests a deeper clog, a problem with the main vent stack (perhaps an obstruction high up or a design flaw), or an issue with the main sewer line.
  • Solution: At this point, calling a professional plumber is the most sensible course of action. They have the tools and expertise to diagnose and resolve complex plumbing issues that are beyond basic DIY capabilities.

Comparison Of Diy Vs. Professional Solutions

Choosing between a DIY fix and hiring a professional depends on the complexity of the problem, your comfort level, and the potential risks involved.

FeatureDIY Solutions (Plunger, Snake, P-Trap Cleaning)Professional Plumber Services
**Cost**Low (cost of tools)Higher (service call fee + labor)
**Time Investment**Can be time-consumingUsually quicker resolution
**Effectiveness**Good for minor clogs and accessible issuesEffective for all types of clogs and issues
**Risk of Damage**Moderate (if done incorrectly)Low (professionals have proper tools)
**Tools Required**Basic household tools, plunger, drain snakeAdvanced equipment (cameras, hydro-jetters)
**Best For**Simple P-trap clogs, minor drain obstructionsMain line clogs, vent issues, complex problems
**Potential for Error**HigherLower

For minor, easily accessible issues like a clogged P-trap or a slight blockage you can reach with a snake, DIY can save money and provide a sense of accomplishment. However, for anything more complex, involving the main sewer line, or if you lack confidence, the expertise and equipment of a professional plumber are invaluable.

It’s often more cost-effective in the long run to hire a pro for serious issues than to risk causing further damage.

Frequently Asked Questions

What Does It Mean When My Kitchen Sink Gurgles?

A gurgling kitchen sink typically indicates either a partial blockage in the drainpipe or an issue with your plumbing vent system. The gurgling sound occurs as air is forced back up the pipe when water tries to drain past an obstruction or when the vent system can’t equalize air pressure properly.

How Can I Tell If The Problem Is With The Vent Or The Drain?

If The Gurgling Occurs Only

Ryobi Pressure Washer Troubleshooting

Ryobi Pressure Washer Troubleshooting

When your Ryobi pressure washer fails to perform as expected, it can turn a quick cleaning task into a frustrating ordeal. Whether it’s a lack of pressure, an engine that won’t start, or unusual noises, these issues are common and often fixable with a bit of troubleshooting.

Understanding the potential causes and their solutions can save you time, money, and the hassle of seeking professional repair for what might be a simple fix. This guide will walk you through the most common Ryobi pressure washer problems and provide clear, actionable steps to get your equipment back in working order.

Key Takeaways

  • No Start Issues: Often caused by fuel problems (stale gas, clogged carburetor), ignition issues (spark plug), or safety lockouts.
  • Low Pressure: Frequently linked to clogged filters, dirty spray nozzles, water supply problems, or issues with the unloader valve.
  • Engine Surging/Stalling: Typically due to fuel delivery problems, air intake restrictions, or overheating.
  • Leaks: Can originate from loose connections, worn seals, or damaged hoses.
  • Detergent Not Dispensing: Usually a clogged siphon tube, a faulty detergent valve, or an incorrect setup.
  • Safety First: Always disconnect the spark plug and ensure the unit is cool before performing any maintenance.
Ryobi Pressure Washer Troubleshooting

Credit: www.youtube.com

Common Ryobi Pressure Washer Problems And Solutions

Ryobi pressure washers, like any piece of machinery, can encounter a range of issues. Identifying the symptom is the first step toward diagnosing the problem. We’ll break down the most frequent complaints and provide systematic troubleshooting steps.

Engine Won’t Start

This is perhaps the most disheartening problem, leaving you with a powerful tool that’s utterly useless. Several factors can contribute to a Ryobi pressure washer failing to start.

Fuel System Issues

The fuel system is a common culprit for starting problems.

  • Stale Gasoline: Gasoline degrades over time, especially when left in the tank for extended periods. Stale fuel can clog the carburetor and prevent the engine from igniting. Recommendation: Always use fresh gasoline, ideally with a fuel stabilizer if you don’t use the pressure washer regularly. If you suspect stale fuel, drain the tank and carburetor bowl, then refill with fresh fuel.
  • Clogged Carburetor: The carburetor mixes fuel and air for combustion. If it’s clogged with debris or gummed-up fuel residue, the engine won’t get the proper fuel mixture. Troubleshooting: You may need to remove and clean the carburetor. This often involves disassembling it, cleaning the jets and passages with carburetor cleaner, and reassembling. If you’re uncomfortable with this, a small engine repair shop can assist.
  • Fuel Filter: A clogged fuel filter restricts fuel flow to the carburetor. Check: Locate the fuel filter (usually inline between the fuel tank and carburetor) and inspect it. If it appears dirty, replace it. This is a relatively inexpensive and simple maintenance task.

Ignition System Problems

Even with fresh fuel, a lack of spark will prevent the engine from starting.

  • Spark Plug: The spark plug ignites the fuel-air mixture. A fouled, dirty, or worn spark plug can cause weak or no spark. Action: Remove the spark plug, inspect it for carbon buildup or damage, and clean or replace it as needed. Ensure the gap is set correctly according to your Ryobi model’s specifications.
  • Ignition Coil: If the spark plug is fine, the ignition coil might be faulty, failing to generate the necessary voltage for a spark. This is a less common issue but requires professional diagnosis.

Safety Features And Other Checks

Modern pressure washers have safety mechanisms that can prevent starting.

  • Water Supply: Ensure the water supply valve is fully open and there’s adequate water pressure to the pump. Many Ryobi models have a low-water cutoff that prevents the engine from starting if there isn’t enough water.
  • Choke Lever: Make sure the choke lever is in the correct position for starting (usually ‘start’ or ‘choke’ position).
  • On/Off Switch: Verify that the engine’s on/off switch is in the ‘on’ position.
  • Primer Bulb: If your model has a primer bulb, ensure you press it the recommended number of times (usually 3-5) until it feels firm.

Low Water Pressure Or No Pressure

This is another common complaint. You expect a powerful blast of water, but instead, you get a weak stream.

Water Supply And Inlet Issues

The problem might not be with the pressure washer itself but with how it’s being supplied.

  • Insufficient Water Flow: The pressure washer pump needs a consistent and adequate supply of water. If your garden hose is too small, kinked, or the water source pressure is low, the pump can’t perform optimally. Check: Use a garden hose of at least 50 feet with a 5/8-inch diameter. Ensure the hose is not kinked and the water source is fully open.
  • Clogged Inlet Filter: Most Ryobi pressure washers have a filter screen on the water inlet to prevent debris from entering the pump. If this filter is clogged, it restricts water flow. Maintenance: Disconnect the garden hose from the pressure washer, remove the inlet filter, and clean it thoroughly under running water. Rinse it well before reinserting.

Pump And Component Issues

If the water supply is adequate, the issue likely lies within the pressure washer’s components.

  • Dirty Spray Nozzle: The nozzle at the end of your spray wand is crucial for creating pressure. If it’s clogged with dirt, mineral deposits, or debris, the water flow is restricted, leading to low pressure. Solution: Remove the spray nozzle and clean it with a small wire or a specialized nozzle cleaning tool. You can also soak it in a vinegar solution to dissolve mineral buildup.
  • Unloader Valve Malfunction: The unloader valve regulates water flow and pressure. If it’s stuck, dirty, or faulty, it can cause low pressure or prevent the unit from reaching full pressure. Diagnosis: This is a more complex part to troubleshoot. Sometimes, debris can cause it to stick. Gentle tapping might dislodge it, but often it requires removal and cleaning or replacement. Consult your Ryobi manual for its location and any specific procedures.
  • Worn Seals or Damaged Pump: Over time, seals within the pump can wear out, leading to internal leaks and loss of pressure. Physical damage to the pump housing can also cause this. Note: Pump repair can be complex and costly. If you suspect pump damage, it might be more economical to replace the unit, depending on its age and value.

Air In The System

Trapped air can also reduce pressure.

  • Bleeding the System: After connecting the water supply and before starting the engine, squeeze the trigger on the spray wand for about 30 seconds to purge any air from the pump and hose.

Engine Surging, Stalling, Or Running Rough

An engine that runs erratically can be as frustrating as one that won’t start.

Fuel And Air Mixture Problems

The engine’s performance is highly dependent on the correct fuel-air mixture.

  • Carburetor Adjustment: The carburetor may need adjustment. However, many modern Ryobi pressure washers have non-adjustable carburetors. If yours is adjustable, consult your manual for the correct procedure.
  • Air Filter: A dirty or clogged air filter restricts airflow to the engine, causing it to run rich (too much fuel, not enough air) and potentially surge or stall. Action: Locate the air filter housing, remove the filter, and clean or replace it according to your manual’s instructions. A dirty air filter is a very common cause of rough running.
  • Fuel Quality: As mentioned earlier, stale fuel can cause erratic engine behavior. Ensure you’re using fresh, high-quality gasoline.

Overheating

Engines can stall if they overheat.

  • Blocked Cooling Fins: The engine has cooling fins on its exterior. If these are blocked by dirt, grass clippings, or debris, the engine cannot dissipate heat effectively. Maintenance: Periodically clean the engine’s cooling fins with a brush or compressed air.
  • Low Oil Level: Most gasoline engines require oil for lubrication and cooling. An extremely low oil level can cause the engine to overheat and shut down. Check: Always check the oil level before operating and top up if necessary.

Leaks

Leaks can occur at various points on your Ryobi pressure washer.

Hose Connections

The most common leaks are at the points where hoses connect.

  • Water Inlet Hose: Ensure the connection between the garden hose and the pressure washer inlet is secure and the washer is properly seated.
  • High-Pressure Hose: The high-pressure hose connects to the pump outlet and the spray wand. Check that both connections are tight. Use pipe thread tape on threaded connections if recommended by the manual.
  • O-rings and Washers: Damaged or missing O-rings and washers at hose connections are frequent causes of leaks. Inspect them for cracks or wear and replace them if necessary.

Pump And Internal Leaks

Leaks originating directly from the pump housing or internal components are more serious.

  • Pump Seals: Worn seals within the pump can cause water to leak from the pump itself.
  • Cracked Pump Housing: Physical impact or freezing can crack the pump housing, leading to significant leaks.
  • Thermodynamic Relief Valve (TRV): Some Ryobi models have a TRV designed to release hot water if the pump overheats. If this valve is faulty, it might leak.

Warning: If you detect a leak from the pump housing itself, it often indicates internal damage that may require professional repair or pump replacement.

Detergent Not Dispensing

Many users want to use detergent for tougher cleaning jobs, but it sometimes fails to siphon.

  • Clogged Siphon Tube: The clear plastic tube that draws detergent from the bottle can become clogged with dried detergent residue. Action: Remove the tube, soak it in warm water, and use a thin wire to clear any blockages.
  • Detergent Filter: Some Ryobi models have a small filter at the end of the siphon tube. Ensure this filter is clean and not clogged.
  • Detergent Valve/Selector: If your unit has a detergent selector or valve, ensure it’s set to the correct position for siphoning detergent. Some models only dispense detergent at very low pressure, meaning you might need to use a lower-pressure nozzle or a specific detergent setting.
  • Incorrect Nozzle: Detergent is typically siphoned only when using a low-pressure nozzle (often black). Using a high-pressure nozzle (red, yellow, green, white) will prevent detergent from being drawn.
Ryobi Pressure Washer Troubleshooting

Credit: www.allpartsinc.com

Maintenance For Preventing Problems

Proactive maintenance is the best strategy to avoid most Ryobi pressure washer issues.

Regular Cleaning

  • Exterior: Keep the unit clean from dirt, grease, and debris.
  • Cooling Fins: Regularly clean the engine’s cooling fins.
  • Air Filter: Clean or replace the air filter as per the manual’s schedule.

Fuel Management

  • Fresh Fuel: Always use fresh gasoline.
  • Fuel Stabilizer: Use a fuel stabilizer, especially if the pressure washer will be stored for more than a month.
  • Drain Fuel: For long-term storage, drain the fuel tank and run the engine dry to clear the carburetor.

Water System Care

  • Inlet Filter: Clean the water inlet filter regularly.
  • Flush System: After using the pressure washer, especially with detergents, flush the system with clean water.
  • Winterization: If you live in a climate with freezing temperatures, properly winterize the pump to prevent damage from ice expansion. This usually involves draining the pump and running a non-toxic antifreeze solution through it. Consult your manual for specific winterization instructions.

General Checks

  • Connections: Periodically check all hose connections for tightness.
  • Hoses and Wands: Inspect hoses, wands, and spray guns for cracks, leaks, or wear.
  • Oil Level: Always check the engine oil level before operation.
Ryobi Pressure Washer Troubleshooting

Credit: www.youtube.com

Troubleshooting Table: Common Ryobi Pressure Washer Issues

SymptomPossible CauseSolution
**Engine Won’t Start**Stale fuelDrain old fuel, refill with fresh; use fuel stabilizer.
Clogged carburetorClean or rebuild carburetor; professional service if needed.
Dirty/faulty spark plugClean or replace spark plug, check gap.
Clogged fuel filterReplace fuel filter.
Blocked air filterClean or replace air filter.
**Low Pressure**Clogged inlet filterClean inlet filter screen.
Clogged spray nozzleClean nozzle tip with a wire or cleaning tool.
Insufficient water supplyUse a larger diameter hose, ensure water source is fully open, check for kinks.
Unloader valve issueCheck for debris, consult manual for troubleshooting or replacement.
Air in the systemPurge air by running water through the pump before starting engine, squeeze trigger.
**Engine Surges/Stalls**Dirty air filterClean or replace air filter.
Stale fuelDrain and refill with fresh fuel.
Overheating (dirty cooling fins)Clean engine cooling fins.
Low oil levelCheck and top up engine oil.
**Leaks**Loose hose connectionsTighten all water inlet and high-pressure hose connections.
Damaged O-rings/washersInspect and replace worn or damaged O-rings and washers.
Leaking pump sealsMay require pump repair or replacement.
**Detergent Not Dispensing**Clogged detergent siphon tube/filterClean or replace siphon tube and filter.
Incorrect nozzle selectedUse a low-pressure (black) nozzle for detergent siphoning.
Detergent valve not set correctlyEnsure detergent selector is on the correct setting.

Advanced Troubleshooting: The Unloader Valve And Thermal Relief Valve

While many issues are straightforward, two components that can cause significant problems if they malfunction are the unloader valve and the thermodynamic relief valve (TRV).

The Unloader Valve

The unloader valve is critical for regulating pressure and preventing damage to the pump and engine. When you release the trigger on the spray gun, the flow of water is diverted back into the pump’s low-pressure side or to a bypass hose.

This prevents the pump from building excessive pressure when no water is being discharged.

Common Unloader Valve Problems:

  • Sticking: Debris or mineral deposits can cause the valve to stick in either the bypass or pressurized position. If it sticks in the bypass position, you’ll experience low pressure. If it sticks in a way that prevents it from bypassing correctly when the trigger is released, the pressure can build dangerously.
  • Worn Seals: Like any valve, the seals can wear out over time, leading to leaks or inconsistent pressure regulation.
  • Incorrect Adjustment: Some unloader valves are adjustable. An improperly adjusted valve can lead to either too low or too high pressure.

Troubleshooting Steps:

  • Check for Debris: Disconnect the water supply and the high-pressure hose. Inspect the inlet and outlet ports of the unloader valve for visible debris.
  • Tap Gently: Sometimes, gently tapping the unloader valve with a rubber mallet can dislodge minor obstructions.
  • Consult Manual: Refer to your Ryobi pressure washer’s manual for specific instructions on how to safely remove, clean, and reassemble the unloader valve. This process can vary significantly between models.
  • Professional Help: If you’re not comfortable with this procedure or if cleaning doesn’t resolve the issue, it’s best to seek professional assistance.

The Thermodynamic Relief Valve (trv)

The TRV is a safety device designed to prevent the pump from overheating due to water recirculation. When water recirculates through the pump (e. g. , when the trigger is released and the unloader valve is in bypass mode), it heats up.

If this water reaches a certain temperature, the TRV opens, releasing a small amount of hot water and allowing cooler water to enter the pump.

Common TRV Problems:

  • False Activation: The TRV can sometimes open prematurely if it’s faulty or if the water supply is too low, leading to a constant trickle of water from a small port on the pump head.
  • Failure to Open: In rare cases, the TRV might fail to open when the water overheats, which can lead to severe pump damage.

Troubleshooting Steps:

  • Observe for Leaks: If you notice a constant trickle of water from the pump head area, it might be the TRV. Ensure your water supply is adequate and the unloader valve is functioning correctly.
  • Check Temperature: If you suspect overheating, feel the pump head (carefully, it may be hot). If it’s excessively hot, the TRV may not be activating.
  • Replacement: The TRV is a sealed unit and typically cannot be repaired. If it’s malfunctioning, it needs to be replaced. This is usually a straightforward replacement process, but always consult your manual.

Ryobi Pressure Washer Model Comparison (illustrative)

Ryobi offers a range of pressure washers, from electric to gas-powered, with varying PSI (Pounds per Square Inch) and GPM (Gallons Per Minute) ratings. Understanding these differences can help in choosing the right tool and troubleshooting specific performance issues.

FeatureRyobi Electric 1700 PSIRyobi Gas 2300 PSIRyobi Gas 3100 PSI
**Power Source**Electric (120V)GasolineGasoline
**PSI Rating**170023003100
**GPM Rating**1.22.02.3
**Typical Use**Light tasks (decks, patio furniture, small vehicles)Medium tasks (driveways, fences, siding)Heavy tasks (large driveways, concrete, stubborn stains)
**Starting**Push-button/switchPull-cordPull-cord
**Maintenance**Lower (no oil changes, fewer engine parts)Higher (oil changes, fuel stabilizer, air filter)Higher (oil changes, fuel stabilizer, air filter)
**Portability**Lighter, cordedHeavier, wheeledHeavier, wheeled
**Noise Level**LowerHigherHigher

*Note: Specific PSI and GPM ratings can vary by exact model within each series. Always check the product specifications for your particular Ryobi pressure washer.*

Frequently Asked Questions

My Ryobi Pressure Washer Starts But The Engine Keeps Shutting Off. What Could Be The Cause?

This often points to an overheating issue or a fuel delivery problem. Check the engine’s cooling fins for blockages and ensure the oil level is adequate. If those are fine, investigate the fuel system, stale fuel, a clogged fuel filter, or a dirty air filter can cause the engine to run too hot or rich, leading to shutdowns.

Also, ensure you are using the correct type and octane of gasoline as specified in your manual.

How Often Should I Change The Oil In My Ryobi Gas Pressure Washer?

This depends heavily on your specific model and the manufacturer’s recommendations. Generally, for most Ryobi gas pressure washers, an oil change is recommended after the first 20-50 hours of operation for a new engine, and then every 100-200 hours of use or annually, whichever comes first.

Always consult your owner’s manual for the precise oil type and service intervals. Neglecting oil changes can lead to significant engine damage.

Can I Use My Ryobi Pressure Washer In Freezing Temperatures?

No, you should never operate your Ryobi pressure washer in freezing temperatures. Water inside the pump can freeze and expand, causing catastrophic damage to the pump housing and internal components. If you anticipate freezing conditions, it’s crucial to properly winterize the unit by draining all water and running a non-toxic pump saver or antifreeze solution through it.

Why Is The Water Coming Out Of My Ryobi Pressure Washer Very Hot, Even When I’m Not Using The Engine?

If you notice hot water coming from the unit when the engine is off, it’s likely a faulty thermodynamic relief valve (TRV) or an issue with the unloader valve. The TRV is designed to release hot water if the pump overheats due to recirculation.

If it’s stuck open or faulty, it can constantly release hot water. Ensure your water supply is adequate, as low water flow can contribute to overheating.

What Is The Difference Between The Red, Yellow, Green

Why Does My Ceiling Make Cracking Noises At Night

Why Does My Ceiling Make Cracking Noises At Night

The gentle quiet of the night can be a welcome respite, but for many homeowners, it’s punctuated by an unsettling symphony of cracking, popping, and groaning noises emanating from their ceilings. This nocturnal auditory phenomenon can range from a minor annoyance to a source of significant worry, leading to questions about structural integrity and potential hazards. Understanding the root causes behind these sounds is crucial for peace of mind and proactive home maintenance.

These noises are not typically indicative of immediate danger, but rather a natural response of building materials to their environment. The primary culprits are usually temperature fluctuations, humidity changes, and the natural settling of a house. As these elements cause building materials to expand and contract, friction occurs between different components, resulting in audible creaks and cracks. While the sounds themselves are often harmless, they can sometimes signal underlying issues that warrant attention, especially if they are new, sudden, or accompanied by visible signs of damage.

Key Takeaways

  • Temperature Fluctuations: The most common cause of ceiling cracking noises is the expansion and contraction of building materials due to daily and seasonal temperature changes.
  • Humidity Levels: Variations in humidity can also cause materials like wood and drywall to expand and contract, leading to noise.
  • Structural Settling: Houses naturally settle over time, and this gradual movement can create stress points that result in cracking sounds.
  • Loose Materials: Fasteners, nails, or screws holding drywall or plaster in place can become loose, allowing for movement and noise.
  • Water Damage: Leaks or past water intrusion can compromise building materials, making them more susceptible to cracking and noise.
  • Age of the House: Older homes may exhibit more noises due to the natural aging and wear of materials.
  • Professional Inspection: If noises are persistent, sudden, or accompanied by visible damage, a professional inspection is recommended.

The Science Behind The Sounds: Expansion And Contraction

The primary driver behind those mysterious nighttime ceiling noises is the fundamental physics of thermal expansion and contraction. Building materials, much like most substances, change in volume when exposed to varying temperatures. During the day, the sun’s rays or internal heating systems warm the house, causing materials like wood beams, drywall, insulation, and even concrete to expand. As temperatures drop at night, these same materials cool down and contract. This constant cycle of expansion and contraction, particularly when it’s rapid, creates stress within the structure.

Wood Framing And Its Role

The wooden framework of your home, including ceiling joists and rafters, is a major contributor to these sounds. Wood is a hygroscopic material, meaning it absorbs and releases moisture from the air. This property, combined with its response to temperature, makes it particularly prone to movement. When wood expands, it pushes against adjacent materials. When it contracts, it can pull away, creating gaps. The friction generated as these wood components rub against each other, or against metal fasteners, is a frequent source of creaking and popping sounds. This is especially noticeable at night when the house is cooling down rapidly after a day of being heated.

Drywall And Plaster Dynamics

Drywall (gypsum board) and plaster are also susceptible to movement, though their behavior differs slightly. Drywall is typically attached to wooden joists with screws or nails. As the joists expand and contract, they can cause the drywall to flex slightly. If the fasteners are not perfectly snug, or if the drywall itself is under stress, this flexing can lead to popping or cracking noises as the material shifts against the fasteners or against itself at seams. Plaster, especially in older homes, can become brittle over time. As the underlying structure moves, the plaster can crack or detach slightly from the lath, producing sharp cracking sounds.

The Impact Of Humidity

Beyond temperature, humidity levels play a significant role. High humidity causes wood to absorb moisture and swell, while low humidity causes it to release moisture and shrink. This moisture-related expansion and contraction can exacerbate the effects of temperature changes. For instance, a humid day followed by a dry night can lead to more pronounced wood movement and, consequently, more noticeable noises. The seasonal changes in humidity, from damp winters to dry summers (or vice versa, depending on your climate), are often when homeowners report an increase in these sounds.

Why Does My Ceiling Make Cracking Noises At Night

Credit: nozzlenolen.com

Common Causes Of Ceiling Cracking Noises

While expansion and contraction are the underlying scientific principles, several specific factors contribute to why your ceiling might be making noises, particularly at night. These range from simple material fatigue to more complex structural interactions.

Temperature Swings And Seasonal Shifts

The most prevalent reason for nighttime ceiling noises is the significant temperature differential that often occurs between day and night. During the day, your HVAC system or solar gain warms the house, causing materials to expand. As the sun sets and outdoor temperatures drop, the house cools down. This rapid cooling is when the contraction of materials becomes most pronounced. The attic space, in particular, can experience dramatic temperature swings. If the attic is poorly insulated, it will heat up significantly during the day and cool down very quickly at night, transferring these rapid changes to the ceiling below. This rapid contraction puts stress on the building’s components, leading to the characteristic snapping and cracking sounds.

Humidity And Moisture Content

Humidity is another major player. Wood, as mentioned, expands when it absorbs moisture and shrinks when it dries out. This is why you might notice more noises during periods of high humidity or sudden drops in humidity. For example, a damp, rainy day followed by a dry, cool night can cause significant wood shrinkage, leading to creaks. Conversely, a hot, dry day followed by a humid evening can cause expansion. These fluctuations are often more noticeable in older homes where wood may have already undergone many cycles of expansion and contraction, potentially leading to looser connections and more audible friction.

Structural Settling And House Movement

All houses, especially new ones, undergo a process called structural settling. This is the natural, gradual compression and adjustment of the building’s components under its own weight and external forces like wind. Over time, the foundation settles, the wood framing compresses, and the entire structure finds its equilibrium. While this process is usually slow and imperceptible, it can create internal stresses that manifest as cracking or popping sounds. These noises are often more common in the first few years of a home’s life but can continue to occur sporadically as the house continues to adjust. The house’s interaction with ground movement, even minor seismic activity or soil expansion/contraction due to moisture, can also contribute.

Loose Fasteners And Materials

Over time, the fasteners that hold your ceiling materials together can loosen. Screws and nails that secure drywall to ceiling joists can become slightly dislodged due to the constant expansion and contraction cycles. As the framing members move, the drywall can shift slightly against these loose fasteners, creating a squeaking or popping sound. Similarly, in older homes with plaster ceilings, the lath (thin strips of wood or metal) that the plaster is applied to can loosen from the joists. When the joists move, the lath can shift, causing the brittle plaster to crack or pop.

Attic And Crawl Space Conditions

The environment in your attic and crawl spaces significantly impacts ceiling noises. An uninsulated attic will experience extreme temperature fluctuations. During the day, it can become incredibly hot, causing the rafters and joists to expand. At night, it cools rapidly, leading to contraction. This creates a prime environment for creaking. Furthermore, moisture buildup in these areas due to poor ventilation can lead to wood swelling and subsequent shrinking, exacerbating noise issues. In crawl spaces, moisture can affect floor joists and subflooring, which in turn can transmit vibrations and stresses up to the ceiling.

Age And Material Fatigue

As homes age, their materials naturally degrade and become more prone to making noise. Wood can dry out and become brittle, making it more likely to creak. Drywall compounds and paint layers can lose their flexibility and crack under stress. Metal components, such as HVAC ductwork or electrical conduit running through the ceiling cavity, can also expand and contract at different rates than wood, leading to metallic pinging or popping sounds. In essence, the cumulative effect of years of temperature and humidity cycles, combined with the natural aging process of building materials, contributes to the increased likelihood of hearing noises.

Why Does My Ceiling Make Cracking Noises At Night

Credit: lifetimexteriors.com

Specific Scenarios And Contributing Factors

Beyond the general principles, certain specific scenarios can amplify or introduce ceiling noises. Understanding these can help pinpoint the exact cause in your home.

Attic Temperature Extremes

The attic is often the hottest part of the house during the day and the coldest at night. If your attic has little to no insulation, this temperature differential is extreme. The wooden rafters and joists can expand significantly under intense heat and then contract sharply as the outside temperature plummets. This rapid movement is a major trigger for loud cracking and popping sounds that seem to originate directly above your living space. Proper attic insulation acts as a buffer, moderating these temperature swings and reducing the stress on the framing.

Recent Renovations Or Repairs

If you’ve recently undertaken home renovations, particularly those involving the ceiling, attic, or walls, this could be the source of new noises.

  • Drywall Installation: New drywall might not be perfectly secured, or seams might be under stress.
  • Insulation Work: New insulation, if not installed correctly, could trap moisture or create pressure points.
  • HVAC or Plumbing Work: Any alterations to ductwork or pipes within the ceiling cavity can introduce new materials that expand and contract differently from the surrounding wood.
  • Structural Modifications: Even minor changes to load-bearing elements can subtly alter how stress is distributed throughout the structure, leading to new noise patterns.

The Impact Of External Factors

Sometimes, external factors can contribute to internal noises.

  • Wind: Strong winds can cause a house to sway slightly. This subtle movement can put stress on ceiling components, leading to creaks and pops. This is more common in older homes or those in wind-prone areas.
  • Rain and Snow Load: The weight of heavy rain or snow on the roof can cause the structural members to flex slightly, potentially generating noise.
  • Ground Vibrations: Nearby construction, heavy traffic, or even minor seismic activity can transmit vibrations through the ground and into the house’s foundation and framing, causing components to shift and make noise.

Moisture Intrusion And Water Damage

While not always immediately obvious, past or present water damage can significantly contribute to ceiling noises.

  • Leaking Roof: A persistent roof leak can saturate insulation and wooden structural members. As the wood absorbs moisture, it swells. When it dries out, it shrinks, often unevenly. This cycle weakens the wood and makes it more prone to creaking.
  • Condensation: Poor attic ventilation can lead to condensation, especially in colder months. This moisture can affect wooden joists.
  • Plumbing Leaks: Leaks from pipes within the ceiling cavity can cause similar issues to roof leaks.
  • The Damage Itself: Water-damaged materials, particularly drywall and wood, become less structurally sound and more susceptible to movement and noise. If you notice stains or sagging in addition to noises, water damage is a strong possibility.
Why Does My Ceiling Make Cracking Noises At Night

Credit: lifetimexteriors.com

When To Be Concerned: Signs Of Serious Issues

While most ceiling noises are benign, certain indicators suggest that the sounds might be more than just a minor annoyance and could point to a potential structural problem. It’s crucial to distinguish between the normal sounds of a living house and sounds that signal distress.

Sudden Onset Or Significant Increase In Noise

If the cracking or popping noises are sudden in onset, meaning they started abruptly and weren’t a gradual development, this warrants closer attention. Similarly, a significant and dramatic increase in the frequency or intensity of the sounds, especially if they are loud or persistent, could indicate a developing issue. Normal settling and expansion/contraction are usually cyclical and somewhat predictable. Abrupt changes can suggest a new stress point has developed or a component is failing.

Visible Signs Of Damage

The presence of visible damage alongside the noises is a critical red flag. Look for:

  • Cracks in the Ceiling: Especially if they are new, widening, or significant in length and depth. Hairline cracks are common, but larger ones need investigation.
  • Sagging Ceiling: If any part of your ceiling appears to be sagging or drooping, it could indicate a structural failure or severe water damage affecting the integrity of the ceiling joists or the drywall itself.
  • Water Stains or Discoloration: As mentioned, these are direct indicators of moisture issues, which can weaken materials and lead to noises.
  • Peeling Paint or Plaster: This can be a sign of moisture or excessive movement behind the surface.
  • Damage Around Fixtures: Cracks or separation around light fixtures, vents, or ceiling fans can indicate stress concentrated in those areas.

Persistent Or Loud Noises

While occasional pops are normal, if the noises are persistent throughout the day and night, or if they are exceptionally loud and startling, it’s worth investigating. Very loud bangs or sharp cracking sounds that occur frequently could indicate a more serious stress fracture or a failing structural component.

Changes In Door Or Window Operation

Sometimes, structural issues that cause ceiling noises can also affect other parts of the house. If you notice that doors and windows are sticking or are difficult to open and close, it might suggest that the house’s foundation or frame has shifted significantly, potentially causing the ceiling noises as well.

Troubleshooting And Potential Solutions

Once you’ve identified that your ceiling noises are more than just the usual house creaks, or if you simply want to reduce them, there are several troubleshooting steps and potential solutions you can consider.

Improving Attic Insulation And Ventilation

One of the most effective ways to combat temperature-related noises is to address the attic environment.

  • Add Insulation: Increasing the R-value of your attic insulation creates a thermal barrier, significantly reducing the temperature extremes experienced by the ceiling joists and rafters. This moderates expansion and contraction. Aim for insulation levels recommended for your climate zone.
  • Ensure Proper Ventilation: Good attic ventilation is crucial to prevent moisture buildup. This includes having adequate soffit vents (for intake) and ridge or gable vents (for exhaust). Proper ventilation helps keep the attic temperature closer to the outdoor temperature and reduces condensation.

Sealing Air Leaks

Air leaks in the attic floor can allow warm, moist air from the living space to enter the attic, exacerbating temperature and humidity issues. Sealing these leaks with caulk or spray foam around plumbing penetrations, electrical boxes, and attic hatches can improve the efficiency of your insulation and reduce moisture transfer.

Checking And Securing Fasteners

If you suspect loose fasteners are the cause, a professional inspection might be necessary. In some cases, a contractor can access the ceiling cavity (perhaps through an attic or by carefully cutting small access holes) to tighten screws or add additional fasteners where drywall meets the joists. This is a more involved process and requires expertise to avoid damaging the ceiling.

Addressing Moisture Issues

If water damage is suspected or confirmed:

  • Fix Leaks: The first and most critical step is to identify and repair the source of any leaks, whether from the roof, plumbing, or elsewhere.
  • Dry Out Affected Areas: Ensure that any water-damaged materials are thoroughly dried out. In some cases, severely damaged materials may need to be replaced.
  • Improve Ventilation: As mentioned, better ventilation in the attic or crawl space can prevent future moisture problems.

Managing Humidity Levels Indoors

While difficult to control completely, maintaining consistent indoor humidity levels can help reduce the wood’s tendency to expand and contract. Using a dehumidifier in damp seasons or a humidifier in dry seasons can make a difference, though the primary impact is on indoor comfort rather than directly on the ceiling structure.

Professional Inspection

For persistent, loud, or concerning noises, the best course of action is to call a qualified home inspector or structural engineer. They have the expertise to diagnose the specific cause of the sounds, assess any potential structural risks, and recommend appropriate solutions. They can differentiate between normal house sounds and those requiring immediate attention.

Comparison: Common Ceiling Noises And Their Likely Causes

To help clarify the potential origins of your ceiling sounds, consider this comparison table. It outlines common noise types and their most probable causes, especially those occurring at night.

Type of Noise Likely Cause(s) Primary Contributing Factor When Most Common
**Popping / Snapping** Rapid expansion/contraction of wood joists against fasteners or drywall; brittle plaster cracking. Sudden temperature drops (nighttime cooling); high humidity followed by dry air. Nighttime, especially after a warm day; rapid weather changes.
**Creaking / Groaning** Friction between wood framing members (joists, rafters); settling of the house structure. Slower temperature changes; continuous structural settling; wind load. Nighttime or early morning; periods of temperature stability but significant difference from previous day; windy conditions.
**Clicking / Ticking** Expansion/contraction of metal components (HVAC ducts, pipes, electrical conduit) within the ceiling cavity. Temperature changes affecting metal at a different rate than wood. Periods of heating or cooling system activation/deactivation; nighttime cooling.
**Thudding / Banging** Less common; could indicate loose structural elements shifting under load; potentially animal activity in the attic. Significant structural stress; external impact; pest infestation. Irregular; can occur anytime, but sudden shifts might be related to temperature or load changes.

Case Study: The Attic Transformation

Mr. and Mrs. Henderson, residents of a 30-year-old home in a region with distinct seasons, had been experiencing increasingly bothersome cracking and popping noises from their master bedroom ceiling, primarily at night. The sounds were sharp and frequent, disrupting their sleep. Initially, they dismissed it as the house “settling,” but the intensity grew.

Upon inspection, their attic revealed minimal and uneven insulation, with significant gaps around light fixtures and the attic hatch. The temperature in the attic on a summer afternoon was measured at over 140°F (60°C), dropping significantly after sunset. This extreme temperature fluctuation was causing the ceiling joists to expand and contract dramatically, leading to the noises.

Solution: The Hendersons hired a contractor to:

  • Seal air leaks in the attic floor.
  • Install R-49 blown-in fiberglass insulation throughout the attic, ensuring a consistent depth and coverage.
  • Add baffles to maintain soffit ventilation pathways, preventing insulation from blocking airflow.

Result: Within a week of the insulation upgrade, the Hendersons reported a dramatic reduction in ceiling noises. The sharp pops and cracks were replaced by occasional, much fainter creaks, primarily during significant seasonal temperature shifts. Their sleep quality improved significantly, and they felt more confident about their home’s thermal performance. This case highlights how addressing attic conditions can directly resolve nighttime ceiling noise issues.

Frequently Asked Questions

Why Do Houses Make Noise At Night?

Houses make noise at night primarily due to temperature fluctuations. During the day, sunlight and internal heating cause building materials like wood, metal, and drywall to expand. As temperatures drop significantly after sunset, these materials contract. This expansion and contraction create friction and stress within the structure, leading to audible sounds like creaks, pops, and cracks. Humidity changes also contribute to this movement, as wood absorbs and releases moisture.
Is A Cracking Ceiling Dangerous?

A cracking ceiling is usually not dangerous, especially if the noises are intermittent and related to normal expansion and contraction or settling. These sounds are often the house “breathing.” However, if the cracking noises are sudden, very loud, persistent, or accompanied by visible signs of damage such as sagging, significant cracks, or water stains, it could indicate a more serious structural issue or water damage that requires professional inspection.

Can I Stop My Ceiling From Making Noise?

You can significantly reduce or mitigate ceiling noises by addressing the underlying causes. Key strategies include improving attic insulation and ventilation to moderate temperature and humidity swings, sealing air leaks, and ensuring proper structural integrity. In some cases, tightening loose fasteners might help, but this often requires professional intervention. While completely eliminating all natural house sounds may not be possible, substantial improvements can be made.

Does Humidity Affect Ceiling Noises?

Yes, humidity significantly affects ceiling noises. Wood framing, in particular, is hygroscopic, meaning it absorbs and releases moisture from the air. When humidity is high, wood swells and expands; when it’s low, it shrinks. These moisture-related changes add to or exacerbate the expansion and contraction caused by temperature changes, leading to more frequent or louder creaks and cracks, especially during periods of rapid humidity shifts.

How Do I Know If The Noise Is From The Ceiling Or The Walls?

The location and type of noise can offer clues. Ceiling noises often sound like they are directly above you and may involve a wider range of sounds from pops to creaks. Wall noises might sound like they are coming from the sides and can sometimes be related to plumbing within the walls, electrical wiring, or the framing’s interaction with the foundation. If you can pinpoint the sound’s origin by listening closely in different rooms or by using a stethoscope (carefully) against the surface, you can better differentiate. Often, noises originating from the attic or the space between floors will be perceived as ceiling noises.

The natural sounds of a home are a part of its character, but when those sounds become disruptive or

Toilet Makes Hissing Sound

Toilet Makes Hissing Sound

A hissing toilet is more than just an annoying sound; it’s a signal that something within your plumbing system isn’t quite right. This persistent noise, often likened to a snake’s hiss or escaping air, can stem from a variety of issues, ranging from simple fixes to more complex plumbing problems. Understanding the potential causes is the first step toward silencing the hiss and preventing further damage or water wastage. Ignoring this auditory cue can lead to increased water bills, potential water damage, and a less efficient plumbing system overall.

This comprehensive guide will walk you through the common culprits behind a hissing toilet, providing detailed explanations, troubleshooting steps, and when it’s time to call in a professional plumber. We’ll explore everything from worn-out flapper seals to issues with the fill valve, offering practical advice to help you diagnose and resolve the problem effectively.

By the end of this article, you’ll be equipped with the knowledge to tackle that bothersome hiss and ensure your toilet functions smoothly and silently.

Key Takeaways

  • A hissing toilet often indicates a leaking component, most commonly the fill valve or a worn flapper.
  • The sound can be caused by water constantly entering the tank, a loose connection, or air escaping through a small opening.
  • Common culprits include a faulty fill valve, a damaged or improperly seated flapper, a loose coupling nut on the fill valve, or a leak in the tank-to-bowl gasket.
  • Troubleshooting typically involves inspecting and cleaning these components, followed by replacement if necessary.
  • While many hissing toilet issues are DIY-friendly, persistent or complex problems may require professional plumber assistance.
  • Regular toilet maintenance can help prevent hissing sounds and other common plumbing issues.
Toilet Makes Hissing Sound

Credit: www.geiler.com

Understanding Toilet Anatomy And The Hissing Sound

To effectively troubleshoot a hissing toilet, it’s crucial to understand the basic anatomy of a toilet tank and how water flows through it. The tank is a reservoir that holds water for flushing. Key components within the tank include the fill valve, the flush valve (with its attached flapper), the overflow tube, and the float.

When you flush, the flapper lifts, allowing water to rush from the tank into the bowl. Once the tank is empty, the flush valve closes, and the fill valve opens to refill the tank. The float mechanism signals the fill valve to shut off when the water reaches the correct level.

A hissing sound typically arises when water is continuously trying to enter the tank or when air is being forced through a small opening. This can happen for several reasons:

  • Constant Water Input: The most common cause is a fill valve that doesn’t shut off completely, allowing a slow, steady stream of water to enter the tank even after it’s full. This constant flow can create a hissing noise as water enters the tank or the overflow tube.
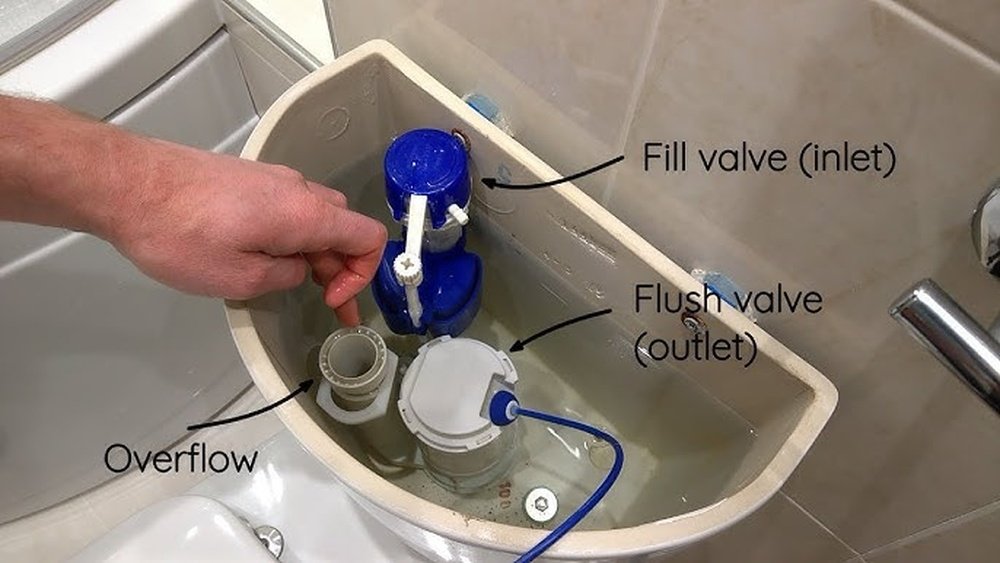
  • Air Escaping: In some cases, a small leak in a connection or a component might allow air to escape under pressure, mimicking a hissing sound.
  • Water Flow Through a Restricted Opening: If water is forced through a small gap or a partially blocked component, it can generate a hissing sound.

Identifying the exact source of the hiss often involves a process of elimination, starting with the most common and easiest-to-fix issues.

The Role Of The Fill Valve

The fill valve, also known as the ballcock, is the component responsible for refilling the toilet tank after each flush. It’s connected to your home’s water supply. When the water level in the tank drops, the float (which can be a ball or a cup) descends, triggering the fill valve to open and allow fresh water in. As the water level rises, the float also rises, eventually signaling the fill valve to close and stop the water flow.

A hissing sound originating from the fill valve usually means it’s not closing properly. This could be due to:

  • Worn Seals: The internal seals within the fill valve can degrade over time, preventing it from creating a watertight seal.
  • Debris or Mineral Buildup: Small particles of debris or mineral deposits from hard water can get lodged in the valve mechanism, preventing it from shutting off completely.
  • Incorrect Float Adjustment: If the float is set too high, it might prevent the valve from fully closing, or it might cause the water to constantly run into the overflow tube.
  • A Faulty Valve Unit: In some instances, the entire fill valve unit may be defective and require replacement.

The Function Of The Flapper And Flush Valve

The flush valve is located at the bottom of the tank and is sealed by the flapper. When you press the flush lever, it lifts the flapper, allowing the stored water to rush into the toilet bowl. Once the tank is empty, the flapper drops back down to seal the flush valve.

A hissing sound related to the flapper or flush valve can occur if:

  • The Flapper Isn’t Sealing Properly: A worn, warped, or damaged flapper won’t create a tight seal against the flush valve opening. This allows a small amount of water to constantly leak from the tank into the bowl, which can sometimes create a faint hissing sound as the water trickles through. You might also notice the toilet running intermittently if this is the case.
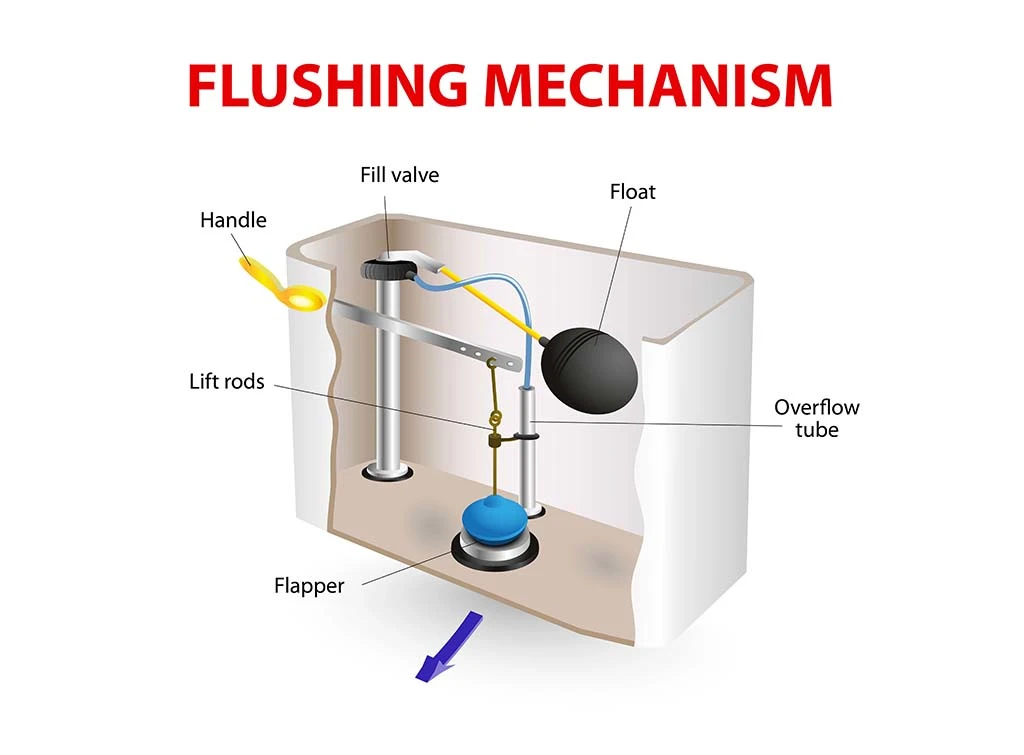
  • The Chain is Too Tight or Too Loose: If the chain connecting the flush lever to the flapper is too tight, it might hold the flapper slightly ajar. If it’s too loose, it might get caught under the flapper, preventing a proper seal.
  • Debris on the Flush Valve Seat: Grit or mineral deposits can accumulate on the rim of the flush valve, preventing the flapper from forming a complete seal.

Other Potential Causes

While the fill valve and flapper are the most frequent culprits, other less common issues can also lead to a hissing sound:

  • Loose Fill Valve Coupling Nut: The fill valve is secured to the tank by a coupling nut on the underside. If this nut is loose, water can leak out, and the escaping water or air could create a hissing noise.
  • Leak in the Tank-to-Bowl Gasket: The large rubber gasket (or seal) that connects the toilet tank to the toilet bowl can degrade over time. A leak here might allow water to escape, and the pressure could cause a hiss.
  • Water Supply Line Issues: Though rare, a problem with the water supply line itself or its connection to the fill valve could potentially cause unusual noises.
  • High Water Pressure: Extremely high household water pressure can sometimes cause components to vibrate or allow water to escape more forcefully, potentially leading to hissing sounds.
Toilet Makes Hissing Sound

Credit: www.youtube.com

Troubleshooting The Hissing Toilet: A Step-by-step Guide

When faced with a hissing toilet, a systematic approach to troubleshooting will help you pinpoint the problem and implement the correct solution. Most of these steps can be performed with basic tools and a little patience.

Step 1: Identify The Source Of The Sound

Before you start disassembling anything, try to pinpoint where the hiss is coming from.

  • Listen Carefully: Is the sound louder near the fill valve (usually on the left side inside the tank)? Or does it seem to emanate from the bottom of the tank or the flush valve area?
  • Remove the Tank Lid: With the tank lid off, listen intently. Does the sound change or become clearer?
  • Observe Water Levels: Is the water level in the tank higher than usual? Is water constantly trickling into the overflow tube? This is a strong indicator of a fill valve problem. If the water level is normal but you still hear a hiss, it might be a subtler issue.

Step 2: Check The Fill Valve

The fill valve is the most common source of hissing.

Inspecting The Fill Valve

  • Turn Off Water Supply: Locate the shut-off valve on the wall behind or beside the toilet. Turn it clockwise until it stops.
  • Flush the Toilet: Flush the toilet to empty the tank.
  • Remove Tank Lid: Place the tank lid aside carefully.
  • Observe the Float: Note the position of the float. If it’s set very high, it might be the issue.
  • Check for Water Flow: With the water supply off and the tank empty, the hissing should stop. If you still hear a faint hiss, it might be residual air or a sound carried through the pipes. The real test is when the water is on.

Testing The Fill Valve Shut-off

  • Turn Water Supply Back On: Slowly turn the water supply valve counter-clockwise.
  • Listen as Tank Fills: As the tank fills, listen closely to the fill valve. Does the hissing start as soon as water enters? Does it continue even after the tank is full and the float has risen to its highest point?
  • Check Water Level: Does the water level rise above the overflow tube? If so, the fill valve is not shutting off correctly.

Adjusting The Float (if Applicable)

Many modern fill valves have an adjustment screw or a clip mechanism to set the float height.

  • Adjustment Screw: If your fill valve has a screw, you can often turn it to lower the float’s stopping point, which should cause the fill valve to shut off earlier, preventing overfilling.
  • Clip Mechanism: Some floats have clips that allow you to reposition them higher or lower on the vertical shaft.

Pro Tip: Make small adjustments and test the fill valve’s shut-off after each change. Over-adjusting can lead to insufficient water in the tank for a proper flush.

Cleaning Or Replacing The Fill Valve

If adjusting the float doesn’t solve the hiss, the fill valve itself may be faulty.

  • Cleaning: Some fill valves have a small cap or screen that can be removed to clean out debris. Refer to your fill valve’s manufacturer instructions for specific cleaning procedures. Be gentle, as these parts can be brittle.
  • Replacement: If cleaning doesn’t work or if the valve appears damaged, replacement is often the most effective solution.
  • Turn Off Water and Drain Tank: As before, turn off the water supply and flush the toilet.
  • Disconnect Water Line: Unscrew the coupling nut connecting the water supply line to the fill valve. Have a towel ready for minor drips.
  • Remove Old Fill Valve: Unscrew the coupling nut on the underside of the tank that secures the fill valve. Lift the old fill valve out from inside the tank.
  • Install New Fill Valve: Follow the instructions provided with your new fill valve. Typically, this involves inserting it into the tank, securing it with the coupling nut underneath, and reconnecting the water supply line.
  • Turn Water On and Test: Slowly turn the water supply back on and check for leaks. Let the tank fill and listen for the hiss.

Step 3: Inspect The Flapper And Flush Valve

If the fill valve seems to be functioning correctly (shutting off at the appropriate water level), the next step is to examine the flapper and flush valve.

Checking The Flapper Seal

  • With Water Off and Tank Drained: Carefully inspect the flapper. Is it cracked, brittle, or warped? Does it look like it’s making even contact with the flush valve seat all the way around?
  • Clean the Flapper and Seat: Use a soft cloth or sponge to clean both the underside of the flapper and the rim of the flush valve seat. Remove any debris, mineral buildup, or residue.
  • Check Flapper Chain: Ensure the chain is not too tight or too loose. It should have just a little slack when the flapper is closed, allowing it to seat properly. Adjust the chain length or clip position as needed.
  • Test the Seal: After cleaning and adjusting, turn the water supply back on. Let the tank fill and listen. If the hiss was due to a poor seal, it should now be gone. You can also add a few drops of food coloring to the tank water. Wait 15-20 minutes without flushing. If color appears in the bowl, the flapper is still leaking.

Replacing The Flapper

If the flapper is damaged or still leaking after cleaning, it’s time for a replacement. Flappers are inexpensive and relatively easy to replace.

  • Turn Off Water and Drain Tank.
  • Remove Old Flapper: Most flappers attach to the flush valve using two “ears” that hook onto posts. Simply unhook these. The chain will also need to be detached from the flush lever arm.
  • Install New Flapper: Hook the new flapper’s ears onto the posts. Attach the chain to the flush lever arm, ensuring the correct amount of slack.
  • Turn Water On and Test: Turn the water supply back on, let the tank fill, and check for the hiss.

Step 4: Investigate Other Potential Causes

If the hiss persists after addressing the fill valve and flapper, consider these less common issues.

Tighten The Fill Valve Coupling Nut

  • Locate the Nut: Look underneath the tank where the fill valve assembly passes through. There’s a large plastic or metal nut.
  • Tighten Gently: Using a pair of pliers or a wrench, gently tighten this nut. Be careful not to overtighten, as this can crack the tank or the plastic components.
  • Turn Water On and Test: Turn the water supply back on and check if the hiss has stopped.

Check The Tank-to-bowl Gasket

A leak in this large gasket can sometimes cause hissing. This is a more involved repair.

  • Turn Off Water and Drain Tank: Ensure the water supply is off and the tank is completely drained.
  • Disconnect Water Line and Flush Lever: Disconnect the water supply line and the flush lever chain.
  • Remove Tank Bolts: There are usually two or three bolts holding the tank to the bowl. Loosen and remove these.
  • Lift Tank Off Bowl: Carefully lift the tank straight up off the bowl. You may need to wiggle it slightly.
  • Inspect and Replace Gasket: The large gasket will be visible on the bottom of the tank or the top of the bowl. Remove the old gasket, clean the surfaces, and install the new gasket according to its instructions.
  • Reassemble: Carefully place the tank back onto the bowl, aligning the bolt holes. Reinstall the bolts, tightening them evenly and securely. Reconnect the water line and flush lever.
  • Turn Water On and Test: Turn the water supply back on and check for leaks and the hissing sound.

Examine Water Pressure

If you suspect high water pressure, you can test it with a water pressure gauge, available at most hardware stores. Connect it to an outdoor faucet or a laundry hookup. Ideal household water pressure is typically between 40-60 PSI. If it consistently exceeds 80 PSI, you may need to install a pressure-reducing valve (PRV) on your main water line. This is usually a job for a professional plumber.

Toilet Makes Hissing Sound

Credit: gstouristcentre.gr

When To Call A Professional Plumber

While many toilet hissing issues can be resolved with DIY troubleshooting and repair, there are times when professional help is advisable.

  • Persistent Hissing: If you’ve gone through all the troubleshooting steps and the hiss continues, there might be a more complex problem within your plumbing system that requires expert diagnosis.
  • Water Damage Concerns: If you notice signs of water damage around the toilet or in the subfloor, it’s crucial to address the leak immediately by calling a plumber.
  • Lack of Confidence or Tools: If you’re uncomfortable working with plumbing or lack the necessary tools, it’s always best to err on the side of caution and hire a professional.
  • Suspected Main Line Issues: Problems with the main water supply line or if multiple fixtures are exhibiting unusual sounds or pressure issues often require professional attention.
  • Cracked Tank or Bowl: If any inspection reveals a crack in the porcelain of the tank or bowl, do not attempt to repair it yourself. This requires professional replacement.

A qualified plumber has the experience, specialized tools, and knowledge to quickly identify and fix even the most stubborn plumbing problems, ensuring your system is safe and efficient.

Preventative Maintenance For Your Toilet

Preventing issues like a hissing toilet often comes down to routine maintenance. By incorporating a few simple checks into your home upkeep, you can avoid many common plumbing headaches.

Regular Inspections

  • Listen for Unusual Sounds: Make it a habit to listen to your toilet after it flushes and at other times. Any persistent hissing, running, or gurgling should be investigated promptly.
  • Check Water Levels: Periodically remove the tank lid and visually inspect the water level. Ensure it’s at the indicated fill line and not constantly running into the overflow tube.
  • Inspect Components: Look for signs of wear, cracks, or mineral buildup on the flapper, fill valve, and seals.

Cleaning Practices

  • Tank Cleaning: While not always necessary, you can periodically clean the inside of the tank with a mild cleaner. Avoid abrasive cleaners or harsh chemicals that could damage internal components. Never use in-tank toilet bowl cleaners that contain bleach, as they can corrode parts and void warranties.
  • Flush Valve Seat: Keep the flush valve seat clean. A simple wipe-down during flapper inspection can prevent future leaks.

Understanding Water Quality

  • Hard Water: If you have hard water, mineral deposits can accumulate more quickly, potentially affecting the performance of your fill valve and flapper. Consider a water softener if hard water is a persistent issue in your home.
  • Filtered Water: In some cases, using filtered water for the toilet tank can reduce mineral buildup, though this is generally an uncommon practice.

Replacing Worn Parts

  • Proactive Replacement: Consider replacing the flapper every 5-7 years, even if it seems to be working fine. They are inexpensive, and a worn flapper is a common cause of leaks and phantom running. Fill valves also have a lifespan; replacing them proactively every 10-15 years can prevent unexpected issues.

By staying vigilant and performing basic maintenance, you can significantly reduce the likelihood of encountering a hissing toilet and ensure your plumbing system operates reliably.

Common Toilet Hissing Scenarios And Solutions

To further illustrate the troubleshooting process, let’s look at a few common scenarios.

Scenario 1: Hissing Stops After Flushing

Problem: The toilet hisses only when the tank is full or as it’s filling, and the sound stops immediately after flushing.

Likely Cause: The fill valve is not shutting off completely, allowing a small amount of water to constantly enter the tank. The hiss is the sound of this constant water flow. Flushing momentarily stops the flow, hence the hiss stops.

Solution: Adjust the float to shut off the fill valve at a lower water level. If that doesn’t work, clean or replace the fill valve.

Scenario 2: Hissing Is Faint And Continuous

Problem: A faint, almost constant hissing sound can be heard, even if the water level appears correct and isn’t running into the overflow tube.

Likely Cause: This could be a very slow leak from the flapper that isn’t significant enough to cause the toilet to run continuously but is still allowing a small amount of water to pass, creating a whisper-like hiss. Alternatively, it could be a slight leak at the fill valve coupling nut or a tiny crack in a component.

Solution:

  • Perform the food coloring test to check the flapper seal.
  • Inspect the fill valve coupling nut underneath the tank and tighten gently if loose.
  • If the flapper is leaking, clean or replace it.

Scenario 3: Loud Hissing During Refill

Problem: A loud, noticeable hissing sound occurs specifically while the toilet tank is refilling after a flush. The sound stops once the tank is full.

Likely Cause: This is a classic symptom of a failing fill valve. The valve is open and allowing water in, but its internal mechanism is worn or obstructed, causing the noise.

Solution: The most effective solution is to replace the fill valve. Cleaning might offer a temporary fix, but a worn valve will likely continue to hiss.

Scenario 4: Hissing From Underneath The Tank

Problem: The hissing sound seems to be coming from directly beneath the toilet tank, not from within the tank itself.

Likely Cause: This points towards a leak at the fill valve coupling nut where the water supply line connects to the fill valve assembly, or potentially a leak in the tank-to-bowl gasket.

Solution:

  • Turn off the water supply, drain the tank, and check the tightness of the fill valve coupling nut. Tighten gently if needed.
  • If tightening doesn’t help, inspect the connection for visible drips or signs of leakage.
  • If the leak appears to be from the tank-to-bowl gasket, this repair will require removing the tank.

Comparing Common Toilet Fill Valve Types

When replacing a fill valve, you’ll encounter different types. Understanding their mechanisms can help you choose the right replacement and troubleshoot effectively.

| Fill Valve Type | Description

Simpson Pressure Washer Wont Start

Simpson Pressure Washer Wont Start

A Simpson pressure washer is a powerful tool designed for tackling tough cleaning jobs, from grimy driveways to dirty siding. However, like any complex piece of machinery, it can sometimes refuse to start, leaving you frustrated and your cleaning project stalled. This can be due to a variety of reasons, ranging from simple user errors to more complex mechanical issues. Understanding these potential problems and knowing how to troubleshoot them is key to getting your Simpson pressure washer back up and running quickly.

When your Simpson pressure washer won’t start, it’s easy to feel overwhelmed. The good news is that most common starting issues can be diagnosed and resolved with a systematic approach. This guide will walk you through the most frequent culprits, providing step-by-step solutions to help you identify and fix the problem, ensuring you can resume your cleaning tasks efficiently.

Key Takeaways

  • Fuel and Oil Levels: Ensure there’s fresh, correct fuel and adequate oil. Old fuel or low oil can prevent starting.
  • Spark Plug: A fouled, loose, or damaged spark plug is a common cause of no-start conditions.
  • Carburetor Issues: Clogged carburetors, often due to stale fuel, are a frequent problem.
  • Water Supply: The pressure washer needs a consistent and adequate water supply to start and run.
  • Safety Features: Check that all safety interlocks and switches are in the correct position.
  • Air Filter: A dirty or clogged air filter restricts airflow, preventing combustion.
  • Primer Bulb: If your model has a primer bulb, ensure it’s functioning correctly to draw fuel.
  • Engine Flooding: An over-primed engine can flood, requiring a specific restart procedure.
Simpson Pressure Washer Wont Start

Credit: www.youtube.com

Common Reasons Your Simpson Pressure Washer Won’t Start

Several factors can prevent your Simpson pressure washer from firing up. A methodical approach to troubleshooting will help you pinpoint the issue. It’s essential to start with the simplest checks and progress to more complex ones.

Fuel System Problems

The fuel system is critical for any gasoline-powered engine. Issues here are among the most common reasons a pressure washer fails to start.

Stale Or Contaminated Fuel

Gasoline degrades over time, especially when left in the tank for extended periods. Ethanol in modern gasoline can also absorb moisture, leading to phase separation and corrosion. Stale fuel loses its volatility, making it difficult for the engine to ignite.

Contaminants like dirt or water in the fuel can clog fuel lines and the carburetor.

  • Solution: Always use fresh gasoline, preferably within 30 days of purchase. If you suspect the fuel is old or contaminated, drain the fuel tank completely and refill it with fresh gasoline. Consider using a fuel stabilizer, especially if the pressure washer will be stored for more than a month.

Incorrect Fuel Type

Using the wrong octane rating or mixing oil (if not a 2-stroke engine) can cause starting problems and engine damage. Simpson pressure washers typically require regular unleaded gasoline with an octane rating of 87 or higher.

  • Solution: Refer to your Simpson pressure washer’s owner’s manual to confirm the recommended fuel type. Ensure you are using straight gasoline and not a fuel mixture unless specified for a 2-stroke engine.

Fuel Valve Blockage

If your pressure washer has a fuel shut-off valve, it might be closed or clogged. A closed valve prevents fuel from reaching the carburetor, essentially starving the engine.

  • Solution: Locate the fuel valve (usually near the fuel tank or carburetor) and ensure it is in the “ON” position. Inspect the valve and its associated fuel line for any visible blockages or kinks.

Clogged Fuel Filter

A small in-line fuel filter is often present between the fuel tank and the carburetor. This filter traps debris before it can enter the carburetor. If it becomes clogged, fuel flow will be restricted.

  • Solution: Locate the fuel filter (consult your manual if unsure). Carefully disconnect the fuel line leading to it, remove the filter, and inspect it. If it appears dirty or clogged, replace it with a new one of the correct specification.

Spark And Ignition Issues

For an engine to start, it needs a spark at the right time. Problems with the ignition system are another major cause of starting failures.

Spark Plug Problems

The spark plug ignites the air-fuel mixture in the cylinder. A worn, fouled, dirty, or improperly gapped spark plug will prevent ignition.

  • Solution:
  • Remove the Spark Plug: Disconnect the spark plug wire. Use a spark plug socket wrench to carefully remove the spark plug.
  • Inspect: Look for signs of fouling (black, sooty deposits), oil contamination, or physical damage to the electrode.
  • Clean or Replace: If fouled, try cleaning the plug with a wire brush and carb cleaner. However, it’s often best to replace it, especially if it’s old or shows significant wear.
  • Check the Gap: Use a spark plug gap tool to ensure the gap between the electrodes is set to the manufacturer’s specification (found in your owner’s manual).
  • Reinstall: Screw the new or cleaned spark plug back in by hand to avoid cross-threading, then tighten with the wrench. Reconnect the spark plug wire securely.

Faulty Ignition Coil

The ignition coil generates the high voltage needed to create a spark. If the coil fails, no spark will be produced. This is a less common issue but can occur.

  • Solution: Testing an ignition coil requires specialized tools and knowledge. If you’ve ruled out the spark plug and other simpler issues, it might be time to consult a professional or consider replacing the coil if you are comfortable with engine repair.

Loose Or Damaged Spark Plug Wire

A loose connection or a damaged spark plug wire can prevent the spark from reaching the plug.

  • Solution: Ensure the spark plug wire is firmly seated on both the spark plug and the ignition coil. Inspect the wire for any cuts, cracks, or signs of corrosion. If damaged, the wire may need to be replaced.

Carburetor Malfunctions

The carburetor mixes air and fuel in the correct ratio for combustion. A dirty or malfunctioning carburetor is a very common reason for a pressure washer to refuse to start or run poorly.

Clogged Carburetor Jets

The tiny passages (jets) inside the carburetor can become blocked by dried fuel residue, dirt, or debris. This is particularly common if the pressure washer has been stored with fuel in the tank.

  • Solution:
  • Carburetor Cleaner: Sometimes, a good quality carburetor cleaner sprayed into the fuel intake while the engine is running (if it starts briefly) or into the spark plug hole can help dislodge minor blockages.
  • Carburetor Disassembly and Cleaning: For more significant clogs, the carburetor may need to be removed and disassembled. The jets and passages can be cleaned with carb cleaner and compressed air. Tiny wires or specialized tools can be used to clear stubborn blockages. This process requires some mechanical aptitude and careful attention to detail. Consult your owner’s manual or a service guide for specific instructions.

Improperly Set Carburetor Adjustments

The idle speed and mixture screws on the carburetor control engine performance. If these are set incorrectly, the engine may not start or run smoothly.

  • Solution: Refer to your owner’s manual for the correct adjustment procedures. Typically, you would adjust the idle speed screw and potentially a fuel mixture screw if your carburetor has one. Incorrect adjustments can lead to a rich (too much fuel) or lean (too little fuel) condition.

Air System Issues

The engine needs a constant supply of clean air to mix with fuel. Obstructions in the air intake system can prevent starting.

Clogged Air Filter

A dirty or clogged air filter restricts the amount of air that can enter the carburetor. This creates a fuel-rich condition, making it difficult for the engine to ignite the air-fuel mixture.

  • Solution:
  • Locate and Remove: Find the air filter housing (usually a plastic cover on the side of the engine). Remove the cover and take out the air filter.
  • Inspect: Check if the filter is dirty, greasy, or clogged with debris.
  • Clean or Replace: Paper filters can often be replaced. Foam filters can usually be cleaned by washing them in soapy water, rinsing thoroughly, and allowing them to dry completely before reinstallation. Ensure the filter is completely dry before putting it back.

Blocked Air Intake

Beyond the filter, the air intake port itself could be obstructed by debris, cobwebs, or even insect nests.

  • Solution: Visually inspect the air intake port and the area around the air filter housing for any blockages. Remove any foreign material found.

Water And Pump System Problems

While these issues primarily affect the pressure output, certain conditions can also prevent the engine from starting or running correctly.

No Water Supply Or Low Water Pressure

Most pressure washers require a minimum water supply pressure and flow rate to operate safely and effectively. If the water source is turned off, the hose is kinked, or the water pressure is too low, the pump can overheat or the engine may struggle to start.

  • Solution:
  • Turn on Water Source: Ensure the outdoor faucet supplying water to the pressure washer is fully open.
  • Check Hose: Make sure the garden hose is not kinked and is connected securely to both the faucet and the pressure washer inlet.
  • Verify Water Flow: Disconnect the hose from the pressure washer and turn on the water. You should have a strong, steady stream. Most manufacturers recommend a minimum of 5 gallons per minute (GPM) flow rate.
  • Prime the Pump: Before starting the engine, it’s crucial to prime the pump. This involves allowing water to flow through the pump and out the unloader valve (or a designated priming port) until all air is purged. This is often done by running water through the system with the engine off for a minute or two.

Blocked Inlet Filter

Many pressure washers have a small mesh filter at the water inlet connection to prevent debris from entering the pump. If this filter is clogged, it will restrict water flow.

  • Solution: Disconnect the garden hose from the pressure washer. Remove the inlet screen/filter (it might pull out or unscrew). Clean it thoroughly under running water and reinstall it.

Safety And Operational Errors

Modern pressure washers are equipped with various safety features that can prevent operation if not engaged correctly.

Incorrect Choke Setting

For cold starts, the choke lever is usually set to the “CHOKE” or “START” position. This enriches the fuel-air mixture. If the engine is already warm, the choke should be moved to the “RUN” or “OPEN” position. Starting with the choke on a warm engine can cause it to flood.

  • Solution: Ensure the choke lever is set correctly for the engine temperature. For a cold engine, use the choke. For a warm engine, ensure the choke is open.

Engine Flooding

This occurs when too much fuel enters the combustion chamber, making it impossible to ignite. It often happens if the choke is left on for too long, or if the engine is cranked excessively without starting.

  • Solution:
  • Turn Off Fuel: If your model has a fuel shut-off valve, turn it off.
  • Move Choke to RUN: Set the choke lever to the fully open (“RUN”) position.
  • Crank Engine: Pull the starter cord several times (5-10 pulls) to clear the excess fuel.
  • Prime (If Applicable): If your model has a primer bulb, press it a few times.
  • Turn Fuel On: If you turned off the fuel valve, turn it back on.
  • Attempt Restart: Try starting the engine normally. You may need to use the choke briefly if it sputters.

Low Oil Level Sensor (on Some Models)

Some Simpson pressure washers are equipped with a low oil sensor that will prevent the engine from starting if the oil level is too low. This is a crucial safety feature to protect the engine from damage.

  • Solution: Check the oil level using the dipstick. If it’s low, add the recommended type and amount of oil as specified in your owner’s manual. Do not overfill.

Water Unloader Valve Issues

The unloader valve regulates water pressure and flow. While it’s primarily related to pump function, a stuck or malfunctioning unloader valve could, in some rare cases, create backpressure that affects starting.

  • Solution: Inspect the unloader valve assembly for visible damage or debris. Ensure the bypass hose is not blocked. If you suspect a fault, consult your manual or a service professional.
Simpson Pressure Washer Wont Start

Credit: www.youtube.com

Troubleshooting Steps: A Systematic Approach

When your Simpson pressure washer refuses to start, follow these steps methodically. This will save you time and prevent unnecessary component replacement.

Step 1: Basic Checks (the Easiest Things First)

  • Fuel Level and Quality: Is there enough fuel? Is it fresh (less than 30 days old)? Does it smell stale or look contaminated?
  • Water Supply: Is the water source on? Is the garden hose connected securely and not kinked? Is the inlet filter clean?
  • Power Switch: Ensure the engine’s ON/OFF switch is in the “ON” position.
  • Fuel Valve: If equipped, is the fuel valve in the “ON” position?
  • Choke Setting: Is the choke set correctly for a cold start (usually “CHOKE” or “START”)?

Step 2: Check The Ignition System

  • Spark Plug: Remove, inspect, clean/gap, or replace the spark plug. Ensure the spark plug wire is securely attached.
  • Pro Tip: To test for spark without fully assembling, connect the spark plug wire to the plug, hold the base of the plug against a clean metal part of the engine (like a bolt head), and pull the starter cord while watching the spark plug gap. You should see a strong blue spark. Warning: Be careful not to ground yourself while doing this.

Step 3: Investigate The Fuel Delivery

  • Primer Bulb: If your model has a primer bulb, press it 3-5 times until you see fuel circulating. If it doesn’t seem to fill or feel firm, there might be a blockage or a leak in the fuel line or primer system.
  • Carburetor: Listen for fuel entering the carburetor. If you suspect a clog, you may need to clean it.
  • Fuel Filter: Inspect and replace if necessary.

Step 4: Examine The Air System

  • Air Filter: Remove and inspect the air filter. Clean or replace it if it’s dirty. Ensure the air intake area is clear.

Step 5: Address Potential Flooding Or Safety Issues

  • Flooded Engine Procedure: If you suspect the engine is flooded, follow the steps outlined in the “Engine Flooding” section above.
  • Low Oil Sensor: Check the oil level and add oil if necessary.

Step 6: Advanced Troubleshooting And Professional Help

If none of the above steps resolve the issue, the problem might lie with more complex components like the ignition coil, carburetor internal passages, or engine compression.

  • Compression Test: A lack of compression will prevent starting. This requires a compression tester.
  • Carburetor Rebuild: If cleaning doesn’t work, a full carburetor rebuild kit might be needed.
  • Professional Service: For persistent issues or if you’re uncomfortable with internal engine repairs, it’s best to take your Simpson pressure washer to an authorized service center.

Spark Plug Replacement And Maintenance

The spark plug is a small but vital component. Regular maintenance and timely replacement can prevent many starting problems.

When To Replace Your Spark Plug

  • Age: Spark plugs have a finite lifespan. Most small engine manufacturers recommend replacing the spark plug annually or after a certain number of operating hours (e.g., 100-200 hours), whichever comes first.
  • Fouling: If the plug is heavily coated with black, oily, or carbon deposits, it’s hindering its ability to spark effectively.
  • Damage: Physical damage to the ceramic insulator or the electrodes necessitates replacement.
  • Wear: Over time, the electrodes can erode, widening the gap and weakening the spark.

How To Replace A Spark Plug On A Simpson Pressure Washer

  • Safety First: Ensure the engine is off and cool. Disconnect the spark plug wire to prevent accidental starting.
  • Access the Plug: Locate the spark plug. It’s usually at the front or side of the engine cylinder, with a thick wire connected to it.
  • Remove the Wire: Gently twist and pull the spark plug wire boot off the spark plug. Do not pull by the wire itself.
  • Unscrew the Plug: Use a spark plug socket wrench of the correct size to turn the plug counter-clockwise. If it’s very tight, apply steady pressure.
  • Inspect the Old Plug: Examine the old plug for signs of wear, fouling, or damage. This can provide clues about the engine’s health (e.g., oily deposits might indicate internal engine issues).
  • Prepare the New Plug: Check the gap on the new spark plug using a feeler gauge or gap tool. Adjust it to the specification found in your Simpson pressure washer’s manual.
  • Install the New Plug: Carefully thread the new spark plug into the cylinder by hand. This prevents cross-threading, which can damage the engine block. Once hand-tight, use the socket wrench to snug it down. Do not overtighten.
  • Reconnect the Wire: Push the spark plug wire boot firmly back onto the new spark plug until it clicks into place.
  • Test Start: Attempt to start the pressure washer.
Simpson Pressure Washer Wont Start

Credit: www.youtube.com

Carburetor Cleaning: A Deeper Dive

A clogged carburetor is arguably the most frequent reason for a stubborn no-start condition in small engines like those on pressure washers. Stale fuel is the primary culprit.

Signs Of A Clogged Carburetor

  • Engine difficult to start or won’t start at all.
  • Engine starts but runs rough, sputters, or stalls.
  • Engine lacks power.
  • Engine only runs with the choke partially or fully engaged.

Carburetor Cleaning Process (general Steps)

Disclaimer: This process requires mechanical aptitude. If you are uncomfortable, seek professional help. Always refer to your specific Simpson pressure washer model’s manual for details.

  • Safety: Disconnect the spark plug wire. Ensure the engine is cool. Work in a well-ventilated area.
  • Access the Carburetor: This typically involves removing the engine cover, air filter housing, and potentially other components to gain clear access.
  • Disconnect Fuel Line and Linkages: Carefully disconnect the fuel line from the carburetor. Note how any throttle or choke linkages are connected so you can reassemble them correctly. You may need to drain any remaining fuel from the carburetor bowl.
  • Remove the Carburetor: Unscrew the bolts or nuts that secure the carburetor to the engine manifold. Gently pull the carburetor away.
  • Disassemble: Lay out the parts on a clean surface in the order they are removed. This usually includes the main body, float bowl, float, needle valve, and jets.
  • Clean Components:
  • Jets: These are small brass fittings with tiny holes. Use carburetor cleaner spray and compressed air to blow through them. A very fine wire (like from a single strand of a wire brush, or a guitar string) can be used *carefully* to clear stubborn blockages, but avoid enlarging the holes.
  • Passages: Spray carburetor cleaner into all the small passages and orifices within the carburetor body. Use compressed air to blow them clear.
  • Float Bowl: Clean any residue from the float bowl.
  • Needle Valve and Seat: Inspect the rubber tip of the needle valve for damage. Clean the seat where it rests.
  • Reassemble: Carefully reassemble the carburetor, ensuring all parts are correctly seated and linkages are reconnected.
  • Reinstall: Mount the carburetor back onto the engine manifold, reconnect the fuel line, throttle/choke linkages, and air filter housing.
  • Test: Reconnect the spark plug wire and attempt to start the engine.

Maintaining Your Simpson Pressure Washer For Reliable Starts

Preventative maintenance is the best way to avoid starting issues. Regular care ensures your equipment is ready when you need it.

Fuel Management

  • Use Fresh Fuel: Always use fresh gasoline (less than 30 days old).
  • Fuel Stabilizer: Add a fuel stabilizer to gasoline if storing for more than a month. This prevents degradation and phase separation.
  • Drain for Storage: If storing for extended periods (over winter), drain the fuel tank and run the engine until it stalls to empty the carburetor bowl. This is the most effective way to prevent internal gumming.

Oil Changes And Checks

  • Regular Checks: Check the oil level before each use. Add oil if low, using the type recommended in your manual.
  • Oil Changes: Change the engine oil according to the manufacturer’s recommendations (typically annually or after a specified number of operating hours). Clean oil is crucial for engine lubrication and preventing issues related to the low oil sensor.

Air Filter Maintenance

  • Clean Regularly: Inspect and clean the air filter periodically, especially if operating in dusty conditions. A dirty filter restricts airflow and affects performance and starting.

*

Are Ikea Kitchen Cabinets Good

Are Ikea Kitchen Cabinets Good

The allure of a beautifully designed kitchen often conjures images of bespoke cabinetry, premium materials, and a hefty price tag. However, for many homeowners and renovators, the dream kitchen remains just that, a dream, seemingly out of reach due to cost. This is where IKEA kitchens have carved out a significant niche, offering a compelling blend of affordability, modern aesthetics, and surprising functionality. But the question lingers: are IKEA kitchen cabinets genuinely good, or are they a budget compromise that won’t stand the test of time?

Evaluating kitchen cabinets involves more than just a quick glance at the price tag. It requires a deep dive into material quality, construction methods, durability, design flexibility, and the overall value proposition. IKEA’s approach to kitchen systems, particularly their SEKTION platform, has revolutionized how many approach kitchen renovations, making stylish and functional kitchens accessible to a wider audience.

This article aims to provide a comprehensive, evidence-based assessment of IKEA kitchen cabinets, examining their strengths, weaknesses, and where they truly stand in the competitive cabinetry market.

Key Takeaways

  • Affordability and Accessibility: IKEA kitchen cabinets, primarily through the SEKTION system, offer a significantly lower price point than custom or semi-custom alternatives, making kitchen renovations more attainable.
  • Modularity and Design Flexibility: The SEKTION system’s modular nature allows for extensive customization in terms of layout and style, catering to diverse kitchen sizes and aesthetic preferences with a wide range of door fronts and internal organizers.
  • Material Quality Varies: While the cabinet boxes are generally considered sturdy (particleboard with laminate/veneer), the quality of the door fronts can vary significantly, with some premium options offering better durability and aesthetics than basic laminate choices.
  • DIY vs. Professional Installation: IKEA cabinets are designed for self-assembly and installation, which can save considerable costs but requires time, skill, and precision. Professional installation is an option but adds to the overall expense.
  • Longevity and Durability: With proper care and realistic expectations, IKEA cabinets can last for many years. However, they may not match the lifelong durability of high-end solid wood or custom-built cabinetry, particularly in high-traffic or demanding environments.
  • Resale Value Impact: While a well-designed IKEA kitchen can enhance a home’s appeal, it’s generally not considered a significant driver of resale value compared to custom or premium brand cabinets, though this is improving with higher-end IKEA door options.

Understanding Ikea’s Kitchen System: Sektion

IKEA’s current kitchen cabinet system, known as SEKTION, launched in 2015, replacing the older AKURUM system. SEKTION is a modular framework designed for maximum flexibility and customization. At its core, it consists of cabinet boxes, hinges, drawers, shelves, and a vast array of front panels (doors and drawer fronts), as well as internal organization solutions.

This modularity is key to IKEA’s appeal, allowing users to design virtually any kitchen layout imaginable, from compact galley kitchens to expansive U-shaped designs.

The cabinet boxes themselves are typically constructed from particleboard with a laminate or veneer finish. This is a common material in the affordable furniture industry, offering a balance between cost and structural integrity. The internal structure is designed to be robust, with various sizes of base cabinets, wall cabinets, and tall cabinets available.

The real customization comes with the vast selection of drawer systems, pull-outs, and specialized inserts that can be fitted within these boxes.

The Sektion Framework Explained

The SEKTION system operates on a grid of standard cabinet widths and heights. This standardization is what allows for the affordability and ease of planning. You select cabinet boxes based on the dimensions required for your space, then choose the internal hardware (drawers, shelves, pull-outs) and finally, the exterior doors and drawer fronts.

This layered approach means you can choose the most basic, cost-effective cabinet box and dress it up with premium doors, or opt for a more budget-friendly door style to match a simpler internal setup.

  • Cabinet Boxes: Available in a range of widths (e.g., 15″, 18″, 24″, 30″, 36″) and heights (e.g., 15″, 30″, 36″, 80″, 90″). Depth is also standardized, typically around 15″ for wall cabinets and 24″ for base cabinets (excluding door thickness).
  • Drawer Systems: IKEA offers several drawer types, with the MAXIMERA drawer being a popular choice for its smooth glide, full extension, and soft-closing features. These are often chosen as upgrades over simpler shelf-based cabinet interiors.
  • Hinges and Hardware: The quality of hinges and drawer slides is crucial for the longevity and user experience of any kitchen cabinet. IKEA uses its own branded hardware, which is generally considered decent for the price point, though higher-end options from brands like Blum (often used in custom kitchens) are known for superior durability.
  • Fronts (Doors & Drawer Fronts): This is where the aesthetic of an IKEA kitchen is truly defined. IKEA offers a wide spectrum of styles, from sleek, handleless laminates like KALLARP and VEDDINGE to more textured wood-effect finishes like EKESTAD and high-gloss options like HAGGEBY. The material and finish of the door fronts significantly impact both the look and the durability.

Material Breakdown: Boxes Vs. Fronts

It’s essential to differentiate between the materials used for the cabinet boxes and those used for the doors and drawer fronts.

  • Cabinet Boxes: Primarily made of particleboard (often referred to as chipboard) with a melamine foil or laminate finish. This material is cost-effective, relatively stable, and resistant to moisture and stains when sealed properly. However, it is less dense and durable than solid wood or high-quality plywood. The edges are typically covered with a plastic or veneer strip.
  • Doors and Drawer Fronts: These come in a much wider variety of materials:
  • Laminate/Melamine Foil: The most budget-friendly options. Durable and easy to clean, but can chip or peel over time, especially at the edges.
  • Veneer: A thin layer of real wood applied over particleboard. Offers a more authentic wood look and feel than laminate, but can be scratched or damaged.
  • Painted MDF: Medium-density fiberboard (MDF) painted for a smooth, consistent color finish. Can be prone to chipping if impacted.
  • High-Gloss Acrylic: Offers a modern, reflective look. Can be prone to scratches and fingerprints.
  • Solid Wood: Available on some higher-end IKEA door styles. Offers the best durability and aesthetic appeal but comes at a significantly higher cost.
Are Ikea Kitchen Cabinets Good

Credit: stylebyemilyhenderson.com

Pros Of Ikea Kitchen Cabinets

The widespread popularity of IKEA kitchens isn’t accidental. Several compelling advantages make them a strong contender for many homeowners.

Affordability And Value

This is arguably the biggest draw. IKEA kitchens are significantly less expensive than custom cabinetry and often more affordable than semi-custom or even many stock cabinet lines found at traditional big-box home improvement stores. The SEKTION system allows users to control costs by selecting different tiers of materials and opting for self-assembly and installation. For those on a tight renovation budget, IKEA presents a viable path to a modern, functional kitchen that might otherwise be unattainable. A complete IKEA kitchen can often cost 30-50% less than a comparable custom kitchen.

Design Flexibility And Customization

The modular nature of the SEKTION system offers unparalleled design freedom. Homeowners aren’t restricted by a limited range of pre-set cabinet sizes. They can mix and match various widths, heights, and depths to perfectly fit their space, utilizing every inch efficiently. Furthermore, IKEA provides an extensive catalog of door styles, colors, finishes, knobs, and pulls, allowing for a high degree of personalization. The ability to combine different door styles or use IKEA fronts on custom-built boxes (a popular workaround for those wanting IKEA aesthetics with enhanced durability) speaks to the system’s versatility.

Extensive Internal Organization Options

Beyond the exterior, IKEA excels in providing smart internal storage solutions. The SEKTION system integrates seamlessly with their range of drawers, pull-out shelves, corner cabinet solutions (like the UTRUSTA carousel or magic corner), waste sorting bins, and specialized organizers for spices, cutlery, and cookware. These accessories are designed to maximize usability and keep the kitchen tidy, often at a lower cost than similar solutions from other brands. The MAXIMERA drawer system, in particular, is frequently praised for its smooth operation and durability.

Modern Aesthetics And Style Variety

IKEA has a keen eye for contemporary design trends. Their door fronts range from minimalist, handleless slabs to shaker-style panels and wood-look finishes, catering to a broad spectrum of tastes, from Scandinavian modern to more traditional looks. The consistent release of new styles and finishes ensures that IKEA kitchens can remain current and stylish. This makes them an attractive option for homeowners looking to update their kitchen with a fresh, updated look without breaking the bank.

Diy-friendly Design And Planning Tools

IKEA provides robust online planning tools and in-store design services. The 3D kitchen planner allows users to map out their kitchen, experiment with layouts, and visualize the final result. This empowers homeowners to take an active role in the design process. While the assembly and installation require effort and skill, the instructions are generally clear, and the components are designed for straightforward assembly, appealing to the DIY enthusiast.

Are Ikea Kitchen Cabinets Good

Credit: www.nbcnews.com

Cons Of Ikea Kitchen Cabinets

Despite their advantages, IKEA cabinets are not without their drawbacks. Understanding these limitations is crucial for making an informed decision.

Material Durability Concerns

The primary concern often revolves around the materials used, particularly for the cabinet boxes and lower-end door fronts. Particleboard, while cost-effective, is susceptible to damage from excessive moisture and can be less resistant to impact than solid wood or high-quality plywood. Laminate and foil finishes on doors can chip, scratch, or peel over time, especially in high-use areas or if subjected to harsh cleaning. While IKEA offers more durable options (like wood veneer or painted MDF), these come at a higher price point, diminishing some of the initial cost savings.

Installation Complexity And Time Commitment

While designed for DIY, the assembly and installation process can be time-consuming and technically challenging. Achieving perfectly aligned doors, level cabinets, and a professional-looking finish requires precision, the right tools, and a significant time investment. Many users underestimate the effort involved, leading to frustration or a less-than-perfect final result. For those not comfortable with woodworking, drilling, and precise measurements, the cost of professional installation can quickly add up, potentially negating the savings compared to other cabinet brands.

Hardware Limitations

While IKEA’s hardware is functional, it generally doesn’t match the premium feel or long-term durability of high-end hardware found in custom kitchens or from specialized manufacturers like Blum or Hettich. Drawer slides might not be as smooth, and hinges could potentially sag over time with heavy use, especially on the more budget-oriented lines. While upgrades are possible, they add to the overall cost.

Resale Value Considerations

In many markets, IKEA cabinets are still perceived as entry-level or budget options. While a well-designed and professionally installed IKEA kitchen can certainly improve a home’s appeal, it may not command the same premium in resale value as custom cabinetry or kitchens from well-established, high-end brands. Buyers looking for luxury finishes or expecting custom solutions might view IKEA kitchens as a temporary feature to be replaced. However, this perception is slowly shifting as IKEA’s higher-end door options become more prevalent.

Limited Customization Beyond The System

While SEKTION is highly modular, it operates within pre-defined dimensions. This means that achieving truly bespoke sizes or unique architectural integrations might be difficult or impossible without significant modification or combining IKEA components with custom elements. For kitchens with very unusual layouts or specific design requirements, IKEA might not offer a perfect fit straight out of the box.

Are Ikea Kitchen Cabinets Good

Credit: fifimcgee.co.uk

Comparing Ikea Cabinets To Alternatives

To truly gauge the “goodness” of IKEA kitchen cabinets, it’s helpful to compare them against other common cabinetry options available in the market.

Ikea Vs. Custom Cabinets

FeatureIKEA KitchensCustom Cabinets
**Price**Significantly lower ($10,000 – $30,000+ for a full kitchen)Significantly higher ($25,000 – $100,000+ for a full kitchen)
**Material Quality**Particleboard boxes; varied door materialsSolid wood, premium plywood, high-grade MDF; custom finishes
**Design Flexibility**High modularity within a grid; limited bespoke sizesUnlimited design possibilities; perfect fit for any space
**Construction**Flat-pack, DIY assemblyHand-built by craftsmen
**Hardware**Functional, decent quality; upgrades availablePremium brands (e.g., Blum, Salice); superior durability
**Installation**DIY-focused; professional option adds costTypically professional installation included or required
**Durability**Good for the price; may not match custom long-termExcellent; built for longevity
**Resale Value**Moderate; improving with higher-end optionsHigh; often a significant selling point

Summary: Custom cabinets offer the ultimate in quality, durability, and bespoke design but come at a premium price. IKEA provides an excellent balance of affordability and style for those willing to compromise on some aspects of material quality or bespoke fit.

Ikea Vs. Big Box Store Stock/semi-custom Cabinets

FeatureIKEA KitchensBig Box Stock/Semi-Custom (e.g., Home Depot KraftMaid, Lowe’s Diamond)
**Price**Generally lower to mid-rangeMid to high range; stock is cheaper, semi-custom is pricier
**Material Quality**Particleboard boxes; varied door materialsOften plywood or particleboard boxes; wide range of door materials
**Design Flexibility**High modularity; excellent planning toolsLimited sizes for stock; more options for semi-custom
**Construction**Flat-pack, DIY assemblyPre-assembled boxes for stock; semi-custom requires ordering
**Hardware**Functional, decent qualityVaries; often better than basic IKEA, but premium upgrades are costly
**Installation**DIY-focused; professional option adds costProfessional installation readily available and often recommended
**Durability**Good for the priceVaries greatly by line; some semi-custom options are very durable
**Style**Strong on modern and Scandinavian aestheticsWider range of traditional and transitional styles available

Summary: Big box stores offer a spectrum from basic stock cabinets to more customizable semi-custom lines. IKEA often wins on price for comparable modularity and modern design. However, some semi-custom lines from big box stores might offer better material quality (like all-plywood boxes) or more traditional aesthetic choices.

Ikea Vs. Online Rta (ready-to-assemble) Cabinet Companies

FeatureIKEA KitchensOnline RTA Companies (e.g., CliqStudios, Barker, Lily Ann Cabinets)
**Price**Very competitive; often slightly lower than RTACompetitive; can be comparable to IKEA, especially with upgrades
**Material Quality**Particleboard boxes; varied door materialsOften offer all-plywood boxes and higher-grade MDF doors
**Design Flexibility**High modularity; user-friendly plannerGood modularity; often more door styles and finish options
**Construction**Flat-pack, DIY assemblyFlat-pack, DIY assembly; assembly can sometimes be more complex
**Hardware**Functional, decent qualityOften include better quality standard hardware (e.g., soft-close)
**Installation**DIY-focused; professional option adds costDIY-focused; professional installation services may be available
**Durability**Good for the priceGenerally considered very good, especially with all-plywood options
**Customer Service**In-person stores, online supportPrimarily online; quality can vary

Summary: Online RTA companies often compete directly with IKEA, sometimes offering superior material quality (like all-plywood boxes) as standard. However, IKEA’s extensive store network, integrated planning tools, and sheer volume of options keep it a dominant force. The choice often comes down to specific material preferences and the nuances of each company’s offerings.

Real-world Experiences And Case Studies

Examining real-world feedback and scenarios can provide valuable insights into the practical performance of IKEA kitchen cabinets.

Case Study 1: The Budget-conscious First-time Homeowner

Sarah and Tom bought their first home, a modest starter house with an outdated kitchen. With a tight renovation budget of $15,000, they opted for an IKEA SEKTION kitchen. They spent several weekends designing the layout using IKEA’s planner and meticulously assembling the cabinets themselves. They chose the white VEDDINGE doors for a clean, modern look and invested in MAXIMERA drawers for the base cabinets. The total cost for cabinets, doors, drawers, hinges, and basic countertops came in just under $10,000. Friends and family were impressed with the high-end look achieved on such a limited budget. Pros: Achieved a stylish, functional kitchen well within budget. DIY effort saved thousands. Cons: Installation took longer than expected, and a few doors required minor adjustments to hang perfectly straight. They anticipate needing to be careful with cleaning to avoid damaging the laminate.

Case Study 2: The Rental Property Upgrade

A property investor, Mark, needed to update the kitchens in a duplex he owned to increase rental income. He opted for IKEA’s green BODARP cabinets for a pop of color and modern appeal. He hired a handyman to assemble and install the cabinets to ensure a professional finish and speed up the process. The total cost, including installation, was roughly $8,000 per unit. The updated kitchens significantly boosted the property’s appeal and allowed him to increase the rent by $150 per month per unit. Pros: Quick turnaround and a modern aesthetic that appeals to renters. Cost-effective for multi-unit renovations. Cons: While durable enough for rentals, Mark acknowledges they might not withstand heavy family use for decades. He chose a basic drawer system to keep costs down, which feels less premium than his own home kitchen.

User Testimonials And Expert Opinions

Online forums and renovation blogs often feature discussions about IKEA kitchens. Many users praise the value and design possibilities. Common positive feedback includes the ease of planning, the wide range of finishes, and the surprising sturdiness of the cabinet boxes when properly assembled. Negative feedback frequently centers on the time and effort required for installation, the potential for laminate doors to chip, and the hardware not feeling as robust as premium brands.

Renovation experts often acknowledge IKEA’s strength in the budget-friendly, modern kitchen space. They recommend IKEA for homeowners who are budget-conscious, design-savvy, and either willing to tackle the DIY aspect or factor in professional installation costs. Experts also emphasize the importance of choosing higher-quality door fronts and drawer systems if the budget allows, as these significantly impact the perceived quality and longevity. Forbes Advisor notes that while IKEA kitchens can be a great value, potential buyers should be aware of the assembly requirements and material trade-offs compared to custom options.

Longevity And Durability Expectations

A critical question for any kitchen investment is how long it will last. For IKEA cabinets, the answer is nuanced and depends heavily on several factors:

  • Quality of Materials Chosen: As discussed, higher-end IKEA door fronts (e.g., painted MDF, wood veneer) and internal systems (like MAXIMERA drawers) will inherently last longer and withstand wear better than basic laminate options.
  • Installation Quality: A precisely installed kitchen with perfectly aligned doors and drawers will function better and show less wear than one that is slightly off-kilter. Proper support for heavy items and secure mounting are crucial.
  • Usage and Maintenance: Kitchens are high-traffic areas. Cabinets subjected to heavy daily use, frequent cleaning with abrasive materials, or constant moisture exposure will degrade faster. Following IKEA’s care instructions is vital.
  • Environmental Factors: High humidity or significant temperature fluctuations can affect particleboard over time.

Realistic Lifespan: With careful selection of components, meticulous installation, and diligent care, an IKEA kitchen can reasonably be expected to last 10-15 years for the average household. Some users report much longer lifespans, especially if they’ve invested in premium doors and hardware and maintained them well. However, it’s unlikely they will match the 20-30+ year lifespan often associated with high-quality custom or solid wood cabinetry, particularly concerning the wear on finishes and hardware.

When IKEA Cabinets Might Not Be Ideal:

  • High-End Luxury Homes: If the goal is to achieve a top-tier luxury aesthetic or maximize resale value in a high-end market, custom cabinetry is generally preferred.
  • Extremely Demanding Environments: Commercial kitchens or homes with very young children and a high propensity for rough use might benefit from more robust materials.
  • Unique Architectural Needs: Spaces requiring

Microsoft Mouse Bluetooth Not Working

Microsoft Mouse Bluetooth Not Working

The seamless integration of a Microsoft Bluetooth mouse can significantly enhance your productivity and comfort. However, when this connection falters, and your mouse stops responding, it can be a frustrating roadblock. Whether you’re in the middle of a critical project or simply browsing, a non-functional mouse disrupts your workflow. This common issue, often manifesting as the Microsoft mouse Bluetooth not working, can stem from a variety of sources, ranging from simple battery issues to more complex software conflicts or hardware malfunctions.

Understanding the potential causes and systematically troubleshooting them is key to restoring your mouse’s functionality. This comprehensive guide aims to walk you through every possible solution, from the most basic checks to advanced troubleshooting steps, ensuring you can get your reliable Microsoft Bluetooth mouse back up and running as quickly as possible.

We’ll cover everything from pairing issues and driver updates to environmental interference and hardware diagnostics, providing actionable advice for a wide range of scenarios.

Key Takeaways

  • Check Batteries and Power: Low battery power is the most frequent culprit behind a non-responsive Bluetooth mouse. Ensure your batteries are fresh or fully charged.
  • Verify Bluetooth is Enabled: Confirm that Bluetooth is turned on for both your mouse and your computer.
  • Re-pair the Mouse: Sometimes, simply removing the mouse from your device’s Bluetooth list and re-pairing it can resolve connection issues.
  • Update Drivers and Software: Outdated or corrupted drivers are a common cause of peripheral malfunctions. Ensure your mouse drivers and Bluetooth drivers are up to date.
  • Address Interference: Other wireless devices or physical obstructions can interfere with Bluetooth signals.
  • Test on Another Device: Isolating the problem by testing the mouse on a different computer helps determine if the issue lies with the mouse itself or your primary device.
  • Run the Troubleshooter: Windows has built-in troubleshooters that can automatically detect and fix common Bluetooth problems.
  • Consider Hardware Issues: If all software solutions fail, there might be a physical defect with the mouse or your computer’s Bluetooth adapter.
Microsoft Mouse Bluetooth Not Working

Credit: www.drivereasy.com

Understanding Bluetooth Connectivity For Your Microsoft Mouse

Bluetooth technology is a wireless communication standard that allows devices to connect and exchange data over short distances. For your Microsoft Bluetooth mouse, this means it communicates with your computer without the need for a physical USB dongle (though some Microsoft mice do use a USB dongle for a more direct connection, this article focuses on Bluetooth-only models).

The reliability of this connection depends on several factors, including the Bluetooth version, signal strength, potential interference, and the proper functioning of both the mouse’s Bluetooth transmitter and your computer’s Bluetooth receiver.

When a Microsoft mouse Bluetooth not working scenario arises, it’s often because one or more of these elements are compromised. The initial setup involves pairing, where your computer discovers and establishes a secure connection with the mouse. Once paired, the devices maintain a constant communication channel. Issues can occur during this pairing process, or with an already paired device if the connection is interrupted or corrupted. Understanding these basics helps in systematically diagnosing the problem.

Microsoft Mouse Bluetooth Not Working

Credit: www.systweak.com

Common Reasons For Microsoft Mouse Bluetooth Not Working

Several factors can contribute to your Microsoft Bluetooth mouse losing its connection or failing to connect altogether. Identifying the root cause is the first step toward a swift resolution.

Low Battery Power

This is by far the most common reason for any wireless device to stop working. Bluetooth mice, like all wireless peripherals, require power to operate. As the batteries drain, the signal strength weakens, leading to intermittent connectivity or a complete failure to respond.

  • Indicator Lights: Many Microsoft mice have an LED indicator that flashes or changes color to signal low battery levels. Familiarize yourself with your specific model’s indicators.
  • Rechargeable Batteries: If your mouse uses rechargeable batteries, ensure they are fully charged. A faulty charging cable or port can also be the culprit.
  • Standard Batteries: For mice using standard AA or AAA batteries, replace them with fresh, high-quality ones. Even if the indicator doesn’t show a critical level, performance can degrade significantly before a complete failure.

Bluetooth Not Enabled

It might sound obvious, but it’s easy to overlook whether Bluetooth is actually turned on in your system settings.

  • On Your Computer: Ensure Bluetooth is enabled in your Windows or macOS settings. A disabled Bluetooth adapter means your computer cannot detect or connect to any Bluetooth devices.
  • On Your Mouse: Some mice have a physical on/off switch, often located on the bottom. Make sure this switch is in the “On” position.

Pairing Issues

The initial connection between your mouse and computer is established through a pairing process. If this process fails or the existing pairing becomes corrupted, the mouse won’t connect.

  • Corrupted Pairing: Over time, the stored pairing information on either the mouse or the computer can become corrupted, leading to connection problems.
  • Interference During Pairing: Other wireless devices or strong electromagnetic fields can sometimes interfere with the pairing process, preventing a successful connection.

Software And Driver Problems

The software that manages your Bluetooth connection and your mouse’s functionality plays a crucial role.

  • Outdated Drivers: Your computer’s Bluetooth adapter and your mouse itself rely on specific drivers to communicate effectively. Outdated or incompatible drivers can cause connectivity issues.
  • Corrupted Drivers: Drivers can sometimes become corrupted due to software conflicts, system updates, or malware.
  • Windows Updates: While updates are generally beneficial, they can occasionally introduce driver conflicts or bugs that affect Bluetooth functionality.
  • Microsoft Mouse Software: If you use Microsoft’s dedicated mouse software (e.g., Microsoft Mouse and Keyboard Center), ensure it’s also up to date and functioning correctly.

Environmental Interference

Bluetooth operates on the 2. 4 GHz radio frequency band, which is also used by many other devices.

  • Other Wireless Devices: Wi-Fi routers, cordless phones, microwaves, other Bluetooth devices, and even USB 3.0 ports can cause interference, disrupting the signal between your mouse and computer.
  • Physical Obstructions: Walls, metal objects, or even the distance between the mouse and the computer can weaken the Bluetooth signal.

Hardware Malfunction

In some cases, the issue might be with the hardware itself.

  • Faulty Mouse: The Bluetooth transmitter or internal components of the mouse could be damaged.
  • Faulty Bluetooth Adapter: Your computer’s built-in Bluetooth adapter or a separate USB Bluetooth dongle might be malfunctioning.
Microsoft Mouse Bluetooth Not Working

Credit: www.cdw.com

Troubleshooting Steps For A Non-working Microsoft Bluetooth Mouse

When your Microsoft mouse Bluetooth not working, a systematic approach to troubleshooting can help pinpoint and resolve the issue. Start with the simplest solutions and progress to more complex ones.

1. Check The Basics: Power And Switches

Before diving into software, rule out the most common and easiest fixes.

  • Replace Batteries:
  • If using disposable batteries, remove the old ones and insert a fresh pair of high-quality alkaline batteries.
  • If using rechargeable batteries, place the mouse on its charger and ensure it’s receiving power. Check the charging indicator light.
  • Check the Power Switch:
  • Locate the on/off switch on the bottom of your Microsoft mouse.
  • Ensure it is firmly in the “On” position. Sometimes, the switch can be loose or accidentally bumped to the off position.
  • Check the Pairing Button (if applicable):
  • Some Microsoft Bluetooth mice have a dedicated pairing button, often near the power switch or battery compartment. Ensure this button isn’t stuck.

2. Verify Bluetooth Is Enabled On Your Computer

Ensure your computer is set up to receive Bluetooth signals.

  • For Windows 10/11:
  • Go to Settings (Windows key + I).
  • Click on Devices (Windows 10) or Bluetooth & devices (Windows 11).
  • Under the Bluetooth section, ensure the toggle switch is set to On.
  • If Bluetooth is off, turn it on. If it’s already on, try toggling it off and then on again.
  • For macOS:
  • Click the Apple menu in the top-left corner.
  • Select System Settings (or System Preferences on older macOS versions).
  • Click on Bluetooth.
  • Ensure Bluetooth is turned On. If it is, try turning it off and then back on.

3. Remove And Re-pair The Mouse

A corrupted pairing is a frequent cause of connection issues. Removing the mouse from your device’s known Bluetooth devices and then re-pairing it often resolves the problem.

  • For Windows 10/11:
  • Go to Settings > Devices (or Bluetooth & devices).
  • Under the list of paired devices, find your Microsoft mouse.
  • Click on the mouse, then select Remove device. Confirm the action.
  • Put your mouse into pairing mode. This usually involves pressing and holding the Bluetooth pairing button on the mouse for a few seconds until the indicator light flashes. Refer to your mouse’s manual for the exact procedure.
  • On your computer, click Add Bluetooth or other device (Windows 10) or Add device (Windows 11).
  • Select Bluetooth.
  • Your computer will scan for nearby discoverable devices. Select your Microsoft mouse when it appears.
  • Follow any on-screen prompts to complete the pairing.
  • For macOS:
  • Go to System Settings (or System Preferences) > Bluetooth.
  • Find your Microsoft mouse in the list of devices.
  • Click the ‘X’ or ‘i’ icon next to the mouse’s name, then select Forget Device (or Remove Device).
  • Put your mouse into pairing mode (usually by holding the pairing button).
  • Your Mac will automatically scan for devices. Select your Microsoft mouse when it appears in the list and click Connect.

4. Update Mouse And Bluetooth Drivers

Outdated or corrupt drivers can cripple your mouse’s functionality.

  • Update Mouse Drivers:
  • Right-click the Start button and select Device Manager.
  • Expand the Mice and other pointing devices category.
  • Right-click on your Microsoft mouse and select Update driver.
  • Choose Search automatically for drivers.
  • If Windows finds a newer driver, follow the prompts to install it.
  • If no update is found, you can try visiting the Microsoft Support website for your specific mouse model to download the latest drivers manually.
  • Update Bluetooth Drivers:
  • In Device Manager, expand the Bluetooth category.
  • Right-click on your computer’s Bluetooth adapter (e.g., “Intel(R) Wireless Bluetooth(R)”) and select Update driver.
  • Choose Search automatically for drivers.
  • If no update is found, you may need to visit your computer manufacturer’s website (e.g., Dell, HP, Lenovo) or the Bluetooth adapter manufacturer’s website for the latest drivers.
  • Microsoft Mouse and Keyboard Center:
  • If you use specific Microsoft software for your mouse, ensure it’s updated. You can usually download the latest version from the Microsoft website.

5. Run The Windows Troubleshooter

Windows has built-in tools that can automatically detect and fix common issues.

  • For Windows 10:
  • Go to Settings > Update & Security > Troubleshoot.
  • Click Additional troubleshooters.
  • Select Bluetooth and click Run the troubleshooter.
  • Follow the on-screen instructions.
  • For Windows 11:
  • Go to Settings > System > Troubleshoot.
  • Click Other troubleshooters.
  • Find Bluetooth in the list and click Run.
  • Follow the on-screen prompts.

6. Check For Interference And Environmental Factors

Physical proximity and other wireless signals can impact Bluetooth performance.

  • Reduce Distance: Move your mouse closer to your computer’s Bluetooth receiver.
  • Minimize Obstructions: Ensure there are no physical objects blocking the direct line of sight between the mouse and the computer.
  • Turn Off Other Wireless Devices: Temporarily disable other Bluetooth devices, Wi-Fi, or wireless peripherals to see if the connection improves. If it does, you’ve identified an interference source.
  • Relocate USB 3.0 Devices: USB 3.0 ports and devices can sometimes interfere with the 2.4 GHz band used by Bluetooth. Try moving your mouse further away from any USB 3.0 ports or devices.
  • Change Bluetooth Radio: In some advanced cases, specific Bluetooth radio frequencies might be more prone to interference. This is less common for typical users but can be a factor in crowded wireless environments.

7. Test The Mouse On Another Device

This is a crucial step to determine if the problem lies with the mouse or your computer.

  • Pair with a Different Computer: Try pairing your Microsoft Bluetooth mouse with a different laptop or desktop computer that has Bluetooth capabilities.
  • If it Works Elsewhere: If the mouse connects and functions correctly on another device, the issue is likely with your original computer’s Bluetooth adapter, drivers, or software settings.
  • If it Doesn’t Work Elsewhere: If the mouse fails to connect or work on multiple devices, it strongly suggests a hardware problem with the mouse itself.

8. Check The Microsoft Mouse And Keyboard Center

For mice with advanced features, specific software is often required.

  • Download and Install: If you haven’t already, download the Microsoft Mouse and Keyboard Center from the official Microsoft website.
  • Check Settings: Open the center and check if your mouse is detected. Review its settings for any unusual configurations or disabled features.
  • Update Software: Ensure the Mouse and Keyboard Center software itself is up to date.
  • Reset Settings: Some versions of the software might offer an option to reset mouse settings to default, which can sometimes resolve configuration issues.

Advanced Troubleshooting And Potential Hardware Issues

If the standard troubleshooting steps haven’t resolved your Microsoft mouse Bluetooth not working problem, it’s time to consider more advanced solutions or the possibility of a hardware failure.

Reinstalling Bluetooth Drivers

Sometimes, a simple update isn’t enough. A clean reinstallation can resolve deeper driver corruption.

  • Open Device Manager.
  • Expand the Bluetooth category.
  • Right-click on your Bluetooth adapter and select Uninstall device.
  • If prompted, check the box that says “Delete the driver software for this device.”
  • Restart your computer. Windows will typically attempt to reinstall the driver automatically upon reboot.
  • If it doesn’t reinstall automatically, go back to Device Manager, click Action > Scan for hardware changes, or manually download and install the latest Bluetooth driver from your computer manufacturer’s website.

Checking For System File Corruption

Corrupted operating system files can sometimes interfere with hardware functionality, including Bluetooth.

  • Open Command Prompt as an administrator. To do this, search for “cmd” in the Start menu, right-click on Command Prompt, and select “Run as administrator.”
  • Type the following command and press Enter: `sfc /scannow`
  • This command will scan your system files for corruption and attempt to repair them. This process can take some time.
  • Once complete, restart your computer and test the mouse again.

Consider A Usb Bluetooth Adapter

If your computer’s built-in Bluetooth adapter seems to be the issue and you’ve exhausted driver solutions, a USB Bluetooth adapter can be a relatively inexpensive workaround. These adapters plug into a USB port and provide a new, independent Bluetooth connection for your computer.

  • Benefits: They bypass any issues with your internal Bluetooth hardware and often offer newer Bluetooth versions with improved range and stability.
  • Installation: Typically, they are plug-and-play, or require a simple driver installation from the manufacturer.
  • Cost: A decent USB Bluetooth adapter can range from $10 to $30.

Diagnosing Potential Mouse Hardware Failure

If you’ve tested the mouse on multiple computers and it consistently fails to connect or function, it’s highly probable that the mouse itself has a hardware defect.

  • Physical Damage: Inspect the mouse for any visible signs of damage, such as cracks or loose buttons.
  • Internal Components: The Bluetooth transmitter, receiver, or internal circuitry within the mouse could have failed.
  • Wear and Tear: Like any electronic device, mice have a lifespan, and internal components can degrade over time.

Example: A user reported their Microsoft Sculpt Ergonomic Mouse suddenly stopped connecting via Bluetooth. After trying all software troubleshooting steps on their Windows 10 laptop, including re-pairing, driver updates, and running troubleshooters, they tested the mouse on a MacBook. The MacBook also failed to detect or connect to the mouse. This confirmed the issue was with the mouse hardware, and the user subsequently purchased a replacement.

Contacting Microsoft Support

If you suspect a hardware defect and your mouse is still under warranty, contacting Microsoft Support is the next logical step. They can provide further diagnostics, guide you through the warranty claim process, or offer repair or replacement options.

  • Warranty Information: Check your mouse’s purchase date and Microsoft’s warranty policy for peripherals.
  • Support Website: Visit the official Microsoft Support website to find contact options, including chat, phone, or email support.

Maintaining Your Microsoft Bluetooth Mouse For Optimal Performance

Preventative measures and good habits can significantly reduce the likelihood of experiencing connectivity issues with your Microsoft Bluetooth mouse.

Regular Battery Replacement/charging

  • Proactive Replacement: Instead of waiting for the battery indicator, make it a habit to replace standard batteries every few months, or charge rechargeable batteries when they reach a certain low percentage (e.g., 20%).
  • Use Quality Batteries: Invest in reputable battery brands for consistent power delivery.

Keep Software And Drivers Updated

  • Windows Updates: Regularly install Windows updates, as they often include driver updates and performance improvements.
  • Microsoft Mouse and Keyboard Center: Periodically check for updates to any dedicated Microsoft software you use for your mouse.

Minimize Interference

  • Organize Your Workspace: Keep your mouse reasonably close to your computer and avoid placing it directly next to other wireless devices or potential sources of interference.
  • Consider a Bluetooth Dongle: If you experience persistent interference with your built-in Bluetooth, a good quality USB Bluetooth adapter can sometimes offer a more stable connection.

Proper Storage And Handling

  • Avoid Extreme Temperatures: Do not leave your mouse in excessively hot or cold environments.
  • Protect from Liquids: Keep liquids away from your mouse to prevent internal damage.

Comparison: Common Troubleshooting Scenarios

To better understand the typical progression of troubleshooting, consider this comparison of common scenarios.

ScenarioPrimary CauseFirst Steps to TryAdvanced StepsLikelihood of Hardware Failure
**Mouse suddenly stops responding**Low batteryReplace/recharge batteries, check power switchTest on another deviceLow
**Mouse connects but cursor is jerky**Interference, low batteryCheck for interference, check batteriesUpdate drivers, test on another deviceMedium
**Mouse won’t pair with computer**Pairing issue, Bluetooth offEnsure Bluetooth is on, re-pair the mouseUpdate Bluetooth drivers, run troubleshooterMedium
**Mouse disconnects intermittently**Interference, weak signalReduce distance, check for interferenceUpdate drivers, test on another deviceMedium
**Mouse detected but not working**Driver issue, software conflictUpdate mouse drivers, reinstall mouse softwareRun SFC scan, test on another deviceMedium
**Mouse completely undetected**Hardware failure, Bluetooth offCheck power, ensure Bluetooth is on, re-pairTest on another device, contact supportHigh

Frequently Asked Questions

Why Is My Microsoft Bluetooth Mouse Suddenly Not Working?

The most common reason is low battery power. Always start by checking or replacing the batteries. If the batteries are fine, ensure Bluetooth is enabled on your computer and the mouse’s power switch is on. Next, try removing the mouse from your computer’s Bluetooth devices and re-pairing it.

How Do I Put My Microsoft Bluetooth Mouse Into Pairing Mode?

The exact method varies by model, but typically you need to press and hold a Bluetooth pairing button located on the bottom of the mouse, often near the battery compartment or power switch. Hold it for a few seconds until the indicator light on the mouse starts flashing, indicating it’s discoverable. Consult your specific mouse model’s manual for precise instructions.

What Should I Do If My Microsoft Mouse Keeps Disconnecting?

Intermittent disconnections are often caused by wireless interference. Try moving the mouse closer to your computer, minimizing obstructions, and turning off other nearby wireless devices (like Wi-Fi routers, other Bluetooth devices, or microwaves) to see if the problem resolves. Also, ensure your mouse batteries are not critically low, as this can weaken the signal. Updating your

Push Button Toilet Not Working

Push Button Toilet Not Working

A toilet that won’t flush can turn a simple convenience into a significant household annoyance. When the flush button or lever is unresponsive, it disrupts daily routines and can quickly lead to unsanitary conditions if not addressed promptly. While modern dual-flush toilets and concealed cisterns offer aesthetic appeal and water-saving benefits, their push-button mechanisms can sometimes present unique troubleshooting challenges compared to traditional lever-operated systems. Understanding the potential causes behind a malfunctioning push-button toilet is the first step towards a swift and effective resolution.

This guide will equip you with the knowledge to diagnose and fix common issues with your push-button toilet. We’ll explore everything from simple adjustments to more complex internal component failures, providing clear, step-by-step instructions to get your toilet back in working order.

Whether you’re dealing with a button that doesn’t press, a flush that doesn’t initiate, or a weak flush, you’ll find the solutions you need right here.

Key Takeaways

  • Identify the Mechanism: Push buttons operate via internal mechanisms like plungers, rods, or cables that lift a flush valve. Issues often stem from these components.
  • Check for Obstructions: Debris or mineral buildup can prevent buttons from depressing or internal parts from moving freely.
  • Adjust Linkages: The connection between the button and the flush valve might be loose, misaligned, or broken, requiring adjustment or replacement.
  • Inspect the Flush Valve: The flush valve itself, located at the bottom of the cistern, is a common culprit for flushing problems, even if the button seems fine.
  • Water Level Matters: An incorrect water level in the cistern can lead to weak flushes or no flush at all.
  • Consider Button Type: Different push-button designs (single, dual-flush, concealed) have specific parts and potential failure points.
  • DIY vs. Professional: Many common issues can be fixed with basic tools, but complex internal cistern problems may require a plumber.
Push Button Toilet Not Working

Credit: www.youtube.com

Understanding Your Push-button Toilet Mechanism

Before diving into troubleshooting, it’s crucial to understand how your specific push-button toilet works. Unlike the familiar lever that directly engages a chain or rod, push buttons typically operate through a more intricate system within the cistern. The design varies significantly between manufacturers and toilet models, but the fundamental principle involves a mechanism that, when pressed, lifts the flush valve to release water from the cistern into the bowl.

Types Of Push-button Mechanisms

Push buttons come in several common configurations:

  • Single-Button Flush: A single button, when pressed, initiates a full flush. These are often found on older or simpler models.
  • Dual-Flush Buttons: These systems feature two buttons (often one larger, one smaller, or a split button) that offer different flush volumes, a reduced flush for liquid waste and a full flush for solid waste. This is a key feature for water conservation.
  • Concealed Cistern Push Plates: In wall-hung or back-to-wall toilet setups, the cistern is hidden within the wall cavity, and a decorative push plate on the wall activates the flush. These plates often have mechanical or pneumatic linkages.
  • Adjustable Rods/Cables: Some button mechanisms use rods or cables that connect the button assembly to the flush valve. The length and tension of these can be critical.

Common Internal Components

Regardless of the specific type, several key components are involved:

  • Button Assembly: The part you physically press. This might be a simple plunger or a more complex lever system.
  • Linkage Rods/Cables: These connect the button assembly to the flush valve mechanism.
  • Flush Valve Seal/Diaphragm: A rubber seal at the bottom of the cistern that holds back the water. When lifted, it allows water to flow into the bowl.
  • Overflow Pipe: A vertical pipe within the cistern that prevents water from exceeding a safe level.
  • Float Valve (Fill Valve): Controls the refilling of the cistern after a flush. While not directly related to the button, an improperly functioning fill valve can affect flush performance.

Troubleshooting A Non-responsive Push Button

The most common symptom is a button that feels loose, doesn’t depress, or doesn’t initiate a flush when pressed. This usually points to an issue with the button assembly or its direct linkage to the flush valve.

Button Feels Loose Or Wobbly

A loose button often indicates that the retaining nut holding the button assembly to the cistern lid is loose.

  • Remove the Cistern Lid: Carefully lift the ceramic lid off the cistern.
  • Locate the Nut: On the underside of the cistern lid, you’ll find the threaded housing for the push button. There’s usually a large plastic nut securing the entire assembly.
  • Tighten the Nut: Use your hand or pliers (with a cloth to prevent scratching) to tighten this nut. Be firm but avoid overtightening, which can crack the plastic or ceramic.
  • Test: Replace the lid and test the button.

Pro Tip: If the nut is difficult to grip or in a tight space, a basin wrench can be invaluable for reaching and tightening it.

Button Does Not Depress

If the button is stuck in the ‘out’ position and won’t move inward, several factors could be at play:

  • Obstruction: Debris, limescale, or even a dislodged internal component can jam the button.
  • Remove the cistern lid.
  • Examine the button mechanism. Gently try to wiggle it. If it feels stuck, look for any visible obstructions around the button’s housing.
  • If you see buildup, use a damp cloth or an old toothbrush to clean around the button. For stubborn limescale, a mild descaler might be necessary, but use it sparingly and rinse thoroughly.
  • Ensure the linkage rod or cable isn’t bent or caught.
  • Misaligned Mechanism: The button assembly might have shifted, causing it to bind.
  • Loosen the retaining nut slightly.
  • Reposition the button assembly so it moves freely.
  • Retighten the nut.
  • Internal Component Failure: The internal part of the button assembly that connects to the linkage might be broken. This often requires replacing the entire button assembly.

Button Depresses, But No Flush Occurs

This is a more complex issue, indicating that while the button is moving, the signal isn’t reaching or activating the flush valve.

  • Check Linkage:
  • Rod Systems: Ensure the rod connecting the button to the flush valve is still attached at both ends and is not bent. If it’s detached, reattach it. If it’s bent, try to straighten it carefully or replace it.
  • Cable Systems: Check that the cable is connected and taut. A slack cable won’t lift the flush valve sufficiently. Some cable systems have an adjustment screw near the button assembly or the flush valve.
  • Inspect Flush Valve: The problem might lie with the flush valve itself.
  • Stuck Flush Valve: The seal at the bottom of the flush valve might be stuck due to debris or wear.
  • Worn Seal: The rubber seal on the flush valve might be perished or damaged, preventing a proper seal when closed and thus a weak or no flush.
  • Incorrect Height: The flush valve might be sitting too low, meaning the button linkage isn’t lifting it high enough.
  • Water Level: An insufficient water level in the cistern means there isn’t enough water to create a strong flush. Check the water level marker inside the cistern. The water should typically reach about 1-2 cm below the overflow pipe. If it’s too low, the fill valve needs adjustment or repair.
Push Button Toilet Not Working

Credit: taekwondoluxembourg.com

Troubleshooting Weak Or Incomplete Flushes

A flush that barely empties the bowl or stops mid-cycle is frustrating and ineffective. This often relates to the volume of water released or the efficiency of the flush valve.

Insufficient Water In Cistern

As mentioned, a low water level is a primary cause of weak flushes.

  • Locate the Fill Valve: This is the mechanism that refills the cistern, usually with a float attached.
  • Adjust the Float: Most float valves have an adjustment screw or clip that allows you to set the water level.
  • Screw Adjustment: Turn the screw to raise or lower the float arm. Raising the float sets a higher water level.
  • Clip Adjustment: Some floats have clips that can be moved up or down the arm.
  • Check the Mark: Ensure the water level reaches the marked line inside the cistern (usually around 1-2 cm below the overflow pipe).
  • Test Flush: Flush the toilet and observe if the water level is now adequate.

Warning: Never set the water level above the top of the overflow pipe, as this will cause continuous water loss.

Flush Valve Not Lifting High Enough

Even with the correct water level, if the flush valve isn’t lifted sufficiently, the flush will be weak.

  • Adjust Linkage: If you have a rod system, the rod might need to be slightly longer or adjusted to lift the valve higher. If it’s a cable system, tighten the cable.
  • Flush Valve Height: Some flush valves can be adjusted vertically. Check your toilet’s manual for specific instructions.

Clogged Flush Valve Or Siphon Jet

The flush valve itself can become clogged with debris or mineral deposits, hindering water flow.

  • Isolate Water Supply: Turn off the water supply valve behind the toilet.
  • Flush Toilet: Press the button to empty the cistern as much as possible.
  • Access Flush Valve: Depending on your model, you may need to remove the flush valve assembly. This usually involves unscrewing a retaining nut at the bottom of the cistern from underneath.
  • Clean the Valve: Inspect the valve seal and the valve body for debris. Clean thoroughly with a brush and water. Use a descaler if necessary, but rinse extremely well.
  • Check Siphon Jet (Bowl): In the toilet bowl itself, at the bottom, there’s a small hole called the siphon jet. This hole injects water into the trapway to help start the siphonic action. If this hole is blocked with limescale, it can significantly weaken the flush. Use a small piece of wire or a stiff brush to clear it.

Worn Flush Valve Seal

The rubber seal at the base of the flush valve is critical. If it’s old, cracked, or deformed, it won’t seal properly when closed, leading to a slow leak into the bowl and a weak flush.

  • Inspect the Seal: With the cistern empty and the flush valve removed, examine the rubber seal.
  • Replace if Damaged: If the seal is worn, cracked, or brittle, it needs replacement. You can usually purchase a replacement seal specific to your flush valve model.
  • Installation: Fit the new seal securely onto the flush valve. Reassemble the flush valve and reconnect the water supply.
Push Button Toilet Not Working

Credit: www.indeepplumbing.com.au

Troubleshooting Dual-flush Button Issues

Dual-flush systems add complexity due to their two-button operation. Problems can arise with one button, both, or the mechanism that differentiates their function.

One Button Works, The Other Doesn’t

This typically points to an issue with the specific button or its corresponding linkage.

  • Stuck Button: If one button is stuck, follow the troubleshooting steps for a non-depressing button for that specific button.
  • Dislodged Linkage: The rod or cable connected to the non-working button might have detached. Open the cistern and check the connections.
  • Internal Mechanism Failure: Dual-flush button assemblies often have internal mechanisms that differentiate the two buttons. If one part of this mechanism breaks, one button will cease to function. This usually requires replacing the entire dual-flush button assembly.

Buttons Stuck Together Or Jammed

Sometimes, the two buttons can become misaligned or jammed, preventing either from operating correctly.

  • Remove Button Assembly: Carefully remove the entire dual-flush button assembly from the cistern lid.
  • Inspect: Look for any debris caught between the buttons or within their housing. Check if the internal plungers or levers are bent or misaligned.
  • Clean and Realign: Clean the assembly thoroughly. Gently try to straighten any bent parts. Ensure the buttons move freely within their housing before reinstalling.
  • Reinstall: Refit the assembly, ensuring it’s seated correctly before tightening the retaining nut.

Incorrect Flush Volume (dual-flush)

If both buttons seem to work but provide the wrong flush volume (e. g. , the ‘full’ flush is weak, or the ‘half’ flush is too strong), it suggests an issue with the flush valve or its adjustment.

  • Flush Valve Type: Most dual-flush systems use a specific type of flush valve designed to respond differently based on how long the button is pressed or which button is pressed.
  • Adjustment: Some flush valves have adjustable settings for the dual-flush function. Consult your toilet’s manual to see if your model is adjustable and how to set it correctly.
  • Faulty Flush Valve: The internal mechanism of the flush valve might be faulty, preventing it from performing the differentiated flushes correctly. This often requires replacing the entire flush valve.

Dealing With Concealed Cistern Push Plates

Concealed cisterns, where the workings are hidden behind a wall, present a different set of challenges. Accessing the components is more difficult, and troubleshooting often requires removing the push plate itself.

Accessing The Cistern Mechanism

The push plate is the primary interface. Removing it provides access to the flush actuator mechanism.

  • Identify Plate Type: Plates are usually attached with screws (often hidden under a cover) or a clip system. Some high-end plates are magnetically attached.
  • Remove Plate: Carefully follow the manufacturer’s instructions. This might involve pressing a release button, unscrewing visible or hidden screws, or gently prying the plate off.
  • Locate Actuator: Once the plate is off, you’ll see the flush actuator rods or pneumatic tubes connecting to the cistern.

Push Plate Not Activating Flush

If the plate feels loose or unresponsive:

  • Linkage Issues: The rods or cables connecting the plate to the flush valve might be disconnected, bent, or obstructed. Check their attachment points on both the plate mechanism and the flush valve.
  • Pneumatic System Faults: If your system uses air pressure (pneumatic), check for leaks in the tubing or issues with the air bellows.
  • Mechanical Faults: The internal levers or cams within the push plate mechanism might be broken or jammed.

Flush Valve Issues In Concealed Systems

Once the push plate is removed, you can inspect the flush valve. However, accessing the flush valve itself often requires removing an access panel in the wall or, in some cases, removing the entire cistern.

  • Standard Flush Valve Problems: Issues like worn seals, debris, or incorrect water levels are common, just as with exposed cisterns.
  • Professional Help: Due to the complexity of accessing concealed cisterns, it’s often advisable to call a plumber for anything beyond minor adjustments to the actuator rods.

When To Call A Professional Plumber

While many push-button toilet issues are DIY-friendly, there are times when professional expertise is essential.

  • Lack of Confidence or Tools: If you’re uncomfortable working with plumbing or lack the necessary tools, it’s safer to call a professional.
  • Concealed Cisterns: As mentioned, working on concealed cisterns can be complex and may require specialized knowledge and tools.
  • Persistent Problems: If you’ve tried basic troubleshooting steps and the problem persists, a plumber can diagnose more complex internal issues.
  • Cracked Cistern or Components: Any sign of cracks in the ceramic cistern or major plastic components necessitates professional assessment and likely replacement.
  • Water Damage Concerns: If you suspect a leak that could cause water damage to your property, immediate professional intervention is recommended.

A plumber can quickly identify faulty components, access difficult-to-reach areas, and ensure repairs are done correctly, preventing further damage or recurring issues. For instance, a common issue they encounter is a corroded or broken flush valve seat, which requires specific parts and expertise to replace correctly.

Maintenance Tips For Push-button Toilets

Regular maintenance can prevent many common problems and extend the life of your toilet’s flushing mechanism.

  • Regular Cleaning: Clean the cistern interior periodically (every 6-12 months) to remove limescale and debris. Use a mild cleaner and avoid abrasive materials.
  • Check Water Level: Periodically ensure the water level in the cistern is correct.
  • Button Check: Occasionally test both buttons (if dual-flush) to ensure they move freely.
  • Listen for Leaks: Pay attention to any constant trickling sounds from the cistern, which might indicate a worn flush valve seal.
  • Use Toilet Cleaners Wisely: Some harsh chemical toilet cleaners can degrade rubber seals over time. Opt for gentler cleaning methods.

Common Push Button Toilet Problems And Solutions

Here’s a quick reference table for common issues:

ProblemPossible Cause(s)Solution(s)
Button doesn’t depressObstruction, misalignment, broken internal partClean around button, tighten retaining nut, check/adjust linkage, replace button assembly.
Button loose/wobblyLoose retaining nutTighten retaining nut under cistern lid.
Button depresses, no flushDisconnected/bent linkage, faulty flush valve, low waterReconnect/straighten linkage, check/clean/replace flush valve seal, adjust water level via fill valve.
Weak or incomplete flushLow water level, flush valve not lifting high enoughAdjust fill valve float for higher water level, adjust linkage length, check/clean flush valve.
Dual-flush button not workingDislodged linkage, internal button mechanism faultCheck/reconnect linkage, clean button assembly, replace dual-flush button assembly.
Continuous running waterFaulty fill valve, worn flush valve sealAdjust/replace fill valve, replace flush valve seal.
Concealed cistern plate unresponsiveLinkage issue, pneumatic fault, mechanical faultRemove plate, check actuator rods/tubes, inspect for leaks, repair/replace plate mechanism or flush valve assembly (often requires plumber).

Frequently Asked Questions

How Often Should I Clean My Toilet Cistern?

It’s generally recommended to clean the inside of your toilet cistern every 6 to 12 months. This helps prevent the buildup of limescale, sediment, and other debris that can interfere with the flushing mechanism and affect performance. Use a mild cleaner and a soft brush, and ensure you rinse thoroughly afterwards.

Can I Adjust The Flush Strength On A Dual-flush Toilet?

Yes, most dual-flush toilets allow for adjustment of the flush strength, primarily by adjusting the water level in the cistern or the flush valve mechanism itself. Consult your toilet’s manual, as the method varies by manufacturer. Adjusting the float on the fill valve is a common way to set the overall water volume, which influences flush strength.

Some flush valves also have specific settings for dual-flush operation.

What Does It Mean If My Toilet Makes A Gurgling Sound After Flushing?

A gurgling sound after flushing can indicate a partial blockage in the drain line or the toilet trap. It suggests that air is being forced back through the trap as the water tries to drain. While not always an immediate emergency, it’s a sign that the toilet may not be flushing efficiently and could lead to a complete blockage if ignored.

Using a toilet plunger or a drain snake can often resolve minor blockages.

How Do I Know If I Need To Replace The Flush Valve?

You likely need to replace the flush valve if you experience persistent issues like a weak flush, the toilet constantly running (even after adjusting the fill valve), or if the flush valve seal is visibly worn, cracked, or deformed. If cleaning the flush valve and its seal doesn’t resolve the problem, replacement is usually the next step.

You can typically buy a replacement valve specific to your toilet model.

Is It Safe To Use Strong Chemical Cleaners Inside The Cistern?

While chemical cleaners can remove limescale, it’s advisable to use them sparingly, if at all, inside the cistern. Harsh chemicals can degrade the rubber seals and plastic components within the flushing mechanism over time, potentially leading to leaks and more significant problems.

Mild descalers or natural cleaning solutions like vinegar, followed by thorough rinsing, are often safer alternatives for routine maintenance.

A flush button that refuses to cooperate can be a perplexing issue, but by systematically working through the potential causes, from simple obstructions to worn internal components, most problems can be resolved. Understanding the mechanics of your specific toilet model is key.

For many, a loose nut, a bit of debris, or a misaligned rod will be the culprit, easily fixed with basic tools and a little patience. However, for more complex issues, especially those involving concealed cisterns or persistent problems, don’t hesitate to enlist the help of a qualified plumber.

Regular maintenance, including cleaning and checking water levels, will go a long way in ensuring your push-button toilet functions reliably for years to come.