
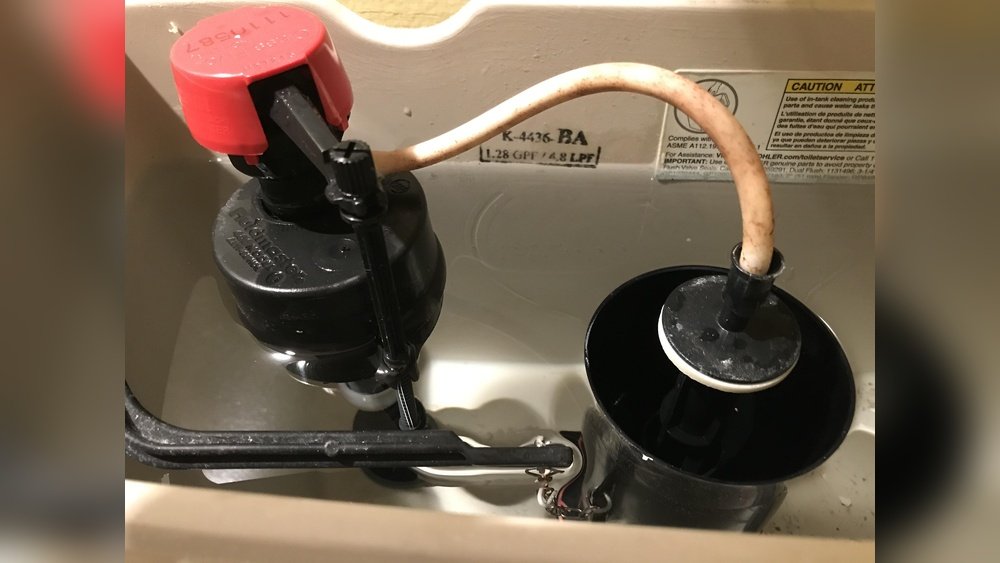
A persistent hissing noise after flushing a toilet can be more than just an annoyance; it often signals a problem within the toilet tank’s internal mechanisms. This sound, typically caused by air or water escaping where it shouldn’t, can lead to wasted water, increased utility bills, and eventually, more significant plumbing issues. Understanding the common culprits behind this sound is the first step toward a quiet and efficient toilet.
Recognizing the source of the hiss is crucial for effective troubleshooting. While some issues are simple fixes anyone can tackle with basic tools, others might require the expertise of a professional plumber. This guide will walk you through the most frequent reasons your toilet hisses after a flush, providing clear steps for diagnosis and repair, ensuring your bathroom remains a peaceful sanctuary.
Key Takeaways
- A hissing toilet after flushing is usually caused by a faulty flapper, a worn-out fill valve, or an issue with the float.
- Water wastage is a significant consequence, potentially costing hundreds of dollars annually in increased utility bills.
- The most common fix involves replacing the toilet flapper, a relatively simple DIY task.
- If the hiss persists after checking the flapper, the fill valve is the next likely culprit, requiring a replacement.
- A toilet leak detector can help identify silent leaks that contribute to continuous water loss and hissing sounds.
- Regular maintenance and understanding your toilet’s components can prevent future issues.
Credit: www.benjaminfranklinplumbing.com
Understanding Your Toilet’s Anatomy
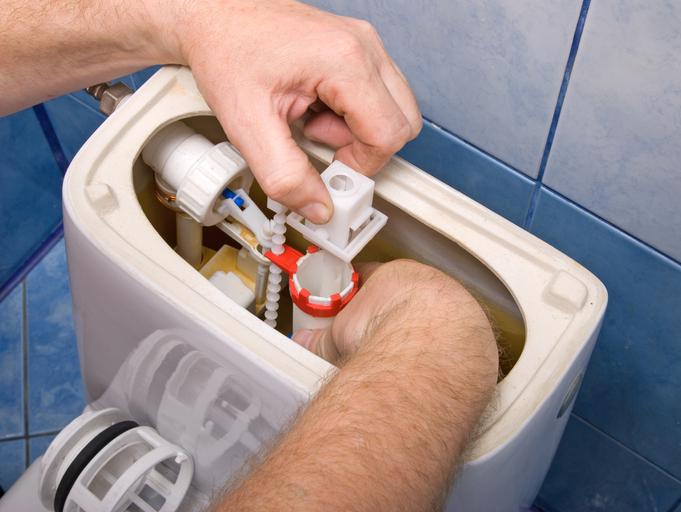
Before diving into troubleshooting, it’s essential to have a basic understanding of the components within your toilet tank that are responsible for its operation. The tank holds the water used for flushing, and several parts work in concert to refill it and prepare for the next use. The primary components involved in the hissing noise are the fill valve, the flapper, and the float.
The fill valve (also known as the ballcock) is responsible for refilling the tank with water after a flush. It automatically shuts off the water supply once the tank reaches the desired water level. The float, typically a ball or a cup attached to the fill valve, rises with the water level and signals the fill valve to shut off. The flapper is a rubber or plastic seal at the bottom of the tank that lifts when you flush, allowing water to enter the bowl, and then reseals the opening.
The Fill Valve Explained
The fill valve is a critical component that regulates the water entering the tank. When you flush, the flapper opens, and the water level in the tank drops. This causes the float to descend, which in turn opens the fill valve, allowing fresh water to flow into the tank. As the water level rises, the float also rises, eventually signaling the fill valve to close and stop the flow of water. If the fill valve is worn out, damaged, or improperly adjusted, it might not close completely, leading to a continuous trickle of water into the tank, which can manifest as a hissing sound.
The Role Of The Flapper
The flapper is the gatekeeper of the tank’s water. Its primary job is to create a watertight seal at the bottom of the tank. When you press the flush handle, a chain or lever lifts the flapper, allowing the water to rush into the toilet bowl. Once the flush is complete, the flapper is designed to drop back down and seal the opening. Over time, the rubber of the flapper can degrade, becoming stiff, warped, or cracked. This prevents it from forming a proper seal, allowing water to constantly leak from the tank into the bowl, often accompanied by a faint hissing sound as the fill valve tries to compensate for the lost water.
The Float Mechanism
The float is intrinsically linked to the fill valve. Its purpose is to monitor the water level within the tank. As the water fills, the float rises. When it reaches a pre-determined height, it triggers the fill valve to shut off. If the float is set too high, it can cause the water to constantly overflow into the overflow tube, which is a safety feature to prevent flooding. If the float mechanism itself is malfunctioning or misaligned, it might not correctly signal the fill valve, leading to overfilling or a failure to shut off the water supply, both of which can result in hissing noises.
Common Causes Of The Hissing Noise
Several issues can lead to that persistent hiss. Most of these are related to the components within the tank that control water flow and level. Identifying the specific cause is key to implementing the correct repair.
1. A Leaking Or Worn-out Flapper
This is by far the most common reason for a hissing toilet. As mentioned, the flapper is a seal, and if that seal is compromised, water will continuously leak from the tank into the bowl. The fill valve, sensing the drop in water level, will intermittently turn on to replenish the tank, creating a cycle of filling and a characteristic hissing sound.
Symptoms:
- A faint but continuous hissing sound coming from the tank.
- The toilet may run for a short period after flushing, then stop, only to start again later.
- You might hear the fill valve kick on even when the toilet hasn’t been flushed.
- Visible signs of wear or degradation on the flapper itself (cracks, stiffness).
Diagnosis:
To check for a faulty flapper, you can perform a simple dye test. Add a few drops of food coloring or a dye tablet to the water in the tank. Wait for about 15-30 minutes without flushing. If you see colored water in the toilet bowl, it means the flapper is not sealing properly, and water is leaking from the tank.
Repair:
Replacing a toilet flapper is a straightforward DIY task. Most flappers are inexpensive and can be found at any hardware or home improvement store. You’ll need to turn off the water supply to the toilet, flush to empty the tank, disconnect the old flapper from the flush valve and the chain, and attach the new one.
Ensure the new flapper creates a good seal.
2. A Faulty Fill Valve (ballcock)
If the flapper is in good condition, the next most likely culprit is the fill valve. This valve is responsible for controlling the flow of water into the tank. If the valve mechanism is worn, damaged, or has debris caught in it, it may fail to close completely, allowing water to continuously flow into the tank. This continuous flow creates a hissing sound.
Symptoms:
- The hissing sound is more constant and might be louder than with a leaky flapper.
- The water level in the tank might be too high, potentially overflowing into the overflow tube.
- The fill valve may not shut off completely even after the tank is full.
- The float mechanism might appear to be set correctly, but the valve still leaks.
Diagnosis:
Listen closely to the fill valve itself. If the hissing is directly emanating from the valve assembly, it’s a strong indicator of a problem. You can also try gently pushing down on the float arm or adjusting the float mechanism to see if it temporarily stops the hiss.
If it does, it points to an issue with the valve’s ability to shut off the water.
Repair:
Replacing a fill valve is also a manageable DIY project, though it might be slightly more involved than changing a flapper. You’ll need to turn off the water supply, disconnect the water line, remove the old fill valve, install the new one, reconnect the water line, and adjust the float to the correct water level.
Many modern fill valves are designed for easy installation.
3. Incorrect Float Adjustment
The float is designed to rise with the water level and signal the fill valve to shut off. If the float is set too high, it can cause the water level to exceed the recommended mark. This can lead to water constantly overflowing into the overflow tube, which is essentially a continuous leak. While the primary sound might be gurgling from the overflow, the fill valve working overtime to maintain this high level can also produce a hissing sound.
Symptoms:
- Water continuously running into the overflow tube.
- The water level in the tank is noticeably high, close to or above the top of the overflow pipe.
- The fill valve may be shut off, but the overflow is still active.
Diagnosis:
Visually inspect the water level in the tank. Most toilets have a fill line marked inside the tank or on the overflow tube. If the water level is above this line, the float is likely adjusted too high. You can also observe the float mechanism to see if it’s stuck in a high position.
Repair:
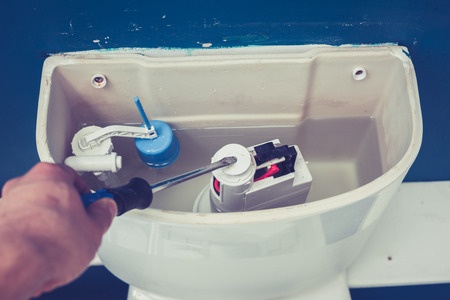
Most floats have an adjustment screw or clip that allows you to lower the float’s position. By adjusting the float to a lower level, you can ensure the water shuts off before reaching the overflow tube. Turn off the water supply, adjust the float downwards, then turn the water back on and check the level.
4. Debris In The System
Occasionally, small pieces of debris, sediment, or mineral buildup can get lodged in the fill valve or around the flapper seal. This debris can prevent the valve from closing properly or interfere with the flapper’s seal, leading to a leak and subsequent hissing.
Symptoms:
- Hissing may be intermittent or change in intensity.
- The problem might have started suddenly.
- Older plumbing systems or areas with hard water are more prone to this.
Diagnosis:
This can be harder to diagnose visually without disassembling parts. However, if you’ve ruled out a worn-out flapper or fill valve, and the float is correctly adjusted, debris is a possibility. Sometimes, a thorough cleaning of the tank’s components can help.
Repair:
- For Fill Valve: Turn off the water supply, flush the toilet, and then remove the fill valve. Inspect the inlet and outlet for any visible debris. Some fill valves have a small screen that can be cleaned.
- For Flapper: Remove the flapper and clean the rim of the flush valve opening where the flapper seals. Gently scrape away any mineral deposits or debris. Reinstall the flapper and check the seal.
- A more thorough cleaning might involve draining the tank completely and scrubbing the inside of the tank and bowl to remove sediment.
5. Issues With The Flush Valve Seat
The flush valve seat is the rim at the bottom of the tank that the flapper seals against. If this seat is corroded, pitted, or damaged, the flapper cannot create a proper watertight seal, even if the flapper itself is in good condition. This continuous leak will cause the fill valve to engage, resulting in a hiss.
Symptoms:
- The flapper appears to be in good condition, but the dye test still shows a leak.
- Visible corrosion, nicks, or rough spots on the flush valve seat.
- The hissing sound is persistent.
Diagnosis:
After removing the flapper, carefully inspect the rim of the flush valve seat. Run your finger gently around it (ensure there are no sharp edges). If you feel roughness, pitting, or see obvious damage, the seat is likely the problem.
Repair:
For minor imperfections, you might be able to smooth the seat using fine-grit sandpaper or a specialized toilet seat repair kit. However, if the damage is significant, the entire flush valve assembly may need to be replaced, which is a more involved plumbing task.
Credit: www.geiler.com
Troubleshooting Steps: A Practical Guide
When faced with a hissing toilet, a systematic approach to troubleshooting can save time and effort. Here’s a step-by-step guide to help you pinpoint and fix the issue.
Step 1: Identify The Source Of The Sound
- Listen carefully: Try to determine if the hiss is coming from the fill valve itself, the overflow tube, or the general area of the flapper.
- Open the tank lid: With the lid off, the sound should become more apparent.
- Water level check: Observe the water level relative to the overflow tube. Is it consistently above the tube’s opening?
Step 2: Perform The Dye Test
- Add a few drops of food coloring or a toilet leak detection tablet into the tank water.
- Wait 15-30 minutes without flushing.
- Check the toilet bowl for any signs of color.
- If color appears: The flapper is leaking, or the flush valve seat is compromised. Proceed to Step 3.
- If no color appears: The flapper is likely sealing correctly. The issue is more likely with the fill valve or its adjustment. Proceed to Step 4.
Step 3: Address Flapper Or Flush Valve Seat Issues
- Inspect the flapper: If the dye test indicated a leak, remove the flapper. Check for cracks, stiffness, or warping. Feel the seal. If it looks or feels worn, replace it.
- Replace the flapper:
- Turn off the water supply valve behind the toilet.
- Flush the toilet to empty the tank.
- Unclip the old flapper from the ears on the flush valve.
- Disconnect the chain from the flush lever arm.
- Attach the new flapper to the ears.
- Reconnect the chain to the flush lever arm, ensuring there’s minimal slack (about 1/2 inch).
- Turn the water supply back on and let the tank fill. Listen for the hiss.
- Inspect the flush valve seat: If replacing the flapper doesn’t solve the hiss, carefully examine the rim of the flush valve seat for damage or corrosion. If damaged, consider a repair kit or professional replacement.
Step 4: Investigate The Fill Valve And Float
- Observe the fill valve: If the dye test showed no leak, the problem is likely the fill valve or float. Listen to the fill valve. Is the hiss coming directly from it?
- Check float adjustment:
- Locate the float (ball or cup) attached to the fill valve.
- Ensure the water level in the tank is about 1/2 inch to 1 inch below the top of the overflow tube.
- If the level is too high, adjust the float downwards. Many have a screw mechanism; others have a clip you can move.
- If the float is stuck or doesn’t seem to be controlling the fill valve, it might be faulty.
- Adjust or replace the fill valve:
- Turn off the water supply.
- Flush to empty the tank.
- Disconnect the water supply line from the fill valve.
- Release the locking nut or clip holding the fill valve in place.
- Remove the old fill valve.
- Install the new fill valve according to the manufacturer’s instructions.
- Reconnect the water supply line.
- Turn the water back on and adjust the float to the correct water level. Listen for the hiss.
Step 5: Consider Less Common Issues
- Water Hammer Arrestor: In some rare cases, a hissing sound might be related to water hammer when the fill valve shuts off abruptly. Installing a water hammer arrestor can sometimes help.
- Toilet Design: Some modern, low-flow toilets have specific valve designs that might produce a slight “breathing” or hissing sound as they equalize pressure. If the toilet is functioning correctly and the water bill is normal, this might be normal operation.

Credit: www.reddit.com
Tools And Materials You Might Need
Successfully troubleshooting and repairing a hissing toilet often requires a few basic tools and replacement parts. Having these on hand can make the process much smoother.
Essential Tools
- Screwdriver Set: Both Phillips and flathead screwdrivers are useful for various adjustments and disassembly.
- Pliers: Adjustable pliers (like Channel Locks) are helpful for gripping nuts and fittings, especially when disconnecting the water supply line.
- Adjustable Wrench: Similar to pliers, a wrench provides better grip on hexagonal nuts.
- Towel or Rag: For wiping up any spilled water.
- Bucket: To catch residual water when disconnecting lines.
- Gloves: To keep your hands clean.
Common Replacement Parts
- Toilet Flapper: Available in various materials (rubber, silicone) and designs to fit different flush valve types. It’s wise to have a universal flapper on hand.
- Fill Valve: Modern fill valves are often universal and easier to install than older ballcock types. Consider a quiet-fill model.
- Toilet Repair Kit: Some kits include a flapper, a flush valve seal, and sometimes a fill valve, offering a comprehensive solution for common issues.
- Toilet Leak Detection Tablets: Useful for regular checks to ensure your flapper is sealing properly.
When To Call A Professional Plumber
While many toilet hissing issues are DIY-friendly, there are times when professional help is necessary.
- Persistent Hissing: If you’ve tried all the common fixes and the hissing noise continues, there might be a more complex problem within the toilet’s internal plumbing or even the water supply line.
- Damaged Flush Valve Seat: If the flush valve seat is severely corroded or pitted, replacing the entire flush valve assembly can be challenging and may require specialized tools.
- Uncertainty or Lack of Confidence: If you’re uncomfortable working with plumbing or unsure about any step, it’s always best to call a licensed plumber. Incorrect repairs can lead to leaks and water damage.
- Multiple Toilet Issues: If you have several toilets exhibiting problems or if the issue seems widespread in your plumbing system, a professional can diagnose the root cause.
The Environmental And Financial Impact Of A Hissing Toilet
A seemingly minor hissing sound from your toilet can have significant repercussions on both your wallet and the environment. The continuous, albeit sometimes slow, leak of water translates directly into wasted resources and higher utility bills. Understanding this impact can be a strong motivator for prompt repair.
Water Wastage Statistics
The amount of water wasted by a leaking toilet can be substantial. A small, steady leak from the tank into the bowl can waste dozens of gallons per day.
- A toilet that leaks just one drop per second can waste over 3,000 gallons of water per year.
- A more significant leak, where the fill valve runs intermittently due to a faulty flapper, can waste up to 200 gallons per day, totaling over 73,000 gallons annually.
- According to the U.S. Environmental Protection Agency (EPA), household leaks are responsible for wasting trillions of gallons of water across the country each year, with toilets being a major contributor.
Financial Costs
The financial impact of a hissing toilet is directly tied to your water and sewer bills. Water utilities typically charge based on consumption, and a constant leak means you’re paying for water that is immediately sent down the drain.
- For an average household, a constantly running or leaking toilet can add $100 to $1,000 or more to annual utility bills, depending on local water rates and the severity of the leak.
- In areas with high water costs or tiered pricing structures, the financial penalty for water wastage can be even more pronounced.
- Beyond water costs, excessive use of the water heater can also increase energy bills if the leak is significant enough to trigger frequent reheating cycles.
Environmental Considerations
Water is a precious resource, and its conservation is crucial for environmental sustainability.
- Resource Depletion: Wasting water strains local water supplies, especially in drought-prone regions. This impacts ecosystems, agriculture, and the availability of clean drinking water.
- Energy Consumption: Treating and pumping water to homes requires significant energy. Wasting water indirectly contributes to carbon emissions associated with energy production.
- Wastewater Treatment: Discharged water, even if leaking, still needs to be processed by wastewater treatment plants, which are energy-intensive facilities.
Addressing a hissing toilet promptly is not just about eliminating an annoying sound; it’s a responsible action that benefits your finances and contributes to water conservation efforts.
Toilet Hissing Noise Maintenance And Prevention
Preventing the hissing noise in the first place often comes down to regular maintenance and understanding the signs of wear and tear in your toilet’s components. By being proactive, you can avoid costly repairs and unnecessary water wastage.
Regular Inspections
- Listen for unusual sounds: Make it a habit to listen to your toilet after flushing. Any persistent hissing, running, or gurgling sounds should be investigated.
- Perform the dye test quarterly: This simple test can catch flapper leaks before they become significant problems.
- Check the water level: Ensure the water level in the tank is consistently at the marked line and not overflowing into the tube.
Component Lifespan And Replacement
- Flappers: Most toilet flappers have a lifespan of 5 to 10 years, depending on water quality and usage. Hard water and certain water treatment chemicals can shorten this lifespan. Consider replacing the flapper proactively if it’s nearing this age range, especially if you notice it becoming stiff.
- Fill Valves: Fill valves can last 10 to 15 years or more, but their seals can degrade over time. If you experience frequent issues with the fill valve not shutting off properly, replacement might be the most cost-effective solution.
- Float Mechanisms: While often part of the