
A hissing toilet is more than just an annoying sound; it’s a signal that something within your plumbing system isn’t quite right. This persistent noise, often likened to a snake’s hiss or escaping air, can stem from a variety of issues, ranging from simple fixes to more complex plumbing problems. Understanding the potential causes is the first step toward silencing the hiss and preventing further damage or water wastage. Ignoring this auditory cue can lead to increased water bills, potential water damage, and a less efficient plumbing system overall.
This comprehensive guide will walk you through the common culprits behind a hissing toilet, providing detailed explanations, troubleshooting steps, and when it’s time to call in a professional plumber. We’ll explore everything from worn-out flapper seals to issues with the fill valve, offering practical advice to help you diagnose and resolve the problem effectively.
By the end of this article, you’ll be equipped with the knowledge to tackle that bothersome hiss and ensure your toilet functions smoothly and silently.
Key Takeaways
- A hissing toilet often indicates a leaking component, most commonly the fill valve or a worn flapper.
- The sound can be caused by water constantly entering the tank, a loose connection, or air escaping through a small opening.
- Common culprits include a faulty fill valve, a damaged or improperly seated flapper, a loose coupling nut on the fill valve, or a leak in the tank-to-bowl gasket.
- Troubleshooting typically involves inspecting and cleaning these components, followed by replacement if necessary.
- While many hissing toilet issues are DIY-friendly, persistent or complex problems may require professional plumber assistance.
- Regular toilet maintenance can help prevent hissing sounds and other common plumbing issues.
Credit: www.geiler.com
Understanding Toilet Anatomy And The Hissing Sound
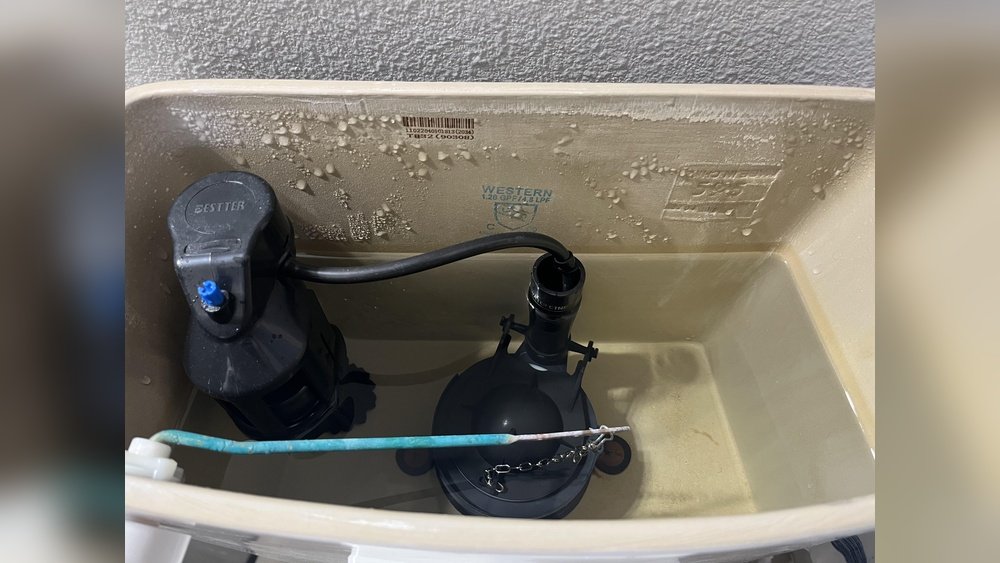
To effectively troubleshoot a hissing toilet, it’s crucial to understand the basic anatomy of a toilet tank and how water flows through it. The tank is a reservoir that holds water for flushing. Key components within the tank include the fill valve, the flush valve (with its attached flapper), the overflow tube, and the float.
When you flush, the flapper lifts, allowing water to rush from the tank into the bowl. Once the tank is empty, the flush valve closes, and the fill valve opens to refill the tank. The float mechanism signals the fill valve to shut off when the water reaches the correct level.
A hissing sound typically arises when water is continuously trying to enter the tank or when air is being forced through a small opening. This can happen for several reasons:
- Constant Water Input: The most common cause is a fill valve that doesn’t shut off completely, allowing a slow, steady stream of water to enter the tank even after it’s full. This constant flow can create a hissing noise as water enters the tank or the overflow tube.
- Air Escaping: In some cases, a small leak in a connection or a component might allow air to escape under pressure, mimicking a hissing sound.
- Water Flow Through a Restricted Opening: If water is forced through a small gap or a partially blocked component, it can generate a hissing sound.
Identifying the exact source of the hiss often involves a process of elimination, starting with the most common and easiest-to-fix issues.
The Role Of The Fill Valve
The fill valve, also known as the ballcock, is the component responsible for refilling the toilet tank after each flush. It’s connected to your home’s water supply. When the water level in the tank drops, the float (which can be a ball or a cup) descends, triggering the fill valve to open and allow fresh water in. As the water level rises, the float also rises, eventually signaling the fill valve to close and stop the water flow.
A hissing sound originating from the fill valve usually means it’s not closing properly. This could be due to:
- Worn Seals: The internal seals within the fill valve can degrade over time, preventing it from creating a watertight seal.
- Debris or Mineral Buildup: Small particles of debris or mineral deposits from hard water can get lodged in the valve mechanism, preventing it from shutting off completely.
- Incorrect Float Adjustment: If the float is set too high, it might prevent the valve from fully closing, or it might cause the water to constantly run into the overflow tube.
- A Faulty Valve Unit: In some instances, the entire fill valve unit may be defective and require replacement.
The Function Of The Flapper And Flush Valve
The flush valve is located at the bottom of the tank and is sealed by the flapper. When you press the flush lever, it lifts the flapper, allowing the stored water to rush into the toilet bowl. Once the tank is empty, the flapper drops back down to seal the flush valve.
A hissing sound related to the flapper or flush valve can occur if:
- The Flapper Isn’t Sealing Properly: A worn, warped, or damaged flapper won’t create a tight seal against the flush valve opening. This allows a small amount of water to constantly leak from the tank into the bowl, which can sometimes create a faint hissing sound as the water trickles through. You might also notice the toilet running intermittently if this is the case.
- The Chain is Too Tight or Too Loose: If the chain connecting the flush lever to the flapper is too tight, it might hold the flapper slightly ajar. If it’s too loose, it might get caught under the flapper, preventing a proper seal.
- Debris on the Flush Valve Seat: Grit or mineral deposits can accumulate on the rim of the flush valve, preventing the flapper from forming a complete seal.
Other Potential Causes
While the fill valve and flapper are the most frequent culprits, other less common issues can also lead to a hissing sound:
- Loose Fill Valve Coupling Nut: The fill valve is secured to the tank by a coupling nut on the underside. If this nut is loose, water can leak out, and the escaping water or air could create a hissing noise.
- Leak in the Tank-to-Bowl Gasket: The large rubber gasket (or seal) that connects the toilet tank to the toilet bowl can degrade over time. A leak here might allow water to escape, and the pressure could cause a hiss.
- Water Supply Line Issues: Though rare, a problem with the water supply line itself or its connection to the fill valve could potentially cause unusual noises.
- High Water Pressure: Extremely high household water pressure can sometimes cause components to vibrate or allow water to escape more forcefully, potentially leading to hissing sounds.

Credit: www.youtube.com
Troubleshooting The Hissing Toilet: A Step-by-step Guide
When faced with a hissing toilet, a systematic approach to troubleshooting will help you pinpoint the problem and implement the correct solution. Most of these steps can be performed with basic tools and a little patience.
Step 1: Identify The Source Of The Sound
Before you start disassembling anything, try to pinpoint where the hiss is coming from.
- Listen Carefully: Is the sound louder near the fill valve (usually on the left side inside the tank)? Or does it seem to emanate from the bottom of the tank or the flush valve area?
- Remove the Tank Lid: With the tank lid off, listen intently. Does the sound change or become clearer?
- Observe Water Levels: Is the water level in the tank higher than usual? Is water constantly trickling into the overflow tube? This is a strong indicator of a fill valve problem. If the water level is normal but you still hear a hiss, it might be a subtler issue.
Step 2: Check The Fill Valve
The fill valve is the most common source of hissing.
Inspecting The Fill Valve
- Turn Off Water Supply: Locate the shut-off valve on the wall behind or beside the toilet. Turn it clockwise until it stops.
- Flush the Toilet: Flush the toilet to empty the tank.
- Remove Tank Lid: Place the tank lid aside carefully.
- Observe the Float: Note the position of the float. If it’s set very high, it might be the issue.
- Check for Water Flow: With the water supply off and the tank empty, the hissing should stop. If you still hear a faint hiss, it might be residual air or a sound carried through the pipes. The real test is when the water is on.
Testing The Fill Valve Shut-off
- Turn Water Supply Back On: Slowly turn the water supply valve counter-clockwise.
- Listen as Tank Fills: As the tank fills, listen closely to the fill valve. Does the hissing start as soon as water enters? Does it continue even after the tank is full and the float has risen to its highest point?
- Check Water Level: Does the water level rise above the overflow tube? If so, the fill valve is not shutting off correctly.
Adjusting The Float (if Applicable)
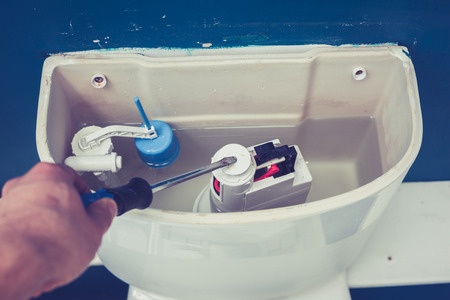
Many modern fill valves have an adjustment screw or a clip mechanism to set the float height.
- Adjustment Screw: If your fill valve has a screw, you can often turn it to lower the float’s stopping point, which should cause the fill valve to shut off earlier, preventing overfilling.
- Clip Mechanism: Some floats have clips that allow you to reposition them higher or lower on the vertical shaft.
Pro Tip: Make small adjustments and test the fill valve’s shut-off after each change. Over-adjusting can lead to insufficient water in the tank for a proper flush.
Cleaning Or Replacing The Fill Valve
If adjusting the float doesn’t solve the hiss, the fill valve itself may be faulty.
- Cleaning: Some fill valves have a small cap or screen that can be removed to clean out debris. Refer to your fill valve’s manufacturer instructions for specific cleaning procedures. Be gentle, as these parts can be brittle.
- Replacement: If cleaning doesn’t work or if the valve appears damaged, replacement is often the most effective solution.
- Turn Off Water and Drain Tank: As before, turn off the water supply and flush the toilet.
- Disconnect Water Line: Unscrew the coupling nut connecting the water supply line to the fill valve. Have a towel ready for minor drips.
- Remove Old Fill Valve: Unscrew the coupling nut on the underside of the tank that secures the fill valve. Lift the old fill valve out from inside the tank.
- Install New Fill Valve: Follow the instructions provided with your new fill valve. Typically, this involves inserting it into the tank, securing it with the coupling nut underneath, and reconnecting the water supply line.
- Turn Water On and Test: Slowly turn the water supply back on and check for leaks. Let the tank fill and listen for the hiss.
Step 3: Inspect The Flapper And Flush Valve
If the fill valve seems to be functioning correctly (shutting off at the appropriate water level), the next step is to examine the flapper and flush valve.
Checking The Flapper Seal
- With Water Off and Tank Drained: Carefully inspect the flapper. Is it cracked, brittle, or warped? Does it look like it’s making even contact with the flush valve seat all the way around?
- Clean the Flapper and Seat: Use a soft cloth or sponge to clean both the underside of the flapper and the rim of the flush valve seat. Remove any debris, mineral buildup, or residue.
- Check Flapper Chain: Ensure the chain is not too tight or too loose. It should have just a little slack when the flapper is closed, allowing it to seat properly. Adjust the chain length or clip position as needed.
- Test the Seal: After cleaning and adjusting, turn the water supply back on. Let the tank fill and listen. If the hiss was due to a poor seal, it should now be gone. You can also add a few drops of food coloring to the tank water. Wait 15-20 minutes without flushing. If color appears in the bowl, the flapper is still leaking.
Replacing The Flapper
If the flapper is damaged or still leaking after cleaning, it’s time for a replacement. Flappers are inexpensive and relatively easy to replace.
- Turn Off Water and Drain Tank.
- Remove Old Flapper: Most flappers attach to the flush valve using two “ears” that hook onto posts. Simply unhook these. The chain will also need to be detached from the flush lever arm.
- Install New Flapper: Hook the new flapper’s ears onto the posts. Attach the chain to the flush lever arm, ensuring the correct amount of slack.
- Turn Water On and Test: Turn the water supply back on, let the tank fill, and check for the hiss.
Step 4: Investigate Other Potential Causes
If the hiss persists after addressing the fill valve and flapper, consider these less common issues.
Tighten The Fill Valve Coupling Nut
- Locate the Nut: Look underneath the tank where the fill valve assembly passes through. There’s a large plastic or metal nut.
- Tighten Gently: Using a pair of pliers or a wrench, gently tighten this nut. Be careful not to overtighten, as this can crack the tank or the plastic components.
- Turn Water On and Test: Turn the water supply back on and check if the hiss has stopped.
Check The Tank-to-bowl Gasket
A leak in this large gasket can sometimes cause hissing. This is a more involved repair.
- Turn Off Water and Drain Tank: Ensure the water supply is off and the tank is completely drained.
- Disconnect Water Line and Flush Lever: Disconnect the water supply line and the flush lever chain.
- Remove Tank Bolts: There are usually two or three bolts holding the tank to the bowl. Loosen and remove these.
- Lift Tank Off Bowl: Carefully lift the tank straight up off the bowl. You may need to wiggle it slightly.
- Inspect and Replace Gasket: The large gasket will be visible on the bottom of the tank or the top of the bowl. Remove the old gasket, clean the surfaces, and install the new gasket according to its instructions.
- Reassemble: Carefully place the tank back onto the bowl, aligning the bolt holes. Reinstall the bolts, tightening them evenly and securely. Reconnect the water line and flush lever.
- Turn Water On and Test: Turn the water supply back on and check for leaks and the hissing sound.
Examine Water Pressure
If you suspect high water pressure, you can test it with a water pressure gauge, available at most hardware stores. Connect it to an outdoor faucet or a laundry hookup. Ideal household water pressure is typically between 40-60 PSI. If it consistently exceeds 80 PSI, you may need to install a pressure-reducing valve (PRV) on your main water line. This is usually a job for a professional plumber.
Credit: gstouristcentre.gr
When To Call A Professional Plumber
While many toilet hissing issues can be resolved with DIY troubleshooting and repair, there are times when professional help is advisable.
- Persistent Hissing: If you’ve gone through all the troubleshooting steps and the hiss continues, there might be a more complex problem within your plumbing system that requires expert diagnosis.
- Water Damage Concerns: If you notice signs of water damage around the toilet or in the subfloor, it’s crucial to address the leak immediately by calling a plumber.
- Lack of Confidence or Tools: If you’re uncomfortable working with plumbing or lack the necessary tools, it’s always best to err on the side of caution and hire a professional.
- Suspected Main Line Issues: Problems with the main water supply line or if multiple fixtures are exhibiting unusual sounds or pressure issues often require professional attention.
- Cracked Tank or Bowl: If any inspection reveals a crack in the porcelain of the tank or bowl, do not attempt to repair it yourself. This requires professional replacement.
A qualified plumber has the experience, specialized tools, and knowledge to quickly identify and fix even the most stubborn plumbing problems, ensuring your system is safe and efficient.
Preventative Maintenance For Your Toilet
Preventing issues like a hissing toilet often comes down to routine maintenance. By incorporating a few simple checks into your home upkeep, you can avoid many common plumbing headaches.
Regular Inspections
- Listen for Unusual Sounds: Make it a habit to listen to your toilet after it flushes and at other times. Any persistent hissing, running, or gurgling should be investigated promptly.
- Check Water Levels: Periodically remove the tank lid and visually inspect the water level. Ensure it’s at the indicated fill line and not constantly running into the overflow tube.
- Inspect Components: Look for signs of wear, cracks, or mineral buildup on the flapper, fill valve, and seals.
Cleaning Practices
- Tank Cleaning: While not always necessary, you can periodically clean the inside of the tank with a mild cleaner. Avoid abrasive cleaners or harsh chemicals that could damage internal components. Never use in-tank toilet bowl cleaners that contain bleach, as they can corrode parts and void warranties.
- Flush Valve Seat: Keep the flush valve seat clean. A simple wipe-down during flapper inspection can prevent future leaks.
Understanding Water Quality
- Hard Water: If you have hard water, mineral deposits can accumulate more quickly, potentially affecting the performance of your fill valve and flapper. Consider a water softener if hard water is a persistent issue in your home.
- Filtered Water: In some cases, using filtered water for the toilet tank can reduce mineral buildup, though this is generally an uncommon practice.
Replacing Worn Parts
- Proactive Replacement: Consider replacing the flapper every 5-7 years, even if it seems to be working fine. They are inexpensive, and a worn flapper is a common cause of leaks and phantom running. Fill valves also have a lifespan; replacing them proactively every 10-15 years can prevent unexpected issues.
By staying vigilant and performing basic maintenance, you can significantly reduce the likelihood of encountering a hissing toilet and ensure your plumbing system operates reliably.
Common Toilet Hissing Scenarios And Solutions
To further illustrate the troubleshooting process, let’s look at a few common scenarios.
Scenario 1: Hissing Stops After Flushing
Problem: The toilet hisses only when the tank is full or as it’s filling, and the sound stops immediately after flushing.
Likely Cause: The fill valve is not shutting off completely, allowing a small amount of water to constantly enter the tank. The hiss is the sound of this constant water flow. Flushing momentarily stops the flow, hence the hiss stops.
Solution: Adjust the float to shut off the fill valve at a lower water level. If that doesn’t work, clean or replace the fill valve.
Scenario 2: Hissing Is Faint And Continuous
Problem: A faint, almost constant hissing sound can be heard, even if the water level appears correct and isn’t running into the overflow tube.
Likely Cause: This could be a very slow leak from the flapper that isn’t significant enough to cause the toilet to run continuously but is still allowing a small amount of water to pass, creating a whisper-like hiss. Alternatively, it could be a slight leak at the fill valve coupling nut or a tiny crack in a component.
Solution:
- Perform the food coloring test to check the flapper seal.
- Inspect the fill valve coupling nut underneath the tank and tighten gently if loose.
- If the flapper is leaking, clean or replace it.
Scenario 3: Loud Hissing During Refill
Problem: A loud, noticeable hissing sound occurs specifically while the toilet tank is refilling after a flush. The sound stops once the tank is full.
Likely Cause: This is a classic symptom of a failing fill valve. The valve is open and allowing water in, but its internal mechanism is worn or obstructed, causing the noise.
Solution: The most effective solution is to replace the fill valve. Cleaning might offer a temporary fix, but a worn valve will likely continue to hiss.
Scenario 4: Hissing From Underneath The Tank
Problem: The hissing sound seems to be coming from directly beneath the toilet tank, not from within the tank itself.
Likely Cause: This points towards a leak at the fill valve coupling nut where the water supply line connects to the fill valve assembly, or potentially a leak in the tank-to-bowl gasket.
Solution:
- Turn off the water supply, drain the tank, and check the tightness of the fill valve coupling nut. Tighten gently if needed.
- If tightening doesn’t help, inspect the connection for visible drips or signs of leakage.
- If the leak appears to be from the tank-to-bowl gasket, this repair will require removing the tank.
Comparing Common Toilet Fill Valve Types
When replacing a fill valve, you’ll encounter different types. Understanding their mechanisms can help you choose the right replacement and troubleshoot effectively.