
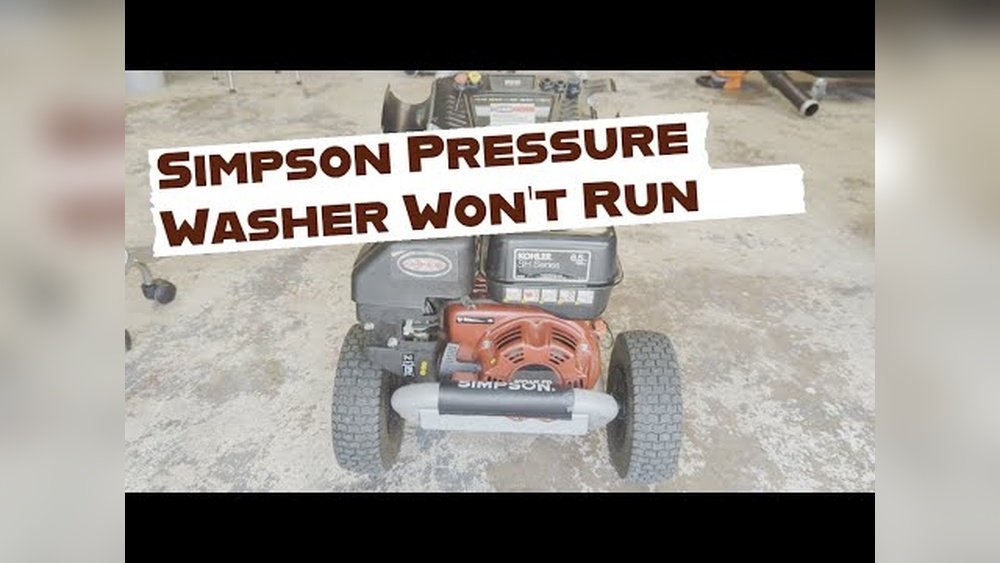
A Simpson pressure washer is a powerful tool designed for tackling tough cleaning jobs, from grimy driveways to dirty siding. However, like any complex piece of machinery, it can sometimes refuse to start, leaving you frustrated and your cleaning project stalled. This can be due to a variety of reasons, ranging from simple user errors to more complex mechanical issues. Understanding these potential problems and knowing how to troubleshoot them is key to getting your Simpson pressure washer back up and running quickly.
When your Simpson pressure washer won’t start, it’s easy to feel overwhelmed. The good news is that most common starting issues can be diagnosed and resolved with a systematic approach. This guide will walk you through the most frequent culprits, providing step-by-step solutions to help you identify and fix the problem, ensuring you can resume your cleaning tasks efficiently.
Key Takeaways
- Fuel and Oil Levels: Ensure there’s fresh, correct fuel and adequate oil. Old fuel or low oil can prevent starting.
- Spark Plug: A fouled, loose, or damaged spark plug is a common cause of no-start conditions.
- Carburetor Issues: Clogged carburetors, often due to stale fuel, are a frequent problem.
- Water Supply: The pressure washer needs a consistent and adequate water supply to start and run.
- Safety Features: Check that all safety interlocks and switches are in the correct position.
- Air Filter: A dirty or clogged air filter restricts airflow, preventing combustion.
- Primer Bulb: If your model has a primer bulb, ensure it’s functioning correctly to draw fuel.
- Engine Flooding: An over-primed engine can flood, requiring a specific restart procedure.

Credit: www.youtube.com
Common Reasons Your Simpson Pressure Washer Won’t Start
Several factors can prevent your Simpson pressure washer from firing up. A methodical approach to troubleshooting will help you pinpoint the issue. It’s essential to start with the simplest checks and progress to more complex ones.
Fuel System Problems
The fuel system is critical for any gasoline-powered engine. Issues here are among the most common reasons a pressure washer fails to start.
Stale Or Contaminated Fuel
Gasoline degrades over time, especially when left in the tank for extended periods. Ethanol in modern gasoline can also absorb moisture, leading to phase separation and corrosion. Stale fuel loses its volatility, making it difficult for the engine to ignite.
Contaminants like dirt or water in the fuel can clog fuel lines and the carburetor.
- Solution: Always use fresh gasoline, preferably within 30 days of purchase. If you suspect the fuel is old or contaminated, drain the fuel tank completely and refill it with fresh gasoline. Consider using a fuel stabilizer, especially if the pressure washer will be stored for more than a month.
Incorrect Fuel Type
Using the wrong octane rating or mixing oil (if not a 2-stroke engine) can cause starting problems and engine damage. Simpson pressure washers typically require regular unleaded gasoline with an octane rating of 87 or higher.
- Solution: Refer to your Simpson pressure washer’s owner’s manual to confirm the recommended fuel type. Ensure you are using straight gasoline and not a fuel mixture unless specified for a 2-stroke engine.
Fuel Valve Blockage
If your pressure washer has a fuel shut-off valve, it might be closed or clogged. A closed valve prevents fuel from reaching the carburetor, essentially starving the engine.
- Solution: Locate the fuel valve (usually near the fuel tank or carburetor) and ensure it is in the “ON” position. Inspect the valve and its associated fuel line for any visible blockages or kinks.
Clogged Fuel Filter
A small in-line fuel filter is often present between the fuel tank and the carburetor. This filter traps debris before it can enter the carburetor. If it becomes clogged, fuel flow will be restricted.
- Solution: Locate the fuel filter (consult your manual if unsure). Carefully disconnect the fuel line leading to it, remove the filter, and inspect it. If it appears dirty or clogged, replace it with a new one of the correct specification.
Spark And Ignition Issues
For an engine to start, it needs a spark at the right time. Problems with the ignition system are another major cause of starting failures.
Spark Plug Problems
The spark plug ignites the air-fuel mixture in the cylinder. A worn, fouled, dirty, or improperly gapped spark plug will prevent ignition.
- Solution:
- Remove the Spark Plug: Disconnect the spark plug wire. Use a spark plug socket wrench to carefully remove the spark plug.
- Inspect: Look for signs of fouling (black, sooty deposits), oil contamination, or physical damage to the electrode.
- Clean or Replace: If fouled, try cleaning the plug with a wire brush and carb cleaner. However, it’s often best to replace it, especially if it’s old or shows significant wear.
- Check the Gap: Use a spark plug gap tool to ensure the gap between the electrodes is set to the manufacturer’s specification (found in your owner’s manual).
- Reinstall: Screw the new or cleaned spark plug back in by hand to avoid cross-threading, then tighten with the wrench. Reconnect the spark plug wire securely.
Faulty Ignition Coil
The ignition coil generates the high voltage needed to create a spark. If the coil fails, no spark will be produced. This is a less common issue but can occur.
- Solution: Testing an ignition coil requires specialized tools and knowledge. If you’ve ruled out the spark plug and other simpler issues, it might be time to consult a professional or consider replacing the coil if you are comfortable with engine repair.
Loose Or Damaged Spark Plug Wire
A loose connection or a damaged spark plug wire can prevent the spark from reaching the plug.
- Solution: Ensure the spark plug wire is firmly seated on both the spark plug and the ignition coil. Inspect the wire for any cuts, cracks, or signs of corrosion. If damaged, the wire may need to be replaced.
Carburetor Malfunctions
The carburetor mixes air and fuel in the correct ratio for combustion. A dirty or malfunctioning carburetor is a very common reason for a pressure washer to refuse to start or run poorly.
Clogged Carburetor Jets
The tiny passages (jets) inside the carburetor can become blocked by dried fuel residue, dirt, or debris. This is particularly common if the pressure washer has been stored with fuel in the tank.
- Solution:
- Carburetor Cleaner: Sometimes, a good quality carburetor cleaner sprayed into the fuel intake while the engine is running (if it starts briefly) or into the spark plug hole can help dislodge minor blockages.
- Carburetor Disassembly and Cleaning: For more significant clogs, the carburetor may need to be removed and disassembled. The jets and passages can be cleaned with carb cleaner and compressed air. Tiny wires or specialized tools can be used to clear stubborn blockages. This process requires some mechanical aptitude and careful attention to detail. Consult your owner’s manual or a service guide for specific instructions.
Improperly Set Carburetor Adjustments
The idle speed and mixture screws on the carburetor control engine performance. If these are set incorrectly, the engine may not start or run smoothly.
- Solution: Refer to your owner’s manual for the correct adjustment procedures. Typically, you would adjust the idle speed screw and potentially a fuel mixture screw if your carburetor has one. Incorrect adjustments can lead to a rich (too much fuel) or lean (too little fuel) condition.
Air System Issues
The engine needs a constant supply of clean air to mix with fuel. Obstructions in the air intake system can prevent starting.
Clogged Air Filter
A dirty or clogged air filter restricts the amount of air that can enter the carburetor. This creates a fuel-rich condition, making it difficult for the engine to ignite the air-fuel mixture.
- Solution:
- Locate and Remove: Find the air filter housing (usually a plastic cover on the side of the engine). Remove the cover and take out the air filter.
- Inspect: Check if the filter is dirty, greasy, or clogged with debris.
- Clean or Replace: Paper filters can often be replaced. Foam filters can usually be cleaned by washing them in soapy water, rinsing thoroughly, and allowing them to dry completely before reinstallation. Ensure the filter is completely dry before putting it back.
Blocked Air Intake
Beyond the filter, the air intake port itself could be obstructed by debris, cobwebs, or even insect nests.
- Solution: Visually inspect the air intake port and the area around the air filter housing for any blockages. Remove any foreign material found.
Water And Pump System Problems
While these issues primarily affect the pressure output, certain conditions can also prevent the engine from starting or running correctly.
No Water Supply Or Low Water Pressure
Most pressure washers require a minimum water supply pressure and flow rate to operate safely and effectively. If the water source is turned off, the hose is kinked, or the water pressure is too low, the pump can overheat or the engine may struggle to start.
- Solution:
- Turn on Water Source: Ensure the outdoor faucet supplying water to the pressure washer is fully open.
- Check Hose: Make sure the garden hose is not kinked and is connected securely to both the faucet and the pressure washer inlet.
- Verify Water Flow: Disconnect the hose from the pressure washer and turn on the water. You should have a strong, steady stream. Most manufacturers recommend a minimum of 5 gallons per minute (GPM) flow rate.
- Prime the Pump: Before starting the engine, it’s crucial to prime the pump. This involves allowing water to flow through the pump and out the unloader valve (or a designated priming port) until all air is purged. This is often done by running water through the system with the engine off for a minute or two.
Blocked Inlet Filter
Many pressure washers have a small mesh filter at the water inlet connection to prevent debris from entering the pump. If this filter is clogged, it will restrict water flow.
- Solution: Disconnect the garden hose from the pressure washer. Remove the inlet screen/filter (it might pull out or unscrew). Clean it thoroughly under running water and reinstall it.
Safety And Operational Errors
Modern pressure washers are equipped with various safety features that can prevent operation if not engaged correctly.
Incorrect Choke Setting
For cold starts, the choke lever is usually set to the “CHOKE” or “START” position. This enriches the fuel-air mixture. If the engine is already warm, the choke should be moved to the “RUN” or “OPEN” position. Starting with the choke on a warm engine can cause it to flood.
- Solution: Ensure the choke lever is set correctly for the engine temperature. For a cold engine, use the choke. For a warm engine, ensure the choke is open.
Engine Flooding
This occurs when too much fuel enters the combustion chamber, making it impossible to ignite. It often happens if the choke is left on for too long, or if the engine is cranked excessively without starting.
- Solution:
- Turn Off Fuel: If your model has a fuel shut-off valve, turn it off.
- Move Choke to RUN: Set the choke lever to the fully open (“RUN”) position.
- Crank Engine: Pull the starter cord several times (5-10 pulls) to clear the excess fuel.
- Prime (If Applicable): If your model has a primer bulb, press it a few times.
- Turn Fuel On: If you turned off the fuel valve, turn it back on.
- Attempt Restart: Try starting the engine normally. You may need to use the choke briefly if it sputters.
Low Oil Level Sensor (on Some Models)
Some Simpson pressure washers are equipped with a low oil sensor that will prevent the engine from starting if the oil level is too low. This is a crucial safety feature to protect the engine from damage.
- Solution: Check the oil level using the dipstick. If it’s low, add the recommended type and amount of oil as specified in your owner’s manual. Do not overfill.
Water Unloader Valve Issues
The unloader valve regulates water pressure and flow. While it’s primarily related to pump function, a stuck or malfunctioning unloader valve could, in some rare cases, create backpressure that affects starting.
- Solution: Inspect the unloader valve assembly for visible damage or debris. Ensure the bypass hose is not blocked. If you suspect a fault, consult your manual or a service professional.

Credit: www.youtube.com
Troubleshooting Steps: A Systematic Approach
When your Simpson pressure washer refuses to start, follow these steps methodically. This will save you time and prevent unnecessary component replacement.
Step 1: Basic Checks (the Easiest Things First)
- Fuel Level and Quality: Is there enough fuel? Is it fresh (less than 30 days old)? Does it smell stale or look contaminated?
- Water Supply: Is the water source on? Is the garden hose connected securely and not kinked? Is the inlet filter clean?
- Power Switch: Ensure the engine’s ON/OFF switch is in the “ON” position.
- Fuel Valve: If equipped, is the fuel valve in the “ON” position?
- Choke Setting: Is the choke set correctly for a cold start (usually “CHOKE” or “START”)?
Step 2: Check The Ignition System
- Spark Plug: Remove, inspect, clean/gap, or replace the spark plug. Ensure the spark plug wire is securely attached.
- Pro Tip: To test for spark without fully assembling, connect the spark plug wire to the plug, hold the base of the plug against a clean metal part of the engine (like a bolt head), and pull the starter cord while watching the spark plug gap. You should see a strong blue spark. Warning: Be careful not to ground yourself while doing this.
Step 3: Investigate The Fuel Delivery
- Primer Bulb: If your model has a primer bulb, press it 3-5 times until you see fuel circulating. If it doesn’t seem to fill or feel firm, there might be a blockage or a leak in the fuel line or primer system.
- Carburetor: Listen for fuel entering the carburetor. If you suspect a clog, you may need to clean it.
- Fuel Filter: Inspect and replace if necessary.
Step 4: Examine The Air System
- Air Filter: Remove and inspect the air filter. Clean or replace it if it’s dirty. Ensure the air intake area is clear.
Step 5: Address Potential Flooding Or Safety Issues
- Flooded Engine Procedure: If you suspect the engine is flooded, follow the steps outlined in the “Engine Flooding” section above.
- Low Oil Sensor: Check the oil level and add oil if necessary.
Step 6: Advanced Troubleshooting And Professional Help
If none of the above steps resolve the issue, the problem might lie with more complex components like the ignition coil, carburetor internal passages, or engine compression.
- Compression Test: A lack of compression will prevent starting. This requires a compression tester.
- Carburetor Rebuild: If cleaning doesn’t work, a full carburetor rebuild kit might be needed.
- Professional Service: For persistent issues or if you’re uncomfortable with internal engine repairs, it’s best to take your Simpson pressure washer to an authorized service center.
Spark Plug Replacement And Maintenance
The spark plug is a small but vital component. Regular maintenance and timely replacement can prevent many starting problems.
When To Replace Your Spark Plug
- Age: Spark plugs have a finite lifespan. Most small engine manufacturers recommend replacing the spark plug annually or after a certain number of operating hours (e.g., 100-200 hours), whichever comes first.
- Fouling: If the plug is heavily coated with black, oily, or carbon deposits, it’s hindering its ability to spark effectively.
- Damage: Physical damage to the ceramic insulator or the electrodes necessitates replacement.
- Wear: Over time, the electrodes can erode, widening the gap and weakening the spark.
How To Replace A Spark Plug On A Simpson Pressure Washer
- Safety First: Ensure the engine is off and cool. Disconnect the spark plug wire to prevent accidental starting.
- Access the Plug: Locate the spark plug. It’s usually at the front or side of the engine cylinder, with a thick wire connected to it.
- Remove the Wire: Gently twist and pull the spark plug wire boot off the spark plug. Do not pull by the wire itself.
- Unscrew the Plug: Use a spark plug socket wrench of the correct size to turn the plug counter-clockwise. If it’s very tight, apply steady pressure.
- Inspect the Old Plug: Examine the old plug for signs of wear, fouling, or damage. This can provide clues about the engine’s health (e.g., oily deposits might indicate internal engine issues).
- Prepare the New Plug: Check the gap on the new spark plug using a feeler gauge or gap tool. Adjust it to the specification found in your Simpson pressure washer’s manual.
- Install the New Plug: Carefully thread the new spark plug into the cylinder by hand. This prevents cross-threading, which can damage the engine block. Once hand-tight, use the socket wrench to snug it down. Do not overtighten.
- Reconnect the Wire: Push the spark plug wire boot firmly back onto the new spark plug until it clicks into place.
- Test Start: Attempt to start the pressure washer.

Credit: www.youtube.com
Carburetor Cleaning: A Deeper Dive
A clogged carburetor is arguably the most frequent reason for a stubborn no-start condition in small engines like those on pressure washers. Stale fuel is the primary culprit.
Signs Of A Clogged Carburetor
- Engine difficult to start or won’t start at all.
- Engine starts but runs rough, sputters, or stalls.
- Engine lacks power.
- Engine only runs with the choke partially or fully engaged.
Carburetor Cleaning Process (general Steps)
Disclaimer: This process requires mechanical aptitude. If you are uncomfortable, seek professional help. Always refer to your specific Simpson pressure washer model’s manual for details.
- Safety: Disconnect the spark plug wire. Ensure the engine is cool. Work in a well-ventilated area.
- Access the Carburetor: This typically involves removing the engine cover, air filter housing, and potentially other components to gain clear access.
- Disconnect Fuel Line and Linkages: Carefully disconnect the fuel line from the carburetor. Note how any throttle or choke linkages are connected so you can reassemble them correctly. You may need to drain any remaining fuel from the carburetor bowl.
- Remove the Carburetor: Unscrew the bolts or nuts that secure the carburetor to the engine manifold. Gently pull the carburetor away.
- Disassemble: Lay out the parts on a clean surface in the order they are removed. This usually includes the main body, float bowl, float, needle valve, and jets.
- Clean Components:
- Jets: These are small brass fittings with tiny holes. Use carburetor cleaner spray and compressed air to blow through them. A very fine wire (like from a single strand of a wire brush, or a guitar string) can be used *carefully* to clear stubborn blockages, but avoid enlarging the holes.
- Passages: Spray carburetor cleaner into all the small passages and orifices within the carburetor body. Use compressed air to blow them clear.
- Float Bowl: Clean any residue from the float bowl.
- Needle Valve and Seat: Inspect the rubber tip of the needle valve for damage. Clean the seat where it rests.
- Reassemble: Carefully reassemble the carburetor, ensuring all parts are correctly seated and linkages are reconnected.
- Reinstall: Mount the carburetor back onto the engine manifold, reconnect the fuel line, throttle/choke linkages, and air filter housing.
- Test: Reconnect the spark plug wire and attempt to start the engine.
Maintaining Your Simpson Pressure Washer For Reliable Starts
Preventative maintenance is the best way to avoid starting issues. Regular care ensures your equipment is ready when you need it.
Fuel Management
- Use Fresh Fuel: Always use fresh gasoline (less than 30 days old).
- Fuel Stabilizer: Add a fuel stabilizer to gasoline if storing for more than a month. This prevents degradation and phase separation.
- Drain for Storage: If storing for extended periods (over winter), drain the fuel tank and run the engine until it stalls to empty the carburetor bowl. This is the most effective way to prevent internal gumming.
Oil Changes And Checks
- Regular Checks: Check the oil level before each use. Add oil if low, using the type recommended in your manual.
- Oil Changes: Change the engine oil according to the manufacturer’s recommendations (typically annually or after a specified number of operating hours). Clean oil is crucial for engine lubrication and preventing issues related to the low oil sensor.
Air Filter Maintenance
- Clean Regularly: Inspect and clean the air filter periodically, especially if operating in dusty conditions. A dirty filter restricts airflow and affects performance and starting.
*