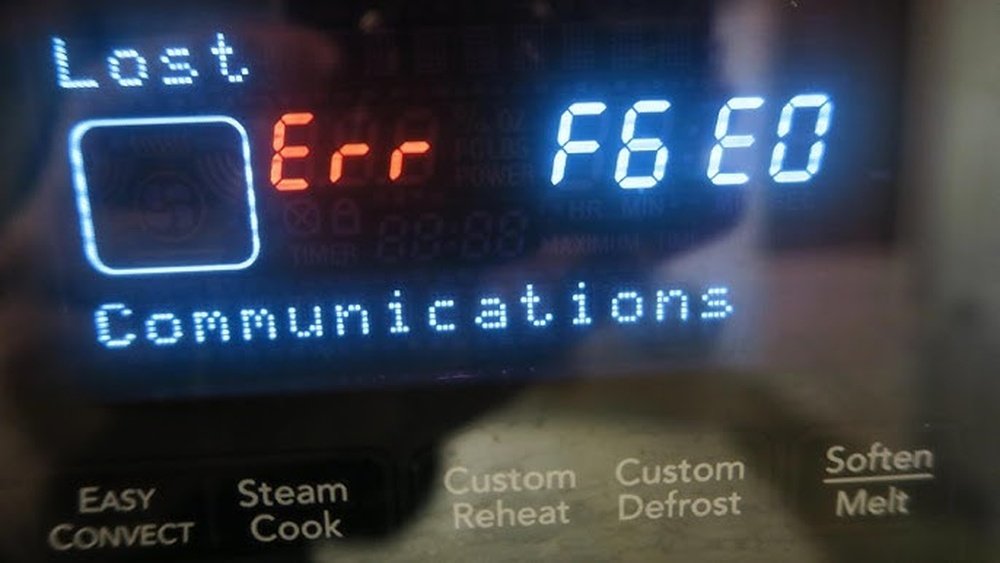
Kitchenaid F6 Error Troubleshooting

Kitchenaid F6 Error Troubleshooting

Experiencing an F6 error code on your KitchenAid range can be a frustrating interruption to your cooking routine. This specific error code points to a temperature sensor issue, meaning your oven isn’t accurately reading or maintaining the desired cooking temperature. While it might sound like a serious problem requiring immediate professional service, many F6 errors are resolvable with a bit of targeted troubleshooting. Understanding the potential causes and the steps to address them can save you time and money, allowing you to get back to baking, roasting, and broiling with confidence.

This guide will walk you through the common culprits behind the KitchenAid F6 error and provide a structured approach to diagnosing and fixing the problem. We’ll cover everything from simple resets to identifying faulty components, empowering you to take control of your appliance’s performance.

By following these steps, you’ll gain a clearer understanding of your oven’s inner workings and be better equipped to handle such issues in the future, ensuring your KitchenAid range continues to be a reliable centerpiece in your kitchen.

Key Takeaways

  • The KitchenAid F6 error typically indicates a problem with the oven’s temperature sensor or its associated components.
  • Common causes include a faulty temperature sensor, wiring issues, or a control board malfunction.
  • A power cycle is the first and simplest troubleshooting step to try.
  • Inspect the temperature sensor for any visible damage or obstruction.
  • Check wiring connections to the sensor and control board for looseness or corrosion.
  • If these steps don’t resolve the issue, the control board may be the culprit, often requiring professional replacement.
  • Always disconnect power before attempting any internal inspection or repair.
Kitchenaid F6 Error Troubleshooting

Credit: www.hillcountryrepairs.com

Understanding The Kitchenaid F6 Error

The F6 error code on a KitchenAid oven is a specific diagnostic message that alerts you to a problem within the oven’s temperature regulation system. At its core, this error signifies that the oven’s control board is not receiving accurate or consistent temperature readings from the temperature sensor (or probe). This sensor is a crucial component, acting like the oven’s thermometer, and it communicates the internal temperature back to the electronic control board. The control board then uses this information to adjust the heating elements, ensuring the oven reaches and maintains the set temperature for your cooking.

When the F6 error appears, it means there’s a breakdown in this communication loop. The control board might be detecting an open circuit, a short circuit, or simply a reading that is far outside the expected operational range. This could be due to the sensor itself failing, or it could be an issue with the wiring that connects the sensor to the control board, or even a problem with the control board’s ability to interpret the sensor’s signal.

Without accurate temperature feedback, the oven cannot function correctly, leading to the error message and a potentially unusable appliance.

The Role Of The Temperature Sensor

The temperature sensor, often referred to as the oven probe, is a small but vital part of your KitchenAid oven. It’s typically a metal rod or a small bulb located inside the oven cavity, often near the top or back. Its primary function is to measure the air temperature within the oven. This measurement is then converted into an electrical resistance signal that is sent to the electronic oven control (EOC) or electronic oven control board. The resistance of the sensor changes with temperature; for example, as the temperature inside the oven increases, the resistance of the sensor typically decreases.

The control board constantly monitors this resistance. When you set your oven to 350°F (175°C), the control board sends power to the heating elements. Simultaneously, it reads the signal from the temperature sensor. As the oven heats up, the sensor’s resistance changes, and the control board interprets this change to know how hot the oven is.

It cycles the heating elements on and off to maintain the set temperature. If the sensor fails, becomes damaged, or its connection is compromised, the control board receives faulty data, or no data at all, leading to the F6 error.

How The Control Board Interprets Sensor Data

The electronic oven control (EOC) board is the brain of your KitchenAid oven. It receives all inputs, including temperature settings from the user interface, and temperature data from the sensor. The EOC is programmed with specific parameters for how the temperature sensor should behave. It expects a certain range of resistance values corresponding to various temperatures.

When the F6 error is triggered, it means the EOC has detected a condition that falls outside its normal operating parameters for the temperature sensor. This could manifest in several ways:

  • Open Circuit: The EOC detects no resistance, or an infinitely high resistance, indicating a break in the circuit between the sensor and the board. This could be due to a broken wire or a disconnected sensor.
  • Short Circuit: The EOC detects very low resistance, meaning the signal is not properly reaching the board, possibly due to wires touching each other or a faulty sensor.
  • Out-of-Range Reading: The sensor is reporting a temperature that is physically impossible for an oven, such as extremely low or extremely high temperatures that don’t correlate with the heating cycle.

Essentially, the EOC is saying, “I’m not getting reliable information from my thermometer, so I can’t safely or accurately control the oven’s temperature. ” This is why the F6 error is a safety and operational lockout.

Common Causes Of The F6 Error

The F6 error code, while specific in its meaning, can arise from a few different points of failure within your KitchenAid oven. Identifying the exact cause is key to an effective repair. Here are the most frequent culprits:

1. Faulty Temperature Sensor

The most direct cause of an F6 error is a failed temperature sensor itself. Like any electronic component, sensors can degrade over time due to heat exposure, power surges, or manufacturing defects. A sensor might fail internally, leading to inaccurate resistance readings or an open/short circuit.

  • Symptoms of a failing sensor: Inconsistent oven temperatures, oven not heating to the set temperature, or the F6 error appearing randomly. Sometimes, the oven might heat erratically, going from too cool to too hot.
  • Why it happens: Constant exposure to high temperatures can cause the internal components of the sensor to break down. Power surges can also damage delicate electronic parts.

2. Wiring Harness Issues

The wiring harness that connects the temperature sensor to the EOC board is another common point of failure. This harness is a bundle of wires, and any of them can become damaged, loose, or corroded.

  • Loose Connections: The connectors at either the sensor end or the EOC board end can vibrate loose over time, interrupting the electrical signal.
  • Damaged Wires: Wires can be pinched, frayed, or broken due to the oven door opening and closing, movement of internal components, or even rodent damage in some installations.
  • Corrosion: Moisture or spillage inside the oven can lead to corrosion on the wire terminals, increasing resistance or causing an open circuit.

3. Control Board Malfunction

While less common than sensor or wiring issues, a faulty electronic oven control (EOC) board can also trigger an F6 error. The EOC board is responsible for interpreting the sensor’s signal and controlling the oven’s functions. If the board itself has a defect, it might misinterpret a perfectly good sensor reading or fail to communicate with the sensor altogether.

  • Why it happens: Electronic components on the board can fail due to age, heat, power surges, or manufacturing defects. A specific circuit responsible for reading the temperature sensor could be compromised.
  • Diagnosis: This is usually the last resort for troubleshooting, as EOC boards are expensive components. If all other possibilities are ruled out, the EOC is the likely culprit.

4. Issues With The Oven’s Power Supply

Although not directly related to the temperature sensor itself, an unstable or inadequate power supply to the oven can sometimes manifest in strange error codes, including temperature-related ones. Fluctuations in voltage can affect the sensitive electronics of the control board and the sensor’s readings.

  • Causes: Loose wiring at the junction box, a faulty circuit breaker, or issues with the home’s electrical system.
  • Note: This is less common for a specific F6 error but is worth considering if other troubleshooting steps fail and there are other electrical anomalies in the kitchen.
Kitchenaid F6 Error Troubleshooting

Credit: www.youtube.com

Troubleshooting Steps For Kitchenaid F6 Error

When faced with a KitchenAid F6 error, a systematic approach is best. Start with the simplest solutions and progress to more complex ones. Always prioritize safety by disconnecting power before touching any internal components.

Step 1: Power Cycle The Oven (the Simplest Fix)

Often, electronic appliances can experience temporary glitches that cause them to display error codes. A simple power cycle, also known as a hard reset, can clear these temporary faults.

  • Locate the circuit breaker that controls your KitchenAid range in your home’s electrical panel.
  • Switch the breaker OFF.
  • Wait for at least 5 minutes. This allows any residual power in the oven’s control board to dissipate.
  • Switch the breaker back ON.
  • Turn on the oven and set it to a cooking mode to see if the F6 error has disappeared.
  • Pro Tip: If you’re unsure which breaker controls your oven, you can unplug the range from the wall outlet if it has a plug, or turn off the main breaker for the house if absolutely necessary, but be aware this will shut off power to everything.

Step 2: Inspect The Temperature Sensor

The temperature sensor is the most likely component to fail. Its location inside the oven cavity makes it susceptible to damage and requires careful inspection.

  • Ensure the oven is completely cool and unplugged or the circuit breaker is turned off.
  • Locate the sensor: It’s typically a slender metal probe, about 2-3 inches long, often with a ceramic insulator at its base. It’s usually found at the top or back of the oven cavity.
  • Visually inspect the sensor: Look for any signs of physical damage such as cracks, bends, or obvious corrosion.
  • Check for obstructions: Ensure there’s no food debris, foil, or other items that might be touching or obstructing the sensor, which could interfere with temperature readings.
  • Clean the sensor: Gently wipe the sensor with a damp cloth to remove any residue. Ensure it is completely dry before proceeding.

If you notice any damage, the sensor likely needs replacement. If it appears intact, proceed to check the wiring.

Step 3: Examine The Wiring And Connections

The wiring that connects the temperature sensor to the control board is critical. Even a slight issue here can cause the F6 error.

  • Disconnect power to the oven at the breaker or outlet.
  • Access the oven’s internal components: This usually involves removing the back panel of the oven. Refer to your KitchenAid owner’s manual for specific instructions on how to safely access the internal wiring.
  • Trace the wires: Follow the wires from the temperature sensor into the oven’s chassis. They should lead to the electronic oven control (EOC) board.
  • Inspect the sensor connection: At the sensor end, ensure the wires are securely attached to the sensor terminals. Look for any signs of corrosion, melting, or breakage.
  • Inspect the EOC board connection: Locate where these wires connect to the EOC board. Again, check for secure connections, corrosion, or damage to the wires or terminals. Gently wiggle the connectors to ensure they are not loose.
  • Check for damaged wires: Look for any signs of pinching, fraying, or breaks in the insulation along the entire length of the wire harness.
  • Warning: If you are not comfortable working with electrical wiring, it is best to stop here and call a qualified appliance repair technician.

Step 4: Test The Temperature Sensor’s Resistance (advanced)

If the visual inspection reveals no obvious problems, you can test the sensor’s electrical resistance using a multimeter. This requires some technical skill.

  • Disconnect power to the oven.
  • Access the sensor terminals either at the sensor itself or where the wires connect to the EOC board. You’ll need to disconnect the wires from the sensor or the board to get an accurate reading.
  • Set your multimeter to measure resistance (Ohms Ω).
  • Place the multimeter probes across the two terminals where the sensor wires connect.
  • Compare the reading to specifications: You will need to find the expected resistance value for your specific KitchenAid model at room temperature. This information can sometimes be found in service manuals or by searching online for your model number and “temperature sensor resistance.” A common range for many ovens at room temperature is around 1000-1100 Ohms.
  • Interpret the results:
  • If the multimeter reads OL (Open Line) or a very high resistance, the sensor is likely broken internally, indicating an open circuit.
  • If the multimeter reads 0 Ohms or a very low resistance, it suggests a short circuit within the sensor.
  • If the reading is significantly different from the expected value, the sensor is faulty.
  • Note: This test is most accurate when performed at a known temperature. If possible, try to test the sensor’s resistance when the oven cavity is at room temperature and again after it has been heated for a short period to see if the resistance changes as expected.

Step 5: Consider The Control Board

If the temperature sensor tests good (or appears visually fine and the wiring connections are secure), and the power cycle didn’t resolve the F6 error, the electronic oven control (EOC) board may be the issue.

  • Symptoms: The F6 error persists despite a good sensor and wiring. Other electronic functions of the oven might also be behaving erratically.
  • Diagnosis: Diagnosing a faulty EOC board is complex and usually requires professional expertise. A technician might test for voltage going to and from the EOC board, or check for specific diagnostic codes within the board’s memory.
  • Replacement: If the EOC board is indeed faulty, it will need to be replaced. This is typically an expensive part and requires careful installation.
Kitchenaid F6 Error Troubleshooting

Credit: www.appliancerepairlosangeles.com

Replacing The Temperature Sensor

If you’ve determined that the temperature sensor is the faulty component, replacing it is a manageable DIY repair for many homeowners. Always remember to prioritize safety.

Tools And Materials Needed

  • New KitchenAid temperature sensor compatible with your specific oven model.
  • Screwdriver set (Phillips head likely).
  • Pliers (needle-nose can be helpful).
  • Multimeter (optional, for testing).
  • Work gloves.
  • Safety glasses.
  • A helper (recommended for larger ovens).

Step-by-step Replacement Guide

  • Disconnect Power: Crucially, ensure the oven is completely unplugged from the wall outlet or the circuit breaker is turned OFF.
  • Access the Oven Interior: For most KitchenAid models, the temperature sensor is accessible from within the oven cavity. You may need to remove the oven racks to get better access.
  • Locate the Sensor: Identify the metal probe inside the oven. It’s usually attached to the oven wall or ceiling with a bracket or clip.
  • Disconnect the Sensor Wires: At the back of the oven cavity, you’ll find where the sensor wires connect. Carefully disconnect these wires. They might be push-on terminals or screw terminals. Note which wire goes to which terminal if they are not color-coded identically on the new sensor.
  • Remove the Old Sensor: Unfasten the sensor from its mounting bracket or clip. This might involve unscrewing a nut or releasing a retaining clip. Gently pull the old sensor out of the oven cavity.
  • Install the New Sensor: Insert the new temperature sensor through the opening from the inside of the oven cavity. Secure it in place using the original mounting bracket or clip. Ensure it is positioned correctly and securely.
  • Reconnect the Wires: Attach the wires from the new sensor to the corresponding terminals on the back of the oven. Ensure a firm connection. If the new sensor comes with different connectors, you may need to splice them using appropriate wire connectors, following the manufacturer’s instructions.
  • Reassemble: Replace any oven racks that were removed. If you had to remove a back panel to access wiring, reattach it securely.
  • Restore Power: Plug the oven back in or turn the circuit breaker ON.
  • Test the Oven: Turn on the oven and set it to a baking temperature. Monitor it to see if the F6 error code reappears and if the oven heats and maintains temperature correctly.
  • Example: On many KitchenAid electric ranges, the temperature sensor is secured by a single screw from the inside of the oven cavity. The wires then pass through a small opening to connect to terminals on the main control board housing behind the oven.

When To Call A Professional

While many KitchenAid F6 errors can be resolved with the troubleshooting steps outlined above, there are instances where professional help is necessary. Recognizing these situations can save you time, frustration, and potential further damage to your appliance.

Complex Electrical Issues

If you’ve performed the basic troubleshooting steps and the F6 error persists, it’s a strong indicator of a more complex electrical problem. This could involve:

  • Internal wiring damage that is difficult to access or locate.
  • Multiple faulty components, such as both the sensor and wiring.
  • A malfunctioning electronic oven control (EOC) board. Diagnosing and replacing an EOC board requires specialized knowledge and tools to ensure it’s correctly programmed and installed.

Lack Of Technical Confidence Or Tools

Appliance repair, especially involving electrical components, requires a certain level of technical skill and the right tools. If you are uncomfortable working with electrical wiring, do not have a multimeter, or are unsure about any step in the process, it’s safer to call a professional. Attempting repairs beyond your skill level can lead to:

  • Personal injury from electric shock.
  • Further damage to the oven, leading to more expensive repairs.
  • Voiding your warranty if your appliance is still covered.

Persistent Or Intermittent Errors

If the F6 error is intermittent, meaning it appears and disappears, it can be particularly challenging to diagnose. These types of faults often require advanced diagnostic equipment that a professional technician will have. They can also use their experience to identify subtle issues that might be missed during a DIY inspection.

Safety Concerns

Any time you are dealing with electrical appliances, safety is paramount. If you notice any signs of burning, melting wires, sparking, or unusual odors, immediately disconnect power and call a professional. These could indicate serious electrical hazards that need immediate attention from an expert.

A qualified appliance repair technician will have the necessary diagnostic tools, schematics for your specific model, and the expertise to quickly and safely identify the root cause of the F6 error and perform the repair.

Kitchenaid Range Error Codes Comparison

While the F6 error specifically relates to the temperature sensor, KitchenAid ranges can display a variety of error codes indicating different issues. Understanding these codes can help in diagnosing problems quickly. Here’s a comparison of common KitchenAid range error codes:

Error Code Description Likely Cause Troubleshooting Approach
F1 / F2 Keypad/Display Error Faulty touchpad or display panel, loose connection. Power cycle, check connections, replace touchpad/display.
F3 / F4 Communication Error Issue between the main control board and other components (e.g., display). Power cycle, check wiring, replace control board.
F5 Door Lock Error Problem with the oven door lock mechanism. Check for obstructions, reset lock motor, replace lock assembly.
F6 Temperature Sensor Error Faulty temperature sensor, wiring issue, or control board problem. Power cycle, inspect sensor and wiring, test sensor resistance, replace sensor or control board.
F8 / F9 System Malfunction General electronic control board or system failure. Power cycle, professional diagnosis and potential control board replacement.
F0 / F1 Control Board Error Main electronic control board failure. Power cycle, professional diagnosis and control board replacement.

This table provides a general overview. Always consult your specific KitchenAid model’s user manual for the most accurate information regarding error codes and their meanings.

Frequently Asked Questions

How Do I Know If My Kitchenaid Oven Temperature Sensor Is Bad?

Besides the F6 error code, a faulty temperature sensor can manifest as inconsistent oven temperatures (too hot or too cold), the oven taking an unusually long time to preheat, or the oven not heating at all. If the oven’s display shows the correct temperature setting but the actual cooking results are off, the sensor is a prime suspect. A multimeter test can confirm its electrical integrity by measuring its resistance.

Can I Use My Kitchenaid Oven With An F6 Error?

It Is

Ubuntu Ethernet Not Working

The sudden silence of your network connection on Ubuntu, indicated by the dreaded “Ethernet not working” error, can be a significant roadblock for both home users and enterprise professionals. Whether you’re trying to download critical updates, access cloud resources, or simply browse the web, a non-functional Ethernet connection brings productivity to a halt.

This issue often stems from a variety of sources, ranging from simple cable problems to complex driver incompatibilities or network configuration errors. Understanding the potential causes and systematically troubleshooting them is key to restoring your network connectivity.

This comprehensive guide aims to equip you with the knowledge and step-by-step procedures necessary to diagnose and resolve common Ubuntu Ethernet issues. We will cover everything from basic physical checks to advanced command-line diagnostics, ensuring you have a clear path to getting your wired network back online.

Key Takeaways

  • Physical Checks First: Always start by verifying your Ethernet cable, port, and network hardware for any visible damage or loose connections.
  • System Updates are Crucial: Ensure your Ubuntu system and kernel are up-to-date, as this often resolves driver-related issues.
  • Network Manager is Your Friend: Utilize Ubuntu’s Network Manager for straightforward configuration and troubleshooting of network connections.
  • Command-Line Tools Offer Depth: Tools like `ip`, `nmcli`, `ethtool`, and `lspci` provide detailed insights into network interface status and hardware.
  • Driver Issues are Common: Incorrect or missing drivers are frequent culprits; identifying and reinstalling them can fix connectivity problems.
  • Configuration Errors Happen: Incorrect IP addresses, DNS settings, or static configurations can prevent your Ethernet from functioning.
  • Hardware Failure is Possible: While less common, a faulty network card or router port can be the root cause.
Ubuntu Ethernet Not Working

Credit: askubuntu.com

Understanding Your Ethernet Connection In Ubuntu

Before diving into troubleshooting, it’s helpful to understand how Ubuntu manages its network connections. Ubuntu, like most modern Linux distributions, relies heavily on the NetworkManager service to configure and control network devices, including Ethernet interfaces. NetworkManager provides both a graphical interface (accessible via the system tray) and a powerful command-line tool (`nmcli`) for managing connections.

Each Ethernet connection is typically identified by an interface name, commonly starting with `eth` (e. g. , `eth0`, `eth1`) or `enp` followed by a series of numbers and letters indicating the bus information (e. g. , `enp3s0`). You can easily find these names using the `ip a` command.

Identifying Your Ethernet Interface

The first step in any troubleshooting process is to identify the specific Ethernet interface that is causing problems.

Using The `ip` Command

The `ip` command is a versatile tool for network diagnostics. To list all network interfaces and their statuses, open a terminal and run:

ip a

Look for entries that typically represent wired connections, such as `eth0`, `eth1`, or those with names like `enpXsY` (where X and Y are numbers). You’ll see details like the interface name, its state (UP/DOWN), and its IP address if one is assigned.

If your interface is listed but shows `state DOWN`, it’s likely disabled or not properly initialized.

Using `lspci` For Hardware Information

Sometimes, the issue might be related to the network card’s hardware itself or its driver. The `lspci` command can help you identify your Ethernet controller.

lspci -nn | grep -i ethernet

This command lists all PCI devices and filters for those identified as Ethernet controllers. The output will show the manufacturer and model of your network card, along with its PCI ID (e.g., `[10ec:8168]`). This information is invaluable when searching for specific drivers or troubleshooting hardware compatibility.

Ubuntu Ethernet Not Working

Credit: itsfoss.com

Common Causes And Initial Checks

Many Ethernet issues on Ubuntu can be resolved by systematically checking the most common culprits. These are often the simplest solutions, and it’s always best to rule them out before proceeding to more complex diagnostics.

Physical Connections And Hardware

A loose or damaged Ethernet cable is a surprisingly frequent cause of connectivity loss.

  • Check the Cable: Ensure the Ethernet cable is securely plugged into both your Ubuntu machine’s Ethernet port and your router, switch, or modem. Try unplugging and replugging it at both ends. If possible, test with a different, known-good Ethernet cable. Cables can become damaged internally without visible external signs.
  • Inspect Ports: Examine the Ethernet ports on your computer and networking equipment. Look for bent pins or debris that might be obstructing the connection.
  • LED Indicators: Most Ethernet ports have LED lights that indicate network activity and connection status. If the lights are off or consistently amber/red (depending on the hardware), it suggests a physical link issue. A solid green or blue light usually indicates a healthy connection.
  • Test Other Devices: Try connecting another device (laptop, phone with adapter) to the same Ethernet cable and port on your router/switch. If that device also fails to connect, the problem likely lies with your networking equipment or the cable, not your Ubuntu machine.

Network Cable Integrity

Ethernet cables, particularly Cat5e and Cat6, are designed for reliable data transmission. However, they are not immune to failure.

  • Physical Damage: Bends, kinks, or crushing can damage the internal wires or shielding of the cable, leading to intermittent or complete connection loss.
  • Connector Issues: The RJ45 connectors at the ends of the cable can become loose or damaged, preventing proper contact with the port.
  • Cable Length: While less common for typical home or office use, exceeding the maximum recommended length for a specific Ethernet category (e.g., 100 meters for Cat5e/Cat6) can degrade signal quality and cause connectivity problems.

Router/switch And Modem Status

Your networking hardware plays a crucial role in establishing and maintaining your internet connection.

  • Reboot Your Network: A simple reboot of your modem, router, and switch (if you have separate devices) can often resolve temporary glitches. Power them off, wait 30 seconds, and then power them back on in order: modem first, then router, then switch.
  • Check Router Lights: Observe the status lights on your router and modem. Consult your device’s manual to understand what each light signifies. A lack of an “Internet” or “WAN” light often indicates an issue with your ISP or modem.
Ubuntu Ethernet Not Working

Credit: www.reddit.com

Troubleshooting With Networkmanager

NetworkManager is the primary tool for managing network connections in Ubuntu. Its graphical interface and command-line counterpart, `nmcli`, offer powerful ways to diagnose and reconfigure your Ethernet setup.

Using The Graphical Network Settings

Ubuntu’s desktop environment provides an intuitive way to manage network connections.

  • Click on the system tray (usually in the top-right corner).
  • Select “Wired Connected” or “Network” (the exact wording may vary slightly depending on your Ubuntu version and desktop environment).
  • Click on “Wired Settings” or navigate to Settings > Network.
  • You should see your Ethernet connection listed. Ensure it is toggled ON.
  • Click the gear icon next to your Ethernet connection to access its detailed settings. Here you can check and modify IP addressing (DHCP or static), DNS servers, and other network parameters. If the connection is not listed or shows as disconnected, try toggling the switch off and then on again.

Using `nmcli` (networkmanager Command-line Interface)

For more advanced users or when working on servers without a graphical interface, `nmcli` is indispensable.

Checking Connection Status

To see all NetworkManager-managed connections and their states:

nmcli connection show

Look for your Ethernet connection. If it’s present but not active, you might see it listed with a status like `disconnected` or `unavailable`.

Bringing The Connection Up

If your Ethernet connection is listed but `down`, you can try bringing it up with:

nmcli connection up 

Replace `` with the name of your Ethernet connection as shown by `nmcli connection show`.

Restarting Networkmanager

Sometimes, simply restarting the NetworkManager service can resolve transient issues:

sudo systemctl restart NetworkManager

After restarting, check the connection status again using `nmcli connection show` or the graphical interface.

Verifying Ip Address Assignment

Even if the link is up, you might not have internet access if you haven’t received an IP address.

ip a show 

Replace `` with your Ethernet interface name (e.g., `enp3s0`). If there’s no IP address listed under `inet`, your DHCP client might be failing, or a static IP configuration might be incorrect.

Driver And Module Issues

A common cause of Ethernet problems, especially after system updates or hardware changes, is related to device drivers. Linux uses kernel modules (drivers) to communicate with hardware.

Checking Loaded Kernel Modules

You can see which network drivers are currently loaded for your Ethernet card.

  • First, identify your network card’s PCI ID using `lspci -nn | grep -i ethernet` as shown earlier.
  • Then, list loaded modules and search for drivers associated with that PCI ID. A common way is to look at the output of `dmesg`.
dmesg | grep -i eth

This command shows kernel messages, and you can often spot messages related to your Ethernet adapter being detected, initialized, or encountering errors. Look for lines indicating the driver being loaded (e. g. , `e1000e`, `r8169`, `igb`).

Identifying Missing Or Incorrect Drivers

If `dmesg` doesn’t show any messages related to your Ethernet card, or if it indicates errors during driver loading, the driver might be missing or incompatible.

  • Check `lspci -k`: This command shows the kernel driver in use for each PCI device.
lspci -k | grep -A 3 -i ethernet

Look for the line “Kernel driver in use:“. If it’s missing or shows a generic driver that doesn’t seem to work, you likely have a driver issue.

Installing Or Reinstalling Drivers

  • Automatic Driver Installation: For most common Ethernet chipsets, Ubuntu includes drivers within the kernel. Ensuring your system is up-to-date often resolves driver issues. Run:
sudo apt update
sudo apt upgrade
sudo apt dist-upgrade
sudo reboot
  • Proprietary Drivers: Some network cards require proprietary drivers that are not included in the default kernel. You can check for additional drivers using the “Software & Updates” application, under the “Additional Drivers” tab. If a proprietary driver is available for your card, you can select it and apply the changes. This often requires a reboot.
  • Manual Driver Installation: In rare cases, you might need to manually download and compile drivers from the manufacturer’s website. This is an advanced procedure and should only be attempted if you are comfortable with compiling software and understand the risks. Always ensure you download drivers specifically for your network card model and your Ubuntu version.

Pro Tip: Before attempting manual driver installation, always try updating your system and checking for proprietary drivers first. This is usually sufficient for most hardware.

Network Configuration Errors

Incorrect network settings can prevent your Ethernet connection from functioning correctly, even if the hardware and drivers are working.

Dhcp Vs. Static Ip Addressing

Most home and small office networks use DHCP (Dynamic Host Configuration Protocol) to automatically assign IP addresses, subnet masks, gateway addresses, and DNS server information to devices. If your Ubuntu machine is configured for a static IP address but the settings are incorrect, or if the DHCP server on your network is malfunctioning, you won’t be able to connect.

Checking And Reconfiguring Dhcp

  • Graphical Interface: In Settings > Network > Wired, click the gear icon for your Ethernet connection. Under the IPv4 tab, ensure “Automatic (DHCP)” is selected. Click “Apply”.
  • `nmcli`:
nmcli connection modify ipv4.method auto
nmcli connection up 

Configuring A Static Ip Address

If you need to use a static IP address (common in server environments or specific network setups), ensure the following are correctly set:

  • IP Address: A unique IP address within your network’s subnet (e.g., `192.168.1.100`).
  • Subnet Mask: Defines the network portion of the IP address (e.g., `255.255.255.0`).
  • Gateway: The IP address of your router (e.g., `192.168.1.1`).
  • DNS Servers: Addresses of servers that translate domain names into IP addresses (e.g., `8.8.8.8` for Google DNS, or your router’s IP).
  • Graphical Interface: In the IPv4 settings, select “Manual” and fill in the details.
  • `nmcli`:
nmcli connection modify ipv4.method manual ipv4.addresses 192.168.1.100/24 ipv4.gateway 192.168.1.1 ipv4.dns "8.8.8.8,8.8.4.4"
nmcli connection up 

*(Note: `/24` is CIDR notation for `255.255.255.0`)*

Dns Resolution Issues

Even with a valid IP address, you won’t be able to browse the web if DNS resolution isn’t working. This means your computer can’t translate website names (like `google. com`) into IP addresses.

  • Check DNS Settings: Ensure your DNS servers are correctly configured, either via DHCP or static settings.
  • Test DNS: Use the `ping` command to test DNS resolution:
ping google.com

If this fails but `ping 8. 8. 8. 8` works, you have a DNS problem. Check your DNS server settings. You can view your current DNS configuration in the `/etc/resolv. conf` file, though NetworkManager often manages this dynamically.

Firewall Restrictions

While less common for basic Ethernet connectivity issues, a misconfigured firewall could potentially block network traffic.

  • Check `ufw` (Uncomplicated Firewall): If you have `ufw` enabled, check its status and rules.
sudo ufw status

If `ufw` is active and blocking traffic, you might need to allow specific ports or services. For general internet access, ensure outgoing traffic is permitted. You can temporarily disable the firewall to test if it’s the cause:

sudo ufw disable

Warning: Disabling your firewall reduces security. Re-enable it (`sudo ufw enable`) after testing.

Advanced Command-line Diagnostics

When the basic checks and NetworkManager configurations don’t resolve the issue, diving deeper with command-line tools can provide crucial insights.

Using `ethtool` For Link Settings

`ethtool` is a utility for displaying and manipulating Ethernet card settings, including link detection and speed.

  • Install `ethtool`: If it’s not already installed:
sudo apt install ethtool
  • Check Link Status:
sudo ethtool 

Look for the `Link detected:` line. It should say `yes`. If it says `no`, it points to a physical layer issue (cable, port, or hardware). You can also see details like Speed and Duplex settings.

Analyzing System Logs With `journalctl`

The systemd journal (`journalctl`) provides a comprehensive log of system events, including network-related messages.

  • View all logs:
journalctl -b

(shows Logs Since The Last Boot)

  • Filter for network-related messages:
journalctl -b | grep -iE 'network|eth|netdev|dhcp'

This can help pinpoint errors related to network services, interface detection, or DHCP client activity.

Network Interface Configuration Files

While NetworkManager is the preferred method, traditional network configuration files exist. Understanding them can be helpful for diagnosing conflicts or issues on systems where NetworkManager might be disabled or misconfigured.

  • /etc/network/interfaces: On older systems or systems configured for `ifupdown`, this file defines network interfaces. Check it for static configurations that might conflict with NetworkManager.
  • /etc/NetworkManager/NetworkManager.conf: This file configures NetworkManager itself. Ensure it’s not set to ignore your Ethernet interface.

Example Scenario: A User’s Experience

Sarah, a freelance graphic designer, recently installed a new Ubuntu 22.04 LTS system. After setting it up, she connected her Ethernet cable, expecting immediate internet access. To her dismay, the network icon showed no connection, and the “Ethernet not working” message persisted. She followed these steps:

  • Physical Checks: Verified the cable was firmly seated at both ends and tried a different cable. The port lights on her router and PC remained off.
  • `ip a`: Showed her interface `enp4s0` but it was in a `DOWN` state.
  • `lspci -k`: Revealed that `enp4s0` was using the `r8169` driver, but the output suggested no kernel driver was actively in use for the specific device instance.
  • System Updates: Ran `sudo apt update && sudo apt upgrade` and rebooted. This didn’t change the status.
  • `dmesg`: Showed an error message: “r8169 Realtek Ethernet: firmware load failed – firmware file rtl_nic/rtl8168g-3.fw not found”.
  • Solution: Sarah realized her system was missing the specific firmware file needed for her Realtek network card. She searched online for “Ubuntu rtl8168g-3.fw” and found that it was part of the `firmware-realtek` package. She installed it:
sudo apt install firmware-realtek
sudo reboot

Upon reboot, the Ethernet connection was automatically established, and the lights on the port illuminated.

This case highlights how specific hardware might require additional firmware, which can be resolved through package management.

Comparing Troubleshooting Methods

Different approaches suit different scenarios and user expertise levels. Here’s a comparison:

FeatureGraphical Settings`nmcli` Command-Line`ip`/`ethtool`/`dmesg` Diagnostics
**Ease of Use**High (Intuitive)Medium (Requires command knowledge)Low (Requires deep technical understanding)
**Speed**Fast for basic checks/changesFast for scripting/remote accessSlow, iterative process
**Information Depth**LimitedGoodVery High
**Best For**Desktop users, quick checksServers, automation, remote troubleshootingDeep-level hardware/driver issues
**Common Fixes**Toggling connections, basic IP configEnabling/disabling connections, IP configDriver issues, firmware, hardware

When To Use Which Method

  • Start with Graphical: Always begin with the graphical network settings for simple checks and changes.
  • Move to `nmcli`: If graphical tools are insufficient or you’re on a server, `nmcli` provides more control and clarity.
  • Use `ip`, `ethtool`, `dmesg`, `journalctl`: Reserve these tools for when you suspect driver, firmware, or low-level hardware issues. They provide the most detailed diagnostic information.

When To Consider Hardware Failure

While software and configuration issues are the most common reasons for an Ubuntu Ethernet connection not working, hardware failure is a possibility.

Signs Of Potential Hardware Failure

  • No Link Lights: If the LEDs on your Ethernet port remain completely dead, even after trying different cables and ports on your switch/router, the network card itself might be faulty.
  • Intermittent Connectivity: Frequent drops in connection that cannot be explained by software or cable issues might indicate a failing network card.
  • System Instability: In rare cases, a severely damaged network card can cause system freezes or crashes.
  • BIOS/UEFI Detection: Check if your computer’s BIOS/UEFI recognizes the onboard Ethernet adapter. If it’s not detected even at the firmware level, it’s a strong indicator of hardware failure.

Testing Network Card Functionality

  • Use a Live USB: Boot your computer from an Ubuntu Live USB/DVD. If the Ethernet connection works correctly in the live environment, it strongly suggests the problem lies within your installed system’s configuration or drivers, not the hardware itself.
  • Install a Separate Network Card: If you

Hairline Cracks Vs Structural Cracks

The integrity of a building or structure is paramount, and understanding the signs of potential distress is crucial for homeowners and property managers alike. Among the most common visual indicators of underlying issues are cracks. However, not all cracks are created equal. Distinguishing between hairline cracks and structural cracks is a vital skill that can help prevent minor cosmetic issues from escalating into costly and dangerous problems. While hairline cracks are often superficial and benign, structural cracks can signal serious foundational or load-bearing deficiencies that demand immediate attention.

This comprehensive guide will equip you with the knowledge to identify, understand, and address different types of cracks in your property. We will explore their causes, characteristics, and the implications they hold for your building’s safety and longevity. By the end of this article, you will be better prepared to assess the severity of cracks and know when to call in the professionals.

Key Takeaways

  • Hairline cracks are typically superficial, less than 1/16th of an inch wide, and often appear on plaster or paint. They are usually caused by normal settling or material expansion/contraction.
  • Structural cracks are wider (often over 1/8th inch), deeper, and can penetrate through the entire material of a wall or foundation. They are indicators of significant stress on the building’s framework.
  • Common causes for hairline cracks include building settlement, drying and shrinking of materials (like plaster or concrete), and temperature fluctuations.
  • Structural cracks are frequently caused by foundation movement, water damage and hydrostatic pressure, overloading of structural elements, poor construction practices, and tree root intrusion.
  • The width, depth, pattern, and location of a crack are key indicators of its severity. Diagonal cracks in brickwork or cracks that run through multiple materials often signal structural problems.
  • While hairline cracks are often cosmetic, they should still be monitored. Structural cracks require prompt professional assessment by a structural engineer or qualified contractor to determine the cause and necessary repairs.
  • Proactive maintenance, such as ensuring proper drainage and addressing water intrusion issues, can help prevent many types of cracks.
Hairline Cracks Vs Structural Cracks

Credit: allcountywaterproofing.com

Understanding Hairline Cracks

Hairline cracks, often referred to as superficial cracks or settlement cracks, are a common sight in many homes and buildings. They are characterized by their narrow width, typically measuring less than 1/16th of an inch. These fine fissures are usually confined to the surface layer of materials like plaster, drywall, paint, or stucco. In many instances, they are simply a cosmetic issue and do not pose a threat to the structural integrity of the building.

The primary culprit behind hairline cracks is the natural process of building settlement. When a new building is constructed, the soil beneath it compacts over time, causing the foundation to shift slightly. This minor movement can exert stress on the building’s materials, leading to the formation of these fine cracks. Furthermore, materials themselves expand and contract with changes in temperature and humidity. Plaster and drywall, in particular, are prone to shrinking as they dry out after installation or during seasonal humidity shifts, which can manifest as hairline cracks, especially along joints or corners.

Causes Of Hairline Cracks

Several factors contribute to the development of hairline cracks, most of which are related to normal building processes or environmental influences. Understanding these causes can help homeowners differentiate them from more serious issues.

  • Normal Building Settlement: As mentioned, new construction undergoes a period of settling. This is a gradual process where the building’s weight causes the soil beneath the foundation to compress. This settling is normal and usually stops once the soil has fully compacted. The resulting minute shifts in the foundation can cause superficial cracks to appear in the walls and ceilings. These are typically minor and often appear in a random pattern.
  • Drying and Shrinking of Materials: Many building materials, especially those used for interior finishes, contain moisture. Plaster, drywall mud, and even concrete will shrink as they dry. This shrinkage can create tensile stress, leading to the formation of fine cracks, particularly where different materials meet or where there are stress points. For instance, cracks often appear along drywall seams or around window and door frames as the compound dries.
  • Temperature and Humidity Fluctuations: Materials expand when heated and contract when cooled, and they absorb moisture and expand, releasing it and contracting. These natural physical changes, especially in response to seasonal weather shifts, can put stress on building components. When these stresses exceed the material’s tensile strength, hairline cracks can form. This is particularly noticeable in older homes with less advanced insulation and vapor barriers.
  • Vibrations: While less common, significant vibrations from nearby construction, heavy traffic, or even seismic activity can sometimes cause hairline cracks to appear, especially in brittle materials like plaster.

Identifying Hairline Cracks

The key to identifying hairline cracks lies in their physical characteristics and behavior. They are often subtle and can be easily overlooked if one isn’t paying close attention.

  • Width: The most defining feature is their narrowness. A crack is generally considered a hairline crack if it is less than 1/16th of an inch wide. You can often barely fit a credit card edge into it.
  • Depth: Hairline cracks are typically surface-level. They are usually present only in the paint or plaster layer and do not penetrate the underlying material like drywall or brick.
  • Pattern: They often appear in random patterns, along drywall seams, corners of walls, or around window and door frames. They are less likely to follow a consistent, geometric path.
  • Location: Commonly found on interior walls and ceilings, especially in newer homes or areas that have experienced significant temperature or humidity changes.
  • Progression: While they can widen slightly with seasonal changes, hairline cracks usually remain relatively stable over time. They do not typically grow rapidly or change in a concerning manner.

Pro Tip: If you’re unsure about the width of a crack, you can use a ruler with fine markings or even a coin to gauge its size. A crack that can easily accommodate the edge of a dime or quarter is likely beyond the hairline stage.

Hairline Cracks Vs Structural Cracks

Credit: eppconcrete.com

Understanding Structural Cracks

Structural cracks are a more serious concern. Unlike their superficial counterparts, these cracks indicate a compromise in the building’s structural integrity. They suggest that the building’s foundation, walls, beams, or other load-bearing elements are under significant stress, potentially due to movement, overload, or material failure. These cracks can be wider, deeper, and follow patterns that suggest underlying issues.

The presence of structural cracks warrants immediate attention from a qualified professional. Ignoring them can lead to escalating damage, posing risks to safety and significantly impacting property value. The causes are often more complex and directly related to the fundamental stability of the building.

Causes Of Structural Cracks

The origins of structural cracks are typically more profound, involving forces that challenge the building’s design and construction.

  • Foundation Movement or Failure: This is one of the most common causes of structural cracks. Issues like soil erosion, hydrostatic pressure (water pushing against the foundation), tree root intrusion, or inadequate soil compaction during construction can cause the foundation to shift, heave, or settle unevenly. This movement translates into stress on the walls and framing above.
  • Water Damage and Drainage Issues: Persistent water intrusion around the foundation can saturate the soil, increasing its pressure against basement walls and slabs. It can also weaken the soil supporting the foundation. Poor grading, clogged gutters, and leaky downspouts that direct water towards the foundation are common culprits. This can lead to hydrostatic pressure, forcing walls inward or causing cracks.
  • Overloading of Structural Elements: If a floor, roof, or wall is subjected to loads exceeding its design capacity, it can lead to cracking. This might happen due to heavy snow loads, adding extra floors to a building without reinforcing the foundation, or improper renovations that remove load-bearing walls without adequate support.
  • Poor Construction Practices: Substandard materials, inadequate reinforcement (like insufficient rebar in concrete), improper jointing, or failure to follow building codes during construction can create inherent weaknesses that eventually lead to structural cracks.
  • Expansive Soils: Certain types of soil, like clay, absorb significant amounts of water and expand. When they dry, they shrink. This constant cycle of expansion and contraction can exert immense pressure on foundations, leading to severe cracking.
  • Vibrations and Seismic Activity: While minor vibrations might cause hairline cracks, significant seismic events or prolonged exposure to intense vibrations from nearby heavy industrial activity can cause structural damage and lead to larger cracks.

Identifying Structural Cracks

Recognizing structural cracks is crucial for homeowner safety and property preservation. They exhibit distinct characteristics that differentiate them from superficial damage.

  • Width: Structural cracks are generally wider than 1/8th of an inch. They can be wide enough to fit a pencil eraser or even a finger. The wider the crack, the more significant the potential problem.
  • Depth: These cracks are often deep, penetrating through the entire thickness of the material, whether it’s concrete, brick, block, or plaster.
  • Pattern: Structural cracks often follow predictable patterns that indicate the direction of stress.
  • Diagonal Cracks: In brick or block walls, diagonal cracks that run from the corner of a window or door opening upwards or downwards are a strong indicator of foundation settlement or movement.
  • Horizontal Cracks: In basement walls, horizontal cracks can indicate significant hydrostatic pressure pushing the wall inward.
  • Stair-Step Cracks: Cracks that resemble steps in brick or block walls often point to uneven settlement of the foundation.
  • Location: They can appear anywhere on the building, but are particularly concerning when found in foundations, load-bearing walls, beams, columns, and structural slabs. Cracks that extend through multiple materials (e.g., from plaster through to brick) are also a red flag.
  • Progression: Structural cracks are often active and growing. They may widen over time, especially after rain events or significant temperature changes. You might notice them getting larger or new ones appearing.

Pro Tip: Monitor cracks regularly. Use a pencil or marker to draw a line across the crack and note the date. Check periodically to see if the line is broken or if the crack has visibly widened. This can provide valuable information for a professional assessment.

Comparison: Hairline Vs. Structural Cracks

To better illustrate the differences, let’s compare the key characteristics of hairline and structural cracks side-by-side. This table highlights the critical distinctions that homeowners should look for when assessing cracks in their property.

FeatureHairline CracksStructural Cracks
**Width**Less than 1/16th of an inch1/8th of an inch or wider
**Depth**Superficial, only in paint or plasterDeep, penetrates through material
**Pattern**Random, along drywall seams, cornersDiagonal, horizontal, stair-step, follows stress lines
**Location**Interior walls, ceilings, cosmetic surfacesFoundations, load-bearing walls, beams, structural elements
**Cause**Settlement, drying/shrinking, temperature changesFoundation movement, water pressure, overloading, soil issues
**Severity**Usually cosmetic, low riskSerious, indicates structural compromise, high risk
**Progression**Stable or minor seasonal wideningOften active, growing, widening over time
**Action Needed**Monitor, cosmetic repair**Immediate professional assessment**

Real-world Example: The Settling House

Consider two hypothetical houses in the same neighborhood. House A is a 5-year-old home where the owner notices fine, spiderweb-like cracks on the ceiling of the master bedroom and a thin vertical crack along a drywall seam in the hallway.

These cracks are barely visible and don’t seem to be growing. This is typical behavior for hairline cracks resulting from the initial settling of the house and the drying of drywall compound. A simple cosmetic repair, like filling the cracks with spackle and repainting, is usually sufficient.

House B, a 20-year-old home, has a homeowner who observes a significant crack running diagonally from the bottom corner of a living room window down to the floor. The crack is about 1/4 inch wide and appears to extend through the plaster and into the brickwork behind. The homeowner also notices that the window frame seems slightly out of square. Furthermore, in the basement, there’s a noticeable horizontal crack in the concrete foundation wall, with some efflorescence (a powdery white deposit) visible. These are strong indicators of foundation settlement or hydrostatic pressure. This situation requires immediate attention from a structural engineer to diagnose the cause of the foundation issues and recommend necessary repairs, which could involve underpinning the foundation or installing a drainage system.

Causes And Implications Of Hairline Cracks

Hairline cracks, while generally not alarming, can sometimes be the first visible sign of more significant issues, or they can simply be a testament to the aging process of a building. Understanding their root causes helps in determining whether they warrant further investigation or if they can be addressed with simple maintenance.

Material Expansion And Contraction

Building materials are constantly subjected to environmental changes. Wood frames expand and contract with humidity fluctuations, while concrete and masonry materials react to temperature changes. When these movements occur, the finishes applied over them, such as plaster or paint, can be stressed.

If the stress exceeds the material’s tensile strength, fine cracks will form. This is particularly common in areas with significant seasonal temperature swings or high humidity variations.

Drying And Curing Processes

When new construction is completed, many materials, especially plaster, drywall joint compound, and concrete, contain a significant amount of water. As these materials dry and cure over weeks and months, they shrink. This shrinkage creates internal stresses that can lead to the formation of hairline cracks, particularly along joints, corners, and around penetrations like electrical boxes or plumbing.

Minor Foundation Settling

All buildings experience some degree of settling, especially in their first few years. This is the natural compaction of the soil beneath the foundation under the building’s weight. While significant settling can cause structural cracks, minor, uniform settling often results in the appearance of hairline cracks in interior finishes.

These cracks usually stabilize once the soil has fully compacted.

Implications Of Hairline Cracks

For the most part, hairline cracks are benign. Their main implication is aesthetic, potentially detracting from the visual appeal of interior surfaces. However, they can also serve as early warning signs:

  • Indicator of Environmental Stress: They can signal that a particular area of the building is experiencing significant temperature or humidity fluctuations, which might point to issues with insulation or ventilation.
  • Early Sign of Settlement: While usually minor, if hairline cracks start to appear in large numbers or in specific patterns, they could be an early indication of more substantial foundation movement that could worsen over time.
  • Entry Point for Moisture: Although very fine, in areas prone to high humidity or direct water exposure, hairline cracks could potentially allow small amounts of moisture to penetrate, leading to mold or further degradation of finishes over long periods.

Causes And Implications Of Structural Cracks

Structural cracks are a different breed altogether. They are not merely cosmetic blemishes but rather symptoms of underlying problems that affect the load-bearing capacity and safety of the building. Their causes are invariably linked to forces that compromise the building’s fundamental stability.

Foundation Issues

The foundation is the bedrock of any structure. Any compromise to its integrity, such as uneven settlement, hydrostatic pressure from saturated soil, or damage from tree roots, will directly impact the walls and framing above. This stress will manifest as structural cracks. For example, if one side of the foundation settles more than the other, the walls above will twist, creating diagonal or stair-step cracks.

Water Intrusion And Drainage Problems

Water is a persistent enemy of building foundations. Poor drainage around a property can lead to soil saturation, increasing the pressure on basement walls. This hydrostatic pressure can literally push walls inward, causing them to crack and bow. Over time, water can also erode the soil supporting the foundation, leading to settlement and subsequent cracking.

Material Degradation And Overload

Building materials are designed to withstand specific loads and environmental conditions. However, over time, materials can degrade due to age, moisture, or chemical exposure. Furthermore, if a structural element is subjected to loads beyond its design limits, such as excessive snow on a roof or the addition of extra floors without proper reinforcement, it can fail, leading to cracks.

Poor Construction And Design

Deficiencies in the original construction or design are a significant cause of structural cracks. This can include:

  • Inadequate Footings: Foundations that are too shallow or not wide enough for the soil conditions.
  • Insufficient Reinforcement: Lack of proper rebar in concrete foundations or walls.
  • Improperly Placed Load-Bearing Walls: Removing or altering walls without providing adequate alternative support.
  • Lack of Moisture Barriers: Inadequate protection against soil moisture.

Implications Of Structural Cracks

The implications of structural cracks are far more severe than those of hairline cracks:

  • Compromised Safety: Structural cracks can weaken the building’s ability to withstand loads, making it vulnerable to collapse, especially during extreme weather events or seismic activity.
  • Increased Risk of Further Damage: An active structural crack can allow water and pests to enter the building’s structure, leading to rot, mold, and further degradation.
  • Reduced Property Value: Visible structural damage significantly lowers a property’s market value and can make it difficult to sell.
  • Costly Repairs: Addressing structural cracks often requires extensive and expensive repairs, potentially involving foundation stabilization, reinforcement of walls, or complete reconstruction of damaged sections.
  • Potential for Catastrophic Failure: In the most severe cases, untreated structural cracks can lead to partial or complete building failure.

Monitoring And Maintenance Strategies

Regular monitoring and proactive maintenance are key to managing both hairline and structural cracks. While hairline cracks often require minimal intervention, consistent observation can help identify when they might be evolving into something more serious. For structural cracks, monitoring is part of a larger strategy to manage ongoing issues and ensure the building’s safety.

Monitoring Hairline Cracks

  • Regular Inspections: Periodically inspect surfaces where hairline cracks have appeared. Look for any changes in their width, length, or pattern.
  • Marking and Dating: As mentioned earlier, marking cracks with a pencil and date can help track their progression. This is useful even for hairline cracks, as a sudden change in their behavior could be an early indicator of a developing issue.
  • Contextual Observation: Note the location of hairline cracks relative to potential stress points, such as corners, joints, or areas near plumbing or electrical fixtures. Observe if they appear more prominently during specific weather conditions.

Maintenance To Prevent Cracks

Preventative maintenance is the most effective way to minimize the occurrence of both types of cracks.

  • Ensure Proper Drainage: This is perhaps the most critical step in preventing foundation-related cracks.
  • Gutters and Downspouts: Keep gutters clean and ensure downspouts extend at least 5-10 feet away from the foundation.
  • Grading: The ground around your foundation should slope away from the house to direct rainwater and snowmelt away.
  • Sump Pumps: If you have a basement or crawl space, ensure your sump pump is functioning correctly.
  • Manage Landscaping: Avoid planting large trees or shrubs too close to the foundation, as their roots can damage the foundation. Trim existing tree roots that may be growing towards the foundation.
  • Address Water Leaks Promptly: Fix leaky pipes, faucets, or appliances that could contribute to moisture issues within walls or under floors.
  • Maintain Exterior Finishes: Ensure that caulking around windows and doors is intact and that exterior paint or siding is in good condition to prevent water penetration.
  • Control Interior Humidity: Use dehumidifiers in damp basements or crawl spaces and ensure proper ventilation in bathrooms and kitchens to minimize moisture-related expansion and contraction of materials.

When To Call A Professional

While homeowners can monitor and perform basic maintenance, certain situations necessitate professional intervention.

  • For Hairline Cracks: If hairline cracks begin to widen significantly, appear in large numbers rapidly, or are accompanied by other signs of distress (like sticking doors or windows), it’s wise to consult a home inspector or structural engineer.
  • For Structural Cracks: Any crack that exhibits the characteristics of a structural crack (wide, deep, horizontal, diagonal, stair-step, or active growth) requires immediate attention from a qualified professional. This typically means a structural engineer who can accurately diagnose the problem, determine its cause, and recommend the appropriate repair strategy. A reputable foundation repair specialist or general contractor with experience in structural issues can then carry out the repairs.

Repairing Cracks: A Professional Perspective

The approach to repairing cracks differs significantly based on whether the crack is hairline or structural. Attempting to repair a structural crack with methods suitable for hairline cracks can be ineffective and dangerous, masking a serious problem.

Repairing Hairline Cracks

Given that hairline cracks are primarily cosmetic, the repair methods are straightforward and often achievable as DIY projects.

  • Spackling and Patching: For minor cracks in drywall or plaster, the most common method is to slightly widen the crack with a utility knife to create a better surface for adhesion, clean out any dust, and then fill it with spackling compound or joint compound. After the compound dries, it’s sanded smooth, primed, and painted to match the surrounding surface.
  • Caulking: For cracks in trim, around windows, or baseboards, a flexible paintable caulk can be used to fill the gap. Once dry, it

Why Does My Sink Gurgle When Draining

Why Does My Sink Gurgle When Draining

The unsettling sound of a gurgling sink can transform a mundane chore into a minor mystery. It’s a common household annoyance, often dismissed as a quirky plumbing characteristic. However, this seemingly harmless noise is frequently a symptom of a more significant issue lurking within your drainage system.

Understanding why your sink gurgles when draining is the first step toward diagnosing and resolving potential problems, from minor clogs to more serious ventilation failures that can impact your entire home’s plumbing.

Ignoring these gurgling sounds can lead to slow drains, unpleasant odors, and even water backing up into your sink or elsewhere in your home. These issues aren’t just inconvenient; they can indicate a compromised plumbing system that requires attention. This article will explore the various reasons behind sink gurgling, delve into the mechanics of your plumbing, and provide practical, actionable steps you can take to identify and fix the problem, ensuring your drains flow freely and quietly.

Key Takeaways

  • Gurgling is a sign of trapped air: The primary cause of sink gurgling is air being forced through water in the pipes, indicating a blockage or venting issue.
  • Common culprits include clogs: Food debris, grease, hair, and soap scum are frequent culprits that accumulate in drain pipes, causing partial or full blockages.
  • Ventilation is crucial: Plumbing systems rely on vents to equalize pressure, allowing water to flow smoothly. A blocked vent pipe can cause gurgling and slow drains.
  • P-traps can cause issues: The U-shaped P-trap under your sink is designed to hold water and prevent sewer gases from entering your home. If it’s blocked or improperly vented, it can gurgle.
  • Deeper blockages require professional help: While minor clogs can often be cleared with DIY methods, extensive blockages or ventilation problems may necessitate calling a plumber.
  • Regular maintenance prevents problems: Simple preventative measures like using drain strainers and avoiding pouring grease down the drain can significantly reduce the likelihood of gurgling.
Why Does My Sink Gurgle When Draining

Credit: www.robinsonsplumbingservice.com

Understanding Your Plumbing System’s Mechanics

Before diving into the specific causes of gurgling, it’s essential to grasp how a typical residential plumbing system functions. Your drains are not just simple pipes leading away from your fixtures; they are part of a complex network designed to efficiently remove wastewater and prevent sewer gases from entering your home. This network relies on gravity, water pressure, and a critical component known as the vent system.

The Role Of The P-trap

Every fixture in your home, including sinks, showers, and toilets, is equipped with a P-trap. This is the U-shaped section of pipe located directly beneath the fixture. Its primary purpose is twofold:

  • Preventing Sewer Gases: The curve of the P-trap holds a small amount of water, creating a seal that blocks unpleasant and potentially harmful sewer gases from rising back up through the drain and into your living space.
  • Catching Debris: The P-trap can also catch heavier debris that might otherwise travel further down the system, making it easier to retrieve if a clog occurs nearby.

When water flows down a drain, it pushes air ahead of it. As the water passes through the P-trap, air can escape through the vent system. If the vent is clear and the trap is functioning correctly, the water flows smoothly.

However, if air cannot escape properly, it can become trapped and forced back up through the water in the P-trap, causing the characteristic gurgling sound.

The Importance Of The Vent System

The vent system is a network of pipes that runs from your drainage pipes up through your roof. Its main function is to equalize air pressure within the drainage system. Think of it like this: as water rushes down a drain, it creates a vacuum behind it. Without a vent, this vacuum can suck water out of the P-traps, breaking the seal and allowing sewer gases to enter. Conversely, if air can’t escape forward, it can create back pressure.

The vent system allows air to enter the pipes from above, preventing this vacuum and back pressure. This ensures that water flows down the drain quickly and efficiently, and that your P-traps remain filled with water. A properly functioning vent system is crucial for all plumbing fixtures to operate correctly and odor-free.

How Air Pressure Affects Drains

Air pressure is a silent but critical player in your plumbing’s performance. When you run water down a drain, gravity pulls the water and the wastewater it carries downwards. As this column of water moves, it displaces air. The vent system allows fresh air to enter the pipes, maintaining atmospheric pressure and allowing the water to flow unimpeded.

If the vent is blocked, the air behind the draining water can’t escape. This trapped air gets compressed, and as the water continues to push, it forces the air back up the pipe. This is precisely what causes the gurgling sound, air being pushed through the water seal in the P-trap.

In severe cases of blocked vents, this back pressure can even cause water to back up into the fixture or push water into adjacent fixtures.

Why Does My Sink Gurgle When Draining

Credit: www.homeserve.co.uk

Common Causes Of Sink Gurgling

The gurgling sound is almost always a symptom of a problem with either a blockage within the drainpipe or an issue with the ventilation of your plumbing system. Identifying which of these is the root cause is key to effective troubleshooting.

Partial Clogs In The Drainpipe

The most frequent reason for a gurgling sink is a partial clog somewhere in the drainpipe. Over time, a combination of substances can accumulate, restricting the flow of water and trapping air.

  • Grease and Fat Buildup: When hot grease, oil, or fats are poured down the sink, they can cool and solidify as they travel through the pipes. This sticky substance adheres to the pipe walls, narrowing the passage and trapping other debris. Even “flushable” wipes can contribute to this buildup.
  • Food Scraps: In kitchen sinks, small pieces of food, coffee grounds, eggshells, and starchy substances like rice or pasta can get lodged in the pipe. While a garbage disposal can help, it doesn’t pulverize everything, and some particles can still accumulate.
  • Hair and Soap Scum: Bathroom sinks are particularly prone to clogs from hair and soap residue. Hair, even when combined with water, can form a tangled mass that catches soap scum and other small particles, creating a significant obstruction.
  • Foreign Objects: Occasionally, small items like jewelry, bottle caps, or even children’s toys can accidentally fall into the sink and get stuck in the P-trap or further down the pipe, causing an immediate blockage.

When a partial clog exists, water struggles to pass through the restricted opening. As water backs up behind the clog, it can force trapped air through the remaining water in the P-trap, creating the gurgling sound. The clog also impedes the smooth flow of air that should be entering from the vent, exacerbating the pressure issue.

Blocked Plumbing Vents

Your home’s plumbing system has a network of vent pipes, typically extending from the main drain line up through the roof. These vents are crucial for allowing air to enter the drainage system, equalize pressure, and prevent siphoning of P-traps.

When a vent pipe becomes blocked, it disrupts the entire drainage process.

  • Debris Accumulation: Leaves, bird nests, snow, and ice can accumulate in the vent pipe opening at the roof level, obstructing airflow.
  • Animal Infestation: Small animals or birds can build nests inside vent pipes, creating a significant blockage.
  • Tree Growth: In some cases, tree roots can infiltrate underground vent pipes, causing blockages.
  • Improper Installation: While less common, vents can sometimes be improperly installed, leading to inadequate airflow or even blockage over time.

When a vent is blocked, the air pressure within the drainage system cannot equalize. As water drains from a fixture, it creates a vacuum behind it. This vacuum can pull water from the P-traps of other fixtures, causing them to lose their water seal and allow sewer gases to enter.

Simultaneously, the lack of incoming air means that air trying to escape from downstream fixtures gets trapped and forced back up, leading to gurgling sounds, slow drains, and potentially even sewage odors.

Issues With The P-trap

The P-trap itself, while designed to prevent problems, can sometimes be the source of gurgling.

  • Clogs within the P-Trap: The U-shape of the P-trap is a natural collection point for debris. If enough material accumulates, it can create a clog directly within the trap, leading to slow draining and gurgling.
  • Improperly Sealed P-Trap: If the connections to the P-trap are loose or improperly sealed, air can be drawn in, or water can leak out, disrupting the water seal and potentially causing gurgling or whistling sounds.
  • Siphoning: In systems with inadequate venting, the vacuum created by draining water can sometimes siphon the water out of the P-trap. When the next flush or drain occurs, the air forced through the now-empty trap will cause a distinct gurgle.

The gurgling from a P-trap issue often sounds more localized and may be accompanied by visible water flow problems directly at the sink.

Simultaneous Fixture Drainage

A common scenario that highlights venting or pressure issues is when multiple fixtures are used concurrently. If you flush a toilet and then immediately hear your sink gurgle, or if running the shower causes the sink to gurgle, it strongly suggests a problem with the overall system’s ability to handle simultaneous water flow and air pressure changes.

This is a classic indicator of a blocked vent or a significant blockage further down the main drain line. The sudden demand for air or the surge of water pushing through a restricted pipe can force air and water back up through other nearby fixtures.

Why Does My Sink Gurgle When Draining

Credit: www.youtube.com

Diagnosing The Gurgling Sink

Before you grab a plunger or call a professional, a bit of detective work can help pinpoint the cause of your gurgling sink. Observing when and how the gurgling occurs is key to narrowing down the possibilities.

Step-by-step Diagnostic Process

  • Observe the Gurgling:
  • When does it happen? Does it occur only when you run the specific sink, or when other fixtures in the house are used (e.g., flushing a toilet, running a washing machine)?
  • What does it sound like? Is it a faint bubbling, a loud gulping, or a more sustained rushing sound?
  • Is the drain slow? Is the water draining slowly, or is it draining at a normal pace despite the gurgling?
  • Test Other Fixtures:
  • Run water in the problematic sink for a minute. Note any gurgling.
  • Flush a nearby toilet. Listen for gurgling in the sink.
  • Run water in another sink or shower. Listen for gurgling in the problematic sink.
  • Run the washing machine (if applicable and nearby). Listen for gurgling.
  • Check the P-Trap:
  • Place a bucket under the P-trap.
  • Carefully loosen the slip nuts connecting the trap. Be prepared for residual water to drain out.
  • Inspect the trap for visible clogs or debris.
  • If clear, reassemble and tighten the nuts.
  • Examine the Sink Stopper:
  • Remove the sink stopper. Many stoppers have a mechanism that can catch hair and debris. Clean it thoroughly.
  • Test the drain with the stopper removed.
  • Consider Recent Work:
  • Has any plumbing work been done recently? An improperly reconnected pipe or a temporarily blocked vent during construction could be the cause.

Signs Pointing To A Clog Vs. A Vent Issue

Signs suggesting a clog:

  • The gurgling and slow drain occur only when that specific sink is used.
  • The gurgling is loudest when water is actively draining from that sink.
  • You can often feel or hear the clog if you put your ear near the drain opening.
  • The problem may be localized to the P-trap or the first few feet of pipe.

Signs suggesting a vent issue:

  • Gurgling occurs in multiple fixtures, or when other fixtures are used.
  • You hear gurgling in sinks or showers when a toilet is flushed.
  • You experience foul sewer odors, especially after flushing toilets or running drains.
  • Drains throughout the house are slow or draining erratically.
  • Water levels in toilet bowls fluctuate unexpectedly.
  • The sink drains relatively normally, but still gurgles, indicating air pressure problems rather than just a water flow obstruction.

Using A Plunger Effectively

A plunger is a common tool for clearing minor clogs. For a sink, use a cup-style plunger.

  • Create a Seal: Ensure there’s enough water in the sink to cover the plunger cup. Block the overflow opening with a wet rag to maximize suction.
  • Plunge Vigorously: Place the plunger over the drain opening, ensuring a tight seal. Pump it up and down vigorously 15-20 times.
  • Break the Seal: Quickly pull the plunger away to break the seal.
  • Repeat: Repeat the process several times. If the water starts draining, flush with hot water. If not, the clog may be deeper or a vent issue might be present.

The Bucket Test For P-trap Issues

This is a simple test to check if the P-trap itself is the problem.

  • Place a bucket directly under the P-trap.
  • Carefully loosen the slip nuts on either side of the U-bend.
  • Allow any water to drain into the bucket.
  • Inspect the inside of the trap for any visible debris, grease, or hair.
  • Clean out any obstructions.
  • Reassemble the P-trap, ensuring the connections are snug but not overtightened.
  • Run water to check for leaks and listen for gurgling.

If cleaning the P-trap resolves the issue, the clog was contained within that section. If the gurgling persists, the problem lies further down the drainpipe or in the vent system.

Troubleshooting Common Causes

Once you have a better idea of the potential cause, you can employ specific troubleshooting methods.

Clearing Drainpipe Clogs

If you suspect a clog in the drainpipe beyond the P-trap, several methods can be effective.

  • Boiling Water: For kitchen sinks prone to grease buildup, pouring a kettle of boiling water down the drain can help melt and dislodge minor grease clogs. Repeat this several times. Be cautious with PVC pipes, as excessive heat can damage them; lukewarm or hot tap water might be a safer alternative.
  • Baking Soda and Vinegar: This classic DIY method can help break down minor clogs and deodorize the drain.
  • Pour about half a cup of baking soda down the drain.
  • Follow with an equal amount of white vinegar.
  • The mixture will fizz. Cover the drain opening with a stopper or rag to direct the reaction downwards.
  • Let it sit for 30 minutes to an hour.
  • Flush with hot water.
  • Drain Snake (Auger): For clogs deeper than the P-trap, a drain snake is an invaluable tool.
  • Feed the snake cable into the drainpipe (you may need to remove the P-trap first).
  • When you encounter resistance, crank the handle to rotate the auger head, breaking up or snagging the clog.
  • Carefully pull the snake back out, removing any debris it has captured.
  • Flush the drain thoroughly with hot water.

*Pro Tip:* When using a drain snake, always wear gloves and eye protection. Some snakes have sharp ends that can cause injury if not handled carefully.

  • Enzymatic Drain Cleaners: Unlike harsh chemical cleaners, enzymatic cleaners use natural enzymes to break down organic waste like grease, hair, and food particles. They are generally safer for pipes and the environment but work more slowly, often requiring overnight application. They are best used for maintenance or very minor clogs.

Addressing Blocked Vents

Diagnosing and clearing a blocked vent pipe can be more challenging, as they are often inaccessible.

  • Locating Vents: Vent pipes typically run vertically from drain lines and connect to a larger stack that exits through the roof. You might hear gurgling from a vent pipe if it’s blocked, or notice the effects on your drains.
  • Roof Access: The most direct way to check for vent blockages is to safely access your roof.
  • Safety First: Ensure you have a sturdy ladder and proper safety equipment. It’s often best to have a second person present.
  • Inspect the Vent Opening: Look for any obvious obstructions like leaves, nests, or debris around the vent pipe opening.
  • Clear Obstructions: Carefully remove any debris you find. You can use a garden hose to try and flush out minor blockages.
  • Using a Drain Snake on Vents: If you suspect a blockage further down the vent pipe, you might be able to use a drain snake.
  • Insert the snake into the vent opening on the roof.
  • Feed the cable down, trying to dislodge any obstruction.
  • Be aware that vent pipes can have turns and connections that may make snaking difficult.

*Warning:* Working on a roof can be dangerous. If you are uncomfortable with heights or unsure about clearing the vent, it is far safer to call a professional plumber. They have the specialized tools and experience to safely access and clear vent pipes.

Dealing With P-trap Issues

As mentioned, cleaning the P-trap is a straightforward DIY task. If the issue is not a clog within the trap itself, but rather a problem with its seal or function, it might indicate a broader venting issue that is causing the trap to siphon.

In such cases, addressing the vent system is the primary solution. If the P-trap connections are leaking, simply tightening the slip nuts or replacing worn-out rubber washers might resolve the problem.

When To Call A Professional Plumber

While many sink gurgling issues can be resolved with DIY methods, there are situations where calling a professional plumber is the wisest and most effective course of action.

Signs You Need A Plumber

  • Persistent Gurgling: If you’ve tried basic troubleshooting (plunger, baking soda/vinegar, P-trap cleaning) and the gurgling persists, the blockage is likely deeper in the system or the issue is with the main drain line or vent stack.
  • Multiple Fixtures Affected: If gurgling, slow drains, or sewer odors are affecting multiple fixtures in your home, it points to a problem with the main sewer line or a significant vent blockage affecting the entire house. This is beyond typical DIY repair.
  • Sewage Backup: Any sign of sewage backing up into your sink, shower, or toilet is a serious plumbing emergency that requires immediate professional attention.
  • Uncertainty About Venting: Vent systems can be complex. If you are unsure about how to locate or safely access your vent pipes, or if you suspect a blockage within them, a plumber has the expertise and equipment to handle it.
  • Recurring Problems: If your sink gurgles frequently, even after you’ve cleared it, there might be an underlying issue with the pipe slope, a partial collapse of a drainpipe, or an undersized vent system that needs professional diagnosis and repair.
  • Lack of Tools or Comfort: If you don’t have the necessary tools (like a long drain snake or inspection camera) or are not comfortable performing the necessary work, it’s always best to let a professional handle it to avoid causing further damage.

Benefits Of Professional Plumbing Services

  • Expert Diagnosis: Plumbers have specialized tools, such as drain inspection cameras, that can visually identify the exact location and nature of blockages or damage within your pipes and vents. This eliminates guesswork.
  • Advanced Equipment: Professionals have access to powerful drain cleaning machines, hydro-jetting equipment, and specialized tools for vent clearing that are far more effective than standard household tools.
  • Efficiency and Speed: Experienced plumbers can diagnose and resolve issues much faster than a DIYer, saving you time and frustration.
  • Preventative Maintenance: A plumber can not only fix the immediate problem but also assess your entire plumbing system for potential future issues and recommend preventative maintenance.
  • Warranty and Guarantees: Reputable plumbers often offer warranties on their work, providing peace of mind that the repair will be effective and lasting.

Cost Considerations

While calling a plumber involves a cost, it’s important to weigh this against the potential damage and inconvenience of DIY attempts gone wrong. The cost of a plumber can vary based on your location, the complexity of the job, and the time required.

For a simple clog removal, you might expect to pay anywhere from $100 to $300. More complex issues, like vent stack clearing or main line blockages, could range from $250 to $1,000 or more. Always get an estimate upfront and ask about potential additional charges.

Preventative Maintenance For Your Drains

The best way to deal with a gurgling sink is to prevent it from happening in the first place. Regular maintenance can keep your drains flowing smoothly and quietly.

Kitchen Sink Maintenance

  • Scrape Plates: Scrape food scraps into the trash or compost bin before rinsing dishes.
  • Avoid Pouring Grease: Never pour grease, oil, or fats down the kitchen sink. Collect them in a container and

Karcher Pressure Washer Won T Start

Karcher Pressure Washer Won T Start

When your trusty Karcher pressure washer won’t start, it can be a frustrating experience, especially when you have cleaning tasks lined up. These machines are designed for reliability and power, but like any piece of equipment, they can encounter issues. Understanding the common reasons why a Karcher pressure washer might refuse to start is the first step towards diagnosing and fixing the problem, getting you back to tackling dirt and grime effectively.

From a simple lack of fuel to more complex internal issues, a non-starting pressure washer can stem from a variety of sources. Often, the fix is straightforward and can be performed by the user without needing a professional. However, sometimes the problem requires a deeper dive into the machine’s components.

This guide aims to provide a comprehensive walkthrough of the troubleshooting process, covering everything from basic checks to more involved repairs, ensuring your Karcher pressure washer is back in action as quickly as possible.

Key Takeaways

  • Fuel and Oil Levels: Ensure there’s adequate fuel (for gas models) and that the oil level is correct. Low levels are common culprits for starting failures.
  • Water Supply: Verify the water source is on, the hose is connected securely, and there are no kinks or blockages.
  • Spark Plug Issues: A dirty, damaged, or incorrectly gapped spark plug will prevent a gas engine from igniting.
  • Carburetor Problems: Clogged or dirty carburetors are frequent causes of starting difficulties in gas-powered units.
  • Safety Features: Check that all safety mechanisms, like the trigger lock or GFCI (for electric models), are disengaged or functioning correctly.
  • Air Filter: A clogged air filter restricts airflow to the engine, hindering combustion.
  • Water Filter/Inlet Screen: A blocked inlet screen can prevent water from reaching the pump, leading to a no-start or stalling condition.
  • Electrical Connections (Electric Models): For electric Karcher pressure washers, check the power cord, outlet, and any circuit breakers.
Karcher Pressure Washer Won T Start

Credit: www.youtube.com

Common Causes For Karcher Gas Pressure Washer Won’t Start

Gas-powered Karcher pressure washers offer immense power and portability, but their internal combustion engines require a few key elements to fire up. When these elements are not present or are compromised, the engine will refuse to start.

Fuel System Issues

The fuel system is the lifeblood of any gasoline engine. Problems here are among the most frequent reasons for a Karcher pressure washer failing to start.

  • Stale Fuel: Gasoline degrades over time, especially when left in the tank for extended periods. Stale fuel loses its volatility, making it difficult for the engine to ignite. This is particularly common after a pressure washer has been stored for a season or longer. If the fuel is more than 30 days old, it’s best to drain it and refill with fresh gasoline. For storage, using a fuel stabilizer is highly recommended to prevent this issue.
  • Incorrect Fuel Type: Always use the type of gasoline recommended by Karcher, typically unleaded gasoline with an octane rating of 87 or higher. Using a fuel with a lower octane rating can lead to engine knocking and performance issues, though it’s less likely to cause a complete no-start unless severely mismatched.
  • Empty Fuel Tank: This might seem obvious, but it’s easy to overlook. Always ensure the fuel tank is filled to the appropriate level before attempting to start the pressure washer.
  • Fuel Cap Vent: The fuel cap often has a small vent that allows air to enter the tank, preventing a vacuum from forming. If this vent is blocked, fuel flow can be restricted, leading to starting problems. You can check this by slightly loosening the fuel cap and attempting to start the machine. If it starts, the cap’s vent is likely the issue.

Ignition System Problems

Even with fresh fuel, the engine needs a spark to ignite the fuel-air mixture. Issues with the ignition system will prevent this crucial step.

  • Spark Plug: The spark plug is a common point of failure.
  • Fouled or Dirty Spark Plug: Carbon deposits can build up on the spark plug tip, preventing it from creating a strong spark. Remove the spark plug, inspect it for heavy fouling or damage, and clean it with a wire brush. If it appears worn or damaged, it’s best to replace it.
  • Incorrect Spark Plug Gap: The gap between the spark plug electrodes is critical for efficient ignition. Refer to your Karcher owner’s manual for the correct gap specification and use a feeler gauge to measure and adjust it if necessary.
  • Loose Spark Plug Wire: Ensure the spark plug wire is securely connected to the spark plug. A loose connection will result in a weak or non-existent spark.
  • Ignition Coil: The ignition coil is responsible for generating the high voltage needed to create a spark. If the ignition coil fails, the spark plug won’t receive sufficient power. Diagnosing a faulty ignition coil usually requires specialized tools or professional expertise, as it often involves checking for voltage output.

Air Intake Restrictions

An engine needs a proper mixture of fuel and air to combust. If airflow is restricted, the engine won’t start or will run poorly.

  • Clogged Air Filter: The air filter prevents dirt and debris from entering the engine. Over time, it can become clogged with dust and grime, significantly reducing airflow. Locate the air filter housing (usually a plastic cover on the side of the engine), remove the filter, and inspect it. If it’s dirty, clean it (if washable) or replace it with a new one. A severely clogged air filter can cause a no-start condition.

Karcher Pressure Washer Won’t Start: Carburetor Issues

The carburetor is responsible for mixing the correct amount of fuel and air for combustion. It’s a common source of starting problems, especially if the pressure washer has been stored with fuel in it.

  • Dirty or Clogged Carburetor: Gum and varnish deposits from old fuel can clog the tiny passageways within the carburetor. This prevents fuel from reaching the engine cylinders.
  • Symptoms: The engine may sputter, run rough, or refuse to start altogether.
  • Troubleshooting:
  • Fuel Shut-off Valve: Ensure the fuel shut-off valve is in the “on” position.
  • Primer Bulb (if equipped): For models with a primer bulb, press it several times until you see fuel in the bulb. If you don’t see fuel, there might be a blockage in the fuel line or a problem with the fuel pump.
  • Cleaning the Carburetor: For a clogged carburetor, the most effective solution is often to remove it and clean it thoroughly. This involves disassembling the carburetor, spraying carburetor cleaner into all jets and passages, and reassembling it. If you’re not comfortable with this process, it’s best to seek professional help or replace the carburetor.
  • Carburetor Adjustment: Sometimes, the carburetor may simply be out of adjustment. The idle speed and fuel mixture screws may need fine-tuning. However, this is a more advanced step and should only be attempted if you are familiar with engine mechanics.

Mechanical Issues

While less common for a no-start situation than fuel or ignition problems, mechanical issues can also prevent a Karcher pressure washer from starting.

  • Low Compression: The engine needs sufficient compression to ignite the fuel-air mixture. Low compression can be caused by worn piston rings, damaged valves, or a blown head gasket. This is a more serious issue that usually requires professional repair.
  • Seized Engine: If the engine has been run without oil or has overheated severely, internal components can seize, preventing the engine from turning over. This is a critical failure and typically means the engine needs replacement.

Safety Feature Engagements

Karcher pressure washers, like all power equipment, are equipped with safety features to prevent accidental operation. Ensure these are not hindering startup.

  • Trigger Lock: Most Karcher pressure washers have a trigger lock on the spray gun handle. Ensure this is disengaged before attempting to start the engine.
  • Water Flow Interruption: Some models have features that shut off the engine if water flow is interrupted or if the unit overheats. While these usually cause the engine to stop *during* operation, a faulty sensor could potentially prevent a start.
Karcher Pressure Washer Won T Start

Credit: www.youtube.com

Common Causes For Karcher Electric Pressure Washer Won’t Start

Electric Karcher pressure washers are generally simpler than their gas counterparts, but they too can encounter starting issues. These are often related to the power supply or internal electrical components.

Power Supply Problems

The most fundamental requirement for an electric pressure washer is a consistent and adequate power supply.

  • No Power:
  • Outlet: Ensure the electrical outlet is working by plugging in another appliance.
  • GFCI Outlet: Many electric pressure washers require a Ground Fault Circuit Interrupter (GFCI) outlet for safety. Check if the GFCI outlet has tripped and reset it. If it trips again immediately, there might be an issue with the pressure washer itself or the circuit.
  • Circuit Breaker: Check your home’s electrical panel to ensure the circuit breaker for the outlet hasn’t tripped. If it has, reset it. If it trips again, it indicates a potential overload or short circuit.
  • Extension Cord Issues:
  • Incorrect Gauge: Using an extension cord that is too thin (higher gauge number) for the length and power draw of the pressure washer can cause voltage drop, insufficient power, and overheating. Always use a heavy-duty outdoor-rated extension cord with the correct gauge for your model’s requirements. Karcher typically recommends specific cord types and lengths. For instance, a 12-gauge cord is often needed for longer runs.
  • Damaged Cord: Inspect the extension cord for any cuts, nicks, or damage to the insulation. Damaged cords are a serious safety hazard and can also prevent the pressure washer from receiving adequate power.
  • Loose Connections: Ensure the plug is securely inserted into both the outlet and the pressure washer’s power inlet.

Internal Electrical Component Issues

If the power supply is confirmed to be adequate, the problem might lie within the pressure washer’s electrical system.

  • Faulty On/Off Switch: The switch itself could be damaged or worn out, preventing power from reaching the motor.
  • Motor Overload Protector: Many electric pressure washers have a thermal overload protector that will shut off the motor if it overheats. This usually happens during operation, but a faulty protector could potentially prevent a start. Allow the unit to cool down completely before attempting to restart.
  • Internal Wiring: Loose or damaged internal wiring within the pressure washer can interrupt the power flow to the motor. This is a more complex issue that typically requires professional diagnosis.
  • Motor Failure: In some cases, the electric motor itself may have failed. This is often indicated by a humming sound without the motor turning, or no sound at all. Motor replacement is usually an expensive repair.

Water System Issues (affecting Start)

While primarily a mechanical component, issues with the water intake can sometimes manifest as a no-start condition for electric models, particularly if there’s a safety interlock.

  • Blocked Inlet Screen: A clogged inlet screen can prevent water from reaching the pump. Some electric models may have a safety feature that prevents the motor from starting if no water is detected, to protect the pump from running dry.
  • No Water Supply: Ensure the garden hose is connected securely to both the water source and the pressure washer inlet, and that the water supply is turned on.

Safety Lockouts

Similar to gas models, electric pressure washers have safety features that must be correctly engaged or disengaged.

  • Trigger Lock: Ensure the trigger lock on the spray gun is disengaged.
  • GFCI Interruption: As mentioned earlier, a tripped GFCI can prevent power from reaching the unit.

Troubleshooting Steps: Karcher Pressure Washer Won’t Start

When your Karcher pressure washer refuses to cooperate, a systematic troubleshooting approach is essential. This method helps isolate the problem efficiently and prevents unnecessary component replacement.

Step 1: Basic Checks (universal For Gas & Electric)

Before diving into complex diagnostics, perform these fundamental checks.

  • Power Source:
  • Electric: Is it plugged in? Is the outlet live? Has the GFCI or circuit breaker tripped? Is the extension cord properly rated and undamaged?
  • Gas: Is there fuel in the tank? Is the fuel cap vent clear?
  • Water Supply:
  • Is the water source turned on?
  • Is the garden hose connected securely to both the tap and the pressure washer inlet?
  • Are there any kinks in the garden hose?
  • Is the water inlet filter or screen clean?
  • Safety Features:
  • Is the trigger lock on the spray gun disengaged?

Step 2: Gas Model Specific Checks

If the basic checks don’t resolve the issue for a gas Karcher pressure washer, proceed with these engine-specific diagnostics.

  • Fuel:
  • Is the fuel fresh (less than 30 days old)? If not, drain and refill with fresh gasoline and a fuel stabilizer.
  • Is the fuel shut-off valve open?
  • Air Filter:
  • Remove and inspect the air filter. If it’s dirty or clogged, clean or replace it.
  • Spark Plug:
  • Disconnect the spark plug wire.
  • Use a spark plug wrench to remove the spark plug.
  • Inspect for fouling, damage, or wear. Clean with a wire brush or replace if necessary.
  • Check and adjust the spark plug gap using a feeler gauge according to your manual’s specifications.
  • Reconnect the spark plug wire securely.
  • Primer Bulb (if applicable):
  • Press the primer bulb 3-5 times. If you don’t see fuel moving into or through the bulb, there’s a fuel delivery issue (e.g., blocked fuel line, faulty fuel pump, or empty tank).

Step 3: Electric Model Specific Checks

For electric Karcher pressure washers that still won’t start after basic checks:

  • Power Cord: Double-check the connection at both the wall outlet and the pressure washer. Inspect the entire length of the power cord and the extension cord for damage.
  • GFCI/Breaker: If the GFCI or breaker trips repeatedly, there might be a short circuit within the pressure washer’s motor or wiring.
  • Listen for Sounds: Does the motor hum? If it hums but doesn’t spin, it might be seized or have an internal electrical fault. If there’s no sound, it’s likely a power supply issue or a completely failed motor.

Step 4: Advanced Diagnostics (gas Models)

If the simpler checks haven’t worked, you might need to investigate further into the engine’s systems.

  • Carburetor Cleaning: If you suspect a clogged carburetor (common if the machine sat with fuel), you may need to remove and clean it. This involves careful disassembly, using carburetor cleaner spray on all jets and passages, and reassembly. Refer to your Karcher manual or online tutorials specific to your engine model.
  • Check for Spark: Remove the spark plug, reconnect the spark plug wire, and hold the spark plug base firmly against a metal part of the engine block (ensure you are insulated from electrical shock). Have someone pull the starter cord. You should see a strong, blue spark jump across the electrodes. If the spark is weak, yellow, or non-existent, the issue could be the spark plug, ignition coil, or wiring.
  • Check Fuel Flow to Carburetor: Disconnect the fuel line from the carburetor and place the end into a suitable container. Turn the fuel shut-off valve on. Fuel should flow freely. If it doesn’t, the fuel line or filter might be blocked, or the fuel pump (if equipped) may be faulty.

Step 5: When To Call A Professional

Some problems are beyond the scope of DIY repair for the average user. If you’ve exhausted the above steps and your Karcher pressure washer still won’t start, it’s time to consider professional help.

  • Engine Seized: If the engine won’t turn over at all, it may be seized due to lack of oil or severe overheating.
  • Low Compression: This requires specialized tools to test and repair.
  • Ignition Coil Failure: Diagnosing and replacing an ignition coil often requires electrical testing equipment.
  • Internal Engine Damage: Issues like damaged valves or piston rings are complex repairs.
  • Electric Motor Failure: Replacing an electric motor is a significant repair.
  • Uncertainty: If you are uncomfortable performing any of the diagnostic or repair steps, it’s always safer and often more efficient to consult a qualified small engine mechanic or an authorized Karcher service center.
Karcher Pressure Washer Won T Start

Credit: www.youtube.com

Maintenance Tips To Prevent Starting Issues

Preventative maintenance is key to ensuring your Karcher pressure washer starts reliably every time you need it. Regular care can save you significant troubleshooting time and expense.

Fuel Management (gas Models)

Proper fuel handling is crucial for gas engines.

  • Use Fresh Fuel: Always use fresh gasoline. Fill up with fuel just before you plan to use the pressure washer, or purchase only what you need.
  • Fuel Stabilizer: If you don’t plan to use the entire tank of gasoline within a month, add a fuel stabilizer to the fresh gasoline. This prevents the fuel from degrading and forming gum and varnish deposits. This is especially important before storing the pressure washer for an extended period.
  • Empty Fuel for Storage: For long-term storage (over 3-6 months), it’s best to run the engine dry or drain the fuel tank completely. Run the engine until it stops from lack of fuel. This ensures no stale fuel remains in the carburetor or fuel lines.

Air Filter Maintenance

The air filter directly impacts engine performance.

  • Regular Inspection: Check the air filter before each use, especially if operating in dusty conditions.
  • Cleaning/Replacement: Clean washable filters according to the manufacturer’s instructions (usually with soap and water, then dried thoroughly). Replace disposable filters when they appear dirty, damaged, or at the interval recommended in your owner’s manual. A clean air filter ensures adequate airflow for optimal combustion.

Spark Plug Care

The spark plug is a small but vital component.

  • Annual Replacement: It’s good practice to replace the spark plug annually, or as recommended by Karcher. They are inexpensive and a common cause of starting issues when worn.
  • Inspection: When you do replace it, or if you encounter starting problems, inspect the old plug for signs of fouling (black, oily deposits), wear (eroded electrodes), or damage.

Oil Level And Quality (gas Models)

Proper lubrication is essential for engine health and starting.

  • Check Oil Level: Before each use, check the engine oil level using the dipstick. Ensure it is between the ‘min’ and ‘max’ marks.
  • Regular Oil Changes: Change the engine oil annually or after a specified number of operating hours, as per your Karcher manual. Using the correct type and grade of oil is important.

Carburetor Care

Preventing carburetor issues is easier than fixing them.

  • Use Fresh Fuel/Stabilizer: As mentioned, this is the best defense against carburetor gumming.
  • Run Engine Dry: For storage, running the engine dry is the most effective way to prevent fuel deposits in the carburetor.

Water Inlet Filter Cleaning

A clean water inlet filter ensures proper water flow to the pump.

  • Routine Check: Remove and rinse the inlet filter screen regularly, especially if you have hard water or debris in your water supply. A clogged filter can restrict water flow, potentially causing the pump to cavitate or even triggering safety shut-offs on some models.

General Cleaning And Storage

Keeping your pressure washer clean and storing it properly contributes to its longevity and reliability.

  • Clean After Use: Rinse off dirt, mud, and detergent residue after each use.
  • Proper Storage: Store the pressure washer in a clean, dry place, protected from extreme temperatures and moisture. For gas models, consider using a storage cover.

Understanding Karcher Pressure Washer Components

To effectively troubleshoot why your Karcher pressure washer won’t start, understanding its key components and their functions is beneficial. While specific designs vary between electric and gas models, and across different Karcher series (like K2, K3, K5, K7), the core principles remain similar.

Gas Engine Components

For Karcher models powered by gasoline engines:

  • Engine Block: The main housing containing the crankshaft, piston, and cylinder.
  • Fuel Tank: Stores the gasoline.
  • Carburetor: Mixes fuel and air.
  • Air Filter: Cleans incoming air.
  • Spark Plug: Ignites the fuel-air mixture.
  • Ignition Coil: Generates high voltage for the spark plug.
  • Starter Recoil: The mechanism used to manually start the engine by pulling a rope.
  • Exhaust System: Manages engine exhaust gases.
  • Lubrication System: Circulates oil for engine protection (oil sump, dipstick).

Electric Motor Components

For Karcher models powered by electricity:

  • Electric Motor: The powerhouse that drives the pump.
  • Power Cord: Connects the unit to the electrical supply.
  • On/Off Switch: Controls power to the motor.
  • Thermal Overload Protector: Safety device to prevent motor overheating.
  • GFCI Plug/Adapter (often integrated): Safety device to prevent electrical shock.

Pump Components

Handle Toilet Not Working

Handle Toilet Not Working

A toilet not working is more than just an inconvenience; it’s a plumbing emergency that can quickly escalate into a messy and unsanitary situation. Whether it’s a clogged drain, a faulty flush, or a persistent leak, understanding the common culprits and how to address them is crucial for any homeowner. Ignoring these issues can lead to water damage, mold growth, and even structural problems, not to mention the sheer discomfort of a non-functional bathroom. This guide will equip you with the knowledge to diagnose and, in many cases, fix common toilet problems, saving you time, money, and a whole lot of stress.

Key Takeaways

  • Identify the Problem: Differentiate between a clogged toilet, a toilet that won’t flush, a running toilet, and a toilet with a weak flush.
  • Basic Troubleshooting: For clogs, a plunger or a toilet auger are your first lines of defense. For flushing issues, check the flapper, fill valve, and handle mechanism.
  • Running Toilets: Often caused by a worn flapper or an improperly adjusted float.
  • Weak Flush: May indicate low water levels in the tank, a partially blocked rim jet, or an issue with the flapper opening.
  • When to Call a Professional: Complex blockages, persistent leaks, or if DIY attempts fail are clear indicators to seek expert help.
  • Preventative Maintenance: Regular cleaning and awareness of what goes down the toilet can prevent many common issues.
Handle Toilet Not Working

Credit: www.medonemedicalgroup.com

Understanding Common Toilet Problems

When your toilet decides to stop working, it usually falls into one of several common categories. Recognizing the specific symptom is the first step toward an effective solution. Each type of malfunction has its own set of causes and potential fixes, ranging from simple DIY adjustments to more involved repairs requiring professional plumbing expertise.

The Stubborn Clog: When Water Refuses To Go Down

A clogged toilet is perhaps the most frequent and frustrating toilet issue. It occurs when an obstruction prevents waste and water from draining properly through the toilet trap and into the drainpipe. This can be caused by excessive toilet paper, flushing non-flushable items, or even by tree roots intruding into the main sewer line. The immediate sign is water backing up into the bowl, sometimes to the point of overflowing.

The Silent Refusal: Toilet Won’t Flush At All

This happens when you press the handle, and nothing, or very little, happens. The water level in the tank might drop slightly, but the bowl remains stagnant. This usually points to a problem within the toilet tank mechanism. It could be a disconnected flush handle, a faulty chain, or a problem with the flush valve.

The Never-ending Drip: A Running Toilet

A running toilet is characterized by the sound of water constantly refilling the tank, even when it hasn’t been flushed. This isn’t just annoying; it’s a significant water waste issue. According to the Environmental Protection Agency (EPA), a running toilet can waste hundreds or even thousands of gallons of water per month, leading to higher utility bills. The most common causes are a worn-out flapper valve, an improperly set float ball, or a faulty fill valve.

The Feeble Flush: Weak Water Flow

A weak flush means the water doesn’t create enough siphoning action to clear the bowl effectively. This can leave behind waste or require multiple flushes. Causes can include insufficient water in the tank, a partially blocked rim jet (small holes under the bowl rim that direct water into the bowl), or a flapper that doesn’t open fully or stays open for too short a time.

Diagnosing And Fixing Common Toilet Clogs

Clogs are the most common toilet problem, and thankfully, often the easiest to fix yourself. Before reaching for the phone to call a plumber, try these DIY methods.

The Plunger Power Play

The plunger is the most fundamental tool for a clogged toilet. Ensure you have a flange plunger, which has an extra flap designed to create a better seal in the toilet drain.

  • Create a Seal: Place the plunger over the drain hole, ensuring it completely covers the opening.
  • Add Water (If Needed): If there isn’t enough water in the bowl to cover the plunger, add a bucket of water. This helps create the necessary suction.
  • Plunge Vigorously: Push down firmly and then pull up sharply. Repeat this motion 15-20 times. The goal is to create pressure and suction to dislodge the blockage.
  • Check the Drain: After plunging, watch to see if the water level drops. If it does, you’ve likely cleared the clog. If not, repeat the process or try another method.

Pro Tip: Never use a chemical drain cleaner as your first resort for a toilet clog. These can be harsh, damage pipes, and are dangerous if they splash. If a plunger doesn’t work, it’s better to move to a mechanical method or call a professional.

The Toilet Auger: For Tougher Obstructions

If plunging fails, a toilet auger (also known as a closet auger) is the next step. This flexible cable is specifically designed to navigate the curves of a toilet trap and break up or retrieve clogs.

  • Insert the Auger: Feed the auger head into the toilet bowl drain.
  • Crank the Handle: Slowly crank the handle to extend the cable into the drainpipe. You’ll feel resistance when you hit the clog.
  • Break Through or Retrieve: Continue cranking to break up the clog or hook onto it so you can pull it out.
  • Retract and Flush: Once the clog is cleared, retract the auger and flush the toilet to test.

When To Call A Professional Plumber For Clogs

If neither a plunger nor an auger can clear the clog, the blockage might be further down the line, possibly in your main sewer pipe. This could be due to a more significant obstruction, like a sewer line blockage caused by tree roots or collapsed pipes. In such cases, a professional plumber has specialized equipment like drain snakes and video inspection cameras to accurately diagnose and resolve the issue.

Handle Toilet Not Working

Credit: blog.expertsinyourhome.com

Troubleshooting A Toilet That Won’t Flush

When the flush handle feels loose or the toilet simply doesn’t respond, the problem usually lies within the tank.

Inspect The Handle And Chain

The flush handle connects to a lift arm inside the tank via a chain. This chain lifts the flapper to allow water to rush into the bowl.

  • Check for Disconnection: Open the toilet tank lid. See if the chain connecting the handle arm to the flapper has come undone. If so, reattach it.
  • Adjust Chain Length: The chain should have a little slack but not be too long. If it’s too long, it might not lift the flapper high enough. If it’s too short, the flapper might not seal properly, leading to a running toilet. Adjust the length by hooking the chain to a different link on the lift arm.
  • Examine the Handle Arm: Ensure the arm itself is securely attached to the flush handle and moves freely.

The Flapper Valve: A Common Culprit

The flapper is the rubber or plastic piece at the bottom of the tank that seals the drain hole. When you flush, it lifts to let water out.

  • Worn Out: Over time, flappers can become stiff, cracked, or lose their seal. This prevents a full flush or causes leaks.
  • Replacement: Replacing a flapper is a straightforward DIY task. Turn off the water supply, empty the tank, unhook the old flapper, and attach the new one. Ensure it creates a tight seal.

The Fill Valve: Regulating Water Input

The fill valve (also known as the ballcock) is responsible for refilling the tank after each flush and shutting off the water when the correct level is reached.

  • Malfunctions: If the fill valve is faulty, it might not allow enough water into the tank for a proper flush, or it might continuously run.
  • Adjustment: Many fill valves have an adjustment screw or mechanism to set the water level. If the water level is too low, adjust it to rise about half an inch below the overflow tube.
  • Replacement: If the fill valve is the issue, it can be replaced. This is a slightly more involved DIY project but is well within the capabilities of many homeowners.
Handle Toilet Not Working

Credit: www.medonemedicalgroup.com

Addressing A Running Toilet

A running toilet is a constant waste of water. The good news is that the most common causes are relatively easy to fix.

The Flapper Seal Problem

As mentioned earlier, a worn or improperly seated flapper is the leading cause of a running toilet.

  • Check the Seal: Listen for the sound of running water. If it seems to come from the bottom of the tank, the flapper is the prime suspect. You can also perform a dye test: put a few drops of food coloring in the tank, wait 15-20 minutes without flushing, and check the bowl. If colored water appears in the bowl, the flapper is leaking.
  • Clean and Reseat: Sometimes, mineral deposits can prevent the flapper from sealing properly. Clean the flapper and the flush valve seat it rests on.
  • Replace if Necessary: If cleaning doesn’t help, replace the flapper.

Float Ball And Fill Valve Height

The float ball (or cup) on the fill valve rises with the water level. When it reaches a certain height, it triggers the valve to shut off the water.

  • Low Water Level: If the float is set too low, the tank won’t fill sufficiently for a strong flush, and the water might constantly run if the fill valve mechanism is sticking.
  • Adjustment: Most modern fill valves have an adjustment screw or a clip mechanism on the float arm to raise or lower the float. Adjust it so the water level is about 1/2 inch below the top of the overflow tube.
  • Sticky Float: Sometimes the float arm can get stuck. Gently tap it or check for obstructions.

The Overflow Tube

The overflow tube is a vertical pipe inside the tank. If the water level rises above the top of this tube, water will spill into it and go down the drain, causing the toilet to run.

  • Height Check: As mentioned, ensure the water level is below the top of the overflow tube. If the fill valve is filling the tank too high, adjust the float.
  • Cracked Tube: In rare cases, the overflow tube itself might be cracked, though this is less common.

Fixing A Toilet With A Weak Flush

A weak flush can be embarrassing and inefficient. Fortunately, most causes can be addressed with simple adjustments.

Increasing Water Volume In The Tank

A weak flush is often due to insufficient water in the tank.

  • Adjust the Fill Valve: As described in the running toilet section, adjust the float mechanism on the fill valve to allow the water level to rise higher in the tank. Aim for a level about 1/2 inch below the overflow tube.
  • Check the Flapper Timing: Ensure the flapper is opening fully and staying open long enough for the water to empty from the tank. If it closes too quickly, the flush won’t be strong. You might need to adjust the chain length or replace a stiff flapper.

Cleaning The Rim Jets

Underneath the rim of the toilet bowl are small holes called rim jets. These direct a stream of water into the bowl to help rinse it during a flush.

  • Mineral Buildup: Over time, these jets can become clogged with mineral deposits, reducing the water flow and weakening the flush.
  • Cleaning Method: Use a small wire or a straightened paperclip to poke into each jet and clear out any debris. You can also spray a cleaner with a vinegar base (which helps dissolve mineral deposits) into the rim and let it sit for a while before scrubbing with a brush.

Checking The Trapway

The trapway is the S-shaped passage at the bottom of the toilet bowl that leads to the drainpipe. While a full clog stops flushing entirely, a partial obstruction can reduce the flush strength.

  • Partial Blockages: Small objects or excessive waste can create a partial blockage.
  • Auger Use: If you suspect a partial blockage, use a toilet auger to try and dislodge it.

Advanced Issues And When To Call A Professional

While many toilet problems are DIY-friendly, some situations require the expertise of a licensed plumber.

Persistent Blockages And Sewer Line Issues

If you’ve tried plunging and augering multiple times without success, the problem might be beyond your reach.

  • Main Line Clogs: Blockages in the main sewer line can affect all the drains in your house, not just the toilet. This often requires specialized equipment to clear.
  • Tree Roots: In older homes, tree roots can infiltrate sewer lines, causing significant obstructions. A plumber can often remove them and advise on preventative measures.
  • Damaged Pipes: Collapsed or broken sewer pipes are a serious issue requiring professional repair.

Leaks Beyond The Tank

While tank leaks are often simple fixes, leaks originating from the toilet base can indicate a more serious problem.

  • Wax Ring Failure: The wax ring at the base of the toilet creates a seal between the toilet and the drainpipe. If this seal fails, water can leak out, causing damage and odor. Replacing a wax ring involves removing the toilet and requires careful reinstallation.
  • Cracked Porcelain: Though rare, a crack in the toilet bowl or tank can cause leaks. These are typically not repairable and require a toilet replacement.

Water Pressure And Supply Line Issues

Problems with your home’s main water supply can affect toilet function.

  • Low Water Pressure: If your entire home has low water pressure, it will impact the toilet’s ability to fill and flush effectively.
  • Shut-off Valve Problems: A partially closed or faulty toilet shut-off valve can restrict water flow into the tank.

When in doubt, call a plumber. Attempting complex repairs without the right knowledge or tools can lead to further damage and more expensive fixes. A professional plumber has the experience, tools, and insurance to handle these situations safely and effectively.

Preventative Maintenance For Your Toilet

The best way to deal with a toilet not working is to prevent it from happening in the first place. Regular maintenance can save you from unexpected emergencies.

What Not To Flush

This is the golden rule of toilet maintenance. Toilets are designed for human waste and a limited amount of toilet paper only. Flushing non-flushable items is the leading cause of clogs and damage. These include:

  • Wipes (even “flushable” ones): These do not break down like toilet paper and are a major cause of clogs.
  • Paper towels: Stronger and thicker than toilet paper.
  • Feminine hygiene products: Designed to absorb liquid and expand.
  • Cotton balls and swabs: Do not dissolve.
  • Dental floss: Can create a net-like clog.
  • Cat litter: Clumps and hardens.
  • Grease and oil: Can solidify in pipes.
  • Hair: Can accumulate and trap other debris.

Regular Cleaning

A clean toilet is a healthy toilet. Regular cleaning prevents mineral buildup and allows you to spot potential issues early.

  • Bowl Cleaning: Use a toilet bowl cleaner and brush regularly.
  • Tank Cleaning: Occasionally, clean the inside of the tank to remove sediment and prevent buildup on the fill valve and flapper. A mild cleaner can be used, but avoid harsh chemicals that could damage the tank components.
  • Check for Leaks: Periodically inspect the base of the toilet and the water supply line for any signs of moisture.

Water Level Checks

Ensure the water level in your tank is consistently at the manufacturer’s recommended height. This ensures adequate water for a strong flush.

Professional Inspections

Consider having a plumber inspect your plumbing system, including toilets, every few years, especially in older homes. They can identify potential issues before they become major problems. According to the U. S. Department of Energy, fixing leaks promptly can save a significant amount of water.

Frequently Asked Questions

What Is The Most Common Reason A Toilet Won’t Flush?

The most common reason a toilet won’t flush is an issue with the internal tank mechanism. This often involves a disconnected or improperly adjusted flush chain, a worn-out flapper that isn’t lifting, or a problem with the flush handle itself not engaging the lift arm properly. Less frequently, it could be a completely failed fill valve preventing water from entering the tank.

How Can I Tell If My Toilet Is Wasting Water?

The easiest way to check for water waste is the dye test. Add a few drops of food coloring to the toilet tank. Wait for about 15-20 minutes without flushing. If colored water appears in the toilet bowl, it means the flapper is leaking, and water is constantly seeping from the tank into the bowl, indicating a running toilet. You might also hear a faint hissing or running sound from the tank when the toilet isn’t in use.

Can I Fix A Running Toilet Myself?

Yes, many running toilet issues are simple DIY fixes. The most common culprits are a worn-out flapper valve or an improperly adjusted float mechanism on the fill valve. Both are relatively inexpensive parts and can usually be replaced or adjusted with basic tools and a little guidance. If the problem persists after addressing these, it might be time to call a plumber.

What Should I Do If My Toilet Overflows?

If your toilet starts to overflow, the first and most crucial step is to stop the water flow immediately. Locate the shut-off valve on the wall behind the toilet (usually a small oval or round handle) and turn it clockwise until it stops. This will prevent further flooding. Once the water stops rising, you can then assess the cause of the overflow, which is typically a severe clog. After addressing the clog, turn the water supply back on slowly and check for leaks.

How Often Should I Replace My Toilet’s Internal Parts?

The lifespan of toilet internal parts varies depending on water quality, usage, and the quality of the parts themselves. However, a good rule of thumb is to inspect them every 2-3 years. The flapper valve is often the first component to wear out, typically lasting 5-10 years, but sometimes less if exposed to harsh cleaning chemicals. Fill valves can last 10-15 years or more. Regular checks allow you to replace parts proactively before they cause a malfunction.

When your toilet isn’t working, it’s easy to feel overwhelmed. However, by understanding the common issues and employing the troubleshooting steps outlined in this guide, you can often resolve the problem yourself. From mastering the plunger to understanding the mechanics within the tank, many toilet woes are surprisingly manageable.

Remember to prioritize what goes down the drain, perform regular maintenance, and don’t hesitate to call a professional plumber when faced with complex or persistent problems. A well-maintained toilet is a cornerstone of a functional and comfortable home.

Obs Mic Not Working

Obs Mic Not Working

Experiencing issues with your OBS mic not working can be incredibly frustrating, especially when you’re trying to stream, record content, or participate in a crucial video call. The silence from your microphone in OBS Studio, a popular and powerful open-source broadcasting software, can stem from a variety of sources, ranging from simple configuration errors to more complex hardware or software conflicts. This comprehensive guide will walk you through the most common reasons your microphone isn’t being picked up by OBS and provide step-by-step solutions to get your audio back online.

Understanding the intricacies of audio input within OBS can feel daunting, but by systematically troubleshooting each potential problem area, you can pinpoint the cause and implement the fix. We’ll cover everything from checking basic Windows or macOS audio settings to diving deep into OBS’s own audio mixer, filters, and even potential conflicts with other applications.

Whether you’re a seasoned streamer or new to content creation, this guide aims to equip you with the knowledge and practical steps needed to resolve your OBS mic issues efficiently.

Key Takeaways

  • Check Basic Connections and Device Selection: Ensure your microphone is properly plugged in and selected as the default recording device in your operating system and within OBS.
  • Verify OBS Audio Mixer: Confirm your microphone source is added, unmuted, and has sufficient volume levels in OBS’s Audio Mixer.
  • Review Windows/macOS Privacy Settings: Ensure OBS has permission to access your microphone.
  • Disable Exclusive Mode: Prevent other applications from taking exclusive control of your microphone.
  • Update Drivers and OBS: Outdated drivers or software can cause compatibility issues.
  • Test with Other Applications: Rule out hardware failure by testing your microphone in different programs.
  • Utilize OBS Filters: Sometimes, filters can inadvertently mute or reduce audio levels.
Obs Mic Not Working

Credit: www.youtube.com

Troubleshooting Your Obs Mic: A Step-by-step Approach

When your microphone refuses to cooperate with OBS Studio, it’s crucial to approach the problem systematically. Jumping to conclusions can waste valuable time. This section outlines a logical flow of troubleshooting steps, starting with the simplest checks and progressing to more advanced solutions.

1. Fundamental Checks: The Obvious First Steps

Before diving into complex settings, let’s ensure the basics are covered. These are often overlooked but are the most frequent culprits for a mic not working in OBS.

Microphone Connection And Power

  • Physical Connection: For USB microphones, ensure the cable is securely plugged into both the microphone and a functional USB port on your computer. Try a different USB port if possible. For XLR microphones connected via an audio interface, verify all connections are snug, including phantom power if your microphone requires it.
  • Power: Some microphones, especially condenser mics, require phantom power (+48V) which is usually enabled on your audio interface. Check your interface’s manual to ensure this is correctly set. Many USB mics also have a power switch or indicator light; confirm it’s on.
  • Microphone Mute Button: Many microphones have a physical mute button on the device itself. Double-check that this hasn’t been accidentally pressed.

Operating System Audio Settings

Your computer needs to recognize and be configured to use your microphone correctly.

  • Windows:
  • Right-click the speaker icon in your system tray (bottom right corner).
  • Select “Open Sound settings” or “Sounds”.
  • Under the “Input” section, ensure your desired microphone is selected from the dropdown menu.
  • Click “Device properties” (or similar) to check the microphone’s volume level and ensure it’s not muted. Speak into the mic and observe the “Test your microphone” bar; it should show activity.
  • Go to “Sound Control Panel” (usually accessible from the Sound settings page) and navigate to the “Recording” tab.
  • Right-click your microphone and select “Set as Default Device” and “Set as Default Communication Device”.
  • Right-click your microphone again and select “Properties”. Go to the “Listen” tab and check “Listen to this device” temporarily to hear yourself. This helps confirm the mic is picking up sound at the OS level. Remember to uncheck this later to avoid audio feedback loops.
  • MacOS:
  • Go to System Preferences > Sound.
  • Click the “Input” tab.
  • Select your microphone from the list.
  • Ensure the “Input volume” slider is turned up and the microphone is not muted.
  • Speak into the microphone and observe the “Input level” meter; it should show activity.

Obs Studio Audio Settings

Even if your OS recognizes the mic, OBS needs to be told to use it.

  • Open OBS Studio.
  • Go to File > Settings (or OBS > Preferences on macOS).
  • Navigate to the “Audio” tab.
  • Under “Global Audio Devices”:
  • For “Mic/Auxiliary Audio”: Select your microphone from the dropdown list. If you have multiple audio devices, ensure you choose the correct one.
  • If you don’t see your mic here, it might be better to add it as a Source (see next section).
  • Click “Apply” and then “OK”.

2. Obs Audio Mixer: The Heart Of Your Sound

The Audio Mixer panel in OBS is where you manage all your audio sources. A common reason for a mic not showing in OBS or not producing sound is a misconfiguration here.

Adding Your Microphone As A Source

If your microphone isn’t automatically appearing or you prefer manual control:

  • In the main OBS window, locate the “Sources” dock.
  • Click the “+” button at the bottom of the Sources dock.
  • Select “Audio Input Capture”.
  • Choose “Create new” and give your microphone source a descriptive name (e.g., “My USB Mic,” “Podcast Mic”). Click “OK”.
  • In the Properties window that appears, select your microphone from the “Device” dropdown menu.
  • Click “OK”.

Checking The Audio Mixer Panel

Once your microphone is added as a source (either automatically detected or manually added), it should appear as a fader in the “Audio Mixer” dock.

  • Visibility: Ensure your microphone source is listed. If not, revisit the steps for adding it as a source.
  • Mute Button: Look for the speaker icon next to your microphone’s fader. If it’s red and has a line through it, the source is muted. Click it to unmute.
  • Volume Level: Speak into your microphone. You should see the level meter next to your microphone’s fader moving. If it’s not moving, there’s still a connection or detection issue.
  • Fader Position: Ensure the volume fader for your microphone is not set all the way to the left (silenced). Adjust it to a reasonable level, typically between -20dB and -6dB for most content. Aim for the yellow range on the meter, occasionally touching the orange, but avoiding consistent red (clipping/distortion).
  • Desktop Audio vs. Mic/Aux: Make sure you are adjusting the fader for your microphone source and not “Desktop Audio,” which captures sound from your computer’s speakers or applications.

Monitoring Your Audio

OBS offers audio monitoring options to help you hear your microphone input.

  • In the “Audio Mixer” dock, click the gear icon next to your microphone source.
  • Select “Advanced Audio Properties”.
  • In the “Monitoring” column for your microphone source, you have a few options:
  • “Monitor Off”: You won’t hear your mic through OBS.
  • “Monitor Only (mute output)”: You’ll hear your mic through OBS (via your headphones/speakers) but it won’t be included in the final recording or stream output. This is useful for checking if the mic is working.
  • “Monitor and Output”: You’ll hear your mic through OBS, *and* it will be included in the stream/recording. Warning: This can cause echo or feedback if your speakers are picked up by the microphone. Use headphones when this is enabled.
  • If you choose a monitoring option, ensure your “Audio Monitoring Device” is correctly set in Settings > Audio.

3. Privacy And Permissions: The Gatekeepers

Modern operating systems have strict privacy controls to prevent applications from accessing sensitive hardware like microphones without user consent. A common reason for a mic not detected in OBS is a lack of permission.

Windows Privacy Settings

  • Go to Settings > Privacy (or Settings > Privacy & security in Windows 11).
  • Scroll down and click on “Microphone” under “App permissions.”
  • Ensure “Microphone access for this device” is turned On. If not, click “Change” and toggle it on.
  • Scroll down further to “Let apps access your microphone” and ensure this is toggled On.
  • Crucially, scroll down to the list of applications and find “OBS Studio”. Make sure the toggle switch next to it is On.
  • If OBS is listed under “Desktop apps,” ensure it has permission there as well.

Macos Privacy Settings

  • Go to System Preferences > Security & Privacy.
  • Click the “Privacy” tab.
  • Select “Microphone” from the left-hand sidebar.
  • You’ll likely need to click the lock icon in the bottom left corner and enter your password to make changes.
  • Find “OBS” in the list of applications. Ensure the checkbox next to it is ticked. If it’s not listed, you may need to uninstall and reinstall OBS while ensuring you grant permissions during the initial setup, or check if it falls under a broader category.
  • Close System Preferences. You might need to restart OBS for the changes to take effect.

4. Exclusive Mode And Application Conflicts

Sometimes, another application might be using your microphone in a way that prevents OBS from accessing it. This often relates to “Exclusive Mode” settings in Windows.

Disabling Exclusive Mode (windows)

Exclusive Mode allows an application to take direct control of an audio device, potentially locking it out for other programs.

  • Right-click the speaker icon in your system tray.
  • Select “Sounds”.
  • Go to the “Recording” tab.
  • Right-click your microphone and select “Properties”.
  • Navigate to the “Advanced” tab.
  • Under “Exclusive Mode,” uncheck the boxes for “Allow applications to take exclusive control of this device” and “Give exclusive mode applications priority. “
  • Click “Apply” and then “OK.”
  • Restart OBS Studio.

Identifying Conflicting Applications

  • Video Conferencing Software: Applications like Zoom, Discord, Microsoft Teams, or Skype can sometimes interfere. Ensure they are closed completely (not just minimized) when you’re trying to use OBS. Check their audio settings to see if they are set to use your primary microphone.
  • Voice Changers or Audio Routing Software: Any software that manipulates or routes audio might cause conflicts. Try disabling them temporarily.
  • Other Recording Software: Ensure no other recording or streaming software is running simultaneously and attempting to access the same microphone.

5. Drivers And Software Updates

Outdated or corrupted drivers are a frequent cause of hardware malfunction, including microphone issues. Similarly, using an outdated version of OBS can lead to compatibility problems.

Updating Audio Drivers (windows)

  • Right-click the Start button and select “Device Manager. “
  • Expand the “Audio inputs and outputs” section.
  • Right-click your microphone (or your sound card/audio interface if it’s not listed directly) and select “Update driver.”
  • Choose “Search automatically for drivers.”
  • If Windows finds a newer driver, follow the prompts to install it.
  • Alternatively, visit the website of your computer manufacturer (Dell, HP, Lenovo, etc.) Or your motherboard manufacturer (ASUS, Gigabyte, MSI, etc.) For the latest audio drivers specific to your model. For external audio interfaces, visit the manufacturer’s website (e.g., Focusrite, PreSonus, Behringer).
  • Restart your computer after updating drivers.

Updating Obs Studio

  • Open OBS Studio.
  • Go to Help > Check For Updates.
  • If an update is available, follow the prompts to download and install it.
  • It’s generally recommended to keep OBS updated to the latest stable version to benefit from bug fixes and new features.

Updating Macos Audio Drivers

MacOS generally handles driver updates through its system updates.

  • Go to System Preferences > Software Update.
  • Install any available macOS updates.
  • For specific audio interfaces, check the manufacturer’s website for macOS-specific driver updates.

6. Testing Your Microphone Outside Obs

To definitively rule out OBS as the sole source of the problem, test your microphone in other applications.

  • Windows: Use the “Test your microphone” feature in Sound Settings (as described in Section 1) or open the Voice Recorder app.
  • MacOS: Use the “Input level” meter in System Preferences > Sound > Input, or open QuickTime Player, go to File > New Audio Recording, select your mic, and try recording.
  • Cross-Platform: Use a web-based microphone test tool like Online Mic Test.

If your microphone works in these other applications, the issue is almost certainly within OBS’s configuration. If it *doesn’t* work elsewhere, the problem lies with the microphone hardware, its connection, or your operating system’s audio settings.

7. Obs Filters And Advanced Settings

While less common, specific OBS filters or advanced settings can sometimes cause audio issues.

Checking Obs Filters

  • In the “Sources” dock, right-click your microphone source.
  • Select “Filters.”
  • Review any applied filters (e.g., Noise Suppression, Gain, Compressor).
  • Try disabling each filter one by one by unchecking the box next to it to see if it resolves the issue. A misconfigured gain filter, for example, could be drastically lowering your microphone’s volume.
  • Ensure the “Mic/Aux” source itself isn’t muted or set to an extremely low volume within the Audio Mixer.

Advanced Audio Properties

  • In the “Audio Mixer” dock, click the gear icon next to your microphone source.
  • Select “Advanced Audio Properties.”
  • Sync Offset: Ensure this is set to 0 unless you are experiencing audio sync issues. A large offset could theoretically cause problems, though it’s rare.
  • Monitoring: As mentioned earlier, ensure monitoring settings are appropriate.
  • Tracks: Verify that your microphone is assigned to the correct audio track(s) for recording or streaming. Usually, Track 1 is the default for streaming.

8. Hardware Issues And Advanced Scenarios

If all software troubleshooting fails, it’s time to consider hardware or more complex system interactions.

Testing With A Different Cable/port

  • A faulty USB cable or a problematic audio interface connection can cause intermittent or complete failure. Try a different, known-good cable.

Testing With A Different Computer

  • If possible, connect your microphone to a completely different computer. This is the ultimate test to determine if the microphone itself is faulty.

Usb Power Issues

  • Some microphones, especially higher-end USB models, require more power than certain USB ports or hubs can provide. Try connecting directly to a USB port on your computer’s motherboard (usually the rear ports on a desktop) rather than a front panel port or an unpowered hub.

Sample Rate Mismatch

  • Ensure your microphone’s sample rate (in Windows/macOS sound properties) matches the sample rate set in OBS (Settings > Audio > Sample Rate). Mismatched rates (e.g., 44.1 kHz vs. 48 kHz) can sometimes cause audio dropouts or no sound. 48 kHz is generally recommended for streaming and video.

Let’s compare common microphone types and their potential connection nuances:

Microphone Type Connection Method Common Issues Troubleshooting Focus
USB Microphone Direct USB connection to PC Driver conflicts, insufficient USB power, OS permissions, software conflicts (Discord, Zoom) Update drivers, check USB port/cable, verify OS privacy settings, disable exclusive mode, test in other apps
XLR Microphone (via Audio Interface) XLR cable to Audio Interface, Interface via USB/Thunderbolt to PC Phantom power setting, audio interface drivers, interface connection issues, gain staging Check phantom power, update interface drivers, verify interface is recognized by OS, check gain levels on interface
3.5mm Jack Microphone (e.g., Headset Mic) Direct 3.5mm connection to PC sound card Incorrect port selection (mic vs. line-in), onboard audio drivers, OS settings Ensure plugged into the correct mic jack (often pink), update onboard audio drivers, check OS input settings

Example Scenario: The Discord Dilemma

Sarah, a Twitch streamer, noticed her mic wasn’t working in OBS. She had recently updated Discord and was talking to friends. After checking OBS settings, drivers, and permissions, her mic still showed no activity.

The Fix: Sarah realized Discord, after its update, had automatically set itself to use her USB microphone exclusively. Even though Discord was closed, a background process or a lingering setting was preventing OBS from accessing the mic. She went into Discord’s User Settings > Voice & Video and explicitly set her microphone to “Default” or deselected it. She then restarted OBS, and her microphone audio returned. This highlights how other applications, even when seemingly closed, can impact audio device availability.

Obs Mic Not Working

Credit: www.youtube.com

Frequently Asked Questions

Why Is My Microphone Showing Up In Windows/macos But Not In Obs?

This is a common scenario often caused by OBS not having the correct permissions or not being configured to use the device. Ensure you’ve selected the microphone under OBS Settings > Audio > Mic/Auxiliary Audio, or added it as an “Audio Input Capture” source in the Sources dock. Also, double-check your operating system’s privacy settings to ensure OBS is allowed to access the microphone.

My Mic Works In Other Apps, But Obs Shows No Audio Levels. What Should I Check?

Focus on OBS-specific settings. First, confirm the microphone is added as an Audio Input Capture source. Then, meticulously check the Audio Mixer panel: ensure the source is visible, not muted (speaker icon), and the fader is up. Review the Advanced Audio Properties for any unusual settings. Finally, temporarily disable any Filters applied to the microphone source in OBS, as a misconfigured filter can silence the input.

Can Background Applications Cause My Obs Mic To Stop Working?

Yes, absolutely. Applications like Discord, Zoom, Skype, or even some game overlays can sometimes hog the microphone or conflict with OBS’s access. Ensure these applications are fully closed (not just minimized) and check their audio settings to confirm they aren’t set to exclusive control.

Restarting your computer can also help clear any lingering processes that might be causing conflicts.

How Do I Check If My Microphone Is Muted Within Obs?

Check two main places:

  • Audio Mixer: Look for the speaker icon next to your microphone’s fader in the Audio Mixer dock. If it’s red with a line through it, click it to unmute.
  • Filters: Right-click your microphone source in the Sources dock, select Filters, and check if any filters (like Gain or a poorly configured Compressor) are set to excessively reduce the volume or mute the signal.

What Is “exclusive Mode” And Why Should I Disable It For Obs?

Exclusive Mode in Windows audio settings allows a single application to take full control of an audio device, preventing other applications from using it simultaneously. While sometimes useful for professional audio work, it frequently causes problems for streaming software like OBS, where multiple audio sources need to coexist.

Disabling Exclusive Mode (found in Microphone Properties > Advanced tab) ensures OBS can access the microphone even if another program briefly tries to use it.

Concrete Dust Coming From Wall

Concrete Dust Coming From Wall

Fine dust sifting from your walls can be a perplexing and often concerning issue for homeowners and building managers. It’s not just an aesthetic problem; it can indicate underlying structural issues, moisture problems, or even the presence of potentially harmful substances. Understanding the source of this concrete dust is the first step toward resolving it effectively and ensuring the longevity and safety of your property. From hairline cracks to more significant structural stresses, the reasons can vary widely, each requiring a specific diagnostic approach and remedy.

This article will guide you through the common causes of concrete dust appearing on your walls, explore how to identify the specific culprit, and detail the most effective solutions. We’ll cover everything from minor cosmetic fixes to more involved repairs, ensuring you have the knowledge to address this problem with confidence, whether you’re a DIY enthusiast or looking to hire a professional.

Key Takeaways

  • Concrete dust from walls can stem from various issues, including hairline cracks, efflorescence, moisture intrusion, structural settlement, and poor finishing.
  • Identifying the source involves a thorough visual inspection, checking for moisture patterns, crack types, and the dust’s consistency.
  • Hairline cracks are often cosmetic but can be entry points for moisture if not sealed.
  • Efflorescence is a white, powdery residue caused by soluble salts migrating to the surface and reacting with moisture.
  • Moisture intrusion is a critical issue that can weaken concrete and lead to dust, mold, and structural damage.
  • Structural settlement or movement can cause larger, more significant cracks that release dust and debris.
  • Repairs range from simple crack sealing and cleaning to more complex waterproofing and structural reinforcement.
  • Professional consultation is recommended for significant or persistent dust issues, especially if structural integrity or hazardous materials are suspected.
Concrete Dust Coming From Wall

Credit: www.reddit.com

Understanding The Nature Of Concrete Dust

Concrete, while incredibly durable, is not an inert material. It’s a composite substance made from cement, aggregates (like sand and gravel), and water. When these materials react, a process called hydration occurs, which causes the concrete to harden and gain strength.

However, this process, along with environmental factors and physical stresses, can lead to the release of fine particles over time.

The dust you see is typically composed of cementitious materials, fine aggregate particles, and sometimes byproducts of chemical reactions within the concrete. The color of the dust can offer clues: a light gray or white dust might suggest efflorescence or cementitious paste breakdown, while a dust with colored flecks could indicate aggregate particles. The texture is also important; a fine, flour-like dust is different from a gritty, sand-like substance.

The Role Of Hydration And Curing

The initial curing process of concrete is crucial for its long-term durability. If concrete is not cured properly, its surface can be weaker and more prone to dusting. The hydration process continues at a slower rate even after the concrete has hardened, and changes in temperature and humidity can cause microscopic expansions and contractions within the material.

These subtle movements can dislodge very fine particles from the surface, especially on older or less robust concrete structures.

Environmental Factors

Exposure to the elements plays a significant role. Freeze-thaw cycles in colder climates can cause water to penetrate small surface imperfections, freeze, expand, and create micro-cracks. In warmer climates, rapid drying during curing can lead to surface crazing. Airborne pollutants and acid rain can also chemically react with the concrete surface, weakening it and leading to dusting.

Understanding these basic properties helps in diagnosing why concrete dust might be appearing on your walls.

Common Causes Of Concrete Dust On Walls

Several factors can contribute to concrete dust appearing on interior or exterior walls. Identifying the specific cause is paramount for implementing the correct repair strategy. These causes often overlap, and a single issue might present with multiple symptoms.

1. Hairline Cracks (crazing)

One of the most common reasons for minor dust is the presence of hairline cracks, also known as crazing. These are very fine, shallow cracks that often appear on the surface of concrete, particularly in older structures or on surfaces that have undergone significant temperature fluctuations.

  • Mechanism: These cracks form due to surface shrinkage during curing or minor expansion and contraction of the concrete over time. They are typically only a few millimeters deep.
  • Dust Appearance: The dust generated from hairline cracks is usually very fine, almost like powder, and can be a light gray color. It often appears along the crack line.
  • Associated Issues: While often cosmetic, hairline cracks can become entry points for moisture if left unsealed, potentially leading to more significant problems like efflorescence or freeze-thaw damage.

2. Efflorescence

Efflorescence is a crystalline deposit of salts that appears on the surface of concrete or masonry. It’s a common phenomenon, especially in damp environments.

  • Mechanism: Soluble salts are naturally present in concrete or can be absorbed from the soil. When water penetrates the concrete, it dissolves these salts. As the water evaporates from the surface, it leaves the dissolved salts behind, forming a white or grayish powdery residue.
  • Dust Appearance: Efflorescence typically looks like a white, powdery or sometimes crystalline deposit. It can be brushed off easily, but it will return if the underlying moisture issue is not resolved.
  • Associated Issues: Efflorescence itself is usually not structurally damaging, but it is a clear indicator of moisture moving through the concrete. Persistent moisture can weaken the concrete over time and encourage mold growth.

3. Moisture Intrusion And Water Damage

Moisture intrusion is a significant cause of concrete dust and can lead to severe structural problems. Water can enter concrete through cracks, porous areas, or faulty waterproofing.

  • Mechanism: Water seeping into the concrete can dissolve cementitious compounds and carry them to the surface. As the water evaporates, it leaves behind fine particles of cement and aggregate. Repeated wetting and drying cycles exacerbate this process, weakening the concrete’s surface layer.
  • Dust Appearance: The dust from moisture intrusion can vary. It might be powdery like efflorescence or grittier if aggregate particles are being dislodged. You might also notice staining or discoloration on the wall where moisture is entering.
  • Associated Issues: This is a critical issue that can lead to mold and mildew growth, spalling (flaking or peeling of the concrete surface), rebar corrosion (if steel reinforcement is present), and overall structural degradation.

4. Structural Settlement Or Movement

More serious issues like structural settlement or seismic activity can cause larger, more significant cracks in concrete walls.

  • Mechanism: When a building settles unevenly, or when seismic forces are applied, the concrete structure experiences stress. This stress can result in cracks that are wider and deeper than hairline cracks, sometimes extending through the entire thickness of the wall.
  • Dust Appearance: The dust from structural cracks can be more substantial and grittier, often containing larger aggregate particles along with cementitious fines. You might see visible displacement of concrete along the crack.
  • Associated Issues: These cracks compromise the structural integrity of the building. They are often accompanied by other signs of distress, such as uneven floors, sticking doors and windows, or diagonal cracks in masonry.

5. Poor Concrete Finishing Or Surface Treatments

Sometimes, the issue stems from the original construction or subsequent treatments.

  • Mechanism: If the concrete was not finished properly, leaving a weak or powdery surface layer, or if sealants or coatings have failed, this can lead to dusting. Certain chemical treatments or curing compounds, if improperly applied or if they degrade, can also contribute to surface breakdown.
  • Dust Appearance: This dust might be consistent across a larger area of the wall rather than concentrated along specific cracks. It can feel very fine and powdery.
  • Associated Issues: This is primarily an aesthetic and housekeeping issue, though a degraded surface can be more susceptible to wear and tear.

Diagnosing The Source Of Concrete Dust

Pinpointing the exact cause of concrete dust requires a systematic approach. A thorough inspection, combining visual cues with an understanding of your property’s history and environment, is essential.

Visual Inspection: What To Look For

Start with a detailed visual examination of the affected walls.

  • Location and Pattern: Is the dust concentrated in one area or spread across a large section? Does it appear along specific lines (cracks), at joints, or near water sources (plumbing, exterior walls)?
  • Crack Analysis:
  • Width and Depth: Are they fine (hairline) or wider? Do they appear to go through the entire wall?
  • Pattern: Are they straight, jagged, or diagonal? Do they run horizontally, vertically, or in a random pattern?
  • Condition: Are the edges of the crack sharp and clean, or are they crumbling?
  • Moisture Indicators: Look for any signs of water stains, dark patches, mold, or mildew on or near the dusty areas. Check for dampness to the touch.
  • Dust Characteristics:
  • Color: Is it white, light gray, dark gray, or does it contain colored particles?
  • Texture: Is it fine and powdery, or gritty like sand? Can it be easily wiped away?

Environmental And Historical Context

Consider the building’s history and its surroundings.

  • Age of the Building: Older buildings are more prone to settlement and material degradation.
  • Climate: Does your region experience significant freeze-thaw cycles, heavy rainfall, or high humidity?
  • Recent Events: Have there been any recent floods, leaks, renovations, or seismic activity?
  • Building Use: Is the area prone to vibration (e.g., near a busy road or railway)?

Moisture Testing

If moisture is suspected, targeted testing can confirm its presence and path.

  • Moisture Meters: These handheld devices can measure the moisture content within the concrete, helping to identify damp areas or water ingress points.
  • Water Puddle Test: For exterior walls, you can sometimes perform a simple test by placing a small puddle of water against the wall and observing if it penetrates and causes dampness inside. This should be done cautiously and is more applicable to basement walls.
  • Infrared (IR) Thermography: Professionals can use IR cameras to detect temperature differences on the wall surface, which often indicate areas of moisture behind the concrete.

Professional Assessment

For persistent or severe dusting, especially if structural concerns are present, engaging professionals is crucial.

  • Structural Engineers: Can assess for settlement, stress, and structural integrity issues.
  • Building Envelope Specialists: Can diagnose moisture intrusion problems and recommend waterproofing solutions.
  • Concrete Restoration Specialists: Have the expertise to identify concrete-specific issues and perform repairs.

Solutions For Concrete Dust: From Minor Fixes To Major Repairs

Once the cause of the concrete dust is identified, the appropriate solution can be implemented. The approach will vary significantly depending on the severity and nature of the problem.

Addressing Hairline Cracks

For minor hairline cracks, the goal is typically to seal them to prevent moisture ingress and stop dust generation.

  • Cleaning: Thoroughly clean the crack and surrounding area to remove loose dust and debris. A stiff brush and vacuum cleaner are effective.
  • Sealing:
  • Caulking: For very fine cracks, a high-quality concrete caulk or polyurethane sealant can be applied. Ensure the caulk is paintable if you plan to redecorate.
  • Epoxy Injection: For slightly wider or deeper hairline cracks that need a more robust seal, epoxy injection can be used. This involves injecting a liquid epoxy resin into the crack, which hardens to create a strong, waterproof bond.
  • Cementitious Grout: For some applications, a fine cementitious grout can be mixed and troweled over the crack.

Managing Efflorescence

Dealing with efflorescence requires addressing the underlying moisture problem.

  • Cleaning:
  • Dry Brushing: In many cases, light efflorescence can be removed by dry brushing.
  • Water Washing: For more stubborn deposits, gently scrub the area with a stiff brush and clean water.
  • Acid Wash (Use with Caution): Diluted solutions of muriatic acid (hydrochloric acid) or a commercial efflorescence remover can be used, but this requires extreme caution, protective gear, and thorough rinsing. It’s often best left to professionals as incorrect use can damage the concrete.
  • Addressing Moisture: This is the critical step.
  • Identify Source: Determine where the water is coming from (e.g., ground water, rain, plumbing leaks, condensation).
  • Waterproofing: Apply appropriate waterproofing membranes or sealers to the exterior of foundation walls or relevant surfaces.
  • Drainage Improvement: Ensure proper grading around the foundation and functional gutters and downspouts to divert water away from the building.
  • Ventilation: Improve ventilation in damp basements or crawl spaces to reduce condensation.

Remedying Moisture Intrusion

Solving moisture intrusion is often more complex and may require extensive work.

  • Exterior Waterproofing:
  • Membrane Application: Applying a liquid-applied or sheet membrane waterproofing system to the exterior of foundation walls is highly effective. This often involves excavation down to the footing.
  • Drainage Systems: Installing a French drain or weeping tile system around the foundation can collect groundwater and channel it away.
  • Sealants and Coatings: For less severe issues, high-quality penetrating sealers or water-repellent coatings can be applied to the exterior concrete surfaces.
  • Interior Waterproofing:
  • Vapor Barriers: Installing plastic vapor barriers on interior walls can help prevent moisture from migrating from the ground into the living space.
  • Interior Drainage Systems: Systems that collect water entering at the foundation-wall joint and channel it to a sump pump can manage interior moisture.
  • Epoxy/Polyurethane Injection: For cracks allowing significant water ingress, injecting epoxy or polyurethane can create a waterproof barrier.

Repairing Structural Cracks

Structural cracks require expert attention to ensure the building’s safety.

  • Structural Assessment: A structural engineer must first assess the cause and severity of the settlement or movement.
  • Stabilization: Depending on the cause, stabilization might involve underpinning the foundation, installing helical piers, or reinforcing the structure.
  • Crack Repair:
  • Epoxy or Polyurethane Injection: For structural cracks that are no longer actively moving, high-strength epoxy or polyurethane injection can bond the concrete back together and restore structural integrity.
  • Stitching: For wider cracks, metal “stitches” or plates may be embedded into the concrete across the crack to hold it together.
  • Grouting: In some cases, expansive grouts can be used to fill large voids.
  • Waterproofing: Once repaired, the exterior of the wall should be waterproofed to prevent future moisture issues.

Improving Concrete Surface Durability

If the dusting is due to a poor initial finish or degraded surface.

  • Surface Grinding: Lightly grinding the surface can remove the weak top layer and create a better profile for subsequent treatments.
  • Concrete Sealers: Applying a penetrating concrete sealer can harden the surface and reduce dusting. These sealers soak into the concrete pores, binding the surface particles.
  • Epoxy or Polyurethane Coatings: For high-traffic areas or where a more durable finish is needed, applying an epoxy or polyurethane coating can create a tough, dust-free surface.

Preventing Future Concrete Dust Issues

Prevention is always better than cure. Implementing proactive measures can significantly reduce the likelihood of experiencing concrete dust problems in the future.

Proper Curing And Finishing Practices

For new construction or renovations involving concrete:

  • Adequate Curing: Ensure concrete is properly cured for at least 7 days, ideally longer, using methods like water curing, wet coverings, or curing compounds. This allows for optimal hydration and strength development.
  • Appropriate Finishing: Avoid overworking the surface during finishing, as this can bring too much water and fine material to the top, creating a weaker layer. Use the correct finishing tools and techniques for the intended use of the concrete.

Regular Maintenance And Inspection

  • Gutter and Downspout Cleaning: Keep gutters clean and ensure downspouts direct water well away from the foundation.
  • Grading: Maintain positive grading around the building so that surface water flows away from the foundation.
  • Sealant Checks: Periodically inspect caulking and sealants around windows, doors, and expansion joints. Reapply as needed.
  • Visual Checks: Conduct annual visual inspections of foundation walls (interior and exterior) for any signs of new cracks or moisture stains.

Moisture Management

  • Ventilation: Ensure adequate ventilation in basements, crawl spaces, and garages to prevent condensation buildup.
  • Dehumidification: In humid climates or areas prone to dampness, using a dehumidifier can help control indoor moisture levels.
  • Landscaping: Avoid planting trees or large shrubs too close to foundation walls, as their roots can damage the structure and affect drainage.

Applying Protective Coatings

  • Exterior Sealers: For exposed concrete walls (like basement exteriors), applying a breathable water-repellent sealer can prevent water absorption from rain and soil.
  • Interior Sealers: For interior concrete surfaces, especially in garages or basements, a penetrating sealer can reduce dusting and make cleaning easier.

When To Call A Professional

While some minor dust issues can be addressed with DIY methods, there are specific situations where professional help is indispensable.

Signs You Need Professional Help

  • Large or Active Cracks: Cracks wider than 1/8 inch (3mm), or those that appear to be growing or actively moving, usually indicate a structural problem requiring expert assessment.
  • Persistent Moisture: If you’ve tried basic waterproofing or drainage improvements and still experience significant moisture intrusion and associated dust, a professional building envelope specialist is needed.
  • Suspected Structural Issues: Any indication of building settlement, such as uneven floors, sticking doors, or visible structural distress, warrants an immediate consultation with a structural engineer.
  • Extensive Dusting: If the dusting is widespread and not confined to specific cracks, it might point to a systemic issue with the concrete mix, curing, or finishing that requires specialized remediation.
  • Hazardous Materials: In older buildings, dust could potentially contain hazardous materials like asbestos or lead paint. If you suspect this, professional testing and abatement are necessary.
  • Lack of Confidence or Time: If you’re unsure about the cause, uncomfortable with the repair process, or lack the necessary tools and time, hiring a qualified contractor is the safest and most effective route.

Choosing The Right Professional

  • Structural Engineer: For issues related to foundation stability, settlement, and major structural cracks.
  • Waterproofing Contractor: For diagnosing and repairing moisture intrusion from exterior sources.
  • Concrete Restoration Specialist: For repairs involving concrete patching, crack injection, and surface treatments.
  • General Contractor: Can be a starting point, but they may subcontract specialized work to the above professionals.

Always seek multiple quotes, check references, and ensure contractors are licensed and insured. A professional assessment can save you time, money, and potential future damage by correctly identifying the root cause and recommending the most appropriate long-term solution.

Frequently Asked Questions

What Is The Difference Between Efflorescence And Mold On A Concrete Wall?

Efflorescence is a white, crystalline or powdery salt deposit left behind when water evaporates from concrete. It’s dry to the touch and usually smells neutral. Mold, on the other hand, is a living organism that appears as fuzzy or slimy patches, often black, green, or gray. It typically has a musty odor and indicates persistent dampness. While efflorescence is a sign of moisture, mold indicates a more significant moisture problem that can affect indoor air quality and health.

Can Concrete Dust Be Harmful To My Health?

In small quantities, typical concrete dust is usually an irritant, similar to common household dust. However, prolonged or heavy exposure, especially to very fine particles, can potentially cause respiratory issues. If the concrete contains hazardous additives or was disturbed during renovation (e.

g. , containing asbestos or lead paint), the dust can be significantly more harmful. If you are experiencing significant dust or are concerned about its composition, it’s advisable to minimize exposure and consider professional testing.

How Quickly Can Concrete Dust Reappear After Cleaning?

The speed at which concrete dust reappears depends entirely on the underlying cause. If it’s due to minor surface abrasion or residual dust from a cleaning, it might take weeks or months. However, if the dust is caused by active moisture intrusion, efflorescence, or structural issues, it can reappear within days or even hours after cleaning, especially if the conditions causing it (like water movement) are ongoing.

Addressing the root cause is key to preventing recurrence.

Is It Normal For New Concrete Walls To Produce Dust?

Some very fine dust can be expected during the initial curing and drying phase of new concrete as the surface hardens and any loose particles are shed. However, significant or persistent dusting from new concrete often indicates issues with the mix design, placement, or, most commonly, inadequate curing. Proper curing is essential for developing a strong, durable surface that resists dusting. If new concrete is dusting excessively, it warrants investigation.

Can I Just Paint Over Concrete Dust Or Cracks?

Painting directly over concrete dust will not solve the problem and will likely lead to the paint peeling or bubbling as the dust continues to emerge. For cracks, simply painting over them is a temporary cosmetic fix at best. The crack will likely reappear through the paint, and any moisture entering the crack will continue to cause damage.

It is crucial to clean the surface thoroughly, address the underlying cause (like sealing cracks or managing moisture), and then use appropriate primers and paints designed for concrete surfaces

House Smells Musty After Rain

House Smells Musty After Rain

The persistent, earthy scent of must, often described as damp, moldy, or even like old socks, is a common and unwelcome guest in homes after a period of rain. This distinctive odor isn’t just unpleasant; it’s a clear indicator of excess moisture and potentially the presence of mold or mildew.

Understanding the root causes of this musty smell is crucial for homeowners looking to restore a fresh and healthy environment. From subtle leaks in the foundation to condensation on windows, numerous factors can contribute to the damp conditions that foster these odors.

Addressing a musty smell after rain requires a systematic approach, focusing first on identifying the source of moisture and then implementing effective remediation and prevention strategies. Ignoring the smell can lead to more significant problems down the line, including structural damage to your home and adverse effects on indoor air quality and occupant health.

This article will guide you through the common culprits behind that post-rain musty odor, provide practical solutions for eliminating it, and offer advice on how to prevent its return, ensuring your home remains a sanctuary of fresh air.

Key Takeaways

  • A musty smell after rain is typically caused by excess moisture leading to mold and mildew growth.
  • Common sources include foundation leaks, roof damage, poor ventilation, and plumbing issues.
  • Early detection and immediate action are vital to prevent mold spread and structural damage.
  • Dehumidification, proper ventilation, and thorough cleaning are key steps in eliminating the odor.
  • Regular home maintenance and addressing water intrusion points are essential for long-term prevention.
House Smells Musty After Rain

Credit: www.icecleaning.co.uk

Understanding The Science Behind The Musty Smell

The characteristic “musty” smell is primarily a byproduct of mold and mildew. These fungi thrive in damp environments, feeding on organic materials found in homes, such as wood, drywall, fabric, and even dust. When mold spores encounter moisture, they begin to reproduce, releasing volatile organic compounds (VOCs) into the air. These VOCs are what we perceive as the musty odor. The intensity of the smell often correlates with the extent of the mold growth and the specific types of mold present.

Different types of mold can produce slightly different scent profiles, but the general “musty” descriptor covers most. For instance, *Stachybotrys chartarum*, commonly known as black mold, is often associated with a strong, earthy, and sometimes musty smell. However, many other common molds, like *Aspergillus* and *Penicillium*, also contribute to this odor.

The presence of these VOCs isn’t just about an unpleasant smell; prolonged exposure can have health implications, ranging from allergic reactions to respiratory issues, especially for sensitive individuals.

The Role Of Humidity And Condensation

High humidity levels are a significant contributor to musty smells, even without visible leaks. When indoor humidity consistently hovers above 60%, it creates an environment conducive to mold growth on surfaces. Rain events often exacerbate this by increasing ambient humidity both outdoors and potentially indoors if the home’s envelope isn’t airtight.

Condensation is another major culprit. It occurs when warm, moist air comes into contact with cooler surfaces. Common areas for condensation include:

  • Windows and window frames: Especially single-pane windows or poorly sealed double-pane units.
  • Exterior walls: Particularly those that are poorly insulated.
  • Basement walls and floors: Cool, subterranean surfaces are prone to condensation.
  • Pipes: Cold water pipes in humid areas can sweat.

This trapped moisture on surfaces provides a breeding ground for mold and mildew, leading to that telltale musty scent that becomes more pronounced after damp weather.

Mold And Mildew: The Primary Culprits

Mold and mildew are types of fungi that grow in the form of multicellular filaments called hyphae. While often used interchangeably, there are subtle differences. Mildew typically grows on flat surfaces, appearing as a thin, powdery or fuzzy growth, often white or gray.

Mold, on the other hand, can grow in a more textured, slimy, or fuzzy manner and can come in various colors, including green, black, brown, and orange.

Both require moisture, a food source (organic materials), and moderate temperatures to thrive. After rain, increased moisture ingress into a home provides the perfect conditions. Mold spores are ubiquitous, present both indoors and outdoors. When they land on a damp surface within your home, they can germinate and begin to colonize, releasing the VOCs responsible for the musty odor.

The longer the moisture persists, the more extensive the mold growth, and the stronger the smell becomes.

Common Sources Of Moisture After Rain

Identifying the precise point where moisture is entering your home is the first critical step in eliminating the musty smell. Rainwater can find its way in through various pathways, often through small, overlooked vulnerabilities in your home’s exterior and interior.

Foundation And Basement Leaks

Basements and crawl spaces are particularly susceptible to moisture problems, especially after heavy rainfall.

  • Hydrostatic pressure: When the soil surrounding your foundation becomes saturated with water, it exerts pressure against the basement walls and floor. This can force water through even hairline cracks in the concrete.
  • Clogged gutters and downspouts: If gutters are blocked with debris, rainwater can overflow and pool around the foundation, increasing the likelihood of seepage. Downspouts that discharge water too close to the house also contribute.
  • Cracks in foundation walls or floor: Over time, concrete can develop small cracks due to settling or temperature fluctuations. These become entry points for water.
  • Poor grading: If the ground around your home slopes towards the foundation instead of away from it, water will naturally flow towards the lowest point, your basement.

These leaks create a consistently damp environment, ideal for mold and mildew to flourish, leading to that persistent musty odor.

Roof And Attic Issues

The roof is your home’s first line of defense against the elements, and any compromised areas can allow water to infiltrate.

  • Damaged or missing shingles: Shingles can be blown off by strong winds or deteriorate over time, exposing the underlayment or decking to water.
  • Flashing failures: Metal flashing around chimneys, vents, skylights, and valleys can corrode or become dislodged, creating gaps where water can enter.
  • Ice dams: In colder climates, ice dams can form at the roofline, preventing melting snow from draining properly and forcing water back up under the shingles.
  • Clogged gutters: Similar to foundation issues, overflowing gutters can cause water to back up under eaves and into the attic space.

Once water enters the attic, it can seep into insulation, wooden beams, and drywall, creating damp pockets that generate musty smells. Poor attic ventilation can trap this moisture, making the problem worse.

Exterior Wall And Window Leaks

Rainwater can also penetrate through the exterior walls and around windows and doors.

  • Cracked or deteriorating siding: Gaps or damage in siding materials can allow water to seep behind them.
  • Faulty caulking: The sealant around windows, doors, and trim can degrade over time, creating small openings for water.
  • Poorly installed windows or doors: Improper fitting or flashing during installation can lead to leaks.
  • Blocked weep holes: In brick veneer construction, weep holes are designed to allow moisture to escape. If they become blocked, moisture can become trapped within the wall cavity.

Water entering wall cavities can lead to mold growth on the interior side of the exterior sheathing or even on the back of drywall, often resulting in a musty smell that seems to emanate from the walls themselves.

Plumbing And Hvac System Issues

While not directly caused by rain, plumbing and HVAC systems can become moisture sources that are exacerbated by damp conditions or contribute to the overall humidity that worsens post-rain smells.

  • Leaky pipes: Slow, persistent leaks within walls or under floors can create hidden dampness.
  • Condensation in HVAC systems: Air conditioning units dehumidify the air, but if the condensate drain line is clogged or the unit is improperly maintained, standing water can lead to mold growth within the system. This mold can then be distributed throughout the house when the system runs.
  • Humidifiers: If a whole-house humidifier is overused or malfunctions, it can significantly increase indoor humidity levels.
  • Appliance leaks: Leaks from washing machines, dishwashers, or refrigerators can contribute to localized moisture problems.

These internal moisture sources can create the perfect environment for mold, and the increased ambient humidity post-rain can amplify the resulting musty odors.

House Smells Musty After Rain

Credit: www.restoreit.cleaning

Diagnosing The Source Of The Smell

Pinpointing the exact location and cause of the musty smell is crucial for effective remediation. Simply masking the odor won’t solve the underlying moisture problem. A thorough inspection, both visual and olfactory, is necessary.

Visual Inspection Checklist

Start by systematically examining areas prone to moisture and mold growth. Look for:

  • Water stains or discoloration: On walls, ceilings, floors, especially near windows, pipes, or exterior walls.
  • Peeling paint or wallpaper: Often a sign of moisture trapped behind the surface.
  • Visible mold or mildew growth: Fuzzy or powdery patches, often black, green, or white, typically in damp areas.
  • Condensation: On windows, pipes, or cold surfaces.
  • Rotting wood: In basements, crawl spaces, or around window frames.
  • Efflorescence: A white, powdery deposit on concrete or masonry surfaces, indicating moisture evaporation.
  • Damp insulation: In attics or wall cavities.

Olfactory Clues And Tools

Your sense of smell is your primary tool. Pay attention to where the odor is strongest.

  • Follow the scent: Move from room to room, trying to track the intensity of the musty smell. It might be strongest in a particular corner, near a specific wall, or in a basement/crawl space.
  • Moisture meters: These handheld devices can detect moisture content in materials like drywall, wood, and concrete. They are invaluable for identifying hidden dampness behind surfaces where visual inspection is impossible. Readings above 15-17% typically indicate a moisture problem that needs addressing.
  • Hygrometer: This device measures relative humidity. Consistently high readings (above 60%) in specific areas suggest a ventilation issue or a moisture source.

Pro Tip: Sometimes, the smell is strongest after the rain stops and the air inside the house begins to warm up, as trapped moisture evaporates and releases VOCs.

House Smells Musty After Rain

Credit: www.meyer-depew.com

Remediation Steps: Eliminating The Musty Smell

Once the source of the moisture and any existing mold is identified, you can begin the process of remediation and odor elimination. This typically involves drying out affected areas, cleaning or removing mold, and improving ventilation.

Drying Out Affected Areas

The absolute first step is to eliminate the moisture source and dry out the damp materials.

  • Ventilate: Open windows and doors (if outdoor humidity is low) to allow fresh air circulation. Use fans to direct airflow towards damp areas.
  • Dehumidify: Place dehumidifiers in damp rooms, basements, or crawl spaces. Ensure they are appropriately sized for the space and empty the collection tanks regularly or set up a continuous drain. Aim to maintain indoor humidity levels between 30-50%.
  • Address leaks: Promptly repair any roof leaks, foundation cracks, plumbing issues, or faulty seals identified during the inspection.
  • Remove standing water: In basements or crawl spaces, use wet/dry vacuums or submersible pumps to remove any accumulated water.

Cleaning Mold And Mildew

For small areas of surface mold (less than 10 square feet), you can often tackle the cleaning yourself. For larger or more widespread infestations, or if mold is inside walls or HVAC systems, it’s best to hire a professional mold remediation service.

For DIY cleaning:

  • Safety First: Wear protective gear, including gloves, eye protection (goggles), and an N95 respirator mask to avoid inhaling spores. Ensure good ventilation during cleaning.
  • Cleaning Solutions:
  • Mildew Cleaner: Use a commercial mildew cleaner specifically designed for the affected surface.
  • Soap and Water: For non-porous surfaces (like tile or metal), scrubbing with detergent and water can often remove surface mold.
  • Vinegar: Undiluted white vinegar in a spray bottle can kill many types of mold. Spray it on the area, let it sit for an hour, then wipe clean. The vinegar smell will dissipate.
  • Hydrogen Peroxide: A 3% solution of hydrogen peroxide can be sprayed on moldy surfaces, left for 10-15 minutes, and then scrubbed and wiped clean. It’s less harsh than bleach.
  • Avoid Bleach on Porous Materials: While bleach can kill surface mold, it often doesn’t penetrate porous materials like drywall or wood effectively. It can also damage surfaces and release harmful fumes. If you must use bleach (diluted 1 part bleach to 10 parts water), ensure extreme ventilation and never mix it with ammonia or other cleaners.
  • Scrub and Dry: Use a stiff brush or scrub sponge to remove the mold. Thoroughly rinse the area with clean water and dry completely with fans and dehumidifiers.

Odor Removal Techniques

Even after mold is removed, lingering odors can persist.

  • Activated Charcoal: Place bowls of activated charcoal or baking soda in affected areas to absorb odors.
  • Ozone Generators: These can be effective but require the space to be unoccupied during use and for a period afterward due to health risks associated with ozone. They break down odor-causing molecules.
  • Air Purifiers: High-quality air purifiers with HEPA filters and activated carbon filters can help remove airborne mold spores and odor particles.
  • Professional Ozone Treatment: For severe odors, professional services can use ozone generators or other advanced techniques.

Preventing Future Musty Smells

The most effective way to deal with a musty smell after rain is to prevent it from happening in the first place. This involves ongoing maintenance and addressing potential moisture entry points proactively.

Maintain Gutters And Downspouts

Regularly cleaning gutters and downspouts is one of the simplest yet most effective preventative measures.

  • Frequency: Clean at least twice a year, in late spring and late fall, or more often if you have many trees nearby.
  • Downspout Extensions: Ensure downspouts extend at least 5-10 feet away from the foundation to direct water away from the house.
  • Gutter Guards: Consider installing gutter guards to minimize debris accumulation.

Improve Home Ventilation

Good airflow helps prevent moisture buildup within the home.

  • Attic and Crawl Space Ventilation: Ensure these areas have adequate vents (soffit, ridge, gable vents) to allow moist air to escape. Consider a powered attic fan if ventilation is poor.
  • Bathroom and Kitchen Fans: Use exhaust fans during and after showering, cooking, or using the dishwasher to vent moist air outside. Ensure these fans are vented to the exterior, not just into the attic.
  • Whole-House Ventilation: In tightly sealed modern homes, consider an Energy Recovery Ventilator (ERV) or Heat Recovery Ventilator (HRV) system to provide fresh air exchange while minimizing energy loss.

Seal Air Leaks And Cracks

Preventing air and water from entering unintended spaces is key.

  • Exterior Caulking: Inspect and reapply caulk around windows, doors, and siding penetrations as needed.
  • Foundation Sealing: Seal any cracks or openings in the foundation walls. Consider professional waterproofing solutions if persistent basement moisture is an issue.
  • Weatherstripping: Ensure doors and windows have good weatherstripping to create a tight seal.

Control Indoor Humidity

Maintaining optimal indoor humidity levels year-round is critical.

  • Use Dehumidifiers: Especially in basements, crawl spaces, and during humid summer months.
  • Monitor Humidity: Use a hygrometer to keep track of indoor humidity levels. Aim for 30-50%.
  • Ventilate Appliances: Ensure clothes dryers are vented directly outdoors.
  • Fix Leaks Promptly: Address any plumbing leaks or condensation issues as soon as they are discovered.

Comparison Of Mold Cleaning Methods

Different cleaning agents have varying effectiveness and safety profiles. Here’s a comparison for small-scale DIY mold remediation:

Cleaning Agent Effectiveness Surface Types Pros Cons Safety Considerations
Soap and Water Low to Moderate (surface mold) Non-porous Readily available, inexpensive, relatively safe May not kill all spores, requires significant scrubbing Minimal
White Vinegar (undiluted) Moderate to High (kills many types) Most surfaces (porous & non-porous) Effective mold killer, natural, inexpensive Vinegar odor (temporary), may etch some surfaces Ventilation recommended, avoid mixing
Hydrogen Peroxide (3%) Moderate to High Most surfaces (porous & non-porous) Antifungal, antiviral, antibacterial; less harsh than bleach Can lighten colors, requires time to work Ventilation recommended, avoid eye contact
Bleach (1:10 dilution) High (surface mold) Non-porous only Readily available, disinfects well Ineffective on porous materials, harsh fumes, can damage surfaces, potential for toxic gas if mixed Requires excellent ventilation, NEVER mix with ammonia or other cleaners, wear full PPE

When To Call A Professional

While minor mold spots can often be handled by homeowners, certain situations warrant professional intervention.

  • Large Infestations: If mold covers an area larger than 10 square feet.
  • Hidden Mold: If you suspect mold is growing inside walls, HVAC systems, or under flooring, professionals have specialized equipment to detect and remove it.
  • Health Concerns: If occupants have pre-existing respiratory conditions, allergies, or compromised immune systems, professional remediation is safer.
  • Recurring Problems: If the smell or mold keeps returning despite your best efforts, it indicates a persistent moisture issue that requires expert diagnosis.
  • After Major Water Damage: Significant flooding or water intrusion events often require professional assessment and cleanup to prevent secondary mold growth.

A professional mold remediation company will have the expertise, specialized equipment (like industrial-grade dehumidifiers, air scrubbers, and containment systems), and protective gear to safely and effectively remove mold and address the underlying moisture issues. They can also provide post-remediation testing to confirm the air quality is safe.

You can find certified professionals through organizations like the Institute of Inspection, Cleaning and Restoration Certification (IICRC).

Frequently Asked Questions

What Are The Health Risks Associated With A Musty Smell?

The musty smell itself is caused by volatile organic compounds (VOCs) released by mold and mildew. Prolonged exposure to these VOCs and the mold spores themselves can trigger allergic reactions, including sneezing, runny nose, red eyes, and skin rash. For individuals with asthma or other respiratory conditions, exposure can lead to more severe symptoms like difficulty breathing and asthma attacks. Some molds can also produce mycotoxins, which, while less common in typical home environments, can have more serious health implications. If you or your family members experience persistent symptoms that seem linked to the musty odor, it’s crucial to address the mold issue promptly and consider consulting a healthcare professional.

How Quickly Does Mold Grow After A Rain Event?

Mold spores are present nearly everywhere, and they only need a food source and moisture to start growing. In ideal conditions (damp surfaces, suitable temperature), mold can begin to grow and become visible within 24 to 48 hours after a water event. The musty smell may become noticeable even sooner, as the VOCs are released as soon as the mold begins to colonize. This rapid growth highlights the importance of drying out any water-damaged areas as quickly as possible, ideally within 24-48 hours, to prevent significant mold proliferation and odor development.

Can A Musty Smell Indicate A Structural Problem?

Yes, a persistent musty smell, especially one that appears or worsens after rain, can absolutely indicate a structural problem. It often points to water intrusion through compromised parts of your home’s structure, such as cracks in the foundation, damaged roofing, or failing exterior seals. If water is consistently seeping into wall cavities, under floors, or into the basement, it can lead to rot in wooden structural elements (like joists, beams, or studs) and compromise the integrity of building materials over time. Addressing the source of the water intrusion is not only crucial for eliminating the smell and preventing mold but also for maintaining the long-term safety and stability of your home.

Is It Safe To Use Essential Oils To Mask The Smell?

While essential oils like tea tree or eucalyptus can offer a pleasant scent and possess some antimicrobial properties, they are generally not a substitute for proper mold remediation. Masking the smell with essential oils does nothing to address the underlying moisture problem or eliminate the mold itself. In fact, adding more moisture or organic compounds (from the oils) to an already damp environment could potentially exacerbate the issue. For effective and safe odor elimination, focus on drying the area, removing the mold, and improving ventilation. Once the source is resolved and the area is dry, pleasant scents can be used sparingly, but they should never be relied upon as a primary solution for a musty odor.

Ac Suddenly Blowing Warm Air

Ac Suddenly Blowing Warm Air

Your air conditioning system is designed to be a reliable source of comfort, especially during the sweltering heat of summer. So, when you step into your home expecting a cool reprieve and are instead met with a blast of warm air, it can be a deeply unsettling experience.

This common HVAC problem can disrupt your comfort, lead to high energy bills, and potentially signal a more serious underlying issue. Understanding why your AC is blowing warm air is the first step toward diagnosing and fixing the problem, ensuring your home environment remains pleasant and your system operates efficiently.

This comprehensive guide will walk you through the most common culprits behind an AC blowing warm air, offering practical advice for homeowners. We’ll explore everything from simple troubleshooting steps you can take yourself to identifying when it’s time to call in a professional HVAC technician.

By the end of this article, you’ll have a clearer picture of what might be going wrong with your cooling system and how to get it back to blowing cold air.

Key Takeaways

  • Low Refrigerant Levels: A common cause of warm air is a refrigerant leak, which requires professional detection and repair.
  • Dirty Air Filters: Clogged filters restrict airflow, preventing the AC from cooling effectively and potentially causing the system to freeze up.
  • Thermostat Issues: Incorrect settings or a malfunctioning thermostat can make the AC believe the desired temperature has been reached when it hasn’t.
  • Dirty Condenser Coils: Outdoor unit coils covered in dirt and debris reduce the system’s ability to release heat.
  • Frozen Evaporator Coils: Caused by poor airflow or low refrigerant, frozen coils block air circulation and cooling.
  • Compressor Problems: A faulty compressor is a significant issue that prevents the AC from cooling altogether.
  • Ductwork Leaks: Leaky ducts can lose cooled air before it reaches your rooms, making the AC seem like it’s blowing warm.
  • Electrical Issues: Tripped breakers, blown fuses, or faulty wiring can shut down components of the AC system.
Ac Suddenly Blowing Warm Air

Credit: www.pigikoinsep.com

Common Reasons Your Ac Is Blowing Warm Air

When your air conditioner inexplicably starts blowing warm air, it’s a signal that something is amiss within the complex system responsible for cooling your home. These systems rely on a delicate balance of components working in harmony to extract heat from your indoor air and dissipate it outside.

Any disruption to this process, whether mechanical, electrical, or related to maintenance, can manifest as warm or even hot air coming from your vents. Let’s break down the most frequent reasons for this frustrating issue.

Dirty Air Filters: The Simplest Culprit

Perhaps the most straightforward and common reason for an AC blowing warm air is a clogged air filter. Your air filter’s primary job is to trap dust, dirt, pollen, and other airborne particles, preventing them from entering your HVAC system and circulating throughout your home. However, over time, these filters become saturated with debris. When a filter gets too dirty, it significantly restricts the amount of air that can pass through the system.

This restricted airflow has several detrimental effects. Firstly, it prevents the evaporator coil, located inside your home, from absorbing heat efficiently. The refrigerant flowing through these coils needs air to pass over them to absorb heat from your living space. With insufficient airflow, the refrigerant doesn’t get warm enough, and the air that does pass over the coil doesn’t get cooled. Secondly, severely restricted airflow can cause the evaporator coil to freeze over. When ice builds up on the coil, it acts as an additional barrier, further blocking airflow and preventing any cooling from occurring. Even if the system continues to run, it will only circulate uncooled air, and once the ice melts, the water can cause further damage.

Pro Tip: Check your air filter monthly and replace it every 1-3 months, depending on the filter type and household conditions (e.g., pets, allergies). A clean filter is crucial for maintaining proper airflow and overall system efficiency.

Refrigerant Leaks: A Critical Issue

Refrigerant, often referred to as Freon, is the lifeblood of your air conditioning system. It’s a chemical compound that circulates through the AC’s coils, undergoing phase changes (from liquid to gas and back) to absorb heat from your indoor air and release it outdoors. If your system has a refrigerant leak, the amount of this critical substance will be insufficient to perform the cooling cycle effectively.

When refrigerant levels drop too low, the AC system cannot absorb heat properly. This means the air passing over the evaporator coil isn’t cooled, and consequently, warm air is blown into your home. You might also notice other symptoms accompanying a refrigerant leak, such as:

  • Frost or ice buildup on the refrigerant lines or evaporator coil.
  • Hissing or bubbling sounds coming from the AC unit, indicating escaping refrigerant.
  • A significant increase in your energy bills, as the system struggles to compensate for the lack of cooling.
  • Reduced cooling capacity over time, rather than an abrupt stop.

Addressing a refrigerant leak is not a DIY task. It requires specialized tools and knowledge to safely locate the leak, repair it, and then recharge the system with the correct amount of refrigerant. Attempting to add refrigerant without fixing the leak is a temporary and ultimately harmful solution, as the refrigerant will continue to escape, and overcharging can damage the compressor.

Thermostat Malfunctions Or Incorrect Settings

Your thermostat is the command center for your air conditioning system. It tells the AC when to turn on, when to turn off, and what temperature to maintain. If your thermostat is malfunctioning or set incorrectly, it can easily lead to your AC blowing warm air.

Several thermostat-related issues can cause this problem:

  • Incorrect Mode Setting: The most common oversight is accidentally setting the thermostat to “Heat” or “Fan Only” instead of “Cool.” Always double-check that the mode is set to Cool and the fan setting is on Auto (which means the fan only runs when cooling is needed).
  • Dead Batteries: Many thermostats, especially digital ones, rely on batteries to maintain their settings and communicate with the HVAC system. If the batteries are low or dead, the thermostat may not be able to send the correct signals, leading to the AC not engaging its cooling function.
  • Calibration Issues: Over time, thermostats can lose their calibration, meaning they don’t accurately read the room temperature. If the thermostat thinks the room is cooler than it actually is, it won’t signal the AC to turn on and cool the air.
  • Faulty Thermostat: Like any electronic device, thermostats can fail. A broken thermostat might not be able to send the “cool” signal to the AC unit, even if the room is hot. In some cases, a faulty thermostat can even cause the heating system to engage when it shouldn’t.

Example: A homeowner might notice their AC blowing warm air and immediately suspect a major system failure. However, a quick check of the thermostat reveals it was accidentally switched to “Heat” during a recent power flicker. Simply switching it back to “Cool” resolved the issue instantly.

Dirty Condenser Coils: The Outdoor Unit’s Struggle

The condenser unit, located outside your home, is responsible for releasing the heat that the AC has absorbed from your indoor air. It contains coils that are exposed to the elements. When these outdoor coils become caked with dirt, grass clippings, leaves, and other debris, their ability to dissipate heat is severely compromised.

Think of the condenser coils like the radiator in your car. If it’s clogged with bugs and dirt, the engine will overheat. Similarly, if your AC’s condenser coils are dirty, the hot refrigerant circulating through them cannot efficiently transfer its heat to the outside air.

This inefficiency forces the system to work harder, leading to reduced cooling performance and potentially causing the system to overheat and shut down. In severe cases, the system might continue to run but will only blow warm air because the heat isn’t being expelled properly.

Regular cleaning of the condenser unit is essential for maintaining its efficiency. This involves gently hosing down the coils to remove surface debris. However, for deep cleaning or if the coils are heavily soiled, it’s best to call a professional.

Frozen Evaporator Coils: A Symptom Of Deeper Problems

As mentioned earlier, frozen evaporator coils are a common cause of warm air blowing from your vents. This occurs when ice builds up on the indoor coil, forming a barrier that prevents air from circulating and absorbing heat. While a dirty air filter is a primary cause, other factors can also lead to coil freezing:

  • Low Refrigerant Levels: When refrigerant is low, the pressure within the evaporator coil drops, causing its temperature to fall below freezing. This leads to condensation freezing on the coil.
  • Poor Airflow: Insufficient airflow over the evaporator coil, whether due to a dirty filter, a malfunctioning blower motor, or blocked vents, means the coil doesn’t warm up enough. This prolonged cold temperature can cause moisture to freeze.
  • Blocked Ducts: If supply or return ducts are significantly blocked or collapsed, airflow can be severely reduced, leading to coil freezing.
  • Running the AC in Cold Weather: While less common for warm air issues, attempting to run the AC when outdoor temperatures are too low (typically below 60-65°F or 15-18°C) can cause the system to malfunction and potentially freeze up.

If you suspect your evaporator coils are frozen, the first step is to turn off the AC system completely (but leave the fan running if possible, or turn the fan to ‘On’ at the thermostat) to allow the ice to melt.

This can take several hours. During this time, address the likely cause, such as replacing the air filter. If the problem persists after thawing, it indicates a more significant issue requiring professional attention.

Electrical Issues: Tripped Breakers And Blown Fuses

Your air conditioning system is a complex network of electrical components, including motors, capacitors, relays, and control boards. Any interruption in the electrical supply can prevent the system, or parts of it, from functioning correctly, leading to warm air.

  • Tripped Circuit Breaker: AC units draw a significant amount of power. If there’s a power surge, a short circuit, or if the unit draws more power than the circuit is designed for, the circuit breaker for the AC will trip. This cuts off the power supply to prevent damage. You might notice the AC simply stops working altogether, or specific components like the fan or compressor might fail.
  • Blown Fuse: Some HVAC systems, particularly older ones or window units, may use fuses instead of or in addition to circuit breakers. A blown fuse means the electrical path is broken, and power cannot reach the system’s components.
  • Wiring Problems: Damaged, loose, or corroded wiring connections can interrupt the flow of electricity to essential parts of the AC unit. This can be caused by wear and tear, pests, or improper installation.

If you suspect an electrical issue, the first and safest step is to check your home’s electrical panel for a tripped breaker. If a breaker is tripped, try resetting it ONCE. If it trips again immediately, do not attempt to reset it further, as this indicates a persistent electrical fault that needs professional diagnosis.

Similarly, if your system has fuses, and one appears blown, it’s best to have an HVAC technician replace it and investigate the cause.

Compressor Problems: The Heart Of The Ac

The compressor is often referred to as the “heart” of your air conditioning system. It’s a powerful motor that compresses refrigerant, increasing its temperature and pressure, and circulating it throughout the system to facilitate the cooling process. If the compressor fails or malfunctions, your AC will be unable to cool your home, resulting in warm air being blown from the vents.

Signs of a potential compressor issue include:

  • The outdoor unit fan is running, but the compressor isn’t engaging (you might hear a humming sound, but no distinct “thump” or startup noise from the compressor itself).
  • The AC unit starts and stops frequently (short cycling).
  • An unusual humming or grinding noise coming from the outdoor unit.
  • The circuit breaker for the AC trips repeatedly, indicating a power draw issue often associated with a failing compressor.

Compressor failures can be caused by a variety of factors, including electrical problems (like faulty capacitors or starting relays), lack of lubrication, overheating due to poor airflow or low refrigerant, or simply reaching the end of its operational lifespan. Repairing or replacing a compressor is typically one of the most expensive AC repairs, often costing hundreds or even thousands of dollars.

In some cases, if the compressor has failed catastrophically, it might be more cost-effective to replace the entire AC unit.

Ductwork Leaks: Losing Cool Air Before It Reaches You

Your ductwork is the network of tunnels that carries cooled air from your air handler to the various rooms in your house and returns warmer air back to the system. If these ducts have leaks, holes, or are not properly sealed, cooled air can escape into unconditioned spaces like attics, crawl spaces, or wall cavities before it ever reaches your living areas.

Even if your AC is producing cold air perfectly, duct leaks can make it seem like it’s blowing warm. This is because the air that eventually comes out of your vents has lost a significant portion of its coolness during its journey through the compromised ductwork. This leads to uneven cooling throughout the house, higher energy bills, and the AC system running for longer periods trying to compensate for the lost air.

Common causes of duct leaks include:

  • Loose connections at joints and seams.
  • Tears or punctures in the duct material.
  • Poorly sealed register boots where ducts connect to vents.
  • Deterioration of duct materials over time.

You might also notice:

  • Uneven temperatures between rooms.
  • High dust levels in your home.
  • Strange noises (whistling or hissing) coming from vents or ceilings.
  • Higher than usual energy bills.

Addressing duct leaks often involves sealing them with mastic sealant or specialized metal tape, or in more severe cases, replacing sections of the ductwork. Professional ductwork inspection and sealing services can significantly improve your AC’s efficiency and comfort.

Ac Suddenly Blowing Warm Air

Credit: www.8burger.it

Troubleshooting Steps For An Ac Blowing Warm Air

Before you pick up the phone to call a professional HVAC technician, there are several troubleshooting steps you can take yourself to diagnose the problem. Many common AC issues are surprisingly simple to fix, saving you time and money. Always prioritize safety and consult your system’s manual for specific instructions related to your model.

Check The Thermostat Settings

This is the most basic yet often overlooked step.

  • Verify the Mode: Ensure your thermostat is set to Cool. If it’s set to Heat or Fan Only, it won’t engage the cooling cycle.
  • Check the Temperature Setting: Make sure the desired temperature is set lower than the current room temperature. For example, if it’s 80°F (27°C) in your home, set the thermostat to 75°F (24°C) or lower to prompt cooling.
  • Fan Setting: Confirm the fan is set to Auto. If it’s set to “On,” the fan will run continuously, even when the AC isn’t actively cooling, which can sometimes make it feel like warm air is blowing if the system is struggling.
  • Batteries: If you have a digital thermostat, check and replace the batteries if they are low or dead.

Inspect And Replace The Air Filter

A dirty air filter is a prime suspect for restricted airflow and subsequent warm air issues.

  • Locate the Filter: Air filters are typically found in the return air duct (the large grille that pulls air into your system) or inside the air handler unit itself.
  • Visually Inspect: Pull out the filter and hold it up to a light source. If you can’t see light through it, or if it’s visibly clogged with dust and debris, it needs replacement.
  • Replace the Filter: Purchase a new filter of the same size and MERV (Minimum Efficiency Reporting Value) rating as the old one. Ensure you install the new filter with the airflow arrow pointing in the correct direction (usually towards the furnace/air handler).

Examine The Outdoor Unit (condenser)

The outdoor unit plays a crucial role in heat dissipation.

  • Clear Debris: Walk around your outdoor condenser unit. Remove any leaves, grass clippings, branches, or other debris that might be blocking the exterior fins. Be careful not to bend the fins.
  • Check for Obstructions: Ensure there’s at least 2 feet of clear space around the unit for proper airflow. Trim back any overgrown bushes or plants.
  • Listen for Operation: Turn the system to “Cool” and observe the outdoor unit. The fan should be spinning, and you should hear the compressor running (a humming sound). If the fan isn’t spinning or if there are unusual noises, it could indicate a problem.
  • Gentle Cleaning (Optional): If the fins appear dirty, you can gently spray them with a garden hose from the outside in. Never use a pressure washer, as it can damage the delicate fins. Turn off the power to the unit at the breaker box before attempting any cleaning.

Check For Ice Buildup

Ice on the indoor or outdoor coils is a sign of a problem.

  • Indoor Unit: Look for frost or ice on the refrigerant lines (copper pipes) leading into the indoor air handler or on the evaporator coil itself (often located above the furnace).
  • Outdoor Unit: While less common for ice buildup in warm weather, check the larger refrigerant line connecting to the outdoor unit.
  • Thawing Process: If you find ice, turn the AC system off at the thermostat, but leave the fan set to “On” or “Auto” to circulate room-temperature air over the coils. This will help melt the ice. This process can take several hours.
  • Identify the Cause: Once thawed, try to determine the cause. Was the filter extremely dirty? Was airflow restricted? If the problem recurs, it likely indicates low refrigerant or a mechanical issue that requires professional attention.

Inspect The Circuit Breaker

Electrical issues can halt AC operation.

  • Locate the Panel: Find your home’s main electrical panel.
  • Identify the AC Breaker: Look for a breaker labeled “AC,” “Air Conditioner,” “HVAC,” or similar. It might be a double breaker.
  • Check the Position: If the breaker is in the “Off” position or in a middle “Tripped” position, carefully flip it completely to “Off” and then back to “On.”
  • Observe: If the breaker immediately trips again, do not attempt to reset it further. This indicates a serious electrical fault that requires an HVAC technician or electrician.

Listen For Unusual Noises

Pay attention to any sounds your AC system is making.

  • Humming: A faint hum might be normal for the compressor. A loud, struggling hum could indicate an electrical issue with the compressor or fan motor.
  • Clicking: Repeated clicking might mean the system is trying to start but can’t, possibly due to a faulty capacitor or relay.
  • Grinding/Screeching: These noises often indicate serious mechanical problems with the fan motor or compressor.
  • Hissing/Bubbling: This can be a sign of a refrigerant leak.

If you hear any of these unusual noises, it’s usually a sign that you should turn off the system and call a professional.

Ac Suddenly Blowing Warm Air

Credit: www.8burger.it

When To Call A Professional Hvac Technician

While DIY troubleshooting can resolve many minor issues, some AC problems are complex, require specialized tools, or involve potentially hazardous components like refrigerants and high-voltage electricity. Knowing when to call a qualified HVAC technician is crucial for ensuring your system is repaired correctly and safely.

Low Refrigerant Levels Or Suspected Leaks

As discussed, refrigerant is essential for cooling. If your system is low on refrigerant, it’s almost always due to a leak somewhere in the sealed refrigerant lines.

  • Why you need a pro: Locating refrigerant leaks requires specialized detection equipment (like electronic leak detectors or UV dye). Safely recovering the old refrigerant, repairing the leak (which might involve brazing copper lines), and then recharging the system with the precise amount and type of refrigerant requires EPA certification and specific tools. Simply adding more refrigerant without fixing the leak is illegal, environmentally harmful, and can cause further damage to the compressor.
  • Warning signs: Hissing sounds, oily residue around refrigerant lines, gradual loss of cooling, and ice buildup on coils are strong indicators of a leak.

Compressor Failure Or Malfunction

The compressor is the most vital and expensive component of your AC system.

  • Why you need a pro: Diagnosing compressor issues involves checking electrical components like capacitors and relays, measuring refrigerant pressures, and assessing the compressor’s internal function. Replacing a compressor is a major repair that requires evacuating the refrigerant, removing the old unit, installing the new one, and then properly recharging the system. This is not a DIY job due to the complexity and specialized tools required.
  • Warning signs: Repeatedly tripping breakers, loud humming or grinding noises from the outdoor unit, or the outdoor unit fan running while the compressor remains silent.

Electrical Component Failure (beyond Breakers)

While you can check your circuit breaker, other electrical components can fail.

  • Why you need a pro: Capacitors (which help start motors), contactors (which act as switches), relays, and control boards can burn out or fail. These components are often integrated into complex electrical systems. A technician can safely test these parts, identify the faulty one, and replace it with the correct, compatible part. Working with high-voltage electrical systems without proper training and safety