Liftmaster Garage Door Opener Not Working Power Outage

Liftmaster Garage Door Opener Not Working Power Outage

A sudden power outage can leave any homeowner feeling vulnerable, but when your garage door opener, a crucial gateway to your home, refuses to budge, the inconvenience can quickly escalate into a security concern. LiftMaster, a leading brand in garage door openers, offers robust and reliable systems, yet even the most advanced technology can be affected by a loss of electricity.

Understanding how to manage your LiftMaster opener during and after a power outage is essential for maintaining access to your home and ensuring its security.

This guide will walk you through the common issues that arise with LiftMaster garage door openers during a power outage, the steps you can take to regain functionality, and preventative measures to ensure you’re prepared for the next blackout. From understanding the emergency release mechanism to troubleshooting common problems, we’ll cover everything you need to know to keep your garage door operational when the lights go out.

Key Takeaways

  • Manual Operation is Key: During a power outage, your LiftMaster opener will likely become inoperable, necessitating the use of the emergency release cord to manually operate the garage door.
  • Battery Backup: Many modern LiftMaster models include a battery backup system designed to provide limited operation during power outages.
  • Safety First: Always disengage the opener from the door before attempting manual operation to prevent damage to the opener or door.
  • Troubleshooting Steps: Common issues after a power restoration include the opener losing its remote control programming or the safety sensors needing realignment.
  • Preventative Maintenance: Regularly test your battery backup and emergency release mechanism to ensure they function correctly when needed.

Understanding Liftmaster Openers And Power Outages

LiftMaster garage door openers are designed with various features to enhance convenience and security. However, like any electrical appliance, they rely on a consistent power supply. When the electricity grid fails, the opener’s primary motor and electronic components cease to function.

This is a critical juncture where understanding the opener’s built-in safety and emergency features becomes paramount.

The Role Of The Emergency Release Cord

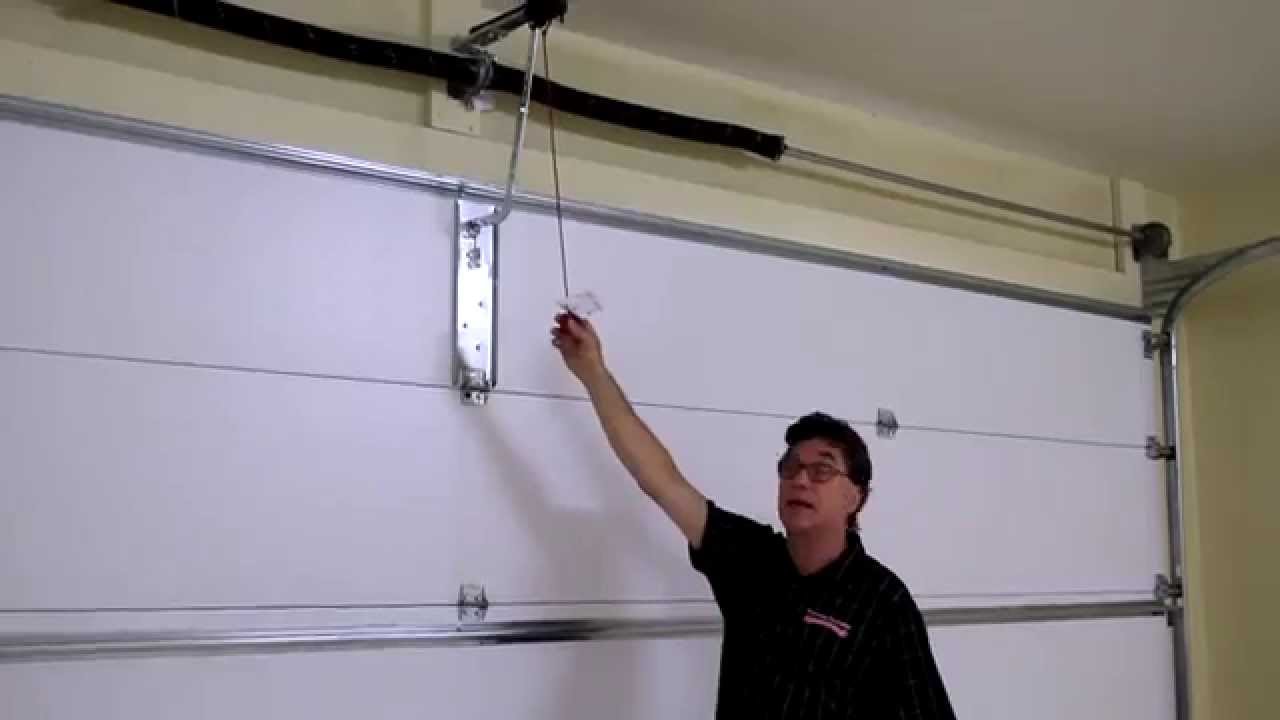
Every LiftMaster garage door opener is equipped with an emergency release cord, typically a red or yellow rope hanging from the trolley mechanism on the opener’s rail. This cord is your lifeline during a power outage. Pulling this cord disengages the trolley from the opener’s drive chain or belt, effectively disconnecting the motor from the garage door. This allows you to lift or lower the door manually.

Pro Tip: Before pulling the emergency release, ensure the garage door is fully closed. If the door is partially open, the weight can make manual operation difficult and potentially dangerous. It’s also crucial to ensure no one is in the path of the door as you manually operate it.

Battery Backup Systems: A Lifesaver

Many newer LiftMaster models come with an integrated battery backup system. This feature is specifically designed to provide a limited number of open and close cycles during a power outage. The battery typically kicks in automatically when it detects a loss of AC power, allowing you to operate your garage door as you normally would via remote or keypad.

The capacity of these battery backups varies by model. Some might offer enough power for a few cycles, while others can sustain operation for longer periods. It’s essential to know your specific LiftMaster model’s capabilities and to maintain the battery’s health.

Batteries have a finite lifespan and may need replacement every 3-5 years, depending on usage and environmental factors.

Why Your Opener Stops Working During An Outage

When the power goes out, the electric motor that drives the garage door opener cannot receive the electricity it needs to operate. This is the most straightforward reason your opener becomes unresponsive. Beyond the motor, the logic board and other electronic components also lose power, rendering the opener’s sophisticated control systems inactive.

Even if you have a battery backup, its capacity is not infinite. If the outage is prolonged, or if the battery is old or depleted, it may not be able to power the opener for an extended period. In such cases, manual operation via the emergency release cord is the only option.

Liftmaster Garage Door Opener Not Working Power Outage

Credit: marvinsgaragedoors.com

Restoring Operation After A Power Outage

Once the power is restored, your LiftMaster opener might not immediately return to its fully functional state. Several issues can arise, ranging from simple resets to more complex sensor or programming problems. Following a systematic approach can help you get your opener working again efficiently.

Re-engaging The Opener

After a power outage, if you manually operated the door using the emergency release cord, you’ll need to re-engage the opener’s trolley to the door. This is usually a straightforward process, but it’s vital to do it correctly.

  • Ensure the Garage Door is Closed: Before re-engaging, make sure the garage door is fully in the closed position.
  • Locate the Trolley: Find the trolley mechanism on the opener’s rail.
  • Pull the Release Cord: Sometimes, a gentle pull on the emergency release cord is needed to disengage the trolley.
  • Re-engage Mechanism: Most LiftMaster openers have a lever or mechanism on the trolley that allows you to re-engage it with the drive chain or belt. This might involve pulling a lever or pushing a button. Consult your LiftMaster manual for the specific procedure for your model.
  • Test: Once re-engaged, you should be able to operate the door using the remote.

Warning: Never attempt to re-engage the opener while the door is in motion or if the opener is still under power. Always ensure the door is stationary and the opener is in a neutral state before attempting this step.

Resetting Your Liftmaster Opener

In some instances, a power surge or fluctuation during the outage and restoration can cause the opener’s logic board to malfunction or require a reset. Many LiftMaster models have a reset procedure that can resolve electronic glitches.

  • Unplug the Opener: The first step is to unplug the garage door opener from the power outlet. This ensures no power is flowing through the system.
  • Wait: Leave the opener unplugged for at least 5-10 minutes. This allows any residual power in the capacitors to dissipate and can help reset the internal electronics.
  • Check Battery Backup (if applicable): If your model has a battery backup, remove the battery during this unplugging period. This ensures a complete power cycle for both the main unit and the backup.
  • Plug Back In: After the waiting period, plug the opener back into the power outlet.
  • Test: Attempt to operate the garage door using your remote or wall button.

If the opener still doesn’t respond, you may need to perform a hard reset, which often involves pressing and holding a specific button on the motor unit for a set duration. Again, refer to your LiftMaster owner’s manual for the precise instructions for your model.

Remote Control And Keypad Issues

Power outages can sometimes disrupt the communication between your LiftMaster opener and its remote controls or wireless keypads. The opener’s memory for these devices may be cleared, or the devices themselves might need to be reprogrammed.

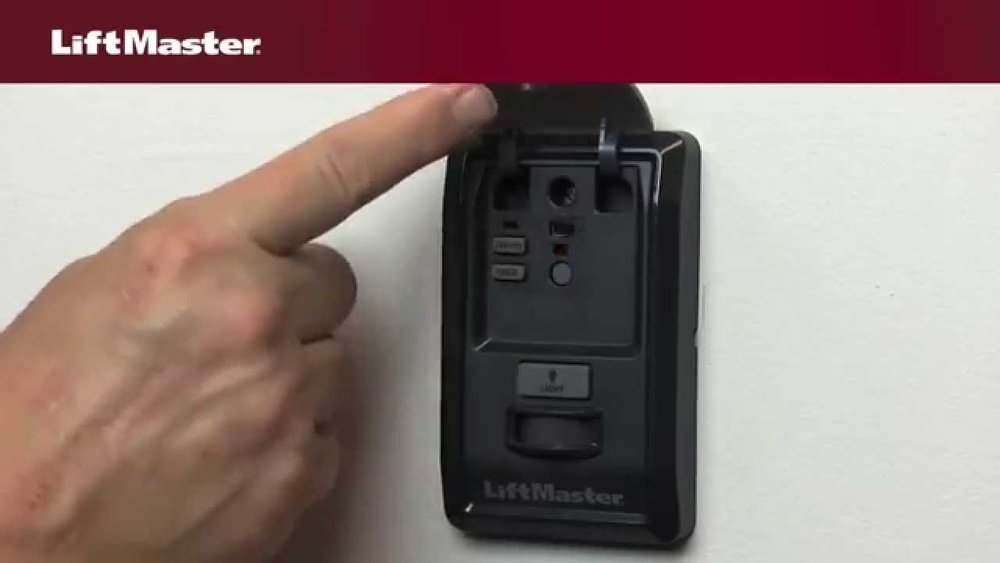
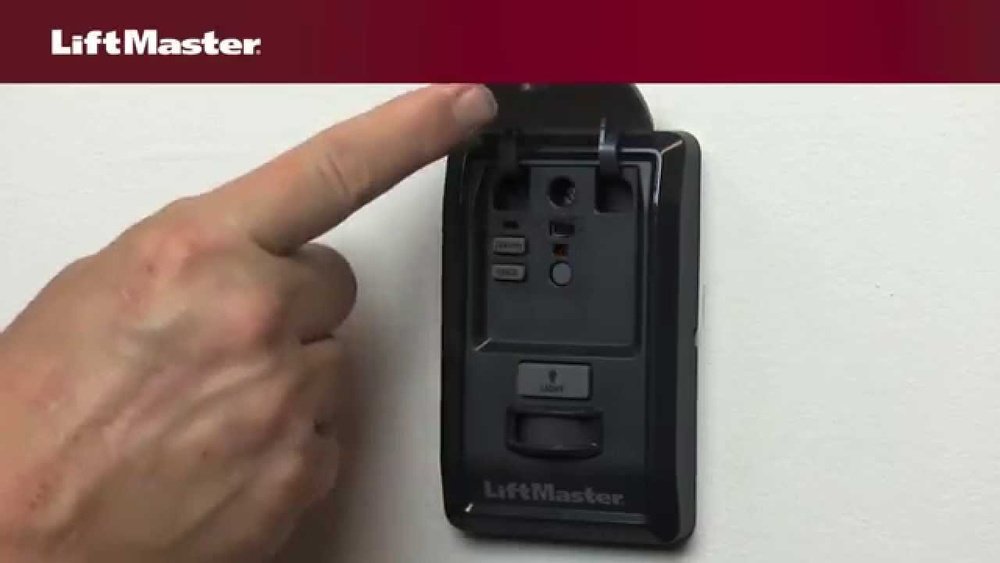
  • Reprogramming Remotes: Most LiftMaster openers have a “Learn” button on the motor unit. To reprogram a remote, you typically press and release this button, then press and hold the desired button on your remote. The opener’s indicator light will usually flash to confirm the programming. This process is detailed in your LiftMaster manual.
  • Reprogramming Keypads: Wireless keypads also require a reprogramming sequence. This usually involves entering a PIN code and then pressing a specific sequence of buttons on the keypad to sync it with the opener.
  • Check Batteries: Ensure the batteries in your remote controls and keypads are fresh, as a low battery can sometimes cause connectivity issues, especially after a power interruption.

Safety Sensor Alignment

The safety sensors are crucial for the proper functioning of your garage door opener. These small sensors are located near the bottom of the garage door track and emit an invisible beam across the opening. If this beam is broken while the door is closing, the opener will reverse the door’s direction to prevent accidents.

Power outages, or even minor vibrations from the house settling, can sometimes cause these sensors to become misaligned. If your door closes partially and then reverses, or if the opener refuses to close the door at all, misaligned safety sensors are a common culprit.

  • Locate Sensors: Identify the two sensors at the bottom of your garage door tracks. They usually have a small indicator light on each.
  • Check Indicator Lights: One sensor typically has a steady light, while the other’s light might blink or be off if there’s a misalignment or obstruction.
  • Align: Gently adjust the angle of the sensors until both indicator lights are steady and illuminated. You may need to loosen a mounting screw to adjust the angle.
  • Obstructions: Ensure nothing is blocking the path between the sensors, such as tools, debris, or even cobwebs.
  • Clean Lenses: Wipe the lenses of the sensors with a soft, dry cloth.

If realignment doesn’t solve the issue, the sensors might require more thorough troubleshooting, potentially involving checking wiring connections or replacing a faulty sensor.

Liftmaster Garage Door Opener Not Working Power Outage

Credit: bt1doors.com

Troubleshooting Common Liftmaster Issues Post-outage

Beyond the general steps, specific problems can arise that require targeted troubleshooting. Being aware of these common issues can save you time and frustration when dealing with a LiftMaster opener after a power disruption.

Opener Not Responding To Remote Or Wall Button

If your LiftMaster opener is receiving power (you might hear a faint hum or see indicator lights on the motor unit) but is unresponsive to its controls, several factors could be at play.

  • Loss of Programming: As mentioned, the opener might have lost its programming for the remotes. Follow the reprogramming steps outlined in your manual.
  • Wall Button Issue: If the remote works but the wall button doesn’t, the issue might be with the wiring to the wall button or the button itself. Check for loose connections at the motor unit.
  • Logic Board Fault: In rare cases, a power surge during the outage could have damaged the logic board. If all other troubleshooting steps fail, this might be the cause.

Garage Door Opens But Won’t Close

This is a classic symptom of misaligned safety sensors. However, other possibilities exist:

  • Travel Limits: The opener’s travel limits (the points at which the door stops when fully open or closed) might have been inadvertently reset or altered. These limits tell the opener when to stop. Reprogramming the travel limits, as described in your manual, is often necessary after a power interruption.
  • Obstruction in Track: A physical obstruction in the garage door track can prevent it from closing fully, triggering the safety reversal. Inspect the tracks carefully.
  • Force Settings: The opener has force settings that determine how much effort it will exert to open or close the door. If these settings are too low, the opener might struggle to close the door against minor resistance. You may need to adjust the force settings, but do so cautiously as incorrect settings can damage the door or opener.

Garage Door Closes Partially And Reverses

This is almost always an indication of an issue with the safety sensors or a problem with the door’s ability to close completely.

  • Safety Sensors: Double-check the alignment and ensure no obstructions are breaking the beam.
  • Obstruction: A small object, a warped section of the door, or debris in the track can prevent the door from closing fully, triggering the safety reversal.
  • Travel Limits: If the travel limit for the closed position is set too low, the opener might think the door is closed when it’s not, causing it to reverse. Adjusting the closed travel limit is necessary.

Opener Makes Noise But Door Doesn’t Move

If you hear the opener motor running, but the door remains stationary, the trolley is likely disengaged from the drive mechanism, or there’s a mechanical issue within the opener’s drive system.

  • Trolley Disengaged: This is common after manual operation. Ensure the trolley is properly re-engaged with the chain or belt.
  • Broken Drive Chain/Belt: The drive chain or belt that connects the trolley to the motor could be broken or have slipped off its sprockets. This requires inspection and potential repair or replacement.
  • Internal Gear Stripped: The gears inside the opener’s motor unit can wear out or strip, preventing power from being transferred to the drive mechanism. This usually necessitates motor unit repair or replacement.
Liftmaster Garage Door Opener Not Working Power Outage

Credit: www.youtube.com

Maintaining Your Liftmaster Opener For Power Outages

Proactive maintenance is the best strategy for ensuring your LiftMaster opener is ready for any power outage. Regular checks and upkeep can prevent common issues and guarantee the functionality of essential safety features.

Testing The Battery Backup System

If your LiftMaster has a battery backup, you should test it periodically. Most manufacturers recommend testing at least twice a year.

  • Simulate Power Loss: Unplug the garage door opener from the wall outlet.
  • Operate the Door: Use your remote control to open and close the garage door.
  • Observe Performance: Note if the opener operates at a normal speed and sound. If it’s significantly slower, weaker, or fails to complete a full cycle, the battery may be nearing the end of its life or may need charging.
  • Re-plug: Plug the opener back into the outlet. The battery backup system will begin to recharge.

Battery Replacement: LiftMaster batteries typically last 3-5 years. If your battery fails a test or is several years old, consider replacing it. Genuine LiftMaster replacement batteries are recommended for optimal performance and compatibility.

Checking The Emergency Release Mechanism

The emergency release cord is simple but vital. Ensure it’s easily accessible and functional.

  • Accessibility: Make sure the cord is not tangled, frayed, or otherwise obstructed. It should hang freely from the trolley.
  • Functionality Test: Periodically, with the opener powered off, gently pull the cord to ensure it disengages the trolley smoothly. Then, re-engage the trolley and test the opener with the remote.

Lubrication And General Maintenance

A well-maintained garage door system is less likely to encounter problems during stressful events like power outages.

  • Lubricate Moving Parts: Apply a silicone-based lubricant or white lithium grease to the tracks, rollers, hinges, and springs of your garage door. This reduces friction and strain on the opener.
  • Inspect Rollers and Tracks: Ensure rollers are turning freely and that tracks are free of debris and not bent or damaged.
  • Check Springs: Garage door springs are under high tension and are critical for smooth operation. If you suspect an issue with your springs, contact a professional for inspection and repair.

Keeping Your Manual Handy

In the event of an emergency, having your LiftMaster owner’s manual readily available can be invaluable. It contains specific instructions for your model regarding emergency release, re-engagement, battery backup, remote programming, and limit adjustments. Store a physical copy in a safe place or keep a digital version accessible on your smartphone or computer.

Advanced Troubleshooting And When To Call A Professional

While many power outage-related issues can be resolved with basic troubleshooting, some problems may indicate more serious mechanical or electrical faults. Knowing when to seek professional help is crucial for safety and to prevent further damage.

When To Call A Professional

  • Persistent Issues: If you’ve followed all troubleshooting steps and your LiftMaster opener still doesn’t function correctly, it’s time to call a qualified garage door technician.
  • Damaged Components: Any visible damage to the motor unit, rail, drive chain/belt, or garage door itself warrants professional assessment.
  • Spring Problems: Garage door springs are under extreme tension and can cause severe injury if handled improperly. Never attempt to adjust or replace springs yourself.
  • Electrical Concerns: If you suspect electrical issues beyond a simple reset, such as frayed wiring or a malfunctioning logic board, a professional electrician or garage door technician should be consulted.
  • Uncertainty: If at any point you feel uncomfortable or unsure about performing a repair or adjustment, it’s always best to err on the side of caution and call a professional.

Understanding Liftmaster Model Differences

LiftMaster offers a wide range of openers, from basic chain-drive models to advanced belt-drive systems with smart features. The specific troubleshooting steps and features, such as battery backup capabilities, can vary significantly between models.

  • Battery Backup Models: If your model includes a battery backup, familiarize yourself with its specifications, including how to test and replace the battery. LiftMaster’s Premium Series and some Contractor Series models often include this feature.
  • Smart Control Models: LiftMaster’s MyQ-enabled openers offer remote access and control via a smartphone app. While these features are convenient, they rely on a stable internet connection. During a power outage, your home Wi-Fi will likely be down, disabling MyQ functionality. However, the battery backup (if equipped) will still allow local operation via remote.
  • Drive Types: Chain-drive openers are generally more robust but can be noisier. Belt-drive openers are quieter and often found in premium models. The troubleshooting for mechanical issues might differ slightly based on the drive type.

Resources For Liftmaster Support

LiftMaster provides extensive resources for homeowners:

  • Owner’s Manuals: The most critical resource. You can usually find digital copies on the LiftMaster website by searching for your specific model number.
  • LiftMaster Website Support: The official LiftMaster website often has FAQs, troubleshooting guides, and video tutorials. LiftMaster Support provides detailed information.
  • Authorized Dealers/Technicians: For repairs and installations, using an authorized LiftMaster dealer ensures you receive quality service from trained professionals.

Preparing For Future Power Outages

The best way to handle a power outage affecting your garage door opener is to be prepared *before* it happens. A little foresight can save a lot of hassle.

Create A Garage Door Emergency Kit

Consider assembling a small kit to keep in your garage, containing:

  • Flashlight with extra batteries: Essential for visibility during dark outages.
  • Work gloves: To protect your hands when manually operating the door.
  • Your LiftMaster owner’s manual: For quick reference.
  • Basic tools: A small screwdriver or pliers might be useful for minor adjustments.
  • Fresh batteries for remotes/keypads: To ensure they function if the opener’s memory is lost.

Educate Household Members

Ensure everyone in your household knows how to:

  • Locate and use the emergency release cord.
  • Manually open and close the garage door.
  • Re-engage the opener after power is restored.
  • Identify the safety sensors and their function.

Consider A Surge Protector

While not directly related to power outages, power surges that often accompany power restoration can damage electronic components. Plugging your garage door opener into a high-quality surge protector can help safeguard its logic board and other sensitive electronics.

Battery Backup As A Standard Feature

If you live in an area prone to frequent power outages and don’t currently have a battery backup system, consider upgrading your LiftMaster opener to a model that includes this feature. It provides a significant level of convenience and security during blackouts.
Frequently Asked Questions

How Do I Manually Open My Liftmaster Garage Door During A Power Outage?

To Manually Open Your Liftmaster Garage Door During A Power Outage, Locate The Emergency Release Cord Hanging From The Trolley Mechanism On The Opener’s Rail. Pull This Cord Firmly Downwards. This Disengages The Trolley From The Opener’s Drive Chain Or Belt, Allowing You To Lift The Door By Hand. Ensure The Door Is Fully Closed Before Pulling The Cord If Possible, And Always Check That The Path Is Clear.

Will My Liftmaster Remote Work During A Power Outage?

Your Liftmaster Remote Will Only Work During A Power Outage If Your Opener Is Equipped With A Functional Battery Backup System. The Battery Backup Provides Temporary Power To The Opener, Allowing It To Respond To Remote Commands For A Limited Number Of Cycles. If Your Opener Does Not Have A Battery Backup, Or If The Battery Is Depleted Or Non-existent, The Remote Will Not Function.

What Should I Do If My Liftmaster Opener Loses Its Remote Programming After A Power Outage?

If Your Liftmaster Opener Loses Its Remote Programming After A Power Outage, You Will Need To Reprogram The Remote Control. Locate The “learn” Button On The Motor Unit Of Your Opener. Press And Release This Button, Then Immediately Press And Hold The Button On Your Remote Control That You Wish To Use. The Opener’s Indicator Light Will Typically Flash Or Turn On To Confirm The Programming. Refer To Your Specific Liftmaster Model’s Owner’s Manual For Precise Instructions.

My Liftmaster Safety Sensors Are Blinking After A Power Outage. What Does This Mean?

Blinking Safety Sensor Lights On A Liftmaster Opener Typically Indicate That The Safety Sensors Are Misaligned Or Obstructed. During A Power Outage Or Restoration, Vibrations Or Minor Shifts Can Cause Them To Become Misaligned. Ensure The Path Between The Two Sensors Is Clear Of Any Objects And Gently Adjust The Angle Of The Sensors Until Both Indicator Lights Are Steady. If The Issue Persists, Check The Wiring Connections To The Sensors.

How Long Does The Battery Backup On A Liftmaster Opener Typically Last?

The Duration A Liftmaster Battery Backup Can Power The Opener Varies By Model And Battery Condition. Generally, A Fully Charged Battery Backup Can Provide Enough Power For Approximately 24-48 Hours Of Standby Time And 10-20 Open/close Cycles. However, This Is An Approximation, And Actual Performance Can Depend On Factors Like Temperature, Battery Age, And How Frequently The Opener Is Used During The Outage. Always Consult Your Owner’s Manual For Specific Details On Your Model’s

Liftmaster Garage Door Opener Not Working Blinking Light

Liftmaster Garage Door Opener Not Working Blinking Light

A blinking light on your LiftMaster garage door opener is a common indicator that something isn’t quite right. While it might seem like a minor annoyance, this flashing signal is your opener’s way of communicating a specific issue, ranging from simple misalignments to more complex electrical problems.

Understanding what the blinking light means is the first crucial step in troubleshooting and getting your garage door back to its reliable operation. Ignoring these signals can lead to further damage or inconvenience.

This guide will demystify the various blinking light patterns on LiftMaster garage door openers, providing a comprehensive troubleshooting roadmap. We’ll break down the common causes, offer step-by-step solutions, and help you determine when it’s time to call a professional. Whether you’re dealing with a safety sensor issue, a loose connection, or a more intricate internal problem, by the end of this article, you’ll be equipped to diagnose and, in many cases, resolve the blinking light issue yourself.

Key Takeaways

  • A blinking light on a LiftMaster garage door opener signifies a specific problem, acting as a diagnostic code.
  • Common causes include safety sensor misalignment or obstruction, travel limit issues, and remote control malfunctions.
  • Troubleshooting involves checking safety sensors, ensuring proper alignment, and verifying remote control battery and programming.
  • Power cycling the opener and checking for physical obstructions are essential initial steps.
  • Specific blinking patterns correspond to distinct error codes, often detailed in the LiftMaster manual.
  • For persistent issues or electrical concerns, professional diagnosis and repair are recommended.

Understanding Liftmaster Blinking Light Codes

LiftMaster garage door openers utilize a blinking LED light, often located on the motor unit, as a diagnostic tool. This light flashes in a specific sequence or pattern to communicate the nature of a malfunction. While the exact code can vary slightly between models, most follow a standardized system.

The most common pattern involves a series of rapid flashes, pauses, and then a repeat of the flashes. For instance, a common error code might be “five flashes. ” This means the unit flashes five times, pauses, and then flashes five times again.

Identifying the precise number of flashes is paramount. You’ll need to observe the light carefully and count the repetitions. Once you have a count, you can cross-reference it with your opener’s manual or online LiftMaster resources to pinpoint the exact issue.

These codes are designed to simplify troubleshooting, guiding you toward the most probable cause without requiring extensive technical knowledge. Without understanding these codes, you’re essentially guessing at the problem, which can lead to unnecessary repairs or prolonged downtime for your garage door.

The Importance Of Your Liftmaster Manual

The LiftMaster owner’s manual is your most valuable resource when deciphering blinking light codes. Every model comes with a manual that details the specific error codes for that unit. These manuals provide clear explanations of what each blinking pattern signifies, along with recommended troubleshooting steps. If you’ve misplaced your manual, most can be downloaded directly from the official LiftMaster website by entering your opener’s model number. It’s crucial to consult the manual for *your specific model* as variations can exist. For example, a four-flash code on one model might indicate a safety sensor issue, while on another, it could relate to a motor overload.

Common Blinking Light Patterns And Their Meanings

While consulting your manual is always the definitive step, several blinking light patterns are frequently encountered across various LiftMaster models. These typically revolve around safety, power, and operational limits.

  • One Flash: Often indicates an issue with the remote control or wall button. This could be a dead battery, a faulty button, or a programming issue.
  • Two Flashes: Frequently points to a problem with the safety sensors (also known as photo eyes). This could be misalignment, obstruction, or a wiring issue.
  • Three Flashes: Commonly relates to travel limits or force settings. The opener might be struggling to open or close the door fully, or the limits may need adjustment.
  • Four Flashes: Often indicates a safety sensor issue, similar to two flashes, but sometimes more specific to a complete failure of one sensor to detect the other.
  • Five Flashes: This can signify a motor or logic board problem, or sometimes an issue with the encoder. This is generally a more serious error.
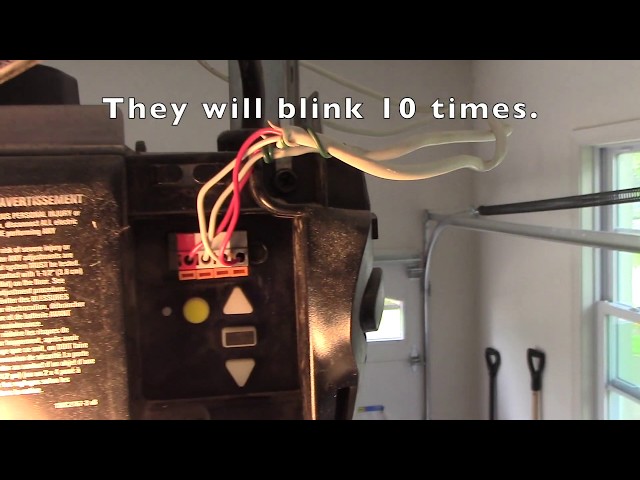
  • Ten Flashes: Usually indicates an encoder failure or a problem with the motor’s ability to detect its position.

It’s important to note that these are general interpretations. Always confirm with your specific model’s manual.

Liftmaster Garage Door Opener Not Working Blinking Light

Credit: gdmedics.com

Troubleshooting Safety Sensor Issues

The most frequent culprit behind a blinking light on a LiftMaster opener is a problem with the safety sensors. These are small devices, usually mounted near the bottom of the garage door tracks, that emit an invisible infrared beam. If this beam is broken or misaligned when the door is closing, the opener will stop and reverse to prevent accidents. A blinking light often signals that one or both sensors are not functioning correctly.

Identifying Safety Sensor Problems

Before diving into adjustments, visually inspect the sensors. Look for:

  • Obstructions: Anything blocking the path of the beam, such as a parked car, a broom, a trash can, or even thick cobwebs.
  • Damage: Bent brackets, cracked housings, or loose wiring on either sensor.
  • Alignment: The sensors should be directly facing each other. If one is angled away, the beam won’t connect.
  • Indicator Lights: Most safety sensors have small LED lights on them. Typically, one sensor will have a steady light, while the other will blink until the beam is properly aligned. If both are off or blinking erratically, it points to a problem.

Aligning The Safety Sensors

Misalignment is the most common safety sensor issue. Here’s how to address it:

  • Clear Obstructions: Remove anything that might be blocking the beam.
  • Check Sensor Lights: Observe the indicator lights on both sensors. One should be solid (indicating power and a connected beam), and the other might be blinking if misaligned.
  • Adjust the Misaligned Sensor: Gently adjust the sensor that has the blinking or off light. Move it slowly side-to-side and up-and-down until its indicator light turns solid. This means the beam has successfully connected with the other sensor.
  • Secure the Sensors: Once aligned, ensure the sensors are firmly mounted and the brackets are not loose.
  • Test the Opener: Try operating the garage door. If the blinking light stops and the door closes fully, you’ve likely resolved the issue.

If the sensors continue to blink or the door still doesn’t close properly after alignment, proceed to check the wiring.

Checking Safety Sensor Wiring

Loose or damaged wiring can prevent the safety sensors from communicating effectively.

  • Inspect the Wires: Trace the wires from each sensor back to the motor unit. Look for any nicks, cuts, frayed insulation, or loose connections at the sensor terminals or where they enter the motor unit.
  • Secure Connections: If you find loose wires, disconnect the power to the opener (unplug it from the outlet) and re-secure the wires to the terminals. Ensure they are firmly attached.
  • Test for Continuity (Advanced): If you have a multimeter, you can test the wiring for continuity. This involves checking if the wire is intact and allowing electrical current to pass through. This step is generally recommended for those with electrical experience.

If, after checking for obstructions, alignment, and wiring, the safety sensors still appear to be the problem, the sensors themselves might be faulty and require replacement.

Liftmaster Garage Door Opener Not Working Blinking Light

Credit: www.youtube.com

Addressing Travel Limit And Force Adjustments

Another common reason for a LiftMaster opener’s blinking light is incorrect travel limit or force settings. The travel limits dictate how far the door opens and closes, and the force settings determine how much power the opener uses to move the door. If the opener encounters too much resistance (or not enough, in some cases) during its travel, it can trigger a safety stop and a blinking light.

What Are Travel Limits And Force Settings?

  • Travel Limits: These are settings that tell the opener when to stop moving the door at the fully open and fully closed positions. If these are set too high or too low, the door might not close completely, or the opener might strain against the floor or the header.
  • Force Settings: This controls the amount of power the motor applies to move the door. If the force is set too high, the opener might trigger a safety stop if it encounters even minor resistance. If set too low, it might not be able to move the door fully.

Adjusting Travel Limits And Force

The adjustment process for travel limits and force settings varies significantly by LiftMaster model. However, most modern openers use a programming sequence involving buttons on the motor unit.

  • Locate Adjustment Controls: Consult your owner’s manual to find the location of the “UP” and “DOWN” limit adjustment screws or the electronic programming buttons.
  • Enter Programming Mode: Typically, you’ll need to press and hold a specific button (often labeled “PROGRAM” or “SQUARE BUTTON”) until an LED on the motor unit lights up or flashes.
  • Adjust Limits: Use the remote control to move the door to the desired fully open position. Then, press and hold the “PROGRAM” button and the “UP” button simultaneously until the opener’s light flashes or a click is heard. Repeat this process for the fully closed position, using the “DOWN” button.
  • Adjust Force: After setting the limits, you’ll usually adjust the force. This often involves pressing the “PROGRAM” button and then the “UP” or “DOWN” button, followed by pressing the “UP” or “DOWN” button again to increase or decrease force. The manual will guide you on how to gauge the correct force, usually by observing if the door reverses upon encountering light resistance (like a 2×4 piece of wood placed flat on the ground).
  • Exit Programming: Press the “PROGRAM” button again to save the settings.

Example: On some LiftMaster models (like the 1300 series), you might press the “PROGRAM” button, then press the “UP” button to move the door open. Once at the desired open position, press and hold “PROGRAM” and “UP” until the light flashes. Then, press the “DOWN” button to move the door to the closed position, press and hold “PROGRAM” and “DOWN” until the light flashes to set the down limit. Force adjustments are typically done via separate buttons or a dial.

It’s critical to follow your manual precisely, as incorrect adjustments can lead to the door not opening or closing properly, or even damage to the door or opener.

Liftmaster Garage Door Opener Not Working Blinking Light

Credit: thriftygaragedoorrepair.ca

Remote Control And Wall Button Issues

A blinking light can also stem from a problem with the remote control or the mounted wall button. If the opener isn’t receiving a valid signal, it might interpret this as an error.

Remote Control Problems

  • Battery: The most common issue is a dead or weak battery in the remote. Replace the battery with a fresh one. Ensure it’s inserted correctly.
  • Range: Sometimes, the remote might be too far from the opener, or there might be significant interference from other electronic devices or structural materials. Try operating the remote closer to the motor unit.
  • Programming: The remote might have become deprogrammed from the opener. You’ll need to reprogram it according to your opener’s manual. This usually involves pressing a “Learn” or “Program” button on the motor unit and then pressing a button on the remote.
  • Faulty Remote: The remote itself might be damaged or malfunctioning. Try using a different remote if you have one, or the wall button, to see if the issue persists.

Wall Button Problems

  • Loose Wiring: The wires connecting the wall button to the motor unit could be loose or damaged. Check the connections at both the button and the motor unit.
  • Faulty Button: The button itself might be stuck or broken. Press it firmly to ensure it’s not physically jammed. If it feels loose or unresponsive, it may need replacement.

Pro Tip: If you suspect a remote issue, try using the wired wall button. If the door operates correctly with the wall button but not the remote, you’ve isolated the problem to the remote or its receiver. Conversely, if neither works, the issue likely lies with the opener’s logic board, power, or safety sensors.

Power And Internal Component Issues

When simpler troubleshooting steps fail, the blinking light might indicate a more significant problem with the opener’s power supply or internal components.

Power Cycling The Opener

Before assuming a major fault, always try a simple power cycle. This can reset the opener’s logic board and clear temporary glitches.

  • Disconnect Power: Unplug the garage door opener from the electrical outlet.
  • Wait: Leave it unplugged for at least 60 seconds. This allows any residual power in the capacitors to dissipate.
  • Reconnect Power: Plug the opener back into the outlet.
  • Test: Try operating the opener with the remote or wall button.

This simple step can resolve many intermittent issues and is a good first diagnostic measure for any electronic device.

Logic Board Or Motor Problems

A blinking light, especially a rapid, continuous flash or a pattern indicating a motor fault (like five or ten flashes), can point to a failing logic board or motor.

  • Logic Board: This is the “brain” of the opener. If it’s damaged due to power surges, age, or wear, it can cause erratic behavior, including incorrect blinking light codes. Replacing a logic board can be costly.
  • Motor Issues: The motor itself might be overheating, failing, or have internal damage. This could be due to age, lack of maintenance (lubrication), or a mechanical issue within the opener’s gear system.

Warning: Working with the internal components of a garage door opener can be dangerous due to the presence of high voltage and heavy springs. If you suspect a logic board or motor issue, it is strongly recommended to contact a qualified garage door technician.

Encoder Malfunction

Some LiftMaster openers use an encoder to monitor the position and speed of the motor. If the encoder fails, the opener won’t know how far to move the door, leading to it stopping prematurely and potentially triggering a blinking light code (often 5 or 10 flashes). Replacing an encoder typically requires a service call.

When To Call A Professional

While many LiftMaster blinking light issues can be resolved with basic troubleshooting, there are times when professional expertise is essential. If you’ve exhausted the steps outlined above and the blinking light persists, or if you encounter any of the following situations, it’s time to call a qualified garage door technician:

  • Persistent Blinking Light: After attempting all relevant troubleshooting steps for your model, if the light continues to blink, indicating an unresolved error code.
  • Electrical Concerns: If you suspect issues with the wiring, motor, or logic board, especially if you’re not comfortable working with electrical components.
  • Mechanical Problems: If the door is physically stuck, making unusual noises, or if you notice bent tracks, broken springs, or damaged cables. These are serious safety hazards.
  • Complex Error Codes: If your manual indicates a complex error code that requires specialized diagnostic tools or knowledge.
  • Safety Concerns: If you are unsure about any step or feel uncomfortable performing the troubleshooting yourself. Garage doors are heavy and under tension, posing significant risks if handled improperly.

A professional technician has the necessary tools, knowledge, and experience to accurately diagnose the problem, perform repairs safely, and ensure your garage door system operates reliably and securely. They can also identify potential future issues before they become major problems.

Maintenance Tips To Prevent Future Issues

Regular preventive maintenance is key to minimizing the occurrence of blinking lights and other operational problems with your LiftMaster garage door opener. A well-maintained system is less likely to develop faults.

Regular Inspections

  • Visual Checks: Monthly, visually inspect the entire garage door system. Look for worn rollers, damaged tracks, frayed cables, and loose hardware.
  • Safety Sensor Alignment: Periodically check that the safety sensors are clean and aligned. Dust or debris can accumulate, and vibrations can cause slight misalignment over time.
  • Balance Test: Manually disengage the opener (using the emergency release cord) and lift the door halfway. It should stay in place without significant effort. If it’s too heavy or slams shut, the springs may need adjustment by a professional.

Lubrication

  • Moving Parts: Lubricate the hinges, rollers, and tracks of the garage door itself (not the opener mechanism) with a silicone-based spray lubricant at least twice a year. This reduces strain on the opener motor.
  • Opener Chain/Screw Drive: If you have a chain-driven opener, check the chain tension and lubricate it according to the manual. For screw drives, ensure the screw mechanism is clean and free of debris.

Battery Replacement

  • Remotes: Replace batteries in your remotes at least once a year, or when you notice a decrease in range or responsiveness.
  • Backup Battery: If your opener has a battery backup, test it annually and replace the battery according to the manufacturer’s recommendations (typically every 3-5 years).

Software/firmware Updates (smart Openers)

  • If you have a smart LiftMaster opener connected to your home network, ensure it has the latest firmware updates installed. These updates can sometimes resolve bugs and improve performance. Check the LiftMaster app or website for instructions.

By incorporating these simple maintenance practices, you can significantly extend the lifespan of your garage door opener and reduce the likelihood of encountering disruptive issues like a blinking light.

Frequently Asked Questions

What Does A Continuous Blinking Light On A Liftmaster Mean?

A continuous, rapid blinking light on a LiftMaster opener usually indicates a critical error, often related to the safety sensors not being aligned or detecting an obstruction. It could also signify an issue with the logic board or motor. The exact meaning depends on the specific model, so consulting your owner’s manual is crucial.

How Do I Reset My Liftmaster Garage Door Opener?

To reset your LiftMaster garage door opener, you typically perform a power cycle. Unplug the opener from the electrical outlet, wait for at least 60 seconds to allow capacitors to discharge, and then plug it back in. For some models, a full reset might involve reprogramming the limits and remotes, which is detailed in the owner’s manual.

Can I Fix A Liftmaster Opener With A Blinking Light Myself?

Many common issues, such as misaligned safety sensors, dead remote batteries, or the need for a power cycle, can be fixed yourself. However, if the blinking light indicates a more complex problem like a faulty logic board, motor issue, or damaged wiring that you’re not comfortable addressing, it’s best to call a professional technician.

My Liftmaster Opener Is Blinking 5 Times. What Does That Mean?

A pattern of five flashes on a LiftMaster garage door opener commonly indicates an issue with the motor or the logic board. It might signify that the motor is overheating, has failed, or that the logic board is not receiving proper feedback from the motor. This often requires professional diagnosis.

How Often Should I Check My Garage Door Opener’s Safety Sensors?

You should visually inspect your LiftMaster garage door opener’s safety sensors for obstructions and alignment at least once a month. It’s also a good practice to test their functionality by attempting to close the door with an obstruction in the beam path. If the door reverses, the sensors are working correctly.

A blinking light on your LiftMaster garage door opener is a signal, not a permanent failure. By systematically working through the potential causes, starting with the simplest solutions like checking obstructions and power cycling, and progressing to more technical adjustments, you can often restore your opener’s functionality.

Remember to always prioritize safety, consult your owner’s manual for model-specific guidance, and don’t hesitate to contact a professional if the problem persists or involves complex electrical or mechanical components. Regular maintenance is your best defense against future issues, ensuring your garage door opener continues to operate smoothly and reliably for years to come.

Why Walls Crack In New Houses

Why Walls Crack In New Houses

The excitement of moving into a brand-new home is often unparalleled. The fresh paint, the gleaming floors, and the promise of a space designed for you are incredibly appealing. However, for many new homeowners, this initial joy can be short-lived when they start noticing small, hairline cracks appearing in their walls and ceilings. While it’s easy to panic and assume the worst, cracks in new construction are surprisingly common and often a normal part of the building’s settling process. Understanding why these cracks form is the first step to addressing them effectively and preserving the beauty and integrity of your new home.

These minor imperfections can range from thin fissures in drywall corners to slightly wider gaps along trim. They can appear in various locations, including around windows and doors, at ceiling and wall junctions, or even across larger wall surfaces. The root cause is almost always related to the natural processes a newly constructed house undergoes as it matures.

From the drying of materials to the subtle shifts in the foundation, several factors contribute to these cosmetic issues. This article will explore the primary reasons behind wall cracks in new homes, differentiate between minor settling and more serious structural concerns, and provide guidance on how to manage and repair them.

Key Takeaways

  • Settling is Normal: New homes experience natural settling as materials dry and the structure adjusts to its environment, leading to minor cracks.
  • Material Expansion/Contraction: Temperature fluctuations and humidity changes cause building materials like wood and drywall to expand and contract, stressing joints and creating cracks.
  • Moisture Content: Excess moisture in newly installed materials, especially wood framing, can shrink as it dries, pulling joints apart and causing cracks.
  • Foundation Movement: While less common for minor cracks, significant foundation shifts due to soil conditions or poor construction can cause more substantial wall damage.
  • Drywall Installation: Techniques like improper joint taping or mudding can lead to cracks, particularly at seams and corners.
  • Distinguishing Serious Cracks: Diagonal cracks, those wider than a dime, or cracks accompanied by uneven floors or sticking doors may indicate structural issues requiring professional assessment.
  • Repair Strategies: Minor cracks are typically repaired with spackling compound and paint, while larger or structural cracks need more involved solutions.
Why Walls Crack In New Houses

Credit: garrattsdamp.com

The Science Of Settling: Why New Houses Shift

A new house is a dynamic structure, especially in its first few years. It’s not a static object but a collection of materials that are still undergoing changes. The most significant factor contributing to cracks is the natural settling of the building. This process is a combination of several physical phenomena that occur as the house establishes itself on its foundation and its components acclimatize to their surroundings.

Drying And Shrinkage Of Structural Materials

One of the primary drivers of settling is the moisture content in the building materials themselves. Wood, the primary framing material for most modern homes, is typically kiln-dried before use, but it still contains residual moisture. When lumber is used in construction, it continues to dry out and shrink as it acclutes to the ambient humidity and temperature of the finished house. This shrinkage is not uniform across all pieces of lumber, and it can cause slight movements in the framing.

For instance, studs, joists, and rafters might shrink at different rates. As these wooden components subtly change dimension, they can pull away from nails or screws, or exert pressure on adjacent materials like drywall. This movement is often imperceptible to the naked eye but is enough to stress the joints in drywall, particularly at corners and where different planes meet.

Think of it like a piece of wood slowly drying out and warping; a house frame is a much larger, more complex version of this. The cumulative effect of many small movements across the entire structure can manifest as visible cracks.

Foundation Compression And Soil Consolidation

The foundation of a house is its base, and it rests on the soil. When a new house is built, the weight of the structure compresses the soil beneath it. This soil consolidation is a gradual process, especially in soils with high clay content, which can hold a lot of water and compress significantly. As the soil compacts, the foundation can sink ever so slightly.

While modern foundations are designed to minimize this effect, even minor, uniform settling of the foundation can cause stresses to travel up through the walls. If the foundation settles unevenly, the stresses become more pronounced and can lead to more significant cracking.

The extent of foundation movement is heavily influenced by the type of soil, local groundwater levels, and the quality of the foundation engineering and construction. In most cases, the settling is minimal and results in only superficial cracks, but it’s a crucial part of the initial aging process for any new home.

Thermal Expansion And Contraction

Building materials are subject to the laws of physics, and one of the most fundamental is thermal expansion and contraction. Nearly all materials expand when heated and contract when cooled. In a house, this happens daily and seasonally. Wood, metal, concrete, and even drywall will expand and contract with changes in temperature.

When different materials are joined together, their differing rates of expansion and contraction can create internal stresses. For example, wood framing might expand more than drywall during a hot summer day. This can push drywall outwards, and as it cools in the evening, it contracts, potentially pulling away from the framing or causing stress at the joints.

Over time, these repeated cycles of expansion and contraction can widen small gaps or create new ones, leading to the appearance of cracks, especially in areas where materials meet at right angles, such as corners or around windows and doors.

Why Walls Crack In New Houses

Credit: gosmartbricks.com

Common Culprits: Where And Why Cracks Appear

Understanding the general principles of settling is helpful, but pinpointing the specific locations where cracks commonly appear in new homes can offer further insight into their cause. Different locations are susceptible to particular types of stress.

Cracks At Drywall Joints And Corners

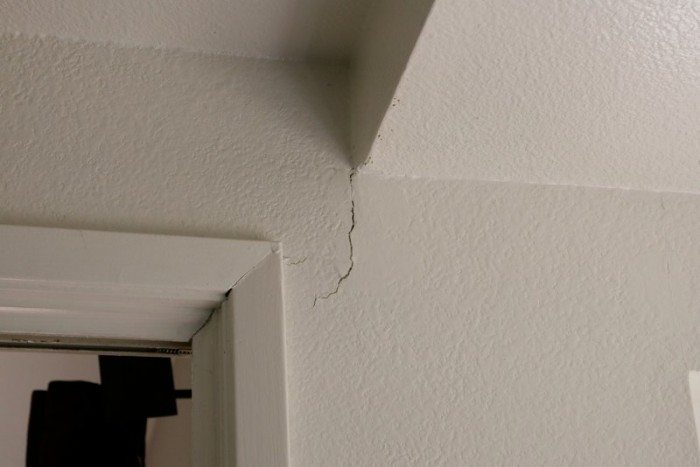
Perhaps the most frequent type of crack in new homes appears at the seams between drywall panels or in the internal and external corners of rooms. Drywall panels are typically joined together, and the resulting seam is covered with joint tape and multiple layers of joint compound (mud). This process is designed to create a smooth, seamless surface.

However, the tape and mud are relatively thin materials. If the underlying wood framing shrinks or shifts, it can cause the tape to pull away from the drywall, or the mud to crack. In corners, especially where two walls meet, or where a wall meets a ceiling, the movement of the framing can create shear forces that exceed the tensile strength of the joint compound, leading to characteristic cracks that run along the tape line. In external corners, the stress is often more pronounced.

Cracks Around Windows And Doors

Windows and doors are openings in the wall structure, and they are typically framed with wood. The framing around these openings, known as the buck or jamb, is crucial for structural integrity and for supporting the load from above. As the house settles and the framing materials dry and shrink, the buck can shift slightly.

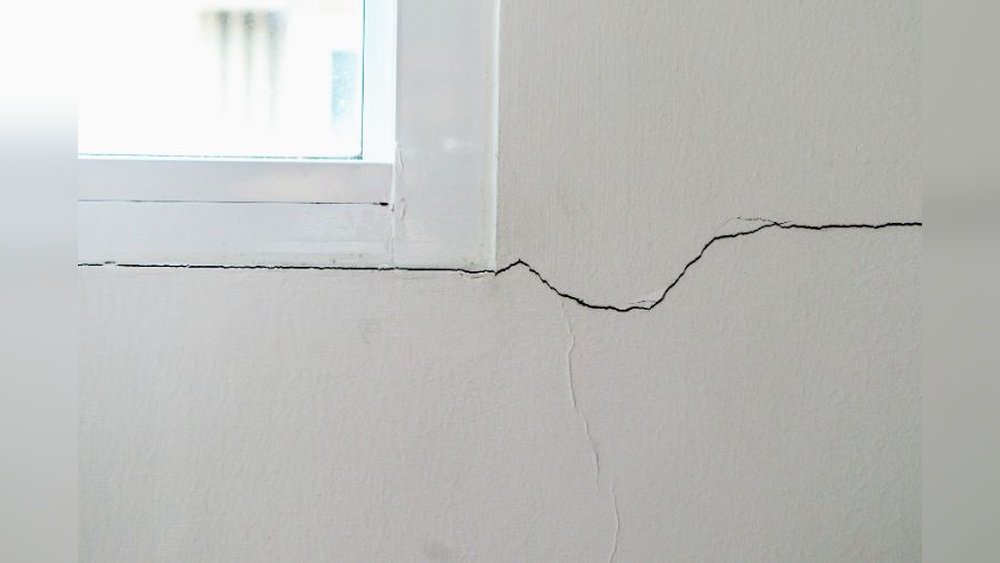
This movement can cause cracks to appear in the drywall adjacent to the window or door frames. Often, these cracks will run diagonally from the corners of the frames, following the path of least resistance. The trim around windows and doors can also become loose if the underlying framing moves, creating a gap that might be mistaken for a crack in the wall itself.

Ceiling Cracks

Ceilings are particularly susceptible to cracks due to the weight of the materials above and the way they are supported. Ceiling joists, like wall studs, are made of wood and can shrink. Additionally, if there’s an attic or second floor above, the weight can cause the ceiling joists to deflect slightly.

Cracks on the ceiling often appear along the junction where the wall meets the ceiling, similar to corner cracks in walls. They can also appear in the middle of the ceiling, particularly if there are two drywall panels joined together. If there are any imperfections in the drywall installation, such as inadequate support or improper staggering of seams, these can become points of weakness that develop into cracks as the house settles.

Hairline Cracks On Large Wall Surfaces

Occasionally, you might notice very fine, hairline cracks appearing across large, flat expanses of drywall. These are often less dramatic than corner or joint cracks and can be caused by a variety of factors, including:

  • Inconsistent Drying: If the drywall sheets themselves were installed with slightly different moisture levels, or if they dry out unevenly in the home, it can cause minor surface stresses.
  • Impact or Stress: Even minor impacts during the construction or finishing process, or stress from furniture leaning against a wall, can create micro-fractures that become visible over time.
  • Paint Film Stress: The paint layer itself can sometimes develop fine cracks if it’s applied too thickly, or if it’s subjected to rapid temperature changes before it has fully cured. These are typically very superficial and only affect the paint layer.
Why Walls Crack In New Houses

Credit: www.homesandgardens.com

Beyond Settling: Other Contributing Factors

While settling is the most common reason for cracks in new homes, other factors can contribute to or exacerbate the problem. Understanding these can help in diagnosing the issue and determining the appropriate course of action.

Moisture Issues

Excess moisture during or immediately after construction is a significant contributor to cracking. If lumber framing is installed while still very wet, its subsequent shrinkage will be more pronounced. This is especially true if the house is closed up tightly during construction, trapping humidity.

  • Rain Intrusion: Leaks from rain during construction, or from improperly sealed windows and doors, can saturate framing members and drywall. As these areas dry out, the shrinkage can be significant, leading to larger cracks.
  • Plumbing Leaks: Although less common in brand-new construction, a small plumbing leak behind a wall can introduce moisture, causing materials to swell and then shrink, leading to cracks.
  • High Humidity: If a new home is not properly ventilated, particularly in bathrooms and kitchens, or if there are issues with HVAC systems, high indoor humidity can cause materials to swell, and then contract as the humidity drops, stressing joints.

Construction Quality And Techniques

The quality of workmanship plays a crucial role in how well a house withstands the settling process. Even with the best materials, poor construction techniques can lead to a higher incidence of cracks.

  • Drywall Installation: Improperly installed drywall tape is a common culprit. If the tape isn’t embedded properly in the joint compound, or if it’s applied too loosely, it’s much more likely to crack as the framing moves. Over-sanding or applying too much pressure can also weaken the tape.
  • Fastening: If drywall is not adequately fastened to the studs, or if screws are overdriven (which can tear the paper face of the drywall), it creates weak points.
  • Mudding and Taping: Applying joint compound too thinly, or not allowing adequate drying time between coats, can lead to premature cracking. The mud needs to form a solid, cohesive layer to bridge the gaps between drywall panels effectively.

Soil And Site Conditions

The ground on which the house is built has a profound impact on its stability. Certain soil types are more prone to movement than others.

  • Expansive Soils: Soils with a high clay content, like bentonite, can absorb large amounts of water and swell significantly. When they dry out, they shrink just as dramatically. This constant cycle of expansion and contraction can cause substantial movement in the foundation, leading to more pronounced wall cracks.
  • Poor Drainage: If the site is not properly graded, or if drainage systems are inadequate, water can pool around the foundation. This constant saturation can lead to soil expansion and hydrostatic pressure against the foundation walls, potentially causing movement and cracks.
  • Compaction: If the soil beneath the foundation was not adequately compacted before construction, it will continue to settle over time, leading to a more significant and prolonged settling process for the house.

When To Worry: Distinguishing Minor Cracks From Structural Issues

While most cracks in new homes are cosmetic and related to settling, it’s essential to know when a crack might signal a more serious structural problem. Early detection and intervention are key to preventing minor issues from becoming major, costly repairs.

Characteristics Of Serious Cracks

Several indicators suggest a crack is more than just a cosmetic annoyance:

  • Width: Cracks wider than 1/8th of an inch (about the thickness of a dime) are generally considered more serious. Hairline cracks (less than 1/16th of an inch) are typically normal settling.
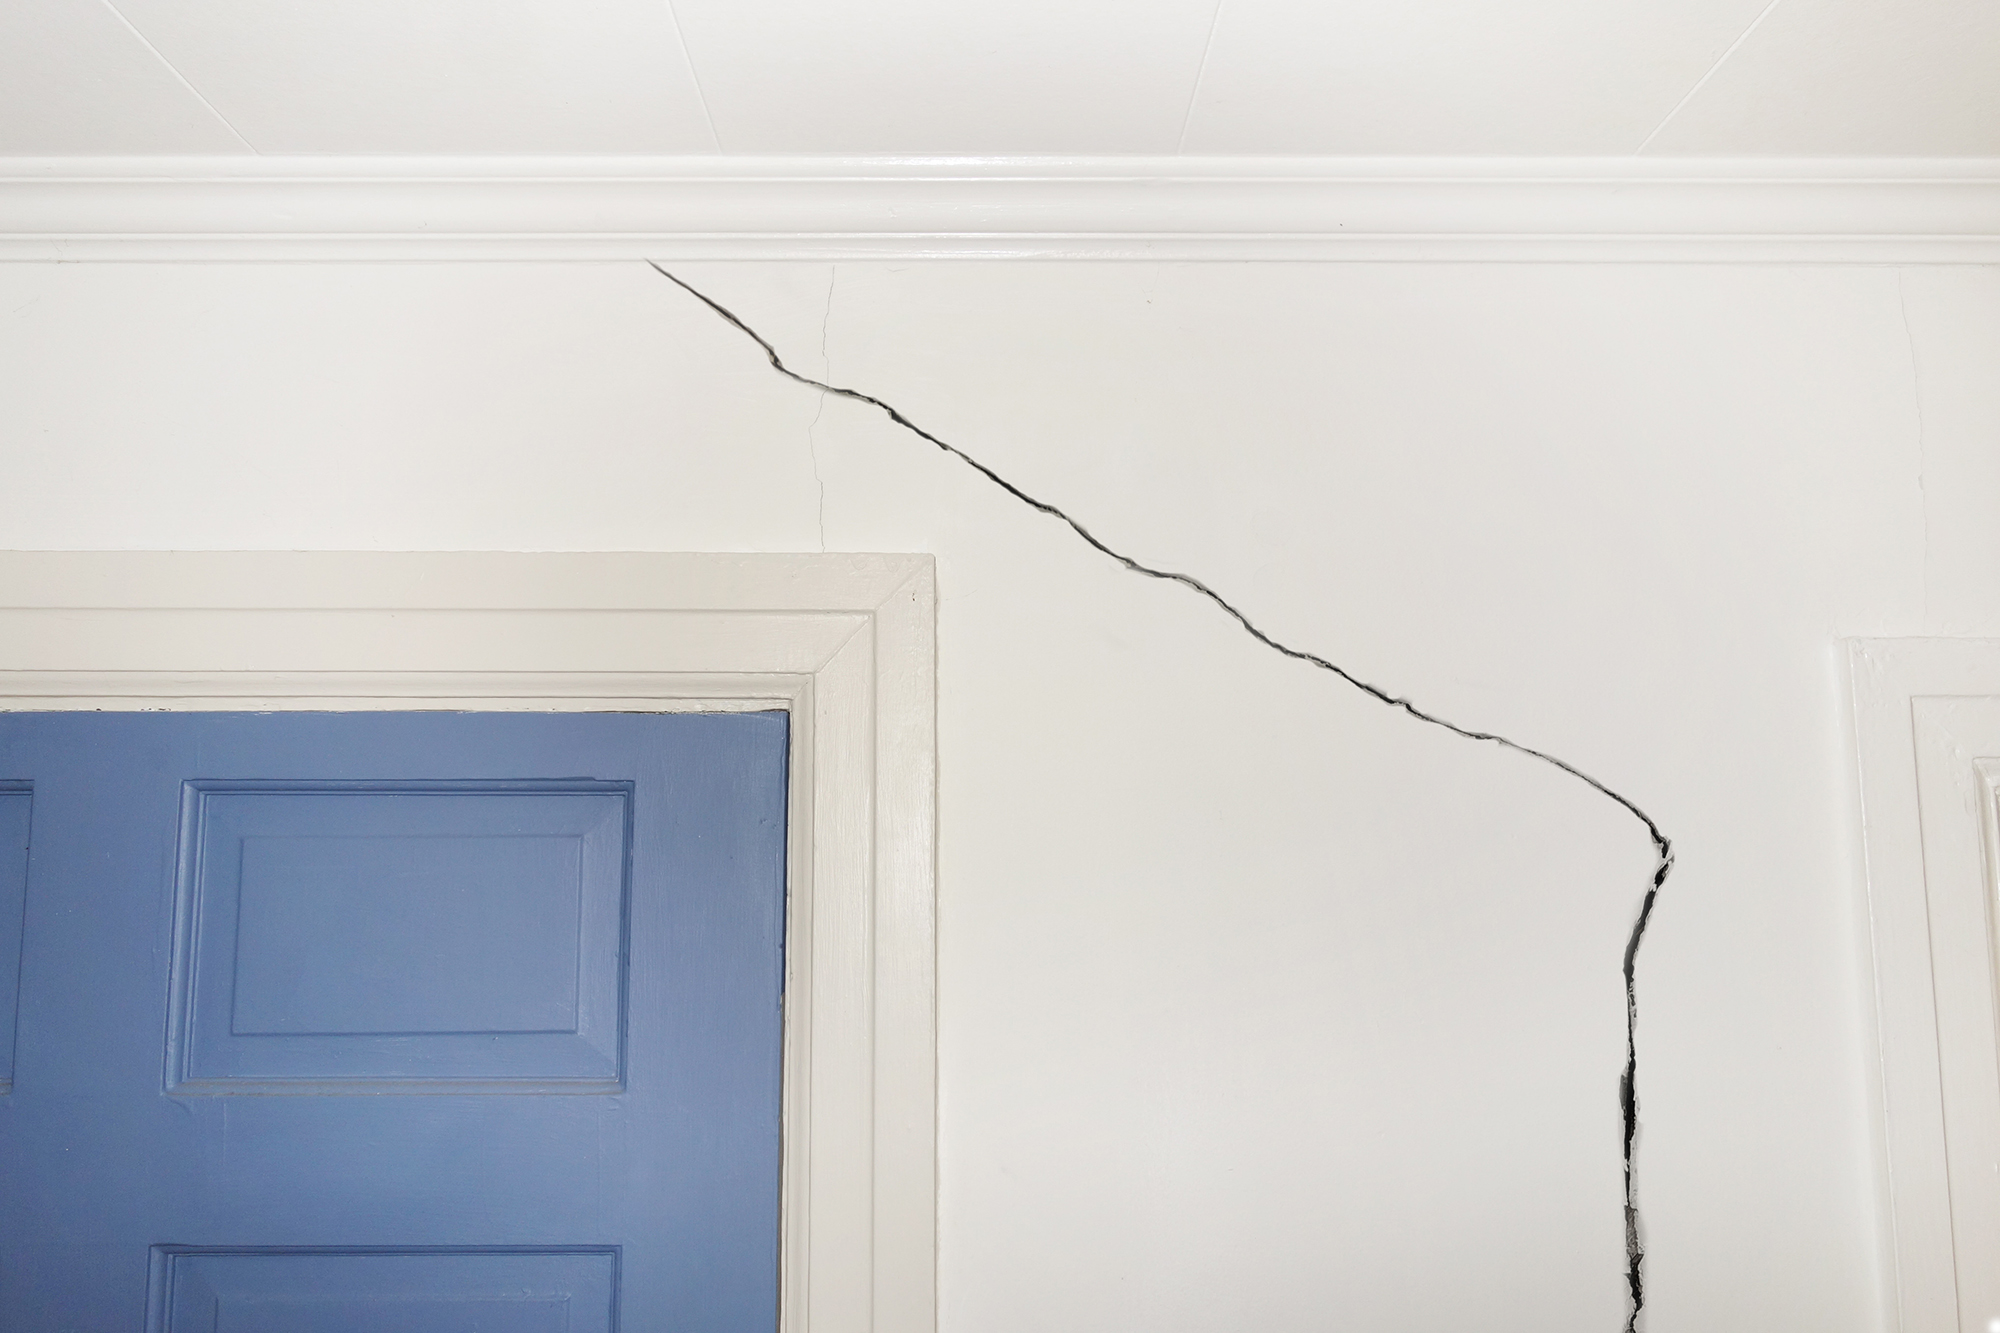
  • Diagonal Orientation: Cracks that run diagonally across a wall, especially from the corners of windows or doors upwards or downwards, can indicate that the foundation or framing is shifting.
  • Stair-Step Cracks: In brick or block construction, stair-step cracks that follow the mortar lines are often a sign of foundation movement or differential settling.
  • Cracks That Widen Over Time: If you notice a crack that is steadily getting larger, or if it reappears after being repaired, this suggests an ongoing issue that needs professional attention.
  • Associated Problems: Cracks are more concerning if they are accompanied by other symptoms of structural distress, such as:
  • Doors or windows that stick or don’t close properly.
  • Uneven or sloping floors.
  • Gaps appearing around door or window frames.
  • Cracks in the foundation itself.
  • Visible bowing or sagging of walls or ceilings.

Examples Of Structural Crack Patterns

Let’s consider a few scenarios:

Scenario 1: Normal Settling Crack

A thin, hairline crack appears along the top corner of a door frame, running about 12 inches up the wall. It’s only visible when the light hits it at a certain angle. This is likely due to minor shrinkage of the wood framing around the door opening.

Scenario 2: Potential Structural Issue

A crack, approximately 1/4 inch wide, runs diagonally from the top corner of a large living room window all the way to the ceiling. Simultaneously, the door on the opposite side of the room has started to stick, and you notice a slight dip in the floor near the center of the room.

This combination of symptoms suggests a more significant issue, possibly related to foundation settlement or framing stress.

Scenario 3: Brickwork Concern

In a brick veneer house, you observe several cracks that follow the mortar lines in a stair-step pattern across a section of the exterior wall. This is often indicative of the foundation beneath that section of the wall settling more than the surrounding areas.

When To Call A Professional

If you observe any of the characteristics of serious cracks, or if you have multiple cracks that are concerning you, it’s wise to consult a qualified professional. This could be:

  • A Structural Engineer: They can assess the integrity of your home’s structure and identify the root cause of significant cracking.
  • A Reputable Contractor: Experienced contractors, particularly those specializing in foundation repair or structural issues, can diagnose problems and recommend solutions.
  • Your Home Builder: In the first year or two, your builder may be responsible for addressing certain types of defects under warranty. Review your warranty documents carefully.

Managing And Repairing Cracks In New Homes

Fortunately, most cracks that appear in new homes are cosmetic and can be repaired relatively easily. The key is to address them at the right time and with the appropriate methods.

The “wait And See” Approach

For very fine, hairline cracks, especially those that appear within the first year of ownership, a common recommendation is to wait and see. The house will continue to settle and acclimatize for the first 1-2 years. If you repair a crack too early, it’s quite possible that the underlying movement will cause the crack to reappear shortly after.

Once the house has settled for a while (often around the first anniversary), and you notice the cracks have stabilized and are no longer widening, then it’s a good time to consider repairs. This approach allows the majority of the natural movement to occur before you invest time and money in cosmetic fixes.

Diy Repair For Minor Cracks

For most cosmetic cracks, a simple DIY repair is often sufficient. The process typically involves:

  • Cleaning the Crack: Remove any loose debris or paint from the crack using a putty knife or utility knife.
  • Sanding: Lightly sand the area around the crack to create a smooth surface for the filler.
  • Applying Filler: Use a good quality spackling compound or joint compound (mud). For hairline cracks, a lightweight spackle is often adequate. For slightly wider cracks, a vinyl-based joint compound might be more durable. Apply the compound with a putty knife, pressing it firmly into the crack to ensure it’s filled completely. For wider cracks, you might need to apply multiple thin coats, allowing each to dry and lightly sanding between coats.
  • Taping (for wider cracks): If the crack is wider than 1/8 inch, consider embedding a piece of drywall tape (paper or fiberglass mesh) into the first coat of joint compound. This provides reinforcement.
  • Sanding Smooth: Once the compound is completely dry, sand the repaired area smooth with fine-grit sandpaper until it’s flush with the surrounding wall.
  • Priming and Painting: Apply a coat of primer to the repaired area to seal it and ensure even paint coverage. Then, paint the wall with matching paint. You may need to paint the entire wall from corner to corner to avoid noticeable patches.

Professional Repair For Larger Or Recurring Cracks

If cracks are wider, more extensive, or if they repeatedly reappear after DIY repairs, it’s time to call in the professionals.

  • Drywall Specialists: For issues related to drywall joints, corners, or larger surface cracks, a skilled drywall contractor can re-tape, re-mud, and ensure a smooth, durable finish. They have the experience to identify underlying causes of recurring cracks related to drywall installation.
  • General Contractors: For more complex issues that might involve minor framing adjustments or more significant plaster repair, a general contractor can manage the project.
  • Structural Engineers: As mentioned, if there’s any suspicion of a structural problem, a structural engineer is the first point of contact. They will provide a detailed report and recommendations, which can then be given to contractors for execution.

Preventative Measures And Maintenance

While you can’t entirely prevent settling cracks in a new home, some preventative measures and good maintenance practices can minimize their occurrence and impact.

Proper Ventilation And Humidity Control

Maintaining consistent indoor humidity levels is crucial. Use exhaust fans in bathrooms and kitchens, and consider a dehumidifier in humid climates or a humidifier in dry ones. Aim for a relative humidity between 30% and 50%. This helps to minimize the expansion and contraction of building materials.

Regular Inspections

Periodically inspect your walls and ceilings, especially during the first few years. Look for new cracks or widening of existing ones. Pay attention to areas around windows, doors, and ceiling/wall junctions. Early detection makes repairs easier and less costly.

Addressing Water Intrusion Promptly

Ensure that gutters are clean and directing water away from the foundation. Check for any signs of leaks around windows, doors, and plumbing fixtures. Promptly address any water intrusion issues, as moisture is a significant enemy of building materials.

Understanding Your Warranty

Familiarize yourself with your new home warranty. Many builders offer a warranty that covers structural defects for several years. Understanding what is covered and for how long can be invaluable if you encounter more serious issues. Typically, there’s a period for cosmetic defects (often within the first year) and longer periods for structural components.

Frequently Asked Questions

What Is The Typical Lifespan Of A New Home Warranty For Cosmetic Issues?

Most new home warranties cover cosmetic issues, such as minor drywall cracks and nail pops, for a limited period, typically the first year of ownership. This period is designed to allow for the initial settling and acclimatization of the house. After the first year, these types of issues are often considered the homeowner’s responsibility to repair.

Can Painting A New House Prevent Cracks?

While a fresh coat of paint can sometimes bridge very fine hairline cracks temporarily, painting does not prevent cracks caused by structural settling or material movement. In fact, painting too early, before the house has had a chance to settle, can sometimes lead to cracks appearing *through* the paint layer. It’s generally recommended to wait for the majority of the settling to occur before undertaking significant painting projects, or to be prepared for touch-ups.

Are Cracks In New Construction Covered By Insurance?

Standard homeowner’s insurance policies typically do not cover damage caused by normal settling, wear and tear, or poor maintenance. They are designed to cover sudden, accidental, and external events like fire, windstorms, or vandalism. If a crack is caused by a covered peril (e.g., a major foundation shift due to an earthquake or flood), then insurance might apply, but the underlying cause is critical. Always check your specific policy details.

How Long Does It Take For A New House To Stop Settling?

The most significant settling typically occurs within the first 1-2 years after construction. During this period, the building materials dry out, the soil beneath the foundation consolidates, and the structure adjusts to its environment. While some minor settling might continue for longer, most noticeable movement and the associated cracks will usually stabilize within this initial timeframe.

What Is The Difference Between Drywall Tape And Joint Tape?

In the context of home construction, drywall tape and joint tape are often used interchangeably, referring to the material used to cover seams between drywall panels. There are different types, including paper tape (which is embedded in wet joint compound) and fiberglass mesh tape (which is often self-adhesive and applied before the joint compound). Both serve the purpose of reinforcing the joint and preventing cracks.

The appearance of cracks in a new home can be unsettling, but understanding the underlying causes, primarily the natural settling process, can alleviate much of the anxiety. Most cracks are minor, cosmetic issues that arise as a house matures and its

What To Do Before Replacing Windows

Replacing your home’s windows is a significant investment, often one of the most substantial home improvement projects you’ll undertake. It’s a decision that impacts your home’s energy efficiency, comfort, security, and curb appeal for decades to come. While the allure of gleaming new panes and improved insulation is strong, rushing into a window replacement without proper preparation can lead to costly mistakes, buyer’s remorse, and a final product that doesn’t meet your expectations.

Taking the time to thoroughly plan and research beforehand is crucial to ensuring a smooth process and a satisfying outcome.

This guide will walk you through the essential steps to take *before* you commit to new windows. From understanding your motivations to selecting the right materials and professionals, we’ll cover everything you need to know to make an informed decision.

By the end, you’ll be well-equipped to approach your window replacement project with confidence, knowing you’ve done your homework and are on the path to enhancing your home’s performance and beauty.

Key Takeaways

  • Define Your “Why”: Clearly identify the primary reasons for replacing your windows, whether it’s energy efficiency, aesthetics, comfort, or structural issues.
  • Assess Your Current Windows: Conduct a thorough inspection of your existing windows to document problems and understand their current performance.
  • Understand Window Types & Materials: Familiarize yourself with different window styles (double-hung, casement, etc.) And frame materials (vinyl, wood, fiberglass, aluminum).
  • Research Energy Efficiency Ratings: Learn about U-factor, SHGC, and ENERGY STAR certifications to make informed choices about performance.
  • Set a Realistic Budget: Factor in the cost of windows, installation, potential repairs, and any unexpected expenses.
  • Choose the Right Professionals: Vet contractors thoroughly, obtain multiple quotes, and understand contracts before signing.
  • Consider Local Climate & Regulations: Understand how your climate impacts window choices and if any building codes or HOA rules apply.
  • Plan for Installation Disruption: Prepare your home and family for the installation process.

Understanding Your Motivation: Why Replace Your Windows?

Before you even start looking at different window styles or materials, the most critical first step is to understand why you’re considering this significant investment. Your motivations will shape every subsequent decision, from the type of window you choose to the contractor you hire. Without a clear understanding of your goals, you risk overspending on features you don’t need or overlooking critical issues that will continue to plague you after installation.

Identifying The Core Issues

Take a moment to honestly assess the performance and condition of your current windows. Are they:

  • Drafty and Inefficient? Do you feel cold air seeping in during winter or hot air during summer? High energy bills are often a direct result of poor window insulation. Look for visible signs of air leaks around the frames and sashes.
  • Difficult to Operate? Do windows stick, refuse to open or close, or have broken mechanisms? This can be a sign of warping, rot, or wear and tear.
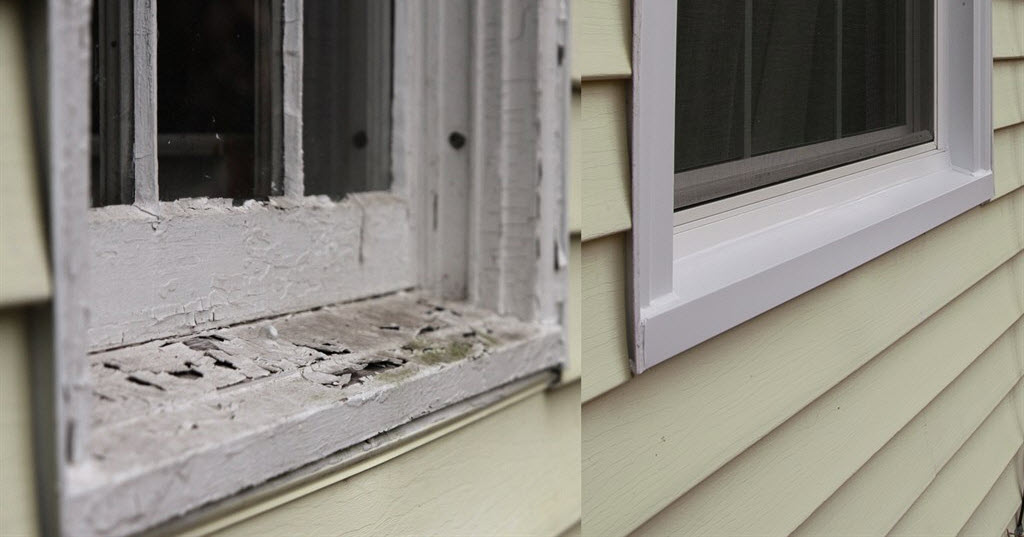
  • Damaged or Deteriorated? Is there visible rot in wooden frames, cracked or fogged glass (indicating seal failure), or corroded hardware? These are clear indicators that replacement is necessary.
  • Outdated or Aesthetically Unpleasing? Do your windows simply not match your home’s style or your personal taste? While aesthetics are important, they should ideally be addressed alongside functional concerns.
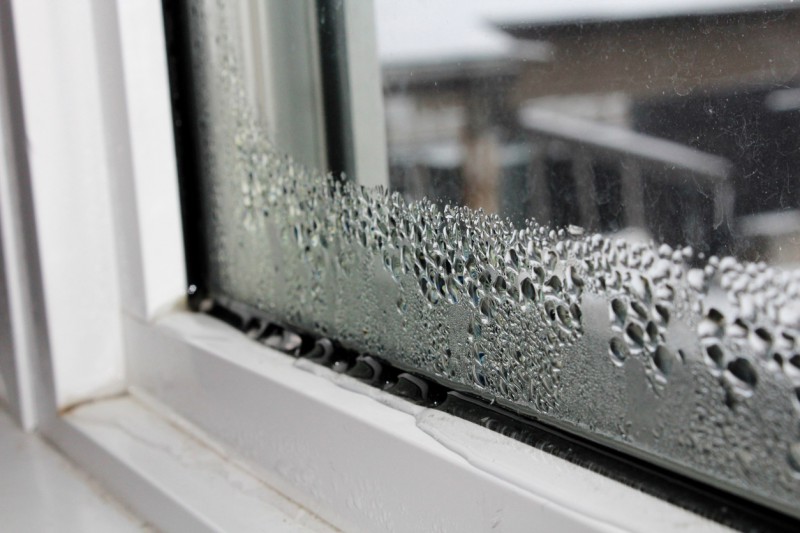
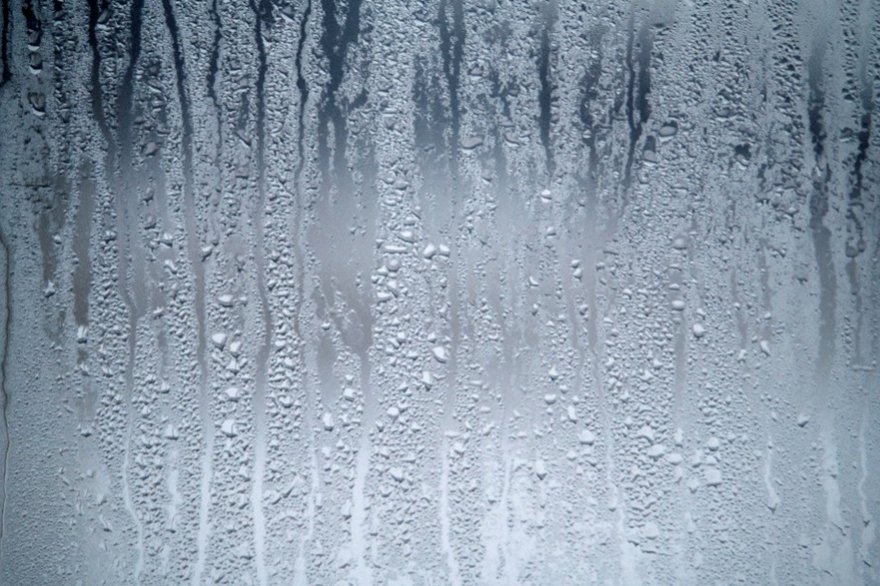
  • Causing Condensation Issues? Persistent condensation between panes suggests a failed seal and compromised insulation.

Prioritizing Your Needs

Once you’ve identified the problems, prioritize them. For most homeowners, energy efficiency and comfort are paramount. Saving money on utility bills and enjoying a more stable indoor temperature are often the primary drivers for window replacement. Following closely are durability, maintenance, and security. Finally, aesthetics and curb appeal play a significant role, especially if you plan to sell your home in the future.

  • Example: If your primary concern is high heating bills, you’ll want to focus on windows with low U-factors and consider triple-pane options. If you dread scraping and painting, low-maintenance materials like vinyl or fiberglass will be more appealing.
What To Do Before Replacing Windows

Credit: thebco.com

Assessing Your Current Windows: A Detailed Inspection

With your motivations clarified, the next step is to conduct a thorough inspection of your existing windows. This isn’t just about noting what’s wrong; it’s about gathering detailed information that will help you make informed decisions and communicate effectively with contractors.

Documenting Existing Problems

Walk around your entire house, inside and out, and meticulously document the condition of each window. Use a checklist or a notebook to record:

  • Window Type: (e.g., double-hung, casement, picture, slider)
  • Location: (e.g., living room, master bedroom, kitchen)
  • Frame Material: (e.g., wood, aluminum, vinyl)
  • Visible Damage: Rot, cracks, peeling paint, warping, corrosion.
  • Operational Issues: Sticking, difficult to open/close, broken locks or hardware.
  • Glass Condition: Cracks, chips, fogging between panes (seal failure).
  • Drafts: Feel for air leaks around the frame and sash.
  • Condensation: Note any recurring condensation issues.

Understanding Your Home’s Architecture And Needs

Consider how each window functions within your home.

  • Sun Exposure: Which windows receive direct sunlight throughout the day? This impacts the type of glass coating (Low-E) and tinting you might need to manage heat gain.
  • Ventilation: Which windows are crucial for cross-ventilation? If you rely on opening windows for cooling, ensure replacements maintain or improve airflow.
  • Noise Levels: Are certain rooms exposed to significant street noise? Consider windows with better soundproofing qualities.
  • Accessibility: Are any windows difficult to reach or clean? This might influence your choice of opening mechanisms or styles.

Measuring For Replacement (preliminary)

While precise measurements will be taken by the installer, it’s helpful to get a rough idea of your window sizes. Measure the rough opening (the framed space in the wall where the window sits) from stud to stud horizontally and from sill to header vertically. Note these rough dimensions. This will give you a preliminary understanding of standard window sizes and help you discuss options with professionals. Remember, most replacement windows are ordered to fit the existing rough opening, often installed as “insert” or “pocket” replacements.

What To Do Before Replacing Windows

Credit: gealanwindows.com

Exploring Window Types And Materials

The world of windows offers a diverse range of styles and materials, each with its own set of advantages and disadvantages. Understanding these options is key to selecting windows that not only perform well but also complement your home’s aesthetic.

Common Window Styles

  • Double-Hung Windows: These are perhaps the most traditional style, featuring two sashes that slide vertically. Both sashes can typically tilt inward for easy cleaning. They offer good ventilation as you can open the top, bottom, or both.
  • Casement Windows: These windows crank open outward, similar to a door. They offer excellent ventilation and a clear, unobstructed view when closed. They are also known for their airtight seal when locked.
  • Awning Windows: Hinged at the top and opening outward from the bottom, awning windows are excellent for providing ventilation during rainstorms as the awning shape deflects water. They are often used in basements or above other windows.
  • Hopper Windows: Similar to awning windows but hinged at the bottom and opening inward from the top. They are common in basements and provide ventilation while offering security.
  • Sliding Windows: These windows operate horizontally, with one or more sashes sliding past each other. They are a good option for wide openings where vertical sashes might be impractical.
  • Picture Windows: These are fixed windows that do not open. They are designed to maximize natural light and offer expansive views. They are often combined with operable windows for ventilation.
  • Bay and Bow Windows: Bay windows project outward from the house, creating a nook and increasing interior space. Bow windows are similar but feature a more curved, segmented appearance. Both can add significant architectural interest and light.

Popular Frame Materials

The material of your window frame significantly impacts its durability, maintenance requirements, energy efficiency, and cost.

  • Vinyl: Vinyl windows are the most popular choice for replacement due to their affordability, low maintenance, and good energy efficiency. They are resistant to rot and corrosion and come in various colors. However, they can warp or become brittle in extreme temperatures over time and may not be as structurally strong as other materials for very large windows.
  • Wood: Wood windows offer a classic, warm aesthetic and excellent insulation properties. They can be painted or stained to match any décor. However, wood requires significant maintenance to prevent rot, warping, and insect damage, especially in humid or wet climates. They are also generally more expensive than vinyl.
  • Fiberglass: Fiberglass windows are known for their strength, durability, and excellent energy efficiency. They are resistant to warping, cracking, and corrosion and can mimic the look of wood without the high maintenance. Fiberglass frames are also very stable in extreme temperatures. They are typically more expensive than vinyl but often less than high-end wood.
  • Aluminum: Aluminum windows are strong, durable, and low-maintenance. They are often used in modern or commercial buildings. However, aluminum is a poor insulator, leading to significant heat transfer unless it incorporates a thermal break. This makes them less ideal for energy efficiency in residential settings unless specifically designed with advanced features.
  • Composite: Composite windows are made from a blend of materials, often wood fibers and plastics. They aim to offer the look of wood with improved durability and lower maintenance. Performance and cost can vary widely depending on the specific blend.

Material Comparison Table

To help visualize the differences, consider this comparison:

Material Pros Cons Typical Cost (Relative) Maintenance Level
Vinyl Affordable, Low Maintenance, Good Energy Efficiency Can warp/fade over time, Limited aesthetic customization, Less structural strength $ Low
Wood Aesthetic Appeal, Excellent Insulation, Customizable High Maintenance (rot, pests, painting), Expensive, Can warp $$$ High
Fiberglass Durable, Strong, Energy Efficient, Low Maintenance, Stable More Expensive than Vinyl, Limited color options (though improving) $$ Low
Aluminum Strong, Durable, Low Maintenance, Modern Look Poor insulator (unless thermally broken), Can corrode, Less energy efficient $$ Low
What To Do Before Replacing Windows

Credit: www.windowworldtampa.com

Understanding Energy Efficiency Ratings

Windows play a critical role in your home’s overall energy performance. Understanding key ratings will empower you to choose windows that reduce your energy bills and improve comfort. Look for the ENERGY STAR® label on windows, which indicates they meet strict energy efficiency guidelines set by the U.S. Environmental Protection Agency.

Key Ratings To Know

  • U-Factor: This rating measures how well a window prevents heat from escaping your home. It’s expressed as a number between 0.15 and 1.0. The lower the U-factor, the better the window’s insulating capability. For colder climates, a lower U-factor is more important. For example, a window with a U-factor of 0.25 is a better insulator than one with a U-factor of 0.40.
  • Solar Heat Gain Coefficient (SHGC): This rating measures how well a window blocks heat caused by sunlight. It’s expressed as a number between 0 and 1. The lower the SHGC, the less solar heat is transferred into your home. This is particularly important in warmer climates or for windows that receive direct, intense sunlight, as it helps reduce cooling costs. In very cold climates, a slightly higher SHGC might be desirable on south-facing windows to allow some passive solar heating during winter.
  • Visible Transmittance (VT): This rating measures how much visible light passes through the window. It’s expressed as a number between 0 and 1. A higher VT means more natural light enters your home. While important for daylighting, VT should be balanced with U-factor and SHGC to maintain energy efficiency.
  • Air Leakage (AL): This rating indicates how much air passes through the window’s joints and seals. It’s expressed in cubic feet per minute per square foot (cfm/ft²). The lower the AL rating, the less air will leak through the window. Look for ratings of 0.3 cfm/ft² or lower.

Energy Star® Zones

ENERGY STAR® categorizes the U. S. into different climate zones, providing specific recommendations for window energy performance in each. Understanding your zone helps you select windows optimized for your local climate.

  • Northern Zone: Requires the lowest U-factors for maximum heat retention.
  • North-Central Zone: Moderate requirements for U-factor and SHGC.
  • South-Central Zone: Focuses on moderate SHGC to reduce cooling loads.
  • Southern Zone: Requires the lowest SHGC to minimize unwanted solar heat gain.

You can find detailed zone maps and recommendations on the ENERGY STAR® website.

Setting A Realistic Budget

Window replacement is a significant financial undertaking. Establishing a clear and realistic budget before you start getting quotes is essential to avoid financial strain and ensure you can afford the quality of windows and installation you desire.

Understanding Cost Components

The total cost of replacing your windows typically includes several components:

  • Window Units: The price of the windows themselves varies greatly depending on material, style, size, brand, and energy-efficient features (like triple-pane glass or specialized coatings).
  • Labor: Professional installation is crucial for proper performance and longevity. Labor costs can vary based on the complexity of the job, the number of windows, and the prevailing rates in your area.
  • Removal and Disposal: The cost of removing and disposing of your old windows.
  • Potential Repairs: If your inspection reveals issues with the window frames, sills, or surrounding wall structure (like rot or water damage), these repairs will add to the overall cost.
  • Hardware and Trim: Costs associated with new hardware, interior trim, and exterior caulking and finishing.
  • Permits: Some municipalities require permits for window replacement, which adds a small fee.

Estimating Costs

  • DIY vs. Professional Installation: While DIY can save on labor, it’s generally not recommended for full window replacement unless you have significant construction experience. Improper installation can void warranties and lead to performance issues.
  • Average Costs: National averages can range from $400 to $1,200 per window for basic vinyl replacement windows, including installation. High-end materials like wood or custom-sized windows can push the cost to $1,500-$3,000 or even more per window. A project involving 10 windows could therefore range from $4,000 to $30,000 or higher.
  • Pro Tip: Always ask contractors if their quote includes all aspects: window removal, installation, debris disposal, and any necessary flashing or sealing.

Building In A Contingency

It’s wise to add a contingency fund of 10-20% to your budget. This buffer will cover unexpected issues that might arise during demolition, such as discovering rot or structural damage that needs immediate repair.

Choosing The Right Professionals

The quality of your window installation is just as important as the quality of the windows themselves. Selecting a reputable, experienced contractor is paramount to a successful project.

Vetting Contractors

Don’t choose the first contractor you speak with. Take the time to research and vet potential candidates thoroughly.

  • Seek Recommendations: Ask friends, family, neighbors, or colleagues for recommendations. Local hardware stores or building supply companies can also be good sources.
  • Check Online Reviews: Look for reviews on platforms like Google, Yelp, Angie’s List, and the Better Business Bureau (BBB). Pay attention to both positive and negative feedback.
  • Verify Credentials:
  • Licensing: Ensure the contractor holds the necessary licenses required by your state or local municipality.
  • Insurance: Confirm they have adequate liability insurance and workers’ compensation insurance. Ask for proof. This protects you from financial responsibility if an accident occurs on your property.
  • Experience: How long have they been in business? Do they specialize in window replacement? How many projects similar to yours have they completed?
  • Look for Certifications: Some manufacturers offer certifications for installers who have been trained on their specific products.

Getting Multiple Quotes

Obtain detailed, written quotes from at least three different contractors. Ensure each quote includes:

  • A detailed breakdown of the scope of work.
  • The specific window models, brands, and specifications being quoted.
  • The total cost, including materials, labor, removal, disposal, and any potential additional charges.
  • A clear timeline for the project.
  • Warranty information for both the product and the labor.

Pro Tip: Be wary of quotes that are significantly lower than others. This could indicate cut corners, less experienced labor, or lower-quality materials.

Understanding Contracts

Read the contract carefully before signing. Ensure it matches the verbal agreements and the quote you received. Key elements to verify include:

  • All details from the quote (materials, labor, etc. ).
  • Payment schedule (avoid paying the full amount upfront). A common schedule is a deposit, a progress payment, and final payment upon satisfactory completion.
  • Start and estimated completion dates.
  • Warranty details (product and labor).
  • A clause addressing change orders for any work not initially included.

The National Roofing Contractors Association offers excellent general advice on hiring contractors that applies broadly to home improvement professionals.

Considering Climate And Local Factors

Your local climate and specific property conditions play a significant role in determining the best window choices and installation considerations.

Climate-specific Needs

  • Cold Climates: Prioritize windows with very low U-factors to minimize heat loss. Double- or triple-pane windows with argon or krypton gas fills and Low-E coatings are essential. Consider warm-edge spacer systems between glass panes.
  • Hot Climates: Focus on windows with a low SHGC to reduce solar heat gain, which directly impacts cooling costs. Low-E coatings designed to reflect solar radiation are crucial. Window tinting or coatings can also be beneficial.
  • Humid Climates: Wood windows require extra diligence regarding maintenance and proper sealing to prevent rot and moisture damage. Ensure good ventilation to prevent condensation buildup within the home.
  • Coastal Areas: Salt spray can corrode metal components. Aluminum windows should have appropriate protective coatings, or consider vinyl or fiberglass which are naturally resistant to corrosion.

Local Building Codes And Hoa Regulations

  • Building Codes: Some areas have specific building codes related to window energy efficiency, safety (e.g., egress requirements for bedrooms), and installation methods. Ensure your chosen windows and installation practices comply with these regulations. Your contractor should be knowledgeable about local codes.
  • Homeowners Associations (HOAs): If you live in a community with an HOA, review their guidelines regarding exterior modifications. There may be restrictions on window styles, frame colors, or materials to maintain neighborhood aesthetics. Get approval from your HOA before proceeding.

Preparing For Installation Day

Once you’ve selected your windows and contractor, you need to prepare your home for the installation process. This will help the project run smoothly and minimize disruption to your household.

Protecting Your Home And Belongings

  • Clear the Area: Remove all furniture, decorations, curtains, and blinds from the windows being replaced. Move larger items away from the walls surrounding the windows to give installers ample working space.
  • Protect Floors and Furniture: Lay down drop cloths or plastic sheeting on floors in the work areas and along the path the installers will use to enter and exit your home. Cover any nearby furniture that cannot be moved.
  • Secure Valuables: Remove or secure any delicate or valuable items that could be damaged by dust or vibration.

Preparing Your Family And Pets

  • Communicate the Schedule: Ensure all household members are aware of the installation dates and expected duration.
  • Plan for Noise and Dust: Window replacement can be noisy and dusty. Plan for activities to be elsewhere if needed, especially if you have very young children or pets sensitive to noise.
  • Pet Safety: Keep pets confined to a safe, quiet area of the house, away from the work zones, to prevent them from escaping or getting injured.

Pre-installation Walk-through

Before the installers begin, conduct a brief walk-through with the lead installer. Confirm the scope of work, the order in which windows will be replaced (if applicable), and any specific concerns you might have.

Final Preparations And Considerations

With The Major

How To Clean Ikea Kitchen Cabinets

How To Clean Ikea Kitchen Cabinets

Maintaining the pristine look of your IKEA kitchen cabinets is essential for both the aesthetic appeal of your home and the longevity of your investment. Over time, grease, food splatters, fingerprints, and general grime can accumulate, dulling the finish and making your kitchen feel less inviting.

Fortunately, cleaning IKEA kitchen cabinets is a straightforward process, provided you use the right methods and cleaning agents for their specific materials. Whether you have high-gloss fronts, matte finishes, or wood veneer, a consistent cleaning routine will keep them looking as good as new.

This comprehensive guide will walk you through everything you need to know about cleaning IKEA kitchen cabinets, from understanding different finishes to tackling stubborn stains and implementing preventative measures. We’ll cover the most effective cleaning solutions, the tools you’ll need, and the techniques to avoid damaging your cabinet surfaces.

By following these steps, you can ensure your IKEA kitchen remains a clean, bright, and functional heart of your home for years to come.

Key Takeaways

  • Identify Cabinet Material: Different IKEA cabinet finishes (high-gloss, matte, wood veneer, foil) require specific cleaning approaches to avoid damage.
  • Gentle Cleaning is Key: Always start with the mildest cleaning solution and tool, escalating only if necessary. Harsh chemicals or abrasive scrubbers can permanently damage surfaces.
  • Routine Maintenance Prevents Buildup: Regular, light cleaning is far more effective and less labor-intensive than tackling heavy, ingrained grime.
  • Proper Tools Matter: Use soft cloths, sponges, and non-abrasive brushes. Avoid steel wool, scouring pads, or overly stiff brushes.
  • Specific Stain Removal: Address grease, hard water spots, and food stains with targeted, yet gentle, methods.
  • Drying is Crucial: Always dry cabinets thoroughly after cleaning to prevent water spots and moisture damage.
How To Clean Ikea Kitchen Cabinets

Credit: nadinestay.com

Understanding Ikea Cabinet Finishes And Their Care

IKEA offers a variety of cabinet door and drawer front finishes, each with unique properties and cleaning requirements. Understanding the material of your cabinets is the first and most crucial step in effective cleaning. Using the wrong cleaner or tool on a delicate finish can lead to permanent damage, such as discoloration, scratches, or peeling. IKEA’s most common finishes include high-gloss laminate, matte laminate, foil, and wood veneer.

High-gloss Laminate (e.g., Järsta, Veddinge In White/high-gloss)

High-gloss cabinets offer a sleek, modern look that can make a kitchen feel more spacious and bright. However, their reflective surface also highlights every fingerprint, smudge, and scratch. The material is typically a particleboard or MDF core covered with a high-gloss foil or laminate.

Cleaning Approach:

  • Daily/Weekly: Wipe down with a soft, damp microfiber cloth. This is usually sufficient to remove fingerprints and light dust.
  • For Smudges/Grease: Use a mild dish soap diluted in warm water. Apply with a soft cloth or sponge, wiping gently in a circular motion. Immediately follow with a clean, damp cloth to rinse away soap residue, and then dry thoroughly with a separate, dry microfiber cloth to prevent streaks and water spots.
  • Stubborn Stains: For more persistent marks, a solution of 10% isopropyl alcohol (rubbing alcohol) and 90% water can be effective. Apply sparingly with a soft cloth, wipe the stain, and then rinse and dry as above.
  • What to Avoid: Abrasive cleaners, scouring pads, steel wool, harsh chemicals (like ammonia or bleach), and excessive water. These can dull the finish, cause micro-scratches, or even lift the laminate.

Matte Laminate (e.g., Kallarp, Veddinge In Matte)

Matte finishes provide a sophisticated, non-reflective look that is increasingly popular. They tend to show fingerprints less prominently than high-gloss surfaces but can still accumulate grease and grime, especially around handles and cooking areas. The material is similar to high-gloss, but with a matte top layer.

Cleaning Approach:

  • Daily/Weekly: A simple wipe with a soft, damp microfiber cloth is often all that’s needed.
  • For Grime/Grease: A solution of mild dish soap and warm water is the go-to. Use a soft cloth or sponge, and wipe gently. Rinse thoroughly with a clean, damp cloth and dry completely with a separate dry cloth.
  • Stubborn Spots: For tougher marks, a paste made from baking soda and water can be a gentle abrasive. Apply the paste to the spot, let it sit for a few minutes, then gently rub with a soft cloth. Rinse thoroughly and dry.
  • What to Avoid: Abrasive cleaners, harsh chemicals, and excessive scrubbing, which can leave marks or alter the matte texture.

Foil-wrapped Cabinets (e.g., Vassvrikk, Some Older Voxtorp)

Foil-wrapped cabinets are made by applying a thin layer of decorative foil (often PVC) over a particleboard or MDF core. This is generally a more budget-friendly option. While durable for everyday use, the foil can be susceptible to heat damage and peeling if exposed to excessive moisture or harsh cleaning agents.

Cleaning Approach:

  • Daily/Weekly: A soft, damp cloth is usually sufficient.
  • For Grease/Smudges: Use a mild dish soap diluted in water. Apply with a soft cloth, wipe gently, rinse with a clean, damp cloth, and dry immediately.
  • Stubborn Stains: A solution of equal parts white vinegar and water can help lift tougher grime. Apply, wipe, rinse, and dry thoroughly.
  • What to Avoid: High heat (from ovens, kettles, or direct sunlight), abrasive cleaners, solvents (like nail polish remover or paint thinner), and prolonged exposure to moisture, especially around edges and seams where the foil might lift.

Wood Veneer (e.g., Björksnäs, Some Axstad)

Wood veneer cabinets feature a thin layer of real wood applied over a composite core. They offer a natural, warm aesthetic. The care required depends on the type of wood and the finish applied (e. g. , lacquered, oiled). IKEA’s veneer finishes often have a protective lacquer.

Cleaning Approach:

  • Daily/Weekly: Dust regularly with a dry, soft cloth. For light cleaning, use a slightly damp cloth, but ensure you dry immediately.
  • For Grime/Grease: Use a cleaner specifically designed for wood furniture or a very mild solution of dish soap and water. Apply sparingly with a soft cloth, wipe gently along the wood grain, and dry immediately.
  • Stubborn Stains: For tougher spots, consult the specific care instructions for your veneer finish. Sometimes a wood cleaner polish can help.
  • What to Avoid: Excessive water, steam cleaners, ammonia-based cleaners, abrasive cleaners, and furniture polish containing silicone, which can build up over time. Always test any cleaner in an inconspicuous area first.

Essential Cleaning Tools And Supplies

Having the right tools makes the cleaning process significantly easier and more effective, while also protecting your cabinet surfaces. Investing in a few key items can save you time and prevent potential damage.

Soft Cloths And Sponges

  • Microfiber Cloths: These are your best friends for cleaning IKEA cabinets. They are non-abrasive, highly absorbent, and excellent at trapping dust and grime without scratching surfaces. Have several on hand: one for cleaning, one for rinsing, and one for drying.
  • Soft Sponges: Opt for sponges with a soft side. Avoid any sponges with abrasive scrubbing surfaces, as these can easily scratch high-gloss or matte finishes.

Cleaning Solutions

  • Mild Dish Soap: A few drops of a gentle dish soap (like Dawn or Fairy) diluted in warm water is the most recommended all-purpose cleaner for most IKEA cabinet finishes. It effectively cuts through grease without being overly harsh.
  • Warm Water: Often, warm water alone is enough for light cleaning and rinsing.
  • White Vinegar: Diluted with water (e.g., 1:1 ratio), white vinegar is a good natural degreaser and disinfectant. It’s particularly useful for foil finishes and can help remove hard water spots. However, use sparingly on wood veneers as its acidity can be problematic over time.
  • Isopropyl Alcohol (Rubbing Alcohol): A 10% alcohol to 90% water solution is effective for tackling stubborn smudges, fingerprints on high-gloss surfaces, and disinfecting. Ensure good ventilation when using.
  • Baking Soda: Mixed with water to form a paste, baking soda acts as a very mild abrasive for tougher spots on matte finishes. Use with caution and gentle pressure.

Other Useful Items

  • Spray Bottle: For mixing and applying diluted cleaning solutions evenly.
  • Soft-bristled Brush: A clean, soft toothbrush or a small detailing brush can be useful for cleaning grooves, corners, and around hardware.
  • Bucket: For mixing your cleaning solutions.
  • Dry Towels: For thorough drying.

Step-by-step Guide To Cleaning Ikea Kitchen Cabinets

Follow these steps for a thorough and safe cleaning of your IKEA kitchen cabinets. Remember to always test any cleaning solution or method on an inconspicuous area first.

Step 1: Preparation

  • Clear the Cabinets: Remove any items from the cabinet doors and drawer fronts. This gives you clear access to the entire surface.
  • Gather Supplies: Ensure you have all your chosen cleaning tools and solutions ready.
  • Ventilate: Open windows or turn on your kitchen fan, especially if using stronger cleaning agents like vinegar or alcohol.

Step 2: Initial Wipe-down

  • Dust Removal: Start by dusting all surfaces with a dry microfiber cloth. This removes loose debris that could scratch the surface during wet cleaning.
  • Gentle Wash: Dampen a clean microfiber cloth with warm water (or your chosen mild cleaning solution, like diluted dish soap). Wring out the cloth thoroughly so it’s damp, not soaking wet.
  • Wipe Surfaces: Gently wipe down the cabinet doors and drawer fronts. Work in sections, and pay attention to areas prone to grease buildup, like around the stovetop and sink. For high-gloss finishes, wipe in a consistent direction to minimize streaks. For wood veneers, wipe *with* the grain.

Step 3: Tackling Grease And Grime

  • Apply Cleaner: If water alone isn’t sufficient, use your mild dish soap solution. Apply it to the cloth, not directly onto the cabinet, to avoid oversaturation.
  • Gentle Scrubbing: For greasy areas, gently rub the surface with the damp cloth. For stubborn spots, you might need to let the solution sit for a minute or two.
  • Use a Soft Brush (If Needed): For grime in crevices, corners, or around handles, use a soft-bristled toothbrush or detailing brush dipped in your cleaning solution. Gently agitate the dirt.

Step 4: Rinsing

  • Clean Cloth: Take a fresh microfiber cloth and dampen it with clean, warm water. Wring it out well.
  • Rinse Thoroughly: Wipe down all the surfaces you just cleaned to remove any soap residue. Soap residue can attract more dirt and leave a dull film. Repeat if necessary, ensuring all traces of cleaner are gone.

Step 5: Drying

  • Immediate Drying: This is a critical step, especially for high-gloss and foil finishes. Use a separate, clean, and dry microfiber cloth to immediately dry all cabinet surfaces.
  • Buffing (Optional): For high-gloss finishes, you can buff the surface gently with the dry cloth to enhance shine and remove any faint streaks. For matte finishes, simply ensure they are dry to prevent water spots.

Step 6: Cleaning Hardware

  • Don’t forget cabinet handles and knobs! Clean them with the same mild dish soap solution and a soft cloth. For intricate designs, use a soft brush. Dry them thoroughly afterward.

Specific Stain Removal Techniques

Even with regular cleaning, stubborn stains can appear. Here’s how to tackle common kitchen cabinet culprits without causing damage.

Grease Splatters

Grease is a common enemy in the kitchen. It tends to build up over time, especially on cabinets near the stovetop.

  • Method: Start with the mild dish soap and warm water solution. Apply with a soft cloth, letting it sit on the greasy spot for a minute to break down the oil. Gently wipe in a circular motion. If the grease persists, try a slightly stronger concentration of dish soap or a 1:1 vinegar-water solution. For very stubborn, baked-on grease, a paste of baking soda and water can be used as a gentle abrasive, but test this in an inconspicuous area first, especially on matte or foil finishes. Always rinse thoroughly and dry immediately.

Food Stains (e.g., Tomato Sauce, Coffee)

Accidental spills are inevitable. The key is to act quickly.

  • Method: For fresh spills, blot immediately with a clean, damp cloth. If the stain has set, use the mild dish soap solution. For tougher stains like tomato sauce or coffee, a paste of baking soda and water can sometimes lift the discoloration. Apply the paste, let it sit for 5-10 minutes, then gently rub with a soft cloth. Rinse thoroughly and dry. For very persistent stains on non-wood surfaces, a solution of diluted hydrogen peroxide (use with extreme caution and test first) might be considered, but dish soap and baking soda are generally safer.

Hard Water Spots

If you have mineral-rich tap water, hard water spots can appear, especially on high-gloss finishes.

  • Method: White vinegar is excellent for dissolving mineral deposits. Mix equal parts white vinegar and water in a spray bottle. Lightly spray the affected area or apply with a soft cloth. Let it sit for a minute, then wipe clean with a damp cloth. Rinse thoroughly with clean water and dry immediately to prevent new spots from forming.

Ink Or Crayon Marks

These can be tricky, especially on lighter finishes.

  • Method: For ink, try dabbing the spot with a cotton ball slightly dampened with isopropyl alcohol. Be careful not to spread the ink. For crayon or waxy marks, the baking soda paste can sometimes lift the wax. Gently rub the paste over the mark, then wipe clean. On high-gloss finishes, a magic eraser (melamine foam sponge) can sometimes work, but use it very gently and sparingly, as it is mildly abrasive and can dull the finish with overuse. Always rinse and dry thoroughly.

Avoiding Damage: What Not To Do

Preventing damage is as important as knowing how to clean. Certain cleaning practices and products can ruin your IKEA cabinets.

Abrasive Materials

  • Avoid: Steel wool, scouring pads, abrasive sponges, stiff-bristled brushes, and abrasive cleaning powders (like Comet). These will scratch, dull, and permanently damage the finish of your cabinets, especially high-gloss and matte laminates.

Harsh Chemicals

  • Avoid: Bleach, ammonia, acetone (nail polish remover), strong solvents, and oven cleaners. These can discolor, weaken the adhesive holding foils, or even dissolve the finish. Always use mild, pH-neutral cleaners.

Excessive Water

  • Avoid: Soaking the cabinets or leaving standing water on them. Excess moisture can seep into the particleboard or MDF core, causing swelling, warping, and delamination of foils or veneers. Always use a well-wrung-out cloth and dry surfaces immediately.

Steam Cleaners

  • Avoid: While seemingly a good idea for sanitizing, steam cleaners can force moisture into seams and edges, leading to damage, especially on foil-wrapped or veneer cabinets. The heat can also be detrimental.

Direct Heat And Sunlight

  • Avoid: Prolonged exposure to direct sunlight or heat sources (like ovens or kettles placed too close). This can cause discoloration, fading, and warping, particularly on foil and high-gloss finishes. Ensure good ventilation around heat-generating appliances.

Routine Maintenance And Prevention

The best way to keep your IKEA kitchen cabinets looking great is through consistent, preventative care.

Daily Habits

  • Wipe Spills Immediately: Don’t let spills sit. A quick wipe with a damp cloth after cooking or meal prep can prevent stains from setting.
  • Fingerprint Patrol: Keep a microfiber cloth handy to wipe away fingerprints on high-gloss doors as soon as you notice them.

Weekly Checks

  • Quick Clean: Once a week, give all cabinet fronts a quick wipe-down with a damp microfiber cloth, followed by drying. This prevents significant buildup.
  • Hardware Shine: Wipe down handles and knobs to keep them looking their best.

Protective Measures

  • Use Cabinet Guards: Consider placing small, clear adhesive pads or felt protectors on the inside corners of cabinet doors where they might hit the frame, preventing chips and scratches.
  • Ventilation: Ensure your kitchen is well-ventilated, especially when cooking, to reduce grease buildup on cabinet surfaces. Using your range hood consistently makes a big difference.
  • Handle Choice: While aesthetics are important, consider how easy handles are to clean. Minimalist designs with fewer crevices can be simpler to maintain.

Cleaning Ikea Cabinet Hardware

Cabinet hardware, such as handles and knobs, can accumulate grime, fingerprints, and even food residue, detracting from the overall cleanliness of your kitchen. IKEA hardware varies in material, from brushed metal and chrome to painted finishes.

Cleaning Metal Hardware (chrome, Stainless Steel, Brushed Nickel)

  • Method: Use a soft cloth dampened with warm water and a small amount of mild dish soap. Gently wipe the hardware to remove dirt and fingerprints. For tougher spots, a solution of equal parts white vinegar and water can help dissolve mineral deposits or residue. Rinse the cloth with clean water and wipe the hardware again to remove any soap or vinegar residue. Crucially, dry the hardware completely with a clean, dry microfiber cloth to prevent water spots and corrosion, especially on plated finishes.
  • What to Avoid: Abrasive cleaners, scouring pads, and harsh chemicals like bleach or ammonia, which can scratch or discolor metal finishes.

Cleaning Painted Or Powder-coated Hardware

  • Method: These finishes are generally more delicate. Stick to a soft cloth dampened with warm water and a very mild soap. Wipe gently. Avoid any scrubbing action. Rinse the cloth and wipe again to remove residue. Dry thoroughly with a soft cloth.
  • What to Avoid: Abrasive cleaners, harsh chemicals, and excessive rubbing, which can scratch or chip the paint.

Cleaning Specialized Finishes (e.g., Matte Black, Brass)

  • Method: Always refer to the manufacturer’s specific care instructions if available. For matte black or brass finishes, a gentle approach is best. Start with a damp microfiber cloth. If more cleaning power is needed, use a highly diluted mild dish soap solution. Wipe gently, rinse with a clean damp cloth, and dry immediately and thoroughly. Some brass finishes are lacquered and can be cleaned like painted hardware, while unlacquered brass will develop a patina over time, which may be desirable. Avoid polishes unless specifically recommended for the finish.
  • What to Avoid: Aggressive cleaning, abrasive materials, and cleaners not intended for the specific finish, as they can alter the color or texture.

Common Issues And Troubleshooting

Even with careful cleaning, you might encounter specific problems with your IKEA cabinets.

Peeling Or Bubbling Foil/laminate

This often occurs due to excessive heat, moisture, or using the wrong cleaning agents.

  • Troubleshooting: If the peeling is minor and near an edge, you might be able to carefully re-adhere it using a heat-resistant adhesive and applying gentle, even pressure with a roller or a book. Do not use regular glue, as it may become brittle. For larger areas or bubbling that cannot be smoothed, contact IKEA for potential replacement parts or consider professional repair. Avoid using steam cleaners or excessive water near these areas.

Scratches On High-gloss Finishes

Minor scratches can sometimes be buffed out, but deep ones are permanent.

  • Troubleshooting: For very light surface scratches on high-gloss laminate, you can try using a plastic polish or a mild abrasive compound specifically designed for automotive plastic or high-gloss surfaces. Apply a small amount to a soft cloth and rub gently in a circular motion. Test in an inconspicuous area first. Deep scratches will likely require a touch-up kit or replacement door/drawer front. Avoid abrasive cleaners and rough cloths at all costs.

Discoloration

This can happen due to prolonged sun exposure, harsh cleaning chemicals, or reaction with certain substances.

  • Troubleshooting: If discoloration is due to sun fading, there isn’t much that can be done besides trying to prevent further exposure. If it’s due to a chemical reaction, the damage is likely permanent. For minor discoloration on white cabinets from food stains (like turmeric), a paste of baking soda and water or a diluted hydrogen peroxide solution (used with extreme caution and testing) might help lift the stain. Always rinse and dry thoroughly.

Sticky Residue

This can be from cooking oils, adhesive labels, or certain cleaning products.

  • Troubleshooting: For general stickiness, the mild dish soap solution usually works. For stubborn adhesive residue from labels, try using a citrus-based cleaner or rubbing alcohol on a cloth. Apply to the residue, let it sit for a few minutes to break it down, then gently rub it away. Wipe the area clean with a damp cloth afterward and dry thoroughly. Avoid using harsh solvents like acetone, which can damage the finish.

Comparison Of Cleaning Methods By Finish

To summarize the best approaches, here’s a quick comparison table.

Cabinet Finish

Liftmaster Garage Door Sensors Not Working

Liftmaster Garage Door Sensors Not Working

When your Liftmaster garage door suddenly refuses to budge, and the safety sensors are the prime suspects, it can be a source of significant frustration. These crucial components, often overlooked until they fail, are the silent guardians that prevent your heavy garage door from closing on a car, a pet, or a person. A malfunction here doesn’t just mean inconvenience; it’s a potential safety hazard. Understanding why your Liftmaster garage door sensors might not be working, and how to troubleshoot them effectively, is key to restoring both functionality and peace of mind.

The symptoms are usually clear: the garage door opener will not close the door, or it will start to close and then immediately reverse. While other issues can cause similar behavior, the photoelectric safety sensors are the most common culprits. These small, cylindrical devices, typically mounted a few inches off the floor on either side of the garage door tracks, work by emitting an invisible infrared beam. If this beam is interrupted or misaligned, the opener’s safety protocol dictates that the door must stop or reverse to prevent an accident. This article will guide you through the common reasons for Liftmaster garage door sensor failure and provide a step-by-step approach to diagnose and resolve these issues, ensuring your garage door operates safely and reliably.

Key Takeaways

  • Misalignment is the most frequent cause of Liftmaster garage door sensors not working, often due to vibrations or accidental bumps.
  • Obstructions like dust, cobwebs, or debris can block the infrared beam between sensors.
  • Damaged wiring (frayed, cut, or loose connections) is a common electrical issue affecting sensor function.
  • Indicator lights on the sensors are crucial diagnostic tools, signaling power, alignment, and beam status.
  • Power supply issues to the sensors, including loose connections at the motor unit or opener logic board, can cause failure.
  • Internal sensor failure can occur due to age, wear, or manufacturing defects, requiring sensor replacement.
  • Environmental factors such as direct sunlight or extreme temperatures can occasionally interfere with sensor operation.
  • Regular maintenance and cleaning can prevent many common sensor problems.
Liftmaster Garage Door Sensors Not Working

Credit: thriftygaragedoorrepair.ca

Understanding Liftmaster Garage Door Safety Sensors

Liftmaster garage door openers are equipped with a sophisticated safety system, and the photoelectric safety sensors are a critical part of this. These sensors are designed to emit an invisible infrared beam across the garage door opening. One sensor transmits the beam, and the other receives it. If the beam is unbroken, the garage door opener is permitted to close. However, if anything obstructs this beam, be it a stray toy, a child’s bicycle, or even a dense patch of fog, the opener will immediately stop the door’s downward travel and reverse it to the open position. This is a non-negotiable safety feature mandated by federal regulations for garage door openers manufactured after 1993.

The sensors themselves are typically small, cylindrical units, usually about the size of a golf ball, mounted on brackets a few inches above the garage floor on each side of the door track. They are connected to the garage door opener’s motor unit via low-voltage wires.

Each sensor usually has an indicator light that provides crucial diagnostic information. Understanding what these lights mean is the first step in troubleshooting. For instance, one sensor might have a solid light indicating it has power, while the other’s light might be off or blinking, suggesting a problem with power, alignment, or the beam itself.

How The Safety Sensors Work

The operation of Liftmaster safety sensors relies on a simple yet effective principle: line-of-sight infrared communication. The transmitting sensor emits a focused beam of infrared light. This beam travels horizontally across the garage floor, aiming directly at the receiving sensor. The receiving sensor is designed to detect this specific infrared signal. When the beam is continuous and uninterrupted, the receiver signals to the opener’s logic board that the path is clear. This allows the opener to proceed with closing the garage door.

If the beam is broken, the receiving sensor no longer detects the infrared signal. It then sends a signal to the opener’s logic board indicating an obstruction. The opener’s programming interprets this as a safety hazard, and it immediately reverses the door’s motion.

This is why you’ll often see the door start to close and then snap back up when the sensors are misaligned or obstructed. It’s a fail-safe mechanism designed to prevent accidents. The effectiveness of this system depends entirely on the sensors being properly aligned and the beam being able to travel unimpeded between them.

The Role Of Indicator Lights

Liftmaster safety sensors are equipped with indicator lights that serve as invaluable diagnostic tools. These lights provide real-time feedback on the status of the sensors and the infrared beam. Typically, one sensor will have a solid light (often green or amber) indicating it is receiving power and the beam is properly aligned. The other sensor, which is the transmitter, might have a different colored light (often red or amber) that is also solid when the beam is properly aligned and connected.

If the light on the receiving sensor is off or blinking, it usually indicates a lack of power or a complete loss of the infrared beam. A blinking light on the receiving sensor, especially if the transmitting sensor’s light is solid, strongly suggests an alignment issue. The beam is likely not hitting the receiver accurately. If both lights are off, it points to a power problem affecting both sensors, such as a disconnected wire at the motor unit or a tripped breaker. Understanding the specific light patterns for your Liftmaster model (consult your owner’s manual for precise details) is essential for efficient troubleshooting.

Liftmaster Garage Door Sensors Not Working

Credit: gdmedics.com

Common Causes For Liftmaster Garage Door Sensors Not Working

When your Liftmaster garage door opener refuses to close, the safety sensors are the most probable cause. Several factors can lead to their malfunction, ranging from simple environmental issues to more complex wiring problems. Identifying the specific cause is the first step toward a solution.

1. Sensor Misalignment

This is by far the most common reason for Liftmaster garage door sensors not working. The sensors are designed to be precisely aligned. Even a slight bump to one of the sensors, or vibrations from the garage door opener motor or passing traffic, can throw them out of alignment. When they are not perfectly aimed at each other, the infrared beam is either not reaching the receiver or is hitting it at an angle that the sensor cannot interpret as a valid signal. This triggers the safety reversal mechanism, preventing the door from closing.

Pro Tip: Misalignment is often indicated by a blinking light on the receiving sensor, while the transmitting sensor’s light remains solid.

2. Obstructions In The Beam Path

The invisible infrared beam travels a few inches above the garage floor. Anything that physically blocks this path will cause the sensors to fail. Common obstructions include:

  • Dirt and Debris: Dust, mud, leaves, or small stones can accumulate on the sensors themselves or in the path between them.
  • Cobwebs: Spiders often build webs across the sensor path, particularly in less-trafficked garages.
  • Tools or Equipment: Items left near the garage door tracks can accidentally block the beam.
  • Snow or Ice: In colder climates, accumulated snow or ice along the bottom of the garage door or on the sensors can interfere.
  • Insects: Occasionally, a larger insect can momentarily block the beam.

3. Damaged Or Loose Wiring

The sensors are connected to the garage door opener motor unit via low-voltage wires. These wires can become damaged over time, leading to intermittent or complete failure of the sensors.

  • Frayed or Cut Wires: Wires can be chewed by rodents, pinched by moving parts of the garage door, or damaged during installation or previous repairs.
  • Loose Connections: The wires may become loose at the sensor terminals, at the motor unit connection point, or where they are spliced. Vibration can also loosen wire nuts or terminal screws over time.
  • Corrosion: In damp environments, the wire terminals or connections can corrode, impeding electrical flow.

4. Power Supply Issues

If the sensors are not receiving adequate power, they will not function. This can stem from several sources:

  • Disconnected Wires at the Motor Unit: The wires from the sensors connect to specific terminals on the garage door opener’s logic board. These connections can come loose.
  • Tripped Circuit Breaker or Blown Fuse: While less common for just the sensors, a power issue to the entire opener might also affect sensor power.
  • Faulty Logic Board: In rare cases, the logic board within the motor unit that powers the sensors could be malfunctioning.

5. Environmental Factors

While designed to be robust, certain environmental conditions can sometimes affect sensor performance:

  • Direct Sunlight: Intense, direct sunlight, especially at certain times of the day, can sometimes interfere with the infrared beam or the sensors’ ability to detect it. This is more common with older sensor models.
  • Extreme Temperatures: While most sensors are rated for typical operating temperatures, extremely high or low temperatures could theoretically impact their performance, though this is a less frequent cause.
  • Radio Frequency Interference (RFI): Strong RFI from other electronic devices in close proximity can occasionally disrupt the low-voltage signals, though this is rare.

6. Internal Sensor Failure

Like any electronic component, the sensors themselves can fail due to age, wear and tear, or manufacturing defects. If all other troubleshooting steps fail, and the sensors are receiving proper power and are perfectly aligned, it’s possible that one or both of the sensors have internally malfunctioned and need to be replaced.

Troubleshooting Liftmaster Garage Door Sensors: A Step-by-step Guide

When your Liftmaster garage door opener behaves as if an obstruction is present (i. e. , it won’t close or reverses immediately), it’s time to troubleshoot the safety sensors. Follow these steps systematically to diagnose and resolve the issue.

Step 1: Observe The Indicator Lights

Begin by examining the indicator lights on both safety sensors. As mentioned earlier, these lights are your primary diagnostic tool.

  • Scenario A: Both lights are OFF. This suggests a power issue. Check if the garage door opener motor unit is receiving power. Ensure the power cord is plugged in and the circuit breaker or fuse for the garage is not tripped. If the opener has power, inspect the wiring connections at the motor unit.
  • Scenario B: One light is ON (solid), the other is OFF. This usually indicates a problem with the sensor that has no light. Check the wiring connections for that specific sensor and trace the wire back towards the motor unit for any visible damage.
  • Scenario C: One light is ON (solid), the other is BLINKING. This is the classic symptom of misalignment. The sensor with the solid light is likely the transmitter (often red), and the one with the blinking light is the receiver (often green or amber). The beam is not reaching the receiver correctly.
  • Scenario D: Both lights are ON (solid). If both lights are solid, and the door still won’t close, the issue might lie elsewhere, such as the logic board in the motor unit, the wall control button, or the travel limit settings. However, double-check for subtle obstructions or very slight misalignment that might not be immediately apparent.

Step 2: Check For Obstructions And Clean The Sensors

With the indicator lights providing clues, the next step is to physically inspect the sensors and their path.

  • Visual Inspection: Look closely at both sensors and the space between them. Remove any visible debris, dust, cobwebs, or obstructions.
  • Clean the Lenses: Use a soft, dry cloth or a microfiber cloth to gently clean the lenses of both sensors. For stubborn dirt, you can slightly dampen the cloth with water or an electronics-safe cleaner. Avoid abrasive materials that could scratch the lenses.
  • Verify Path: Ensure nothing is blocking the direct line between the two sensors. Check the bottom edge of the garage door itself for any damage or warping that might be interfering with the beam when the door is nearly closed.

Step 3: Realign The Sensors

If the indicator lights point to misalignment (Scenario C), you’ll need to realign the sensors.

  • Loosen Mounting Brackets: Gently loosen the screws or wing nuts that secure the sensors to their brackets. This will allow you to adjust their position.
  • Adjust One Sensor at a Time: It’s usually easiest to adjust the receiving sensor (the one with the blinking light). Carefully move it until its indicator light turns solid. You may need to slightly tilt or rotate it.
  • Fine-Tuning: Once the receiving sensor’s light is solid, check the transmitting sensor’s light. If it’s also solid, you’ve likely achieved alignment. If not, make minor adjustments to the transmitting sensor until both lights are solid.
  • Secure Brackets: Once aligned, carefully tighten the screws or wing nuts on the sensor brackets, ensuring they don’t move out of position during tightening.
  • Test Operation: Try operating the garage door opener. If the alignment was the issue, the door should now close properly.

Example: Imagine you’re adjusting the receiving sensor. You might notice its blinking light turns solid when you tilt it slightly upwards by just a quarter of an inch. This small adjustment is often all that’s needed.

Step 4: Inspect Wiring And Connections

If cleaning and realignment don’t solve the problem, or if the lights indicate a power issue (Scenarios A or B), carefully inspect the wiring.

  • Examine Visible Wires: Trace the wires from each sensor down towards the motor unit. Look for any signs of damage: cuts, nicks, kinks, or areas where the insulation has worn away. Pay close attention to areas where the wires might be pinched by the garage door tracks or rollers.
  • Check Sensor Terminals: At the sensor end, ensure the wires are securely fastened to the terminal screws or plugged firmly into their connectors. Sometimes, a wire can simply pull out.
  • Inspect Motor Unit Connections: Carefully open the motor unit cover (ensure the opener is unplugged first!). Locate the terminals where the sensor wires connect to the opener’s logic board. Check that these wires are securely attached. If they use wire nuts, ensure they are tight and the wires haven’t slipped out.
  • Test Continuity (Advanced): If you have a multimeter, you can test the continuity of the wires. Unplug the opener, disconnect the wires at both ends, and use the multimeter to check if the wires are conducting electricity without breaks. This is a more advanced step and requires some electrical knowledge.

Step 5: Test The Opener Logic Board And Remote

If the sensors appear to have power, are aligned, and the wiring seems intact, the problem might be with the opener’s logic board itself.

  • Wall Button Test: Try operating the garage door using the wall-mounted control button. If the door operates normally via the wall button but not the remote, the issue might be with the remote or the opener’s receiver. If it doesn’t work with the wall button either, it reinforces the idea that the problem lies with the safety system or the main logic board.
  • Resetting the Opener: Some Liftmaster models allow for a system reset. Consult your owner’s manual to see if this is applicable and how to perform it. This can sometimes clear temporary logic board glitches.
  • Check Travel Limits: While less likely to cause a “won’t close” scenario specifically due to sensors, incorrect travel limit settings can sometimes lead to unexpected behavior. Refer to your manual to ensure these are set correctly.

Step 6: Consider Replacing The Sensors

If you’ve gone through all the previous steps, and the sensors still aren’t working, it’s highly probable that one or both of the sensors have failed internally.

  • Purchase Replacements: Liftmaster offers replacement safety sensor kits. Ensure you purchase a kit compatible with your specific Liftmaster opener model. You can often find these kits online or at hardware stores. Many universal garage door opener sensors are also compatible, but it’s best to stick with Liftmaster branded parts for guaranteed compatibility.
  • Installation: Replacing the sensors is generally a straightforward process. It involves disconnecting the wires from the old sensors, removing the old sensors from their brackets, mounting the new sensors, and reconnecting the wires according to the instructions provided with the new kit.
  • Testing: After installation, test the opener thoroughly to ensure the new sensors are functioning correctly.

When to Call a Professional: If you’re uncomfortable working with electrical wiring, cannot diagnose the problem, or have performed all the steps without success, it’s best to contact a qualified garage door technician. They have the tools and expertise to quickly identify and fix complex issues.

Liftmaster Garage Door Sensors Not Working

Credit: www.reddit.com

Replacing Liftmaster Safety Sensors

Replacing malfunctioning Liftmaster safety sensors is a common DIY repair that can save you money on professional service calls. The process is generally straightforward, involving basic tools and following a few key steps. The primary goal is to ensure the new sensors are correctly mounted, wired, and aligned.

Choosing The Right Replacement Sensors

Liftmaster has produced various models over the years, and while many share similar designs, it’s crucial to select compatible replacement sensors.

  • Identify Your Opener Model: The model number is usually found on the motor unit housing. Knowing this will help you find the exact replacement part or a guaranteed compatible alternative.
  • Liftmaster Part Numbers: Look for specific Liftmaster part numbers for safety sensors, such as the 41A5034 or similar.
  • Universal Sensors: If a direct Liftmaster replacement isn’t available, consider universal garage door opener safety sensors. These are designed to work with most brands, but always check the compatibility list or consult with the manufacturer or a local dealer.
  • Check the Kit Contents: Ensure the replacement kit includes the sensors, mounting brackets (if needed), and any necessary wiring connectors or hardware.

Step-by-step Installation Process

Once you have your new, compatible sensors, follow these steps for installation:

  • Safety First: Disconnect Power: Before touching any wiring, unplug the garage door opener from the power outlet or turn off the corresponding circuit breaker. This is a critical safety step to prevent electrical shock.
  • Remove Old Sensors:
  • Carefully disconnect the wires from the terminals of the old sensors. Note which wire connects to which terminal if they are different colors or marked.
  • Unscrew the old sensors from their mounting brackets. If the brackets are damaged or corroded, you may need to remove and replace those as well.
  • Mount New Sensors:
  • Attach the new sensors to the existing brackets or install the new brackets if provided. Position them at the same height as the old sensors were, typically 4-6 inches from the floor.
  • Ensure the sensors are oriented correctly, with the lens facing outwards towards the other sensor.
  • Connect Wiring:
  • Connect the wires from the opener to the new sensors. Most Liftmaster sensors have two wires each. These typically connect to screw terminals on the sensor body. Ensure a secure connection. If your new sensors use different connectors, follow the specific instructions provided with the kit.
  • If the wires were spliced or used wire nuts, ensure these connections are also secure and insulated.
  • Restore Power and Test Alignment:
  • Plug the garage door opener back in or turn the circuit breaker back on.
  • Observe the indicator lights on the new sensors. One should light up indicating power, and the other should light up when the beam is properly aligned.
  • Refer to the alignment steps outlined previously (Step 3 in the troubleshooting section) to adjust the new sensors until both indicator lights are solid, signifying a strong, aligned beam.
  • Test Door Operation:
  • Once aligned, test the garage door opener by pressing the wall control button.
  • Ensure the door closes smoothly without reversing. Test with the remote as well.

Example: If your old sensors had red and black wires, and the new ones have similar terminals, connect the red wire to the corresponding terminal on the new sensor and the black wire to its terminal. If the wires are color-coded, pay attention to matching them, or consult the documentation for the correct polarity.

Maintenance And Prevention Tips

Preventing issues with your Liftmaster garage door sensors is far easier than fixing them. Regular, simple maintenance can significantly extend their lifespan and ensure reliable operation. By incorporating a few checks into your routine garage upkeep, you can avoid the frustration and potential safety risks associated with malfunctioning sensors.

Regular Cleaning Schedule

Make it a habit to clean your garage door sensors at least twice a year, or more frequently if you live in a dusty or debris-prone environment.

  • Spring and Fall: These are good times to perform a quick clean. Use a soft, dry cloth to wipe down the sensor lenses.
  • During Opener Checks: When you check your garage door opener’s general function, take a moment to inspect the sensors.

Inspect Wiring Periodically

While wiring issues might not be as frequent as misalignment, it’s wise to periodically inspect the sensor wiring.

  • Annual Check: Once a year, visually inspect the wires running from the sensors to the motor unit. Look for any signs of fraying, chewing (rodents), or pinching.
  • Listen for Unusual Noises: If you hear grinding or scraping sounds when the door operates, it might indicate wires are being caught or pulled.

Ensure Proper Alignment After Major Events

While sensors are designed to be robust, significant events can cause them to shift.

  • After Garage Door Repairs: If you’ve had any work done on the garage door or opener system, always re-verify sensor alignment.
  • After Strong Vibrations: If you’ve experienced nearby construction or seismic activity,

Small Wall Holes Appearing Suddenly

Small Wall Holes Appearing Suddenly

The sudden appearance of small holes in walls can be a perplexing and sometimes alarming issue for homeowners. These tiny perforations, often no larger than a pinprick or a pencil eraser, can manifest in various locations around your house, from drywall and plaster to even more solid materials like concrete or brick.

While they might initially seem like minor cosmetic blemishes, these small holes can sometimes be indicators of underlying problems that, if left unaddressed, could lead to more significant structural damage, pest infestations, or even health hazards. Understanding the potential causes behind these mysterious holes is the first step toward effective diagnosis and remediation, ensuring the long-term integrity and safety of your home.

This article will serve as a comprehensive guide to identifying the causes of small wall holes appearing suddenly, exploring the common culprits and providing actionable advice on how to address them. We’ll delve into the science behind material degradation, the habits of common household pests, and the environmental factors that can contribute to these issues.

By equipping you with the knowledge to recognize the signs and understand the implications, you’ll be better prepared to protect your home and your peace of mind.

Key Takeaways

  • Multiple Causes: Small wall holes can stem from various sources, including pest activity, moisture damage, structural settling, or even DIY project remnants.
  • Pest Indicators: Tiny holes are frequently linked to wood-boring insects like termites, carpenter ants, or powderpost beetles, and sometimes rodents.
  • Moisture is a Culprit: Water intrusion can weaken drywall and plaster, leading to small perforations as materials degrade or as pests are attracted to damp environments.
  • Structural Settling: Natural movement of a house over time can cause small cracks and holes, especially around stress points.
  • DIY & Installation Issues: Improperly sealed penetrations for wires, pipes, or previous installations can leave small openings.
  • Prompt Action is Key: Addressing the root cause of small holes is crucial to prevent further damage, infestations, or structural compromise.
  • Professional Help: For persistent issues or when the cause is unclear, consulting pest control professionals or structural engineers is advisable.

Common Causes Of Small Wall Holes

The sudden appearance of small holes in walls isn’t usually a random event. More often than not, there’s an underlying reason, and identifying it is paramount to effective repair. These holes can range in size from minuscule pinpricks to openings that can accommodate a pencil tip, and their location can offer clues to their origin.

Understanding the common culprits will help you diagnose the problem accurately.

Pest Infestations

One of the most frequent reasons for small holes appearing in walls is the activity of various pests. These creatures bore into materials for nesting, feeding, or simply to gain access to your home.

Wood-boring Insects

Several types of insects are notorious for their ability to create small holes in wooden structures and drywall. These insects often leave behind tell-tale signs, such as sawdust-like frass or tiny exit holes.

  • Termites: Subterranean termites, a common type, often build mud tubes from the soil to your home’s wooden structures. While their primary damage is internal, they can create small, irregular holes as they emerge or when their galleries are close to the surface. Drywood termites, on the other hand, live within the wood itself and create distinct, small, circular or oval exit holes, often about 1-3mm in diameter, to expel fecal pellets (frass). This frass looks like tiny, hexagonal grains of sand and is often found in small piles beneath the damaged wood.
  • Carpenter Ants: Unlike termites, carpenter ants do not eat wood; they excavate it to create nests. They prefer damp or decaying wood. Their galleries are smoother than termite damage. The holes they create are typically about 1/4 to 1/2 inch in diameter and are used as entry and exit points. You might also find sawdust-like shavings, called “frass,” which contains insect parts, near these holes.
  • Powderpost Beetles: These beetles target seasoned hardwoods. The adult female lays eggs in the pores of the wood, and the larvae bore into the wood to feed. When the adult beetles emerge, they create small, circular exit holes, typically 1/16 to 1/8 inch in diameter. The wood can appear “pitted” with these numerous small holes. Fine, powder-like sawdust (frass) is often found below the infested area.

Rodents And Other Small Pests

While rodents typically chew larger holes to gain entry, smaller openings can sometimes be associated with their activity or that of other small creatures.

  • Mice and Rats: Mice can squeeze through surprisingly small openings, sometimes as small as a dime. If a mouse has found a tiny existing hole or created one through persistent gnawing on a softer material like drywall, it can leave behind small entry points. You might also find droppings or gnaw marks near these holes.
  • Insects (e.g., Bees, Wasps): In some cases, small holes in exterior walls, particularly those made of wood or siding, can be entry points for stinging insects like bees or wasps seeking to establish a nest within wall voids. These holes are often clean-cut and may have visible insect activity around them during warmer months.

Moisture Damage And Deterioration

Water is a silent enemy of building materials. Persistent moisture can weaken drywall, plaster, and wood, making them susceptible to developing small holes.

Leaks And Condensation

  • Plumbing Leaks: Small leaks from pipes within walls can saturate drywall and plaster over time. As the material dries, it can shrink and crumble, or the constant dampness can encourage mold growth, which can further degrade the material. This can lead to soft spots and eventual perforations.
  • Roof Leaks: Water seeping through the roof and down wall cavities can have a similar effect, compromising the integrity of interior wall surfaces.
  • Condensation: In areas with high humidity or poor ventilation, condensation can form on pipes or walls. Repeated cycles of moisture and drying can weaken materials, making them prone to developing small holes, especially if mold begins to grow.

Mold And Mildew Growth

Mold thrives in damp environments. Certain types of mold can degrade organic materials like paper backing on drywall or wood. As mold colonies grow and consume the material, they can create small, irregular holes or soft patches that eventually break through.

The presence of mold can also indicate a hidden moisture problem that needs to be addressed.

Structural Issues And Settling

Buildings are dynamic structures that experience natural movement over time. This settling can sometimes manifest as small cracks or holes in walls.

Natural House Settling

As a house ages, its foundation and structural components can shift slightly due to changes in soil moisture, temperature fluctuations, and the natural compression of building materials. This movement can create stress points in the walls, leading to small cracks that might appear as tiny holes, particularly around windows, doors, or where different building materials meet.

These are often hairline cracks that can widen into small perforations over time.

Expansion And Contraction

Materials used in construction, such as wood and drywall, expand and contract with changes in temperature and humidity. This constant movement, especially in areas with significant climate variations, can cause stress on the wall structure. Over time, this can lead to small cracks or holes forming as materials pull away from each other or break down.

Installation And Diy Remnants

Sometimes, small holes are the result of previous installations or DIY projects that weren’t properly finished or sealed.

Unfinished Projects Or Poorly Sealed Holes

  • Electrical or Plumbing Penetrations: When electricians or plumbers run wires or pipes through walls, they create holes. If these holes are not properly sealed with appropriate materials like caulk, expanding foam, or patching compounds, they can remain as small openings. These can be entry points for pests or allow for air drafts.
  • Previous Fixture Mounts: Holes left behind from mounting shelves, curtain rods, or other fixtures, if not adequately filled and smoothed, can appear as small indentations or holes.
  • Accidental Punctures: During renovation or even just regular household activity, small accidental punctures can occur in drywall. If these are not immediately repaired, they can remain as small holes.
Small Wall Holes Appearing Suddenly

Credit: luxhospitals.com

Identifying The Culprit: Diagnostic Steps

Before you can effectively address the small holes in your walls, you need to pinpoint their cause. A systematic approach to diagnosis will help you avoid unnecessary repairs and ensure you’re tackling the root problem.

Visual Inspection: What To Look For

The first step is a thorough visual examination of the holes and their surroundings. Pay close attention to the size, shape, and texture of the holes, as well as any associated debris or damage.

  • Hole Characteristics:
  • Size and Shape: Are the holes perfectly round, irregular, or elongated? Tiny, clean-cut round holes (1-3mm) might suggest powderpost beetles or termites. Larger, irregular holes could indicate rodent gnawing or carpenter ant activity.
  • Texture: Does the edge of the hole appear chewed, bored, or simply cracked?
  • Location: Are the holes concentrated in one area? Are they near wooden structural elements, baseboards, windows, or plumbing fixtures? Are they on interior or exterior walls?
  • Associated Debris:
  • Frass: Look for fine, powder-like material (sawdust) near the holes. The texture and color of this frass can be a strong indicator of specific wood-boring insects. Termite frass is often described as looking like sand or tiny hexagonal pellets. Powderpost beetle frass is typically very fine and powdery. Carpenter ant frass may contain wood shavings and insect parts.
  • Mud Tubes: If you see small mud-like tubes on the wall surface, especially near the foundation or along wooden beams, it’s a strong sign of subterranean termites.
  • Mold or Mildew: Discoloration, fuzzy growth, or a musty odor around the holes can point to moisture problems and mold.
  • Droppings: Small, dark, pellet-like droppings are a clear sign of rodent activity.

Environmental Clues

The conditions in and around your home can also provide significant clues.

  • Moisture Sources: Are there any signs of recent or past water leaks? Check for stained ceilings, damp spots on walls, or areas with peeling paint or wallpaper, especially around plumbing fixtures, bathrooms, kitchens, or exterior walls prone to rain.
  • Humidity Levels: Is the area consistently humid? High humidity can contribute to material degradation and attract certain pests.
  • Proximity to Outdoors: Holes on exterior walls, especially near the ground or around utility entry points, might be related to pests seeking entry or environmental damage.

Using Tools For Better Assessment

Sometimes, a closer look is necessary.

  • Flashlight: A bright flashlight is essential for illuminating dark corners and highlighting subtle details around the holes.
  • Magnifying Glass: A magnifying glass can help you examine the texture of the holes and any associated frass or debris more closely.
  • Moisture Meter: If you suspect moisture is an issue, a moisture meter can help you identify damp areas within walls that aren’t visibly apparent. These devices measure the moisture content of building materials.
  • Inspection Camera (Borescope): For deeper inspection within wall cavities, a small inspection camera can be invaluable. These cameras can be inserted into small holes to view the interior of the wall without causing significant damage.

When To Call A Professional

While some small holes are easy to identify and fix, others require expert knowledge.

  • Uncertainty: If you’ve performed a visual inspection and are still unsure about the cause, it’s best to consult a professional.
  • Suspected Major Infestation: If you suspect a significant termite or carpenter ant infestation, immediate professional intervention is crucial.
  • Structural Concerns: If the holes are accompanied by sagging ceilings, uneven floors, or significant cracking, it could indicate a serious structural issue requiring an engineer’s assessment.
  • Persistent Moisture Issues: If you can’t locate the source of a persistent moisture problem, a professional may be needed to trace and repair leaks.
Small Wall Holes Appearing Suddenly

Credit: luxhospitals.com

Addressing Specific Causes And Solutions

Once you’ve identified the likely cause of the small wall holes, you can implement the appropriate solutions. The approach will vary significantly depending on whether the issue is pest-related, moisture-induced, or due to structural factors.

Pest-related Solutions

Dealing with pests requires targeted treatment to eliminate the infestation and prevent recurrence.

Insecticide Treatments

  • For Termites: Treatment for termites is highly specialized. It often involves liquid termiticides applied around the foundation of the home or baited systems that termites carry back to the colony. Fumigation may be necessary for severe drywood termite infestations. It is almost always recommended to hire a licensed pest control professional for termite issues.
  • For Powderpost Beetles: Surface treatments with insecticides can be effective if the infestation is caught early and is limited to the surface layers of the wood. For deeper infestations, wood injection of insecticides or heat treatment might be necessary. In severe cases, replacing infested lumber may be the only option.
  • For Carpenter Ants: Treatment typically involves locating the ant nest and applying direct insecticidal treatments (foams, dusts, or liquids) to the nest and entry points. Baiting systems can also be effective, as ants carry the poisoned bait back to the colony. Sealing entry points is also crucial.

Rodent Control

  • Exclusion: The most effective long-term solution for rodents is exclusion, sealing all potential entry points into the home. This includes sealing holes larger than 1/4 inch.
  • Trapping and Baiting: For existing infestations, snap traps or live traps can be used. Rodenticides (baits) can also be effective but should be used with extreme caution, especially in homes with children or pets, as they can be toxic. Always place baits in tamper-resistant stations.

Stinging Insect Nest Removal

  • If bees or wasps are nesting in wall voids, it’s often best to hire a professional pest control service experienced in removing these nests safely. Attempting to remove them yourself can be dangerous due to the risk of stings.

Moisture And Mold Remediation

Addressing moisture issues is critical not only to repair the holes but also to prevent future problems and health risks associated with mold.

Repairing Leaks

  • Identify the Source: The first step is to meticulously locate the source of the leak. This might involve inspecting plumbing, roofing, gutters, window seals, or exterior siding.
  • Professional Repair: Depending on the complexity, you may need to hire a plumber, roofer, or siding contractor to fix the underlying leak.
  • Drying the Area: After the leak is repaired, the affected wall cavity and materials must be thoroughly dried. This may involve using fans, dehumidifiers, or even professional drying equipment. In some cases, damaged materials may need to be removed and replaced.

Mold Remediation

  • Safety First: Wear appropriate personal protective equipment (PPE), including gloves, masks (N95 or higher), and eye protection, when dealing with mold.
  • Cleaning: For small areas of mold (less than 10 square feet), you can often clean it yourself using a solution of water and detergent. For more stubborn mold, a solution of water and bleach (1 cup bleach per gallon of water) can be used on non-porous surfaces, but ensure good ventilation and never mix bleach with ammonia.
  • Professional Remediation: For larger or more extensive mold growth, or if the mold is suspected to be toxic (e.g., black mold), it is highly recommended to hire a certified mold remediation specialist.
  • Preventing Recurrence: Ensure the moisture source is eliminated and that the area is properly ventilated to prevent mold from returning.

Structural Repair And Cosmetic Fixes

For holes caused by settling or minor installation issues, repairs are often more straightforward.

Patching Small Holes

  • For Drywall: Small holes (up to a few inches in diameter) can be repaired using spackling paste or joint compound. For slightly larger holes, a self-adhesive mesh patch can be applied over the hole before applying the compound. Multiple thin layers of compound are usually better than one thick layer. Sand smooth once dry and repaint.
  • For Plaster: Similar to drywall, small holes can be filled with plaster patching compound. For larger areas, a plaster repair kit might be necessary.
  • For Wood: Small dents or punctures in wood trim or framing can be filled with wood filler or epoxy putty. Sand smooth and refinish or paint to match.

Sealing Gaps

  • Caulking: For small gaps around utility penetrations or where different materials meet, use paintable acrylic latex caulk or silicone caulk (depending on the location and need for flexibility). Ensure the area is clean and dry before applying.
  • Expanding Foam: For larger gaps around pipes or conduits, low-expansion spray foam sealant can be used to fill the void and provide insulation. Trim any excess foam once cured.

Example Case Study: The Mysterious Pinpricks In The Master Bedroom

A homeowner in suburban Ohio noticed a scattering of tiny, pinprick-sized holes appearing on the walls of their master bedroom over a few weeks. Initially, they dismissed them as minor imperfections. However, the homeowner, an avid reader of home improvement blogs, decided to investigate further when they noticed a faint, sweet smell in the room.

Diagnosis:

Using a flashlight and a magnifying glass, the homeowner examined the holes. They were perfectly round, about 1mm in diameter, and clustered around a large wooden wardrobe and the baseboards. Crucially, they found tiny piles of fine, powdery dust beneath some of the holes.

The sweet smell was also a significant clue. The homeowner suspected powderpost beetles.

Solution:

The homeowner contacted a local pest control service specializing in wood-destroying insects. The technician confirmed the presence of powderpost beetles. The infestation was not severe, and the damage was primarily superficial. The technician recommended a surface application of a borate-based insecticide to the affected wood surfaces, which is effective against powderpost beetles and provides long-term protection. They also advised monitoring the area for the next year. The homeowner then filled the small exit holes with a wood filler and repainted the walls, restoring their pristine appearance.

Preventative Measures: Stopping Holes Before They Start

While some holes might be unavoidable due to natural settling, many can be prevented with diligent maintenance and proactive measures. Preventing issues before they escalate is always more cost-effective and less disruptive than dealing with repairs.

Regular Inspections And Maintenance

  • Home Exterior: Regularly inspect the exterior of your home for any cracks, gaps, or potential entry points. Pay attention to the foundation, siding, window and door frames, and areas where utilities enter the house. Seal any openings promptly.
  • Gutters and Drainage: Ensure your gutters are clean and functioning correctly, directing water away from the foundation. Clogged gutters can lead to water pooling around the foundation, potentially causing moisture issues within walls.
  • Roof and Windows: Check your roof for damage and ensure window seals are intact. Leaks from these areas are common sources of water intrusion.

Moisture Control

  • Ventilation: Ensure adequate ventilation in moisture-prone areas like bathrooms, kitchens, and basements. Use exhaust fans and consider installing a dehumidifier if humidity levels are consistently high.
  • Fix Leaks Promptly: Address any plumbing leaks, no matter how small, as soon as they are detected. Even minor drips can lead to significant material degradation and mold growth over time.
  • Manage Interior Humidity: Aim to maintain indoor humidity levels between 30-50%. This can be achieved through proper ventilation, using exhaust fans, and potentially a dehumidifier in damp climates.

Pest Prevention Strategies

  • Seal Entry Points: As mentioned, sealing cracks and crevices around the foundation, walls, and utility penetrations is crucial for preventing pests from entering your home. Use caulk, steel wool (for rodents), or expanding foam.
  • Proper Storage: Store firewood away from the house, as it can harbor termites and other wood-boring insects. Keep your home clean and free of food debris that can attract rodents and insects.
  • Address Wood Decay: Repair any damaged or decaying wood on the exterior of your home promptly, as this can be an attractive nesting site for carpenter ants and termites.

Smart Diy Practices

  • Proper Sealing: When performing any DIY work that involves creating holes in walls (e.g., hanging pictures, installing fixtures), ensure that any resulting holes are properly filled and smoothed.
  • Use Appropriate Materials: When sealing gaps around pipes or wires, use appropriate materials like caulk or expanding foam designed for the specific application.

Comparison Of Common Hole Types

To further aid in diagnosis, understanding the typical characteristics of holes caused by different issues can be helpful.

Hole Type/CauseTypical SizeShapeAssociated Debris/SignsLocation Clues
**Powderpost Beetle**1/16 to 1/8 inch (1.5 to 3 mm)Small, perfectly roundFine, powdery frass resembling sawdust.Infested wood (structural, furniture), often hardwoods.

| Drywood Termite | 1 to 3 mm | Small, clean-cut round or oval | Small piles of hexagonal fecal pellets (frass). | Wooden structures, furniture, beams; often near attics or less-used areas.

Window Condensation Inside House

Window Condensation Inside House

The appearance of condensation on the inside of your windows can be a perplexing and often frustrating problem for homeowners. It’s more than just a minor aesthetic annoyance; it can be a symptom of underlying issues related to your home’s ventilation, insulation, and overall humidity levels. Ignoring it can lead to more significant problems, including mold growth, wood rot, and damage to your window frames and surrounding walls. Understanding why condensation forms and how to effectively manage it is crucial for maintaining a healthy and comfortable living environment.

This phenomenon occurs when warm, moist air inside your home comes into contact with cooler surfaces, such as window panes, especially during colder months. As the air cools, its ability to hold moisture decreases, causing the water vapor to condense into liquid droplets.

While a small amount of condensation might be normal on a very cold day, persistent or excessive moisture indicates a potential imbalance that needs addressing. This comprehensive guide will explore the causes, consequences, and, most importantly, the practical solutions for tackling window condensation inside your house.

Key Takeaways

  • Condensation forms when warm, humid indoor air meets cold window surfaces, causing water vapor to turn into liquid.
  • Excessive indoor humidity is a primary driver, often caused by everyday activities like cooking, showering, and breathing.
  • Poor insulation and air leaks around windows exacerbate the problem by allowing cold outdoor air to cool the interior glass surface.
  • Potential consequences include mold growth, damaged window frames, peeling paint, and reduced indoor air quality.
  • Effective solutions involve controlling indoor humidity, improving ventilation, and enhancing window insulation.
  • Regular monitoring and addressing the root cause are essential for long-term prevention.
Window Condensation Inside House

Credit: www.reddit.com

Understanding The Science Behind Window Condensation

The formation of condensation on your windows is a direct application of thermodynamics and the principles of relative humidity. Understanding these concepts is the first step in effectively combating the issue.

The Role Of Humidity

Humidity refers to the amount of water vapor present in the air. This moisture is constantly being added to your home’s atmosphere through various daily activities. Cooking, showering, doing laundry, even the simple act of breathing by occupants and pets, all contribute to increasing indoor humidity levels. Relative humidity (RH) is a measure of how much moisture the air is holding compared to the maximum amount it *could* hold at a specific temperature. For example, 50% RH means the air is holding half the water vapor it can at that temperature.

When the air inside your home is warm and holds a significant amount of moisture, its relative humidity can become quite high. This is particularly common in winter when heating systems are running, but outdoor air is cold. The warm, moist air circulates throughout your house, and when it comes into contact with cooler surfaces, its temperature drops.

As the air cools, its capacity to hold moisture diminishes.

The Dew Point Phenomenon

Every temperature has a corresponding dew point, which is the temperature at which the air becomes saturated with water vapor and condensation begins to form. When the surface temperature of your windows drops below the dew point of the indoor air, the excess moisture in the air will condense into liquid water droplets on the glass.

Window surfaces are often the coldest spots in a room, especially single-pane windows or those with poor seals, because they are directly exposed to the colder outdoor temperatures. Even double-pane windows can become cold enough if the seal between the panes has failed or if the gas fill has escaped.

The larger the temperature difference between the indoor air and the window surface, the more likely condensation is to form. In my experience, the most severe condensation issues I’ve encountered were always linked to a combination of high indoor humidity and significantly cooler window surfaces.

Factors Influencing Condensation

Several factors can influence the likelihood and severity of window condensation:

  • Outdoor Temperature: Colder outside temperatures lead to colder window surfaces.
  • Indoor Temperature: Warmer indoor temperatures hold more moisture, increasing potential RH.
  • Indoor Humidity Levels: Higher RH means the air is closer to saturation, requiring a smaller temperature drop for condensation.
  • Window Type and Age: Single-pane windows are far more susceptible than modern, energy-efficient double or triple-pane windows.
  • Window Insulation and Seals: Poorly insulated frames and leaky seals allow cold air to penetrate, cooling the glass.
  • Ventilation: Inadequate air circulation traps moist air near windows.
  • Sunlight Exposure: South-facing windows may receive more solar heat, which can sometimes help evaporate condensation, but this is a minor factor compared to the others.
Window Condensation Inside House

Credit: www.drexelteam.com

Common Causes Of Excessive Indoor Humidity

While some moisture in the air is natural, elevated levels that lead to condensation are often caused by specific sources within the home. Identifying these sources is critical for implementing effective control strategies.

Everyday Household Activities

As mentioned, many common household activities are significant contributors to indoor humidity.

  • Cooking: Boiling water, steaming vegetables, and even simmering sauces release substantial amounts of water vapor into the air. A kettle boiling for an hour can release over 2 pounds of water into the atmosphere.
  • Showering and Bathing: Hot showers and baths generate a large volume of steam. Without proper ventilation in bathrooms, this moisture can escape into the rest of the house. A 15-minute shower can release up to 1 pound of water into the air.
  • Doing Laundry: Washing machines, especially during the rinse cycle, and clothes dryers, if not properly vented to the exterior, can significantly increase humidity.
  • Drying Clothes Indoors: Hanging wet clothes to dry inside a home, particularly in unventilated areas, is a major source of moisture. A single load of laundry can release several pounds of water into the air over a few hours.
  • Dishwashing: Running a dishwasher, especially older models, can release steam.
  • Houseplants: Plants release water vapor through a process called transpiration. While generally a minor contributor, a large number of plants in a poorly ventilated space can add noticeable moisture.
  • Aquariums and Terrariums: Open-top fish tanks and similar enclosures continuously release water vapor.

Building-related Issues

Beyond daily activities, structural issues within the home can also lead to persistently high humidity.

  • Poor Ventilation: This is arguably the most significant building-related cause. Homes that are tightly sealed for energy efficiency can trap moisture if there isn’t adequate mechanical or natural ventilation. Older homes may have more natural air leakage, but modern homes often require dedicated ventilation systems like exhaust fans or Heat Recovery Ventilators (HRVs) to manage indoor air quality and humidity.
  • Crawl Spaces and Basements: Unsealed or damp crawl spaces and basements can be significant sources of moisture. Water vapor can migrate upwards through floors and walls, increasing the overall humidity of the living space. Inadequate waterproofing or drainage issues can exacerbate this.
  • Plumbing Leaks: Slow, undetected leaks in pipes, especially those running through walls or under floors, can introduce moisture into the building structure, leading to increased humidity.
  • Foundation Issues: Cracks in the foundation or poor grading around the house can allow groundwater to seep into the basement or crawl space, contributing to ambient moisture.

Lifestyle Factors

The number of occupants in a home also plays a role. More people mean more respiration, which releases moisture. A family of four can exhale several pounds of water vapor into the air each day.

Window Condensation Inside House

Credit: www.pella.com

The Negative Impacts Of Persistent Window Condensation

Allowing window condensation to persist unchecked can lead to a cascade of detrimental effects, impacting both your home’s structure and the health of its occupants.

Mold And Mildew Growth

The most common and concerning consequence of persistent condensation is the proliferation of mold and mildew. These fungi thrive in damp environments. The moisture that collects on window sills, frames, and surrounding walls provides the ideal breeding ground. Mold can appear as black, green, or white fuzzy patches. Beyond being unsightly, mold releases spores into the air, which can trigger allergic reactions, asthma attacks, and other respiratory problems. The U.S. Environmental Protection Agency (EPA) notes that mold can cause symptoms like wheezing, itchy eyes, and skin irritation, and can be more severe for individuals with chronic respiratory conditions.

Damage To Window Components And Structure

The constant presence of moisture can wreak havoc on window materials.

  • Wood Rot: Wooden window frames are particularly vulnerable. Prolonged exposure to moisture can cause the wood to soften, decay, and rot, compromising the structural integrity of the window and potentially requiring expensive repairs or replacement.
  • Corrosion: Metal components, such as window hardware or aluminum frames, can corrode and degrade over time due to constant dampness.
  • Paint and Finish Damage: Moisture can cause paint to blister, peel, and flake off window frames and surrounding trim. This not only looks bad but also exposes the underlying material to further damage.
  • Insulation Degradation: In walls around windows, moisture can seep into insulation materials, reducing their effectiveness and potentially leading to mold growth within the wall cavity.

Reduced Indoor Air Quality

Beyond mold, the damp conditions created by condensation can contribute to a generally poor indoor air quality. The musty smell associated with mold and mildew can permeate the home. Furthermore, the dampness can encourage the growth of other microorganisms and dust mites, exacerbating allergies and respiratory issues for sensitive individuals.

Decreased Energy Efficiency

While it might seem counterintuitive, excessive condensation can sometimes indicate or lead to reduced energy efficiency. If condensation is occurring because of drafts or poorly sealed windows, these same drafts are allowing heated air to escape and cold air to enter, increasing heating costs.

Moreover, if moisture has permeated wall insulation near the windows, its R-value (thermal resistance) is significantly reduced, making that area of the house less effective at retaining heat.

Aesthetics And Comfort

Finally, there’s the undeniable impact on the aesthetics and comfort of your home. Streaky, fogged-up windows detract from the appearance of your living space. The dampness can also make rooms feel colder and less inviting, even if the thermostat is set to a comfortable temperature.

Practical Solutions For Eliminating Window Condensation

Fortunately, addressing window condensation is achievable with a combination of strategies focused on reducing indoor humidity, improving ventilation, and enhancing window performance.

Controlling Indoor Humidity Levels

This is the most crucial step. The goal is to keep relative humidity below 60%, ideally between 30-50%, especially during colder months.

  • Use Exhaust Fans: Always run exhaust fans in bathrooms during and for at least 15-20 minutes after showering. Similarly, use a kitchen exhaust fan when cooking, especially when boiling or steaming. Ensure these fans vent *outside* the house, not into the attic.
  • Vent Clothes Dryers: Make sure your clothes dryer is properly vented to the exterior. Check the vent hose for leaks or blockages.
  • Limit Indoor Clothes Drying: Avoid drying clothes indoors on racks whenever possible. If you must, do so in a well-ventilated room, perhaps with a dehumidifier running.
  • Cover Pots and Pans: Use lids when cooking to reduce the amount of steam released into the kitchen.
  • Reduce Shower Time and Temperature: Shorter, cooler showers produce less steam.
  • Dehumidifiers: For persistent high humidity, a portable dehumidifier can be very effective. Place it in areas where humidity is highest, like basements or main living areas. Ensure you empty it regularly or set up continuous drainage if possible. Whole-house dehumidifiers integrated into your HVAC system offer a more automated and comprehensive solution.
  • Check for Leaks: Inspect for any plumbing leaks or water intrusion from the foundation or roof and address them promptly.
  • Ventilate Crawl Spaces and Basements: Ensure these areas are properly sealed and ventilated, or consider installing a vapor barrier.

Improving Ventilation And Air Circulation

Good airflow helps to prevent moist air from stagnating near cold surfaces.

  • Open Windows Periodically: Even for a few minutes each day, opening windows on opposite sides of the house can create cross-ventilation and exchange moist indoor air for drier outdoor air. This is most effective when outdoor humidity is lower than indoor humidity.
  • Use Ceiling Fans: Running ceiling fans on a low setting can help circulate air throughout rooms, preventing pockets of stagnant, moist air from forming near windows.
  • Ensure Furniture Placement Allows Airflow: Avoid placing large furniture directly against exterior walls or windows, as this can impede air circulation.
  • Consider a Whole-House Ventilation System: For tightly sealed modern homes, a Heat Recovery Ventilator (HRV) or Energy Recovery Ventilator (ERV) can provide continuous fresh air exchange while minimizing heat loss. HRVs transfer heat from the outgoing stale air to the incoming fresh air, while ERVs also transfer moisture.

Enhancing Window Insulation

Improving the thermal performance of your windows can prevent surfaces from getting cold enough for condensation to form.

  • Window Insulation Kits: For single-pane windows, temporary plastic film insulation kits can create an insulating air gap and significantly reduce condensation. These kits are inexpensive and relatively easy to install.
  • Storm Windows: Adding exterior storm windows provides an extra layer of insulation and protection against the elements.
  • Thermal Curtains or Blinds: Heavy, insulated curtains or cellular blinds can act as a barrier, keeping some of the room’s heat from reaching the cold glass surface. It’s important to open them during the day to allow air circulation.
  • Caulking and Weatherstripping: Seal any air leaks around window frames with caulk and weatherstripping. This prevents cold drafts from cooling the interior glass surface.
  • Upgrade Windows: The most effective long-term solution is to replace old, inefficient windows with modern, energy-efficient double or triple-pane windows. Look for windows with low-E coatings and gas fills (like argon or krypton) for optimal thermal performance. The National Fenestration Rating Council (NFRC) provides ratings for windows that help consumers compare their energy performance.

Assessing Your Windows: A Comparative Look

Understanding the type of windows you have can help you prioritize solutions. Different window constructions offer varying levels of insulation and susceptibility to condensation.

Window Types And Condensation Risk

Here’s a breakdown of common window types and their general susceptibility to condensation:

| Window Type | Description | Condensation Risk | Primary Causes of Condensation

Dual Flush Toilet Not Working

Dual Flush Toilet Not Working

A dual flush toilet offers an eco-friendly and water-saving solution for modern households. By providing two distinct flush options, a partial flush for liquid waste and a full flush for solid waste, these toilets can significantly reduce water consumption compared to older, single-flush models. However, like any mechanical device, they can encounter issues. When your dual flush toilet isn’t working as expected, it can range from a minor annoyance to a plumbing emergency. Understanding the common problems and their solutions is key to maintaining your toilet’s efficiency and preventing water waste and potential damage.

This comprehensive guide will walk you through the most frequent issues plaguing dual flush toilets, from a weak flush to a constantly running tank. We’ll explore the underlying causes, provide step-by-step troubleshooting advice, and explain when it’s time to call in a professional plumber.

Whether you’re dealing with a jammed flush button, a slow-filling tank, or a leak, by the end of this article, you’ll be equipped to diagnose and, in many cases, fix your dual flush toilet problems.

Key Takeaways

  • Common Dual Flush Problems: Issues often stem from the flush mechanism components within the tank, such as the flapper, fill valve, or flush button assembly.
  • Troubleshooting Steps: Most problems can be diagnosed by examining the internal tank components. Look for debris, worn-out seals, or misaligned parts.
  • Water Level is Crucial: The water level in the tank is critical for proper flushing. Too low, and the flush will be weak; too high, and the toilet may run continuously.
  • The Flapper Seal: A faulty flapper is a frequent culprit for a running toilet, preventing the tank from holding water.
  • Fill Valve Function: The fill valve controls water refilling and shut-off. If it’s not working correctly, it can lead to overfilling or insufficient refilling.
  • Flush Button Assembly: The buttons themselves can become clogged or detached, leading to flushing difficulties.
  • When to Call a Pro: For persistent leaks, cracked porcelain, or complex internal issues, professional plumbing assistance is recommended.
Dual Flush Toilet Not Working

Credit: www.youtube.com

Understanding Dual Flush Toilet Mechanics

Before diving into troubleshooting, it’s essential to grasp how a dual flush toilet operates. The core components are located within the toilet tank. When you press either the half-flush or full-flush button, it activates a flush valve assembly at the bottom of the tank. This valve lifts, allowing water to rush from the tank into the toilet bowl, creating the flushing action. Simultaneously, the fill valve (also known as a ballcock) is typically closed, preventing more water from entering the tank.

Once the tank is empty, the flush valve closes, and the fill valve opens, allowing fresh water to replenish the tank to its optimal level. A float mechanism, connected to the fill valve, rises with the water level and signals the fill valve to shut off once the correct level is reached. The water level is crucial; it must be set correctly to ensure sufficient siphonic action for a proper flush.

The dual flush mechanism usually involves a split button or lever system. One button/lever is designed to lift the flush valve only partially, releasing less water for liquid waste. The other is designed to lift it fully, releasing the entire tank’s contents for solid waste.

The difference lies in how far the flush valve is lifted or for how long it stays open, depending on the specific design.

Key Internal Components And Their Roles

  • Flush Valve: Located at the bottom of the tank, this is the main seal that holds back water until you flush. It consists of the valve seat and a flapper or a flush cup. When activated, it lifts to allow water to exit.
  • Flapper: A rubber or plastic seal that sits over the flush valve opening. It’s usually attached to the tank by chains or arms connected to the flush button mechanism. Its flexibility and seal are vital.
  • Fill Valve (Ballcock): This valve controls the refilling of the tank with fresh water after a flush and shuts off the water supply when the tank is full.
  • Float: Connected to the fill valve, this mechanism rises with the water level. It’s designed to trigger the fill valve to shut off when the water reaches the designated height. Floats can be a ball-type or a cup-type integrated into the fill valve.
  • Flush Button/Lever Assembly: This is the external mechanism you interact with. It connects to the flush valve via rods or chains and is designed to activate either the partial or full flush.
Dual Flush Toilet Not Working

Credit: orangecoastplumbing.net

Common Dual Flush Toilet Problems And Solutions

Many dual flush toilet issues can be traced back to one or more of these internal components. Identifying the specific symptom is the first step in diagnosing the problem.

Weak Flush Or Incomplete Bowl Clearing

A weak flush is one of the most common complaints. It means the toilet doesn’t clear the bowl effectively, often requiring a second flush, which defeats the water-saving purpose.

Low Water Level In The Tank

The most frequent cause of a weak flush is an insufficient water level in the tank. The water level needs to be high enough to create adequate pressure and siphonic action when released.

  • Diagnosis: Open the tank lid and observe the water level. It should typically be about 1/2 to 1 inch below the overflow tube. If it’s lower, the fill valve may not be set correctly, or the float might be malfunctioning.
  • Solution:
  • Adjust the Float: Most fill valves have an adjustment screw or clip that allows you to raise the float. Turn the screw clockwise or reposition the clip to raise the float’s position. Test the flush. If it’s still weak, adjust it slightly higher. Be careful not to set it so high that water enters the overflow tube.
  • Check the Fill Valve: If adjusting the float doesn’t help, the fill valve itself might be worn or clogged. Mineral deposits can impede its function. You might need to clean it or replace the entire fill valve assembly. Many modern fill valves have a specific adjustment dial for water height.

Partially Obstructed Flush Valve

Debris, mineral buildup, or a misaligned flapper can prevent the flush valve from opening fully or sealing properly.

  • Diagnosis: Inspect the flush valve opening at the bottom of the tank. Ensure there are no obstructions. Check if the flapper is seated correctly and not hindered by its chains or arms.
  • Solution:
  • Clean the Flush Valve: Turn off the water supply, flush the toilet to empty the tank, and then use a sponge or cloth to clean around the flush valve opening and the flapper.
  • Check Flapper Alignment: Ensure the flapper is not warped and its chains are not tangled or too short/long. The chains should have a slight slack, allowing the flapper to lift freely but close completely.

Clogged Rim Jets Or Siphon Jet

The toilet bowl has small holes (rim jets) around the rim and a larger siphon jet at the bottom that help direct water flow and initiate the siphon. If these are clogged, the flush will be weak.

  • Diagnosis: Inspect the rim jets for visible blockages. The siphon jet is harder to see directly.
  • Solution:
  • Clean Rim Jets: Use a small wire, a straightened coat hanger, or a stiff brush to dislodge any mineral deposits or debris from the rim jets. You can also use a vinegar soak for stubborn buildup.
  • Vinegar Soak: Pour a cup or two of white vinegar into the overflow tube, allowing it to flow into the rim jets. Let it sit for several hours or overnight, then flush. For the siphon jet, you might need to use a wire to probe the opening if accessible.

Dual Flush Button Mechanism Issue

If only one of the flush buttons is providing a weak flush, the issue might be with that specific button’s activation rod or chain.

  • Diagnosis: Observe the flush button mechanism when you press the weak flush button. Does the rod or chain move correctly? Does it lift the flush valve sufficiently?
  • Solution:
  • Adjust Rod/Chain Length: Most dual flush mechanisms have adjustable rods or chains. Try adjusting the length to ensure the flush valve lifts higher or for longer. If it’s a chain, try re-hooking it to a different link.
  • Check for Damage: Inspect the button assembly and its connecting parts for cracks or wear.

Toilet Runs Continuously

A toilet that constantly runs is not only annoying due to the sound but also a significant waste of water. This usually indicates a problem with the tank holding water.

Faulty Flapper Seal

The flapper is responsible for sealing the flush valve opening to keep water in the tank. If it’s worn, warped, or not seating properly, water will continuously leak into the bowl.

  • Diagnosis: Listen for the sound of running water. If you can hear it, open the tank lid. You’ll likely see water flowing from the tank into the overflow tube. The flapper might appear worn, cracked, or have debris stuck to it.
  • Solution:
  • Clean the Flapper: First, try cleaning the flapper and the valve seat it rests on. Sometimes, a small piece of debris can prevent a good seal.
  • Replace the Flapper: If cleaning doesn’t work, the flapper is likely worn out and needs replacement. Flappers are inexpensive and relatively easy to replace. Ensure you purchase a flapper compatible with your toilet model or a universal one. Turn off the water, flush to empty the tank, detach the old flapper (usually by unhooking its chain and sliding it off its posts), and install the new one.

Incorrect Water Level (too High)

If the water level in the tank is set too high, it will constantly spill into the overflow tube, creating the illusion of a running toilet.

  • Diagnosis: Open the tank lid and check the water level. If it’s above the top of the overflow tube, this is the likely cause.
  • Solution:
  • Lower the Float: Adjust the fill valve float downwards. Turn the adjustment screw counter-clockwise or reposition the float mechanism so that the fill valve shuts off the water at a level below the overflow tube, typically 1/2 to 1 inch from the top.

Malfunctioning Fill Valve

The fill valve is supposed to shut off the water supply once the tank is full. If it fails to do so, the toilet will run continuously.

  • Diagnosis: Observe the fill valve. If the water continues to run into the overflow tube even after the tank should be full, the fill valve is likely the issue.
  • Solution:
  • Clean the Fill Valve: Sometimes, mineral deposits can clog the fill valve mechanism. You can try disassembling and cleaning it according to the manufacturer’s instructions.
  • Replace the Fill Valve: If cleaning doesn’t resolve the issue, the fill valve needs to be replaced. This is a common DIY repair. Turn off the water supply, disconnect the water line, remove the old fill valve (usually held by a lock nut under the tank), install the new one, reconnect the water line, and turn the water back on.

Toilet Fills Slowly

A toilet that takes a long time to refill after flushing can be frustrating. This usually points to a problem with the fill valve or the water supply.

Partially Closed Water Supply Valve

The shut-off valve for the toilet, usually located on the wall behind the toilet, might not be fully open.

  • Diagnosis: Check the handle on the shut-off valve. Ensure it’s turned completely counter-clockwise (for most standard valves) to allow maximum water flow.
  • Solution: Open the valve fully.

Clogged Fill Valve Or Inlet Screen

Mineral deposits or sediment can clog the fill valve’s inlet or the small screen often found where the water supply line connects to the fill valve.

  • Diagnosis: Disconnect the water supply line from the fill valve. Inspect the valve inlet and the screen for debris or buildup.
  • Solution:
  • Clean the Screen: If a screen is present, carefully remove it and rinse it under running water.
  • Clean the Fill Valve: If the valve itself appears clogged, you may need to disassemble it (following manufacturer instructions) and clean out any sediment. If it’s heavily clogged, replacement might be more efficient.

Worn-out Fill Valve

Over time, the internal seals and mechanisms of a fill valve can wear out, reducing its efficiency and flow rate.

  • Diagnosis: If cleaning and checking the supply valve don’t improve the fill rate, the fill valve itself is likely the culprit.
  • Solution: Replace the fill valve. This is a standard plumbing repair that can often be done by a homeowner.

Dual Flush Buttons Stuck Or Not Working

The external flush buttons are the most visible part of the dual flush system. When they don’t work, it can be due to several reasons.

Debris Or Mineral Buildup

The buttons can become clogged with dust, hard water deposits, or other grime, preventing them from being pressed or returning to their original position.

  • Diagnosis: Examine the buttons. Do they feel sticky or loose? Is there visible buildup around them?
  • Solution:
  • Clean Around Buttons: Use a damp cloth and a mild cleaner (like diluted vinegar or soap) to clean around the buttons. A small brush can help dislodge debris from crevices.
  • Access and Clean Internally: For more stubborn clogs, you might need to disassemble the button assembly. This usually involves unscrewing a retaining nut from inside the tank. Once accessed, clean the button stems and the housing.

Detached Or Broken Linkage

The rods or chains connecting the buttons to the flush valve mechanism can become detached, bent, or broken.

  • Diagnosis: Open the tank lid and observe the linkage when you press the button. Does it move the flush valve actuator? Is anything bent or disconnected?
  • Solution:
  • Reattach Linkage: If a rod or chain has simply popped off, reattach it. Ensure it’s securely connected.
  • Adjust or Straighten: If a rod is bent, try to gently straighten it. If a chain is too long or short, adjust its connection point.
  • Replace Damaged Parts: If any part of the linkage is broken, it will need to be replaced.

Internal Flush Valve Issues

Sometimes, the buttons work fine, but the flush valve itself is stuck or malfunctioning, preventing the flush from occurring.

  • Diagnosis: Press the button and observe the flush valve mechanism. Does it attempt to lift? Is it obstructed?
  • Solution: This often points back to issues with the flush valve or flapper, as discussed in the “Weak Flush” section. Ensure the flush valve is clean and the flapper is not stuck.

Leaks From The Tank

Leaks can occur from various points in the toilet tank system. Identifying the source is key to fixing it.

Cracked Tank Or Bowl

While less common, the porcelain of the tank or bowl can develop cracks, leading to leaks.

  • Diagnosis: Visually inspect the entire exterior of the tank and bowl for any signs of cracks. Leaks from cracks in the tank might drip down the outside of the toilet.
  • Solution: A cracked tank or bowl usually requires replacement of the entire toilet unit. Minor cracks might be temporarily sealed with epoxy, but this is rarely a permanent solution.

Loose Tank-to-bowl Connection

The bolts that secure the tank to the bowl can loosen over time, causing water to leak from the seam between them.

  • Diagnosis: Look for water seeping from where the tank meets the bowl.
  • Solution:
  • Tighten Bolts: Carefully tighten the nuts on the tank bolts from underneath the bowl. Do not overtighten, as this can crack the porcelain.
  • Replace Gasket: If tightening doesn’t stop the leak, the spud washer (the large gasket between the tank and bowl) may be worn or damaged and needs replacement. This involves unbolting the tank completely.

Worn Inlet/outlet Gaskets

Gaskets around the fill valve inlet or the flush valve outlet can degrade over time, causing leaks.

  • Diagnosis: Inspect the areas where water enters and exits the tank mechanism.
  • Solution: Replace the worn gaskets. This may involve removing the fill valve or the flush valve assembly.

Troubleshooting Table: Common Dual Flush Toilet Issues

To help you quickly identify and address problems, here’s a table summarizing common issues and their likely causes and solutions.

Symptom Likely Cause(s) Primary Solution(s)
Weak Flush / Incomplete Bowl Clearing Low water level in tank Adjust float to raise water level
Weak Flush / Incomplete Bowl Clearing Obstructed flush valve or worn flapper Clean flush valve; check/replace flapper
Weak Flush / Incomplete Bowl Clearing Clogged rim jets or siphon jet Clean jets with wire or vinegar
Toilet Runs Continuously Faulty flapper seal Clean or replace flapper
Toilet Runs Continuously Water level too high (entering overflow tube) Adjust float to lower water level
Toilet Runs Continuously Malfunctioning fill valve Clean or replace fill valve
Toilet Fills Slowly Partially closed water supply valve Open water supply valve fully
Toilet Fills Slowly Clogged fill valve inlet or screen Clean inlet screen or fill valve
Toilet Fills Slowly Worn-out fill valve Replace fill valve
Flush Buttons Stuck/Not Working Debris/mineral buildup around buttons Clean buttons and housing
Flush Buttons Stuck/Not Working Detached or broken linkage Reattach, adjust, or replace linkage
Leaks from Tank Loose tank-to-bowl bolts Tighten bolts; replace gasket if needed
Leaks from Tank Cracked tank Replace tank or toilet
Leaks from Tank Worn inlet/outlet gaskets Replace gaskets
Dual Flush Toilet Not Working

Credit: www.youtube.com

When To Call A Professional Plumber

While many dual flush toilet issues are manageable DIY repairs, some situations warrant professional expertise. Attempting complex repairs without proper knowledge can lead to further damage or water waste.

Persistent Leaks Despite Troubleshooting

If you’ve tried replacing the flapper, adjusting the fill valve, and checking all visible seals, but the toilet continues to leak, there might be an underlying issue that requires professional diagnosis. This could include a hairline crack in the tank or bowl that’s difficult to spot, or a problem with the internal pipework connected to the toilet.

Cracked Porcelain

A cracked toilet tank or bowl is a serious issue. While temporary fixes with epoxy might be possible for very minor cracks, they are rarely reliable long-term. A crack compromises the structural integrity of the toilet and will likely lead to significant leaks.

A plumber can assess the damage and recommend the best course of action, which often involves replacing the entire unit.

Major Water Damage Concerns

If you suspect a leak has been ongoing for some time and has caused significant water damage to your flooring, subflooring, or surrounding walls, it’s crucial to involve a plumber immediately. They can not only fix the toilet but also help identify the extent of the damage and advise on necessary repairs to prevent mold growth and further structural issues.

Complex Internal Mechanism Issues

Some high-end or older dual flush toilets may have more intricate flushing mechanisms that are not easily understood or repaired by the average homeowner. If you’re unsure about how to disassemble or reassemble these parts, or if the problem seems beyond simple component replacement, a plumber’s expertise is invaluable.

They have the specialized tools and knowledge to handle such complexities.

Preventative Maintenance For Your Dual Flush Toilet

Regular maintenance can help prevent many common dual flush toilet problems and extend the lifespan of your fixtures.

Regular Cleaning

Pro Tip: Clean your toilet tank at least once or twice a year. Mineral deposits and sediment can build up inside, affecting the performance of the fill valve and flush valve. Use a mild cleaner and a brush to scrub the inside of the tank, paying attention to the valve seats and the float mechanism. Avoid harsh chemicals that can damage rubber seals.

Inspect Components Periodically

Take a moment to open the tank lid every few months and visually inspect the components. Look for:

  • Worn Flapper: Check for cracks, stiffness, or signs of degradation.
  • Fill Valve Operation: Ensure the float moves freely and the valve shuts off water cleanly.

*

Pressure Washer Wont Start Running Gas

Pressure Washer Wont Start Running Gas

A powerful gas pressure washer is an invaluable tool for tackling tough cleaning jobs, from stripping old paint to degreasing driveways. However, when this reliable workhorse refuses to start running, it can be a source of immense frustration. The symphony of a sputtering engine or the ominous silence can leave you stranded mid-project.

Understanding the common culprits behind a gas pressure washer’s failure to start is the first step towards getting it back to full power.

This comprehensive guide will walk you through the most frequent reasons why your gas pressure washer won’t start running, offering systematic troubleshooting steps and practical solutions. We’ll cover everything from basic fuel and ignition issues to more complex mechanical problems, equipping you with the knowledge to diagnose and, in many cases, fix the issue yourself, saving you time and money on professional repairs.

Key Takeaways

  • Fuel System Issues: Stale fuel, clogged fuel lines, or a dirty carburetor are primary reasons for a pressure washer not starting.
  • Ignition Problems: A faulty spark plug, loose ignition coil, or a safety switch malfunction can prevent the engine from firing.
  • Airflow Obstructions: A blocked air filter or a dirty engine intake can starve the engine of the necessary air for combustion.
  • Water/Pump Issues: While less common for starting, water in the pump or a seized pump can sometimes prevent the engine from turning over.
  • Safety Features: Ensure all safety interlocks and low-oil sensors are correctly engaged and functional.
  • Maintenance is Key: Regular cleaning of the air filter, fuel system, and spark plug can prevent many starting problems.

Troubleshooting The Fuel System

The fuel system is arguably the most common area to investigate when a gas pressure washer won’t start. For an internal combustion engine to run, it needs a precise mixture of fuel and air. If either of these components is compromised, the engine will struggle or fail to ignite.

Stale Or Contaminated Fuel

Gasoline, especially ethanol-blended fuel, degrades over time. After just a month or two of sitting, it can lose its octane rating and develop gummy deposits. This stale fuel can clog fuel lines, the carburetor’s jets, and the fuel filter, preventing the engine from receiving a clean, combustible mixture.

Pro Tip: Always use fresh gasoline, ideally purchased within the last 30 days. If your pressure washer has been stored for an extended period, drain the old fuel from the tank and carburetor bowl and replace it with fresh fuel. For longer storage, using a fuel stabilizer is highly recommended.

Contamination is another fuel-related issue. Water, dirt, or debris in the fuel tank can wreak havoc on the fuel system. This can happen if the fuel cap is left off, if the fuel itself was contaminated at the pump, or if moisture has condensed in the tank during storage.

Clogged Fuel Lines And Filter

The fuel lines carry gasoline from the tank to the carburetor. Over time, especially with stale fuel, these lines can become blocked by varnish or debris. Similarly, the in-line fuel filter, if equipped, acts as a first line of defense against contaminants. If this filter becomes clogged, fuel flow to the carburetor will be significantly restricted or stopped altogether.

To check and clean these components:

  • Locate the fuel filter: It’s usually a small, inline component between the fuel tank and the carburetor.
  • Drain the fuel: If necessary, drain the fuel tank to prevent spillage.
  • Disconnect fuel lines: Carefully detach the fuel lines from the filter and the carburetor. Have a rag ready for any residual fuel.
  • Inspect the filter: If the filter is visibly dirty or clogged, replace it. They are inexpensive and readily available.
  • Clean or replace fuel lines: If the lines appear gummy or blocked, they may need to be flushed with a carburetor cleaner or replaced.

Carburetor Issues

The carburetor is the heart of the fuel delivery system, responsible for mixing fuel and air in the correct proportions for combustion. It’s a complex component with tiny jets and passages that are easily clogged by even small amounts of debris or fuel varnish. A dirty or malfunctioning carburetor is a very common reason for a gas pressure washer not starting.

Symptoms of a dirty carburetor include:

  • The engine cranks but won’t start.
  • The engine starts but runs rough or stalls.
  • Difficulty starting after sitting for a while.

Troubleshooting and cleaning the carburetor can be challenging for beginners. It often involves disassembling the carburetor, cleaning its jets with a fine wire or compressed air, and reassembling it. If you’re not comfortable with this, seeking professional help or replacing the carburetor might be a better option.

Many pressure washer manufacturers offer specific carburetor cleaning kits or replacement parts.

Fuel Petcock Valve

Some pressure washers have a fuel petcock valve that acts as a shut-off switch for the fuel supply. If this valve is closed or partially blocked, it will prevent fuel from reaching the carburetor. Ensure the valve is in the “ON” or “OPEN” position. If it has a filter screen, this screen can also become clogged and require cleaning.

Pressure Washer Wont Start Running Gas

Credit: www.youtube.com

Diagnosing Ignition System Faults

Even with a perfect fuel supply, the engine won’t ignite without a strong spark. The ignition system is responsible for generating and delivering this spark at the precise moment needed for combustion.

Faulty Spark Plug

The spark plug is a small but critical component. It creates the electrical spark that ignites the fuel-air mixture in the cylinder. Over time, spark plugs can become fouled with carbon deposits, oil, or fuel, or the electrode gap can widen, leading to a weak or non-existent spark.

Troubleshooting the spark plug:

  • Locate the spark plug: It’s typically a ceramic-insulated component connected to a spark plug wire.
  • Remove the spark plug: Use a spark plug wrench to carefully unscrew it.
  • Inspect the plug: Look for signs of fouling (black, oily deposits), damage to the ceramic insulator, or wear on the electrodes.
  • Clean or replace: If fouled, you can try cleaning it with a wire brush and carburetor cleaner. However, replacing a spark plug is inexpensive and often the most reliable solution. Ensure you purchase the correct type of spark plug for your pressure washer model.
  • Check the gap: Use a feeler gauge to ensure the electrode gap is set to the manufacturer’s specifications.

Weak Spark Or No Spark

If cleaning or replacing the spark plug doesn’t resolve the issue, the problem might lie with the ignition coil or the spark plug wire. The ignition coil transforms the low voltage from the engine’s alternator into the high voltage needed to jump the spark plug gap. A faulty coil or a damaged spark plug wire (which can short out or be broken internally) will result in a weak or absent spark.

To test for spark:

  • Remove the spark plug and reconnect it to the spark plug wire.
  • Ground the spark plug: Hold the metal body of the spark plug firmly against a clean, unpainted metal part of the engine block. Ensure your hand is insulated from the engine block.
  • Attempt to start the engine: Pull the starter cord or engage the starter motor.
  • Observe for a spark: You should see a strong, blue spark jump across the spark plug gap. A weak, yellow spark or no spark at all indicates an ignition system problem.

If there’s no spark, you may need to test the ignition coil’s resistance with a multimeter or consult your pressure washer’s manual for specific ignition system diagnostic procedures. In many cases, replacing the ignition coil or spark plug wire will be necessary.

Safety Switches And Interlocks

Modern pressure washers are equipped with various safety switches to prevent accidental operation. These can include:

  • Trigger lock: Prevents the trigger from being squeezed unintentionally.
  • Low-oil sensor: Many engines have a sensor that automatically shuts off the engine if the oil level is too low. If this sensor malfunctions or the oil is indeed low, the engine may refuse to start.
  • Tip-over switch: Some units have a switch that cuts the engine if the machine is tilted excessively.

Ensure that all these safety features are correctly engaged and that the oil level is adequate. A faulty low-oil sensor, even with sufficient oil, can prevent startup. Consult your owner’s manual to locate and understand the function of these safety mechanisms.

Pressure Washer Wont Start Running Gas

Credit: www.youtube.com

Airflow And Engine Performance Issues

An internal combustion engine needs a steady supply of air to mix with fuel. If the engine is starved of air, it won’t run properly, and often, it won’t start at all.

Clogged Air Filter

The air filter protects the engine from dirt and debris that could otherwise enter the combustion chamber and cause significant damage. However, over time, the air filter itself can become clogged with dust, dirt, and oil. A severely blocked air filter restricts airflow, leading to a rich fuel-air mixture and difficulty starting.

Checking and cleaning the air filter:

  • Locate the air filter housing: This is usually a plastic cover on the side of the engine.
  • Remove the filter: Unscrew or unclip the cover and carefully remove the air filter element.
  • Inspect the filter: Hold it up to a light source. If you can’t see light through it, it’s likely clogged.
  • Clean or replace: Paper filters can often be replaced. Foam filters can typically be washed with soap and water, dried thoroughly, and then lightly oiled with clean engine oil before reinstallation. Always refer to your owner’s manual for specific cleaning instructions.

Dirty Engine Intake Or Carburetor Air Horn

Beyond the main air filter, the engine’s intake port and the carburetor’s air horn can also accumulate debris. If these areas are blocked, it further restricts the air supply to the engine, exacerbating starting problems. A visual inspection and gentle cleaning with a brush or compressed air can often resolve this.

Choke Operation

Most gas pressure washers have a choke mechanism. The choke restricts airflow into the carburetor, creating a richer fuel-air mixture that is necessary for starting a cold engine. If the choke is stuck in the “open” position, it may be difficult to start a cold engine. Conversely, if it’s stuck in the “closed” position, it can lead to flooding and prevent starting once the engine is warm.

Ensure the choke lever moves freely and returns to its correct position. Check for any obstructions or ice buildup in cold, damp conditions.

Pressure Washer Wont Start Running Gas

Credit: www.mitm.com

Water And Pump-related Problems

While primarily responsible for delivering pressurized water, the pump and its associated water lines can sometimes indirectly affect the engine’s ability to start.

Water In The Pump Or Lines

If the pressure washer has been stored in freezing temperatures without being properly winterized, water left in the pump or hoses can freeze and expand, potentially causing damage. While this usually manifests as a damaged pump, in some rare cases, a severely obstructed water path might create enough backpressure to make it harder for the engine to turn over.

Seized Pump

A seized pump occurs when the internal components of the pump become locked up due to corrosion, lack of lubrication, or damage. If the pump is seized, it will create a significant load on the engine, making it very difficult or impossible for the engine to rotate and start.

How to check for a seized pump:

  • Disconnect the water source: Ensure no water is connected to the inlet.
  • Disconnect the high-pressure hose: This removes the load from the pump’s outlet.
  • Attempt to manually rotate the pump shaft: You might be able to do this with a wrench on the shaft nut or by gently trying to turn the engine’s crankshaft (if accessible). If the pump shaft is completely locked and won’t turn even with the high-pressure hose removed, the pump may be seized.

A seized pump usually requires professional repair or replacement.

Water Pressure Issues

While not a direct cause of an engine failing to start, issues with water supply can sometimes be confused with engine problems. Ensure you have adequate water flow to the inlet. A kinked or blocked inlet hose will prevent water from reaching the pump, and while the engine might start, you won’t get any output, leading to a perception of a problem.

Engine Internal Issues

Less common, but still possible, are issues originating from within the engine itself. These typically require more advanced mechanical knowledge to diagnose and repair.

Low Oil Level Or Faulty Sensor

As mentioned under safety features, many engines have a low-oil shutdown sensor. If the oil level is critically low, the engine will not start. Always check the oil level according to your owner’s manual before attempting to start the pressure washer. If the oil level is correct, the sensor itself might be faulty, preventing startup.

Stuck Piston Or Valves

In rare cases, the engine’s piston might seize in the cylinder due to overheating or lack of lubrication, or valves might become stuck. This would prevent the engine from turning over at all. This is a serious internal engine problem that usually requires complete engine disassembly and repair.

Compression Issues

An engine needs adequate compression to ignite the fuel-air mixture. Worn piston rings, damaged cylinder walls, or blown head gaskets can lead to a loss of compression, making it impossible for the engine to start. Compression can be tested with a specialized gauge, a task usually performed by a professional mechanic.

Practical Examples And Case Studies

Let’s look at a couple of common scenarios illustrating these troubleshooting steps.

Case Study 1: The “Forgotten Fuel” Problem

Sarah hadn’t used her pressure washer since the previous summer. When she tried to start it for spring cleaning, it sputtered for a second and then died. She checked the spark plug, which looked okay, and the air filter, which was clean. Frustrated, she was about to call for service when she remembered the fuel. She drained the old gas, which smelled stale and varnish-like, replaced it with fresh fuel, and the pressure washer started up perfectly on the first pull. This is a classic example of stale fuel causing starting issues.

Case Study 2: The “Low Oil” Scare

Mark was preparing to clean his deck when his brand-new pressure washer refused to start. He pulled the cord several times, but nothing happened. He double-checked the fuel and the spark plug, finding them to be in good condition. He was about to pack it up when he noticed a small, red indicator light on the engine. Consulting the manual, he discovered it was a low-oil warning light. Though the machine was new, the oil level had been slightly low from the factory. Adding the recommended type and amount of oil allowed the engine to start immediately.

Maintenance For Prevention

The best way to avoid a gas pressure washer not starting is through regular preventative maintenance. This not only ensures your machine is ready when you need it but also extends its lifespan.

Regular Cleaning

  • Air Filter: Clean or replace the air filter at recommended intervals, or more often if operating in dusty conditions. A clean air filter ensures optimal airflow for combustion.
  • Spark Plug: Inspect the spark plug annually. Clean or replace it as needed. A fouled spark plug is a common cause of misfires and no-starts.
  • Fuel System: If storing the pressure washer for more than a month, either run the engine dry of fuel or use a fuel stabilizer. Periodically drain and clean the carburetor bowl to remove any accumulated sediment.

Proper Storage

  • Fuel Management: For long-term storage (over 3 months), it’s best to drain the fuel tank and run the engine until it stops from lack of fuel. This prevents fuel from degrading and gumming up the carburetor. Alternatively, use a quality fuel stabilizer.
  • Winterization: If you live in a climate where freezing temperatures are common, ensure your pressure washer is properly winterized. This involves draining all water from the pump and hoses to prevent damage from ice expansion. Many manuals provide specific winterization instructions.

Fluid Checks

  • Oil Levels: Always check the engine oil and pump oil (if applicable) levels before each use. Low oil can trigger safety shutoffs or lead to engine damage.

When To Call A Professional

While many starting issues can be resolved with basic troubleshooting, some problems are best left to experienced technicians. If you’ve gone through the common checks and your pressure washer still won’t start, or if you encounter a problem that requires advanced mechanical knowledge (like internal engine repairs or complex carburetor diagnostics), it’s time to seek professional help.

Trying to fix complex issues without the right expertise can sometimes lead to further damage and more expensive repairs.

Frequently Asked Questions

Why Does My Pressure Washer Start But Then Immediately Die?

This is often a sign of a fuel delivery problem or an air-fuel mixture issue. The engine might be getting just enough fuel to start briefly, but not enough to sustain operation. Check for a partially clogged fuel filter, a dirty carburetor, or a faulty fuel pump (if equipped). Ensure the choke is operating correctly; if it’s stuck open, a cold engine may stall. Also, verify the low-oil sensor isn’t malfunctioning, as this can cause an immediate shutdown.

Can I Use Starting Fluid To Get My Pressure Washer Running?

Starting fluid (ether) is highly flammable and can be used as a last resort to help diagnose if the problem is purely fuel-related. If the engine starts and runs for a few seconds when sprayed into the air intake, it strongly suggests a fuel delivery issue (stale fuel, clogged carburetor, etc.). However, do not use starting fluid regularly as it lacks lubrication and can damage engine components over time. It’s a diagnostic tool, not a permanent solution.

How Often Should I Clean My Pressure Washer’s Air Filter?

The frequency of air filter cleaning or replacement depends heavily on your operating environment. If you use your pressure washer in dusty or dirty conditions, you might need to check and clean the filter after every few uses. For lighter use in cleaner environments, checking it monthly or at the start of each season is usually sufficient. Always refer to your owner’s manual for the manufacturer’s specific recommendations. A clogged air filter is one of the most common reasons for a gas pressure washer won’t start running.

My Pressure Washer’s Engine Is Flooded. What Does That Mean And How Do I Fix It?

A flooded engine means there’s too much fuel in the combustion chamber, preventing ignition. This often happens if the choke is left on for too long, or if you’ve tried starting the engine multiple times without it firing. To fix it, turn off the choke, move the throttle to the “fast” position (if adjustable), and pull the starter cord vigorously 5-10 times. This helps clear out excess fuel. You can also remove the spark plug, crank the engine to help evaporate fuel, and then reinstall the spark plug.

Is It Worth Repairing An Old Pressure Washer, Or Should I Buy A New One?

The decision to repair or replace depends on several factors: the cost of the repair versus the cost of a new unit, the age and overall condition of the pressure washer, and the availability of parts. If the repair involves major engine work or a new pump, it might be more economical to invest in a new, more efficient model. However, for simpler fixes like replacing a spark plug, air filter, or fuel line, repairing an older, reliable machine is often a cost-effective choice.

When your gas pressure washer refuses to start, it can be a perplexing issue. By systematically working through potential problems related to fuel, ignition, and airflow, you can often pinpoint the cause yourself. Remember that consistent maintenance, including using fresh fuel, cleaning filters, and checking spark plugs, is your best defense against unexpected downtime.

With a bit of patience and the right approach, you can get your pressure washer back in action and ready to tackle those cleaning tasks.