
Staining balsa wood requires a gentle touch and specific preparation because this extremely porous, lightweight material absorbs liquids much faster than traditional hardwoods like oak or maple. Achieving a professional finish on balsa involves controlling the absorption rate through pre-treatment, selecting the right type of stain, and applying the product with precision to prevent blotching or uneven saturation.
Key Takeaways
- Balsa wood is highly absorbent, requiring a wood conditioner or sealer to prevent dark, uneven spots.
- Water-based stains are generally safer and easier to clean, while oil-based stains offer deeper penetration.
- Always sand the surface thoroughly with fine-grit sandpaper before applying any liquid colorant.
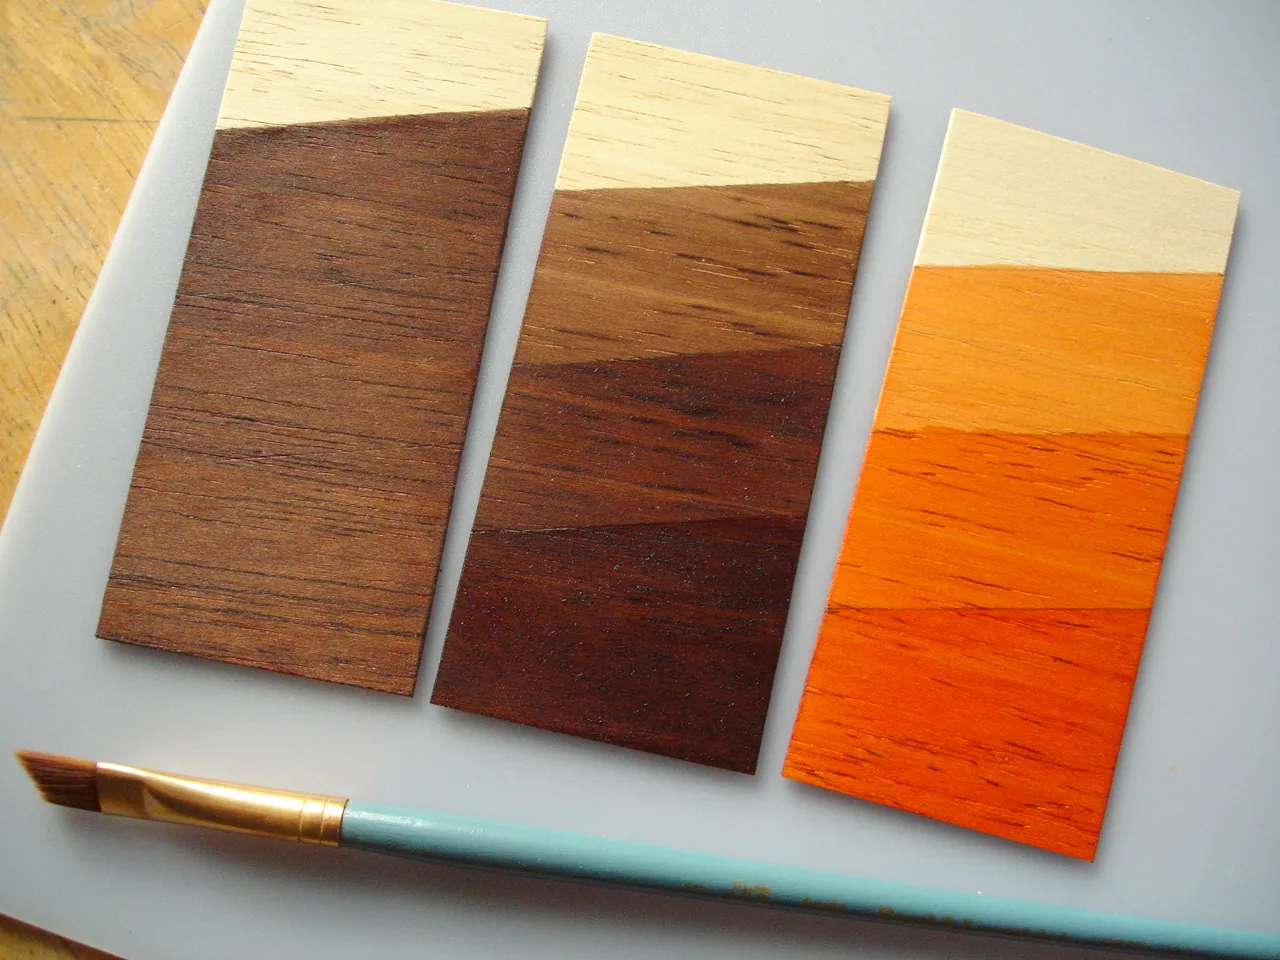
- Test your chosen stain on a scrap piece of balsa from the same batch to ensure color accuracy.
- Apply multiple thin coats rather than one heavy application to maintain control over the final shade.
Understanding Balsa Wood Characteristics
Balsa is a tropical hardwood, yet it functions more like a sponge due to its low density and open-cell structure. When you apply liquid stain directly to raw balsa, the wood fibers pull the pigment into the grain instantly, often resulting in a muddy or overly dark appearance. Understanding how this material interacts with liquids is the first step toward a clean, professional finish.
Wood porosity is the primary challenge here. Because the cells are large and loosely packed, the stain travels deep into the wood instantly. Unlike denser woods that allow for a “wipe-on, wipe-off” method, balsa will hold onto everything it touches. To manage this, you must adjust your expectations regarding drying times and color intensity. The wood will look significantly darker when wet than it will once it has fully cured.
Necessary Tools and Materials
To achieve a consistent result, gather your supplies before beginning the project. Using the correct tools prevents common mistakes like fiber tearing or uneven absorption.
- Fine-grit sandpaper: 220, 320, and 400 grit.
- Wood conditioner: Pre-stain sealer designed for softwoods.
- Applicators: Lint-free cotton rags, foam brushes, or high-quality soft-bristle brushes.
- Protective gear: Nitrile gloves and a well-ventilated workspace.
- Stain types: Water-based, oil-based, or gel stains.
Surface preparation is non-negotiable when working with balsa. Because the wood is soft, it bruises easily. Use a light touch when sanding to avoid creating depressions that will show up as dark, concentrated spots once the stain is applied.
How to Stain Balsa Wood Properly
The process of staining balsa requires patience and a systematic approach. Follow these steps to ensure the best possible outcome for your model or craft project.
Step 1: Sanding the Surface
Start with 220-grit sandpaper to remove any manufacturing marks or surface imperfections. Move to 320-grit for a final smoothing. Always sand in the direction of the grain. If you sand across the grain, you’ll create scratches that become highly visible once the stain highlights them.
Step 2: Applying Pre-Stain Conditioner
This is the most critical step for balsa. Apply a thin layer of wood conditioner or a 50/50 mix of shellac and denatured alcohol. This seals the largest pores, allowing the stain to sit on the surface more evenly. Allow the conditioner to dry for at least 30 minutes before proceeding to the next step.
Step 3: Testing the Color
Never apply stain to your finished piece without testing it first. Use a scrap piece of balsa from the same supplier. Apply the stain, wait for the recommended time, and wipe away the excess. If the color is too light, apply a second coat. If it’s too dark, dilute your stain or use a pre-stain conditioner more aggressively.
Step 4: The Application Process
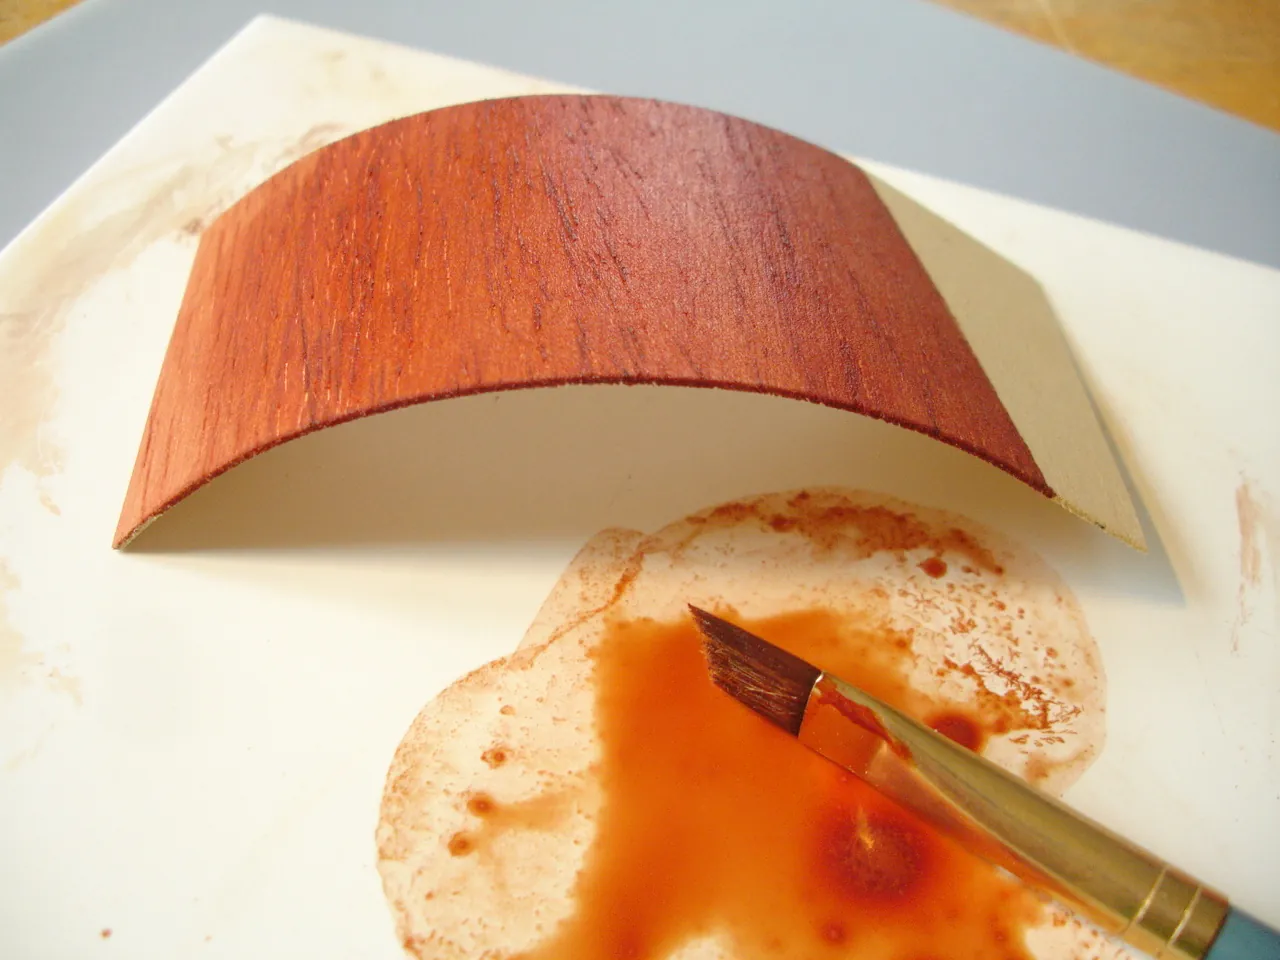
Apply the stain using a foam brush or a lint-free cloth. Work in small sections to keep the edges wet. Don’t let the stain pool in any areas. After one to three minutes, wipe off the excess with a clean, dry cloth. Always wipe with the grain.
Comparing Stain Types for Balsa
Selecting the right medium depends on the desired look and the intended use of the balsa object.
| Stain Type | Pros | Cons | Best For |
|---|---|---|---|
| Water-Based | Fast drying, low odor | Can raise grain fibers | Light, natural finishes |
| Oil-Based | Deep penetration, rich color | Longer dry time, VOCs | Darker, traditional tones |
| Gel Stain | Won’t drip, less absorption | Can look like paint | Intricate, carved details |
Consistent results rely on your ability to monitor the absorption rate. If you’re staining a model airplane or a delicate craft, oil-based stains may add unnecessary weight compared to water-based alternatives. Always consider the final weight of the object if you’re building something that needs to remain lightweight.
Addressing Common Staining Problems
Even with careful planning, issues can arise. Understanding how to fix them will save your project.
Blotchy or Uneven Color
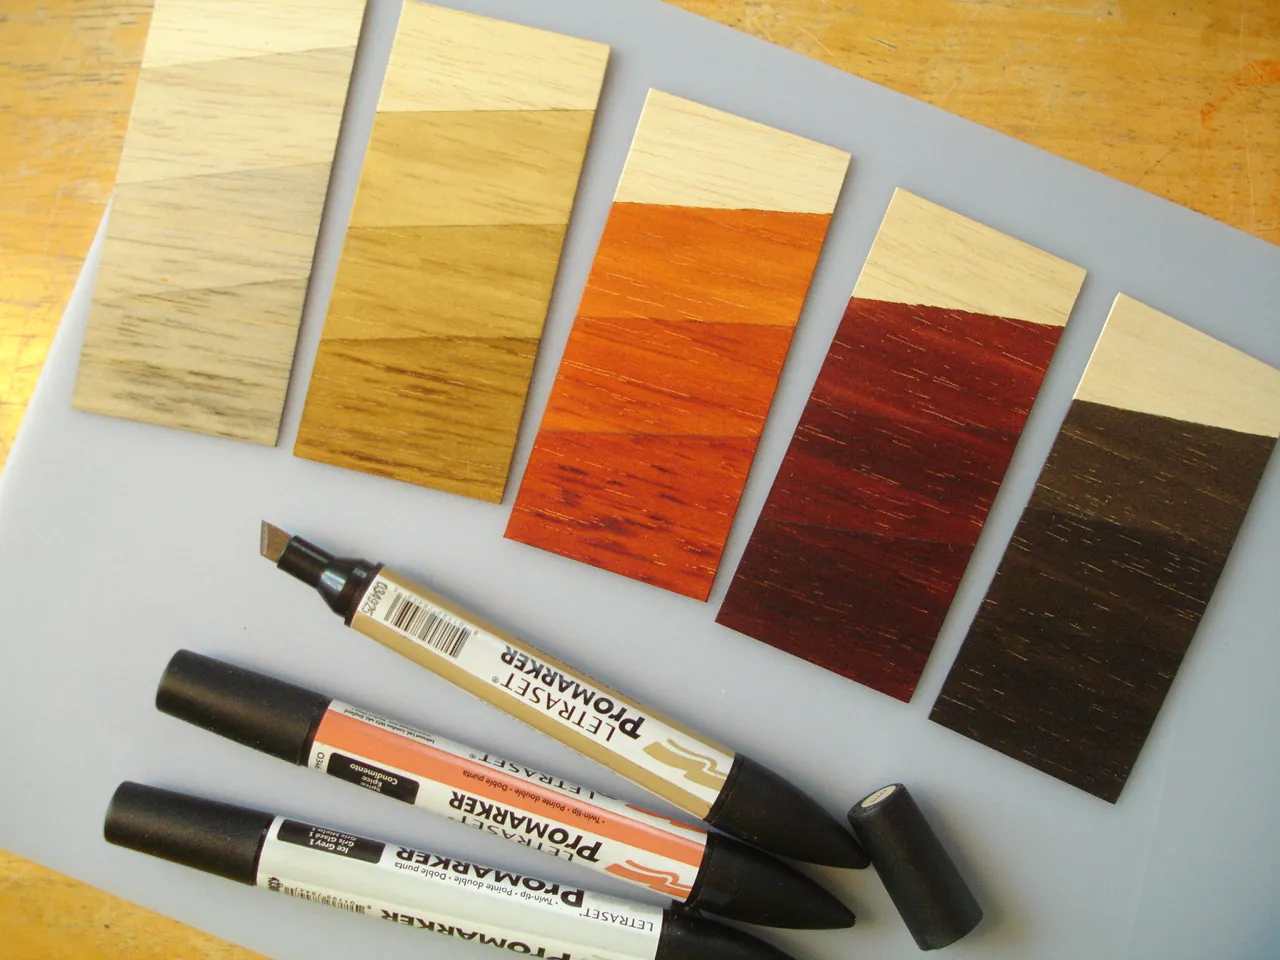
This usually happens because the wood wasn’t properly conditioned. If the finish is blotchy, you can try to even it out by applying a very light wash of stain, but often the best solution is to lightly sand the area and re-apply conditioner.
Excessive Darkening
If the wood turns black or dark brown, you have likely left the stain on too long. You can attempt to lighten the wood by wiping it with a cloth dampened with mineral spirits (for oil-based stains) or water (for water-based stains). Excessive saturation is difficult to reverse, so always start with a lighter hand.
Raising the Grain
Water-based products can cause the wood fibers to stand up, creating a fuzzy texture. If this happens, wait for the stain to dry completely and then lightly sand the surface with 400-grit sandpaper to smooth out the grain before applying a final clear coat.
Selecting the Right Finishes
Once the stain has dried for at least 24 hours, you should seal the wood to protect the color and prevent moisture damage.
- Polyurethane: Provides a durable, hard shell.
- Lacquer: Dries quickly and gives a high-gloss finish.
- Wax: Offers a natural, soft sheen and is easy to touch up.
Warning: Always ensure your topcoat is compatible with your stain. Water-based topcoats should be used over water-based stains, while oil-based polyurethanes work best over oil-based stains. Mixing these types can lead to peeling or cloudiness.
Environmental and Safety Considerations
Working with wood stains involves chemicals that require proper handling. According to the Environmental Protection Agency regarding volatile organic compounds, it’s essential to ensure adequate ventilation when using oil-based products. Never work in a closed room; open windows or use a fan to circulate fresh air.
Furthermore, dispose of your staining rags properly. Oil-based stain rags can spontaneously combust if left in a pile. Always lay them flat outdoors to dry completely before throwing them in the trash, or store them in a water-filled, sealed metal container.
Managing Drying Times
Patience is a virtue when staining balsa wood. Because the wood is so porous, it may hold onto solvents longer than expected.
| Environment | Typical Dry Time (Water) | Typical Dry Time (Oil) |
|---|---|---|
| Humid/Cool | 4–6 hours | 24–48 hours |
| Dry/Warm | 1–2 hours | 12–24 hours |
| Forced Air | 30–60 minutes | 8–12 hours |
Drying conditions play a massive role in the final appearance. If the air is too humid, the stain may remain tacky for days. If you’re in a rush, use a small desk fan to move air over the balsa, but avoid direct heat, which can cause the thin wood to warp.
Choosing Between Wiping and Brushing
The method of application changes the final look significantly. Brushing is better for reaching into tight corners, while wiping is superior for achieving a uniform, thin layer across flat surfaces.
The Brush Method
Use a high-quality synthetic brush for water-based stains or a natural bristle brush for oil-based stains. Dip the brush lightly and apply in long, smooth strokes. This method is best for small or intricate balsa carvings where you need precision.
The Wipe-On Method
Use a clean, lint-free cotton cloth. Dip the cloth into the stain and rub it into the wood in a circular motion, then finish with a long, straight stroke following the grain. This method is best for large balsa sheets or structural components.
How to Repair Balsa Surface Damage
Balsa is prone to dings and dents. If you notice a dent before you start staining, you can often “raise” the wood fibers back to their original position.
- Place a damp cloth over the dent.
- Hold a warm iron (on the low setting) over the cloth for a few seconds.
- The steam will cause the compressed wood fibers to expand and return to their shape.
- Let the wood dry completely before sanding and staining.
Pro Tip: If you have deep scratches, use a balsa-compatible wood filler. Note that wood filler doesn’t always take stain the same way as the surrounding wood, so test your filler on a scrap piece first to see if it matches your desired color.
Related guides
Frequently Asked Questions
Does balsa wood need a wood conditioner?
Yes, using a wood conditioner is highly recommended for balsa. Because the wood is extremely soft and porous, it absorbs stain unevenly, leading to dark, blotchy patches. A conditioner fills the larger pores and slows down the absorption rate, allowing for a much more uniform color application across the entire surface of the project.
Can I use a gel stain on balsa?
Gel stains are an excellent choice for balsa wood because they’re thicker and don’t penetrate the wood fibers as deeply as liquid stains. This reduced penetration helps prevent the wood from becoming oversaturated and dark. Gel stains are particularly useful for beginners or for those working on complex shapes where liquid stains might drip or pool in crevices.
How many coats of stain should I apply?
For most projects, one to two thin coats are sufficient. Because balsa absorbs liquid so readily, applying too many coats can lead to a muddy finish that obscures the natural grain of the wood. It’s always better to start with one light coat, let it dry, and evaluate the color before deciding if a second application is necessary.
Is it possible to remove stain from balsa?
Removing stain from balsa is difficult because the pigment absorbs deep into the soft fibers. You can try sanding the surface with a fine-grit sandpaper to remove the top layer of stained wood, but be careful not to sand through the thin material. Once wood is deeply stained, it’s usually easier to paint it or apply a darker color over the top.
What is the best way to seal stained balsa?
The best way to seal stained balsa is with a light-duty clear coat, such as a water-based polyurethane or a spray-on acrylic sealer. These products provide a protective barrier against moisture and wear without adding significant weight or thickness to the wood. Always apply thin, even coats and allow sufficient drying time between applications to avoid a sticky or uneven finish.
Conclusion
Staining balsa wood is a manageable process when you prioritize surface preparation and control the amount of pigment applied. By sanding carefully, using a conditioner, and testing your colors, you can achieve a professional and attractive finish on even the most delicate balsa components. Start by selecting your preferred stain type and practicing on a scrap piece today.