Liftmaster Garage Door Opener Antenna Not Working

Liftmaster Garage Door Opener Antenna Not Working

The smooth operation of a garage door opener relies on a seamless connection between your remote and the opener unit. When your Liftmaster garage door opener antenna isn’t working, this vital link is broken, leaving you stranded outside or struggling to gain access. This common yet frustrating issue can stem from a variety of causes, ranging from simple obstructions to more complex electrical problems. Understanding the potential culprits and how to troubleshoot them is key to restoring functionality quickly and efficiently.

This comprehensive guide will walk you through the most common reasons why your Liftmaster garage door opener antenna might not be working and provide actionable steps to diagnose and resolve the problem. We’ll cover everything from checking for physical damage and interference to understanding the internal components and when it might be time to call a professional.

By the end of this article, you’ll be equipped with the knowledge to tackle this issue with confidence, ensuring your garage door opener operates reliably once more.

Key Takeaways

  • Antenna Location and Obstructions: The antenna’s placement is crucial. Ensure it’s hanging down freely and not obstructed by metal objects, building materials, or other antennas.
  • Interference Sources: Electronic devices like LED lights, Wi-Fi routers, and even neighboring garage door openers can interfere with the antenna’s signal.
  • Loose Connections: Check for loose wires connecting the antenna to the opener’s logic board.
  • Damaged Antenna: Physical damage to the antenna wire or its connection point can render it ineffective.
  • Opener Logic Board Issues: In some cases, the problem may lie with the opener’s internal circuitry, not the antenna itself.
  • Remote Control Problems: A faulty remote or a low battery can mimic antenna issues.
  • Environmental Factors: Extreme temperatures or moisture can sometimes affect electronic components.
  • Professional Help: If basic troubleshooting fails, consulting a qualified Liftmaster technician is the safest and most effective next step.
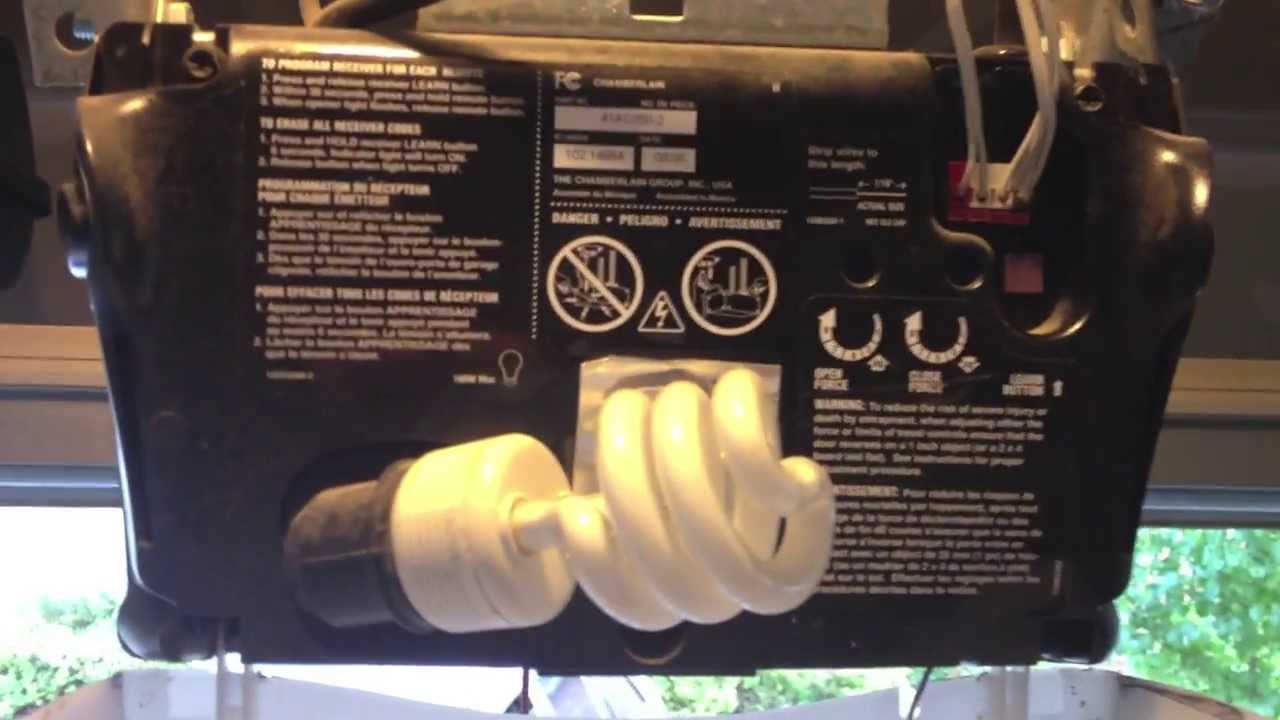
Liftmaster Garage Door Opener Antenna Not Working

Credit: www.youtube.com

Understanding The Liftmaster Garage Door Opener Antenna

The antenna on your Liftmaster garage door opener is a critical component responsible for receiving the radio frequency (RF) signals sent by your remote control. It acts as a conduit, translating the wireless commands into electrical signals that the opener’s logic board can interpret to activate the garage door.

Typically, this antenna is a thin, black wire that hangs down from the motor unit. Its design is optimized to pick up specific frequencies, usually around 310-315 MHz for most Liftmaster models, though this can vary.

The range of your garage door opener is directly tied to the effectiveness of its antenna. A well-functioning antenna, properly positioned and free from interference, can provide a reliable signal reception for distances up to 150 feet or more, depending on environmental factors. However, even slight damage or suboptimal placement can significantly reduce this range, leading to the frustrating experience of the remote not working unless you are standing directly in front of the garage. Understanding its role is the first step in diagnosing why it might not be performing as expected.

How The Antenna Works

At its core, the Liftmaster antenna is a simple dipole antenna. This means it consists of two conductive elements, typically the wire itself and its connection to the opener’s chassis or ground, which are designed to resonate at the specific frequency of the remote’s transmitter.

When a signal from the remote is broadcast, it creates an electromagnetic field. The antenna is designed to capture this field and convert it into a small electrical current. This current is then fed to the opener’s receiver circuit, which decodes the signal to initiate the door’s movement.

The length and orientation of the antenna are precisely engineered to match the operating frequency. For most Liftmaster openers operating in the 310-315 MHz range, the ideal length for a quarter-wave antenna is approximately 9. 5 inches. While the wire is often longer to allow for hanging, the effective radiating/receiving element is crucial.

Any alteration to this effective length, such as kinking, cutting, or improper positioning, can detune the antenna, reducing its sensitivity and range.

Common Antenna Designs And Variations

Liftmaster has used various antenna designs over the years, but the most common is the hanging wire antenna. This is a simple, single wire, usually black, that dangles from the motor unit. It’s designed to hang vertically, which is often the most effective orientation for omnidirectional signal reception. Some older models might have a slightly different wire gauge or insulation, but the fundamental principle remains the same.

More advanced or integrated systems might incorporate antennas that are built into the casing of the motor unit or use a small, external rod antenna. However, for the vast majority of residential Liftmaster openers, you’ll be dealing with the familiar hanging wire.

It’s important to identify which type you have, as troubleshooting steps might vary slightly. For instance, a built-in antenna might be more susceptible to damage from internal components or heat, whereas a hanging wire is more prone to external physical interference or damage.

Diagnosing Antenna Issues: Step-by-step Troubleshooting

When your Liftmaster garage door opener isn’t responding to your remote, the antenna is a prime suspect. However, before assuming the antenna is faulty, it’s essential to go through a systematic diagnostic process. This involves checking the most obvious and simplest potential causes first, working your way towards more complex issues.

1. Check For Physical Obstructions And Antenna Placement

The most common reason for a malfunctioning antenna is its physical placement or something obstructing its signal.

  • Antenna Hanging Down: Ensure the antenna wire is hanging freely and vertically. It should not be coiled, tied up, or pressed against any surface. Liftmaster specifically designs these antennas to hang down to maximize reception. If it’s tucked away, bent sharply, or touching the ceiling or wall, its effectiveness is severely compromised.
  • Metal Interference: Metal objects are notorious for blocking or reflecting radio signals. Check if anything metallic has been placed near or directly in front of the antenna. This could include:
  • Metal shelving units
  • Ductwork or pipes
  • Other metal tools or equipment stored in the garage
  • Even the metal frame of the garage door itself, if the antenna is too close when the door is in certain positions.
  • Other Antennas: If you have multiple garage door openers or other RF-emitting devices in close proximity, their antennas could potentially interfere with each other, especially if they operate on similar frequencies.

Pro Tip: Try gently extending the antenna wire downwards as far as it will comfortably go, ensuring it has at least a few inches of clearance from the motor unit and any surrounding objects.

2. Inspect For Physical Damage To The Antenna Wire

The antenna wire is relatively delicate. Over time, it can become damaged, leading to signal loss.

  • Visual Inspection: Carefully examine the entire length of the antenna wire. Look for:
  • Cuts or nicks in the insulation
  • Crushed sections of the wire
  • Signs of fraying or corrosion at the connection point
  • Loose connections where the wire attaches to the opener’s logic board.
  • Connection Point: Pay close attention to where the antenna wire connects to the opener’s circuit board. Often, it’s a small terminal or plug. Ensure it’s securely seated and free from corrosion or bent pins. Sometimes, the wire might simply have pulled out of its connector.

If you find any damage, especially a break in the wire or a loose connection, this is a likely cause. Depending on the damage, you might be able to repair it, but often, replacing the antenna is the more reliable solution.

3. Identify And Mitigate Radio Frequency (rf) Interference

Modern garages are often filled with electronic devices that can emit RF signals, creating “noise” that drowns out the weaker signal from your remote.

  • Common Sources of Interference:
  • Wi-Fi Routers and Extenders: These devices broadcast signals that can sometimes overlap with garage door opener frequencies.
  • LED Lighting: Many LED bulbs, especially cheaper ones, emit RFI. Try turning off all LED lights in and around the garage to see if the remote works.
  • Wireless Doorbells and Security Systems: Other wireless devices can contribute to RF congestion.
  • Neighboring Openers: If you live in a densely populated area, multiple garage door openers operating on the same or adjacent frequencies can cause interference. Liftmaster’s Security+ 2.0 technology helps mitigate this, but it’s not foolproof.
  • Electric Vehicle Chargers: Some EV chargers can generate significant electromagnetic interference.
  • Troubleshooting Interference:
  • Turn Off Suspect Devices: Systematically turn off potential sources of interference one by one (Wi-Fi, LEDs, etc.) And test the remote after each change.
  • Relocate Devices: If interference is suspected, try moving the offending device further away from the garage door opener.
  • Shielding: In extreme cases, some professional installers might use shielding materials, but this is rarely necessary for typical residential setups.

4. Test The Remote Control And Battery

It’s easy to blame the antenna when the remote isn’t working, but the remote itself could be the problem.

  • Check the Remote Battery: This is the simplest and most common remote issue. A weak or dead battery may not have enough power to transmit a strong enough signal for the antenna to pick up reliably. Replace the battery with a fresh one of the correct type (usually a coin cell like a CR2032 or CR2016).
  • Test with Another Remote: If you have a second remote for the same opener, try using it. If the second remote works, the issue is almost certainly with the first remote.
  • Test the Remote Signal (Advanced): You can sometimes check if the remote is transmitting by holding its button down while pointing it at a digital camera (like on your smartphone). Look at the camera’s screen; you should see a faint purple or white light flashing from the remote’s LED when the button is pressed. If you don’t see this light, the remote likely needs a new battery or is faulty.

5. Check The Opener Logic Board And Receiver

The antenna connects directly to the opener’s logic board, which houses the receiver circuitry. If the antenna itself is fine, the problem might be deeper within the opener.

  • Internal Connections: As mentioned in the physical damage section, ensure the wires connecting the antenna to the logic board are secure. Sometimes, vibration or age can cause these connections to loosen.
  • Receiver Module: Many Liftmaster openers have a separate receiver module that plugs into the logic board. This module contains the radio receiver. If this module is faulty, it won’t pick up signals even from a good antenna. Sometimes, this module can be replaced independently of the main logic board.
  • Logic Board Failure: In rarer cases, the main logic board itself might have a fault that prevents it from processing the signal received by the antenna. This is typically the most expensive repair.

Warning: Working with the logic board involves dealing with electrical components. If you are not comfortable with electronics, it’s best to leave this step to a professional. Always disconnect power to the opener before opening the casing.

Liftmaster Garage Door Opener Antenna Not Working

Credit: www.positivelynaperville.com

Replacing A Liftmaster Garage Door Opener Antenna

If you’ve determined that your Liftmaster antenna is damaged or faulty, replacing it is often a straightforward DIY task. Liftmaster replacement antennas are readily available online and at hardware stores.

Finding The Correct Replacement Antenna

  • Identify Your Opener Model: The first step is to find the model number of your Liftmaster garage door opener. This is usually located on a sticker on the motor unit casing.
  • Check the Manual: Your owner’s manual will specify the correct replacement antenna part number.
  • Online Resources: If you don’t have the manual, you can search online using your opener’s model number to find compatible replacement antennas. Liftmaster part numbers often start with “41A…” or similar. For example, a common replacement antenna for many Security+ 2.0 models is the 41A3504.
  • Antenna Type: Ensure you purchase the correct type, usually a hanging wire antenna, but confirm if your model uses a different design.

Installation Steps

Replacing the antenna typically involves these steps:

  • Disconnect Power: Crucially, unplug the garage door opener from the electrical outlet. This is a vital safety step to prevent electrical shock.
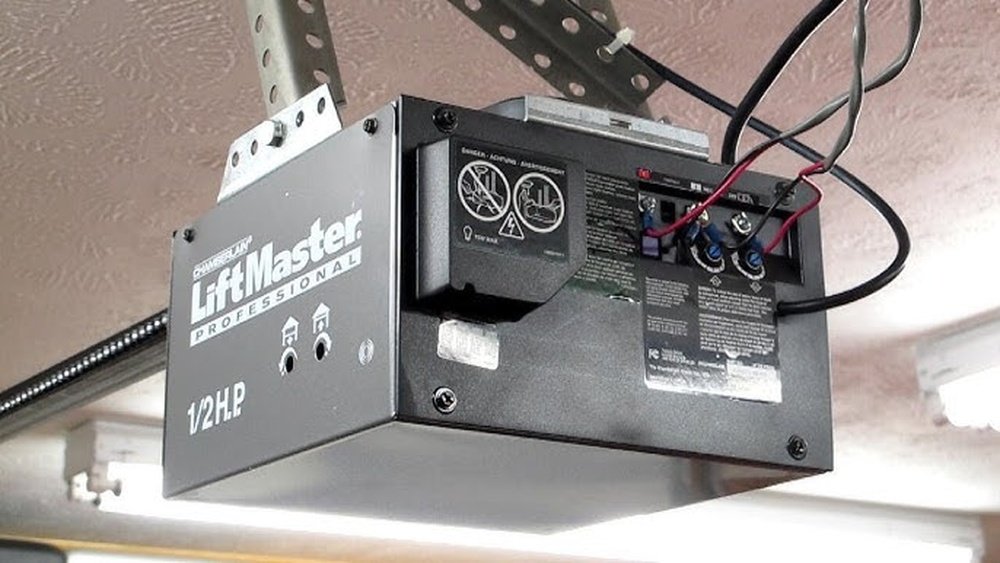
  • Open the Motor Unit Casing: Most Liftmaster motor units have a casing that can be opened, usually by removing a few screws.
  • Locate the Old Antenna Connection: Identify where the existing antenna wire connects to the logic board. It might be a small screw terminal or a plug-in connector.
  • Disconnect the Old Antenna: Carefully disconnect the old antenna wire. If it’s a screw terminal, loosen the screws. If it’s a plug, gently pull it out.
  • Connect the New Antenna: Connect the new antenna wire to the same location on the logic board. Ensure the connection is secure. If it uses screw terminals, make sure the bare wire is properly seated under the screw and tightened.
  • Route the New Antenna: Allow the new antenna wire to hang freely from the motor unit, ensuring it’s positioned similarly to how the old one was intended (hanging vertically). Avoid pinching or kinking the wire.
  • Close the Motor Unit Casing: Reassemble the motor unit casing, ensuring all screws are tightened.
  • Restore Power and Test: Plug the garage door opener back into the electrical outlet. Test your remote control to see if the issue is resolved.

Example: When I replaced the antenna on my Liftmaster 1/2 HP opener, I found the old wire was frayed near the connection. I purchased a 41A3504 replacement. After unplugging the unit, I unscrewed the casing, located the two small screws holding the antenna wires, removed the old wires, attached the new ones, and reassembled. The remote worked perfectly afterward.
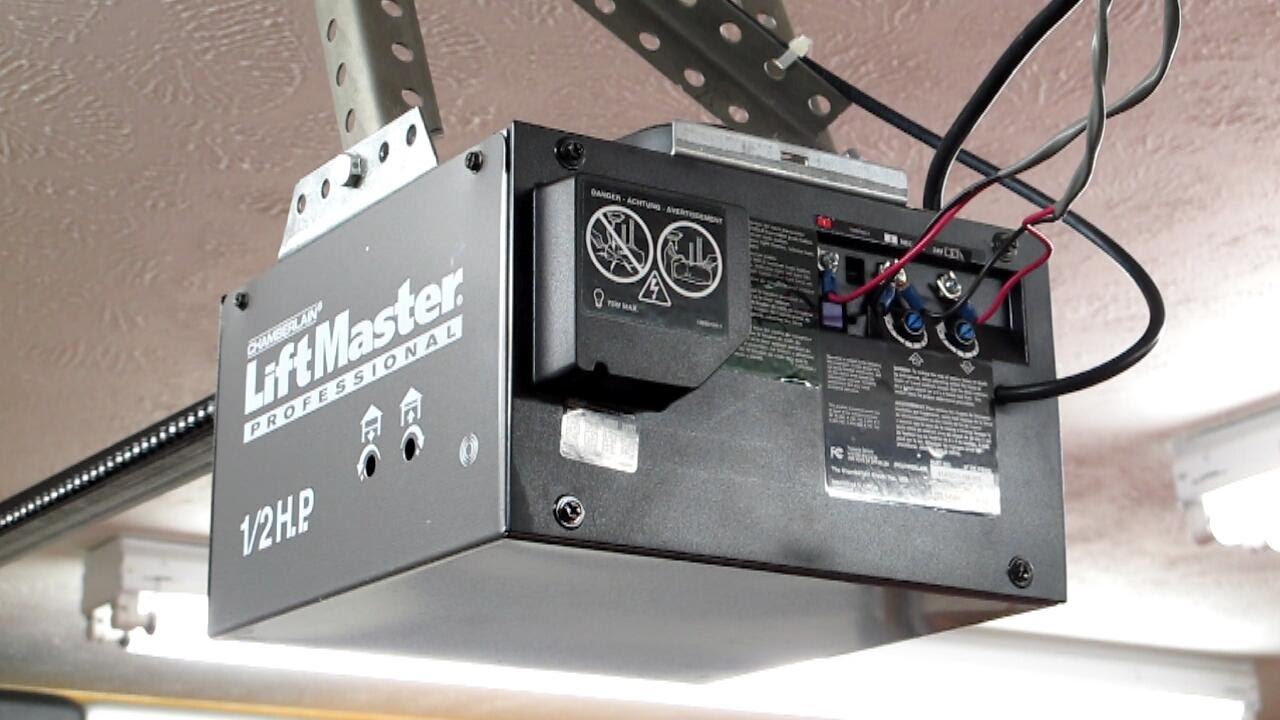
Liftmaster Garage Door Opener Antenna Not Working

Credit: kingsprings-collins.weebly.com

When To Call A Professional

While many antenna issues can be resolved with basic troubleshooting and replacement, there are times when it’s best to call a qualified garage door technician.

  • Uncertainty About the Cause: If you’ve gone through the troubleshooting steps and are still unsure what the problem is, a professional can quickly diagnose the issue.
  • Complex Electrical Problems: If you suspect a fault with the logic board, receiver module, or internal wiring that you’re not comfortable addressing, a technician has the expertise and tools to handle it.
  • Physical Damage to the Opener Unit: If the motor unit itself has sustained damage, or if the antenna connection point on the casing is broken, professional repair might be necessary.
  • Lack of Time or Tools: If you don’t have the time, the right tools, or the confidence to perform the replacement yourself, hiring a professional ensures the job is done correctly and safely.
  • Persistent Issues: Even after replacing the antenna, if the problem persists, it strongly suggests a deeper issue within the opener system that requires expert diagnosis.

When contacting a professional, be prepared to provide:

  • The model number of your Liftmaster opener.
  • A description of the problem (e.g., “remote not working,” “reduced range”).
  • The troubleshooting steps you’ve already taken.

This information will help the technician diagnose the problem more efficiently. You can often find local Liftmaster dealers or garage door repair services through the Liftmaster website or a quick online search.

Advanced Troubleshooting And Potential Causes

Beyond the common issues, a few less frequent problems can manifest as antenna failure. These often require a deeper understanding of the opener’s electronics.

The Role Of The Receiver Logic Board

The antenna doesn’t operate in isolation. It’s connected to the receiver module, which is typically part of, or plugs into, the main logic board. This receiver is tuned to the specific frequency transmitted by your Liftmaster remotes.

  • Receiver Sensitivity: Over time, the sensitivity of the receiver can degrade due to component aging or damage. Even a perfect antenna signal might not be strong enough for a worn-out receiver to detect.
  • Frequency Drift: While rare, the receiver’s tuning frequency can drift slightly, making it less effective at picking up signals from the remote’s transmitter.
  • Intermittent Faults: Sometimes, the receiver or logic board might have intermittent faults that cause signal reception to cut out sporadically. This can be particularly frustrating to diagnose as it might work sometimes and not others.

Example: A customer reported their Liftmaster remote only working when they were very close to the garage. They replaced the antenna, checked for interference, and replaced the remote battery. The issue persisted. Upon inspection, a qualified technician found that the receiver module on the logic board had a faulty capacitor, causing weak signal reception. Replacing the module resolved the problem.

Environmental Factors Affecting Performance

While less common, extreme environmental conditions can sometimes impact electronic components, including the antenna and receiver.

  • Temperature Extremes: While garage door openers are designed to operate within a range of temperatures, prolonged exposure to extreme heat or cold can potentially affect the performance of sensitive electronic components, including those related to RF reception.
  • Moisture and Corrosion: Garages can be prone to humidity or occasional water exposure. If moisture penetrates the motor unit casing, it can lead to corrosion on the logic board, antenna connections, or the receiver module, degrading performance. Regular inspection for signs of water damage or corrosion is advisable, especially in older units or those located in damp environments.

Compatibility Issues With Remotes And Accessories

Ensuring your remote and any accessories are compatible with your specific Liftmaster opener model is crucial.

  • Frequency Mismatch: Liftmaster uses different frequencies and rolling code technologies across its product lines (e.g., Security+, Security+ 2.0, 315 MHz, 390 MHz). Using a remote designed for a different frequency or technology will not work, regardless of the antenna’s condition. Always verify remote compatibility using the opener’s model number.
  • Accessory Interference: External keypads, smart home controllers, or other accessories that communicate wirelessly with the opener can sometimes introduce their own RF signals, potentially causing interference if not properly installed or if they malfunction.

Maintaining Your Liftmaster Garage Door Opener For Optimal Performance

Preventative maintenance is key to ensuring your Liftmaster garage door opener, including its antenna system, functions reliably for years to come. Regular checks can help you catch potential issues before they become major problems.

Regular Inspections

  • Visual Checks: Periodically (e.g., every 6 months), perform a visual inspection of the antenna wire, checking for any signs of fraying, kinking, or damage. Also, check the connection point on the motor unit.
  • Range Testing: Pay attention to the operating range of your remote. If you notice it consistently requires you to be closer to the garage than it used to, it might indicate a degrading antenna or receiver issue.
  • Obstruction Check: Ensure no new items have been placed in the garage that could be obstructing the antenna’s downward path.

Cleaning And Lubrication

While not directly related to the antenna, keeping the entire garage door system clean and lubricated contributes to overall smooth operation, which indirectly supports the opener’s function.

  • Clean the Motor Unit: Dust and debris can accumulate on the motor unit. Gently wipe it down with a dry or slightly damp cloth. Ensure power is disconnected before cleaning.
  • Lubricate Moving Parts: Regularly lubricate the garage door’s rollers, hinges, and tracks according to the manufacturer’s recommendations. This reduces strain on the opener motor.

Software/firmware Updates (for Smart Openers)

For newer Liftmaster models with smart capabilities (e. g. , MyQ technology), ensure the opener’s firmware is up-to-date. While not directly related to the RF antenna, software glitches can sometimes affect overall system performance. Check the Liftmaster app or website for any available updates.

Battery Replacement Schedule

Establish a routine for replacing the batteries in your remotes and keyless entry pads. A good practice is to replace them annually, or whenever you notice a decrease in signal strength or range. This proactive approach prevents remote failure from being mistaken for an antenna problem.

Frequently Asked Questions

Why Is My Liftmaster Remote Not Working Even With A New Battery?

Several reasons could cause this besides a dead battery. The antenna might be obstructed, damaged, or experiencing interference. The remote itself could be faulty, or there might be an issue with the opener’s receiver logic board. It’s also possible the remote is not properly programmed or is incompatible with your opener model.

How Far Should My Liftmaster Garage Door Opener Remote Work?

Under ideal conditions, a properly functioning Liftmaster garage door opener with a clear antenna signal can operate effectively from up to 150 feet away. However, factors like the opener model, remote type, battery strength, surrounding structures (especially metal), and radio frequency interference can significantly reduce this range.

Can I Use A Universal Antenna For My Liftmaster Opener?

While universal antennas exist, it’s strongly recommended to use a replacement antenna specifically designed for your Liftmaster model. Using an incompatible antenna can lead to poor performance, reduced range, or even damage to the opener’s receiver system. Always check the part number compatibility.

What Does It Mean If My Garage Door Opener Only Works When I’m Very Close To It?

This symptom strongly suggests a problem with signal reception. The most likely causes are:

  • Antenna Issue: The antenna is damaged, disconnected, obstructed, or experiencing significant RF interference.
  • Receiver Issue: The receiver module or logic board within the opener is failing or has lost sensitivity.
  • Remote Issue: The remote’s battery is very weak, or the remote itself is failing.

How

Sink Smell Like Rotten Eggs

The unmistakable, pungent odor of rotten eggs wafting from your sink can be deeply unsettling. It’s a smell that can quickly turn a pleasant home environment into one of discomfort and concern. While it might seem like a minor nuisance, a persistent rotten egg smell emanating from your drains often signals an underlying issue that requires attention.

Ignoring it can lead to more significant plumbing problems or even health concerns.

Understanding the root cause of this foul odor is the first step towards a swift and effective solution. This pervasive smell isn’t just unpleasant; it’s a signal from your plumbing system that something is amiss. Whether it’s a buildup of organic matter, a gas leak, or a problem with your water supply, pinpointing the origin is crucial for restoring freshness to your home and ensuring your plumbing system functions optimally.

Key Takeaways

  • The rotten egg smell from sinks is typically caused by hydrogen sulfide gas (H₂S), often produced by the decomposition of organic matter or by certain bacteria.
  • Common sources include trapped food debris, sewage backup, hard water deposits, and issues with the septic system or sewer line.
  • Water heater anode rods made of magnesium or aluminum can react with water to produce H₂S, especially in homes with well water.
  • Dry P-traps allow sewer gases to enter the home, mimicking a rotten egg smell.
  • Solutions range from simple DIY cleaning methods to professional plumbing interventions.
  • Regular plumbing maintenance and addressing water quality issues are key to preventing recurring odors.
Sink Smell Like Rotten Eggs

Credit: www.reddit.com

The Science Behind The Stench: Hydrogen Sulfide (h₂s)

The “rotten egg” smell is almost universally attributed to the presence of hydrogen sulfide (H₂S) gas. This colorless gas has a distinctive, strong odor that is detectable even at very low concentrations, often described as the smell of sulfur or decaying organic matter. In a plumbing context, H₂S is primarily produced through the anaerobic decomposition of organic materials. This process occurs when bacteria, which thrive in the absence of oxygen, break down substances like food particles, hair, soap scum, and other debris that accumulate in drains and pipes.

The chemical reaction is relatively straightforward: organic matter + anaerobic bacteria + water = hydrogen sulfide gas. This gas can then rise through the drainpipes and escape into your home, particularly when water is run, agitating the accumulated material and releasing trapped gases. The concentration of H₂S can vary significantly, influencing the intensity of the smell. In some cases, it might be a faint whiff, while in others, it can be overpowering. It’s important to note that while the smell is unpleasant, H₂S is also flammable and, at very high concentrations, can be toxic. However, the levels typically found in residential plumbing are usually not dangerous, but they do warrant investigation and resolution.

Bacterial Action In Drains

Bacteria are the unsung, and in this case, unpleasantly odorous, culprits behind many sink smells. In the dark, damp environment of your drainpipes, a diverse ecosystem of microorganisms can flourish. When organic waste, such as food scraps, grease, soap residue, and hair, enters the pipes, these bacteria feast on it.

If the conditions are right, specifically, a lack of oxygen (anaerobic conditions), certain types of bacteria, like sulfate-reducing bacteria (SRBs), become particularly active. These SRBs metabolize sulfates present in water and organic matter, producing hydrogen sulfide as a byproduct.

The P-trap, the U-shaped pipe beneath your sink, is designed to hold a small amount of water. This water acts as a seal, preventing gases from the sewer or septic system from entering your home. However, when this water seal is disturbed or when organic matter decomposes rapidly within the P-trap itself, the H₂S gas can bypass the seal and become noticeable.

The more organic material present and the longer it sits undisturbed, the more H₂S can be generated, leading to that characteristic rotten egg smell.

The Role Of Water Quality

Sometimes, the source of the rotten egg smell isn’t within the pipes themselves but in the water supply. This is particularly common in homes that rely on well water. Well water can naturally contain dissolved minerals and gases, including sulfur compounds. When this water comes into contact with certain metals in your plumbing system, such as the anode rod in your water heater, a chemical reaction can occur, releasing hydrogen sulfide.

The anode rod in a water heater is a sacrificial component designed to corrode instead of the tank itself. Typically made of magnesium, aluminum, or a combination, these rods protect the steel tank from rust and corrosion. However, in water with high sulfate content, these rods can react with sulfur compounds to produce H₂S. This smell is often most noticeable when you first turn on a hot water tap, as the gas has had time to accumulate in the water heater. Even municipal water supplies can sometimes have a sulfurous odor, especially if they have been treated with certain chemicals or if there’s an issue with the distribution system.

Common Culprits Lurking In Your Plumbing

Identifying the specific source of the rotten egg smell is key to resolving it. Several common areas within a home’s plumbing system are prime suspects for harboring the conditions that lead to hydrogen sulfide production. These range from simple blockages to more complex systemic issues.

1. Food Debris And Grease Buildup In Drains

This is arguably the most frequent cause of sink odors. Every time you wash dishes, rinse food scraps, or pour grease down the drain, a portion of that material adheres to the inside of the pipes. Over time, this buildup accumulates, creating a perfect breeding ground for anaerobic bacteria.

As these bacteria decompose the trapped organic matter, they release H₂S gas. The smell is often more pronounced after a period of disuse, like in the morning, or when hot water is run, which can agitate the decomposing material and release trapped gases.

Kitchen sinks are particularly prone to this issue due to the frequent presence of food particles and grease.

2. Dry Or Defective P-traps

The P-trap serves a critical function: it holds water to create a seal that blocks sewer gases from entering your home. If the sink is rarely used, the water in the P-trap can evaporate over time, breaking the seal. This is a common issue in guest bathrooms or basements that don’t see much activity. Another possibility is a venting issue in your plumbing system. Plumbing vents allow air into the system, equalizing pressure and helping wastewater flow smoothly. If a vent is blocked, it can cause a siphoning effect, drawing water out of the P-trap. In such cases, the rotten egg smell might be intermittent or appear when other fixtures are used, causing pressure fluctuations.

3. Septic System Or Sewer Line Problems

If your home is connected to a septic system, odors can signal a problem with its function. A septic tank needs regular pumping to remove accumulated sludge and solids. If the tank is full, the system can become overloaded, leading to sewage backup. This backup can force sewer gases, including H₂S, back up through the pipes and out of your drains. Similarly, if your home is connected to a municipal sewer line, blockages or breaks in that line can cause similar issues. In older homes, corroded or damaged sewer lines can also trap waste and lead to decomposition and gas production. The smell might be more widespread throughout the house or particularly strong near floor drains.

4. Water Heater Issues (especially With Well Water)

As mentioned earlier, the anode rod in your water heater can be a source of the rotten egg smell, particularly when you have well water with high sulfur content. The magnesium or aluminum anode rod reacts with sulfates in the water, creating H₂S. This smell is often most noticeable when drawing hot water. Over time, the anode rod depletes as it corrodes. If it’s significantly corroded or if the water chemistry is particularly aggressive, it can accelerate the production of H₂S. In some cases, simply replacing the anode rod with one made of a different material (like zinc-aluminum) or a more modern “powered” anode rod can resolve the issue.

5. Hard Water Deposits And Mineral Buildup

Homes with hard water (water high in dissolved minerals like calcium and magnesium) can experience mineral buildup within their pipes. While not directly producing H₂S, these mineral deposits can create rough surfaces inside the pipes. These rough surfaces can trap organic debris more effectively, exacerbating the problem of bacterial decomposition. Over time, significant mineral buildup can narrow pipes, reduce water flow, and provide more surface area for bacteria to colonize, contributing to foul odors.

Sink Smell Like Rotten Eggs

Credit: www.reddit.com

Troubleshooting The Smell: A Step-by-step Approach

When faced with a rotten egg smell from your sink, a systematic approach to troubleshooting can help you identify and resolve the problem efficiently. Start with the simplest solutions and progress to more complex ones if the initial attempts fail.

Step 1: Identify The Location And Timing

  • Which Sink? Does the smell come from a specific sink (kitchen, bathroom) or multiple sinks? This helps narrow down whether it’s a localized drain issue or a broader system problem.
  • When is it Strongest? Is the smell more noticeable after running water, when hot water is used, or after a period of disuse? This can provide clues about the source (e.g., hot water suggests the water heater, after disuse might indicate a dry P-trap or drain buildup).
  • Any Other Symptoms? Are there any signs of slow draining, gurgling sounds, or actual water backing up? These indicate more severe blockages or venting issues.

Step 2: Check And Clear The P-trap

The P-trap is a common hiding place for debris.

  • Preparation: Place a bucket underneath the P-trap to catch any water and debris.
  • Disassembly: Loosen the slip nuts connecting the P-trap to the vertical and horizontal pipes. Carefully remove the trap.
  • Cleaning: Empty the contents into the bucket. Thoroughly clean the inside of the P-trap using a brush and hot, soapy water. Check the connecting pipes for any visible buildup.
  • Reassembly: Reassemble the P-trap, ensuring all connections are snug but not overtightened.
  • Testing: Run water down the sink for a minute or two to check for leaks and flush out the pipes. See if the smell has improved.

Step 3: Deep Clean The Drains

Even if the P-trap appears clean, buildup can exist further down the line.

  • Boiling Water Flush: Pour a pot of boiling water down the drain. This can help dissolve grease and loosen minor buildup. Repeat several times.
  • Baking Soda and Vinegar: Pour about half a cup of baking soda down the drain, followed by an equal amount of white vinegar. Let it fizz for 15-30 minutes, then flush with hot water. This is a natural way to help break down organic matter.
  • Enzyme Drain Cleaners: For persistent buildup, consider using an enzyme-based drain cleaner. These cleaners use bacteria and enzymes to break down organic waste without harsh chemicals. Follow the product instructions carefully. Avoid using harsh chemical drain cleaners, as they can damage pipes and are less effective against bacterial odors.

Step 4: Address Potential Water Heater Issues

If the smell is primarily associated with hot water:

  • Flush the Water Heater: Drain some hot water from the tank to see if it releases a strong odor. If so, flushing the entire tank might be necessary. This involves draining the tank completely, flushing out sediment, and refilling it. Consult your water heater manual or a professional for instructions.
  • Check the Anode Rod: If you have well water or suspect the anode rod is the issue, you may need to inspect and potentially replace it. This is often a job for a plumber, especially if you’re unfamiliar with water heater maintenance.

Step 5: Investigate Venting And Sewer/septic Systems

If the smell persists after addressing the drains and water heater, or if you notice slow draining or gurgling:

  • Check Plumbing Vents: Ensure roof vents for your plumbing system are not blocked by debris (leaves, nests). This usually requires roof access and is best done by a professional.
  • Septic System: If you have a septic system, check when it was last pumped. If it’s overdue, schedule a pumping service. Persistent odors could indicate a deeper issue with the tank or drain field.
  • Sewer Line: If connected to a municipal sewer, a blockage or issue with the main line might be the cause. A plumber can use a camera to inspect the sewer line for problems.
Sink Smell Like Rotten Eggs

Credit: www.zoomdrain.com

Diy Solutions For Fresher Drains

Many common causes of sink smells can be tackled with readily available household items and a bit of effort. These DIY methods are often effective for minor issues and can help maintain drain health.

Natural Cleaning Agents

  • Baking Soda and Vinegar: This classic combination is excellent for deodorizing and loosening minor grime.
  • Pour 1/2 cup of baking soda down the drain.
  • Follow with 1/2 cup of white vinegar.
  • Allow the mixture to foam and sit for at least 30 minutes (or even overnight for tougher odors).
  • Flush thoroughly with hot water.
  • Boiling Water: A simple yet effective method, especially for kitchen sinks prone to grease.
  • Boil a kettle or pot of water.
  • Carefully pour the boiling water directly down the drain in stages.
  • Repeat this process daily for a week if necessary.
  • Citrus Peels: While not a deep cleaner, running citrus peels (lemon, orange, grapefruit) through the garbage disposal or drain can help freshen the immediate area and mask odors temporarily.

Mechanical Cleaning Tools

  • Drain Snake (Auger): For clogs and buildup just beyond the P-trap, a drain snake can be invaluable.
  • Feed the snake into the drainpipe (after removing the P-trap for better access).
  • Gently push and twist the snake until you encounter resistance.
  • Rotate the handle to break up or hook the blockage.
  • Carefully retract the snake, cleaning off any debris.
  • Flush the drain thoroughly with hot water.
  • Plunger: A good old-fashioned plunger can sometimes dislodge minor clogs and clear out trapped gasses. Ensure there’s enough water in the sink to cover the plunger cup and create a seal.

Maintenance Routine

  • Regular Flushing: Run hot water down drains for a minute or two daily, especially in seldom-used sinks, to keep the P-trap full and wash away minor debris.
  • Scrape Plates: Scrape food scraps into the trash or compost bin before rinsing dishes to minimize the amount of organic matter entering the drain.
  • Avoid Pouring Grease: Never pour cooking grease, oils, or fats down the drain. Collect them in a container and dispose of them in the trash once solidified.
  • Use Drain Screens: Install mesh screens over drain openings to catch hair and larger food particles. Clean these screens regularly.

When To Call A Professional Plumber

While many sink smell issues can be resolved with DIY methods, there are times when professional expertise is necessary. Attempting complex repairs without the right tools or knowledge can sometimes worsen the problem or lead to costly damage.

Signs You Need A Plumber

  • Persistent Odors: If the rotten egg smell continues despite your best cleaning efforts and troubleshooting, it likely indicates a deeper issue.
  • Recurring Slow Drains: Persistent slow draining, especially in multiple fixtures, can signal a significant blockage in your main drain line or sewer/septic system.
  • Gurgling Sounds: Gurgling from drains, particularly when other fixtures are used, often points to venting problems or pressure imbalances in the plumbing system.
  • Sewage Backup: Any sign of sewage backing up into sinks, tubs, or toilets is a serious plumbing emergency that requires immediate professional attention.
  • Suspected Sewer Line Damage: If you suspect damage to your main sewer line (e.g., due to tree roots, ground settling, or age), a plumber has the specialized equipment (like camera inspection tools) to diagnose and repair it.
  • Water Heater Concerns: While some water heater maintenance can be DIY, dealing with anode rods, flushing the tank safely, or diagnosing internal issues is often best left to a professional plumber or water heater technician.
  • Lack of Confidence or Tools: If you’re uncomfortable performing any of the troubleshooting steps, lack the necessary tools, or simply want the job done right the first time, calling a plumber is a wise decision.

What A Plumber Can Do

A professional plumber has the experience, training, and specialized equipment to handle a wide range of plumbing issues. They can:

  • Perform Camera Inspections: Use sewer cameras to visually inspect the inside of your pipes and locate blockages, breaks, or root intrusion.
  • Hydro-Jetting: Utilize high-pressure water jets to thoroughly clean the interior of pipes, removing stubborn buildup and grease that snaking might not clear.
  • Repair or Replace Pipes: Address damaged, corroded, or leaking pipes, including main sewer lines.
  • Diagnose and Fix Venting Issues: Identify and clear blocked plumbing vents or repair faulty vent systems.
  • Septic System Services: For homes with septic systems, plumbers can often perform necessary pumping, inspect the tank and drain field, and make repairs.
  • Water Heater Expertise: Safely service water heaters, including anode rod replacement and thorough tank flushing.
  • Provide Warranties: Professional repairs typically come with a warranty, giving you peace of mind.

Example: A homeowner noticed a persistent rotten egg smell in their kitchen sink, particularly after running the dishwasher. DIY drain cleaning provided temporary relief, but the odor always returned. A plumber was called in. After a camera inspection, they discovered a significant buildup of grease and food particles about 15 feet down the main drain line, exacerbated by a slight sag in the pipe that allowed waste to accumulate. The plumber used hydro-jetting to thoroughly clean the line and recommended the homeowner be more diligent about scraping dishes and avoiding pouring grease down the drain. They also suggested installing a high-quality drain screen.

Preventing Future Sink Smells

The best way to deal with a rotten egg smell is to prevent it from happening in the first place. Implementing a few preventative habits and performing regular maintenance can keep your drains fresh and odor-free.

Regular Maintenance Schedule

  • Monthly Drain Flush: Once a month, pour a gallon of boiling water down each drain, followed by a cup of baking soda and a cup of vinegar. Let it sit for an hour, then flush again with boiling water. This helps keep pipes clear of minor buildup.
  • Quarterly Enzyme Cleaner: Use a biological or enzyme-based drain cleaner quarterly, especially in kitchen sinks and bathrooms, to break down organic waste before it hardens into stubborn clogs. Follow product instructions carefully.
  • Annual Septic Pumping (if applicable): If you have a septic system, schedule professional pumping at least every 3-5 years, or more frequently if recommended based on household size and usage.
  • Water Heater Flushing: Consider flushing your water heater annually to remove sediment buildup, which can sometimes contribute to odors. Consult your owner’s manual or a professional.

Smart Usage Habits

  • Scrape, Don’t Rinse: Scrape food scraps into the trash or compost bin before rinsing dishes. This significantly reduces the amount of organic material going down the drain.
  • No Grease Down the Drain: Never pour grease, oils, or fats down the sink. Collect them in a disposable container and throw them away. Even “flushable” wipes can cause major clogs and should never be put down the toilet or sink.
  • Use Sink Strainers: Place mesh strainers in sink drains to catch hair, food particles, and other debris. Empty and clean them regularly.
  • Run Hot Water Regularly: Especially in infrequently used sinks, run hot water for a minute or two periodically to ensure the P-trap remains filled and to flush away any minor residue.
  • Garbage Disposal Care: If you have a garbage disposal, run cold water while using it and for about 15-30 seconds afterward. Avoid putting fibrous or starchy foods (like celery, potato peels, pasta, rice) down the disposal, as they can contribute to clogs and odors. Periodically grind up citrus peels or ice cubes to help clean the blades and freshen the unit.

Water Quality Considerations

  • Water Testing: If you have well water and suspect sulfur is the issue, consider having your water tested. A water quality report can identify the levels of sulfur and other minerals.
  • Anode Rod Replacement: Based on water quality reports or persistent hot water odors, consider replacing the anode rod in your water heater. Discuss material options (e.g., aluminum-zinc) with your plumber.
  • Water Treatment Systems: In areas with very hard or sulfur-rich water, installing a whole-house water treatment system (like a water softener or sulfur filter) might be a long-term solution, although this represents a significant investment.

By combining regular maintenance with mindful usage habits, you can significantly reduce the likelihood of experiencing that unpleasant rotten egg smell from your sinks and keep your plumbing system running smoothly and smelling fresh.

Frequently Asked Questions

Why Does My Sink Smell Like Rotten Eggs Only When I Run The Hot Water?

This strongly suggests an issue with your water heater. The most common culprit is the anode rod (often made of magnesium or aluminum) inside the tank. In water with dissolved sulfates (common in well water, but can occur in municipal supplies), the anode rod can react chemically to produce hydrogen sulfide gas (H₂S). This gas accumulates in the

Is Soundproofing A Room Worth It

The persistent hum of traffic, the neighbor’s booming music, or even just the everyday sounds of a busy household can significantly detract from the peace and quiet of your living space. For many, this constant auditory intrusion leads to stress, reduced concentration, and a general feeling of unease. This is where the concept of soundproofing a room enters the conversation. But is the investment of time, effort, and money truly worthwhile? The answer, as with most things, is nuanced and depends heavily on your specific needs, the types of noise you’re experiencing, and your desired outcome.

Transforming a regular room into a sanctuary of silence or a perfectly controlled acoustic environment involves more than just hanging heavy curtains. It’s a process that requires understanding how sound travels and implementing strategies to block or absorb it. Whether you’re a musician needing a dedicated practice space, a remote worker seeking uninterrupted focus, or simply someone craving a more tranquil home, the potential benefits of soundproofing are substantial. However, the costs and complexities can also be daunting. This article will explore the various facets of soundproofing, from the science behind it to the practical applications and the ultimate question: is it worth it for you?

Key Takeaways

  • Soundproofing is not a one-size-fits-all solution; its worth depends on individual needs and the type of noise encountered.
  • Complete soundproofing is difficult and expensive, often requiring structural changes; sound reduction is a more achievable goal for most homeowners.
  • Common noise sources include airborne sound (voices, music) and impact sound (footsteps, dropped objects).
  • Key soundproofing principles involve adding mass, decoupling structures, and sealing air gaps.
  • DIY soundproofing can be effective for minor noise issues, but professional help is often needed for significant reduction.
  • The cost of soundproofing varies widely, from a few hundred dollars for simple treatments to tens of thousands for professional, full-room solutions.
  • Benefits include improved focus, better sleep, enhanced privacy, and a more enjoyable home environment.
Is Soundproofing A Room Worth It

Credit: allnoisecontrol.com

Understanding Sound And How It Travels

Before diving into soundproofing techniques, it’s crucial to grasp the basics of acoustics. Sound is essentially vibration that travels through a medium, typically air, but also through solid materials like walls, floors, and ceilings. Understanding the two primary types of sound transmission will help you identify the most effective solutions for your specific noise problems.

Airborne Sound

Airborne sound is generated by vibrations in the air. Think of voices, music played through speakers, television audio, or the sound of traffic outside your window. These sound waves travel through the air and then vibrate surfaces like walls and doors, which in turn vibrate the air on the other side, allowing the sound to pass through. The ease with which airborne sound travels depends on the density and structure of the materials it encounters. Lighter, less dense materials allow more sound to pass through.

Impact Sound (or Structure-borne Sound)

Impact sound, also known as structure-borne sound, is caused by direct physical impact on a building’s structure. This includes footsteps on an upper floor, furniture being moved, doors slamming, or even the vibrations from appliances like washing machines. These vibrations travel directly through the solid materials of the building, the joists, studs, and concrete, and radiate as noise on the other side. Impact sound is often more difficult to address than airborne sound because it bypasses the air and travels directly through the building’s framework.

Is Soundproofing A Room Worth It

Credit: www.mrhandyman.com

The Science Of Soundproofing: Mass, Decoupling, And Absorption

Effective soundproofing relies on three fundamental principles: adding mass, decoupling structures, and damping vibrations. Achieving true soundproofing, where virtually no sound can pass through, is an extremely challenging and often impractical endeavor. For most residential applications, the goal is sound reduction or sound isolation, which significantly minimizes the amount of sound that travels between spaces.

Adding Mass

The most straightforward principle of soundproofing is that heavier, denser materials block sound more effectively. Sound waves have to work harder to vibrate heavier objects. This is why a thick concrete wall is much better at blocking sound than a thin drywall partition. In practice, this means adding layers of dense materials to your walls, floors, and ceilings.

  • Drywall: Adding an extra layer of drywall to existing walls significantly increases mass. Using sound-dampening drywall (often called “quiet rock” or similar names) which has a viscoelastic polymer core sandwiched between two layers of gypsum, is even more effective.
  • Mass Loaded Vinyl (MLV): This is a heavy, flexible vinyl material that can be added behind drywall or other finishes to increase mass without adding significant thickness. It’s a popular choice for its effectiveness and relative ease of installation.
  • Concrete and Brick: While not typically a DIY addition, these materials naturally possess a high degree of mass and are excellent sound blockers.

Decoupling Structures

Decoupling involves separating structural elements so that vibrations cannot easily travel from one surface to another. This is particularly effective against both airborne and impact noise. When two surfaces are rigidly connected, vibrations from one easily transfer to the other. By creating an air gap or using resilient materials, this transfer is greatly reduced.

  • Resilient Channels: These are thin metal strips that are attached to wall studs. Drywall is then screwed into the resilient channels, creating a small air gap between the drywall and the studs. This gap acts as a buffer, significantly reducing the transfer of vibrations.
  • Double-Stud Walls: This involves building a second, independent wall frame next to the existing one, with a gap between them. The two walls share no direct structural connection, making it very difficult for sound to travel across. This is a highly effective but space-consuming method.
  • Staggered-Stud Walls: A variation on the double-stud wall, this method uses a wider base plate (e.g., a 2×6) and staggers the studs so that each side of the drywall is attached to a different set of studs. This still creates some decoupling and is less intrusive than a full double-stud wall.
  • Suspended Ceilings: Installing a suspended ceiling below an existing one creates an air gap that helps to isolate sound, especially impact noise from above.

Absorption And Damping

While mass and decoupling are primarily about blocking sound, absorption and damping are about controlling sound within a space and reducing resonant vibrations.

  • Absorption: This refers to materials that soak up sound energy, converting it into heat. Acoustic insulation, such as fiberglass or mineral wool, installed within wall cavities, is excellent for absorbing sound. It doesn’t block sound as effectively as mass, but it prevents sound from echoing and reverberating within the wall cavity, which can otherwise amplify noise. Soft furnishings like carpets, thick curtains, and upholstered furniture also contribute to sound absorption within a room, reducing echo and making the room feel quieter.
  • Damping: This involves using materials that can dissipate vibrational energy. Viscoelastic materials, like those found in sound-dampening drywall or applied as a spray, are effective at damping vibrations. When sound waves hit a surface with a damping material, the material deforms and stretches, converting some of the sound energy into heat.

When Is Soundproofing A Room Worth It?

The decision to invest in soundproofing hinges on a careful assessment of your needs versus the potential costs and benefits. For some, the return on investment in terms of peace of mind and improved quality of life is undeniable. For others, the expense and effort may not align with their current priorities or the severity of their noise issues.

Scenarios Where Soundproofing Is Highly Beneficial

  • Home Recording Studios: Musicians and audio engineers require environments with minimal external noise interference and controlled acoustics. Soundproofing is essential for accurate recording and mixing. Even hobbyists benefit greatly from a dedicated space where they can practice without disturbing others or being disturbed themselves.
  • Home Theaters and Media Rooms: To achieve an immersive audio experience, minimizing sound leakage into and out of the room is crucial. This allows for higher volume levels without disturbing neighbors and prevents external noises from detracting from the movie or music.
  • Home Offices and Dedicated Workspaces: In an era of remote work, a quiet environment is paramount for productivity and concentration. Soundproofing can eliminate distractions from household noise, traffic, or neighbors, leading to increased efficiency and reduced stress.
  • Nurseries and Children’s Rooms: Parents may want to soundproof a nursery to minimize external disturbances that could wake a sleeping baby. Conversely, they might want to soundproof a child’s playroom to contain noise from toys and activities.
  • Bedrooms: For light sleepers or those living in noisy environments, a soundproofed bedroom can offer a much-needed sanctuary for restful sleep.
  • Apartments and Condominiums: When you share walls, floors, or ceilings with neighbors, sound transmission can be a significant source of conflict and annoyance. Soundproofing can improve neighborly relations and enhance your living experience.
  • Hobby Rooms: Whether it’s a woodworking shop, a gaming room, or a space for crafting, if the hobby generates significant noise, soundproofing can make it more enjoyable and less disruptive.

Scenarios Where Soundproofing Might Be Overkill

  • Minor Noise Annoyances: If your noise issues are infrequent or mild (e.g., occasional distant sirens), simple solutions like thicker curtains, rugs, or white noise machines might suffice without the expense of full soundproofing.
  • Budget Constraints: Professional soundproofing can be a significant investment. If your budget is limited, focusing on less invasive and costly sound reduction techniques is more practical.
  • Temporary Living Situations: If you plan to move in the near future, extensive soundproofing renovations might not offer a good return on investment.
  • Lack of Significant Noise Issues: If you live in a very quiet area and your household is generally not noisy, the need for soundproofing is minimal.
Is Soundproofing A Room Worth It

Credit: www.ikoustic.co.uk

Practical Soundproofing Techniques For Different Budgets

Soundproofing doesn’t always mean tearing down walls. There’s a spectrum of solutions, from simple DIY fixes to comprehensive professional renovations. The effectiveness and cost vary dramatically.

Budget-friendly Solutions (under $500)

These methods focus on improving existing structures and adding soft materials to absorb sound. They offer moderate sound reduction, primarily for airborne noise.

  • Seal Air Gaps: This is the most cost-effective first step. Sound travels easily through even tiny cracks. Use acoustic sealant (which remains flexible) around windows, doors, electrical outlets, and any penetrations in walls. Weatherstripping can also be applied to door frames.
  • Add Heavy Curtains: Thick, heavy curtains with thermal lining can absorb some sound and reduce echo, especially around windows.
  • Install Rugs and Carpets: Soft floor coverings significantly absorb sound, reducing echo and dampening impact noise from within the room.
  • Use Furniture Strategically: Upholstered furniture, bookshelves filled with books, and wall hangings can help to break up sound waves and absorb some noise.
  • Door Sweeps and Seals: Installing a door sweep at the bottom of a door and using weatherstripping around the frame can significantly reduce sound leakage.
  • White Noise Machines: While not soundproofing, these machines generate a consistent, soothing sound that can mask distracting noises, improving focus and sleep.

Mid-range Solutions ($500 – $3,000)

These solutions involve more involved modifications, often incorporating denser materials and some structural changes.

  • Add Mass Loaded Vinyl (MLV): Installing MLV behind drywall or directly onto existing walls can add significant mass for airborne sound blocking. This can be a DIY project for the ambitious.
  • Install Sound-Dampening Drywall: Replacing existing drywall with specialized sound-dampening panels is more effective than standard drywall due to its layered construction with damping compounds.
  • Acoustic Insulation: Adding fiberglass or mineral wool insulation into wall cavities, floor joists, or ceiling spaces can absorb sound and reduce resonance. This is often done during renovations or when walls are open.
  • Solid-Core Doors: Replacing hollow-core doors with solid-core doors dramatically improves sound isolation, as they are much denser and heavier.
  • Window Inserts: Custom-made acrylic or glass window inserts can create an additional barrier, significantly reducing noise from outside without replacing the entire window.

High-end/professional Solutions ($3,000+)

These are comprehensive solutions that often involve significant construction and professional expertise. They aim for substantial sound reduction and isolation.

  • Resilient Channels and Double Drywall: Installing resilient channels and then adding a second layer of drywall (ideally sound-dampening drywall) to walls and ceilings is a very effective method for decoupling and adding mass.
  • Double-Stud Walls: Building a completely separate wall frame creates a significant air gap, offering excellent sound isolation. This is a major construction undertaking and reduces room size.
  • Soundproof Windows and Doors: Replacing existing windows and doors with specialized, high-STC (Sound Transmission Class) rated units designed for maximum sound insulation.
  • Floating Floors: Creating a “floating floor” involves building a new subfloor that is not rigidly attached to the original structure, often using resilient underlayment or specialized clips. This is highly effective against impact noise.
  • Suspended Ceilings: Installing a suspended ceiling system with acoustic tiles and insulation above it can significantly reduce sound transmission from the floor above.

Cost Vs. Benefit Analysis: Is The Investment Worth It?

The “worth” of soundproofing is ultimately a personal calculation. To make an informed decision, consider the following factors:

Quantifying The Benefits

  • Improved Sleep Quality: For individuals suffering from sleep disruption due to noise, the health benefits of consistent, restful sleep can be invaluable, potentially reducing healthcare costs and improving overall well-being.
  • Increased Productivity: For remote workers or students, enhanced focus can lead to better performance, higher earning potential, or improved academic results.
  • Enhanced Property Value: A well-soundproofed room, particularly a home theater or recording studio, can be a significant selling point and potentially increase property value.
  • Reduced Stress and Improved Mental Health: A quieter home environment can lead to a significant reduction in stress, anxiety, and irritability.
  • Better Home Acoustics: For audiophiles or those who enjoy music, improved acoustics can make listening experiences far more enjoyable.
  • Neighborly Relations: In multi-unit dwellings, soundproofing can prevent disputes and foster a more harmonious living environment.

Estimating The Costs

Costs vary dramatically based on the level of soundproofing, the size of the room, the materials used, and whether you hire professionals.

Table 1: Estimated Soundproofing Costs by Scope

Scope of WorkEstimated Cost RangePrimary Focus
**Basic DIY (Sealant, Curtains)**$50 – $300Minor noise reduction, echo control
**Moderate DIY (MLV, Solid Door)**$300 – $1,500Moderate airborne & impact noise reduction
**Advanced DIY/Basic Pro**$1,500 – $5,000Significant reduction, adding mass/decoupling
**Full Room Professional Build**$5,000 – $20,000+High-level isolation, structural changes

*Note: These are rough estimates and can vary significantly based on location, materials, and specific project requirements.*

Calculating Return On Investment (roi)

While not all benefits are easily quantifiable in monetary terms, you can estimate the ROI by considering:

  • Identify Your Primary Noise Problem: Is it traffic, neighbors, internal household noise?
  • Determine Your Goal: Do you need complete silence, or just a noticeable reduction?
  • Research Specific Solutions: Based on your problem and goal, identify suitable techniques and their associated costs.
  • Assign Value to Benefits: How much is improved sleep, focus, or peace of mind worth to you? Consider potential increases in property value or income from increased productivity.
  • Compare Costs vs. Valued Benefits: If the perceived value of the benefits significantly outweighs the costs, then soundproofing is likely worth it.

Common Misconceptions About Soundproofing

Several myths and misunderstandings surround soundproofing, often leading people to adopt ineffective strategies or abandon the idea altogether.

  • Myth: Thick Carpets Alone Will Soundproof a Room. While carpets help absorb sound and reduce echo within a room, they do little to block sound transmission through walls, floors, or ceilings. They primarily address the acoustics *inside* the room rather than sound *proofing* it.
  • Myth: Acoustic Foam Panels Block Sound. Acoustic foam panels are designed for acoustic treatment, meaning they absorb sound reflections within a room to improve clarity and reduce echo. They are not effective at blocking sound from entering or leaving a room. True soundproofing requires mass and decoupling.
  • Myth: Soundproofing is Only for Professionals. While complex projects require expertise, many effective sound reduction techniques, like sealing air gaps, adding MLV, or installing solid-core doors, can be tackled by determined DIYers.
  • Myth: Any Insulation Will Soundproof. Standard thermal insulation (like basic fiberglass batts) helps absorb some sound within cavities, but specialized acoustic insulation (like dense mineral wool or fiberglass designed for sound absorption) is more effective. Furthermore, insulation alone is not enough; it must be combined with mass and decoupling for significant soundproofing.
  • Myth: Soundproofing Means Complete Silence. Achieving absolute silence is practically impossible in a typical building. The goal of most soundproofing projects is significant sound reduction or sound isolation, making noise levels much more manageable and less intrusive.

Diy Vs. Professional Soundproofing: Making The Right Choice

Deciding whether to tackle a soundproofing project yourself or hire a professional is a critical step. Your choice will depend on your budget, skill level, the complexity of the project, and the desired outcome.

When To Consider Diy Soundproofing

  • Sealing Air Gaps: This is a universally recommended and low-cost DIY task.
  • Adding Soft Furnishings: Rugs, heavy curtains, and upholstered furniture are easy additions.
  • Installing Solid-Core Doors: This is a manageable DIY project for those comfortable with basic carpentry.
  • Adding MLV or a Second Layer of Drywall (with caution): These tasks require more effort and skill but are achievable for experienced DIYers, especially if walls are already open.
  • Budget Limitations: If professional services are out of reach, DIY is the only option for significant improvements.

Pro Tip: Always research techniques thoroughly, watch tutorial videos, and ensure you have the right tools and safety equipment before starting any DIY project.

When To Hire A Professional

  • Complex Structural Changes: Building double-stud walls, creating floating floors, or modifying the building’s structure requires professional expertise and building permits.
  • High-Level Performance Requirements: If you need very high levels of sound isolation (e.g., for a professional recording studio or a critical listening room), professionals have the knowledge and tools to achieve precise results.
  • Lack of Time or Skill: If you lack the time, patience, or necessary skills for a complex project, hiring professionals ensures the job is done correctly and efficiently.
  • Troubleshooting Persistent Noise Issues: If you’ve tried basic soundproofing measures without success, a professional acoustician can diagnose the specific problem and recommend the most effective solutions.
  • Warranty and Guarantees: Professional installations often come with warranties, providing peace of mind.

Example: A musician wanting to convert a spare bedroom into a home studio might start by sealing gaps and adding MLV themselves. However, if they require near-total silence for professional recording, they would likely consult an acoustician to design and implement double-stud walls, specialized doors, and potentially a floating floor system.

Case Studies: Soundproofing In Action

Real-world examples illustrate the impact and value of soundproofing.

Case Study 1: The Remote Worker’s Sanctuary

Scenario: Sarah, a freelance graphic designer, struggled to concentrate while working from home due to constant noise from street traffic and her family’s activities.

Solution: She decided to soundproof her home office. First, she meticulously sealed all air gaps around windows and the door with acoustic caulk and added weatherstripping. She then replaced her hollow-core office door with a solid-core one and installed thick, heavy curtains over her window. Finally, she added a layer of Mass Loaded Vinyl (MLV) behind a new layer of drywall on the wall facing the street.

Outcome: The combination of sealing, a solid door, and added mass significantly reduced the traffic noise and household sounds. Sarah reported a 30% increase in her productive work hours and a marked decrease in stress levels. The total cost was around $1,200 for materials and a handyman for the drywall installation.

Case Study 2: The Musician’s Practice Space

Scenario: David, a guitarist, needed a space to practice without disturbing his family or neighbors. His garage was too noisy and reverberant.

Solution: David opted for a more intensive approach. He insulated the garage walls with dense mineral wool, added a second layer of drywall with Green Glue damping compound in between, and installed a solid-core door with robust seals. He also covered a portion of the walls with acoustic panels for sound absorption within the space.

Outcome: The transformation was dramatic. David could now play at full volume without noise complaints. The internal acoustics were also improved, making practice more enjoyable. The project cost approximately $3,500 in materials and labor.

Frequently Asked Questions

What Is The Difference Between Soundproofing And Acoustic Treatment

Does Condensation On Windows Go Away In Summer

Does Condensation On Windows Go Away In Summer

The sight of condensation on windows is a familiar one, particularly during the colder months. Droplets forming on the interior glass surfaces can seem like an unavoidable nuisance, often leading homeowners to wonder if this is a permanent fixture of their living space. As seasons change and temperatures rise, a common question emerges: does condensation on windows go away in summer? The answer is nuanced and depends heavily on the underlying causes of the condensation. While warmer weather can alleviate some moisture issues, persistent condensation often points to deeper problems that won’t simply vanish with the sun. Understanding the root causes is key to effectively managing and preventing this unwelcome phenomenon, ensuring a healthier and more comfortable home environment year-round.

Key Takeaways

  • Condensation on windows is primarily caused by warm, moist indoor air coming into contact with cold glass surfaces. This is most prevalent in winter but can occur in summer under specific conditions.
  • In summer, condensation typically disappears or significantly reduces as outdoor temperatures rise, warming the window panes and lowering the relative humidity indoors. However, it can persist if indoor humidity remains excessively high.
  • High indoor humidity is the main culprit and can stem from various sources: Cooking, showering, breathing, indoor plants, unvented dryers, and poor ventilation.
  • Older, single-pane windows are more prone to condensation because their interior surfaces get colder than those of modern, double or triple-paned windows.
  • Persistent condensation in summer can indicate inadequate ventilation, which might require solutions like exhaust fans, dehumidifiers, or improved air circulation.
  • Addressing the source of moisture and improving ventilation are crucial for long-term solutions, regardless of the season.
Does Condensation On Windows Go Away In Summer

Credit: mycoastalwindows.com

Understanding Window Condensation

Window condensation, often referred to as foggy windows, is a physical phenomenon that occurs when warm, humid air comes into contact with a colder surface. The air’s capacity to hold moisture decreases as its temperature drops. When this warm, moist air touches the cooler glass of a window, it rapidly cools, causing the water vapor in the air to condense into liquid water droplets. This is essentially the same process that forms dew on grass or fog in the air.

The temperature at which condensation begins to form is known as the dew point. If the surface temperature of the window falls below the dew point of the indoor air, condensation will appear. The amount of condensation depends on the difference between the indoor air temperature, the indoor relative humidity, and the temperature of the window’s surface.

The Role Of Indoor Humidity

Indoor humidity is the invisible vapor within your home’s air, and it’s the primary ingredient for condensation. While we can’t see it, its presence significantly impacts comfort and can lead to moisture-related problems. Everyday activities contribute to indoor humidity levels:

  • Breathing: Humans exhale moisture. A family of four can add several pints of water to the air each day.
  • Cooking: Boiling water, steaming food, and even washing dishes release significant amounts of moisture.
  • Showering and Bathing: Hot showers and baths create large plumes of steam.
  • Drying Clothes: Unvented clothes dryers are major sources of indoor humidity.
  • Houseplants: Plants release water vapor through a process called transpiration.
  • Appliances: Humidifiers, aquariums, and even some cooking appliances can add moisture.

When indoor humidity levels are high, the dew point of the air is also higher. This means that even a moderately cool window surface can be enough to trigger condensation.

Why Windows Are Prime Condensation Spots

Windows are particularly susceptible to condensation for several reasons:

  • Temperature Difference: Windows are typically the coldest surfaces in a room, especially during winter. Exterior walls are insulated, but windows often have less insulation, allowing indoor heat to escape more easily and exterior cold to penetrate.
  • Surface Area: Windows present a large, flat surface area where moist air can come into contact with a cold pane.
  • Material Properties: Glass is a relatively poor insulator compared to wall materials.

In summer, the dynamic shifts. The exterior air is warmer, and the sun can heat the windows. However, if indoor air conditioning is running intensely, the interior surfaces can still become cooler than the outdoor air, and if indoor humidity is high, condensation can still form, albeit less frequently and usually to a lesser extent than in winter.

Does Condensation On Windows Go Away In Summer

Credit: blog.totalhomesupply.com

Condensation In Winter Vs. Summer

The seasonal pattern of window condensation is quite distinct, largely due to the dramatic difference in outdoor temperatures and humidity levels.

Winter Condensation: The Usual Suspect

In winter, the external environment is cold, and the internal environment is heated. This creates a significant temperature differential across the window. Homeowners typically crank up their heating systems, which warms the indoor air. This warm air, now carrying more moisture (due to higher temperatures, it can hold more water vapor), comes into contact with the cold glass of the windows. As the indoor air cools upon touching the glass, its moisture condenses. This is why window condensation is most common and severe during winter. The colder it is outside and the warmer and more humid it is inside, the more pronounced the condensation will be.

Factors exacerbating winter condensation include:

  • Poorly insulated windows: Single-pane windows or older double-pane windows with failed seals allow more heat transfer, leading to colder interior glass surfaces.
  • High indoor humidity: Activities like cooking, showering, and drying clothes without proper ventilation significantly increase indoor moisture.
  • Reduced ventilation: In an effort to conserve heat, homeowners often seal up their homes, reducing natural air exchange and trapping moisture indoors.

Summer Condensation: An Uncommon But Possible Scenario

While less frequent, condensation can still occur on windows in the summer. This typically happens when there’s a significant difference between the indoor and outdoor temperatures and humidity levels, but in a reversed dynamic compared to winter.

The most common scenario for summer condensation involves:

  • Aggressive Air Conditioning: When the indoor air is cooled significantly by an air conditioning system, the interior surfaces of the windows can become quite cold.
  • High Outdoor Humidity: Humid summer days mean the outside air is laden with moisture.
  • Warm Indoor Air Contact: If warm, humid outdoor air infiltrates the home, or if indoor activities generate a lot of moisture, this warm, moist air can come into contact with the cold window panes.

Example: Imagine a hot, humid summer day (90°F with 70% humidity). You’re running your air conditioner aggressively, cooling your home down to a chilly 70°F. The interior glass of your windows might drop to around 72-75°F. If a brief period of high indoor humidity occurs, perhaps from cooking a steamy meal or a sudden influx of humid air from opening doors, the dew point inside could rise. If this indoor dew point exceeds the window’s surface temperature, condensation will form.

Another, less common summer scenario involves condensation on the *outside* of windows. This happens when the outdoor air is very warm and humid, and the interior of the house is very cool due to air conditioning. In this case, the exterior glass surface cools below the dew point of the outdoor air, causing condensation to form on the outside. This is usually a sign of a well-sealed, efficiently cooled home.

Why Condensation Might Persist In Summer

If you notice condensation on your windows even as the weather warms up, it’s a strong signal that the issue isn’t solely dependent on the season but rather on persistent high indoor humidity and potentially poor ventilation.

Persistent High Indoor Humidity Sources

As mentioned earlier, many daily activities contribute to indoor moisture. In summer, some sources might even be more pronounced:

  • Increased use of humidifiers: Some people use humidifiers in summer if they find the air too dry from excessive AC use, inadvertently raising humidity.
  • Indoor plants: Many people have more houseplants, and their combined transpiration can add significant moisture.
  • Moisture from the ground: In humid climates, moisture can seep up from basements or crawl spaces, especially if they are not properly sealed or dehumidified.
  • Improperly Vented Appliances: A clothes dryer that vents *into* the house, or a bathroom/kitchen exhaust fan that is broken or not used, will continuously pump moisture into the living space.

Inadequate Ventilation

Ventilation is the process of exchanging stale indoor air with fresh outdoor air. In older homes, this might happen naturally through cracks and leaks. However, modern, energy-efficient homes are often built to be very airtight, which is great for energy savings but can trap moisture and pollutants indoors.

If your home lacks sufficient ventilation, moisture generated by daily activities has nowhere to go. This is particularly problematic in summer if you’re trying to cool a humid environment. Proper ventilation is crucial for controlling indoor humidity levels year-round. This can be achieved through:

  • Exhaust Fans: Using kitchen and bathroom exhaust fans during and after activities that generate steam (cooking, showering) is vital. Ensure they are vented to the *outside* and not just into the attic.
  • Whole-House Ventilation Systems: Heat Recovery Ventilators (HRVs) and Energy Recovery Ventilators (ERVs) provide continuous fresh air while minimizing energy loss.
  • Opening Windows: On days when outdoor humidity is lower than indoor humidity, opening windows can help air out the house.
  • Ceiling Fans and Air Circulation: While not true ventilation, improving air circulation can help prevent moisture from settling on surfaces.

Window Types And Condensation

The type of windows you have plays a significant role in their susceptibility to condensation.

  • Single-Pane Windows: These are the least efficient. The interior glass surface gets very cold in winter and can still get cool enough in summer (if AC is used) to cause condensation if indoor humidity is high.
  • Double-Pane (Insulated) Windows: These have two panes of glass separated by a gap filled with air or an inert gas (like argon or krypton). This gap acts as an insulator, keeping the interior glass warmer and reducing condensation. However, if the seal between the panes fails, the gas escapes, and moisture can enter the gap, leading to foggy windows between the panes, which is a different issue and indicates the window needs replacement.
  • Triple-Pane Windows: These offer even better insulation with three panes of glass and two insulating gas-filled gaps. They are the most effective at preventing condensation caused by cold interior surfaces.
  • Low-E Coatings and Gas Fills: Modern energy-efficient windows often have Low-E coatings (which reflect heat) and are filled with inert gases. These features further improve their insulating properties and reduce the likelihood of condensation.

In summer, older, less efficient windows are still more likely to develop condensation if indoor humidity is high, simply because their interior surfaces will become colder when the AC is running compared to newer, high-performance windows.

Does Condensation On Windows Go Away In Summer

Credit: goendlessenergy.com

Solutions For Persistent Summer Condensation

If you’re experiencing condensation on your windows in the summer, it’s time to implement solutions focused on reducing indoor humidity and improving ventilation.

1. Reduce Indoor Moisture Sources

The most effective strategy is to tackle the moisture at its source.

  • Ventilate During Moisture-Generating Activities:
  • Kitchen: Always use your range hood exhaust fan when cooking, especially when boiling or steaming.
  • Bathroom: Run the exhaust fan during and for at least 20-30 minutes after showering or bathing.
  • Laundry: Ensure your clothes dryer is properly vented to the outside. If it’s venting indoors, this is a major humidity problem that needs immediate correction. Consider air-drying clothes when possible.
  • Control Humidity from Plants and Aquariums: Group houseplants together to create a microclimate, or consider moving them outdoors if possible during humid periods. Cover aquariums when not in use.
  • Check for Leaks: Inspect for any plumbing leaks, roof leaks, or issues with your foundation that could be introducing moisture into your home. Ensure proper drainage around your home’s foundation.
  • Basement and Crawl Space Management: These areas are prone to moisture. Ensure they are properly sealed, insulated, and consider a dehumidifier if necessary. A vapor barrier on the ground can prevent moisture from rising.

2. Enhance Ventilation

Even after reducing sources, you need a way to remove any remaining moisture from the air.

  • Use Exhaust Fans Consistently: Make using your kitchen and bathroom fans a habit. If they seem weak, they may need cleaning or repair.
  • Consider a Whole-House Dehumidifier: If your HVAC system is equipped, a whole-house dehumidifier can automatically manage humidity levels throughout your home.
  • Install or Upgrade Exhaust Fans: If your current fans are inadequate or non-existent, consider installing powerful, properly vented exhaust fans.
  • Strategic Window Opening: On drier days (when outdoor humidity is lower than indoor humidity), open windows on opposite sides of the house to create cross-ventilation.
  • Use Ceiling Fans: While not a substitute for ventilation, ceiling fans help circulate air, preventing stagnant pockets where moisture can accumulate.

3. Utilize Dehumidifiers

For targeted moisture control, portable or whole-house dehumidifiers are highly effective.

  • Portable Dehumidifiers: These are ideal for specific problem areas like basements, bathrooms, or laundry rooms. They collect moisture in a tank that needs regular emptying, or they can be connected to a drain hose for continuous operation.
  • Whole-House Dehumidifiers: These are integrated into your HVAC system and work automatically to maintain a set humidity level throughout your home. They are a more significant investment but offer comprehensive control.

Pro Tip: Aim for an indoor relative humidity level between 30% and 50% year-round. Many smart thermostats and dedicated hygrometers can monitor this for you.

4. Improve Air Circulation

Good air circulation helps prevent moisture from stagnating and condensing on cooler surfaces.

  • Run Your HVAC Fan: Set your thermostat’s fan setting to “On” instead of “Auto.” This circulates air continuously through your home’s ductwork, even when the AC or heat isn’t running.
  • Use Portable Fans: Place oscillating fans in rooms to keep air moving, especially in areas prone to dampness.
  • Avoid Blocking Vents: Ensure furniture or curtains aren’t obstructing air vents, allowing conditioned air to circulate freely.

5. Consider Window Upgrades (long-term Solution)

If your condensation issues are persistent and linked to older, inefficient windows, an upgrade might be the most effective long-term solution.

  • Replace Single-Pane Windows: Upgrading to double or triple-pane, energy-efficient windows with Low-E coatings and gas fills will significantly improve insulation. This raises the interior surface temperature of the glass, making it less likely to reach the dew point of your indoor air.
  • Check Window Seals: For double-pane windows, if you see condensation *between* the panes, the seal has failed. This means the insulating gas has escaped, and the window has lost its effectiveness. Replacement of the insulated glass unit (IGU) or the entire window is necessary.

Case Studies: Real-world Examples

To illustrate how these principles apply, let’s look at a couple of hypothetical but realistic scenarios.

Case Study 1: The New Homeowner With Humid Summers

Scenario: Sarah recently purchased a well-sealed, modern home in a humid coastal region. She loves the energy efficiency but is dismayed to find condensation on her bedroom windows on muggy summer mornings, even with the air conditioning running.

Analysis: The home’s airtightness means that any moisture generated indoors has nowhere to escape. The aggressive air conditioning cools the interior surfaces, including the windows. Sarah realizes her daily routines are contributing: she waters several large houseplants in the bedroom, and her morning shower runs long.

Solutions Implemented:

  • Ventilation: Sarah starts consistently using her bathroom exhaust fan during and after her shower, leaving it on for 30 minutes. She also ensures her kitchen fan is used when cooking.
  • Dehumidifier: She places a portable dehumidifier in the bedroom, setting it to maintain 45% humidity. She empties the tank daily.
  • Plant Management: She moves two of her largest plants to a more open, well-ventilated area of the house.
  • Air Circulation: She uses a ceiling fan in the bedroom to keep air moving.

Outcome: Within a week, the condensation significantly reduced. By consistently managing humidity sources and using the dehumidifier, Sarah achieved comfortable humidity levels, and the summer window condensation disappeared.

Case Study 2: The Older Home With Basement Moisture

Scenario: Mark lives in an older home with original double-pane windows that are showing their age. He experiences condensation on his living room windows during humid summer days, particularly on the side of the house adjacent to his partially finished basement.

Analysis: Mark suspects the condensation is linked to moisture migrating from his basement. The older windows have less effective insulation, and the basement’s dampness is likely increasing the overall indoor humidity. The basement itself may not be adequately sealed or ventilated.

Solutions Implemented:

  • Basement Sealing: Mark investigates his basement and finds some minor cracks in the foundation walls and around the rim joist. He seals these with appropriate caulk and spray foam.
  • Vapor Barrier: He installs a heavy-duty vapor barrier over the dirt floor in the unfinished portion of his basement.
  • Dehumidifier: He places a robust dehumidifier in the basement, set to maintain 50% humidity, and connects it to a drain hose.
  • Window Maintenance: He checks the seals on his double-pane windows. While some condensation is between the panes on a few, indicating seal failure, he prioritizes the humidity control first. He notes that upgrading these windows will be a future project.
  • Ventilation: He ensures his bathroom and kitchen fans are working correctly and vents them outside.

Outcome: By addressing the significant moisture source in the basement, Mark saw a dramatic reduction in overall indoor humidity. This, in turn, led to a significant decrease in window condensation. While the older windows might still show a hint of condensation on the most extreme days, the persistent problem was solved by tackling the root cause of excess moisture. The issue of condensation *between* the panes remains, highlighting the need for future window replacement.

Frequently Asked Questions

What Is The Ideal Humidity Level For My Home In Summer?

The ideal indoor relative humidity level for comfort and to prevent condensation is generally between 30% and 50%. During very hot and humid summer periods, maintaining levels closer to 50% might be challenging without robust dehumidification, but consistently exceeding 60% often indicates a problem that needs addressing.

Will Condensation Between Window Panes Go Away In Summer?

No, condensation that forms between the panes of a double or triple-glazed window is a sign that the seal has failed. This allows moist air to enter the insulating gap, and the water droplets or fogging will persist regardless of the season. This type of condensation indicates that the window’s insulating properties have been compromised, and the insulated glass unit (IGU) typically needs to be replaced.

Can I Just Wipe Away Condensation, Or Is It A Serious Problem?

Wiping away condensation is a temporary fix for the symptom, not the cause. While it removes the immediate water, it doesn’t address the underlying issue of high indoor humidity or cold window surfaces. Persistent condensation can lead to serious problems such as mold growth on window frames and sills, wood rot, peeling paint, and damage to drywall. It also indicates that your indoor air quality may be compromised.

How Do I Know If My Window Condensation Is Normal Or A Sign Of A Problem?

A light misting of condensation on windows during periods of extreme temperature difference (e.g., very cold winter days or very hot, humid summer days with aggressive AC use) might be considered normal, especially with older windows. However, if you see large water droplets, water pooling on the sills, persistent fogging that doesn’t clear, or condensation that occurs frequently even in moderate weather, it’s a strong indicator of a problem with high indoor humidity or inadequate ventilation. Condensation *between* the panes is always a problem.

What’s The Difference Between Condensation On The Inside Vs. The Outside Of My Windows In Summer?

Condensation on the inside of your windows in summer typically means your indoor air is too humid and/or your window surfaces are too cold due to aggressive air conditioning. The warm, moist indoor air is hitting the cold glass and condensing. Condensation on the outside of your windows occurs when the outdoor air is very warm and humid, and your air conditioning has made the exterior surface of the glass very cold. This is usually a sign of an efficient cooling system and well-insulated, well-sealed windows, and is generally not a cause for concern.

As the seasons turn and temperatures fluctuate, the presence and disappearance of window condensation offer valuable insights into your home’s indoor environment. While the warming trend of summer often naturally alleviates the condensation seen during colder months, its persistence can signal underlying issues with humidity control and ventilation.

Addressing these factors proactively, by reducing moisture sources, ensuring adequate airflow, and considering the performance of your windows, is key to maintaining a comfortable, healthy, and problem-free home throughout the year. By understanding the dynamics of condensation, you can take targeted steps to ensure your windows remain clear and your home remains free from the detrimental effects of excess moisture, regardless of the season.

Common House Problems

Common House Problems

Owning a home is a dream for many, representing stability, investment, and a place to build memories. However, this significant asset also comes with responsibilities, chief among them being the constant vigilance required to maintain it. From the roof overhead to the foundation beneath, houses are complex systems susceptible to wear, tear, and the relentless forces of nature.

Ignoring common house problems can lead to escalating repair costs, diminished property value, and significant discomfort for occupants. Proactive identification and timely intervention are key to preserving your home’s integrity and ensuring a safe, comfortable living environment.

Understanding the typical issues homeowners face is the first step in effective home maintenance. These problems can range from minor annoyances like a leaky faucet to major structural concerns that demand immediate attention. By familiarizing yourself with these common culprits, you can develop a robust preventative maintenance schedule and be better prepared to tackle repairs when they inevitably arise.

This article will explore the most frequent house problems, their causes, signs, and recommended solutions, empowering you to protect your investment and enjoy your home for years to come.

Key Takeaways

  • Roofing issues are prevalent, including leaks, damaged shingles, and clogged gutters, often caused by weather and age. Regular inspections and cleaning are crucial.
  • Plumbing problems such as leaks, clogs, and low water pressure can lead to water damage and mold growth. Early detection and professional repair are vital.
  • Electrical system faults like flickering lights, overloaded circuits, and outdated wiring pose fire hazards. Professional assessment and upgrades are recommended.
  • HVAC system malfunctions can result in uneven temperatures, poor air quality, and high energy bills. Regular maintenance is essential for efficiency and longevity.
  • Foundation and structural damage, including cracks and settling, are serious issues requiring expert evaluation and repair to prevent further deterioration.
  • Pest infestations (insects, rodents) can compromise structural integrity and pose health risks. Prevention and professional extermination are key.
  • Mold and mildew thrive in damp environments and can cause health problems and damage building materials. Identifying and addressing moisture sources is paramount.
  • Window and door issues like drafts, sticking, and damaged seals affect energy efficiency and security. Repair or replacement can improve comfort and reduce costs.
Common House Problems

Credit: www.nachi.org

Common Roofing Problems And Solutions

The roof is your home’s first line of defense against the elements. When it fails, the consequences can be severe, impacting everything from your home’s interior to its structural integrity. Regular inspections and prompt repairs are non-negotiable for homeowners.

Leaky Roofs

Leaks are perhaps the most common and concerning roofing problem. They can manifest in various ways, from a small drip in the attic after a heavy rain to visible water stains on ceilings and walls. The source of a leak isn’t always directly above the interior damage; water can travel along rafters and insulation before becoming visible.

  • Causes: Damaged or missing shingles, deteriorated flashing around chimneys, vents, and skylights, cracked or blocked gutters, and ice dams in colder climates are primary culprits. Age and wear-and-tear also play significant roles.
  • Signs: Water stains on ceilings or walls, peeling paint near the roofline, drips from the ceiling, visible mold or mildew in the attic, and an unusually high water bill if the leak is constant.
  • Solutions: Locating the exact source of the leak is the first step, often requiring a thorough inspection of the attic and the exterior roof. Damaged shingles need replacement. Damaged or corroded flashing should be repaired or replaced, ensuring a proper seal. Clogged gutters should be cleared, and if they are damaged, they should be repaired or replaced. In areas prone to ice dams, improving attic insulation and ventilation can help. For persistent or widespread leaks, a professional roof inspection is highly recommended.

Damaged Shingles

Shingles are designed to protect the underlying roof structure from moisture and UV rays. Over time, they can become brittle, cracked, curled, or even blow off entirely.

  • Causes: High winds, hail storms, extreme temperature fluctuations, age, and improper installation can all lead to damaged shingles. Moss or algae growth can also degrade shingle material.
  • Signs: Shingles that are cracked, curled, buckled, or missing. Granules found in gutters or at the base of downspouts indicate that the shingles are losing their protective layer.
  • Solutions: Minor damage, like a few cracked shingles, can often be repaired by replacing individual shingles. However, if a significant portion of the roof shows signs of wear, curling, or is missing many shingles, a full roof replacement may be necessary. It’s important to match new shingles with existing ones as closely as possible for aesthetic and functional reasons.

Clogged Gutters And Downspouts

Gutters and downspouts are essential for diverting rainwater away from your home’s foundation. When they become clogged with leaves, twigs, and debris, water can back up and cause significant damage.

  • Causes: Accumulation of leaves, pine needles, dirt, and other debris over time.
  • Signs: Water overflowing from the gutters, visible debris in the gutters, sagging gutters, water pooling around the foundation, and stains on the exterior walls below the gutters.
  • Solutions: Regular gutter cleaning is the most effective solution. This can be done manually or by hiring a professional. Installing gutter guards can help minimize the amount of debris that enters the gutters, reducing the frequency of cleaning needed. Ensure downspouts are clear and properly directed away from the foundation.
Common House Problems

Credit: www.basichomeloan.com

Plumbing Problems That Cause Headaches

The intricate network of pipes, fixtures, and drains within a home is crucial for daily living. When plumbing systems falter, it can lead to inconvenience, water damage, and potential health hazards.

Leaky Pipes And Faucets

A persistent drip from a faucet or a hidden leak within walls can waste a significant amount of water and cause considerable damage over time.

  • Causes: Worn-out washers or O-rings in faucets, corrosion in pipes (especially older galvanized steel pipes), loose pipe connections, and high water pressure can all lead to leaks. Freezing temperatures can also cause pipes to burst.
  • Signs: Dripping faucets, water stains on walls or ceilings, the sound of running water when no fixtures are in use, mold or mildew growth, and an unexplained increase in water bills.
  • Solutions: For dripping faucets, replacing worn washers or cartridges is often a simple DIY fix. For leaks within walls or floors, it’s crucial to call a plumber immediately to locate and repair the damaged pipe, minimizing water intrusion and potential structural damage. Insulating exposed pipes in unheated areas can prevent freezing.

Clogged Drains And Toilets

Clogged drains and toilets are a common nuisance that can quickly escalate from a minor inconvenience to a major problem, especially if multiple fixtures are affected.

  • Causes: Hair, soap scum, grease, food particles, and foreign objects are the usual culprits. In toilets, excessive use of toilet paper or flushing non-flushable items can cause blockages. Older pipes with accumulated buildup are also more prone to clogs.
  • Signs: Slow-draining sinks or tubs, gurgling sounds from drains, toilets that don’t flush properly or back up, and unpleasant odors emanating from drains.
  • Solutions: For minor clogs, a plunger or a drain snake can often be effective. Pouring boiling water down drains can help dissolve grease. Avoid using harsh chemical drain cleaners, as they can damage pipes and are environmentally harmful. For persistent or severe clogs, especially in main sewer lines, a professional plumber with specialized equipment like a hydro-jetter is necessary.

Low Water Pressure

A sudden or gradual decrease in water pressure throughout the house can be frustrating and indicate an underlying issue.

  • Causes: Clogged aerators on faucets, partially closed shut-off valves, leaks in the plumbing system, issues with the water heater, or problems with the municipal water supply can all cause low water pressure. Mineral buildup within pipes over time can also restrict flow.
  • Signs: Weak flow from showerheads and faucets, difficulty filling tubs or flushing toilets, and inconsistent pressure between different fixtures.
  • Solutions: Start by checking faucet aerators for mineral buildup and cleaning them. Ensure all shut-off valves are fully open. If the problem persists, inspect for obvious leaks. If only the hot water pressure is low, the water heater might be the issue. For widespread low pressure, a plumber can assess the main water line and check for internal pipe blockages or municipal supply issues.
Common House Problems

Credit: www.drenergysaver.com

Electrical System Hazards

The electrical system powers our homes, but faulty wiring or overloaded circuits can pose significant fire risks and disrupt daily life. Regular checks and upgrades are essential for safety.

Flickering Lights And Outlets

Intermittent or persistent flickering lights and outlets that don’t consistently power devices can be more than just annoying; they often signal a deeper electrical problem.

  • Causes: Loose electrical connections in outlets, switches, or the main electrical panel, overloaded circuits, faulty light bulbs or fixtures, or issues with the service entrance can all cause flickering.
  • Signs: Lights dimming or flickering when appliances are turned on, outlets that intermittently lose power, and a buzzing sound from outlets or switches.
  • Solutions: Ensure light bulbs are screwed in tightly. If flickering occurs when specific appliances are used, it might indicate an overloaded circuit. Loose connections are a serious safety concern and require a qualified electrician to diagnose and repair. Never attempt to fix faulty wiring yourself.

Overloaded Circuits

Modern homes use more electricity than ever before. Overloading circuits by plugging too many high-draw appliances into one circuit can lead to tripped breakers and potential fire hazards.

  • Causes: Exceeding the amperage capacity of a circuit breaker or fuse by running too many appliances simultaneously, especially those with heating elements (like toasters, hair dryers, or space heaters).
  • Signs: Circuit breakers that frequently trip, a burning smell coming from outlets or the electrical panel, and lights dimming or flickering.
  • Solutions: Identify which appliances are on the overloaded circuit and redistribute them to different circuits. Avoid using high-wattage appliances simultaneously on the same circuit. If circuits trip regularly despite careful usage, it may be necessary to have an electrician upgrade your electrical panel or add new circuits to accommodate your power needs.

Outdated Wiring

Homes built before the 1970s may have outdated wiring systems, such as knob-and-tube wiring or aluminum wiring, which can be hazardous.

  • Causes: Older wiring materials may not be able to handle the demands of modern appliances and electronics. Aluminum wiring, in particular, can become loose at connection points, leading to overheating and fire risks. Knob-and-tube wiring lacks grounding, which is a crucial safety feature.
  • Signs: Frequent tripped breakers, flickering lights, shocks when touching appliances or outlets, discolored outlets, and the presence of knob-and-tube or aluminum wiring visible in the attic or basement.
  • Solutions: If your home has outdated wiring, it is strongly recommended to have it inspected by a qualified electrician. Rewiring the house may be necessary to ensure safety and meet current electrical codes. This is a significant investment but crucial for the safety of your home and family.

Hvac System Issues

Your Heating, Ventilation, and Air Conditioning (HVAC) system is critical for maintaining comfort and indoor air quality. Malfunctions can lead to discomfort, increased energy costs, and potential health issues.

Inefficient Heating And Cooling

When your HVAC system isn’t working efficiently, you’ll notice it through uneven temperatures, higher energy bills, and a system that runs constantly without providing adequate comfort.

  • Causes: Dirty air filters, clogged condensers or evaporator coils, low refrigerant levels, ductwork leaks, and aging system components can all reduce efficiency. Poor insulation and air leaks in the home also contribute.
  • Signs: Rooms that are too hot or too cold, the system running constantly, high energy bills, strange noises from the unit, and dust buildup.
  • Solutions: Regularly changing air filters is the simplest and most effective way to maintain efficiency. Ensure outdoor condenser units are kept clear of debris. Annual professional maintenance for your HVAC system, including cleaning coils and checking refrigerant levels, is highly recommended. Sealing air leaks in your home and improving insulation can also significantly boost HVAC efficiency.

Poor Indoor Air Quality

The air inside your home can be more polluted than the air outside, especially if your HVAC system isn’t functioning correctly or if there are sources of indoor pollutants.

  • Causes: Dirty filters, mold and mildew growth within the HVAC system or ductwork, inadequate ventilation, and pollutants from cleaning products, cooking, or pets.
  • Signs: Stale or musty odors, increased allergy or asthma symptoms, dust buildup, and visible mold or mildew.
  • Solutions: Regular replacement of air filters is crucial. Consider using high-efficiency filters (MERV 11 or higher) for better particle capture. Professional cleaning of ductwork can remove accumulated dust and debris. Using air purifiers and ensuring proper ventilation, especially when cooking or cleaning, can also improve air quality. Addressing any sources of moisture that might lead to mold growth is also vital.

System Breakdowns

Unexpected HVAC system breakdowns can be particularly stressful, especially during extreme weather conditions.

  • Causes: Lack of regular maintenance is the leading cause of premature system failure. Worn-out parts, electrical issues, refrigerant leaks, and mechanical failures can all lead to a complete breakdown.
  • Signs: The system not turning on, unusual noises (grinding, squealing), strange smells, or complete lack of heating or cooling.
  • Solutions: The best prevention is regular professional maintenance. If a breakdown occurs, turn off the system to prevent further damage and call a qualified HVAC technician for diagnosis and repair. In some cases, if the system is very old and prone to breakdowns, replacement might be more cost-effective in the long run.

Foundation And Structural Issues

The foundation is the bedrock of your home’s stability. Cracks, settling, or other structural problems can compromise the entire building and require expert attention.

Foundation Cracks

Cracks in the foundation walls or floor can be a sign of underlying issues with the soil or the foundation itself.

  • Causes: Soil expansion and contraction due to moisture changes, improper soil compaction during construction, hydrostatic pressure from saturated soil, tree roots, and seismic activity can all cause foundation cracks.
  • Signs: Visible cracks in concrete walls or floors (horizontal, vertical, or stair-step patterns), bowing walls, and water seepage through the foundation.
  • Solutions: Small, hairline cracks might not be immediately concerning, but they should be monitored. Larger cracks, or those that are widening or accompanied by bowing walls, require immediate attention from a foundation repair specialist. Repair methods can include epoxy or polyurethane injections for smaller cracks, or more extensive solutions like carbon fiber reinforcement, wall anchors, or new footings for more severe damage.

Foundation Settling

All homes settle to some degree over time. However, excessive or uneven settling can lead to significant structural problems.

  • Causes: Poor soil conditions, changes in soil moisture content (drought or excessive rain), inadequate foundation design, and nearby construction or excavation can all contribute to foundation settling.
  • Signs: Uneven floors, doors and windows that stick or don’t close properly, cracks in walls or ceilings (often wider at the top), and a separation of the chimney from the house.
  • Solutions: Identifying the cause of the settling is the first step. Solutions can range from improving drainage around the foundation to prevent moisture fluctuations, to installing underpinning systems like piers or piles to stabilize the foundation and transfer the load to more stable soil layers. A structural engineer or foundation specialist can assess the situation and recommend the appropriate remediation.

Moisture And Water Damage

Excessive moisture around or within the foundation can lead to serious structural damage and promote mold growth.

  • Causes: Poor grading and drainage around the home, clogged gutters, leaks from plumbing, and high water tables.
  • Signs: Damp basement or crawl space, musty odors, efflorescence (a white, powdery residue) on foundation walls, mold and mildew growth, and weakened concrete or wood structures.
  • Solutions: Improving exterior grading to ensure water flows away from the foundation is crucial. Cleaning gutters and downspouts and ensuring downspouts extend sufficiently far from the house are also vital. Installing a sump pump and a drain tile system can help manage groundwater. Addressing any interior plumbing leaks promptly is also important. Waterproofing the foundation walls from the interior or exterior can provide an additional layer of protection.

Pest Infestations

Pests, whether insects or rodents, are not just a nuisance; they can cause structural damage, contaminate food, and spread diseases.

Termite Damage

Termites are silent destroyers that can cause extensive damage to a home’s wooden structures before being detected.

  • Causes: Termites feed on cellulose, found in wood, paper, and other organic materials. They build mud tubes to travel between their colonies and food sources.
  • Signs: Mud tubes on foundation walls or wooden beams, discarded wings near windowsills, hollow-sounding wood, and visible damage to wooden structures.
  • Solutions: Professional termite inspection is recommended, especially in areas prone to termites. Treatment options include liquid termiticides applied around the foundation or baiting systems. For existing damage, structural repairs may be necessary. Preventative measures include keeping wooden structures away from direct soil contact and addressing moisture issues.

Rodent Infestations

Rats and mice can chew through wires, insulation, and structural components, posing fire hazards and health risks.

  • Causes: Rodents seek shelter and food. Gaps in the foundation, unscreened vents, and easy access to food sources (like improperly stored garbage) attract them.
  • Signs: Droppings (small, dark pellets), gnaw marks on wood or wires, scratching or scurrying noises within walls, and visible nests made of insulation or shredded materials.
  • Solutions: Sealing entry points is paramount. This includes repairing holes in the foundation, walls, and roof, and ensuring vents are properly screened. Proper food storage and waste management are also essential. Traps and rodenticides can be used for control, but professional pest control services are often the most effective solution for significant infestations.

Other Common Pests (ants, Cockroaches, Etc.)

Various other insects can invade homes, causing discomfort and potential damage.

  • Causes: Ants are often attracted by food crumbs or water sources. Cockroaches thrive in warm, damp environments and are also attracted to food.
  • Signs: Visible trails of ants, sightings of cockroaches, especially at night, and evidence of their presence (e.g., droppings, shed skins).
  • Solutions: Maintaining a clean home is the best defense. Promptly clean up food spills, store food in airtight containers, and manage garbage effectively. For ant infestations, identifying and treating their trails and entry points is key. For cockroaches, thorough cleaning, sealing entry points, and using baits or traps are common solutions. Professional pest control may be necessary for persistent problems.

Mold And Mildew Growth

Mold and mildew are fungi that thrive in damp, humid conditions and can cause significant damage to building materials and pose health risks to occupants.

Causes Of Mold And Mildew

The primary cause is excess moisture. This can come from leaks (roof, plumbing, windows), condensation, high humidity, or flooding.

  • Examples: A leaky pipe under a sink, condensation on poorly insulated windows, a damp basement, or water intrusion after a storm.
  • Signs: Visible discoloration (black, green, white, or orange patches) on walls, ceilings, or fabrics; a persistent musty odor, especially in bathrooms, basements, or areas with poor ventilation; peeling paint or wallpaper; and warped drywall.

Health Risks Associated With Mold

Exposure to mold can trigger allergic reactions and respiratory problems, especially in sensitive individuals.

  • Symptoms: Sneezing, runny nose, red eyes, skin rash, asthma attacks, and respiratory infections. Long-term exposure can lead to more severe health issues.
  • Prevention: Controlling humidity levels (ideally between 30-50%), ensuring good ventilation, promptly fixing leaks, and cleaning up any water damage within 24-48 hours are critical preventive measures.

Remediation And Prevention

Addressing the source of moisture is the first and most crucial step in mold remediation.

  • Solutions: For small areas of mold, cleaning with a mixture of water and detergent or a mild bleach solution may be effective, provided proper ventilation and protective gear are used. However, for larger or more widespread infestations, or if mold is suspected within walls or HVAC systems, professional mold remediation services are essential. These professionals have the expertise and equipment to safely remove mold and prevent its return. Ensuring ongoing ventilation and humidity control is key to long-term prevention.

Window And Door Problems

Windows and doors are essential for light, ventilation, and security, but they can develop issues that affect comfort and energy efficiency.

Drafts And Air Leaks

Drafty windows and doors are a common source of heat loss in winter and cool air loss in summer, significantly impacting energy bills.

  • Causes: Gaps around the window frames or door jambs, worn-out or missing weatherstripping, damaged seals around glass panes, and improperly fitting windows or doors.
  • Signs: Feeling a cool breeze near windows or doors,

Garbage Disposal Smell Like Sewage

Garbage Disposal Smell Like Sewage

The persistent, foul odor emanating from your kitchen sink, often described as sewage-like, can be a deeply unpleasant and concerning issue. It’s a smell that can permeate your kitchen, making it an uncomfortable space to be in and raising questions about hygiene and plumbing integrity. While many homeowners might initially blame the garbage disposal itself, the truth is that the smell is usually a symptom of underlying problems within the disposal unit or the connected plumbing system. Understanding the root causes is the first step toward eliminating this unwelcome odor and restoring freshness to your home.

This pervasive stench isn’t just a minor annoyance; it can indicate potential bacterial growth, food particle buildup, or even plumbing blockages that require prompt attention. Ignoring it can lead to more significant issues down the line, including more serious clogs, pest infestations, or even damage to your plumbing. Fortunately, most garbage disposal smells can be tackled with a systematic approach, combining regular maintenance with targeted cleaning methods.

Key Takeaways

  • Garbage disposal smells like sewage are typically caused by trapped food debris, bacterial growth, improper usage, or plumbing issues.
  • Regular preventative maintenance is crucial to avoid foul odors.
  • Cleaning methods range from simple household remedies like citrus peels and ice to more intensive solutions involving baking soda and vinegar.
  • Professional plumbing services may be necessary for persistent or severe odor problems, especially if they indicate a larger plumbing blockage or vent issue.
  • Understanding what not to put down the disposal is key to preventing clogs and odor buildup.

Common Culprits Behind Garbage Disposal Sewage Smells

The pungent odor of sewage emanating from your garbage disposal is rarely a mystery without a cause. It’s almost always a direct result of organic matter decaying within the unit or its associated plumbing. Identifying the specific culprit is essential for applying the correct solution.

Trapped Food Debris And Buildup

The most frequent offender is food particles that escape the grinding mechanism or get lodged in the disposal’s nooks and crannies. While disposals are designed to break down food waste, certain items, like fibrous vegetables (celery, corn husks), starchy foods (potato peels, pasta), or small, hard items (seeds, bones), can be difficult to grind completely. These remnants can accumulate over time, clinging to the impellers, grinding chamber walls, and drainpipe. As this organic matter sits and decomposes, it releases sulfur compounds, which are responsible for the characteristic rotten-egg or sewage-like smell.

Bacterial Growth

Moisture and organic matter create a perfect breeding ground for bacteria. Inside the garbage disposal, especially in areas where food debris has accumulated, bacteria thrive. These microorganisms break down the food particles, and a byproduct of this anaerobic decomposition is hydrogen sulfide gas, the primary component of the sewage smell. The darker, damper areas within the disposal unit are particularly susceptible to this bacterial proliferation.

Improper Usage And Overloading

Even with regular cleaning, misuse of the garbage disposal can quickly lead to odor problems. Overloading the unit by trying to process too much food waste at once can overwhelm its grinding capacity. This leads to incomplete grinding and increased chances of food particles getting stuck. Additionally, running the disposal with insufficient cold water is a common mistake. Cold water helps solidify grease and fats, making them easier to grind and flush away. Hot water, conversely, can melt grease, allowing it to coat the inside of the disposal and pipes, creating a sticky surface for food debris to adhere to.

Grease, Oil, And Fats

Pouring grease, oil, or fats down the garbage disposal is a recipe for disaster. While the disposal might grind them initially, these substances will inevitably cool and solidify further down the drainpipe. This buildup acts like a trap, catching other food particles and creating a dense, odor-producing mass. Over time, this solidified grease can significantly obstruct the pipe, leading to slow drains and a strong sewage smell as waste begins to back up.

Clogged Or Slow Drains

A clogged or slow-draining sink is a clear indicator that something is amiss in your plumbing. If food waste and water aren’t draining efficiently from the disposal, it means waste is accumulating in the pipes. This stagnant waste will decompose, releasing foul odors that can back up into the kitchen through the disposal unit. A clog can be a direct result of excessive food debris, grease buildup, or even foreign objects that have found their way into the drain.

Plumbing Vent Issues

Less commonly, a sewage smell might originate not directly from the disposal unit but from your plumbing vent system. Plumbing vents are designed to allow air into the drainage system, equalizing pressure and allowing wastewater to flow smoothly. If a vent pipe becomes blocked (often by leaves, debris, or even animal nests), it can disrupt the normal flow of air and waste. This can cause a siphon effect, pulling water out of the P-trap under your sink. The P-trap is a U-shaped section of pipe designed to hold water, creating a seal that prevents sewer gases from entering your home. When this seal is broken, those gases can escape, leading to a sewage smell.

Garbage Disposal Smell Like Sewage

Credit: www.reddit.com

Troubleshooting And Cleaning Methods

Once you’ve identified potential causes, it’s time to tackle the smell. Fortunately, many effective cleaning methods can be performed with common household items, saving you the cost of a plumber for minor issues.

The Power Of Ice And Citrus

A simple yet effective method for cleaning and deodorizing your garbage disposal involves ice cubes and citrus peels.

  • Fill the disposal chamber with about 1-2 cups of ice cubes.
  • Run cold water and turn on the disposal. The hard ice helps to scour the impellers and the interior walls of the grinding chamber, dislodging any stuck food particles.
  • Once the ice is ground, turn off the disposal and let the water run for another 30 seconds to flush away the dislodged debris.
  • For added freshness, cut a lemon, lime, or orange into small pieces and repeat the grinding process with cold water. The citrus oils help to cut through grease and leave a pleasant scent.

Baking Soda And Vinegar: A Classic Duo

This natural cleaning combination is excellent for deodorizing and breaking down buildup.

  • Pour about half a cup of baking soda directly into the disposal.
  • Follow with one cup of white vinegar. You’ll notice a fizzing reaction as the two combine.
  • Let the mixture sit for about 10-15 minutes to allow it to work on any grime and odor-causing bacteria.
  • Cover the drain opening with the sink stopper to contain the reaction and its deodorizing effects.
  • After the time is up, remove the stopper, run cold water, and turn on the disposal to flush the system thoroughly.

Hot Water And Dish Soap Flush

A simple flush with hot water and dish soap can help clear out lingering grease and small food particles.

  • Run hot water into the disposal for about a minute to warm up the pipes and loosen grease.
  • Turn off the water and pour about half a cup of liquid dish soap directly into the disposal.
  • Turn the disposal back on and let it run for about 30 seconds to a minute.
  • Finally, flush the system thoroughly with plenty of cold water while the disposal is running to wash away the soap and loosened debris.

Using Salt And Ice

Similar to the ice method, adding salt to the ice can provide a more abrasive scrubbing action.

  • Fill the disposal with ice cubes.
  • Add about half a cup of coarse salt (like kosher salt) over the ice.
  • Run cold water and turn on the disposal. The combination of ice and salt acts as a powerful scouring agent.
  • Flush thoroughly with cold water afterward.

Professional Cleaning Solutions

For more stubborn buildup or odors, commercially available garbage disposal cleaning products can be effective. These are often formulated with enzymes or chemicals designed to break down grease and food waste. Always follow the manufacturer’s instructions carefully and ensure good ventilation when using such products.

Preventative Maintenance: The Key To Long-term Freshness

The most effective way to combat garbage disposal smells is to prevent them from occurring in the first place. Establishing good habits and performing regular maintenance can keep your disposal running smoothly and smelling fresh.

What Not To Put Down Your Disposal

Understanding the limitations of your garbage disposal is paramount. Certain items can cause clogs, damage the unit, or contribute significantly to odor buildup. Avoid putting the following down your disposal:

  • Fibrous Vegetables: Celery, asparagus, corn husks, and leafy greens can wrap around the impellers and clog the system.
  • Starchy Foods: Potato peels, pasta, rice, and bread can swell and create a thick paste that’s difficult to grind and flush.
  • Grease, Oil, and Fats: As mentioned, these solidify and coat pipes, leading to major clogs and odors.
  • Hard Materials: Fruit pits, bones, shells (oysters, clams), and even coffee grounds can dull the blades and potentially jam the mechanism. Coffee grounds, in particular, can accumulate and create sludge.
  • Non-Food Items: Utensils, sponges, paper towels, and packaging should never be put down the disposal.
  • Large Food Scraps: Always scrape plates into the trash or compost bin before rinsing them in the sink.

Proper Disposal Usage

  • Run Cold Water: Always run cold water before, during, and for about 30 seconds after using the disposal. This helps to flush food particles through the pipes and solidifies grease for easier grinding.
  • Grind in Batches: Don’t overload the disposal. Feed food waste in small amounts, allowing the unit to grind and flush each batch before adding more.
  • Run Regularly: Even if you don’t have much to grind, running the disposal with cold water for a minute every few days can help keep the internal components clean and prevent stagnation.

Regular Cleaning Schedule

In addition to the methods mentioned above, incorporate a regular cleaning routine.

  • Weekly: Use the ice and citrus peel method or the baking soda and vinegar treatment once a week to keep odors at bay and dislodge minor buildup.
  • Monthly: Consider a more thorough cleaning with a commercial disposal cleaner or a repeat of the baking soda and vinegar method if needed.

Inspecting For Leaks And Damage

Periodically check the area around your garbage disposal for any signs of leaks. Leaks can contribute to moisture buildup and potential mold or mildew growth, exacerbating odor problems. Also, listen for any unusual noises when the disposal is running, which could indicate a mechanical issue.

Garbage Disposal Smell Like Sewage

Credit: www.applewoodfixit.com

When To Call A Professional Plumber

While most garbage disposal smells can be resolved with DIY methods, there are times when professional intervention is necessary. Persistent odors, slow drains that don’t resolve, or signs of a larger plumbing issue warrant a call to a qualified plumber.

Persistent Odors Despite Cleaning

If you’ve diligently followed cleaning procedures and the sewage smell persists, it might indicate a deeper problem. This could include:

  • Severe Buildup in Drainpipes: The clog might be further down the line than the disposal unit itself, requiring professional snaking or hydro-jetting.
  • Damaged Disposal Unit: Internal components of the disposal might be worn out or damaged, preventing effective grinding and flushing.
  • Plumbing Vent Blockage: As discussed earlier, a blocked vent can cause sewer gas to enter your home. Plumbers have the tools to inspect and clear vent pipes.

Slow Drains And Backups

If you notice that your sink is draining slowly, or if water is backing up into the sink when you use the disposal or dishwasher, it’s a clear sign of a significant clog. A plumber can use specialized equipment like drain snakes or video inspection cameras to locate and remove the obstruction.

Signs Of Leaks Or Water Damage

If you discover leaks around the disposal unit, under the sink, or notice water stains on your cabinetry, it’s crucial to address them promptly. Leaks can lead to structural damage and mold growth, and a plumber can identify the source and repair the faulty connections or components.

Unusual Noises Or Malfunctions

If your garbage disposal starts making loud grinding noises, vibrates excessively, or fails to operate correctly, it may require professional repair or replacement. Attempting to fix complex mechanical issues without the proper expertise can be dangerous and may cause further damage.

A plumber can diagnose issues related to pipe integrity, proper trap function, and venting systems, ensuring your entire plumbing setup is working correctly and efficiently, thereby preventing the return of those unpleasant sewage smells.

Garbage Disposal Smell Vs. Other Sink Odors

It’s important to differentiate between a true sewage smell and other less severe odors that can emanate from a sink area. Understanding the nuances can help in diagnosing the problem more accurately.

Mild Mustiness Vs. Strong Sewage

A mild musty smell might simply be due to residual moisture and minor food particles in the disposal or sink basin, often easily fixed with a quick cleaning. A strong, pungent sewage or rotten-egg smell, however, typically points to decomposing organic matter and potentially more serious bacterial activity or plumbing issues.

P-trap Functionality

The P-trap under your sink is designed to hold water, creating a seal against sewer gases. If the trap is dry (perhaps due to infrequent use of a rarely used sink) or if the seal is compromised, sewer gases can enter the room. This usually results in a distinct sewage smell. A simple fix might be to run water in the sink for a minute or two to refill the trap. If the smell returns quickly, it could indicate a venting problem or a leak in the trap itself.

Drain Flies And Pests

Sometimes, sink odors can attract drain flies or other small pests. While these pests themselves don’t cause the smell, their presence indicates a source of decaying organic matter within the drain or disposal system that needs to be cleaned. Addressing the underlying food buildup will usually resolve the pest issue.

Comparison Of Common Sink Odor Causes

Odor TypePrimary CauseTypical FixesWhen to Call a Plumber
**Mild Mustiness**Minor food residue, lingering moistureRegular cleaning with citrus, ice, baking soda & vinegarIf odor persists after regular cleaning
**Sewage/Rotten Egg**Decomposing food, bacterial growth, grease buildupDeep cleaning (ice, citrus, baking soda/vinegar), proper usage, hot water flushPersistent odors, slow drains, suspected pipe blockage
**Dry P-Trap**Lack of water seal in U-bendRun water in sink regularlyIf smell returns quickly after refilling trap
**Grease Clog**Solidified fats and oils catching debrisHot water/dish soap flush, commercial degreasers, professional snakingRecurring clogs, severe backups

Frequently Asked Questions

What Is The Fastest Way To Get Rid Of A Garbage Disposal Smell?

The quickest effective method often involves using ice cubes and citrus peels. Fill the disposal with ice, run cold water, and grind. Then, repeat with lemon or orange peels. This helps scour the unit and deodorize it simultaneously. For a more potent immediate effect, the baking soda and vinegar method, allowed to sit for 10-15 minutes before flushing, can also work rapidly.

How Often Should I Clean My Garbage Disposal To Prevent Smells?

To prevent smells, aim for a light cleaning (like the ice and citrus method) at least once a week. A more thorough cleaning using baking soda and vinegar can be done once a month or whenever you notice a faint odor returning. Consistent maintenance is key.

Can I Pour Bleach Down My Garbage Disposal To Kill Odors?

While bleach can kill bacteria and temporarily mask odors, it’s generally not recommended for regular use in garbage disposals. Bleach can be harsh on the metal components of the disposal and may damage certain types of plumbing, especially older pipes. Furthermore, it doesn’t effectively break down the food debris causing the smell, only the bacteria on the surface. Natural methods like vinegar, baking soda, and citrus are safer and more effective for long-term disposal health.

My Garbage Disposal Is Leaking, What Should I Do?

If your garbage disposal is leaking, stop using it immediately and turn off the power switch located under the sink or at the breaker box. Leaks can occur at the sink flange, the connections to the dishwasher hose, or the main housing of the unit. You’ll need to identify the source of the leak. Minor leaks at a connection might be fixable by tightening a clamp, but leaks from the housing or sink flange often require professional repair or replacement of the disposal unit.

Is It Safe To Put Coffee Grounds Down The Garbage Disposal?

It’s generally advised to avoid putting coffee grounds down the garbage disposal. While they are organic, they don’t break down easily and tend to accumulate in the pipes, forming a sludge. This sludge can trap other food particles and contribute to clogs and foul odors over time. It’s better to compost coffee grounds or dispose of them in the trash.

The persistent smell of sewage from your garbage disposal is a signal that needs attention. By understanding the common causes, from simple food debris and bacterial buildup to more complex plumbing issues, you can implement targeted cleaning strategies and preventative measures.

Regular maintenance, including proper usage, avoiding problematic foods, and consistent cleaning with natural remedies like citrus and baking soda, can keep your disposal fresh and functional. However, when DIY efforts fail to eliminate the odor or if you encounter slow drains and leaks, don’t hesitate to call a professional plumber.

They have the expertise and tools to address deeper plumbing problems, ensuring your kitchen remains a pleasant and hygienic space.

The Ultimate Monitor Arm Buying Guide For Remote Workers

The Ultimate Monitor Arm Buying Guide For Remote Workers

The modern workplace has undergone a seismic shift, with remote and hybrid models becoming the norm for millions. This transition, while offering unprecedented flexibility, also presents unique challenges for optimizing our home office setups. Among the most impactful, yet often overlooked, pieces of equipment is the monitor arm.

A well-chosen monitor arm can transform a cluttered desk into an ergonomic sanctuary, boosting productivity and mitigating the physical strain associated with prolonged screen time. It’s more than just a desk accessory; it’s a crucial component for a healthy and efficient remote work environment.

For remote workers, the distinction between a “nice-to-have” and a “must-have” can be blurry. However, the benefits of a monitor arm, improved posture, reduced neck and eye strain, and reclaimed desk space, firmly place it in the latter category. Investing in the right monitor arm isn’t just about aesthetics; it’s about investing in your long-term well-being and professional output.

This guide will walk you through everything you need to know to select the ultimate monitor arm for your remote workspace.

Key Takeaways

  • Ergonomics First: Prioritize monitor arms that allow for precise adjustment of height, tilt, and swivel to achieve an ergonomic viewing angle, reducing neck and eye strain.
  • Weight Capacity & Compatibility: Ensure the arm supports your monitor’s weight and VESA mount size. Check specifications carefully.
  • Mounting Options: Understand the difference between desk clamp, grommet, and wall mounts, and choose the one best suited for your desk and workspace.
  • Arm Type Matters: Single, dual, and triple monitor arms offer different levels of flexibility. Consider your current and future monitor needs.
  • Build Quality & Materials: Opt for sturdy construction (e.g., aluminum, steel) for durability and stability, especially for heavier monitors.
  • Cable Management: Integrated cable management systems are essential for a clean, organized, and professional workspace.
  • Ease of Installation: Look for arms with straightforward assembly instructions and necessary tools included.
The Ultimate Monitor Arm Buying Guide For Remote Workers

Credit: www.wired.com

Understanding Monitor Arm Fundamentals

Before diving into specific types and features, it’s essential to grasp the core functionalities and benefits that a monitor arm brings to your remote workspace. The primary goal is to elevate your monitor(s) off the desk surface, allowing for a more adaptable and comfortable viewing experience.

This elevation is not merely about aesthetics; it directly impacts your physical health and productivity.

The Ergonomic Imperative

Poor posture is a silent productivity killer and a significant contributor to chronic pain. When monitors are placed directly on a desk, users often find themselves hunching forward or craning their necks to achieve a comfortable viewing position. This misalignment can lead to neck pain, shoulder tension, and lower back discomfort. A monitor arm allows you to position your screen at the ideal eye level, ensuring your head and neck remain in a neutral, aligned position. This simple adjustment can dramatically reduce strain and fatigue, allowing you to focus on your work for longer periods without discomfort.

According to the Occupational Safety and Health Administration (OSHA), proper workstation ergonomics can significantly reduce the risk of musculoskeletal disorders (MSDs), which are common among office workers. By enabling you to adjust your monitor’s height, distance, and angle, a monitor arm is a cornerstone of an ergonomic setup.

Space Optimization And Desk Clutter

Remote workers often operate in spaces that weren’t originally designed as dedicated offices. This can mean smaller desks or multi-purpose surfaces. Traditional monitor stands take up valuable desk real estate, leaving less room for keyboards, notebooks, or other essentials. Monitor arms, by contrast, mount directly to the desk or wall, freeing up the entire surface underneath the monitor. This decluttering effect not only creates a more visually appealing workspace but also enhances functionality, allowing for better organization and workflow. A clean desk is often associated with a clear mind, and a monitor arm is a powerful tool for achieving this.

Enhancing Productivity And Workflow

Beyond physical comfort, monitor arms can directly boost your productivity. The ability to easily adjust screen position, tilting, swiveling, and rotating, allows you to optimize your view for different tasks. For instance, you might angle your screen to reduce glare from a nearby window or rotate a document-heavy monitor to a vertical orientation for easier scrolling. For those using multiple monitors, arms allow for seamless alignment and positioning, creating a unified and efficient visual workspace. This fluidity in screen adjustment can lead to faster task completion and reduced errors.

The Ultimate Monitor Arm Buying Guide For Remote Workers

Credit: agamborg.dk

Types Of Monitor Arms

The market offers a variety of monitor arm designs, each catering to different needs and desk setups. Understanding these types is crucial for making an informed purchase.

Single Monitor Arms

The most common and straightforward option, single monitor arms, are designed to hold one display. They are ideal for individuals with a single monitor setup or those looking to replace a bulky monitor stand. These arms typically offer a wide range of motion, allowing for significant adjustments in height, depth, and angle.

Key Features:

  • Extensive Articulation: Most single arms offer 360-degree rotation, tilt, and swivel capabilities.
  • Space-Saving: Frees up significant desk space compared to traditional stands.
  • Versatile Mounting: Available in clamp, grommet, and wall-mount configurations.

Dual Monitor Arms

For professionals who rely on multiple displays for multitasking, dual monitor arms are an excellent solution. These arms typically feature two independent arms or a single arm with two mounting brackets, allowing you to position two monitors side-by-side or at different heights and angles.

This setup is particularly beneficial for programmers, designers, data analysts, and anyone who benefits from having multiple applications or windows open simultaneously.

Key Features:

  • Multi-Display Efficiency: Enables side-by-side viewing of multiple applications.
  • Independent Adjustment: Many dual arms allow for separate height, tilt, and swivel adjustments for each monitor.
  • Stability: High-quality dual arms are designed to support the combined weight of two monitors securely.

Triple And Quad Monitor Arms

For power users who require an even more expansive visual workspace, triple and quad monitor arms are available. These are less common for typical home offices but are essential for specific professional roles. They offer the capability to mount three or four monitors, creating an immersive and highly productive environment.

However, they require more desk space and robust mounting solutions.

Key Features:

  • Maximum Screen Real Estate: Ideal for complex data visualization, trading, or extensive multitasking.
  • Advanced Mounting: Often require more secure desk clamping or even custom mounting solutions due to the weight and leverage involved.
  • Potential for Complexity: Installation and adjustment can be more involved than with single or dual arms.

C-clamp Vs. Grommet Mounts

The method by which a monitor arm attaches to your desk is a critical consideration.

  • C-Clamp Mounts: These are the most prevalent type. They use a C-shaped clamp that grips the edge of your desk. They are generally easy to install and remove, making them ideal for those who might move their setup or don’t want to permanently alter their desk. Pro Tip: Ensure your desk has a suitable edge thickness and that the clamp mechanism is robust enough for the weight of your monitor(s).
  • Grommet Mounts: These require a pre-drilled hole (grommet) in your desk. The arm’s base passes through this hole and is secured from underneath. Grommet mounts offer a very clean aesthetic and can provide superior stability, especially for heavier setups. If your desk doesn’t have a grommet hole, you may need to drill one, which is a permanent modification.

Wall Mounts

For those with limited desk space or a preference for a floating monitor setup, wall mounts are an option. These attach directly to a wall stud, offering maximum desk clearance. However, they are less flexible in terms of repositioning and require careful installation to ensure safety.

Key Features To Consider

When evaluating monitor arms, several features can significantly impact your user experience and the suitability for your specific needs.

Weight Capacity And Monitor Size Compatibility

This is arguably the most critical specification. Every monitor arm has a maximum weight it can safely support. Exceeding this limit can lead to instability, sagging, or even catastrophic failure. Always check the manufacturer’s specifications for the weight range (e.g., 2-9 kg per arm) and ensure it comfortably accommodates your monitor(s).

Equally important is VESA mount compatibility. Most modern monitors adhere to VESA mounting standards, which involve a square pattern of threaded holes on the back of the display. Common VESA patterns are 75x75mm and 100x100mm. The monitor arm’s mounting plate must match your monitor’s VESA pattern. Many arms support both 75x75mm and 100x100mm, but always verify.

Range Of Motion And Adjustability

The degree to which you can move and position your monitor is key to achieving ergonomic comfort. Look for arms that offer:

  • Height Adjustment: The ability to raise or lower the monitor is essential for aligning it with your eye level. Gas spring arms typically offer smoother and more intuitive height adjustments than manual or pneumatic ones.
  • Tilt: Forward and backward angling (e.g., -30° to +85°) allows you to optimize the vertical viewing angle and reduce glare.
  • Swivel: Side-to-side rotation (e.g., 180° or 360°) is useful for sharing your screen or adjusting viewing angles without moving your whole setup.
  • Rotation: The ability to pivot the monitor from landscape to portrait orientation can be highly beneficial for reading documents or coding.
  • Extension/Reach: The maximum distance the arm can extend from its base is important for positioning the monitor at an optimal viewing distance, especially on deeper desks.

Build Quality And Materials

A monitor arm is an investment, and its longevity depends heavily on its construction. Opt for arms made from durable materials like aluminum alloy or sturdy steel. These materials provide the necessary strength to support monitors reliably and resist wear and tear over time. Cheaper, flimsy plastic components are a red flag. Read reviews to gauge the long-term durability and stability reported by other users.

Cable Management

Tangled cables can quickly turn an organized workspace into a chaotic mess. Many high-quality monitor arms come with integrated cable management systems. These typically involve clips or channels along the arm segments that neatly route and conceal your display cables (HDMI, DisplayPort, etc.) and power cords. This not only improves aesthetics but also prevents cables from snagging or getting damaged.

Ease Of Installation

While most monitor arms are designed for straightforward assembly, some are more user-friendly than others. Look for arms that come with clear instructions, all necessary tools (like an Allen wrench), and pre-assembled components where possible. For clamp mounts, ensure the tightening mechanism is easy to operate.

For grommet mounts, check if the required hardware is included.

The Ultimate Monitor Arm Buying Guide For Remote Workers

Credit: www.chase.com

Popular Monitor Arm Brands And Models

Several brands have established a reputation for producing high-quality, reliable monitor arms suitable for remote workers. While specific models can change, these brands consistently offer excellent options.

Ergotron

Ergotron is a leader in ergonomic solutions, and their monitor arms are renowned for their durability, adjustability, and robust build quality. Their HX Desk Monitor Arm is a popular choice for larger or heavier monitors, offering exceptional stability and a wide range of motion. They also offer the LX Desk Monitor Arm, a versatile option for mid-sized displays.

Amazon Basics

For budget-conscious remote workers, Amazon Basics offers surprisingly capable monitor arms. Their Single Monitor Stand Desk Mount and Dual Monitor Stand Desk Mount are well-regarded for their functionality at a lower price point. While they might not match the premium build of Ergotron, they provide solid performance for most standard monitors.

Huanuo

HUANUO is another brand that consistently receives positive reviews for its balance of features, build quality, and affordability. Their dual monitor desk mount and single monitor desk mount options are frequently recommended for their ease of use and strong support.

Vivo

Vivo offers a wide array of monitor mounts, often at competitive prices. Their single monitor desk mount and dual monitor desk mount series are known for their extensive adjustability and inclusion of features like gas spring mechanisms.

Wali

WALI provides a range of single, dual, and triple monitor mounts, often with integrated features like USB ports or device trays. Their single and dual monitor desk mounts are popular for their versatility and value.

Making Your Choice: A Step-by-step Approach

Selecting the right monitor arm involves considering your unique needs and environment. Follow these steps to ensure you make the best decision.

Step 1: Assess Your Monitor(s)

  • Number of Monitors: How many displays do you currently use? Do you anticipate adding more in the future? This will determine if you need a single, dual, or even triple arm.
  • Monitor Size and Weight: Check the diagonal screen size (in inches) and, more importantly, the weight of each monitor. This information is usually found in your monitor’s manual or on the manufacturer’s website.
  • VESA Pattern: Locate the VESA mounting holes on the back of your monitor. Measure the distance between them (e.g., 75x75mm, 100x100mm) or check your monitor’s specifications.

Step 2: Evaluate Your Desk And Workspace

  • Desk Type and Thickness: Is your desk made of solid wood, glass, or particleboard? What is the thickness of the edge where a clamp mount would attach? Most C-clamps have a specified range (e.g., 0.4″ to 3.9″).
  • Desk Surface: Do you have a pre-drilled grommet hole? Are you willing to drill one? Or is a clamp mount the only viable option?
  • Available Space: How much space do you have on your desk? Consider the arm’s reach and how much space it will occupy when retracted and extended.
  • Wall Mounting Options: If your desk is unsuitable, do you have a sturdy wall with accessible studs for mounting?

Step 3: Define Your Ergonomic Needs

  • Viewing Height: How high do you typically need your monitor to be? Do you have specific posture requirements? Gas spring arms offer the most fluid height adjustment.
  • Viewing Distance: How far do you prefer to sit from your monitor? Ensure the arm’s reach is sufficient.
  • Screen Orientation: Do you need to frequently switch between landscape and portrait modes?

Step 4: Compare Features And Budget

  • Material and Build Quality: Prioritize arms made from metal over plastic.
  • Adjustability: Ensure the arm offers the necessary tilt, swivel, and rotation for your comfort.
  • Cable Management: Look for integrated solutions if a tidy workspace is important.
  • Brand Reputation and Reviews: Research brands and read user reviews for insights into durability and customer satisfaction.
  • Price: Set a budget. While premium arms can be expensive, many excellent mid-range options offer great value.

Example Scenarios

Let’s consider a couple of common remote worker profiles:

Scenario 1: The Solo Developer

  • Needs: One ultrawide monitor (e.g., 34-inch, 20 lbs), needs significant desk space, requires frequent height and distance adjustments.
  • Recommendation: A heavy-duty single monitor arm with a high weight capacity (e.g., Ergotron HX or a similar premium gas spring arm) and a robust C-clamp mount. Focus on maximum extension and smooth gas spring adjustment.

Scenario 2: The Multitasking Analyst

  • Needs: Two standard 24-inch monitors (each approx. 10 lbs), needs to align screens perfectly, values a clean desk setup.
  • Recommendation: A dual monitor arm with independent adjustments for each screen. A gas spring model would be ideal for easy repositioning. Integrated cable management is a strong plus. A C-clamp or grommet mount would work, depending on desk preference.

Data-driven Comparison: Monitor Arm Features

To help visualize the differences, here’s a comparison of key features across different tiers of monitor arms. Prices are approximate and can vary significantly.

Feature Budget (< $50) Mid-Range ($50 – $100) Premium ($100+)
Typical Materials Thinner gauge metal, some plastic Thicker gauge metal (aluminum/steel), higher quality plastic Heavy-duty aluminum alloy/steel, premium finishes
Adjustment Mechanism Manual or basic gas spring (less smooth) Smooth gas spring, good range of motion Advanced gas spring, wide range of motion, precise control
Weight Capacity (per arm) Up to 15-20 lbs Up to 20-30 lbs Up to 30-40+ lbs (heavy-duty models)
VESA Compatibility Usually 75×75 & 100x100mm Usually 75×75 & 100x100mm Usually 75×75 & 100x100mm, sometimes larger
Cable Management Basic clips or none Integrated clips/channels Advanced, fully integrated systems
Stability Adequate for lighter monitors, can be wobbly Good stability for most monitors Excellent stability, minimal wobble even at full extension
Ease of Installation Moderate Good Often very good, sometimes requires more steps for heavy-duty models

Real-world Examples And Case Studies

To illustrate the impact of monitor arms, let’s look at a couple of hypothetical, yet realistic, scenarios:

Case Study 1: Sarah, the Graphic Designer

Sarah was struggling with neck pain from constantly looking down at her dual-monitor setup. Her monitors were placed on their original stands, taking up significant desk space and forcing her into an awkward posture. She invested in a HUANUO dual monitor arm with gas spring adjustments.

  • Before: Constant neck strain, limited desk space, difficult to adjust monitor angles for detailed design work.
  • After: Monitors are now at perfect eye level, reducing neck pain by an estimated 80%. She has reclaimed substantial desk space, allowing for easier sketching and reference material placement. The ability to swivel monitors quickly is helpful when collaborating with clients remotely. Sarah reports feeling less fatigued at the end of the workday and more focused.

Case Study 2: Mark, the Software Engineer

Mark used a single, large 32-inch curved monitor. While he loved the immersion, the monitor’s original stand was massive and deep, leaving little room for his keyboard and mouse. He opted for an Ergotron LX Desk Monitor Arm.

  • Before: Cramped desk space, monitor positioned too close, limited ability to adjust viewing distance.
  • After: The monitor arm freed up the entire area under the display, allowing Mark to position his keyboard and mouse comfortably. He can now easily pull the monitor closer or push it further away, finding the perfect viewing distance for long coding sessions. The arm’s stability ensures the large curved monitor remains steady, even when typing vigorously. Mark notes a significant improvement in his ability to maintain good posture during his 8-10 hour workdays.

Frequently Asked Questions

How Do I Know If My Monitor Is Compatible With A Monitor Arm?

Compatibility is primarily determined by two factors: weight capacity and VESA mounting. First, check your monitor’s weight (found in its manual or specifications online) and ensure it falls within the monitor arm’s specified weight range. Second, check the VESA mounting pattern on the back of your monitor. This is usually a square arrangement of four screw holes, commonly 75x75mm or 100x100mm. The monitor arm’s mounting plate must match your monitor’s VESA pattern. Most arms specify which VESA sizes they support.

What Is The Difference Between A Gas Spring And A Pneumatic Monitor Arm?

Both gas spring and pneumatic arms use pressurized gas to allow for easy height adjustment. However, gas spring arms are more common and generally preferred. They use a sealed unit filled with nitrogen gas. The pressure inside is fixed, providing consistent tension. This makes them very smooth and easy to adjust, often requiring just a light touch. Pneumatic arms might use a pump mechanism to adjust pressure, which can be less intuitive and may require re-pressurization over time. In practice, for most home users, the distinction often boils down to the specific implementation by the manufacturer, with gas spring being the dominant and often superior technology for smooth, effortless motion.

Can A Monitor Arm Damage My Desk?

A monitor arm, particularly a C-clamp mount, can potentially damage a desk if not used correctly. Clamping too tightly onto a soft or veneer-finished desk can leave indentations or even crack the surface. Similarly, a poorly designed clamp might exert uneven pressure. To mitigate this risk:

  • Ensure the clamp’s padding is intact and provides even pressure distribution.

Rv Toilet Not Working

Rv Toilet Not Working

The RV toilet is a marvel of mobile living, offering convenience and sanitation far from traditional plumbing. However, when this essential fixture stops working, it can quickly turn a dream vacation into a frustrating ordeal. Whether it’s a clogged bowl, a malfunctioning flush, or an unpleasant odor, understanding the common issues and their solutions is crucial for any RVer.

This guide aims to equip you with the knowledge to diagnose and fix most RV toilet problems, ensuring your travels remain comfortable and hassle-free.

Key Takeaways

  • Clogs are common: Most RV toilet malfunctions stem from clogs, often caused by improper waste disposal or using the wrong type of toilet paper.
  • Flush system issues: Problems with water flow, the flush pedal, or the water pump can prevent flushing.
  • Odor control is vital: Proper use of black tank treatments and regular maintenance are key to preventing foul smells.
  • Regular maintenance prevents problems: A proactive approach to cleaning and inspecting your RV toilet and black tank system can save you from major headaches on the road.
  • Understand your toilet type: Different RV toilets (gravity flush, macerator, Dometic/Thetford models) have specific troubleshooting steps.
Rv Toilet Not Working

Credit: www.youtube.com

Understanding Your Rv Toilet System

Before diving into troubleshooting, it’s essential to grasp how RV toilets function. Unlike household toilets that rely on a large municipal sewer system, RV toilets are self-contained units connected to a black water tank. This tank stores waste until it can be properly disposed of at an RV dump station. Most RV toilets fall into a few main categories:

  • Gravity Flush Toilets: These are the most common type. They use a foot pedal to release water from the freshwater tank into the bowl and to open a valve (often called a “sewer blade”) that allows waste to drop into the black tank. They rely on water pressure from the RV’s freshwater system.
  • Macerator Toilets: These toilets grind solid waste into a finer slurry before pumping it out. This allows for longer hose runs and smaller diameter hoses when dumping, and can even pump waste uphill. They are typically more powerful but also more complex and prone to mechanical failure if misused.
  • Specialty Brands (e.g., Dometic, Thetford): While these brands manufacture various models, many operate on the gravity flush principle with specific design elements for RV use. Understanding your specific model’s manual is always recommended.

The black tank itself is a critical component. It’s usually located beneath the RV floor and is connected to the toilet via a pipe. It has a vent pipe to allow air in and out, preventing vacuum formation, and a drain pipe with a valve for emptying.

The proper functioning of the toilet is directly tied to the health and functionality of the entire black tank system.

Rv Toilet Not Working

Credit: rv-roadtrips.thefuntimesguide.com

Common Rv Toilet Problems And Solutions

When your RV toilet isn’t working, it’s usually due to one of several recurring issues. Identifying the specific symptom is the first step towards a swift resolution.

Clogged Toilet Bowl

This is perhaps the most frequent and frustrating problem RVers face. A clogged bowl prevents waste from entering the black tank, making the toilet unusable.

Causes Of Clogs

  • Too Much Toilet Paper: RV-specific toilet paper is designed to break down quickly. Using regular household toilet paper, which is thicker and slower to dissolve, is a primary culprit. Even with RV-specific paper, using excessive amounts can lead to clogs.
  • Improper Waste Disposal: Flushing items other than human waste and RV toilet paper, such as paper towels, feminine hygiene products, wipes, or excessive food scraps, will almost certainly cause a blockage.
  • Accumulation in the Black Tank: Over time, waste and paper can build up and solidify in the black tank, especially if the tank isn’t properly flushed or if too much water is not used during flushing.
  • Low Water Level in Bowl: If the water level in the toilet bowl is too low, it won’t provide enough pressure to push waste through the valve and into the black tank.

Troubleshooting And Clearing Clogs

  • Add Water: Pour several gallons of water directly into the toilet bowl. This can help soften the blockage.
  • Use a Toilet Brush or Plunger: A standard toilet plunger can be effective, but ensure it creates a good seal around the drain opening. For RV toilets, a flange plunger or a specific RV toilet plunger might be more suitable. Gently work the plunger to dislodge the clog. A toilet brush can also help break up immediate blockages.
  • RV Toilet Wand/Closet Auger: If plunging doesn’t work, an RV toilet wand (a flexible hose that connects to your freshwater supply and snakes into the toilet) or a closet auger (a plumber’s snake) can be used. Carefully insert the wand or auger into the toilet drain and work it to break up or pull out the obstruction. Be gentle to avoid damaging the toilet or the valve.
  • Chemical Treatments: For stubborn clogs, RV-specific chemical treatments designed to break down waste and paper can be poured into the toilet. Follow the product instructions carefully, as some require time to work and may need the addition of water.
  • Refrigerate and Thaw: In extreme cases, some RVers suggest letting the black tank freeze overnight, then thawing it. The expansion and contraction can sometimes break up blockages. This is a last resort and requires specific conditions.

Pro Tip: Always use RV-specific toilet paper. It’s formulated to disintegrate rapidly, preventing clogs.

No Water Or Weak Flush

If your toilet doesn’t flush, or the flush is weak, the issue likely lies with the water supply or the flush mechanism itself.

Causes Of No Water/weak Flush

  • Low Freshwater Tank Level: The RV’s freshwater tank might be empty or very low, meaning there’s no water to flush with.
  • Water Pump Malfunction: The RV’s water pump might not be running, or it could be faulty, failing to supply water pressure to the toilet.
  • Air in Water Lines: If the freshwater tank was recently refilled, air pockets can get trapped in the lines, temporarily disrupting water flow.
  • Clogged Water Strainer: The water pump often has a small strainer to catch debris. If this gets clogged, it restricts water flow.
  • Faulty Flush Pedal Assembly: The foot pedal assembly controls both the water release and the opening of the black tank valve. If the internal mechanism is broken or out of adjustment, it won’t function correctly.
  • Closed Water Shut-off Valve: Some RVs have a shut-off valve for the toilet’s water supply. This might have been accidentally closed.

Troubleshooting No Water/weak Flush

  • Check Freshwater Tank: Ensure your freshwater tank has an adequate supply of water.
  • Listen for Water Pump: Turn on a faucet elsewhere in the RV. If you don’t hear the water pump cycle on, or if it runs continuously without supplying water, there’s an issue with the pump or its power supply.
  • Bleed Air from Lines: If you suspect air in the lines, run several faucets in the RV until water flows smoothly.
  • Inspect Water Strainer: Locate the water pump and check its intake strainer for debris. Clean it if necessary.
  • Examine Pedal Assembly: Check the foot pedal for any visible damage or if it feels loose or stuck. Sometimes, a simple adjustment or cleaning of the linkage can resolve the issue.
  • Verify Water Shut-off Valve: Locate the water line leading to the toilet and check for any inline shut-off valves. Ensure they are fully open.

Odors From The Black Tank

Unpleasant odors are a common complaint, often indicating a problem with the black tank’s venting or management.

Causes Of Odors

  • Dry or Low Water Seal: The toilet creates a water seal in the bowl, which acts as a barrier against odors from the black tank. If the water seal is low or the tank is too full, odors can escape.
  • Improper Venting: The RV’s black tank has a vent pipe that allows gases to escape outside the vehicle. If this vent is blocked (e.g., by debris, insect nests, or improper installation), gases can build up and force their way back into the RV.
  • Lack of Black Tank Treatment: Chemical treatments are essential for breaking down waste and controlling odors in the black tank. Without them, bacteria proliferate, leading to strong smells.
  • Tank Not Emptying Properly: If the black tank isn’t completely emptied during dumping, residual waste can contribute to odors.
  • Leaking Seals: A leak in the toilet seal or the connection to the black tank can allow odors to escape into the RV.

Managing And Eliminating Odors

  • Maintain Water Seal: Ensure there’s always a sufficient water level in the toilet bowl after flushing. If it drops too low, add water.
  • Use Black Tank Treatments: Regularly add a high-quality RV black tank treatment to the toilet after flushing. These treatments contain enzymes or bacteria that break down waste and control odors. Follow product instructions for dosage.
  • Proper Venting Check: Inspect the black tank vent pipe (usually on the RV roof) for any obstructions.
  • Complete Tank Draining: Ensure the black tank valve is fully opened and that the tank is thoroughly flushed (if your system allows) when dumping.
  • Regular Cleaning: Periodically clean the black tank itself with a tank cleaning solution or by using a powerful flush system.

Example: Many RVers find success with treatments containing enzymes, which are more environmentally friendly and effective over time compared to harsh chemical treatments. Brands like Happy Camper or Camco TST are popular choices.

Leaking Toilet

Leaks can occur from various parts of the RV toilet system, from the bowl itself to the connections with the black tank.

Common Leak Points

  • Water Supply Line: The hose connecting the RV’s water system to the toilet can develop cracks or loose fittings.
  • Flush Pedal Seal: The seal around the flush pedal assembly can wear out, allowing water to leak into the RV floor.
  • Toilet Base Seal (Wax Ring or Gasket): The seal between the bottom of the toilet and the flange connected to the black tank can fail. This is common in mobile installations and can lead to water and odor leaks.
  • Black Tank Valve: The valve for the black tank itself might be leaking, allowing waste to drip out.
  • Cracked Bowl or Tank: Though less common, the toilet bowl or the black tank itself can develop cracks.

Troubleshooting And Repairing Leaks

  • Identify the Source: Carefully inspect the toilet and surrounding area while the water system is pressurized and after flushing. Use paper towels to detect moisture.
  • Tighten Fittings: Check all water supply line connections and tighten them if loose.
  • Replace Seals: If the leak is at the flush pedal or the base of the toilet, the seals will likely need replacement. This often involves removing the toilet from its mounting. For the base seal, a new wax ring or rubber gasket will be required.
  • Repair/Replace Valve: If the black tank valve is leaking, it might be possible to replace the seal or the entire valve assembly.
  • Professional Help: For cracked bowls or tanks, or if you’re uncomfortable with disassembly, it’s best to seek professional RV repair services.

Maintenance For A Healthy Rv Toilet System

Preventative maintenance is key to avoiding most RV toilet problems. A little effort goes a long way in ensuring your toilet functions reliably.

Regular Cleaning Schedule

  • Daily: Flush with plenty of water after each use. Ensure the water seal is maintained.
  • Weekly: Add RV toilet paper and a black tank treatment after dumping. If you’re using the RV extensively, you might need to add treatment more frequently.
  • Monthly (or after each trip): Thoroughly flush the black tank. If possible, use a dedicated tank flushing system (like a wand or a built-in spray system) to rinse the tank walls.

Black Tank Maintenance

  • Use RV Toilet Paper: As mentioned, this is crucial.
  • Avoid Non-Flushable Items: Never put anything other than human waste and RV toilet paper into the toilet.
  • Don’t Let Tank Fill Completely: Try to dump the black tank when it’s about two-thirds to three-quarters full. This ensures sufficient liquid to help break down waste.
  • Use Tank Treatments: Always use a quality black tank treatment. These help break down solids, prevent odors, and keep sensors clean.
  • Flush the Tank: After dumping, a thorough flush of the black tank is essential. This removes residual waste and paper that can harden over time. Some RVs have built-in flush systems; others require a separate tank flushing wand.

Water System Checks

  • Winterization/De-winterization: Properly winterize your RV’s plumbing system to prevent freezing and damage. Follow de-winterization procedures carefully in the spring.
  • Water Filter: If your RV has a water filter, replace it according to the manufacturer’s recommendations. A clogged filter can reduce water pressure to the toilet.
Rv Toilet Not Working

Credit: www.rvrepairclub.com

Understanding Different Rv Toilet Types

While many troubleshooting steps are universal, understanding the specific type of RV toilet you have can be highly beneficial.

Gravity Flush Toilets

These are the workhorses of RV plumbing. They are relatively simple, relying on gravity and water pressure.

  • Pros: Simple design, fewer moving parts, generally reliable.
  • Cons: Can clog easily if not maintained, require sufficient water pressure, not ideal for long hose runs or pumping uphill.
  • Troubleshooting Focus: Clogs, water pressure issues, pedal mechanism.

Macerator Toilets

These use a powerful grinder and pump system.

  • Pros: Can grind waste into a fine slurry, allowing for smaller hoses and longer discharge distances, can pump waste uphill.
  • Cons: More complex, require electricity to operate the macerator pump, can be noisy, more expensive, can be damaged by hard objects.
  • Troubleshooting Focus: Electrical issues for the pump, grinding mechanism, clogs specific to the macerator system.

Dometic 300 Series Vs. Other Dometic/thetford Models

Dometic and Thetford are leading manufacturers. The Dometic 300 series, for instance, features a polypropylene bowl and a rimless design for easier cleaning.

  • Dometic 300 Series: Known for its durability and ease of cleaning. Troubleshooting often involves checking the flush mechanism and ensuring proper waste disposal.
  • Other Models: Many other Dometic and Thetford toilets operate on similar principles, but specific parts and maintenance schedules may vary. Always refer to your model’s manual.

Comparison of RV Toilet Types

FeatureGravity Flush ToiletMacerator Toilet
**Mechanism**Water pressure & gravityGrinding and pumping system
**Waste Disposal**Direct drop to black tankGround slurry pumped out
**Hose Size**Standard 3″ RV hose1″ to 2″ flexible hose
**Pumping Ability**Gravity onlyCan pump uphill and long distances
**Power Required**None (uses water pressure)Requires 12V DC power
**Noise Level**ModerateCan be noisy due to grinding
**Clog Resistance**Moderate (prone to paper clogs)Higher (grinds solids), but can clog
**Cost**Generally lowerGenerally higher
**Maintenance**Simpler, focus on flushing & sealsMore complex, electrical & pump focus

Advanced Troubleshooting And When To Call A Professional

While many RV toilet issues can be resolved with DIY methods, some problems require more specialized knowledge or tools.

Black Tank Sensor Issues

RV black tanks often have sensors to indicate the fill level. These sensors can become unreliable due to buildup on their surface.

  • Cause: Waste, paper, or mineral deposits can coat the sensors, giving false readings (e.g., showing a full tank when it’s empty).
  • Solution: Using RV tank cleaning solutions or specialized sensor cleaners can help dissolve buildup. Driving with a few gallons of water and some cleaning solution in the tank can also help dislodge deposits. Mechanical cleaning of the sensors from inside the tank is also an option but requires more effort.

Water Pump System Problems

If you have no water pressure to any fixture, the issue might be with the RV’s main water pump or its associated plumbing.

  • Troubleshooting: Check the pump’s fuse or circuit breaker. Ensure the pump is receiving power. Check the pump’s intake and outlet lines for blockages or leaks. Some pumps have an internal pressure switch that might need adjustment or replacement.

Valve Malfunctions

The valves that control the emptying of the gray and black tanks are critical. If these valves are stuck, broken, or leaking, it can cause significant problems.

  • Stuck Valves: Sometimes, the gate valve can become stuck due to dried waste or corrosion. A good tank flush and treatment might help, or the valve might need manual intervention or replacement.
  • Leaking Valves: As mentioned earlier, a leaking valve needs repair or replacement. This can often be done without removing the entire tank.

When To Seek Professional Help

  • Persistent Clogs: If you’ve tried multiple methods and the clog remains, a professional might have specialized tools or be able to access the blockage more effectively.
  • Major Leaks: Significant leaks, especially those involving the tank itself or multiple plumbing connections, are best handled by an RV technician.
  • Electrical Issues: If the problem involves the macerator pump’s electrical system or the RV’s water pump, an RV technician can diagnose and repair electrical faults safely.
  • Complex Valve Replacements: While some valve replacements are DIY-friendly, others can be more involved and may require professional expertise.
  • Uncertainty: If you’re unsure about any step in the troubleshooting process, or if you don’t have the necessary tools, it’s always safer and more efficient to call a professional RV service center.

Frequently Asked Questions

Why Does My Rv Toilet Smell Even After Using Treatments?

This Can Happen For Several Reasons. The Most Common Is A Dry Water Seal In The Toilet Bowl, Allowing Odors From The Black Tank To Escape. Ensure You Always Have A Sufficient Water Level After Flushing. Another Possibility Is A Blocked Vent Pipe On Your Rv’s Roof, Which Prevents Gases From Escaping Properly. Lastly, If The Black Tank Treatment Isn’t Strong Enough, Or If The Tank Is Not Dumped And Flushed Regularly, Odors Can Still Develop. Consider Using A More Potent Treatment Or Increasing The Frequency Of Tank Flushes.

Can I Use Regular Toilet Paper In My Rv Toilet?

It Is Strongly Discouraged. Regular Household Toilet Paper Is Designed To Hold Together Longer And Does Not Break Down As Quickly As Rv-specific Toilet Paper. This Can Lead To Severe Clogs In Your Rv’s Toilet And Black Tank System. Always Opt For Toilet Paper Specifically Labeled As Rv-safe Or Septic-safe, As It Is Engineered To Disintegrate Rapidly.

How Often Should I Dump And Flush My Rv’s Black Tank?

You Should Aim To Dump Your Black Tank When It Is About Two-thirds To Three-quarters Full. This Ensures There’s Enough Liquid To Help Break Down Waste And Paper Effectively. After Dumping, It’s Crucial To Flush The Tank Thoroughly. This Can Be Done Using A Dedicated Tank Flushing System (like A Wand That Attaches To A Hose Or A Built-in Spray Nozzle) To Rinse The Tank Walls And Sensors. Regular Flushing Helps Prevent Odors And Sensor Malfunctions.

My Rv Toilet Isn’t Getting Any Water. What Could Be The Problem?

Several Issues Can Cause A Lack Of Water. First, Check If Your Rv’s Freshwater Tank Is Low Or Empty. If The Tank Is Full, Listen For Your Rv’s Water Pump; If You Don’t Hear It Running, It Might Be Off, Have Lost Power (check Fuses/breakers), Or Be Faulty. Air In The Water Lines Can Also Cause Temporary Issues; Running A Faucet Until Water Flows Smoothly Can Resolve This. Lastly, Check For Any Shut-off Valves On The Water Line Leading Specifically To The Toilet, As These May Have Been Accidentally Closed.

What Is The Best Way To Clear A Stubborn Clog In My Rv Toilet?

For Stubborn Clogs, Start By Adding Plenty Of Water To The Bowl To Help Soften The Blockage. Then, Try Using A Good Quality Rv Toilet Plunger, Ensuring A Tight Seal. If That Fails, A Closet Auger (plumber’s Snake) Or An Rv Toilet Wand, Which Uses Water Pressure To Dislodge The Clog, Can Be Effective. For Very Tough Clogs, Rv-specific Chemical Treatments Designed To Break Down Waste And Paper Can Be Used, But Always Follow The Product Instructions Carefully And Allow Adequate Time For Them To Work. If These Methods Don’t Resolve The Issue, It May Be Time To Call A Professional Rv Technician.

Troubleshooting an RV toilet that isn’t working can seem daunting, but by understanding the common causes and implementing regular maintenance, most issues can be prevented or resolved efficiently. From simple clogs to more complex plumbing problems, a systematic approach, combined with the right tools and products, will help keep your RV’s most essential amenity functioning smoothly.

Remember that using RV-specific products and adhering to best practices for waste disposal are fundamental to a trouble-free experience on the road.

Liftmaster Garage Door Opener Not Working Power Outage

Liftmaster Garage Door Opener Not Working Power Outage

A sudden power outage can leave any homeowner feeling vulnerable, but when your garage door opener, a crucial gateway to your home, refuses to budge, the inconvenience can quickly escalate into a security concern. LiftMaster, a leading brand in garage door openers, offers robust and reliable systems, yet even the most advanced technology can be affected by a loss of electricity.

Understanding how to manage your LiftMaster opener during and after a power outage is essential for maintaining access to your home and ensuring its security.

This guide will walk you through the common issues that arise with LiftMaster garage door openers during a power outage, the steps you can take to regain functionality, and preventative measures to ensure you’re prepared for the next blackout. From understanding the emergency release mechanism to troubleshooting common problems, we’ll cover everything you need to know to keep your garage door operational when the lights go out.

Key Takeaways

  • Manual Operation is Key: During a power outage, your LiftMaster opener will likely become inoperable, necessitating the use of the emergency release cord to manually operate the garage door.
  • Battery Backup: Many modern LiftMaster models include a battery backup system designed to provide limited operation during power outages.
  • Safety First: Always disengage the opener from the door before attempting manual operation to prevent damage to the opener or door.
  • Troubleshooting Steps: Common issues after a power restoration include the opener losing its remote control programming or the safety sensors needing realignment.
  • Preventative Maintenance: Regularly test your battery backup and emergency release mechanism to ensure they function correctly when needed.

Understanding Liftmaster Openers And Power Outages

LiftMaster garage door openers are designed with various features to enhance convenience and security. However, like any electrical appliance, they rely on a consistent power supply. When the electricity grid fails, the opener’s primary motor and electronic components cease to function.

This is a critical juncture where understanding the opener’s built-in safety and emergency features becomes paramount.

The Role Of The Emergency Release Cord

Every LiftMaster garage door opener is equipped with an emergency release cord, typically a red or yellow rope hanging from the trolley mechanism on the opener’s rail. This cord is your lifeline during a power outage. Pulling this cord disengages the trolley from the opener’s drive chain or belt, effectively disconnecting the motor from the garage door. This allows you to lift or lower the door manually.

Pro Tip: Before pulling the emergency release, ensure the garage door is fully closed. If the door is partially open, the weight can make manual operation difficult and potentially dangerous. It’s also crucial to ensure no one is in the path of the door as you manually operate it.

Battery Backup Systems: A Lifesaver

Many newer LiftMaster models come with an integrated battery backup system. This feature is specifically designed to provide a limited number of open and close cycles during a power outage. The battery typically kicks in automatically when it detects a loss of AC power, allowing you to operate your garage door as you normally would via remote or keypad.

The capacity of these battery backups varies by model. Some might offer enough power for a few cycles, while others can sustain operation for longer periods. It’s essential to know your specific LiftMaster model’s capabilities and to maintain the battery’s health.

Batteries have a finite lifespan and may need replacement every 3-5 years, depending on usage and environmental factors.

Why Your Opener Stops Working During An Outage

When the power goes out, the electric motor that drives the garage door opener cannot receive the electricity it needs to operate. This is the most straightforward reason your opener becomes unresponsive. Beyond the motor, the logic board and other electronic components also lose power, rendering the opener’s sophisticated control systems inactive.

Even if you have a battery backup, its capacity is not infinite. If the outage is prolonged, or if the battery is old or depleted, it may not be able to power the opener for an extended period. In such cases, manual operation via the emergency release cord is the only option.

Liftmaster Garage Door Opener Not Working Power Outage

Credit: marvinsgaragedoors.com

Restoring Operation After A Power Outage

Once the power is restored, your LiftMaster opener might not immediately return to its fully functional state. Several issues can arise, ranging from simple resets to more complex sensor or programming problems. Following a systematic approach can help you get your opener working again efficiently.

Re-engaging The Opener

After a power outage, if you manually operated the door using the emergency release cord, you’ll need to re-engage the opener’s trolley to the door. This is usually a straightforward process, but it’s vital to do it correctly.

  • Ensure the Garage Door is Closed: Before re-engaging, make sure the garage door is fully in the closed position.
  • Locate the Trolley: Find the trolley mechanism on the opener’s rail.
  • Pull the Release Cord: Sometimes, a gentle pull on the emergency release cord is needed to disengage the trolley.
  • Re-engage Mechanism: Most LiftMaster openers have a lever or mechanism on the trolley that allows you to re-engage it with the drive chain or belt. This might involve pulling a lever or pushing a button. Consult your LiftMaster manual for the specific procedure for your model.
  • Test: Once re-engaged, you should be able to operate the door using the remote.

Warning: Never attempt to re-engage the opener while the door is in motion or if the opener is still under power. Always ensure the door is stationary and the opener is in a neutral state before attempting this step.

Resetting Your Liftmaster Opener

In some instances, a power surge or fluctuation during the outage and restoration can cause the opener’s logic board to malfunction or require a reset. Many LiftMaster models have a reset procedure that can resolve electronic glitches.

  • Unplug the Opener: The first step is to unplug the garage door opener from the power outlet. This ensures no power is flowing through the system.
  • Wait: Leave the opener unplugged for at least 5-10 minutes. This allows any residual power in the capacitors to dissipate and can help reset the internal electronics.
  • Check Battery Backup (if applicable): If your model has a battery backup, remove the battery during this unplugging period. This ensures a complete power cycle for both the main unit and the backup.
  • Plug Back In: After the waiting period, plug the opener back into the power outlet.
  • Test: Attempt to operate the garage door using your remote or wall button.

If the opener still doesn’t respond, you may need to perform a hard reset, which often involves pressing and holding a specific button on the motor unit for a set duration. Again, refer to your LiftMaster owner’s manual for the precise instructions for your model.

Remote Control And Keypad Issues

Power outages can sometimes disrupt the communication between your LiftMaster opener and its remote controls or wireless keypads. The opener’s memory for these devices may be cleared, or the devices themselves might need to be reprogrammed.

  • Reprogramming Remotes: Most LiftMaster openers have a “Learn” button on the motor unit. To reprogram a remote, you typically press and release this button, then press and hold the desired button on your remote. The opener’s indicator light will usually flash to confirm the programming. This process is detailed in your LiftMaster manual.
  • Reprogramming Keypads: Wireless keypads also require a reprogramming sequence. This usually involves entering a PIN code and then pressing a specific sequence of buttons on the keypad to sync it with the opener.
  • Check Batteries: Ensure the batteries in your remote controls and keypads are fresh, as a low battery can sometimes cause connectivity issues, especially after a power interruption.

Safety Sensor Alignment

The safety sensors are crucial for the proper functioning of your garage door opener. These small sensors are located near the bottom of the garage door track and emit an invisible beam across the opening. If this beam is broken while the door is closing, the opener will reverse the door’s direction to prevent accidents.

Power outages, or even minor vibrations from the house settling, can sometimes cause these sensors to become misaligned. If your door closes partially and then reverses, or if the opener refuses to close the door at all, misaligned safety sensors are a common culprit.

  • Locate Sensors: Identify the two sensors at the bottom of your garage door tracks. They usually have a small indicator light on each.
  • Check Indicator Lights: One sensor typically has a steady light, while the other’s light might blink or be off if there’s a misalignment or obstruction.
  • Align: Gently adjust the angle of the sensors until both indicator lights are steady and illuminated. You may need to loosen a mounting screw to adjust the angle.
  • Obstructions: Ensure nothing is blocking the path between the sensors, such as tools, debris, or even cobwebs.
  • Clean Lenses: Wipe the lenses of the sensors with a soft, dry cloth.

If realignment doesn’t solve the issue, the sensors might require more thorough troubleshooting, potentially involving checking wiring connections or replacing a faulty sensor.

Liftmaster Garage Door Opener Not Working Power Outage

Credit: bt1doors.com

Troubleshooting Common Liftmaster Issues Post-outage

Beyond the general steps, specific problems can arise that require targeted troubleshooting. Being aware of these common issues can save you time and frustration when dealing with a LiftMaster opener after a power disruption.

Opener Not Responding To Remote Or Wall Button

If your LiftMaster opener is receiving power (you might hear a faint hum or see indicator lights on the motor unit) but is unresponsive to its controls, several factors could be at play.

  • Loss of Programming: As mentioned, the opener might have lost its programming for the remotes. Follow the reprogramming steps outlined in your manual.
  • Wall Button Issue: If the remote works but the wall button doesn’t, the issue might be with the wiring to the wall button or the button itself. Check for loose connections at the motor unit.
  • Logic Board Fault: In rare cases, a power surge during the outage could have damaged the logic board. If all other troubleshooting steps fail, this might be the cause.

Garage Door Opens But Won’t Close

This is a classic symptom of misaligned safety sensors. However, other possibilities exist:

  • Travel Limits: The opener’s travel limits (the points at which the door stops when fully open or closed) might have been inadvertently reset or altered. These limits tell the opener when to stop. Reprogramming the travel limits, as described in your manual, is often necessary after a power interruption.
  • Obstruction in Track: A physical obstruction in the garage door track can prevent it from closing fully, triggering the safety reversal. Inspect the tracks carefully.
  • Force Settings: The opener has force settings that determine how much effort it will exert to open or close the door. If these settings are too low, the opener might struggle to close the door against minor resistance. You may need to adjust the force settings, but do so cautiously as incorrect settings can damage the door or opener.

Garage Door Closes Partially And Reverses

This is almost always an indication of an issue with the safety sensors or a problem with the door’s ability to close completely.

  • Safety Sensors: Double-check the alignment and ensure no obstructions are breaking the beam.
  • Obstruction: A small object, a warped section of the door, or debris in the track can prevent the door from closing fully, triggering the safety reversal.
  • Travel Limits: If the travel limit for the closed position is set too low, the opener might think the door is closed when it’s not, causing it to reverse. Adjusting the closed travel limit is necessary.

Opener Makes Noise But Door Doesn’t Move

If you hear the opener motor running, but the door remains stationary, the trolley is likely disengaged from the drive mechanism, or there’s a mechanical issue within the opener’s drive system.

  • Trolley Disengaged: This is common after manual operation. Ensure the trolley is properly re-engaged with the chain or belt.
  • Broken Drive Chain/Belt: The drive chain or belt that connects the trolley to the motor could be broken or have slipped off its sprockets. This requires inspection and potential repair or replacement.
  • Internal Gear Stripped: The gears inside the opener’s motor unit can wear out or strip, preventing power from being transferred to the drive mechanism. This usually necessitates motor unit repair or replacement.
Liftmaster Garage Door Opener Not Working Power Outage

Credit: www.youtube.com

Maintaining Your Liftmaster Opener For Power Outages

Proactive maintenance is the best strategy for ensuring your LiftMaster opener is ready for any power outage. Regular checks and upkeep can prevent common issues and guarantee the functionality of essential safety features.

Testing The Battery Backup System

If your LiftMaster has a battery backup, you should test it periodically. Most manufacturers recommend testing at least twice a year.

  • Simulate Power Loss: Unplug the garage door opener from the wall outlet.
  • Operate the Door: Use your remote control to open and close the garage door.
  • Observe Performance: Note if the opener operates at a normal speed and sound. If it’s significantly slower, weaker, or fails to complete a full cycle, the battery may be nearing the end of its life or may need charging.
  • Re-plug: Plug the opener back into the outlet. The battery backup system will begin to recharge.

Battery Replacement: LiftMaster batteries typically last 3-5 years. If your battery fails a test or is several years old, consider replacing it. Genuine LiftMaster replacement batteries are recommended for optimal performance and compatibility.

Checking The Emergency Release Mechanism

The emergency release cord is simple but vital. Ensure it’s easily accessible and functional.

  • Accessibility: Make sure the cord is not tangled, frayed, or otherwise obstructed. It should hang freely from the trolley.
  • Functionality Test: Periodically, with the opener powered off, gently pull the cord to ensure it disengages the trolley smoothly. Then, re-engage the trolley and test the opener with the remote.

Lubrication And General Maintenance

A well-maintained garage door system is less likely to encounter problems during stressful events like power outages.

  • Lubricate Moving Parts: Apply a silicone-based lubricant or white lithium grease to the tracks, rollers, hinges, and springs of your garage door. This reduces friction and strain on the opener.
  • Inspect Rollers and Tracks: Ensure rollers are turning freely and that tracks are free of debris and not bent or damaged.
  • Check Springs: Garage door springs are under high tension and are critical for smooth operation. If you suspect an issue with your springs, contact a professional for inspection and repair.

Keeping Your Manual Handy

In the event of an emergency, having your LiftMaster owner’s manual readily available can be invaluable. It contains specific instructions for your model regarding emergency release, re-engagement, battery backup, remote programming, and limit adjustments. Store a physical copy in a safe place or keep a digital version accessible on your smartphone or computer.

Advanced Troubleshooting And When To Call A Professional

While many power outage-related issues can be resolved with basic troubleshooting, some problems may indicate more serious mechanical or electrical faults. Knowing when to seek professional help is crucial for safety and to prevent further damage.

When To Call A Professional

  • Persistent Issues: If you’ve followed all troubleshooting steps and your LiftMaster opener still doesn’t function correctly, it’s time to call a qualified garage door technician.
  • Damaged Components: Any visible damage to the motor unit, rail, drive chain/belt, or garage door itself warrants professional assessment.
  • Spring Problems: Garage door springs are under extreme tension and can cause severe injury if handled improperly. Never attempt to adjust or replace springs yourself.
  • Electrical Concerns: If you suspect electrical issues beyond a simple reset, such as frayed wiring or a malfunctioning logic board, a professional electrician or garage door technician should be consulted.
  • Uncertainty: If at any point you feel uncomfortable or unsure about performing a repair or adjustment, it’s always best to err on the side of caution and call a professional.

Understanding Liftmaster Model Differences

LiftMaster offers a wide range of openers, from basic chain-drive models to advanced belt-drive systems with smart features. The specific troubleshooting steps and features, such as battery backup capabilities, can vary significantly between models.

  • Battery Backup Models: If your model includes a battery backup, familiarize yourself with its specifications, including how to test and replace the battery. LiftMaster’s Premium Series and some Contractor Series models often include this feature.
  • Smart Control Models: LiftMaster’s MyQ-enabled openers offer remote access and control via a smartphone app. While these features are convenient, they rely on a stable internet connection. During a power outage, your home Wi-Fi will likely be down, disabling MyQ functionality. However, the battery backup (if equipped) will still allow local operation via remote.
  • Drive Types: Chain-drive openers are generally more robust but can be noisier. Belt-drive openers are quieter and often found in premium models. The troubleshooting for mechanical issues might differ slightly based on the drive type.

Resources For Liftmaster Support

LiftMaster provides extensive resources for homeowners:

  • Owner’s Manuals: The most critical resource. You can usually find digital copies on the LiftMaster website by searching for your specific model number.
  • LiftMaster Website Support: The official LiftMaster website often has FAQs, troubleshooting guides, and video tutorials. LiftMaster Support provides detailed information.
  • Authorized Dealers/Technicians: For repairs and installations, using an authorized LiftMaster dealer ensures you receive quality service from trained professionals.

Preparing For Future Power Outages

The best way to handle a power outage affecting your garage door opener is to be prepared *before* it happens. A little foresight can save a lot of hassle.

Create A Garage Door Emergency Kit

Consider assembling a small kit to keep in your garage, containing:

  • Flashlight with extra batteries: Essential for visibility during dark outages.
  • Work gloves: To protect your hands when manually operating the door.
  • Your LiftMaster owner’s manual: For quick reference.
  • Basic tools: A small screwdriver or pliers might be useful for minor adjustments.
  • Fresh batteries for remotes/keypads: To ensure they function if the opener’s memory is lost.

Educate Household Members

Ensure everyone in your household knows how to:

  • Locate and use the emergency release cord.
  • Manually open and close the garage door.
  • Re-engage the opener after power is restored.
  • Identify the safety sensors and their function.

Consider A Surge Protector

While not directly related to power outages, power surges that often accompany power restoration can damage electronic components. Plugging your garage door opener into a high-quality surge protector can help safeguard its logic board and other sensitive electronics.

Battery Backup As A Standard Feature

If you live in an area prone to frequent power outages and don’t currently have a battery backup system, consider upgrading your LiftMaster opener to a model that includes this feature. It provides a significant level of convenience and security during blackouts.

Frequently Asked Questions

How Do I Manually Open My Liftmaster Garage Door During A Power Outage?

To Manually Open Your Liftmaster Garage Door During A Power Outage, Locate The Emergency Release Cord Hanging From The Trolley Mechanism On The Opener’s Rail. Pull This Cord Firmly Downwards. This Disengages The Trolley From The Opener’s Drive Chain Or Belt, Allowing You To Lift The Door By Hand. Ensure The Door Is Fully Closed Before Pulling The Cord If Possible, And Always Check That The Path Is Clear.

Will My Liftmaster Remote Work During A Power Outage?

Your Liftmaster Remote Will Only Work During A Power Outage If Your Opener Is Equipped With A Functional Battery Backup System. The Battery Backup Provides Temporary Power To The Opener, Allowing It To Respond To Remote Commands For A Limited Number Of Cycles. If Your Opener Does Not Have A Battery Backup, Or If The Battery Is Depleted Or Non-existent, The Remote Will Not Function.

What Should I Do If My Liftmaster Opener Loses Its Remote Programming After A Power Outage?

If Your Liftmaster Opener Loses Its Remote Programming After A Power Outage, You Will Need To Reprogram The Remote Control. Locate The “learn” Button On The Motor Unit Of Your Opener. Press And Release This Button, Then Immediately Press And Hold The Button On Your Remote Control That You Wish To Use. The Opener’s Indicator Light Will Typically Flash Or Turn On To Confirm The Programming. Refer To Your Specific Liftmaster Model’s Owner’s Manual For Precise Instructions.

My Liftmaster Safety Sensors Are Blinking After A Power Outage. What Does This Mean?

Blinking Safety Sensor Lights On A Liftmaster Opener Typically Indicate That The Safety Sensors Are Misaligned Or Obstructed. During A Power Outage Or Restoration, Vibrations Or Minor Shifts Can Cause Them To Become Misaligned. Ensure The Path Between The Two Sensors Is Clear Of Any Objects And Gently Adjust The Angle Of The Sensors Until Both Indicator Lights Are Steady. If The Issue Persists, Check The Wiring Connections To The Sensors.

How Long Does The Battery Backup On A Liftmaster Opener Typically Last?

The Duration A Liftmaster Battery Backup Can Power The Opener Varies By Model And Battery Condition. Generally, A Fully Charged Battery Backup Can Provide Enough Power For Approximately 24-48 Hours Of Standby Time And 10-20 Open/close Cycles. However, This Is An Approximation, And Actual Performance Can Depend On Factors Like Temperature, Battery Age, And How Frequently The Opener Is Used During The Outage. Always Consult Your Owner’s Manual For Specific Details On Your Model’s

Liftmaster Garage Door Opener Not Working Blinking Light

Liftmaster Garage Door Opener Not Working Blinking Light

A blinking light on your LiftMaster garage door opener is a common indicator that something isn’t quite right. While it might seem like a minor annoyance, this flashing signal is your opener’s way of communicating a specific issue, ranging from simple misalignments to more complex electrical problems.

Understanding what the blinking light means is the first crucial step in troubleshooting and getting your garage door back to its reliable operation. Ignoring these signals can lead to further damage or inconvenience.

This guide will demystify the various blinking light patterns on LiftMaster garage door openers, providing a comprehensive troubleshooting roadmap. We’ll break down the common causes, offer step-by-step solutions, and help you determine when it’s time to call a professional. Whether you’re dealing with a safety sensor issue, a loose connection, or a more intricate internal problem, by the end of this article, you’ll be equipped to diagnose and, in many cases, resolve the blinking light issue yourself.

Key Takeaways

  • A blinking light on a LiftMaster garage door opener signifies a specific problem, acting as a diagnostic code.
  • Common causes include safety sensor misalignment or obstruction, travel limit issues, and remote control malfunctions.
  • Troubleshooting involves checking safety sensors, ensuring proper alignment, and verifying remote control battery and programming.
  • Power cycling the opener and checking for physical obstructions are essential initial steps.
  • Specific blinking patterns correspond to distinct error codes, often detailed in the LiftMaster manual.
  • For persistent issues or electrical concerns, professional diagnosis and repair are recommended.

Understanding Liftmaster Blinking Light Codes

LiftMaster garage door openers utilize a blinking LED light, often located on the motor unit, as a diagnostic tool. This light flashes in a specific sequence or pattern to communicate the nature of a malfunction. While the exact code can vary slightly between models, most follow a standardized system.

The most common pattern involves a series of rapid flashes, pauses, and then a repeat of the flashes. For instance, a common error code might be “five flashes. ” This means the unit flashes five times, pauses, and then flashes five times again.

Identifying the precise number of flashes is paramount. You’ll need to observe the light carefully and count the repetitions. Once you have a count, you can cross-reference it with your opener’s manual or online LiftMaster resources to pinpoint the exact issue.

These codes are designed to simplify troubleshooting, guiding you toward the most probable cause without requiring extensive technical knowledge. Without understanding these codes, you’re essentially guessing at the problem, which can lead to unnecessary repairs or prolonged downtime for your garage door.

The Importance Of Your Liftmaster Manual

The LiftMaster owner’s manual is your most valuable resource when deciphering blinking light codes. Every model comes with a manual that details the specific error codes for that unit. These manuals provide clear explanations of what each blinking pattern signifies, along with recommended troubleshooting steps. If you’ve misplaced your manual, most can be downloaded directly from the official LiftMaster website by entering your opener’s model number. It’s crucial to consult the manual for *your specific model* as variations can exist. For example, a four-flash code on one model might indicate a safety sensor issue, while on another, it could relate to a motor overload.

Common Blinking Light Patterns And Their Meanings

While consulting your manual is always the definitive step, several blinking light patterns are frequently encountered across various LiftMaster models. These typically revolve around safety, power, and operational limits.

  • One Flash: Often indicates an issue with the remote control or wall button. This could be a dead battery, a faulty button, or a programming issue.
  • Two Flashes: Frequently points to a problem with the safety sensors (also known as photo eyes). This could be misalignment, obstruction, or a wiring issue.
  • Three Flashes: Commonly relates to travel limits or force settings. The opener might be struggling to open or close the door fully, or the limits may need adjustment.
  • Four Flashes: Often indicates a safety sensor issue, similar to two flashes, but sometimes more specific to a complete failure of one sensor to detect the other.
  • Five Flashes: This can signify a motor or logic board problem, or sometimes an issue with the encoder. This is generally a more serious error.
  • Ten Flashes: Usually indicates an encoder failure or a problem with the motor’s ability to detect its position.

It’s important to note that these are general interpretations. Always confirm with your specific model’s manual.

Liftmaster Garage Door Opener Not Working Blinking Light

Credit: gdmedics.com

Troubleshooting Safety Sensor Issues

The most frequent culprit behind a blinking light on a LiftMaster opener is a problem with the safety sensors. These are small devices, usually mounted near the bottom of the garage door tracks, that emit an invisible infrared beam. If this beam is broken or misaligned when the door is closing, the opener will stop and reverse to prevent accidents. A blinking light often signals that one or both sensors are not functioning correctly.

Identifying Safety Sensor Problems

Before diving into adjustments, visually inspect the sensors. Look for:

  • Obstructions: Anything blocking the path of the beam, such as a parked car, a broom, a trash can, or even thick cobwebs.
  • Damage: Bent brackets, cracked housings, or loose wiring on either sensor.
  • Alignment: The sensors should be directly facing each other. If one is angled away, the beam won’t connect.
  • Indicator Lights: Most safety sensors have small LED lights on them. Typically, one sensor will have a steady light, while the other will blink until the beam is properly aligned. If both are off or blinking erratically, it points to a problem.

Aligning The Safety Sensors

Misalignment is the most common safety sensor issue. Here’s how to address it:

  • Clear Obstructions: Remove anything that might be blocking the beam.
  • Check Sensor Lights: Observe the indicator lights on both sensors. One should be solid (indicating power and a connected beam), and the other might be blinking if misaligned.
  • Adjust the Misaligned Sensor: Gently adjust the sensor that has the blinking or off light. Move it slowly side-to-side and up-and-down until its indicator light turns solid. This means the beam has successfully connected with the other sensor.
  • Secure the Sensors: Once aligned, ensure the sensors are firmly mounted and the brackets are not loose.
  • Test the Opener: Try operating the garage door. If the blinking light stops and the door closes fully, you’ve likely resolved the issue.

If the sensors continue to blink or the door still doesn’t close properly after alignment, proceed to check the wiring.

Checking Safety Sensor Wiring

Loose or damaged wiring can prevent the safety sensors from communicating effectively.

  • Inspect the Wires: Trace the wires from each sensor back to the motor unit. Look for any nicks, cuts, frayed insulation, or loose connections at the sensor terminals or where they enter the motor unit.
  • Secure Connections: If you find loose wires, disconnect the power to the opener (unplug it from the outlet) and re-secure the wires to the terminals. Ensure they are firmly attached.
  • Test for Continuity (Advanced): If you have a multimeter, you can test the wiring for continuity. This involves checking if the wire is intact and allowing electrical current to pass through. This step is generally recommended for those with electrical experience.

If, after checking for obstructions, alignment, and wiring, the safety sensors still appear to be the problem, the sensors themselves might be faulty and require replacement.

Liftmaster Garage Door Opener Not Working Blinking Light

Credit: www.youtube.com

Addressing Travel Limit And Force Adjustments

Another common reason for a LiftMaster opener’s blinking light is incorrect travel limit or force settings. The travel limits dictate how far the door opens and closes, and the force settings determine how much power the opener uses to move the door. If the opener encounters too much resistance (or not enough, in some cases) during its travel, it can trigger a safety stop and a blinking light.

What Are Travel Limits And Force Settings?

  • Travel Limits: These are settings that tell the opener when to stop moving the door at the fully open and fully closed positions. If these are set too high or too low, the door might not close completely, or the opener might strain against the floor or the header.
  • Force Settings: This controls the amount of power the motor applies to move the door. If the force is set too high, the opener might trigger a safety stop if it encounters even minor resistance. If set too low, it might not be able to move the door fully.

Adjusting Travel Limits And Force

The adjustment process for travel limits and force settings varies significantly by LiftMaster model. However, most modern openers use a programming sequence involving buttons on the motor unit.

  • Locate Adjustment Controls: Consult your owner’s manual to find the location of the “UP” and “DOWN” limit adjustment screws or the electronic programming buttons.
  • Enter Programming Mode: Typically, you’ll need to press and hold a specific button (often labeled “PROGRAM” or “SQUARE BUTTON”) until an LED on the motor unit lights up or flashes.
  • Adjust Limits: Use the remote control to move the door to the desired fully open position. Then, press and hold the “PROGRAM” button and the “UP” button simultaneously until the opener’s light flashes or a click is heard. Repeat this process for the fully closed position, using the “DOWN” button.
  • Adjust Force: After setting the limits, you’ll usually adjust the force. This often involves pressing the “PROGRAM” button and then the “UP” or “DOWN” button, followed by pressing the “UP” or “DOWN” button again to increase or decrease force. The manual will guide you on how to gauge the correct force, usually by observing if the door reverses upon encountering light resistance (like a 2×4 piece of wood placed flat on the ground).
  • Exit Programming: Press the “PROGRAM” button again to save the settings.

Example: On some LiftMaster models (like the 1300 series), you might press the “PROGRAM” button, then press the “UP” button to move the door open. Once at the desired open position, press and hold “PROGRAM” and “UP” until the light flashes. Then, press the “DOWN” button to move the door to the closed position, press and hold “PROGRAM” and “DOWN” until the light flashes to set the down limit. Force adjustments are typically done via separate buttons or a dial.

It’s critical to follow your manual precisely, as incorrect adjustments can lead to the door not opening or closing properly, or even damage to the door or opener.

Liftmaster Garage Door Opener Not Working Blinking Light

Credit: thriftygaragedoorrepair.ca

Remote Control And Wall Button Issues

A blinking light can also stem from a problem with the remote control or the mounted wall button. If the opener isn’t receiving a valid signal, it might interpret this as an error.

Remote Control Problems

  • Battery: The most common issue is a dead or weak battery in the remote. Replace the battery with a fresh one. Ensure it’s inserted correctly.
  • Range: Sometimes, the remote might be too far from the opener, or there might be significant interference from other electronic devices or structural materials. Try operating the remote closer to the motor unit.
  • Programming: The remote might have become deprogrammed from the opener. You’ll need to reprogram it according to your opener’s manual. This usually involves pressing a “Learn” or “Program” button on the motor unit and then pressing a button on the remote.
  • Faulty Remote: The remote itself might be damaged or malfunctioning. Try using a different remote if you have one, or the wall button, to see if the issue persists.

Wall Button Problems

  • Loose Wiring: The wires connecting the wall button to the motor unit could be loose or damaged. Check the connections at both the button and the motor unit.
  • Faulty Button: The button itself might be stuck or broken. Press it firmly to ensure it’s not physically jammed. If it feels loose or unresponsive, it may need replacement.

Pro Tip: If you suspect a remote issue, try using the wired wall button. If the door operates correctly with the wall button but not the remote, you’ve isolated the problem to the remote or its receiver. Conversely, if neither works, the issue likely lies with the opener’s logic board, power, or safety sensors.

Power And Internal Component Issues

When simpler troubleshooting steps fail, the blinking light might indicate a more significant problem with the opener’s power supply or internal components.

Power Cycling The Opener

Before assuming a major fault, always try a simple power cycle. This can reset the opener’s logic board and clear temporary glitches.

  • Disconnect Power: Unplug the garage door opener from the electrical outlet.
  • Wait: Leave it unplugged for at least 60 seconds. This allows any residual power in the capacitors to dissipate.
  • Reconnect Power: Plug the opener back into the outlet.
  • Test: Try operating the opener with the remote or wall button.

This simple step can resolve many intermittent issues and is a good first diagnostic measure for any electronic device.

Logic Board Or Motor Problems

A blinking light, especially a rapid, continuous flash or a pattern indicating a motor fault (like five or ten flashes), can point to a failing logic board or motor.

  • Logic Board: This is the “brain” of the opener. If it’s damaged due to power surges, age, or wear, it can cause erratic behavior, including incorrect blinking light codes. Replacing a logic board can be costly.
  • Motor Issues: The motor itself might be overheating, failing, or have internal damage. This could be due to age, lack of maintenance (lubrication), or a mechanical issue within the opener’s gear system.

Warning: Working with the internal components of a garage door opener can be dangerous due to the presence of high voltage and heavy springs. If you suspect a logic board or motor issue, it is strongly recommended to contact a qualified garage door technician.

Encoder Malfunction

Some LiftMaster openers use an encoder to monitor the position and speed of the motor. If the encoder fails, the opener won’t know how far to move the door, leading to it stopping prematurely and potentially triggering a blinking light code (often 5 or 10 flashes). Replacing an encoder typically requires a service call.

When To Call A Professional

While many LiftMaster blinking light issues can be resolved with basic troubleshooting, there are times when professional expertise is essential. If you’ve exhausted the steps outlined above and the blinking light persists, or if you encounter any of the following situations, it’s time to call a qualified garage door technician:

  • Persistent Blinking Light: After attempting all relevant troubleshooting steps for your model, if the light continues to blink, indicating an unresolved error code.
  • Electrical Concerns: If you suspect issues with the wiring, motor, or logic board, especially if you’re not comfortable working with electrical components.
  • Mechanical Problems: If the door is physically stuck, making unusual noises, or if you notice bent tracks, broken springs, or damaged cables. These are serious safety hazards.
  • Complex Error Codes: If your manual indicates a complex error code that requires specialized diagnostic tools or knowledge.
  • Safety Concerns: If you are unsure about any step or feel uncomfortable performing the troubleshooting yourself. Garage doors are heavy and under tension, posing significant risks if handled improperly.

A professional technician has the necessary tools, knowledge, and experience to accurately diagnose the problem, perform repairs safely, and ensure your garage door system operates reliably and securely. They can also identify potential future issues before they become major problems.

Maintenance Tips To Prevent Future Issues

Regular preventive maintenance is key to minimizing the occurrence of blinking lights and other operational problems with your LiftMaster garage door opener. A well-maintained system is less likely to develop faults.

Regular Inspections

  • Visual Checks: Monthly, visually inspect the entire garage door system. Look for worn rollers, damaged tracks, frayed cables, and loose hardware.
  • Safety Sensor Alignment: Periodically check that the safety sensors are clean and aligned. Dust or debris can accumulate, and vibrations can cause slight misalignment over time.
  • Balance Test: Manually disengage the opener (using the emergency release cord) and lift the door halfway. It should stay in place without significant effort. If it’s too heavy or slams shut, the springs may need adjustment by a professional.

Lubrication

  • Moving Parts: Lubricate the hinges, rollers, and tracks of the garage door itself (not the opener mechanism) with a silicone-based spray lubricant at least twice a year. This reduces strain on the opener motor.
  • Opener Chain/Screw Drive: If you have a chain-driven opener, check the chain tension and lubricate it according to the manual. For screw drives, ensure the screw mechanism is clean and free of debris.

Battery Replacement

  • Remotes: Replace batteries in your remotes at least once a year, or when you notice a decrease in range or responsiveness.
  • Backup Battery: If your opener has a battery backup, test it annually and replace the battery according to the manufacturer’s recommendations (typically every 3-5 years).

Software/firmware Updates (smart Openers)

  • If you have a smart LiftMaster opener connected to your home network, ensure it has the latest firmware updates installed. These updates can sometimes resolve bugs and improve performance. Check the LiftMaster app or website for instructions.

By incorporating these simple maintenance practices, you can significantly extend the lifespan of your garage door opener and reduce the likelihood of encountering disruptive issues like a blinking light.

Frequently Asked Questions

What Does A Continuous Blinking Light On A Liftmaster Mean?

A continuous, rapid blinking light on a LiftMaster opener usually indicates a critical error, often related to the safety sensors not being aligned or detecting an obstruction. It could also signify an issue with the logic board or motor. The exact meaning depends on the specific model, so consulting your owner’s manual is crucial.

How Do I Reset My Liftmaster Garage Door Opener?

To reset your LiftMaster garage door opener, you typically perform a power cycle. Unplug the opener from the electrical outlet, wait for at least 60 seconds to allow capacitors to discharge, and then plug it back in. For some models, a full reset might involve reprogramming the limits and remotes, which is detailed in the owner’s manual.

Can I Fix A Liftmaster Opener With A Blinking Light Myself?

Many common issues, such as misaligned safety sensors, dead remote batteries, or the need for a power cycle, can be fixed yourself. However, if the blinking light indicates a more complex problem like a faulty logic board, motor issue, or damaged wiring that you’re not comfortable addressing, it’s best to call a professional technician.

My Liftmaster Opener Is Blinking 5 Times. What Does That Mean?

A pattern of five flashes on a LiftMaster garage door opener commonly indicates an issue with the motor or the logic board. It might signify that the motor is overheating, has failed, or that the logic board is not receiving proper feedback from the motor. This often requires professional diagnosis.

How Often Should I Check My Garage Door Opener’s Safety Sensors?

You should visually inspect your LiftMaster garage door opener’s safety sensors for obstructions and alignment at least once a month. It’s also a good practice to test their functionality by attempting to close the door with an obstruction in the beam path. If the door reverses, the sensors are working correctly.

A blinking light on your LiftMaster garage door opener is a signal, not a permanent failure. By systematically working through the potential causes, starting with the simplest solutions like checking obstructions and power cycling, and progressing to more technical adjustments, you can often restore your opener’s functionality.

Remember to always prioritize safety, consult your owner’s manual for model-specific guidance, and don’t hesitate to contact a professional if the problem persists or involves complex electrical or mechanical components. Regular maintenance is your best defense against future issues, ensuring your garage door opener continues to operate smoothly and reliably for years to come.