
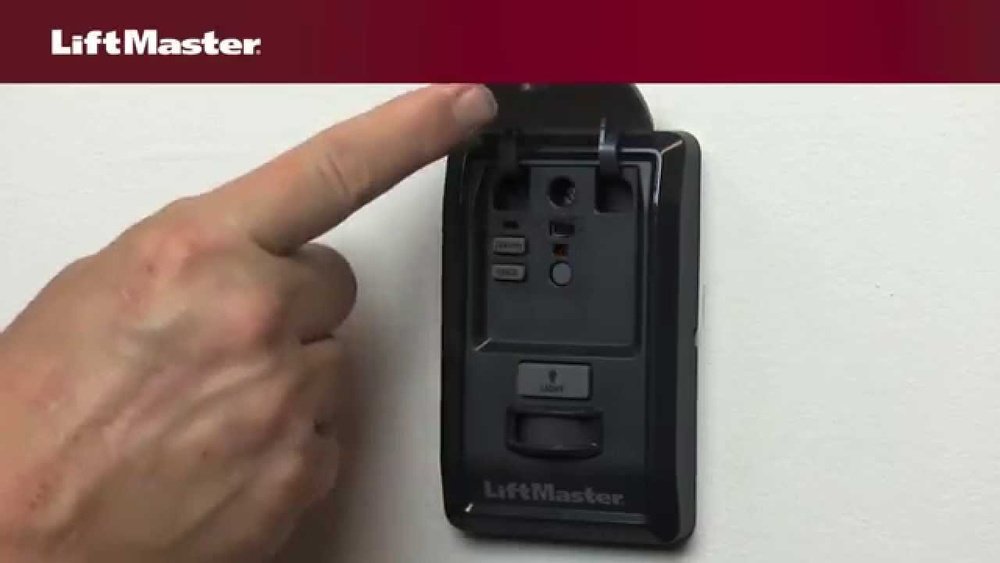
A blinking light on your LiftMaster garage door opener is a common indicator that something isn’t quite right. While it might seem like a minor annoyance, this flashing signal is your opener’s way of communicating a specific issue, ranging from simple misalignments to more complex electrical problems.
Understanding what the blinking light means is the first crucial step in troubleshooting and getting your garage door back to its reliable operation. Ignoring these signals can lead to further damage or inconvenience.
This guide will demystify the various blinking light patterns on LiftMaster garage door openers, providing a comprehensive troubleshooting roadmap. We’ll break down the common causes, offer step-by-step solutions, and help you determine when it’s time to call a professional. Whether you’re dealing with a safety sensor issue, a loose connection, or a more intricate internal problem, by the end of this article, you’ll be equipped to diagnose and, in many cases, resolve the blinking light issue yourself.
Key Takeaways
- A blinking light on a LiftMaster garage door opener signifies a specific problem, acting as a diagnostic code.
- Common causes include safety sensor misalignment or obstruction, travel limit issues, and remote control malfunctions.
- Troubleshooting involves checking safety sensors, ensuring proper alignment, and verifying remote control battery and programming.
- Power cycling the opener and checking for physical obstructions are essential initial steps.
- Specific blinking patterns correspond to distinct error codes, often detailed in the LiftMaster manual.
- For persistent issues or electrical concerns, professional diagnosis and repair are recommended.
Understanding Liftmaster Blinking Light Codes
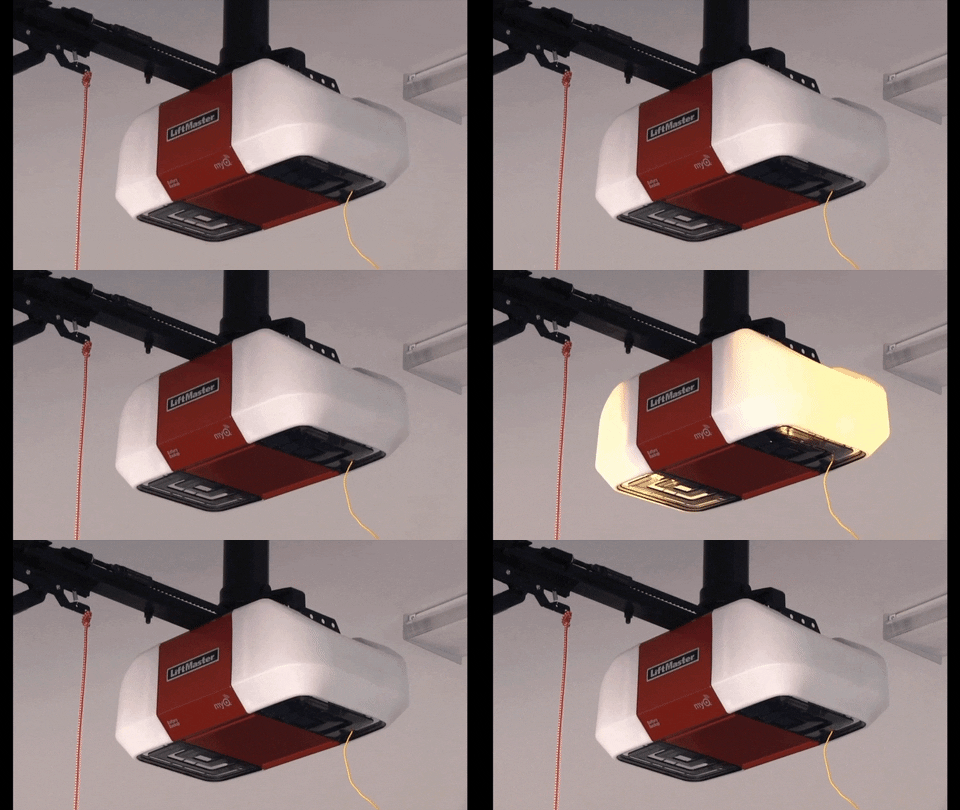
LiftMaster garage door openers utilize a blinking LED light, often located on the motor unit, as a diagnostic tool. This light flashes in a specific sequence or pattern to communicate the nature of a malfunction. While the exact code can vary slightly between models, most follow a standardized system.
The most common pattern involves a series of rapid flashes, pauses, and then a repeat of the flashes. For instance, a common error code might be “five flashes. ” This means the unit flashes five times, pauses, and then flashes five times again.
Identifying the precise number of flashes is paramount. You’ll need to observe the light carefully and count the repetitions. Once you have a count, you can cross-reference it with your opener’s manual or online LiftMaster resources to pinpoint the exact issue.
These codes are designed to simplify troubleshooting, guiding you toward the most probable cause without requiring extensive technical knowledge. Without understanding these codes, you’re essentially guessing at the problem, which can lead to unnecessary repairs or prolonged downtime for your garage door.
The Importance Of Your Liftmaster Manual
The LiftMaster owner’s manual is your most valuable resource when deciphering blinking light codes. Every model comes with a manual that details the specific error codes for that unit. These manuals provide clear explanations of what each blinking pattern signifies, along with recommended troubleshooting steps. If you’ve misplaced your manual, most can be downloaded directly from the official LiftMaster website by entering your opener’s model number. It’s crucial to consult the manual for *your specific model* as variations can exist. For example, a four-flash code on one model might indicate a safety sensor issue, while on another, it could relate to a motor overload.
Common Blinking Light Patterns And Their Meanings
While consulting your manual is always the definitive step, several blinking light patterns are frequently encountered across various LiftMaster models. These typically revolve around safety, power, and operational limits.
- One Flash: Often indicates an issue with the remote control or wall button. This could be a dead battery, a faulty button, or a programming issue.
- Two Flashes: Frequently points to a problem with the safety sensors (also known as photo eyes). This could be misalignment, obstruction, or a wiring issue.
- Three Flashes: Commonly relates to travel limits or force settings. The opener might be struggling to open or close the door fully, or the limits may need adjustment.
- Four Flashes: Often indicates a safety sensor issue, similar to two flashes, but sometimes more specific to a complete failure of one sensor to detect the other.
- Five Flashes: This can signify a motor or logic board problem, or sometimes an issue with the encoder. This is generally a more serious error.
- Ten Flashes: Usually indicates an encoder failure or a problem with the motor’s ability to detect its position.
It’s important to note that these are general interpretations. Always confirm with your specific model’s manual.
Credit: gdmedics.com
Troubleshooting Safety Sensor Issues
The most frequent culprit behind a blinking light on a LiftMaster opener is a problem with the safety sensors. These are small devices, usually mounted near the bottom of the garage door tracks, that emit an invisible infrared beam. If this beam is broken or misaligned when the door is closing, the opener will stop and reverse to prevent accidents. A blinking light often signals that one or both sensors are not functioning correctly.
Identifying Safety Sensor Problems
Before diving into adjustments, visually inspect the sensors. Look for:
- Obstructions: Anything blocking the path of the beam, such as a parked car, a broom, a trash can, or even thick cobwebs.
- Damage: Bent brackets, cracked housings, or loose wiring on either sensor.
- Alignment: The sensors should be directly facing each other. If one is angled away, the beam won’t connect.
- Indicator Lights: Most safety sensors have small LED lights on them. Typically, one sensor will have a steady light, while the other will blink until the beam is properly aligned. If both are off or blinking erratically, it points to a problem.
Aligning The Safety Sensors
Misalignment is the most common safety sensor issue. Here’s how to address it:
- Clear Obstructions: Remove anything that might be blocking the beam.
- Check Sensor Lights: Observe the indicator lights on both sensors. One should be solid (indicating power and a connected beam), and the other might be blinking if misaligned.
- Adjust the Misaligned Sensor: Gently adjust the sensor that has the blinking or off light. Move it slowly side-to-side and up-and-down until its indicator light turns solid. This means the beam has successfully connected with the other sensor.
- Secure the Sensors: Once aligned, ensure the sensors are firmly mounted and the brackets are not loose.
- Test the Opener: Try operating the garage door. If the blinking light stops and the door closes fully, you’ve likely resolved the issue.
If the sensors continue to blink or the door still doesn’t close properly after alignment, proceed to check the wiring.
Checking Safety Sensor Wiring
Loose or damaged wiring can prevent the safety sensors from communicating effectively.
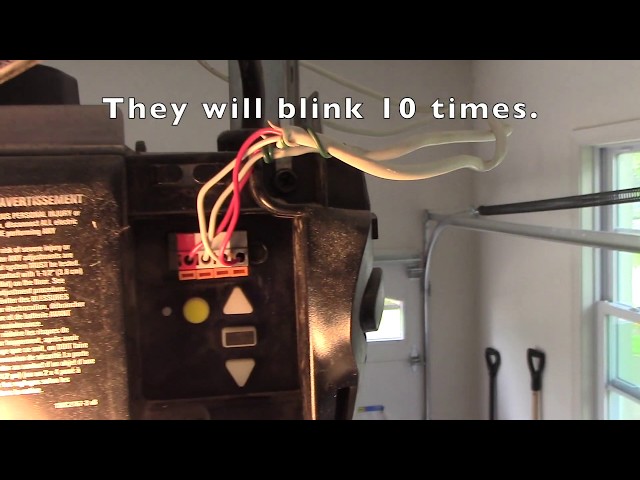
- Inspect the Wires: Trace the wires from each sensor back to the motor unit. Look for any nicks, cuts, frayed insulation, or loose connections at the sensor terminals or where they enter the motor unit.
- Secure Connections: If you find loose wires, disconnect the power to the opener (unplug it from the outlet) and re-secure the wires to the terminals. Ensure they are firmly attached.
- Test for Continuity (Advanced): If you have a multimeter, you can test the wiring for continuity. This involves checking if the wire is intact and allowing electrical current to pass through. This step is generally recommended for those with electrical experience.
If, after checking for obstructions, alignment, and wiring, the safety sensors still appear to be the problem, the sensors themselves might be faulty and require replacement.
Credit: www.youtube.com
Addressing Travel Limit And Force Adjustments
Another common reason for a LiftMaster opener’s blinking light is incorrect travel limit or force settings. The travel limits dictate how far the door opens and closes, and the force settings determine how much power the opener uses to move the door. If the opener encounters too much resistance (or not enough, in some cases) during its travel, it can trigger a safety stop and a blinking light.
What Are Travel Limits And Force Settings?
- Travel Limits: These are settings that tell the opener when to stop moving the door at the fully open and fully closed positions. If these are set too high or too low, the door might not close completely, or the opener might strain against the floor or the header.
- Force Settings: This controls the amount of power the motor applies to move the door. If the force is set too high, the opener might trigger a safety stop if it encounters even minor resistance. If set too low, it might not be able to move the door fully.
Adjusting Travel Limits And Force
The adjustment process for travel limits and force settings varies significantly by LiftMaster model. However, most modern openers use a programming sequence involving buttons on the motor unit.
- Locate Adjustment Controls: Consult your owner’s manual to find the location of the “UP” and “DOWN” limit adjustment screws or the electronic programming buttons.
- Enter Programming Mode: Typically, you’ll need to press and hold a specific button (often labeled “PROGRAM” or “SQUARE BUTTON”) until an LED on the motor unit lights up or flashes.
- Adjust Limits: Use the remote control to move the door to the desired fully open position. Then, press and hold the “PROGRAM” button and the “UP” button simultaneously until the opener’s light flashes or a click is heard. Repeat this process for the fully closed position, using the “DOWN” button.
- Adjust Force: After setting the limits, you’ll usually adjust the force. This often involves pressing the “PROGRAM” button and then the “UP” or “DOWN” button, followed by pressing the “UP” or “DOWN” button again to increase or decrease force. The manual will guide you on how to gauge the correct force, usually by observing if the door reverses upon encountering light resistance (like a 2×4 piece of wood placed flat on the ground).
- Exit Programming: Press the “PROGRAM” button again to save the settings.
Example: On some LiftMaster models (like the 1300 series), you might press the “PROGRAM” button, then press the “UP” button to move the door open. Once at the desired open position, press and hold “PROGRAM” and “UP” until the light flashes. Then, press the “DOWN” button to move the door to the closed position, press and hold “PROGRAM” and “DOWN” until the light flashes to set the down limit. Force adjustments are typically done via separate buttons or a dial.
It’s critical to follow your manual precisely, as incorrect adjustments can lead to the door not opening or closing properly, or even damage to the door or opener.

Credit: thriftygaragedoorrepair.ca
Remote Control And Wall Button Issues
A blinking light can also stem from a problem with the remote control or the mounted wall button. If the opener isn’t receiving a valid signal, it might interpret this as an error.
Remote Control Problems
- Battery: The most common issue is a dead or weak battery in the remote. Replace the battery with a fresh one. Ensure it’s inserted correctly.
- Range: Sometimes, the remote might be too far from the opener, or there might be significant interference from other electronic devices or structural materials. Try operating the remote closer to the motor unit.
- Programming: The remote might have become deprogrammed from the opener. You’ll need to reprogram it according to your opener’s manual. This usually involves pressing a “Learn” or “Program” button on the motor unit and then pressing a button on the remote.
- Faulty Remote: The remote itself might be damaged or malfunctioning. Try using a different remote if you have one, or the wall button, to see if the issue persists.
Wall Button Problems
- Loose Wiring: The wires connecting the wall button to the motor unit could be loose or damaged. Check the connections at both the button and the motor unit.
- Faulty Button: The button itself might be stuck or broken. Press it firmly to ensure it’s not physically jammed. If it feels loose or unresponsive, it may need replacement.
Pro Tip: If you suspect a remote issue, try using the wired wall button. If the door operates correctly with the wall button but not the remote, you’ve isolated the problem to the remote or its receiver. Conversely, if neither works, the issue likely lies with the opener’s logic board, power, or safety sensors.
Power And Internal Component Issues
When simpler troubleshooting steps fail, the blinking light might indicate a more significant problem with the opener’s power supply or internal components.
Power Cycling The Opener
Before assuming a major fault, always try a simple power cycle. This can reset the opener’s logic board and clear temporary glitches.
- Disconnect Power: Unplug the garage door opener from the electrical outlet.
- Wait: Leave it unplugged for at least 60 seconds. This allows any residual power in the capacitors to dissipate.
- Reconnect Power: Plug the opener back into the outlet.
- Test: Try operating the opener with the remote or wall button.
This simple step can resolve many intermittent issues and is a good first diagnostic measure for any electronic device.
Logic Board Or Motor Problems
A blinking light, especially a rapid, continuous flash or a pattern indicating a motor fault (like five or ten flashes), can point to a failing logic board or motor.
- Logic Board: This is the “brain” of the opener. If it’s damaged due to power surges, age, or wear, it can cause erratic behavior, including incorrect blinking light codes. Replacing a logic board can be costly.
- Motor Issues: The motor itself might be overheating, failing, or have internal damage. This could be due to age, lack of maintenance (lubrication), or a mechanical issue within the opener’s gear system.
Warning: Working with the internal components of a garage door opener can be dangerous due to the presence of high voltage and heavy springs. If you suspect a logic board or motor issue, it is strongly recommended to contact a qualified garage door technician.
Encoder Malfunction
Some LiftMaster openers use an encoder to monitor the position and speed of the motor. If the encoder fails, the opener won’t know how far to move the door, leading to it stopping prematurely and potentially triggering a blinking light code (often 5 or 10 flashes). Replacing an encoder typically requires a service call.
When To Call A Professional
While many LiftMaster blinking light issues can be resolved with basic troubleshooting, there are times when professional expertise is essential. If you’ve exhausted the steps outlined above and the blinking light persists, or if you encounter any of the following situations, it’s time to call a qualified garage door technician:
- Persistent Blinking Light: After attempting all relevant troubleshooting steps for your model, if the light continues to blink, indicating an unresolved error code.
- Electrical Concerns: If you suspect issues with the wiring, motor, or logic board, especially if you’re not comfortable working with electrical components.
- Mechanical Problems: If the door is physically stuck, making unusual noises, or if you notice bent tracks, broken springs, or damaged cables. These are serious safety hazards.
- Complex Error Codes: If your manual indicates a complex error code that requires specialized diagnostic tools or knowledge.
- Safety Concerns: If you are unsure about any step or feel uncomfortable performing the troubleshooting yourself. Garage doors are heavy and under tension, posing significant risks if handled improperly.
A professional technician has the necessary tools, knowledge, and experience to accurately diagnose the problem, perform repairs safely, and ensure your garage door system operates reliably and securely. They can also identify potential future issues before they become major problems.
Maintenance Tips To Prevent Future Issues
Regular preventive maintenance is key to minimizing the occurrence of blinking lights and other operational problems with your LiftMaster garage door opener. A well-maintained system is less likely to develop faults.
Regular Inspections
- Visual Checks: Monthly, visually inspect the entire garage door system. Look for worn rollers, damaged tracks, frayed cables, and loose hardware.
- Safety Sensor Alignment: Periodically check that the safety sensors are clean and aligned. Dust or debris can accumulate, and vibrations can cause slight misalignment over time.
- Balance Test: Manually disengage the opener (using the emergency release cord) and lift the door halfway. It should stay in place without significant effort. If it’s too heavy or slams shut, the springs may need adjustment by a professional.
Lubrication
- Moving Parts: Lubricate the hinges, rollers, and tracks of the garage door itself (not the opener mechanism) with a silicone-based spray lubricant at least twice a year. This reduces strain on the opener motor.
- Opener Chain/Screw Drive: If you have a chain-driven opener, check the chain tension and lubricate it according to the manual. For screw drives, ensure the screw mechanism is clean and free of debris.
Battery Replacement
- Remotes: Replace batteries in your remotes at least once a year, or when you notice a decrease in range or responsiveness.
- Backup Battery: If your opener has a battery backup, test it annually and replace the battery according to the manufacturer’s recommendations (typically every 3-5 years).
Software/firmware Updates (smart Openers)
- If you have a smart LiftMaster opener connected to your home network, ensure it has the latest firmware updates installed. These updates can sometimes resolve bugs and improve performance. Check the LiftMaster app or website for instructions.
By incorporating these simple maintenance practices, you can significantly extend the lifespan of your garage door opener and reduce the likelihood of encountering disruptive issues like a blinking light.
Frequently Asked Questions
What Does A Continuous Blinking Light On A Liftmaster Mean?
A continuous, rapid blinking light on a LiftMaster opener usually indicates a critical error, often related to the safety sensors not being aligned or detecting an obstruction. It could also signify an issue with the logic board or motor. The exact meaning depends on the specific model, so consulting your owner’s manual is crucial.
How Do I Reset My Liftmaster Garage Door Opener?
To reset your LiftMaster garage door opener, you typically perform a power cycle. Unplug the opener from the electrical outlet, wait for at least 60 seconds to allow capacitors to discharge, and then plug it back in. For some models, a full reset might involve reprogramming the limits and remotes, which is detailed in the owner’s manual.
Can I Fix A Liftmaster Opener With A Blinking Light Myself?
Many common issues, such as misaligned safety sensors, dead remote batteries, or the need for a power cycle, can be fixed yourself. However, if the blinking light indicates a more complex problem like a faulty logic board, motor issue, or damaged wiring that you’re not comfortable addressing, it’s best to call a professional technician.
My Liftmaster Opener Is Blinking 5 Times. What Does That Mean?
A pattern of five flashes on a LiftMaster garage door opener commonly indicates an issue with the motor or the logic board. It might signify that the motor is overheating, has failed, or that the logic board is not receiving proper feedback from the motor. This often requires professional diagnosis.
How Often Should I Check My Garage Door Opener’s Safety Sensors?
You should visually inspect your LiftMaster garage door opener’s safety sensors for obstructions and alignment at least once a month. It’s also a good practice to test their functionality by attempting to close the door with an obstruction in the beam path. If the door reverses, the sensors are working correctly.
A blinking light on your LiftMaster garage door opener is a signal, not a permanent failure. By systematically working through the potential causes, starting with the simplest solutions like checking obstructions and power cycling, and progressing to more technical adjustments, you can often restore your opener’s functionality.
Remember to always prioritize safety, consult your owner’s manual for model-specific guidance, and don’t hesitate to contact a professional if the problem persists or involves complex electrical or mechanical components. Regular maintenance is your best defense against future issues, ensuring your garage door opener continues to operate smoothly and reliably for years to come.