

No, you shouldn’t use caulk instead of wood filler for most repairs because it doesn’t harden like wood and can’t be sanded smooth. You can only use it if you’re sealing a small gap that will never be painted or stained. If you’re fixing a hole in wood, buy a dedicated wood filler to ensure a clean finish.
Comparing wood filler and caulk
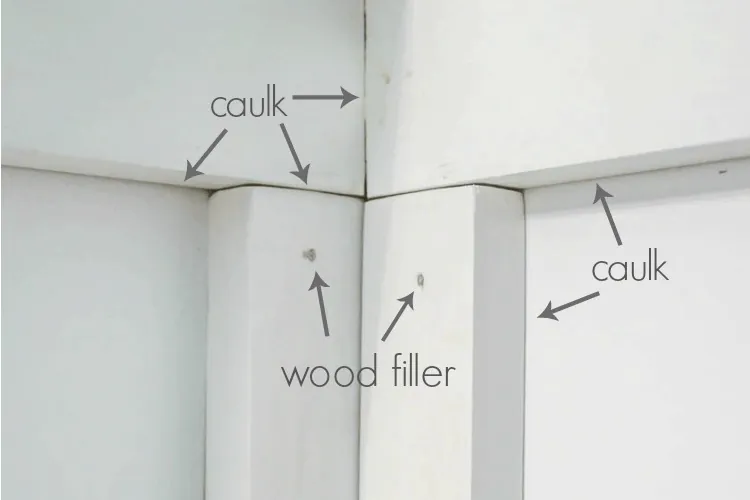
You should choose your material based on whether you plan to paint the surface or if the wood needs to move. Wood filler is designed to bond with wood fibers, while caulk remains flexible to handle expansion and contraction.
If you’re filling holes for painting, choose wood filler. It sands to a perfectly smooth finish that mimics the surrounding grain. Caulk, by contrast, remains tacky even after it cures, which makes sanding nearly impossible.
When sealing joints near windows or doors, use caulk. These areas experience constant thermal expansion. Rigid wood filler will crack and crumble within a single season as the frame shifts. Caulk stretches to absorb this movement without breaking the seal.
For deep gouges, avoid caulk entirely. It shrinks significantly as the water evaporates, often leaving a concave depression that requires multiple applications. Use a two-part epoxy wood filler instead. It cures hard and stays level with the surface.
If you plan to stain the wood later, skip both standard filler and caulk. Most fillers contain resins that block stain penetration, leaving a noticeable light spot. Look for wood-specific putty labeled as “stainable” or “dyeable.” These products contain binders that accept pigment more readily than acrylic caulk.
For nail holes in trim, wood filler is the superior choice. It bonds tightly to the surrounding fibers, ensuring the patch doesn’t pop out when you drive a finish nail nearby. Caulk is too soft for this task and will often pull away from the edges of the hole during cleaning.
Use this rule to decide: if the joint is meant to move, use caulk. If the surface is meant to look like solid, sanded wood, use a filler. Applying caulk where you need a hard, sandable surface is a common mistake that ruins the final paint job and requires you to scrape the entire area clean to start over.
Why these materials perform differently
The main difference between these products is their chemical composition and final texture. Wood filler contains wood dust or fibers mixed with a binder that hardens into a solid mass. This structure allows you to treat the filler exactly like the surrounding wood. You can sand it flat, drill into it, or apply wood stain to match the grain.
Caulk is an elastomer, a rubber-like substance designed to bridge gaps that shift. Because it stays soft, it can’t be sanded; if you try to sand it, the material will simply roll up or tear away. Furthermore, most caulks are formulated to resist adhesion from paint or stain, which means the surface will look uneven if you try to cover it.
Test the gap for movement by pressing firmly on the joint with your thumb. If you notice even a slight flex or a hairline crack that opens and closes with the seasons, the joint is active. Rigid materials like wood filler will crack and pop out of these joints within six months of seasonal humidity changes. In these active areas, use a paintable acrylic latex caulk instead.
If the joint is structural, such as a mitered corner on a cabinet door that’s glued and clamped, it’s considered stationary. Here, you must use wood filler. Because wood filler shrinks as it cures, always overfill the void by about ten percent. Once dry, sand it flush with the surface to create a seamless transition that accepts stain as if it were natural timber.
A common mistake is using wood filler on exterior siding or joints exposed to direct sunlight. The sun causes wood to expand and contract rapidly, which will cause the filler to crumble and fall out. For all exterior applications, prioritize a high-grade silicone or polyurethane sealant regardless of the gap size.
If you’re unsure, check the grain orientation of the pieces you’re joining. When two boards meet with their grains running in different directions, they will expand at different rates. This creates inevitable tension. Treat these junctions with caulk to accommodate the stress. If the grains run parallel, the pieces will move in unison, making them perfect candidates for the stability of wood filler.
Steps for using wood filler correctly
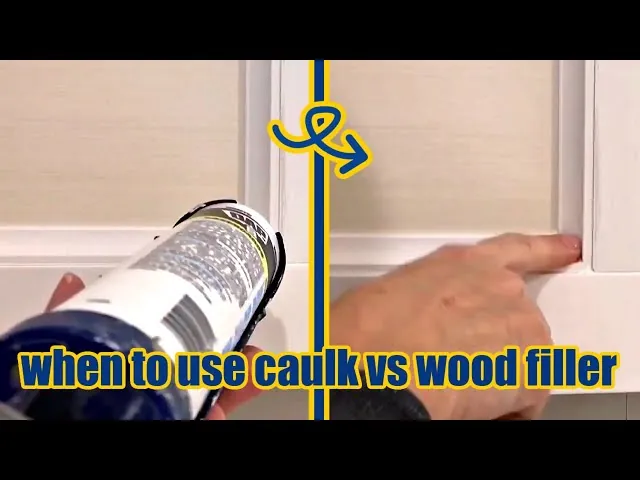
When you have a stationary hole or crack in your wood, wood filler provides the most professional result. Follow these steps to ensure the patch stays in place and looks invisible once finished.
Clear the area by removing any loose splinters or dust from the hole with a small brush or vacuum. If you leave debris behind, the filler will fail to bond to the wood fibers, causing the patch to pop out after the first seasonal change in humidity.
Apply the filler using a plastic putty knife, pressing it firmly into the hole to remove air pockets. Use a knife slightly wider than the damage to ensure you can level the surface in a single, clean stroke.
Overfill the hole slightly to account for the natural shrinkage that happens as the water or solvent evaporates. If you’re filling a gap deeper than a quarter-inch, apply the product in two thin layers rather than one heavy glob. A single thick application will crack as it dries, forcing you to start the entire process over.
Let the filler cure according to the manufacturer’s time on the label, which is typically 30 to 60 minutes for small patches. If the filler remains cool or tacky to the touch, wait an additional hour. Sanding too early pulls the material out of the hole, leaving a concave depression that ruins the finish.
Sand the surface using 120-grit sandpaper until the filler is perfectly level with the surrounding wood grain. Use a sanding block to prevent your fingers from digging into the softer filler material, which creates an uneven surface.
Wipe away dust with a damp cloth before applying your final coat of paint or wood stain. If you plan to use a stain, test a small amount on the cured filler first. Wood filler doesn’t absorb stain exactly like natural timber, so you may need to touch up the patch with a fine-tip artist’s brush to mimic the surrounding grain pattern.
The mistake that ruins wood repairs
The most common error is using caulk on a surface you intend to stain or sand. People often grab whatever is in the garage, thinking a gap is just a gap, but this choice costs you the entire project. When you apply stain to caulk, it remains a different color than the surrounding wood, creating an obvious, ugly spot that you can’t fix without scraping it all out.
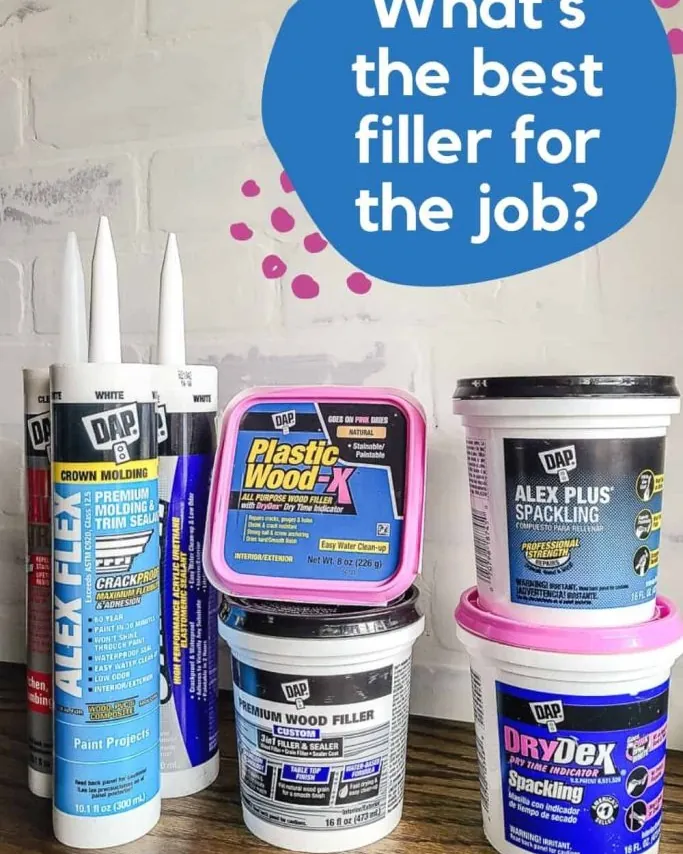
If you’re working with raw wood that requires a finish, reach only for wood filler or wood putty. Wood filler hardens completely, making it the correct choice for areas you plan to sand flush. Wood putty stays pliable and is meant for filling nail holes after the final coat of finish is applied. Using putty before sanding will clog your sandpaper and smear oily residue across the grain.
Check the label for the word “stainable” before buying. If the product lacks this specific claim, it contains silicone or acrylic binders that repel pigment entirely. You’ll be left with a bright, plastic-looking streak that refuses to absorb your stain, effectively ruining the wood’s natural appearance.
If you’re unsure which product matches your project, perform a test on a hidden scrap piece of the same wood species. Apply the filler, let it cure for the full duration listed on the tube, and then wipe it with your chosen stain. If the filler appears lighter than the wood, it will likely look even worse once you apply a clear topcoat.
According to the Environmental Protection Agency, you should also ensure you’re working in a well-ventilated area when using solvent-based wood fillers. If the product doesn’t say “sandable” or “stainable” on the front, it’s likely a sealant that will fail your repair. Always prioritize products labeled for your specific wood type to ensure the finish remains uniform.
When to stop and get professional help
Some repairs are too complex for simple fillers or sealants. You should stop your DIY work and call a professional carpenter if you notice these signs:
The wood is soft or spongy, which indicates rot that requires replacing the board entirely. If you can press a screwdriver tip into the surface with minimal pressure, the internal fibers have disintegrated. Patching over this will only trap moisture and accelerate the decay of surrounding healthy wood.
The gap is wider than 1/2 inch, as most fillers will crack and fall out of such large spaces. When a void exceeds this width, the filler lacks the surface area to bond securely. If you attempt to bridge a gap this large, the material will shrink during the curing process and eventually rattle loose.
The structural integrity of the furniture feels compromised, as filler is purely cosmetic and adds no strength. If a chair wobbles or a table joint shifts under weight, you need mechanical fasteners or new joinery. Applying putty to a loose joint is a temporary aesthetic fix that hides the danger until the piece collapses under use.
You see signs of termite damage, which requires a pest control expert rather than a cosmetic wood repair. Look for small, pin-sized holes or piles of fine, sawdust-like frass near the base. If you find these, stop immediately. Filling these holes won’t stop the colony, and you risk the infestation spreading to the rest of your home.
If you’re unsure about the depth of a crack, use a thin wire to probe the interior. If the wire sinks in more than an inch, the damage is likely internal and requires a structural assessment. When in doubt, prioritize stability over appearance to prevent costly future failures.
Related guides
Frequently asked questions
Can you sand caulk after it dries?
No, you can’t sand caulk because it’s made of flexible rubber or silicone. If you try to sand it, the friction will cause the material to stretch, tear, or peel away from the edges of the gap.
How long does wood filler take to dry?
Most standard wood fillers take 30 to 60 minutes to dry enough for sanding, but this depends on the humidity and depth of the hole. For deeper holes, check the product label, as some fillers require up to 24 hours to cure fully before you can paint or stain them.
Is there a caulk that looks like wood?
Yes, there are colored, paintable latex caulks made to match specific wood tones, but they’re still not meant to be sanded. These are useful for hiding joints in trim or molding where you want the color to blend in without needing a perfect, flat surface.
What happens if I paint over caulk?
Paint will often crack or peel over caulk because the caulk stays soft while the paint hardens. Even with paintable caulk, the flexible nature of the material means that any movement in the joint will eventually cause the paint layer on top to split.
Does wood filler work on outdoor furniture?
Yes, but you must use an exterior-grade wood filler that’s rated for moisture and temperature changes. If you use interior filler outside, it will absorb water, swell, and eventually pop out of the hole, leaving your repair exposed to the elements.
What is the best filler for large holes?
The best choice for large holes is a two-part wood epoxy, which is stronger and shrinks much less than standard water-based fillers. You mix the two parts together just before use, and it creates a rock-hard patch that can be shaped, sanded, and drilled just like natural wood.
Does wood filler shrink when it dries?
Yes, almost all wood fillers shrink slightly as the liquid component evaporates from the mixture. To manage this, apply the filler in thin layers or slightly overfill the hole so you can sand it down to a level surface once it has fully hardened.
Can you use wood filler on metal?
No, wood filler is formulated specifically to bond with the cellular structure of wood fibers and won’t stick to metal. If you need to fill a hole in metal, use a dedicated metal body filler or an epoxy designed for automotive or metal repairs.
Conclusion
Begin by cleaning your repair area and testing the filler on scrap wood to ensure it matches your stain. Once the filler dries hard and feels smooth, your repair is successful. If the patch remains soft or shrinks after several hours, remove the material and consider a more robust structural solution for the gap.