
The frustration of a microphone detected but not working can halt productivity, disrupt online communication, and even ruin creative projects. You’ve plugged it in, the system recognizes its presence, but no sound registers. This common issue plagues users across various operating systems and applications, from casual video calls to professional audio recording. Understanding the root causes and systematically troubleshooting them is key to getting your audio back online.
This comprehensive guide will walk you through the most frequent reasons why your microphone might be detected but unresponsive and provide actionable steps to resolve the problem. We’ll cover everything from simple software glitches to more complex hardware and driver issues, ensuring you can pinpoint and fix the problem efficiently.
Key Takeaways
- Check Physical Connections: Ensure the microphone is securely plugged into the correct port and that any mute switches are disengaged.
- Verify Software Permissions: Confirm that applications have the necessary permissions to access your microphone in your operating system’s privacy settings.
- Select the Correct Input Device: Make sure your operating system and the specific application you’re using have your intended microphone selected as the default input device.
- Update or Reinstall Drivers: Outdated, corrupted, or incompatible microphone drivers are a frequent culprit. Updating or reinstalling them can resolve detection issues.
- Test in Multiple Applications: Isolating the problem to a single app versus a system-wide issue is crucial for effective troubleshooting.
- Examine Mute Switches and Volume Levels: Both physical mute buttons on the microphone and software volume sliders can cause silence.
- Consider Hardware Malfunction: If all software troubleshooting fails, the microphone itself might be faulty.
Credit: www.youtube.com
Understanding The “detected But Not Working” Phenomenon
When your computer or device shows that a microphone is connected, it means the operating system has recognized the hardware and assigned it a basic level of functionality. However, this detection is only the first step. For the microphone to actually capture and transmit audio, several other components and settings must be correctly configured. These include:
- Driver Software: These are small programs that allow your operating system to communicate effectively with the microphone hardware.
- Permissions: Modern operating systems have robust privacy controls that require explicit permission for applications to access your microphone.
- Input Device Selection: Your system might have multiple audio input devices. You need to ensure the correct one is chosen.
- Application Settings: Specific applications, especially communication and recording software, often have their own audio input settings that can override system defaults.
- Volume and Mute Controls: Both physical controls on the microphone and software-based volume sliders can prevent audio from being transmitted.
The “detected but not working” state typically arises when one or more of these critical links in the audio chain are broken or misconfigured. The hardware is seen, but the pathway for audio data to flow is blocked.

Credit: www.youtube.com
Initial Checks: The Simplest Solutions First
Before diving into complex diagnostics, it’s always best to start with the most straightforward potential fixes. These often resolve the issue quickly and save you significant time.
Physical Connections And Mute Switches
The most common reason for a microphone being detected but not working is a simple physical issue.
- Secure Connection: Ensure the microphone’s cable is firmly plugged into the correct port on your computer. For USB microphones, try a different USB port. If it’s a 3.5mm jack, ensure it’s in the microphone input (usually pink) and not the headphone jack.
- Check for Mute Buttons: Many microphones, especially USB models and headsets, have a physical mute button directly on the device or its cable. Make sure this button is not engaged. Look for an illuminated light indicating mute status.
- Inspect the Cable: Examine the microphone’s cable for any visible damage, kinks, or fraying. A damaged cable can prevent audio transmission even if the microphone is detected.
Basic Volume And Input Levels
Even if detected, a microphone won’t work if its volume is turned down to zero or muted at the software level.
- System Volume Mixer:
- Windows: Right-click the speaker icon in the taskbar and select “Open Volume mixer.” Ensure the slider for your microphone is not at zero and not muted. You can also access this via Settings > System > Sound > Input. Select your microphone and check its properties for volume levels.
- MacOS: Go to System Settings > Sound > Input. Select your microphone and ensure the “Input volume” slider is not at the far left.
- Application Volume Settings: Many applications (Zoom, Discord, OBS Studio, etc.) Have their own internal volume controls for microphone input. Open the audio settings within the specific application you are using and verify that the microphone volume is set appropriately and not muted.
Software-related Troubleshooting
When physical checks don’t resolve the problem, the issue often lies within your operating system’s software configuration or driver management.
Microphone Privacy Settings And Permissions
Modern operating systems prioritize user privacy, meaning applications must be explicitly granted permission to access hardware like microphones.
- Windows:
- Go to Settings > Privacy & security > Microphone.
- Ensure “Microphone access” is turned On.
- Scroll down to “Let apps access your microphone” and ensure this is also turned On.
- Further down, under “Let desktop apps access your microphone,” ensure this is toggled On. This is crucial for many traditional applications.
- Review the list of individual apps below and ensure the specific application you’re using has permission enabled.
- MacOS:
- Go to System Settings > Privacy & Security > Microphone.
- You will see a list of applications that have requested microphone access.
- Find the application you are using and ensure the toggle switch next to it is turned On. You may need to restart the application after changing this setting.
Pro Tip: Sometimes, revoking and re-granting permission can resolve glitches. Turn off the permission, restart the application and your computer, then turn the permission back on.
Selecting The Correct Input Device
Your computer might have multiple audio input devices connected (e. g. , built-in microphone, headset microphone, external microphone). The system and individual applications need to know which one to use.
- Windows:
- Go to Settings > System > Sound.
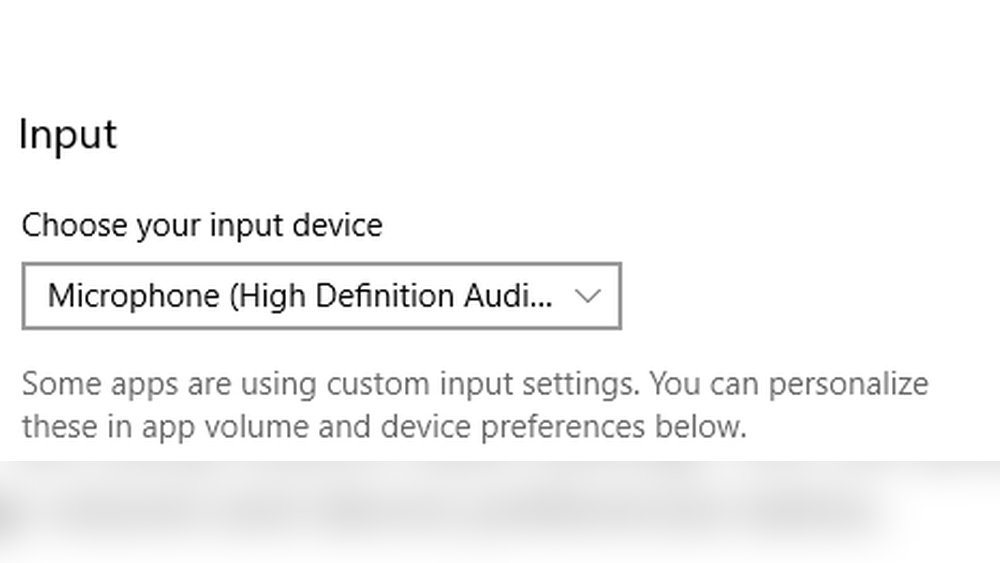
- Under the “Input” section, use the dropdown menu for “Choose your input device” to select your specific microphone.
- Speak into the microphone. You should see the “Test your microphone” meter react.
- MacOS:
- Go to System Settings > Sound > Input.
- From the list of devices, select your desired microphone.
- Speak into the microphone, and observe the “Input level” meter.
Application-Specific Selection: Many applications allow you to override system defaults. Within the application’s audio or voice settings, look for an option to select the “Audio Input Device” or “Microphone.” Ensure your desired microphone is selected here. For example, in Zoom, this is found under Settings > Audio > Microphone.
Audio Troubleshooter (windows)
Windows includes a built-in troubleshooter that can automatically detect and fix common audio problems.
- Go to Settings > System > Sound.
- Scroll down to “Advanced” and click on “Troubleshoot” under the “Troubleshoot common sound problems” section.
- Alternatively, go to Settings > Update & Security > Troubleshoot > Additional troubleshooters and run the “Recording Audio” troubleshooter.
- Follow the on-screen prompts to let Windows attempt to identify and resolve issues with your microphone.
Updating, Reinstalling, Or Rolling Back Drivers
Drivers are the communication bridge between your hardware and operating system. Corrupted, outdated, or incorrect drivers are a very common cause of “detected but not working” issues.
Updating Drivers
- Windows:
- Right-click the Start button and select “Device Manager.”
- Expand the “Audio inputs and outputs” section.
- Right-click on your microphone and select “Update driver.”
- Choose “Search automatically for drivers.” Windows will attempt to find and install the latest driver.
- If that doesn’t work, you can try “Browse my computer for drivers” and then “Let me pick from a list of available drivers on my computer.” Sometimes, a slightly older, stable driver is better.
- Manufacturer’s Website: For many external microphones (especially USB ones), the best drivers are available directly from the manufacturer’s website. Search for your microphone model and download the latest drivers or control software.
Reinstalling Drivers
If updating doesn’t help, or if you suspect the driver is corrupted, reinstalling it can be effective.
- Open Device Manager (as described above).
- Right-click on your microphone and select “Uninstall device.”
- If prompted, check the box to “Delete the driver software for this device.”
- Click “Uninstall.”
- Restart your computer. Windows will typically attempt to automatically reinstall a generic driver upon reboot.
- If you downloaded specific drivers from the manufacturer, install those after restarting.
Rolling Back Drivers (windows)
If the problem started immediately after a driver update, you might need to roll back to a previous version.
- Open Device Manager.
- Right-click on your microphone and select “Properties.”
- Go to the “Driver” tab.
- If the “Roll Back Driver” button is available (not greyed out), click it and follow the prompts.
Checking For Software Conflicts
Sometimes, other audio software or background processes can interfere with microphone functionality.
- Close Unnecessary Applications: Ensure no other applications that might use the microphone (e.g., other communication apps, recording software) are running in the background.
- Antivirus/Security Software: In rare cases, overly aggressive security software might block microphone access. Temporarily disable your antivirus or firewall to see if it resolves the issue. If it does, you’ll need to configure your security software to allow microphone access for your specific applications.
- Audio Enhancement Features: Some operating systems and audio drivers come with “enhancement” features (like noise suppression, echo cancellation, or spatial sound). These can sometimes cause problems.
- Windows: In Sound settings > Input, click on your microphone, then select “Device properties.” Look for an “Enhancements” tab or similar. Try disabling all enhancements.
- MacOS: Check the specific application’s audio settings for any built-in enhancements.
Credit: github.com
Advanced Troubleshooting And Hardware Considerations
If software fixes haven’t yielded results, it’s time to consider more advanced possibilities, including hardware issues.
Testing The Microphone On Another Device
This is a crucial step to determine if the problem lies with the microphone itself or your computer.
- Connect the microphone to a different computer, laptop, or even a smartphone (using appropriate adapters if necessary).
- Test the microphone using a simple recording application or a communication tool on that other device.
- If it works on another device: The issue is almost certainly with your original computer’s settings, drivers, or hardware ports.
- If it does NOT work on another device: The microphone itself is likely faulty and may need repair or replacement.
Checking For Microphone-specific Software
Many higher-end microphones, especially USB microphones and headsets, come with dedicated control panel software from the manufacturer. This software often includes its own settings for input levels, mute status, and sometimes even firmware updates.
- Ensure you have the latest version of this software installed.
- Open the software and check all its settings, paying close attention to mute toggles, input volume, and any sample rate or format settings that might be incompatible with your system.
- Check if the manufacturer provides firmware updates for the microphone through its software.
Testing Different Usb Ports And Cables
If you’re using a USB microphone:
- Try All USB Ports: Connect the microphone to every available USB port on your computer. Some ports might offer more power or stable connections than others. Avoid using USB hubs initially, as they can sometimes introduce issues.
- Test a Different Cable: If your USB microphone has a detachable cable, try using a different USB cable of the same type (e.g., USB-A to USB-C, USB-A to Micro-USB). Cables can fail internally without showing external damage.
Investigating System Audio Settings (advanced)
Sometimes, deeper system settings can be misconfigured.
- Windows:
- Right-click the speaker icon in the taskbar and select “Sounds.”
- Go to the “Recording” tab.
- Right-click on your microphone in the list and select “Properties.”
- General Tab: Ensure the device is enabled.
- Listen Tab: Uncheck “Listen to this device” unless you specifically need to monitor your own voice directly. This can sometimes cause feedback or echo.
- Levels Tab: Verify volume and mute status.
- Advanced Tab:
- Under “Default Format,” try different sample rates and bit depths (e.g., 16-bit, 44100 Hz or 48000 Hz are common).
- Under “Exclusive Mode,” try unchecking “Allow applications to take exclusive control of this device” and also try unchecking “Give exclusive mode applications priority.” This setting dictates whether applications can “lock” the device for their sole use.
- Spatial Sound Tab: Ensure any spatial sound enhancements are turned off for the microphone input.
- MacOS: While macOS offers fewer granular audio settings than Windows, ensure that no unusual configurations are present in Audio MIDI Setup (found in Applications > Utilities). Generally, stick to the default settings unless you have a specific reason to change them.
Hardware Failure
If you’ve exhausted all software troubleshooting steps, tested the microphone on another device, and confirmed it doesn’t work anywhere, it’s highly probable that the microphone hardware has failed. This could be due to:
- Internal Component Failure: Capacitors, circuits, or the microphone capsule itself may have broken.
- Physical Damage: Dropping the microphone or exposing it to moisture can cause irreparable damage.
- Wear and Tear: Like any electronic device, microphones have a lifespan.
In such cases, the only solution is to repair the microphone (if possible and cost-effective) or purchase a new one.
Real-world Scenarios And Examples
Let’s look at a couple of common situations where a microphone might be detected but not work.
Scenario 1: The New Usb Microphone On A Laptop
Problem: Sarah buys a new, highly-rated USB podcasting microphone for her Windows laptop. She plugs it in, Windows installs a generic driver, and the microphone appears in Device Manager and Sound settings. However, when she tries to record a voice note or join a Zoom call, there’s no audio input.
Troubleshooting Steps:
- Physical Check: Sarah confirms the USB cable is secure and checks for a physical mute button (none on this model).
- System Settings: She checks Windows Sound settings and confirms the USB microphone is selected as the input device. The test meter doesn’t move.
- Privacy Settings: She navigates to Settings > Privacy & security > Microphone and finds that “Let desktop apps access your microphone” was turned off by default during a recent Windows update. She enables it.
- Application Test: She re-tests the microphone in her voice recording app. It still doesn’t work.
- Manufacturer Software: Sarah realizes the microphone likely has specific drivers and software. She visits the manufacturer’s website, downloads, and installs the latest driver package.
- Resolution: After installing the manufacturer’s drivers and restarting her computer, the microphone test meter finally registers sound, and she can successfully record audio. The issue was the lack of specific drivers and the OS-level restriction on desktop app access.
Scenario 2: Headset Microphone Stops Working After An Update
Problem: Mark’s gaming headset microphone, which has always worked fine on his macOS computer, suddenly stops registering audio after a macOS system update. The headset itself (for audio output) still works, and the microphone is listed in the Sound preferences.
Troubleshooting Steps:
- Physical Check: Mark ensures the headset is plugged in correctly and checks for any inline mute switches.
- System Selection: He confirms the headset microphone is selected as the input device in System Settings > Sound > Input.
- Application Permissions: He goes to System Settings > Privacy & Security > Microphone and sees that the gaming application he uses has microphone permission enabled. He tries toggling it off and on again, then restarts the app. Still no luck.
- Driver Check (macOS): MacOS typically handles headset drivers automatically. However, sometimes an update can cause a temporary incompatibility. Mark restarts his Mac.
- Test in Another App: He opens QuickTime Player and tries to record audio using the headset microphone. It works! This indicates the issue is specific to the gaming application.
- Application Settings: Mark delves into the gaming application’s specific audio settings. He discovers that a recent update reset the audio input device selection within the game itself. He manually re-selects his headset microphone within the game’s options.
- Resolution: The microphone now works correctly in the gaming application. The problem was an application-specific setting that was reset by the system update, not a system-wide microphone failure.
Comparison Of Common Microphone Types And Issues
Different types of microphones can present unique troubleshooting challenges.
| Microphone Type | Common Connection | Potential Issues | Troubleshooting Focus |
|---|---|---|---|
| **3.5mm Jack Mic** | Analog (TRS/TRRS) | Incorrect port (mic vs. headphone), poor connection, internal sound card issues. | Ensure correct port, check sound card drivers, test with adapter if TRRS. |
| **USB Microphone** | USB (Type-A, C) | Driver issues, USB port power/stability, cable failure, manufacturer software. | Update/reinstall drivers, try different USB ports, check manufacturer software/firmware. |
| **XLR Microphone** | Analog (XLR) | Requires audio interface/mixer, phantom power issues, interface drivers. | Verify phantom power (+48V), check interface connections, update interface drivers. |
| **Bluetooth Microphone** | Wireless (BT) | Pairing issues, interference, battery level, BT driver problems. | Re-pair device, check battery, update Bluetooth drivers, ensure clear line-of-sight. |
| **Webcam Microphone** | Integrated | Disabled in BIOS/UEFI, privacy settings, driver conflicts with webcam. | Check privacy settings, update webcam drivers, ensure not disabled in system settings. |
Frequently Asked Questions
Why Does My Microphone Work In One App But Not Another?
This usually indicates that the application where it’s not working either doesn’t have the correct microphone selected in its own audio settings, or it lacks the necessary microphone permissions within your operating system’s privacy settings. Always check both the application’s internal settings and your OS’s privacy controls for that specific application.
How Do I Know If My Microphone Is Physically Broken?
The most reliable way to test for physical failure is to connect the microphone to a completely different computer or device. If it doesn’t work on multiple devices, it’s very likely that the microphone hardware itself is faulty. Check its cable for damage and, if possible, test with a different compatible cable.
What Is Phantom Power, And Do I Need It?
Phantom power (typically +48V) is a DC electrical current sent from an audio interface or mixer through the microphone cable to condenser microphones that require external power to operate their internal electronics. Dynamic microphones generally do not require phantom power.
If you have a condenser microphone and your audio interface/mixer is detecting it but you get no sound, ensure phantom power is enabled for the relevant input channel. Consult your microphone and interface manuals.
Can A Windows Or Macos Update Break My Microphone?
Yes, operating system updates can sometimes introduce compatibility issues with existing hardware drivers or change default privacy settings. If your microphone stops working immediately after an OS update, the first steps should be to check system privacy settings (especially microphone permissions), ensure your microphone is still selected as the default input, and then look for updated drivers from the microphone manufacturer.
How Do I Reset My Microphone Settings To Default?
On Windows, you can often achieve this by going to Settings > System > Sound > Input, selecting your microphone, clicking “Device properties,” and then looking for an “Enhancements” tab to disable all enhancements. You can also go to Device Manager, uninstall the microphone device (and delete driver software if prompted), then restart your PC to let Windows reinstall a default driver. On macOS, you can try removing the microphone from System Settings > Sound > Input and then re-adding it, or resetting related preference files (though this is a more advanced step).
Getting your microphone to work when it’s detected but unresponsive involves a systematic approach, starting with the simplest checks and progressing to more complex software and hardware diagnostics. By carefully following these steps, you can usually identify the bottleneck in your audio