

You can distress wood by applying white paint and lightly sanding the dried finish to reveal the natural grain underneath. This project typically takes about 3 to 4 hours of active work, excluding the drying time required for the paint to set.
Tools and materials needed
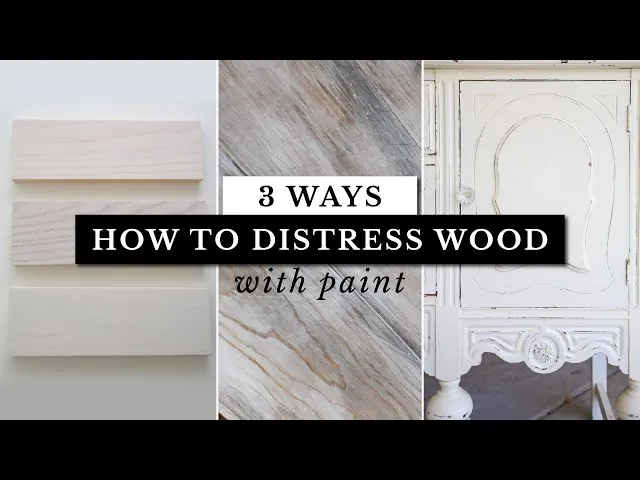
To get started on your project, you’ll need to gather a few essential supplies that help ensure a clean, professional finish. Having these items ready before you begin will save you from stopping mid-task, which can lead to uneven drying or paint application issues.
- Water-based latex or chalk paint: Choose a high-quality white paint that flows easily.
- Medium-grit sandpaper: Use 120-grit for removing paint and 220-grit for smoothing the final surface.
- Natural bristle brush: This provides the best control for a thin, even coat of paint.
- Lint-free cotton cloth: Used for wiping away dust before and after the sanding process.
- Painter’s tape: Essential for masking off areas you don’t want to paint.
- Clear furniture wax or water-based sealer: This protects the wood and keeps the finish from chipping further over time.
If your piece has intricate carvings, swap the brush for a two-inch angled sash brush to reach deep recesses without pooling. You can substitute a foam brush if you prefer a smoother look, but stay away from heavy-duty industrial brushes, as they leave deep, unwanted streaks.
Check for existing varnish before you start. If a drop of water beads on the surface, you must use a deglosser first; otherwise, the paint will peel within weeks. For large furniture, ensure you have a workspace with proper ventilation.
If you lack a garage, set up a box fan in a window to pull fumes away from your living area. Always keep a damp rag nearby to wipe away drips within thirty seconds, as latex paint bonds to wood fibers almost instantly.
Steps for distressing wood with white paint
Follow these steps to create a worn, vintage appearance on your furniture or decor. Always work in a well-lit area so you can see where the paint is building up.
- Clean the wood surface thoroughly with a damp cloth to remove all dust, grease, and debris.
- Apply a single, thin coat of white paint using your brush, moving in the direction of the wood grain.
- Let the paint dry completely, which usually takes 1 to 2 hours depending on the humidity in your room.
- Sand the edges and corners of the wood using the 120-grit sandpaper until you see the natural wood peeking through.
- Move to the flat surfaces, sanding lightly in areas where natural wear would occur, such as near handles or along the top.
- Wipe away all sanding dust with a clean, dry cloth to prepare the surface for the final seal.
- Apply a thin layer of clear wax or sealer over the entire piece to lock in the look.
Tip: Start by sanding only a tiny bit at a time, as you can always remove more paint but you can’t add it back easily. Careful: Don’t sand too aggressively in the center of flat boards, or you’ll create patches that look like damage rather than natural age. If you’re working on a piece that will touch food, ensure you use a food-safe sealant rather than standard furniture wax.
Factors that change your results

The time and effort required for this project depend heavily on the type of wood you choose and the initial state of the surface.
| Situation | Time Required | Key Difference | Watch For |
|---|---|---|---|
| Bare, soft pine | 2 hours | Soaks up paint fast | Over-sanding spots |
| Finished/Varnished | 4 hours | Requires light sanding first | Paint peeling off |
| Detailed molding | 5 hours | Hard to reach corners | Paint buildup in gaps |
| Reclaimed wood | 3 hours | Grain is already rough | Splinters during sanding |
If you’re working with softwoods like pine, use a 220-grit sandpaper to avoid deep scratches that show through the final coat. Hardwoods, such as oak or maple, require a coarser 120-grit start because their dense fibers resist abrasion.
Most beginners mistake a smooth surface for a clean one. Always wipe the wood with a tack cloth before applying the first drop of paint. If you skip this, trapped dust particles will create a gritty, sandpaper texture that ruins the finish regardless of how much time you spent prepping.
If the wood feels oily or waxy to the touch, you must apply a degreaser first. Without this step, the paint will fail to bond and begin flaking within three months.
Always start with a lighter touch and add pressure as needed. It’s much easier to remove extra paint than to fix a spot where you have sanded down to raw wood too quickly. If you see uneven tones, stop immediately and check for moisture or hidden patches of old varnish.
How to judge your results
A successful distressed finish looks soft and intentional, with the white paint highlighting the texture of the wood rather than hiding it. If the transitions between the painted areas and the bare wood are too sharp, the piece will look like it was damaged rather than aged. This often happens when you use sandpaper that’s too coarse, which leaves deep scratches in the wood surface.
To prevent this, use a light hand and always finish by sanding with the 220-grit paper to blend the edges. A good result feels smooth to the touch, with no loose paint flakes or uneven clumps of dried finish. If you see deep gouges, you have applied too much pressure during the sanding phase.
Most beginners make the mistake of sanding in a uniform, circular motion across the entire surface. This creates a fake, repetitive pattern that reveals the process rather than the age. Instead, focus your wear only on the high points or edges where natural friction would occur, such as corners or drawer pulls.
If you’re working with soft pine, use a 320-grit sponge to avoid tearing the grain. If you’re refinishing dense oak, stick to the 220-grit to ensure you actually remove the pigment. If the wood grain looks fuzzy after sanding, you have missed the step of raising the grain with a damp cloth before your final coat.
Rules for lasting quality
The standard for long-term protection is to apply a durable topcoat, as suggested by most furniture restoration guides. Choose a water-based polyurethane if you want to prevent the yellowing common with oil-based finishes.
Once the sealer is dry, keep the piece away from direct sunlight. UV rays degrade binders in paint, causing white finishes to turn a sickly cream within two years. If your room lacks shade, apply a UV-blocking film to the nearby window glass instead of moving the furniture.
If you notice the finish getting dull, re-apply a thin layer of paste wax every 12 months to refresh the sheen. Avoid liquid polishes containing silicone, as these create a barrier that prevents future touch-ups from adhering properly.
If the project involves structural repairs, consult a professional carpenter. A common mistake is using wood filler to bridge gaps larger than a quarter-inch; this will crack as the wood expands and contracts. If the joint wiggles when you push it, mechanical fasteners or dowels are required to ensure the wood remains stable.
Alternative ways to distress
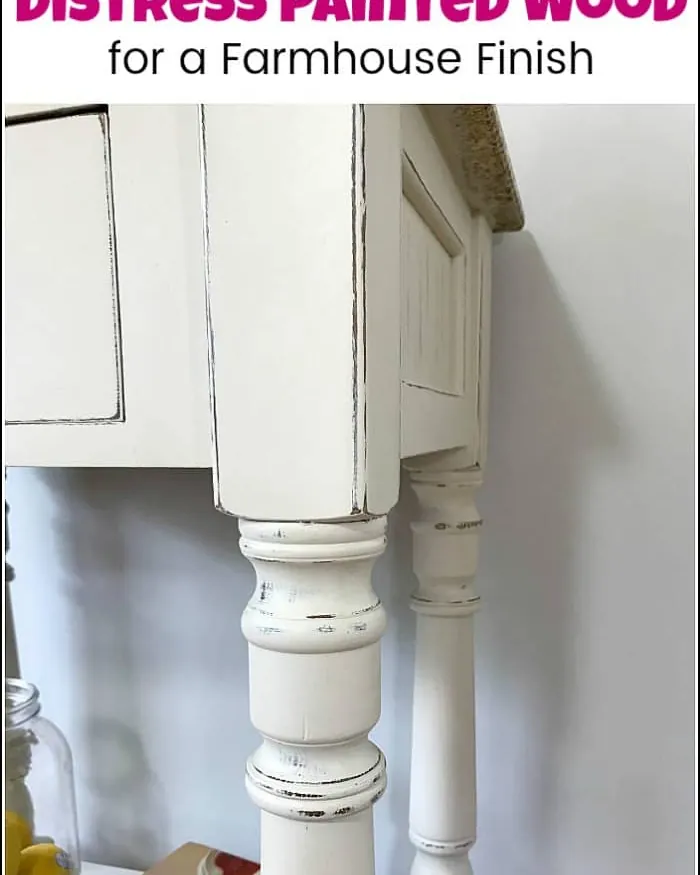
Dry brushing
Use a brush with very little paint on it to lightly drag color across the surface. This creates a faded, airy look that’s much lighter than a full coat of paint. It’s faster and uses less material, making it ideal for large, flat surfaces.
Use a natural bristle brush for this technique; synthetic bristles often hold too much moisture and ruin the effect. If the paint looks too solid, you have overloaded the brush. Wipe it on a paper towel until the bristles barely leave a mark before touching the furniture.
Wet distressing
Wipe the paint away with a damp cloth while it’s still wet in specific areas. This creates a softer, more blended transition than sanding. It’s best for beginners who fear the harsh lines of sandpaper.
Focus your pressure on the corners and raised edges where natural wear occurs. If you wait more than five minutes, the paint will set too firmly to move. Keep a clean, dry rag nearby to immediately buff away any excess moisture that might cause the finish to bleed.
Vinegar masking
Apply a small amount of vinegar to the wood edges before painting. The paint won’t stick well to those spots, making it easy to wipe away after the paint is dry. This gives a very natural, uneven look. Use a cotton swab for precision. If you apply too much, the vinegar will run and create streaks where you want the paint to stay.
Related guides
- How to Harden Wood Using Penetrating Epoxy Resin in 2026
- How Much Weight Can a Wood Closet Rod Hold Safely in 2026
- How to Stop Sap From Coming Out of Wood: Proven Fixes in 2026
Frequently asked questions
How long does the paint need to dry before I can sand it?
The paint needs to dry for at least 2 hours in a room with standard humidity. If the room is cold or damp, wait an extra hour to ensure the paint doesn’t peel off in large, wet chunks when you touch it with the sandpaper.
Can I use spray paint for this method?
No, spray paint isn’t recommended because it creates an even, thick layer that’s difficult to distress naturally. You’ll likely end up with uniform patches that look like mistakes rather than a vintage, weathered finish.
Is it safe to distress old painted furniture?
Yes, but only if you test the surface for lead first, which is especially important for items made before 1978. Use a home lead test kit before you begin sanding to ensure you aren’t releasing toxic dust into your home.
What happens if I sand too much wood away?
You’ll need to re-apply a small amount of white paint to the bare area with a fine-tipped brush and let it dry. Once it’s dry, you can lightly blend the edge with your 220-grit sandpaper to match the rest of the piece.
How often do I need to re-wax the furniture?
Re-wax the surface every 12 months to maintain protection. If the piece sits in a high-traffic area like a hallway or kitchen, check it every 6 months for signs of wear.
Conclusion
Once your piece is dry, you’ll want to protect that beautiful finish with a coat of clear wax or matte sealer. It’s a simple final touch that keeps your work looking fresh for years. You’ve created something unique, so find the perfect spot in your home to show it off today.