
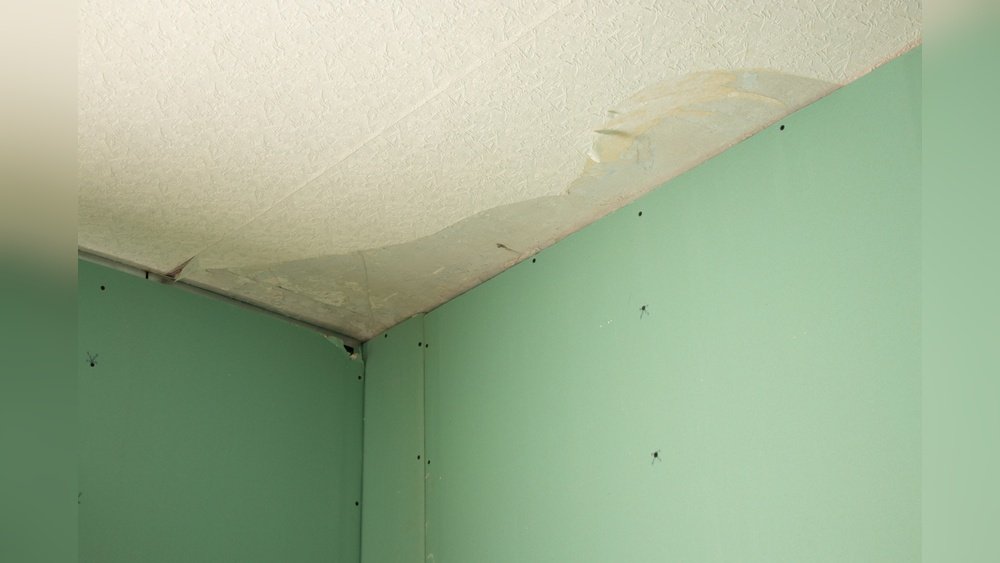
The sight of paint peeling from your walls can be disheartening. It detracts from the aesthetic appeal of your home and can signal underlying issues that, if left unaddressed, could lead to more significant problems. When you notice this flaking, bubbling, or chipping paint, the immediate question becomes: what’s causing it? Two primary culprits often emerge: moisture and poor workmanship. Distinguishing between these two is crucial, as the solutions and potential damage vary significantly.
Moisture-related paint failure often points to persistent water intrusion, whether from leaks, condensation, or high humidity. This type of damage can compromise the structural integrity of your walls over time. On the other hand, poor workmanship suggests issues with the application process itself, improper surface preparation, the wrong primer, or low-quality materials.
While less structurally damaging, it still requires remediation and can be frustratingly persistent if not fixed correctly. Understanding the nuances of each cause will empower you to identify the root problem and implement the most effective repair strategy, saving you time, money, and future headaches.
Key Takeaways
- Identify the Cause: Peeling paint is primarily caused by either excess moisture or poor application workmanship.
- Moisture Indicators: Look for dampness, mold, mildew, efflorescence (white powdery residue), and paint bubbling or blistering, especially near water sources or in humid areas.
- Workmanship Indicators: Observe for issues like poor adhesion, paint chipping shortly after application, uneven textures, or visible brush/roller marks that weren’t intended.
- Moisture Remediation is Key: If moisture is the culprit, fixing the water source is paramount before repainting. This might involve repairing leaks, improving ventilation, or addressing condensation.
- Workmanship Requires Redoing: Poorly applied paint often needs to be stripped and reapplied correctly, focusing on proper surface preparation and material selection.
- Professional Assessment: For complex or persistent issues, consulting a professional painter or building inspector is recommended.

Credit: birlanu.com
Understanding Peeling Paint: The Moisture Connection
Moisture is a relentless enemy of painted surfaces. When water gets behind or beneath the paint film, it weakens the bond between the paint and the substrate (the wall material). This weakening manifests as peeling, blistering, and bubbling. The presence of moisture can originate from various sources, and identifying the specific entry point is critical for a lasting repair.
Sources Of Moisture Intrusion
Several common scenarios lead to moisture-related paint failure:
- Leaks: This is perhaps the most obvious source. Leaks can come from plumbing issues within walls (e.g., leaky pipes), roof leaks that penetrate the ceiling and walls, or damaged gutters and downspouts that direct water against the exterior walls, which can seep through. Even a slow, persistent drip can cause significant damage over time.
- Condensation: High humidity levels, especially in bathrooms, kitchens, and laundry rooms, can lead to condensation forming on cooler wall surfaces. This is particularly common in older homes with poor insulation or inadequate ventilation. When warm, moist air comes into contact with a cold wall, water droplets form. Over time, this constant moisture can break down the paint’s adhesion.
- Infiltration from Exterior: Water can penetrate walls from the outside. Cracks in the exterior siding, brickwork, or stucco, damaged seals around windows and doors, or improper grading around the foundation can allow rainwater to enter the wall cavity. If the wall’s “breathing” capacity is compromised (e.g., by a vapor barrier on the wrong side of the insulation), this moisture can become trapped and push outwards, affecting the interior paint.
- Groundwater and Rising Damp: In basements and lower levels, moisture can wick up from the ground through porous building materials like concrete or brick. This is known as rising damp and can cause significant peeling and deterioration of paint and plaster.
Visual Clues Of Moisture Damage
When moisture is the culprit, the peeling paint often exhibits specific characteristics:
- Blistering and Bubbling: Paint may form small or large blisters that eventually pop, leaving bare patches. This occurs as water vapor gets trapped beneath the paint film and expands.
- Soft or Spongy Substrate: If you gently press on the affected area, the wall material itself might feel soft, damp, or spongy, indicating saturation.
- Mold and Mildew: The persistent dampness creates an ideal environment for mold and mildew growth. You might see black, green, or greyish splotches on or behind the peeling paint. This is a strong indicator of chronic moisture issues.
- Efflorescence: On masonry surfaces (like brick or concrete), moisture can draw salts from the material to the surface. As the water evaporates, it leaves behind a white, powdery residue known as efflorescence. This often appears around water entry points and can precede or accompany paint peeling.
- Sagging or Warping: In severe cases, especially with plaster or drywall, prolonged exposure to moisture can cause the material itself to sag or warp, leading to larger areas of peeling paint and structural concerns.
Pro Tip: Always check the surrounding areas for signs of moisture, even if the peeling seems isolated. Water can travel within wall cavities, so the source might be higher up, further away, or on the other side of the wall.

Credit: construction.groupeberkem.com
The Role Of Poor Workmanship In Peeling Paint
While moisture is a common and often insidious cause, faulty application techniques and substandard materials can also lead to paint peeling, sometimes even shortly after the job is completed. Unlike moisture damage, which often involves a compromised substrate, poor workmanship issues are primarily related to the paint film’s integrity and its adhesion to the surface.
Common Workmanship Errors
Several mistakes during the painting process can result in premature paint failure:
- Inadequate Surface Preparation: This is arguably the most frequent cause of peeling due to workmanship. Walls must be clean, dry, and sound before painting.
- Failure to Clean: Dirt, grease, dust, or old, loose paint left on the surface prevents new paint from adhering properly.
- Insufficient Sanding/Scraping: Glossy surfaces or old, flaky paint must be sanded or scraped back to a sound layer to provide a good “key” for the new paint to grip.
- Ignoring Repairs: Cracks, holes, or damaged plaster should be filled and smoothed. Painting over imperfections means the new paint adheres to a weak or uneven surface.
- Incorrect Primer Use: Primer is designed to seal the surface, improve adhesion, and provide a uniform base for the topcoat.
- Skipping Primer: Applying paint directly to certain surfaces (like new drywall, stained wood, or glossy paint) without a suitable primer can lead to poor adhesion and eventual peeling.
- Using the Wrong Primer: Different surfaces require different types of primers. For example, a stain-blocking primer is needed for water stains, while a bonding primer might be necessary for slick surfaces. Using a general-purpose primer where a specialized one is needed can result in failure.
- Applying Paint in Unsuitable Conditions: Environmental factors play a significant role in paint adhesion and drying.
- Painting Over Damp Surfaces: Applying paint to a surface that is still wet or damp (from cleaning, humidity, or residual moisture) traps moisture, leading to blistering and peeling.
- Extreme Temperatures: Painting in excessively hot, cold, or humid conditions can affect the paint’s ability to dry and cure properly, compromising its integrity. Manufacturers usually specify ideal temperature and humidity ranges.
- Using Low-Quality Materials: While sometimes cost-effective in the short term, using cheap paint or supplies can lead to premature failure. Lower-quality paints may have weaker binders, less pigment, and poorer adhesion properties.
- Improper Paint Application: Techniques matter. Applying paint too thickly can prevent proper drying and curing. Inconsistent application, such as heavy brush strokes or roller marks that haven’t been smoothed out, can create weak points.
Signs Of Workmanship-related Peeling
When poor workmanship is the cause, you might observe these symptoms:
- Peeling Soon After Painting: If paint starts peeling within weeks or months of being applied, it strongly suggests an application error rather than a long-term moisture issue.
- Paint Chips Come Off Cleanly: Often, the paint chips will come away cleanly, revealing a smooth, unprepared surface underneath, rather than a damp or degraded substrate.
- Adhesion Issues on Specific Surfaces: Peeling might be concentrated on areas that were particularly difficult to prepare, like previously glossy surfaces or areas with existing coatings.
- Uneven Texture or Finish: While not directly causing peeling, issues like visible brush marks or an uneven sheen can sometimes accompany poor application that *does* lead to peeling.
- Lack of Primer Undercoat: If you scrape away the peeling paint and see no sign of a primer layer, especially on surfaces that typically require one, it points to a skipped step.
Example: A homeowner paints a bathroom wall that was previously glossy without sanding or using a bonding primer. Within a few months, the paint starts peeling in large sheets, particularly in the high-moisture areas around the shower. This is a classic sign of poor surface preparation and primer selection.
:max_bytes(150000):strip_icc()/peeling-paint-wall-GettyImages-1465459070-49b8ac93cd3f4a7982c0e3031bf38f85.jpg)
Credit: www.realsimple.com
Differentiating Between Moisture And Workmanship
Distinguishing between peeling caused by moisture and that caused by poor workmanship is the most critical step in addressing the problem effectively. A misdiagnosis will lead to wasted effort and money, as the underlying issue won’t be resolved. Here’s a breakdown of how to tell them apart:
Diagnostic Questions And Observations
When examining peeling paint, ask yourself the following questions and look for specific clues:
- Where is the peeling occurring?
- Moisture: Often found near bathrooms, kitchens, laundry rooms, basements, exterior walls (especially those with poor drainage or siding issues), ceilings below bathrooms or roofs, or around windows and doors.
- Workmanship: Can occur anywhere, but is often more prevalent on surfaces that were particularly challenging to prepare (e.g., glossy paint, previously damaged areas) or where application might have been rushed.
- What does the substrate look like under the peeling paint?
- Moisture: May appear damp, discolored (water stains), show signs of mold or mildew, or feel soft/spongy. You might see efflorescence on masonry.
- Workmanship: Often looks relatively dry and sound, possibly just dusty or with residual (but dry) old paint. The underlying surface might appear unprepared (e.g., glossy).
- What is the pattern of the peeling?
- Moisture: Tends to be blistering or bubbling, often starting from the substrate and pushing outwards. It can be widespread in humid areas or localized around leaks.
- Workmanship: Can be chipping, flaking, or peeling in sheets, often related to adhesion failure at the paint-surface interface.
- How old is the paint job?
- Moisture: Can cause peeling at any age, but often develops over time as moisture accumulates.
- Workmanship: Peeling that occurs very soon after painting (weeks to months) is a strong indicator of application error.
- Are there other signs of water damage nearby?
- Moisture: Look for damp spots on ceilings, musty odors, warped baseboards, or visible mold growth elsewhere.
- Workmanship: Less likely to have associated water damage signs unless the poor workmanship coincidentally occurred in an area with existing moisture problems.
Comparison Table: Moisture Vs. Poor Workmanship
To simplify the diagnostic process, consider this table:
| Feature | Moisture Damage | Poor Workmanship |
|---|---|---|
| **Location** | Bathrooms, kitchens, basements, leaks, exterior walls | Can be anywhere, often on difficult-to-prep surfaces |
| **Substrate Condition** | Damp, discolored, moldy, soft, efflorescence | Usually dry, appears unprepared (glossy, dusty) |
| **Peeling Pattern** | Blistering, bubbling (from substrate outwards) | Chipping, flaking, peeling sheets (adhesion failure) |
| **Timing** | Can occur at any age, often develops over time | Often occurs soon after painting (weeks/months) |
| **Associated Issues** | Mold, mildew, dampness, musty odors, structural damage | Less likely to have associated moisture damage signs |
| **Primary Cause** | Water intrusion, high humidity, condensation | Improper prep, wrong primer, bad application, poor materials |
| **Solution Focus** | Fix water source, ventilate, dry out, then repaint | Strip paint, proper prep, correct primer, reapply |
Case Study: The Bathroom Battle
Consider two scenarios:
- Sarah’s Bathroom: Sarah notices peeling paint above her shower. The paint is bubbling, and when she touches it, the wall feels slightly damp. There’s a faint musty smell, and she sees a small patch of black mold. The peeling is concentrated in the area of highest humidity. This strongly indicates moisture damage due to inadequate ventilation and possibly condensation.
- Mark’s Living Room: Mark had his living room repainted last month. Now, he sees paint flaking off near a window. The paint chips come away easily, revealing a glossy surface underneath. There’s no dampness or mold. Mark recalls the painter didn’t do much preparation beyond a quick wipe-down. This points to poor workmanship, specifically inadequate surface preparation (failure to degloss or prime the glossy surface).
The Process Of Remediation: Fixing The Problem
Once you’ve confidently diagnosed the cause, the remediation process can begin. The approach differs significantly depending on whether moisture or poor workmanship is the culprit.
Remediation For Moisture Damage
Addressing moisture-related peeling requires a two-step approach: first, eliminate the source of the water, and second, repair and repaint the affected area.
- Identify and Repair the Water Source: This is non-negotiable.
- Leaks: Fix any plumbing leaks, roof issues, or exterior water intrusion problems. This might involve calling a plumber, roofer, or masonry specialist.
- Condensation/Humidity: Improve ventilation. Install or upgrade exhaust fans in bathrooms and kitchens. Consider using a dehumidifier in chronically damp areas. Ensure attics and crawl spaces are properly ventilated. Improve insulation to reduce cold surfaces where condensation forms.
- Exterior Water: Ensure proper grading slopes away from the foundation. Clean and repair gutters and downspouts. Seal cracks in exterior walls.
- Dry Out the Area: Allow the affected wall materials (drywall, plaster, wood) to dry completely. This can take days or even weeks, depending on the extent of saturation. Using fans and dehumidifiers can speed up the process. Do not paint over damp surfaces.
- Remove Damaged Paint: Scrape away all loose, peeling, or blistering paint using a putty knife or scraper. Feather the edges of the remaining paint by sanding.
- Address Mold/Mildew: If mold or mildew is present, clean the area thoroughly with a mold remover or a bleach solution (1 part bleach to 10 parts water). Wear protective gear (gloves, mask, eye protection). Ensure the area is completely dry afterward. For extensive mold, consult a professional remediation service.
- Repair Substrate: Fill any holes or cracks with appropriate spackle or joint compound. Sand smooth once dry. If the drywall or plaster is significantly damaged or soft, it may need to be replaced.
- Prime: Apply a high-quality stain-blocking primer (especially if water stains are present) or a mold-inhibiting primer. Ensure the primer is suitable for the substrate and the intended topcoat. Allow the primer to dry completely according to the manufacturer’s instructions.
- Repaint: Apply two coats of a good quality interior paint. Consider using a paint with mildew-resistant properties in high-humidity areas like bathrooms.
Remediation For Poor Workmanship
If the peeling is due to faulty application, the process involves removing the compromised paint layer and reapplying it correctly.
- Remove All Loose Paint: Scrape away all peeling, chipping, or flaking paint thoroughly. Unlike moisture issues, the focus here is on removing any paint that isn’t firmly adhered.
- Prepare the Surface: This is the crucial step.
- Clean: Wash the walls to remove dirt, grease, and any residue from scraping. Allow to dry completely.
- Sand: If the previous paint was glossy, lightly sand the entire surface to dull the sheen and create a better grip for the new paint. If there were significant imperfections, you might need to sand more thoroughly. Wipe away all sanding dust.
- Repair: Fill any cracks or holes with spackle or joint compound. Sand smooth once dry.
- Prime Appropriately: Apply a quality primer suitable for the surface and the type of paint you will be using. If you sanded a glossy surface, a bonding primer is often recommended. If you are painting over repaired areas or dark colors, a stain-blocking or universal primer might be best. Ensure the primer is completely dry.
- Repaint: Apply two coats of your chosen paint, following the manufacturer’s recommendations for application temperature and drying times. Ensure even application and avoid applying the paint too thickly.
When To Call A Professional
While minor peeling can often be a DIY fix, certain situations warrant professional help:
- Extensive Damage: If large areas of paint are peeling or the underlying material (drywall, plaster) is severely damaged.
- Suspected Mold: If you suspect significant mold growth, a professional mold remediation company is necessary for safe and effective removal.
- Unclear Cause: If you can’t pinpoint the source of moisture or are unsure about the best repair method.
- Recurring Problems: If the peeling keeps returning despite your repair efforts, indicating a persistent underlying issue that requires expert diagnosis.
- Lack of Time or Confidence: If you lack the time, tools, or confidence to undertake the repairs yourself.
A professional painter has the experience to correctly diagnose the cause, prepare surfaces properly, and apply paint for a durable finish. A building inspector or moisture detection specialist can be invaluable for complex water intrusion problems.
Preventing Future Paint Peeling
Prevention is always better than cure. By understanding the common causes of peeling paint, you can take proactive steps to protect your walls and maintain a beautiful finish.
Moisture Prevention Strategies
- Ventilation is Key: Ensure adequate ventilation in moisture-prone areas. Use exhaust fans during and after showering/cooking, and ensure they vent *outside*, not into the attic. Keep bathroom doors slightly ajar after showers.
- Control Humidity: Use dehumidifiers in basements or other damp areas. Aim for indoor humidity levels between 30-50%.
- Maintain Exterior: Regularly inspect and maintain your home’s exterior. Clean gutters and downspouts, ensure they direct water away from the foundation. Seal cracks in siding, brickwork, and around windows and doors. Ensure proper grading around your home.
- Insulate Properly: Good insulation helps prevent cold interior surfaces, reducing condensation. Pay attention to areas prone to condensation, like window frames and exterior walls.
- Prompt Leak Repair: Address any suspected plumbing leaks immediately. Even small drips can cause significant moisture buildup over time.
Workmanship Prevention Strategies
- Don’t Skimp on Prep: Always prioritize surface preparation. Clean, scrape, sand, and repair as needed before applying any primer or paint. This is the foundation of a lasting paint job.
- Use Quality Materials: Invest in good quality paint and primer. While more expensive upfront, they offer better adhesion, durability, and coverage, ultimately saving you money in the long run.
- Choose the Right Primer: Select a primer specifically designed for the surface you are painting and the conditions it will face. Don’t skip priming when recommended.
- Paint in Ideal Conditions: Adhere to the paint manufacturer’s guidelines regarding temperature and humidity. Avoid painting in direct, hot sunlight or when surfaces are damp.
- Apply Correctly: Follow application instructions. Apply paint evenly, avoiding excessively thick coats. Allow adequate drying time between coats.
- Hire Reputable Professionals: If hiring a painter, get multiple quotes, check references, and ensure they have a clear understanding of proper preparation techniques. Look for painters who emphasize surface prep.
In my experience, taking the time to properly prepare a surface and address any underlying moisture issues before painting is the single most important factor in achieving a durable and attractive finish that won’t peel prematurely.
Frequently Asked Questions
What Is The Difference Between Paint Blistering And Peeling?
Blistering typically refers to the formation of small, raised bubbles in the paint film, often caused by trapped moisture vapor expanding as it heats up or evaporates. Peeling is the subsequent detachment of this compromised paint layer from the surface.
While blistering is a *symptom* often caused by moisture, peeling is the *result*, the paint coming off. Poor workmanship can also cause peeling without significant blistering if adhesion is simply lost.
Can I Paint Over Peeling Paint Without Fixing The Cause?
No, you absolutely should not paint over peeling paint without addressing the underlying cause. Painting over peeling paint is a temporary cosmetic fix at best. If the cause is moisture, the moisture will continue to compromise the new paint layer, leading to blistering and peeling again, potentially trapping moisture and causing more damage to the substrate. If the cause is poor adhesion from bad prep, the new paint will likely fail for the same reason. The only correct approach is to remove the failing paint, fix the root cause, prepare the surface, and then repaint.