
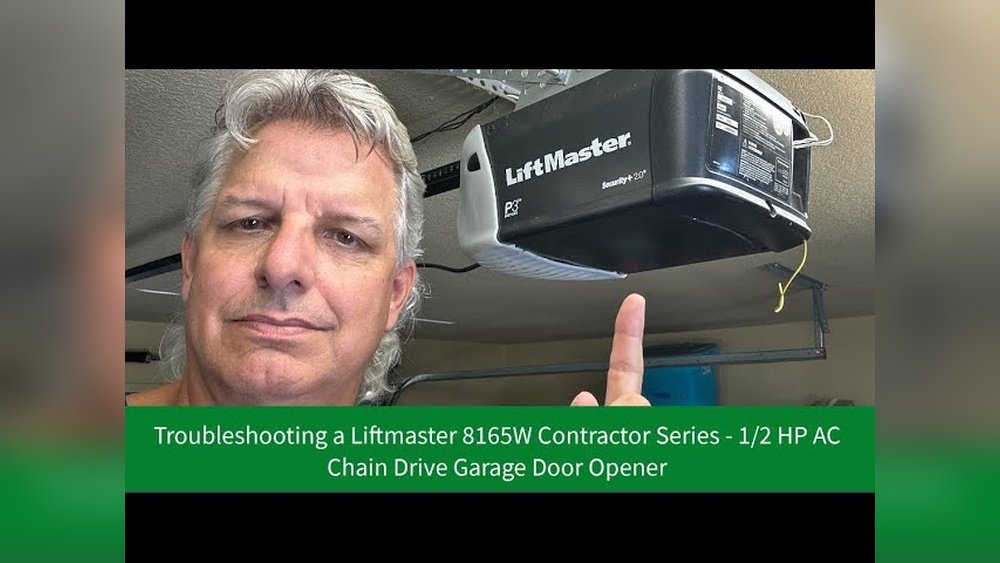
When your Liftmaster garage door opener suddenly stops working, it can be a significant inconvenience, disrupting your daily routine and potentially compromising your home’s security. The sheer number of potential issues, from a simple dead battery in the remote to a complex electrical fault, can make troubleshooting seem daunting. Understanding the common culprits and a systematic approach to diagnosis can save you time, money, and the frustration of being locked out or in. This guide aims to provide a comprehensive, step-by-step process to identify and resolve most problems with your Liftmaster opener, empowering you to tackle issues with confidence.
Key Takeaways
- Power is paramount: Always check the power source first, including the outlet, circuit breaker, and the opener’s power cord.
- Remote control issues: Dead batteries, misaligned remotes, or interference can prevent your opener from responding.
- Safety sensors are critical: Obstructions or misalignments in the safety sensors will prevent the door from closing.
- Mechanical components matter: Inspect the drive mechanism, trolley, and tracks for damage or binding.
- Limit settings can be off: Incorrectly set travel limits can cause the opener to stop prematurely.
- Logic board or motor problems: These are more complex issues often requiring professional diagnosis or replacement.
- Regular maintenance is key: Preventative care can significantly reduce the likelihood of future malfunctions.

Credit: www.youtube.com
Troubleshooting Common Liftmaster Garage Door Opener Problems
A malfunctioning Liftmaster garage door opener can manifest in various ways: it might not respond at all, open but not close, close but not open, or stop mid-cycle. Before diving into complex repairs, it’s crucial to start with the basics. Many issues are surprisingly simple to fix with a little patience and a methodical approach. This section will guide you through the most frequent problems and their solutions.
No Power To The Opener
The most fundamental issue is a lack of power. If your opener shows no signs of life, no lights, no sounds, the problem almost certainly lies with the power supply.
Checking The Power Source
- Outlet Test: The simplest step is to ensure the opener is plugged into a working outlet. Unplug the opener and plug in a small appliance, like a lamp or phone charger, to confirm the outlet has power. If it doesn’t, the issue is with your home’s wiring, and you’ll need to check your circuit breaker or fuse box.
- Circuit Breaker/Fuse Box: Locate your home’s main electrical panel. Look for a tripped breaker (usually in the “off” position or halfway between “on” and “off”). Flip it completely off, then back on. If you have fuses, check if any are blown and replace them if necessary. Remember that garage door openers often share a circuit with other outlets or lights, so check for other devices on the same circuit that might be drawing too much power.
- GFCI Outlets: Some garages are equipped with Ground Fault Circuit Interrupter (GFCI) outlets, which have “Test” and “Reset” buttons. If your opener is plugged into a GFCI outlet and it has tripped, the “Reset” button will likely be popped out. Press it firmly to reset the outlet.
- Power Cord and Connections: Inspect the opener’s power cord for any visible damage, such as cuts, kinks, or fraying. Ensure the plug is securely inserted into the outlet. If the cord appears damaged, it’s a safety hazard and should be replaced by a qualified technician.
Remote Control And Wall Button Issues
If the opener has power but doesn’t respond to your remote or the wall-mounted button, the problem likely lies with the control mechanisms.
Remote Control Troubleshooting
- Battery Replacement: The most common reason a remote stops working is a dead battery. Most Liftmaster remotes use coin-cell batteries (like CR2032) or AA/AAA batteries. Consult your opener’s manual to identify the correct battery type and replace it. Ensure the new battery is inserted with the correct polarity.
- Remote Programming: Over time, remotes can sometimes lose their programming. You may need to re-pair the remote with the opener’s motor unit. This process typically involves pressing and holding a “Learn” button on the motor unit (often red, orange, or purple, depending on the model) and then pressing a button on your remote. Refer to your Liftmaster manual for specific instructions for your model.
- Range Issues: If the remote only works when very close to the motor unit, the antenna on the motor unit might be damaged or obstructed. Ensure the antenna wire is hanging down freely and is not painted or cut.
- Interference: Other electronic devices, such as wireless doorbells, security systems, or even certain types of lighting, can sometimes interfere with the remote’s signal. Try to identify if any new devices were installed around the time the remote stopped working.
Wall Button Malfunctions
- Loose Wiring: The wall button is connected to the motor unit via low-voltage wires. Check the connections at both the wall button and the motor unit. Ensure the wires are securely fastened under the terminal screws. Sometimes, vibrations can loosen these connections over time.
- Damaged Wiring: Inspect the wiring itself for any signs of damage, such as cuts, nicks, or kinks, especially along its run from the wall button to the motor unit.
- Faulty Wall Button: The button itself can fail. If you’ve confirmed power to the opener and checked the wiring, try activating the opener using only the remote. If the remote works but the wall button doesn’t, the button itself may need replacement.
Safety Sensor Problems
Safety sensors are a crucial component of any modern garage door opener system. They are located near the bottom of the garage door tracks and prevent the door from closing if they detect an obstruction, safeguarding people and property. If your door closes partially and then reverses, or won’t close at all, the safety sensors are a prime suspect.
Identifying Safety Sensor Issues
- Indicator Lights: Most Liftmaster safety sensors have small LED indicator lights. Typically, one sensor (the “sender”) will have a steady light, while the other (the “receiver”) will have a light that illuminates when it detects a clear signal from the sender. If either light is off, flashing erratically, or indicates a blocked path when there’s no obstruction, there’s a problem. Consult your manual for the specific light patterns for your model.
- Obstructions: Visually inspect the path between the two sensors. Ensure nothing is blocking the beam, not tools, storage items, debris, or even cobwebs.
- Alignment: The sensors must be perfectly aligned with each other. Even a slight misalignment can break the beam. Try gently adjusting the position of the sensors until the indicator lights show a solid connection. Many sensors have a small adjustment screw to help with precise alignment.
- Damaged Sensors or Wiring: Check the sensors themselves for physical damage. Also, inspect the wiring leading to the sensors for any cuts, abrasions, or loose connections. Like the wall button wiring, these are low-voltage wires and can be susceptible to damage.
Door Not Opening Or Closing Fully
Several issues can cause the garage door to stop moving mid-cycle or not complete its travel.
Travel Limit Settings
The travel limits tell the opener when to stop opening or closing the door. If these are set incorrectly, the opener might stop prematurely or continue to run, straining the mechanism.
- Adjusting Limits: Most Liftmaster openers have adjustment screws or buttons on the motor unit to set the open and close limits. The process involves manually moving the door to the desired open and closed positions and then adjusting the respective limit settings. Refer to your owner’s manual for the specific procedure for your model, as it can vary significantly. Incorrectly set limits are a common cause of doors not opening or closing completely.
Trolley And Drive Mechanism Issues
The trolley is the part that moves along the rail, attached to the garage door. The drive mechanism (chain, belt, or screw) powers this movement.
- Trolley Binding: If the trolley gets stuck on the rail, the door will stop. Inspect the rail for any bends, debris, or damage. Ensure the trolley moves freely when the opener is disengaged.
- Drive System Problems:
- Chain/Belt: Check the chain or belt for looseness, damage, or if it has come off the sprocket or pulley. A loose chain or belt may need to be tightened, while a damaged one might require replacement.
- Screw Drive: Inspect the screw drive for any debris or damage. The trolley on a screw drive can sometimes become dislodged.
- Disengaging the Opener: Most openers have a manual release cord (usually a red handle) hanging from the trolley. Pulling this cord disengages the opener from the door, allowing you to operate it manually. This is useful for checking if the door itself is balanced and moves freely on its tracks without the opener’s assistance. Warning: If the door is heavy and unbalanced, it could fall, so exercise caution.
Motor And Logic Board Failures
If you’ve exhausted all the simpler troubleshooting steps and the opener still isn’t functioning correctly, the issue might be with the internal components of the motor unit itself.
- Motor Issues: The motor is the heart of the opener. If it’s failing, you might hear humming sounds without any movement, or no sound at all. Motor issues often require professional diagnosis and repair or replacement of the entire opener unit.
- Logic Board: The logic board is the “brain” of the opener, controlling all its functions. A faulty logic board can cause a wide range of unpredictable behaviors or complete failure. Diagnosing a logic board problem typically requires specialized knowledge and testing equipment.
Liftmaster Opener Not Responding To Remote But Wall Button Works
This is a common scenario with a few distinct causes. The fact that the wall button works indicates that the motor unit is receiving power and the drive mechanism is functional. The issue is almost certainly related to the remote control signal reception.
Reasons For Remote/wall Button Discrepancy
- Remote Battery: As mentioned earlier, a dead or weak battery in the remote is the most frequent cause. Even if the remote light blinks, the battery might not have enough power to transmit a strong enough signal.
- Remote Programming: The remote may have lost its programming with the motor unit. This can happen spontaneously or after a power surge or outage. Re-programming the remote is usually a straightforward process outlined in your Liftmaster manual.
- Interference: Newer remote frequencies can sometimes be affected by other wireless devices, especially those operating on similar frequencies. While less common with modern rolling code technology, it’s still a possibility. Try turning off nearby wireless devices temporarily to see if the remote starts working.
- Antenna Issue: The antenna on the motor unit might be damaged, obstructed, or disconnected. Ensure the antenna wire is hanging freely and is not painted or damaged. Sometimes, simply extending the antenna wire can improve reception.
- Faulty Remote: The remote itself could be damaged internally. If you have another remote for the same opener, try using that one. If the second remote works, the first one is likely faulty and needs to be replaced.
- Receiver Board Issue: The radio receiver board within the motor unit could be malfunctioning. This is a more serious internal component failure and would likely require professional service or replacement of the motor unit.
Liftmaster Opener Not Closing Fully
A garage door opener that opens fine but refuses to close completely is often experiencing issues related to safety mechanisms or obstructions in the closing path.
Causes For Closing Problems
- Safety Sensors: This is the most common culprit. If the safety sensors are misaligned, blocked, or malfunctioning, the opener will stop the door’s descent to prevent an accident. Check the indicator lights on the sensors. If the “receiving” sensor’s light is off or flashing, it means the beam is interrupted. Ensure a clear path and proper alignment.
- Obstructions in the Closing Path: While the safety sensors are designed to detect these, sometimes a physical obstruction that isn’t precisely in the beam’s path can still cause the door to struggle and reverse. Inspect the tracks and the floor for any objects.
- Travel Limit Settings: The “close” travel limit might be set too low, causing the opener to think the door is fully closed when it’s not. You’ll need to adjust the close limit setting on the motor unit.
- Door Balance and Track Issues: If the garage door itself is heavy, unbalanced, or binding in its tracks, the opener’s motor might not have enough power to force it closed. Disengage the opener using the manual release cord and try to lift and lower the door by hand. It should move smoothly and stay partially open when released, indicating it’s balanced. If it’s too heavy or jerky, the door’s springs or tracks may need professional adjustment or repair.
- Force Settings: Most openers have force sensitivity settings that determine how much resistance the opener will tolerate before stopping. If the closing force is set too low, it might interpret normal resistance (like a slight draft pushing against the door) as an obstruction and reverse. Adjusting the force settings (refer to your manual) can sometimes resolve this, but be cautious not to set it too high, which could override safety features.
Liftmaster Opener Not Opening Fully
If your garage door opener opens the door only partially and stops, it’s usually related to the opening travel limits, obstructions, or a strain on the motor.
Causes For Opening Problems
- Opening Travel Limit: The “open” travel limit might be set too high, causing the opener to stop before the door is fully open. Adjust the open limit setting on the motor unit.
- Obstructions in the Opening Path: As the door opens, it needs a clear path. Check the ceiling for any obstructions that the door might be hitting. Also, ensure the tracks are clear.
- Door Balance and Track Issues: Similar to closing problems, if the door is binding in its tracks or is unbalanced, the opener may struggle to lift it fully. Disengage the opener and manually operate the door to check for smooth movement.
- Motor Strain or Overheating: If the motor is overheating, it might have a thermal cutoff that shuts it down temporarily. Allow the opener to cool down for 15-30 minutes and try again. If the problem persists, the motor might be failing or the opener is struggling due to another issue (like door balance).
- Logic Board or Motor Failure: In more severe cases, a failing logic board or motor could cause the opener to stop prematurely during the opening cycle.
Maintaining Your Liftmaster Garage Door Opener
Preventative maintenance is the most effective way to avoid unexpected breakdowns and extend the lifespan of your Liftmaster garage door opener. Regular checks and servicing can identify minor issues before they become major problems.
Lubrication Schedule
Moving parts need lubrication to operate smoothly and quietly.
- Tracks and Rollers: Over time, dirt and debris can accumulate on the tracks and rollers. Clean them thoroughly with a degreaser or shop vacuum. Once clean, apply a silicone-based lubricant or white lithium grease to the tracks. Avoid using oil-based lubricants, as they can attract dust and grime.
- Springs and Hinges: The torsion spring (above the door) and extension springs (along the tracks) are critical for door balance. Lubricate the springs with a garage door lubricant. Also, lubricate the hinges where the door panels connect.
- Opener Chain/Belt: If you have a chain-driven opener, lubricate the chain periodically with a garage door chain lubricant. For belt-driven openers, the belt generally doesn’t require lubrication, but check it for wear and tension.
- Frequency: Aim to lubricate these components every 6-12 months, or more often if you live in a dusty or humid environment.
Inspecting For Wear And Tear
Regular visual inspections can catch potential problems early.
- Door Balance: As mentioned, manually operate the door (with the opener disengaged) to ensure it’s balanced. If it feels excessively heavy or drops suddenly, the springs may need adjustment by a professional. Warning: Garage door springs are under high tension and can cause serious injury if handled improperly.
- Tracks: Check the tracks for any bends, dents, or misalignments. Ensure they are securely bolted to the garage wall and ceiling.
- Rollers: Inspect the rollers for wear, cracks, or damage. Worn rollers can cause the door to run unevenly.
- Cables: Examine the lift cables for fraying or damage. Damaged cables are a serious safety risk.
- Hardware: Tighten any loose bolts or hardware on the door, tracks, and opener mounting points.
Safety Sensor Maintenance
- Cleaning: Periodically wipe down the lenses of the safety sensors with a soft, dry cloth to remove dust and cobwebs that could interfere with the beam.
- Alignment Checks: Ensure the sensors remain properly aligned. Minor vibrations can sometimes shift them over time.
Checking The Opener Unit
- Mounting Bracket: Ensure the motor unit is securely mounted to the ceiling or wall bracket. Loose mounting can cause excessive vibration and noise.
- Drive Mechanism: For chain or belt drives, check the tension. A chain that’s too loose can slip, and a belt that’s too loose can also cause issues. Refer to your manual for proper tension specifications.
- Remote Batteries: Replace remote batteries proactively, perhaps once a year, to avoid being caught with a dead remote.
Professional Servicing
While many maintenance tasks can be done yourself, consider having a professional garage door technician inspect your system annually or biennially. They can identify potential issues you might miss, such as worn-out springs or subtle electrical problems, and perform more complex adjustments.
Credit: www.liftmaster.com
Understanding Liftmaster Error Codes And Indicator Lights
Liftmaster garage door openers often provide diagnostic information through blinking indicator lights on the motor unit. These codes can help pinpoint the exact nature of the problem, saving you guesswork. While specific codes vary by model series (e. g. , residential vs.
commercial, chain vs. belt drive), there are common patterns.
Common Indicator Light Patterns And Meanings
The primary indicator lights are often on the motor unit itself, near the “Learn” button. These lights typically flash in specific sequences to signal different error conditions.
- Rapid Flashing (e.g., 5 flashes): This often indicates a problem with the safety sensors. The door may not close, or it might reverse mid-cycle. This is usually due to misalignment, obstruction, or a wiring issue with the sensors.
- Slow Flashing (e.g., 10 flashes): This pattern frequently points to an issue with the travel limits. The opener may not be traveling the full distance, or it might be stopping prematurely. This requires adjusting the open and close limit settings.
- Continuous or Irregular Flashing: This can signal a problem with the logic board or the motor itself. It might indicate an internal electrical fault or an overload condition.
- No Lights/No Response: As discussed, this points to a loss of power, either from the outlet, circuit breaker, or a damaged power cord.
How To Interpret Codes
- Identify Your Model: The first step is to know your specific Liftmaster model number. This is usually found on a label on the motor unit.
- Consult Your Manual: Your Liftmaster owner’s manual is the definitive guide to its error codes. It will list the specific number of flashes or light patterns and their corresponding meanings for your model.
- Observe the Pattern: Carefully count the number of flashes and note whether they are rapid or slow. Pay attention to any accompanying sounds or the opener’s behavior.
- Match to the Code: Compare the observed pattern to the list of error codes in your manual.
- Take Action: Once the error is identified, follow the troubleshooting steps recommended in the manual or outlined in this guide for that specific issue.
Example: If your Liftmaster displays 5 rapid flashes, your manual might state this means “Safety sensors are not aligned or obstructed.” This directs you to check the sensors for blockages and ensure they are properly aligned.
Where To Find Your Manual
If you’ve lost your physical manual, you can usually find a digital copy on the Liftmaster website by searching for your specific model number.
When To Call A Professional
While indicator lights are helpful, some error codes, particularly those pointing to logic board or motor failures, may require professional diagnosis. If you’ve followed the troubleshooting steps for a specific code and the problem persists, or if the code indicates an internal component failure, it’s time to contact a qualified garage door technician.

Credit: garagedoorchamp.com
Troubleshooting Specific Liftmaster Models
While the general principles of troubleshooting apply to most Liftmaster garage door openers, certain models may have unique features or common issues. Understanding these can further refine your diagnostic process.
Liftmaster Elite Series (e.g., 8500, 8550w)
The Elite series often includes Wi-Fi connectivity and advanced features.
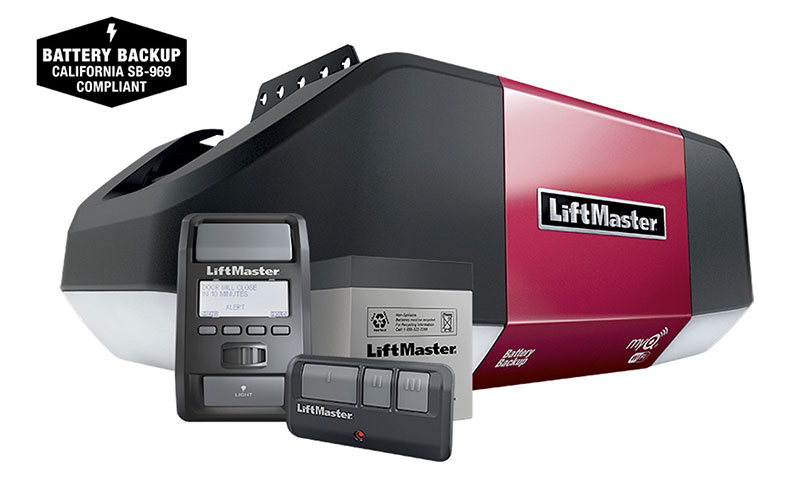
- Connectivity Issues: If your opener isn’t responding via the MyQ app, check your home Wi-Fi network. Ensure the router is functioning and the opener is within range. You may need to re-link the opener to your network. The manual will guide you through the Wi-Fi setup or re-setup process.
- Battery Backup: Models with battery backup might fail to operate during a power outage if the battery is depleted or faulty. Check the battery status indicator and consult the manual for battery replacement instructions.
- Wall Control Panel: Advanced wall control panels on Elite models may have diagnostic displays or buttons that offer more direct feedback on system status.