
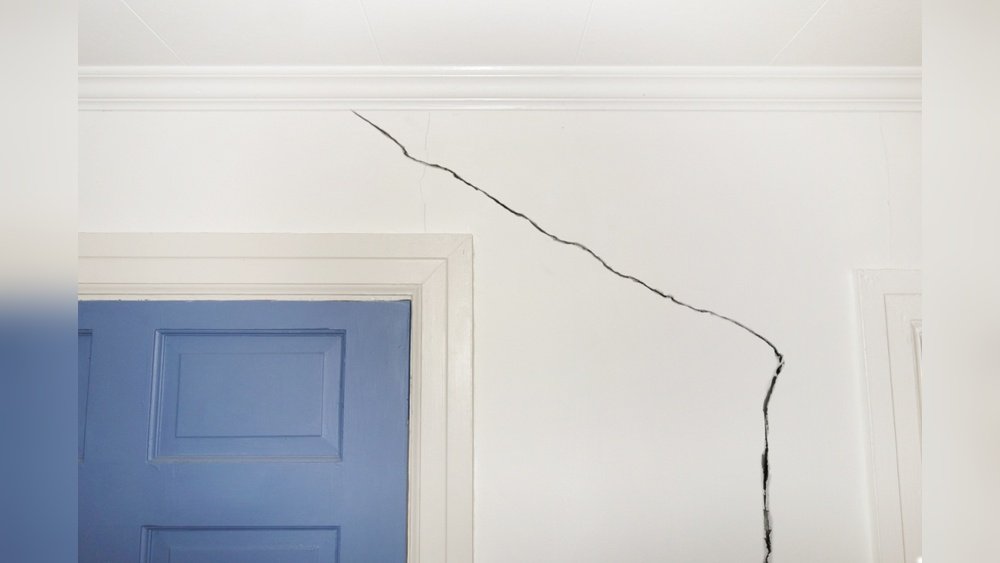
The appearance of cracks in your walls can be a source of considerable anxiety for homeowners. While minor hairline fractures might seem cosmetic, more significant fissures can signal underlying structural issues that require prompt attention. Understanding the myriad of potential causes behind wall cracks is the first crucial step in determining the appropriate fix and ensuring the long-term integrity of your home.
From the natural settling of a new building to more serious environmental factors, a variety of elements can contribute to these unwelcome blemishes.
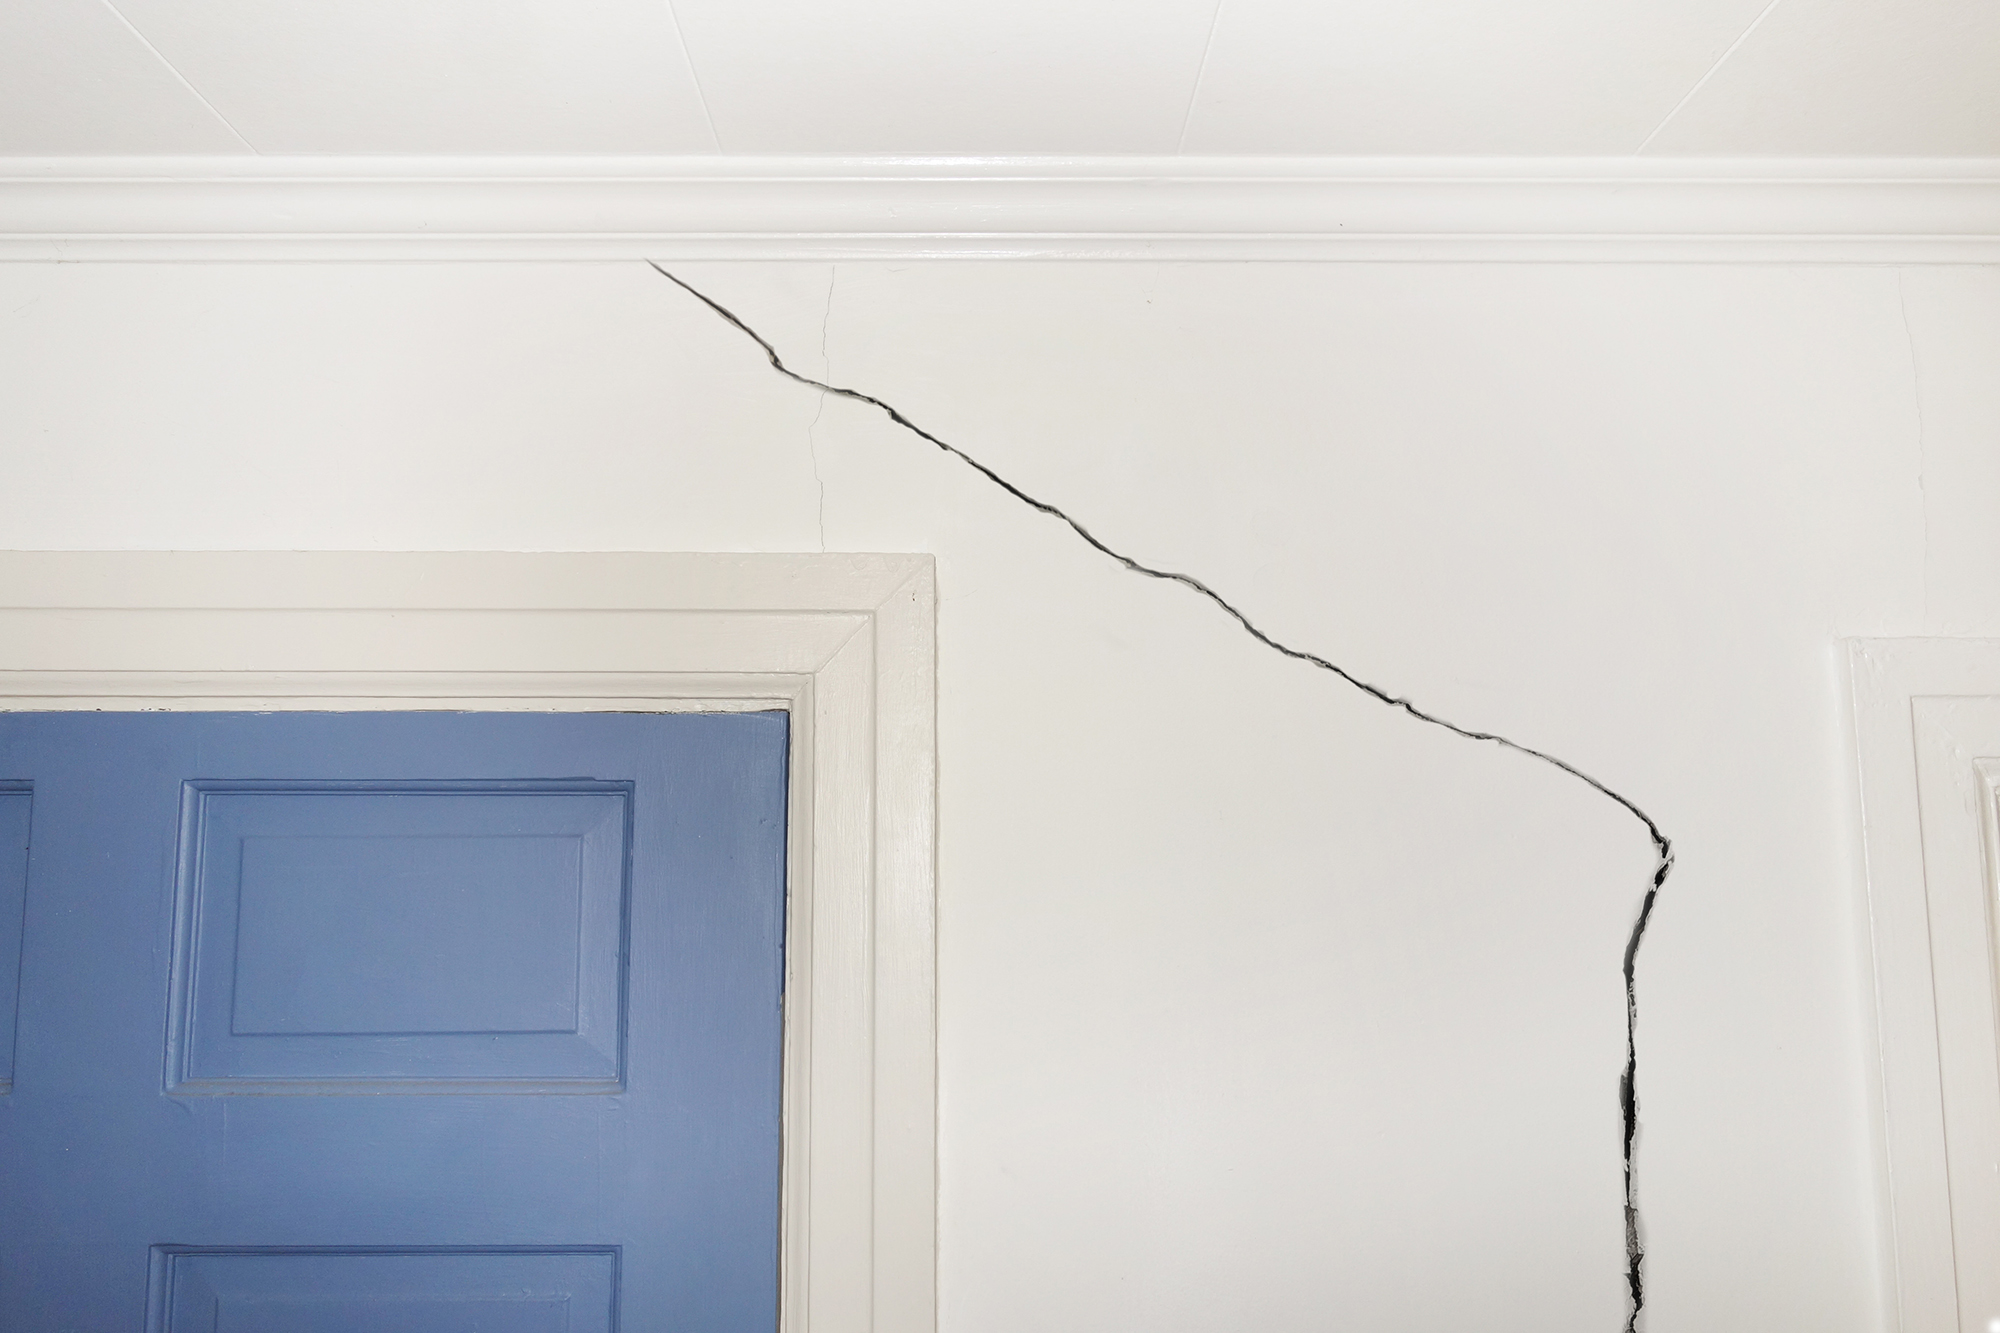
Identifying the type, size, and location of a crack is paramount. A small, horizontal crack near a window might have a different origin than a large, diagonal fissure extending from a doorway. This guide aims to demystify the common culprits behind wall cracks, offering insights into their diagnosis and providing effective solutions, whether you’re a seasoned DIYer or looking to hire a professional.
We will explore everything from minor cosmetic repairs to addressing more complex structural concerns, empowering you with the knowledge to protect your most significant investment.
Key Takeaways
- Settling is Common: New homes and even older ones naturally settle, leading to minor hairline cracks, especially around openings like doors and windows.
- Moisture is a Major Culprit: Water damage, leaks, and high humidity can cause materials to expand and contract, leading to cracks. This is particularly true for plaster and drywall.
- Structural Issues Demand Attention: Significant, widening, or diagonal cracks can indicate foundation problems, which require professional assessment and repair.
- Temperature Fluctuations Cause Expansion/Contraction: Extreme temperature swings cause building materials to expand and contract, stressing joints and potentially forming cracks.
- DIY vs. Professional Fixes: Minor cracks can often be repaired with spackling or joint compound, while structural cracks necessitate professional expertise.
- Prevention is Key: Proper drainage, maintaining consistent humidity, and addressing leaks promptly can help prevent many types of wall cracks.
Credit: www.homesandgardens.com
Understanding The Different Types Of Wall Cracks
Before you can effectively repair cracks in your walls, it’s essential to understand the different types you might encounter. The nature of the crack, its size, shape, direction, and location, often provides clues to its origin. Recognizing these distinctions is the first step in diagnosing the problem and choosing the right repair method.
Hairline Cracks
These are the most common and typically the least concerning cracks. They are usually very fine, often no wider than a strand of hair. Hairline cracks often appear shortly after a house is built or after significant renovations.
Vertical Cracks
Vertical cracks typically run straight up and down the wall. While some can be minor, persistent or widening vertical cracks, especially those that appear near corners or structural elements, might indicate issues with the foundation or settling.
Horizontal Cracks
Horizontal cracks are often a more serious concern. They can suggest pressure pushing on the wall from one side, such as from soil or water pressure against an exterior foundation wall, or from roof load issues. They are less common in interior walls unless there’s a significant structural problem.
Diagonal Cracks
Diagonal cracks, often appearing at a 45-degree angle, are frequently associated with foundation settlement. As the foundation shifts unevenly, it puts stress on the walls above, causing them to crack diagonally, often originating from corners of windows and doors.
Stair-step Cracks
These cracks resemble a staircase pattern, typically found in brick or block walls. They usually occur when the foundation beneath the wall settles unevenly or when there’s lateral pressure on the wall.

Credit: www.crackedslab.com
Common Causes Of Wall Cracks
Numerous factors can contribute to the formation of cracks in your walls. Some are minor and easily addressed, while others point to more significant underlying issues that require professional intervention. Understanding these causes will help you accurately diagnose the problem and implement the most effective solution.
Foundation Settling And Movement
Settling is a natural process that occurs in virtually all buildings. As the soil around and beneath your foundation expands and contracts with changes in moisture and temperature, it can cause the foundation to shift slightly. This movement, especially in the first few years of a building’s life, can lead to minor cracks in interior walls, particularly around door and window frames. This is often referred to as shrinkage cracking.
More problematic is differential settlement, where one part of the foundation settles more than another. This can be caused by:
- Poor soil compaction: If the soil beneath the foundation wasn’t properly compacted during construction, it can settle significantly over time.
- Changes in soil moisture: Drought conditions can cause soil to shrink, while heavy rains or poor drainage can saturate the soil, leading to expansion and subsequent settlement.
- Erosion: Water runoff can erode soil from beneath the foundation.
Differential settlement puts immense stress on the building’s structure, often manifesting as larger, diagonal, or stair-step cracks in walls, especially those that are load-bearing.
Moisture Issues And Water Damage
Moisture is a pervasive enemy of building materials and a frequent cause of wall cracks. When materials absorb water, they expand. As they dry, they contract. This cycle of expansion and contraction, especially if repeated frequently, can weaken joints and create stress fractures.
- Leaking Pipes: Hidden leaks within walls, whether from plumbing or HVAC systems, can saturate drywall or plaster, leading to sagging and cracking. The moisture can also promote mold growth, further compromising the material.
- Roof Leaks: Water dripping from a faulty roof can travel down wall cavities, causing extensive damage and cracking over time.
- High Humidity: In areas like bathrooms or basements, consistently high humidity levels can cause materials to absorb moisture, leading to expansion and eventual cracking.
- Exterior Water Intrusion: Poor exterior drainage, clogged gutters, or cracks in the foundation can allow water to penetrate the building envelope, affecting interior walls. For instance, water seeping into basement walls can cause horizontal cracks due to hydrostatic pressure.
Temperature Fluctuations And Material Expansion/contraction
Buildings are made of materials that naturally expand when heated and contract when cooled. This is particularly true for materials like concrete, brick, and wood.
- Seasonal Changes: Significant temperature swings between seasons can cause the building’s structure to expand and contract. While most structures are designed to accommodate this, extreme or rapid changes can stress joints and lead to minor cracks, especially in large expanses of wall or at junctions between different materials.
- HVAC Systems: While less common as a primary cause, rapid temperature changes induced by powerful heating or cooling systems might contribute to minor stresses over long periods.
Poor Construction Or Material Quality
Sometimes, cracks are a direct result of how the house was built or the quality of the materials used.
- Improperly Mixed Mortar or Concrete: If concrete or mortar is not mixed to the correct specifications, it can be weaker and more prone to cracking as it cures or over time.
- Inadequate Support: Walls that are not properly braced or supported during construction, or that lack sufficient structural elements, can sag and develop cracks under load.
- Fast Drying: If concrete or plaster is forced to dry too quickly (e.g., due to extreme heat or the addition of rapid-drying agents without proper curing), internal stresses can develop, leading to shrinkage cracks.
- Using the Wrong Materials: In some cases, materials might be used in applications where they are not suited for the environmental conditions or structural loads, increasing the likelihood of failure and cracking.
Vibrations
Constant or severe vibrations can also contribute to the formation of cracks.
- Heavy Traffic: Homes located near busy roads with heavy truck traffic may experience vibrations that can, over time, lead to plaster or drywall cracks.
- Nearby Construction: Ongoing construction projects involving heavy machinery or blasting can transmit significant vibrations to nearby structures.
- Earthquakes: Seismic activity is a direct cause of structural damage, including widespread wall cracking.
Age And Wear And Tear
Like anything, buildings age, and their components can degrade over time. Plaster can become brittle, drywall can lose its integrity, and even the foundational elements can experience subtle shifts. Minor cracks due to age are often cosmetic, but they should still be monitored to ensure they aren’t indicative of a more serious underlying issue.
Diagnosing Wall Cracks: What To Look For
Accurately diagnosing the cause of wall cracks is crucial for selecting the appropriate repair method. By carefully observing the characteristics of the crack, you can often narrow down the potential causes and determine whether it’s a DIY-friendly fix or requires professional attention.
Size And Width
- Hairline cracks (less than 1/8 inch wide): Often superficial, possibly due to settling or minor material shrinkage.
- Wider cracks (1/8 inch or more): May indicate more significant structural issues, foundation movement, or moisture damage.
- Cracks that are widening: This is a critical indicator. If a crack is growing larger over time, it suggests ongoing movement or stress within the structure.
Depth
- Surface-level cracks: Typically cosmetic and easier to repair.
- Cracks that go through the entire wall: These are more serious and suggest a deeper structural problem.
Location
- Around windows and doors: Common with settling, as these are natural stress points.
- Near corners of rooms: Can indicate foundation issues or differential settling.
- Along ceilings or where walls meet ceilings: May relate to roof load issues or expansion/contraction of materials.
- In basement walls (especially horizontal): Often due to hydrostatic pressure from saturated soil outside.
- In the middle of a large wall: Could be due to structural stress, material defects, or moisture.
Pattern And Direction
- Vertical or horizontal: Can be related to material stress or moisture.
- Diagonal (45-degree angle): Strongly suggestive of foundation settlement.
- Stair-step (in brick/block): Indicates uneven foundation movement or lateral pressure.
Associated Signs
- Sticking doors or windows: A classic sign of foundation settlement or structural shifting.
- Bowing or bulging walls: Indicates significant pressure, often from outside moisture.
- Water stains or mold: Points directly to moisture intrusion.
- Cracks in the exterior walls or foundation: Reinforces the likelihood of structural or water-related issues.
Monitoring For Change
For any crack that seems more than superficial, the best diagnostic tool is monitoring.
- Mark the ends: Draw a small line at the top and bottom of the crack.
- Measure the width: Use a ruler or crack gauge.
- Record the date: Note when you made the measurements.
- Check periodically: Re-measure and re-date the crack every few weeks or months.
If the crack grows in length or width, it’s a clear sign of ongoing movement and requires professional assessment.

Credit: www.swartplastering.com.au
Repairing Minor Wall Cracks (diy-friendly)
For superficial cracks that are not widening and show no signs of structural compromise, DIY repairs are often effective and can significantly improve the appearance of your walls. These methods focus on filling the void and preparing the surface for painting.
Preparing The Area
Before you begin any repair, proper preparation is key to a lasting finish.
- Clean the crack: Use a stiff brush or vacuum cleaner to remove any loose paint, dust, or debris from within and around the crack. This ensures the filler adheres properly.
- Widen slightly (if necessary): For very fine hairline cracks, gently widening them with a utility knife or a putty knife can create a better surface for the filler to grip. This creates a small V-groove.
- Dust or wipe: Ensure the area is completely free of dust.
Using Spackling Compound
Spackling paste is a lightweight, easy-to-use filler suitable for small holes and hairline cracks in drywall and plaster.
- Application: Apply the spackling compound directly into the crack using a putty knife. Hold the knife at a slight angle and press the compound in firmly to fill the void completely.
- Smoothing: Scrape away excess compound with the putty knife, holding it nearly perpendicular to the wall to leave a smooth, flush surface.
- Drying: Allow the spackling compound to dry completely according to the manufacturer’s instructions. Drying times can vary from minutes to hours depending on the product and humidity.
- Sanding: Once dry, lightly sand the area with fine-grit sandpaper (e.g., 120-150 grit) until it is smooth and level with the surrounding wall.
- Priming and Painting: Apply a coat of primer over the repaired area, followed by two coats of your wall paint to match the surrounding surface.
Using Joint Compound (for Slightly Larger Cracks)
Joint compound, often called “mud,” is a heavier-duty filler than spackling paste. It’s ideal for slightly larger cracks or small holes. It requires a bit more skill to apply smoothly.
- Application: Apply the joint compound into the crack with a putty knife or a drywall knife (wider than a putty knife). Press it in firmly.
- Smoothing: Use the wider knife to smooth the compound, feathering the edges out onto the surrounding wall. This technique involves gradually thinning the compound as you move away from the crack, making the repair less noticeable.
- Multiple Coats: For deeper cracks, you may need two or three thin coats of joint compound, allowing each coat to dry completely before applying the next. Lightly sand between coats if necessary.
- Drying and Sanding: After the final coat dries, sand the entire area smooth with medium-grit sandpaper (e.g., 100-120 grit), then finish with fine-grit sandpaper for a seamless finish.
- Priming and Painting: Prime the repaired area to seal it, then paint to match the wall.
Using Caulk (for Cracks Near Trim Or Corners)
Paintable acrylic latex caulk is a good option for filling cracks where walls meet trim (baseboards, window frames, door frames) or in corners where there might be slight movement.
- Preparation: Ensure the gap is clean and free of dust and old caulk.
- Application: Cut the tip of the caulk tube at a 45-degree angle to create a bead of the desired size. Apply a steady, even bead of caulk into the crack.
- Smoothing: Immediately after applying, use a damp cloth or a damp finger to smooth the bead, pressing it into the crack and removing excess.
- Drying: Allow the caulk to dry completely (check the product label for drying times).
- Painting: Once dry, caulk can be painted over. Apply primer first, followed by paint.
Pro Tip: For a perfectly smooth finish after sanding joint compound, wipe the area with a damp cloth to remove all dust before priming. This prevents the dust from showing through the paint.
Repairing Larger Or Structural Cracks
When cracks are wider than 1/8 inch, are actively widening, appear in a stair-step pattern, or are accompanied by other signs of structural distress like sticking doors, it’s time to consider more robust repairs, and often, professional help. These cracks can indicate issues with the foundation, framing, or significant moisture damage.
Reinforcing Cracks With Drywall Tape
For cracks that are too large for simple filling but not yet requiring structural intervention, reinforcing with drywall tape can provide added strength.
- Preparation: Clean the crack thoroughly. If it’s in drywall, you might need to cut out any loose paper or material.
- Apply Joint Compound: Apply a thin layer of joint compound along the crack with a drywall knife.
- Embed Drywall Tape: While the compound is still wet, press a strip of drywall tape (either paper or fiberglass mesh tape) firmly into the compound, centering it over the crack.
- Smooth Over Tape: Apply another thin layer of joint compound over the tape, ensuring it’s fully covered and feathered out.
- Multiple Coats: Allow the first coat to dry completely. Then, apply one or two more thin coats of joint compound, feathering the edges wider with each coat.
- Sand and Finish: Once the final coat is dry, sand smooth and prime/paint as usual.
This method adds tensile strength, helping to prevent the crack from reappearing due to minor shifts.
Addressing Foundation Issues
If cracks are determined to be caused by foundation settlement or movement, the underlying foundation problem must be addressed first. This is critical and almost always requires professional expertise.
- Underpinning: This involves installing piers or piles beneath the foundation to transfer the load to more stable soil layers deeper underground.
- Mudjacking/Slabjacking: Pumping grout or concrete slurry beneath a settled slab to lift and stabilize it.
- Crack Injection: For cracks in concrete foundations, epoxy or polyurethane injection can seal the crack and restore structural integrity.
- Exterior Drainage Improvements: Ensuring proper grading and drainage away from the foundation is crucial to prevent future water-related issues.
Warning: Attempting to “fix” a crack caused by foundation issues without addressing the foundation itself is a temporary cosmetic solution at best and can mask a serious problem, potentially leading to more extensive damage later. Always consult a structural engineer or reputable foundation repair specialist.
Repairing Plaster Cracks
Plaster walls, especially older ones, can be prone to cracking due to age, settling, or moisture. Repairing plaster requires specific techniques.
- For small cracks: Follow the methods for spackling or joint compound described earlier.
- For larger or crumbling plaster: You may need to carefully chip away loose plaster until you reach a solid base. Then, apply a bonding agent, followed by patching plaster or joint compound in layers, allowing each to dry before applying the next. Reinforcing with drywall tape can also be beneficial.
- Plaster over lath: If you have older plaster walls, you might be repairing plaster over wooden laths. In these cases, ensure any loose lath is secured, and consider using a product specifically designed for plaster repair, which may offer more flexibility.
Sealing Cracks In Masonry Walls
Cracks in brick or block walls, especially those that are stair-stepped or horizontal, often indicate foundation or lateral pressure issues.
- Minor cracks: Can sometimes be filled with a flexible masonry caulk or a specialized masonry repair compound.
- Structural cracks: Require professional assessment. Solutions might include repointing (replacing mortar), reinforcing with steel rods, or addressing underlying foundation problems.
When To Call A Professional
While many minor wall cracks can be tackled as DIY projects, certain situations warrant the expertise of a professional. Recognizing these signs can save you time, money, and prevent potentially dangerous structural issues from worsening.
Signs You Need A Professional
- Cracks wider than 1/4 inch: These are significant and likely indicate a structural problem.
- Cracks that are actively widening: If your monitoring shows the crack growing, it’s a sign of ongoing movement that needs expert diagnosis.
- Horizontal cracks: Especially in basement walls or foundation walls, these often point to serious hydrostatic pressure or structural failure.
- Stair-step cracks in brickwork: A strong indicator of foundation shift or lateral pressure.
- Cracks accompanied by sticking doors or windows: This suggests the building’s structure is warping due to settlement.
- Bowing or bulging walls: A clear sign of excessive pressure, often from water or soil.
- Multiple cracks appearing simultaneously: This could indicate a widespread structural issue.
- Cracks that reappear after repair: If a crack keeps coming back, the underlying cause hasn’t been addressed.
- Any crack you are unsure about: If you lack confidence in diagnosing or repairing a crack, it’s always safer to get a professional opinion.
Types Of Professionals To Consider
- Structural Engineer: For complex structural issues, foundation problems, or when you need an unbiased assessment of the building’s integrity. They can provide detailed reports and recommendations.
- Foundation Repair Specialist: Companies that specialize in diagnosing and repairing foundation issues, including underpinning, crack injection, and stabilization. Ensure they are reputable and licensed.
- General Contractor: For broader renovation or repair projects that might involve addressing wall issues as part of a larger scope of work.
- Experienced Handyman/Drywaller: For more straightforward repairs of drywall or plaster cracks that are not structural in nature.
When hiring, always:
- Get multiple quotes.
- Check references and reviews.
- Ensure they are licensed and insured.
- Get a detailed written estimate outlining the scope of work and warranty.
Preventative Measures To Minimize Future Cracks
While it’s impossible to prevent all wall cracks, especially minor cosmetic ones, taking proactive measures can significantly reduce their occurrence and severity. These steps focus on maintaining the structural health of your home and managing environmental factors.
Maintain Proper Drainage
Water is a primary contributor to foundation issues and material damage.
- Gutters and Downspouts: Ensure your gutters are clean and free of debris. Downspouts should extend at least 4-6 feet away from the foundation, directing water away from the house.
- Grading: The ground around your foundation should slope away from the house. If it slopes towards the house, water will pool against the foundation, increasing hydrostatic pressure and the risk of leaks and settlement. You may need to add soil to build up the grade.
- Sump Pump: If you have a basement or crawl space, ensure your sump pump is functioning correctly and can handle heavy rainfall.
Control Interior Humidity
Excessive moisture within the home can lead to expansion and contraction of materials.
- Ventilation: Use exhaust fans in bathrooms and kitchens to vent moisture directly outside. Ensure your clothes dryer is properly vented.
- De