
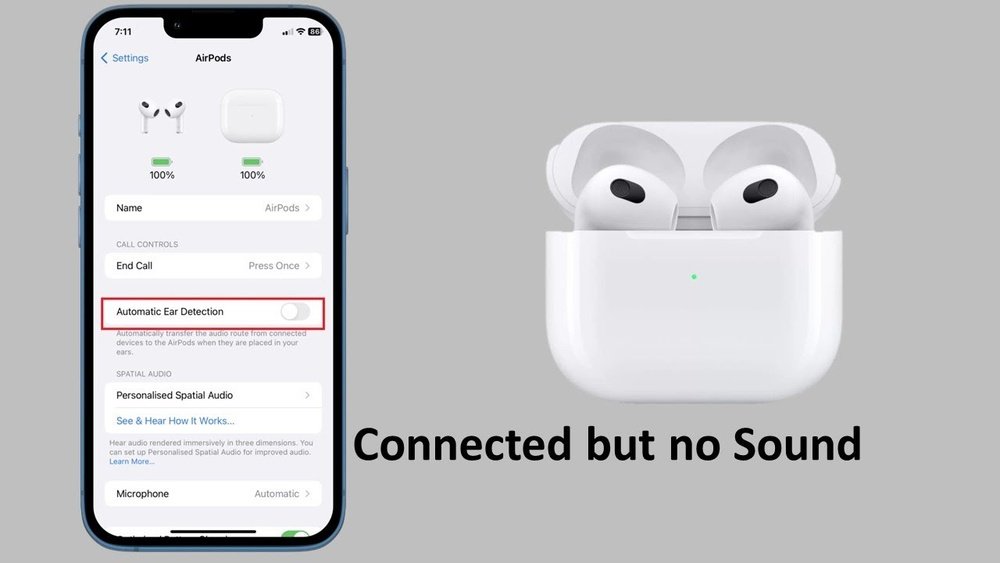
When your microphone is working but producing no sound, it’s a frustratingly common issue that can halt productivity, ruin a crucial meeting, or silence your creative flow. Whether you’re trying to record a podcast, participate in a video conference, or simply chat with friends online, a silent microphone is a showstopper. This problem can stem from a surprisingly wide array of sources, ranging from simple software glitches to complex hardware failures.
The good news is that most of these issues are fixable with a systematic troubleshooting approach. Instead of panicking, understanding the potential culprits and the steps to resolve them can save you time and prevent unnecessary hardware replacement. This guide will walk you through the most common reasons your microphone might appear to be working but isn’t outputting any audio, and provide clear, actionable solutions.
Key Takeaways
- Check Physical Connections: Ensure your microphone is securely plugged into the correct port (USB or audio jack) and that no cables are damaged.
- Verify Software Settings: Confirm the correct microphone is selected as the default input device in your operating system and within the specific application you’re using.
- Test Microphone Mute Switches: Many microphones and headsets have physical mute buttons that can be accidentally engaged.
- Update Drivers and Software: Outdated or corrupted audio drivers are frequent causes of microphone malfunctions.
- Troubleshoot Application Permissions: Ensure the application you’re using has the necessary permissions to access your microphone.
- Test on Another Device: Isolating the problem to the microphone itself or your computer is a critical diagnostic step.
- Consider Hardware Issues: If all else fails, a faulty microphone or port might be the cause.

Credit: www.youtube.com
Understanding The Microphone Signal Chain
Before diving into troubleshooting, it’s helpful to grasp the basic journey of audio from your voice to your computer or recording device. This signal chain involves several components, and a failure at any point can lead to silence.
- Microphone Transducer: This is the core of the microphone, converting sound waves into an electrical signal. Different types (dynamic, condenser, USB) have varying sensitivities and power requirements.
- Pre-amplifier (Internal or External): The electrical signal from the transducer is often very weak and needs to be amplified to a usable level. This can happen within the microphone itself (especially USB mics) or via an external audio interface.
- Analog-to-Digital Converter (ADC): For digital use, the analog electrical signal must be converted into digital data. USB microphones have this built-in. Traditional XLR microphones send an analog signal to your computer’s sound card or an external audio interface, which then performs the conversion.
- Operating System (OS) Audio Drivers: The OS interprets the digital audio data and routes it. Drivers are essential software that allows the OS to communicate effectively with the audio hardware.
- Application Settings: The specific software you’re using (Zoom, OBS, Audacity, etc.) Has its own audio input settings that must be configured to recognize and use the correct microphone.
- Output Device: Finally, the processed audio is sent to your speakers or headphones. While not directly related to the microphone *input*, issues here can sometimes be mistaken for input problems if you’re not hearing anything at all.
A “microphone working but no sound” scenario means that somewhere along this chain, the signal is either not being generated, not being amplified, not being converted correctly, not being recognized by the OS or application, or is being blocked.
Common Software And Settings Issues
Software configuration is the most frequent culprit when a microphone seems to be on but isn’t producing sound. These issues are often the easiest to fix.
Incorrect Default Input Device Selection
Your operating system needs to know which microphone to listen to. If another device (like a webcam mic or a disconnected headset) is set as the default, your primary microphone won’t pick up anything.
- Windows:
- Right-click the speaker icon in the taskbar (bottom right corner).
- Select “Sound settings”.
- Under the “Input” section, use the dropdown menu to select your desired microphone. You should see its name appear.
- Speak into the microphone. The “Test your microphone” bar should show activity. If it doesn’t, try a different device from the dropdown.
- MacOS:
- Go to System Preferences (or System Settings in newer versions).
- Click on “Sound”.
- Select the “Input” tab.
- Choose your microphone from the list.
- Speak into the microphone. The “Input level” meter should show activity.
Application-specific Microphone Settings
Even if your OS has the correct microphone selected, the application you’re using might be configured to use a different one or have its own mute/volume settings.
- Video Conferencing (Zoom, Microsoft Teams, Google Meet):
- Within the application’s settings (usually found under Audio or Video settings), there’s typically a dropdown menu to select the microphone. Ensure your intended mic is chosen.
- Many platforms have a “Test Speaker & Microphone” feature. Use it!
- Recording Software (Audacity, OBS Studio, GarageBand):
- These programs often have detailed audio input configurations. Look for preferences or settings related to audio devices and select your microphone explicitly.
- Check for any software-level mute buttons within the recording interface itself.
- Games:
- In-game audio settings menus are where you’ll find microphone selection. Some games automatically detect, while others require manual selection.
Microphone Privacy And Permissions
Modern operating systems have strict privacy controls that can prevent applications from accessing your microphone, even if it’s selected as the default device.
- Windows:
- Go to Settings > Privacy > Microphone.
- Ensure “Allow apps to access your microphone” is turned On.
- Scroll down to “Choose which apps can access your microphone” and ensure the specific application you’re using is enabled.
- Also check “Allow desktop apps to access your microphone” if you’re using a non-Store application.
- MacOS:
- Go to System Preferences (or System Settings) > Security & Privacy.
- Select the “Privacy” tab.
- Click on “Microphone” in the left-hand sidebar.
- Check the box next to the application(s) that need microphone access. You may need to click the lock icon in the bottom left and enter your password to make changes.
Disabled Audio Devices
Sometimes, a sound device can be accidentally disabled in the operating system’s settings.
- Windows:
- Right-click the speaker icon in the taskbar.
- Select “Sounds”.
- In the “Recording” tab, right-click anywhere in the list of devices.
- Ensure “Show Disabled Devices” is checked. If your microphone appears greyed out, right-click it and select “Enable”.
- MacOS:
- While macOS doesn’t have a direct “disable device” option like Windows, ensuring the correct device is selected in Sound preferences is the equivalent. If a device isn’t appearing at all, it might indicate a driver or connection issue.

Credit: steelandtimbersupply.ca
Hardware And Connection Problems
If software settings appear correct, the issue might lie with the physical connection or the hardware itself.
Loose Or Incorrect Cable Connections
This is the most basic but often overlooked cause.
- USB Microphones: Ensure the USB cable is firmly plugged into both the microphone and the computer’s USB port. Try a different USB port on your computer, as some ports might have power or data issues. Avoid using USB hubs initially, as they can sometimes cause problems.
- 3.5mm Jack Microphones: Verify the plug is fully inserted into the correct port. On desktops, there are often separate ports for microphone input (usually pink) and headphone output (usually green). Plugging into the wrong port will result in no sound. Ensure the cable isn’t frayed or damaged.
- XLR Microphones: If you’re using an XLR mic with an audio interface or mixer, check that the XLR cable is securely connected at both ends. Ensure the interface is powered on and connected to your computer.
Damaged Cables Or Ports
Cables can degrade over time, and ports can become damaged.
- Cable Damage: Look for visible signs of wear, such as kinks, cuts, or bent pins on connectors. If you have a spare cable (especially for USB mics), try using it.
- Port Damage: Inspect the USB or audio jacks on your computer for bent pins or debris. Gently clean them with compressed air if necessary.
Physical Mute Switches
Many microphones, especially headsets and some USB microphones, have a built-in physical mute button.
- Check the Microphone: Look for a button or switch directly on the microphone body, cable, or headset. It might be labeled “Mute,” have a microphone icon with a slash through it, or be a toggle switch.
- Check the Headset: If using a headset, the mute control is often on the earcup or on an inline remote along the cable.
- Accidental Activation: These buttons can be easily bumped or pressed accidentally. Ensure it’s in the unmuted position.
Power Issues (phantom Power, Usb Power)
Some microphones require additional power to function.
- Condenser Microphones (XLR): Most studio condenser microphones require +48V phantom power, which is supplied by the audio interface or mixer. Ensure phantom power is enabled in your interface’s settings for the channel your microphone is connected to. Warning: Phantom power can damage some older or specific types of microphones (like most dynamic ribbon mics). Always check your microphone’s specifications.
- USB Microphones: USB mics draw power directly from the USB port. If the port isn’t providing enough power, or if the cable is faulty, the microphone might not function correctly. Trying a different USB port or a powered USB hub can sometimes help.

Credit: www.youtube.com
Driver And Operating System Conflicts
Software conflicts and outdated drivers are a significant source of “no sound” issues.
Outdated Or Corrupted Audio Drivers
Drivers are the communication bridge between your hardware and the OS. If they’re old or broken, the connection fails.
- Windows:
- Right-click the Start button and select “Device Manager”.
- Expand the “Audio inputs and outputs” section and the “Sound, video and game controllers” section.
- Locate your microphone or audio device. Right-click it and select “Update driver”. Choose “Search automatically for drivers.”
- If that doesn’t work, right-click again and select “Uninstall device”. Important: If prompted, do not check the box to “Delete the driver software for this device” unless you intend to manually reinstall a specific driver.
- Restart your computer. Windows will attempt to reinstall the drivers automatically.
- For specific microphones (especially USB ones), it’s often best to visit the manufacturer’s website and download the latest dedicated driver for your model and OS version.
- MacOS:
- MacOS generally handles driver updates automatically through system updates. Ensure your macOS is up to date (System Preferences/Settings > Software Update).
- For external audio interfaces, manufacturers often provide specific drivers or control panel software. Check their website for the latest versions.
Operating System Updates
Sometimes, a recent OS update can introduce compatibility issues with audio drivers or settings. Conversely, an outdated OS might lack support for newer hardware.
- Ensure your operating system is fully updated.
- If the problem started immediately after an OS update, check the microphone manufacturer’s website for updated drivers compatible with the new OS version. You might also consider rolling back the update as a temporary measure if it’s critical.
Conflicting Audio Software
Other audio applications, virtual audio cables, or sound enhancement software can sometimes interfere with microphone input.
- Disable Enhancements: In Windows Sound settings (“Recording” tab), right-click your microphone, select “Properties,” go to the “Enhancements” tab, and try disabling all enhancements.
- Close Unnecessary Apps: Temporarily close any other applications that might be using audio input or have their own audio routing settings.
- Uninstall Virtual Audio Cables: If you use software like VB-CABLE or VoiceMeeter, try disabling or uninstalling them temporarily to see if they are the cause.
Testing And Isolation Strategies
To pinpoint the problem, you need to systematically test different components.
Test With A Different Application
If your microphone isn’t working in Zoom, try it in Audacity or the Windows Voice Recorder. If it works in another application, the problem is specific to the first application’s settings or permissions.
Test On Another Computer
This is one of the most effective diagnostic steps.
- Connect the microphone to a different computer.
- Check if it’s recognized and working there.
- If it works on another computer, the issue is likely with your original computer’s software, drivers, or hardware ports.
- If it doesn’t work on another computer either, the microphone itself or its cable is the most probable cause.
Use A Different Microphone
If possible, try a different microphone on your computer.
- If the new microphone works, your original microphone is likely faulty.
- If the new microphone also doesn’t work, the problem is more likely with your computer’s settings, drivers, or audio hardware.
Test Different Recording Scenarios
- Built-in vs. External: If you have a laptop, test both the built-in microphone and your external one. Does the built-in mic work? This helps determine if the issue is system-wide or specific to the external device.
- USB vs. 3.5mm: If you have both types of microphones, test them. If only one type fails, it points towards issues with that specific connection type or its associated drivers/ports.
Potential Hardware Failures
While less common than software issues, hardware failure is a possibility.
Microphone Hardware Failure
The internal components of the microphone can fail over time or due to physical damage (like a drop).
- Symptoms: No sound on any device, distorted sound, or intermittent signal loss.
- Solution: If you’ve exhausted all other troubleshooting steps and the microphone fails on multiple devices, it likely needs to be replaced. Check the manufacturer’s warranty.
Audio Interface Or Sound Card Failure
If you’re using an external audio interface or an internal sound card (especially for XLR mics), these components can also fail.
- Symptoms: No sound from any microphone connected through the interface, static, or distorted audio.
- Solution: Test the interface on another computer or try a different interface if possible. For internal sound cards, driver issues are more common, but hardware failure can occur.
Motherboard Audio Chipset Failure
On motherboards, the integrated audio chipset can fail, affecting all audio input and output. This is relatively rare but possible, especially after power surges or physical stress.
- Symptoms: No audio whatsoever from any connected device, including speakers, and all microphones fail.
- Solution: This often requires replacing the motherboard or using a reliable external USB audio interface or sound card as a workaround.
Real-world Examples And Case Studies
Let’s look at a couple of scenarios to illustrate common problems.
Example 1: The Remote Worker’s Zoom Call
Sarah, a marketing manager, joined her team’s weekly Zoom call, but her colleagues couldn’t hear her. She could see her microphone icon wasn’t muted in Zoom, and the little sound meter flickered occasionally, suggesting *some* activity. She panicked, thinking her expensive USB microphone was broken.
- Troubleshooting Steps:
- Checked Zoom Settings: Confirmed her USB mic was selected as the audio device.
- Checked OS Settings: Verified the USB mic was the default input in Windows Sound Settings. The test meter responded to her voice.
- Checked Physical Mute: Ensured the mute button on the mic itself wasn’t engaged.
- Restarted Computer: No change.
- Tested in Another App (Voice Recorder): Her voice was recorded perfectly. This indicated the mic and OS settings were likely fine.
- Revisited Zoom Permissions: She went back to Windows Privacy Settings and confirmed Zoom had permission to access the microphone.
- The Fix: It turned out that after a recent Windows update, Zoom’s specific microphone permission had been *revoked*. Re-enabling it in the Privacy settings solved the problem instantly.
Example 2: The Podcaster’s XLR Setup
Mark was setting up a new podcasting rig with an XLR microphone, an audio interface, and a computer. He could see the microphone’s phantom power light was on, and the interface showed a signal when he spoke, but his recording software (Audacity) showed absolutely no input level.
- Troubleshooting Steps:
- Checked Cables: Verified XLR and USB cables were secure.
- Checked Interface Settings: Confirmed phantom power was ON for the correct channel.
- Checked OS Settings: Selected the audio interface as the default input device in macOS Sound Preferences. The level meter responded.
- Checked Audacity Settings: This is where the issue lay. Mark had correctly selected the audio interface as the input device, but he hadn’t selected the *specific input channel* on the interface that the microphone was plugged into. Audacity was listening to an empty input.
- The Fix: In Audacity’s audio preferences, he changed the “Audio Device” to his interface and then selected the correct “Recording Channels” corresponding to the XLR input port (e.g., Input 1 or Mono 1). Sound immediately registered in Audacity.
Advanced Troubleshooting: The Sound Troubleshooter
Windows includes a built-in troubleshooter that can automatically detect and fix common audio problems.
- Go to Settings > System > Troubleshoot > Other troubleshooters.
- Find “Recording Audio” and click “Run”.
- Follow the on-screen prompts. The troubleshooter will ask you to select the device you’re having problems with (your microphone) and attempt to diagnose and apply fixes. While not always successful, it’s a quick step that can sometimes resolve driver or configuration issues.
When To Seek Professional Help Or Replace Hardware
If you’ve meticulously followed all the steps above, tested your microphone on multiple devices, and tried different cables and ports, and still encounter the “microphone working but no sound” issue, it’s time to consider the possibility of hardware failure.
- For microphones still under warranty: Contact the manufacturer’s support. They can guide you through advanced diagnostics or arrange for a repair or replacement.
- For out-of-warranty microphones: If the microphone is relatively inexpensive, replacement might be more cost-effective than professional repair. For higher-end microphones or audio interfaces, professional repair services might be an option, but weigh the cost against a new unit.
- If the issue seems computer-related: If multiple microphones fail on the same computer, and you’ve ruled out software and driver issues, it could indicate a problem with the computer’s motherboard or USB controller. In this case, using a reliable external USB audio interface is often the best workaround, as it bypasses the computer’s internal audio hardware.