
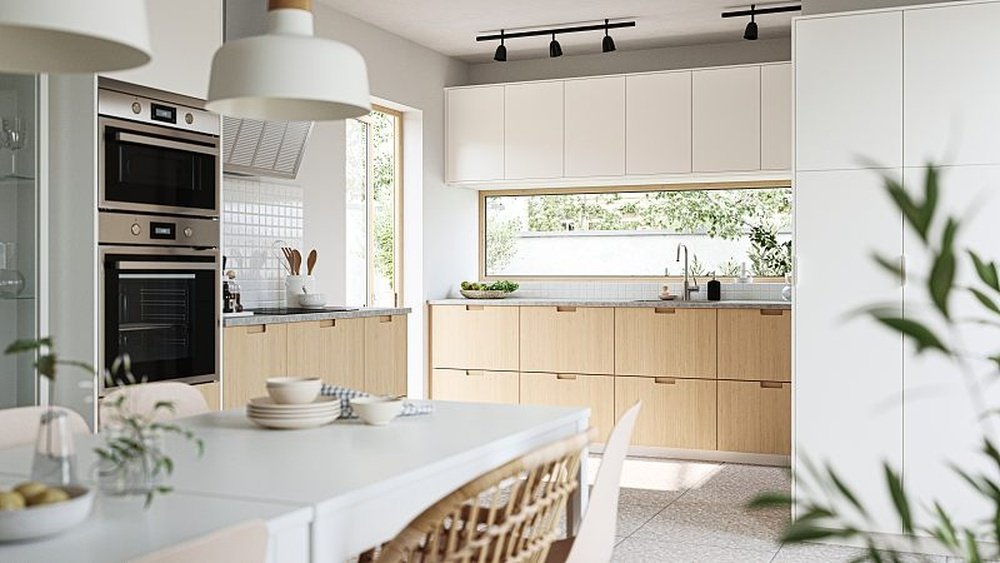
Maintaining the pristine look of your IKEA kitchen cabinets is essential for both the aesthetic appeal of your home and the longevity of your investment. Over time, grease, food splatters, fingerprints, and general grime can accumulate, dulling the finish and making your kitchen feel less inviting.
Fortunately, cleaning IKEA kitchen cabinets is a straightforward process, provided you use the right methods and cleaning agents for their specific materials. Whether you have high-gloss fronts, matte finishes, or wood veneer, a consistent cleaning routine will keep them looking as good as new.
This comprehensive guide will walk you through everything you need to know about cleaning IKEA kitchen cabinets, from understanding different finishes to tackling stubborn stains and implementing preventative measures. We’ll cover the most effective cleaning solutions, the tools you’ll need, and the techniques to avoid damaging your cabinet surfaces.
By following these steps, you can ensure your IKEA kitchen remains a clean, bright, and functional heart of your home for years to come.
Key Takeaways
- Identify Cabinet Material: Different IKEA cabinet finishes (high-gloss, matte, wood veneer, foil) require specific cleaning approaches to avoid damage.
- Gentle Cleaning is Key: Always start with the mildest cleaning solution and tool, escalating only if necessary. Harsh chemicals or abrasive scrubbers can permanently damage surfaces.
- Routine Maintenance Prevents Buildup: Regular, light cleaning is far more effective and less labor-intensive than tackling heavy, ingrained grime.
- Proper Tools Matter: Use soft cloths, sponges, and non-abrasive brushes. Avoid steel wool, scouring pads, or overly stiff brushes.
- Specific Stain Removal: Address grease, hard water spots, and food stains with targeted, yet gentle, methods.
- Drying is Crucial: Always dry cabinets thoroughly after cleaning to prevent water spots and moisture damage.
Credit: nadinestay.com
Understanding Ikea Cabinet Finishes And Their Care
IKEA offers a variety of cabinet door and drawer front finishes, each with unique properties and cleaning requirements. Understanding the material of your cabinets is the first and most crucial step in effective cleaning. Using the wrong cleaner or tool on a delicate finish can lead to permanent damage, such as discoloration, scratches, or peeling. IKEA’s most common finishes include high-gloss laminate, matte laminate, foil, and wood veneer.
High-gloss Laminate (e.g., Järsta, Veddinge In White/high-gloss)
High-gloss cabinets offer a sleek, modern look that can make a kitchen feel more spacious and bright. However, their reflective surface also highlights every fingerprint, smudge, and scratch. The material is typically a particleboard or MDF core covered with a high-gloss foil or laminate.
Cleaning Approach:
- Daily/Weekly: Wipe down with a soft, damp microfiber cloth. This is usually sufficient to remove fingerprints and light dust.
- For Smudges/Grease: Use a mild dish soap diluted in warm water. Apply with a soft cloth or sponge, wiping gently in a circular motion. Immediately follow with a clean, damp cloth to rinse away soap residue, and then dry thoroughly with a separate, dry microfiber cloth to prevent streaks and water spots.
- Stubborn Stains: For more persistent marks, a solution of 10% isopropyl alcohol (rubbing alcohol) and 90% water can be effective. Apply sparingly with a soft cloth, wipe the stain, and then rinse and dry as above.
- What to Avoid: Abrasive cleaners, scouring pads, steel wool, harsh chemicals (like ammonia or bleach), and excessive water. These can dull the finish, cause micro-scratches, or even lift the laminate.
Matte Laminate (e.g., Kallarp, Veddinge In Matte)
Matte finishes provide a sophisticated, non-reflective look that is increasingly popular. They tend to show fingerprints less prominently than high-gloss surfaces but can still accumulate grease and grime, especially around handles and cooking areas. The material is similar to high-gloss, but with a matte top layer.
Cleaning Approach:
- Daily/Weekly: A simple wipe with a soft, damp microfiber cloth is often all that’s needed.
- For Grime/Grease: A solution of mild dish soap and warm water is the go-to. Use a soft cloth or sponge, and wipe gently. Rinse thoroughly with a clean, damp cloth and dry completely with a separate dry cloth.
- Stubborn Spots: For tougher marks, a paste made from baking soda and water can be a gentle abrasive. Apply the paste to the spot, let it sit for a few minutes, then gently rub with a soft cloth. Rinse thoroughly and dry.
- What to Avoid: Abrasive cleaners, harsh chemicals, and excessive scrubbing, which can leave marks or alter the matte texture.
Foil-wrapped Cabinets (e.g., Vassvrikk, Some Older Voxtorp)
Foil-wrapped cabinets are made by applying a thin layer of decorative foil (often PVC) over a particleboard or MDF core. This is generally a more budget-friendly option. While durable for everyday use, the foil can be susceptible to heat damage and peeling if exposed to excessive moisture or harsh cleaning agents.
Cleaning Approach:
- Daily/Weekly: A soft, damp cloth is usually sufficient.
- For Grease/Smudges: Use a mild dish soap diluted in water. Apply with a soft cloth, wipe gently, rinse with a clean, damp cloth, and dry immediately.
- Stubborn Stains: A solution of equal parts white vinegar and water can help lift tougher grime. Apply, wipe, rinse, and dry thoroughly.
- What to Avoid: High heat (from ovens, kettles, or direct sunlight), abrasive cleaners, solvents (like nail polish remover or paint thinner), and prolonged exposure to moisture, especially around edges and seams where the foil might lift.
Wood Veneer (e.g., Björksnäs, Some Axstad)
Wood veneer cabinets feature a thin layer of real wood applied over a composite core. They offer a natural, warm aesthetic. The care required depends on the type of wood and the finish applied (e. g. , lacquered, oiled). IKEA’s veneer finishes often have a protective lacquer.
Cleaning Approach:
- Daily/Weekly: Dust regularly with a dry, soft cloth. For light cleaning, use a slightly damp cloth, but ensure you dry immediately.
- For Grime/Grease: Use a cleaner specifically designed for wood furniture or a very mild solution of dish soap and water. Apply sparingly with a soft cloth, wipe gently along the wood grain, and dry immediately.
- Stubborn Stains: For tougher spots, consult the specific care instructions for your veneer finish. Sometimes a wood cleaner polish can help.
- What to Avoid: Excessive water, steam cleaners, ammonia-based cleaners, abrasive cleaners, and furniture polish containing silicone, which can build up over time. Always test any cleaner in an inconspicuous area first.
Essential Cleaning Tools And Supplies
Having the right tools makes the cleaning process significantly easier and more effective, while also protecting your cabinet surfaces. Investing in a few key items can save you time and prevent potential damage.
Soft Cloths And Sponges
- Microfiber Cloths: These are your best friends for cleaning IKEA cabinets. They are non-abrasive, highly absorbent, and excellent at trapping dust and grime without scratching surfaces. Have several on hand: one for cleaning, one for rinsing, and one for drying.
- Soft Sponges: Opt for sponges with a soft side. Avoid any sponges with abrasive scrubbing surfaces, as these can easily scratch high-gloss or matte finishes.
Cleaning Solutions
- Mild Dish Soap: A few drops of a gentle dish soap (like Dawn or Fairy) diluted in warm water is the most recommended all-purpose cleaner for most IKEA cabinet finishes. It effectively cuts through grease without being overly harsh.
- Warm Water: Often, warm water alone is enough for light cleaning and rinsing.
- White Vinegar: Diluted with water (e.g., 1:1 ratio), white vinegar is a good natural degreaser and disinfectant. It’s particularly useful for foil finishes and can help remove hard water spots. However, use sparingly on wood veneers as its acidity can be problematic over time.
- Isopropyl Alcohol (Rubbing Alcohol): A 10% alcohol to 90% water solution is effective for tackling stubborn smudges, fingerprints on high-gloss surfaces, and disinfecting. Ensure good ventilation when using.
- Baking Soda: Mixed with water to form a paste, baking soda acts as a very mild abrasive for tougher spots on matte finishes. Use with caution and gentle pressure.
Other Useful Items
- Spray Bottle: For mixing and applying diluted cleaning solutions evenly.
- Soft-bristled Brush: A clean, soft toothbrush or a small detailing brush can be useful for cleaning grooves, corners, and around hardware.
- Bucket: For mixing your cleaning solutions.
- Dry Towels: For thorough drying.
Step-by-step Guide To Cleaning Ikea Kitchen Cabinets
Follow these steps for a thorough and safe cleaning of your IKEA kitchen cabinets. Remember to always test any cleaning solution or method on an inconspicuous area first.
Step 1: Preparation
- Clear the Cabinets: Remove any items from the cabinet doors and drawer fronts. This gives you clear access to the entire surface.
- Gather Supplies: Ensure you have all your chosen cleaning tools and solutions ready.
- Ventilate: Open windows or turn on your kitchen fan, especially if using stronger cleaning agents like vinegar or alcohol.
Step 2: Initial Wipe-down
- Dust Removal: Start by dusting all surfaces with a dry microfiber cloth. This removes loose debris that could scratch the surface during wet cleaning.
- Gentle Wash: Dampen a clean microfiber cloth with warm water (or your chosen mild cleaning solution, like diluted dish soap). Wring out the cloth thoroughly so it’s damp, not soaking wet.
- Wipe Surfaces: Gently wipe down the cabinet doors and drawer fronts. Work in sections, and pay attention to areas prone to grease buildup, like around the stovetop and sink. For high-gloss finishes, wipe in a consistent direction to minimize streaks. For wood veneers, wipe *with* the grain.
Step 3: Tackling Grease And Grime
- Apply Cleaner: If water alone isn’t sufficient, use your mild dish soap solution. Apply it to the cloth, not directly onto the cabinet, to avoid oversaturation.
- Gentle Scrubbing: For greasy areas, gently rub the surface with the damp cloth. For stubborn spots, you might need to let the solution sit for a minute or two.
- Use a Soft Brush (If Needed): For grime in crevices, corners, or around handles, use a soft-bristled toothbrush or detailing brush dipped in your cleaning solution. Gently agitate the dirt.
Step 4: Rinsing
- Clean Cloth: Take a fresh microfiber cloth and dampen it with clean, warm water. Wring it out well.
- Rinse Thoroughly: Wipe down all the surfaces you just cleaned to remove any soap residue. Soap residue can attract more dirt and leave a dull film. Repeat if necessary, ensuring all traces of cleaner are gone.
Step 5: Drying
- Immediate Drying: This is a critical step, especially for high-gloss and foil finishes. Use a separate, clean, and dry microfiber cloth to immediately dry all cabinet surfaces.
- Buffing (Optional): For high-gloss finishes, you can buff the surface gently with the dry cloth to enhance shine and remove any faint streaks. For matte finishes, simply ensure they are dry to prevent water spots.
Step 6: Cleaning Hardware
- Don’t forget cabinet handles and knobs! Clean them with the same mild dish soap solution and a soft cloth. For intricate designs, use a soft brush. Dry them thoroughly afterward.
Specific Stain Removal Techniques
Even with regular cleaning, stubborn stains can appear. Here’s how to tackle common kitchen cabinet culprits without causing damage.
Grease Splatters
Grease is a common enemy in the kitchen. It tends to build up over time, especially on cabinets near the stovetop.
- Method: Start with the mild dish soap and warm water solution. Apply with a soft cloth, letting it sit on the greasy spot for a minute to break down the oil. Gently wipe in a circular motion. If the grease persists, try a slightly stronger concentration of dish soap or a 1:1 vinegar-water solution. For very stubborn, baked-on grease, a paste of baking soda and water can be used as a gentle abrasive, but test this in an inconspicuous area first, especially on matte or foil finishes. Always rinse thoroughly and dry immediately.
Food Stains (e.g., Tomato Sauce, Coffee)
Accidental spills are inevitable. The key is to act quickly.
- Method: For fresh spills, blot immediately with a clean, damp cloth. If the stain has set, use the mild dish soap solution. For tougher stains like tomato sauce or coffee, a paste of baking soda and water can sometimes lift the discoloration. Apply the paste, let it sit for 5-10 minutes, then gently rub with a soft cloth. Rinse thoroughly and dry. For very persistent stains on non-wood surfaces, a solution of diluted hydrogen peroxide (use with extreme caution and test first) might be considered, but dish soap and baking soda are generally safer.
Hard Water Spots
If you have mineral-rich tap water, hard water spots can appear, especially on high-gloss finishes.
- Method: White vinegar is excellent for dissolving mineral deposits. Mix equal parts white vinegar and water in a spray bottle. Lightly spray the affected area or apply with a soft cloth. Let it sit for a minute, then wipe clean with a damp cloth. Rinse thoroughly with clean water and dry immediately to prevent new spots from forming.
Ink Or Crayon Marks
These can be tricky, especially on lighter finishes.
- Method: For ink, try dabbing the spot with a cotton ball slightly dampened with isopropyl alcohol. Be careful not to spread the ink. For crayon or waxy marks, the baking soda paste can sometimes lift the wax. Gently rub the paste over the mark, then wipe clean. On high-gloss finishes, a magic eraser (melamine foam sponge) can sometimes work, but use it very gently and sparingly, as it is mildly abrasive and can dull the finish with overuse. Always rinse and dry thoroughly.
Avoiding Damage: What Not To Do
Preventing damage is as important as knowing how to clean. Certain cleaning practices and products can ruin your IKEA cabinets.
Abrasive Materials
- Avoid: Steel wool, scouring pads, abrasive sponges, stiff-bristled brushes, and abrasive cleaning powders (like Comet). These will scratch, dull, and permanently damage the finish of your cabinets, especially high-gloss and matte laminates.
Harsh Chemicals
- Avoid: Bleach, ammonia, acetone (nail polish remover), strong solvents, and oven cleaners. These can discolor, weaken the adhesive holding foils, or even dissolve the finish. Always use mild, pH-neutral cleaners.
Excessive Water
- Avoid: Soaking the cabinets or leaving standing water on them. Excess moisture can seep into the particleboard or MDF core, causing swelling, warping, and delamination of foils or veneers. Always use a well-wrung-out cloth and dry surfaces immediately.
Steam Cleaners
- Avoid: While seemingly a good idea for sanitizing, steam cleaners can force moisture into seams and edges, leading to damage, especially on foil-wrapped or veneer cabinets. The heat can also be detrimental.
Direct Heat And Sunlight
- Avoid: Prolonged exposure to direct sunlight or heat sources (like ovens or kettles placed too close). This can cause discoloration, fading, and warping, particularly on foil and high-gloss finishes. Ensure good ventilation around heat-generating appliances.
Routine Maintenance And Prevention
The best way to keep your IKEA kitchen cabinets looking great is through consistent, preventative care.
Daily Habits
- Wipe Spills Immediately: Don’t let spills sit. A quick wipe with a damp cloth after cooking or meal prep can prevent stains from setting.
- Fingerprint Patrol: Keep a microfiber cloth handy to wipe away fingerprints on high-gloss doors as soon as you notice them.
Weekly Checks
- Quick Clean: Once a week, give all cabinet fronts a quick wipe-down with a damp microfiber cloth, followed by drying. This prevents significant buildup.
- Hardware Shine: Wipe down handles and knobs to keep them looking their best.
Protective Measures
- Use Cabinet Guards: Consider placing small, clear adhesive pads or felt protectors on the inside corners of cabinet doors where they might hit the frame, preventing chips and scratches.
- Ventilation: Ensure your kitchen is well-ventilated, especially when cooking, to reduce grease buildup on cabinet surfaces. Using your range hood consistently makes a big difference.
- Handle Choice: While aesthetics are important, consider how easy handles are to clean. Minimalist designs with fewer crevices can be simpler to maintain.
Cleaning Ikea Cabinet Hardware
Cabinet hardware, such as handles and knobs, can accumulate grime, fingerprints, and even food residue, detracting from the overall cleanliness of your kitchen. IKEA hardware varies in material, from brushed metal and chrome to painted finishes.
Cleaning Metal Hardware (chrome, Stainless Steel, Brushed Nickel)
- Method: Use a soft cloth dampened with warm water and a small amount of mild dish soap. Gently wipe the hardware to remove dirt and fingerprints. For tougher spots, a solution of equal parts white vinegar and water can help dissolve mineral deposits or residue. Rinse the cloth with clean water and wipe the hardware again to remove any soap or vinegar residue. Crucially, dry the hardware completely with a clean, dry microfiber cloth to prevent water spots and corrosion, especially on plated finishes.
- What to Avoid: Abrasive cleaners, scouring pads, and harsh chemicals like bleach or ammonia, which can scratch or discolor metal finishes.
Cleaning Painted Or Powder-coated Hardware
- Method: These finishes are generally more delicate. Stick to a soft cloth dampened with warm water and a very mild soap. Wipe gently. Avoid any scrubbing action. Rinse the cloth and wipe again to remove residue. Dry thoroughly with a soft cloth.
- What to Avoid: Abrasive cleaners, harsh chemicals, and excessive rubbing, which can scratch or chip the paint.
Cleaning Specialized Finishes (e.g., Matte Black, Brass)
- Method: Always refer to the manufacturer’s specific care instructions if available. For matte black or brass finishes, a gentle approach is best. Start with a damp microfiber cloth. If more cleaning power is needed, use a highly diluted mild dish soap solution. Wipe gently, rinse with a clean damp cloth, and dry immediately and thoroughly. Some brass finishes are lacquered and can be cleaned like painted hardware, while unlacquered brass will develop a patina over time, which may be desirable. Avoid polishes unless specifically recommended for the finish.
- What to Avoid: Aggressive cleaning, abrasive materials, and cleaners not intended for the specific finish, as they can alter the color or texture.
Common Issues And Troubleshooting
Even with careful cleaning, you might encounter specific problems with your IKEA cabinets.
Peeling Or Bubbling Foil/laminate
This often occurs due to excessive heat, moisture, or using the wrong cleaning agents.
- Troubleshooting: If the peeling is minor and near an edge, you might be able to carefully re-adhere it using a heat-resistant adhesive and applying gentle, even pressure with a roller or a book. Do not use regular glue, as it may become brittle. For larger areas or bubbling that cannot be smoothed, contact IKEA for potential replacement parts or consider professional repair. Avoid using steam cleaners or excessive water near these areas.
Scratches On High-gloss Finishes
Minor scratches can sometimes be buffed out, but deep ones are permanent.
- Troubleshooting: For very light surface scratches on high-gloss laminate, you can try using a plastic polish or a mild abrasive compound specifically designed for automotive plastic or high-gloss surfaces. Apply a small amount to a soft cloth and rub gently in a circular motion. Test in an inconspicuous area first. Deep scratches will likely require a touch-up kit or replacement door/drawer front. Avoid abrasive cleaners and rough cloths at all costs.
Discoloration
This can happen due to prolonged sun exposure, harsh cleaning chemicals, or reaction with certain substances.
- Troubleshooting: If discoloration is due to sun fading, there isn’t much that can be done besides trying to prevent further exposure. If it’s due to a chemical reaction, the damage is likely permanent. For minor discoloration on white cabinets from food stains (like turmeric), a paste of baking soda and water or a diluted hydrogen peroxide solution (used with extreme caution and testing) might help lift the stain. Always rinse and dry thoroughly.
Sticky Residue
This can be from cooking oils, adhesive labels, or certain cleaning products.
- Troubleshooting: For general stickiness, the mild dish soap solution usually works. For stubborn adhesive residue from labels, try using a citrus-based cleaner or rubbing alcohol on a cloth. Apply to the residue, let it sit for a few minutes to break it down, then gently rub it away. Wipe the area clean with a damp cloth afterward and dry thoroughly. Avoid using harsh solvents like acetone, which can damage the finish.
Comparison Of Cleaning Methods By Finish
To summarize the best approaches, here’s a quick comparison table.
| Cabinet Finish |
|---|