
A leaking pressure washer can turn a satisfying cleaning job into a frustrating mess. Whether you’re tackling grime on your driveway, deck, or car, an unexpected drip or gush from the wrong place signals trouble. This isn’t just an inconvenience; a leak can reduce the machine’s water pressure, diminish its effectiveness, and potentially lead to more serious damage if left unaddressed. Understanding the common causes of pressure washer leaks and knowing how to troubleshoot them is crucial for any homeowner or professional who relies on these powerful cleaning tools.
From a loose hose connection to a damaged pump seal, the source of the leak can vary widely. Identifying the origin point is the first step towards a swift and effective repair. This guide will walk you through the most frequent culprits behind a pressure washer leaking water, offering practical solutions and preventative measures to keep your equipment in optimal working condition. We’ll explore everything from simple fixes like tightening fittings to more complex issues requiring part replacement, ensuring you can confidently diagnose and resolve most common leaks.
Key Takeaways
- Common Leak Points: Leaks often originate from hose connections, O-rings, pump seals, wands, spray guns, or the unloader valve.
- Troubleshooting Steps: Systematically check connections, inspect seals and O-rings, and test components individually to pinpoint the leak’s source.
- Hose Leaks: Loose or damaged high-pressure hoses are frequent offenders. Ensure connections are tight and the hose itself is free from cuts or abrasions.
- Pump and Seal Issues: The pump is the heart of the pressure washer. Leaks here can stem from worn seals, damaged pistons, or loose fittings.
- Accessory Problems: The spray gun, wand, and nozzles can also develop leaks due to worn O-rings or cracks.
- Unloader Valve Malfunctions: This valve regulates pressure. If it fails, it can cause leaks and inconsistent pressure.
- Preventative Maintenance: Regular inspection, proper storage, and using the correct water supply can prevent many leaks.
- When to Call a Pro: For complex internal pump issues or if DIY repairs fail, professional service is recommended.
Understanding Pressure Washer Components And Leak Zones
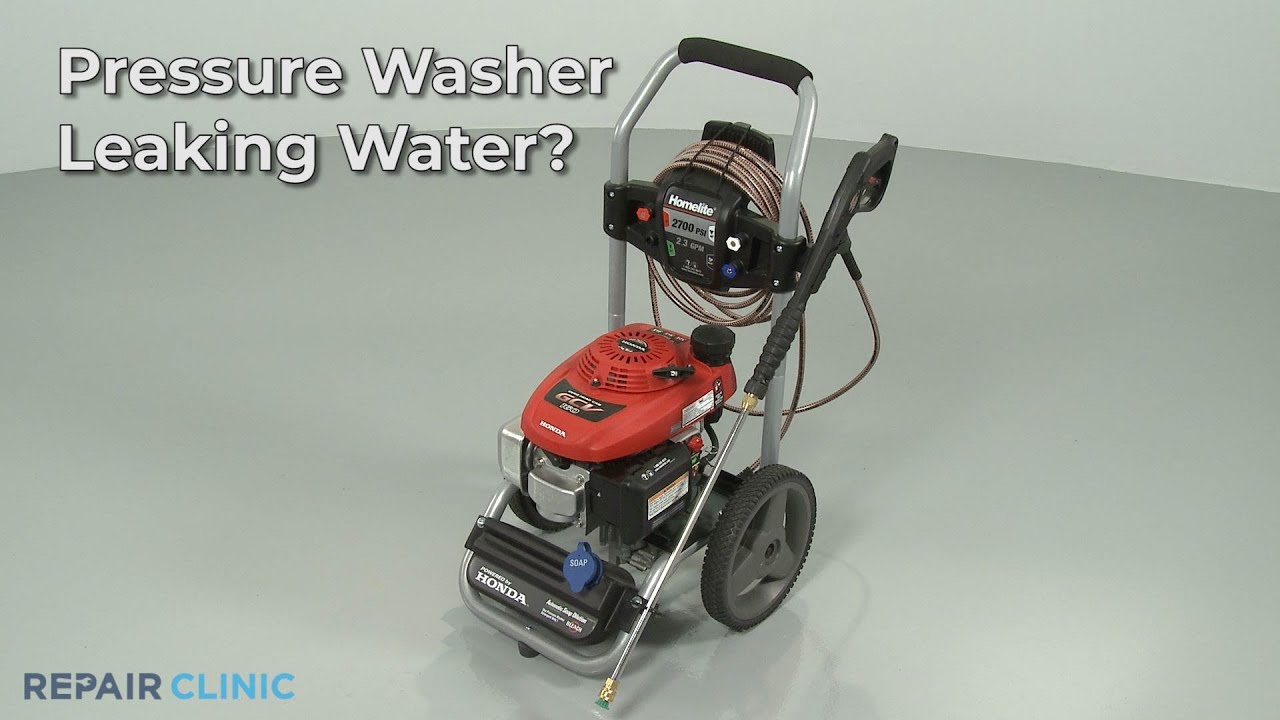
Before diving into specific leak causes, it’s helpful to understand the main components of a pressure washer and where leaks are most likely to occur. A typical pressure washer consists of an engine (electric motor or gas engine), a pump, a high-pressure hose, a spray gun, a wand, and various nozzles. The water supply hose connects the machine to your water source, while the high-pressure hose carries water from the pump to the spray gun.
The pump is arguably the most critical component, responsible for increasing the water pressure significantly. It contains seals, valves, and pistons that are under constant stress. Leaks originating from the pump area can be particularly concerning, as they often indicate wear or damage to these internal parts.
The unloader valve is another key part that plays a role in pressure regulation and can be a source of leaks. It redirects water flow when the trigger on the spray gun is released, preventing pressure buildup that could damage the system.
Finally, the connections between all these parts, from the garden hose to the pump, from the pump to the high-pressure hose, and from the hose to the spray gun and wand, are prime locations for leaks, often due to loose fittings or worn seals.
The Pump: The Heart Of The Operation
The pump is where the magic happens, transforming low-pressure water from your tap into the high-velocity stream that powers your cleaning. Due to the immense pressures involved (often ranging from 1,000 to over 4,000 PSI), the pump is a complex assembly of seals, valves, and moving parts.
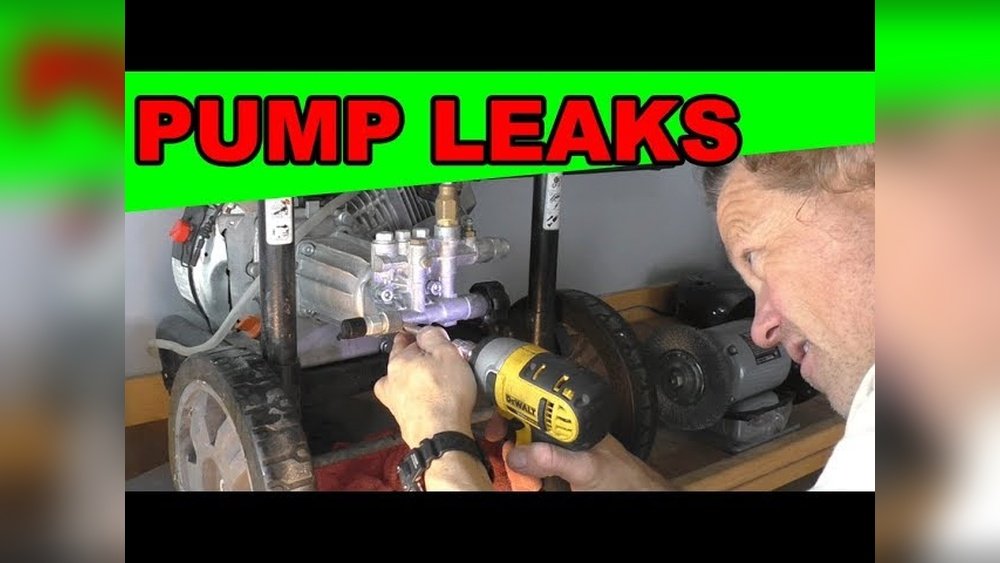
- Pump Seals: These are critical for preventing water from escaping the pump housing. Over time, seals can degrade due to heat, friction, and chemical exposure (from detergents). A leaking seal will typically manifest as water dripping from the pump housing itself, often near where the drive shaft enters the pump or around the cylinder head.
- Pistons and Plungers: Many pressure washer pumps use pistons or plungers that move within cylinders. If these components become scored, worn, or if their seals fail, water can leak past them. This often results in a loss of pressure as well as visible leaks.
- Pump Head/Cylinder: The main housing of the pump, known as the pump head or cylinder, can also develop cracks or have fittings that loosen, leading to leaks.
The Unloader Valve: Pressure Regulation And Potential Leaks
The unloader valve is essential for the safe operation of a pressure washer. When you release the trigger on the spray gun, the valve diverts the high-pressure water back into a low-pressure bypass loop, preventing the pump from building up dangerous pressure when no water is being discharged.
- Sticking or Worn Valve: If the unloader valve sticks open or doesn’t seal properly when the trigger is released, water can continuously bypass the system, leading to a leak. This often presents as a steady stream of water returning to the inlet side of the pump or even dripping from the valve assembly itself.
- Faulty Spring or Seals: Like any mechanical component, the unloader valve has internal seals and springs that can wear out or break. This can cause leaks directly from the valve body or its connection points.
Hoses And Connections: The First Line Of Defense
The hoses and their connections are often the most accessible parts of the pressure washer system and, therefore, the most common culprits for leaks.
- Water Supply Hose: The hose connecting your tap to the pressure washer inlet can leak if not securely attached or if the hose itself is damaged. This is usually a low-pressure leak, but it still reduces the water available to the pump.
- High-Pressure Hose: This is the reinforced hose designed to withstand extreme pressure. Leaks here are more serious and can be dangerous. They can occur at either end where the hose connects to the pump outlet or the spray gun inlet, or along the length of the hose if it’s been cut, abraded, or punctured.
- Fittings and Couplings: The threaded fittings that connect hoses to the machine, spray gun, and wand can loosen over time due to vibration. O-rings within these connections are also prone to wear and tear, leading to leaks.
Spray Gun, Wand, And Nozzles: The User Interface
While often overlooked, the spray gun, wand, and nozzles can also be sources of leaks, especially with frequent use.
- Spray Gun Trigger Valve: The internal mechanism of the spray gun can wear out, causing leaks when the trigger is engaged or released.
- Wand Connection: The point where the wand attaches to the spray gun relies on O-rings to create a watertight seal. Worn or damaged O-rings here are a very common cause of leaks.
- Nozzle Leaks: While less common, a damaged nozzle or a poorly seated nozzle in the wand can sometimes cause minor leaks or spray.
Credit: www.youtube.com
Diagnosing The Leak: A Step-by-step Approach
Pinpointing the exact source of a pressure washer leak is crucial for an effective repair. A systematic approach will save you time and prevent unnecessary part replacements. Before you start, ensure the pressure washer is turned off, unplugged (for electric models), or has its engine stopped and the trigger released (for gas models) to de-pressurize the system.
Step 1: Visual Inspection And Initial Assessment
Start with a thorough visual inspection of the entire machine while it’s dry. Look for obvious signs of damage, such as cracked plastic housings, frayed hoses, or wet spots on components.
- Check Connections: Pay close attention to all threaded connections: where the garden hose connects to the inlet, where the high-pressure hose connects to the pump outlet and spray gun, and where the wand connects to the spray gun. Are they securely tightened? Are there any visible drips or wetness around them?
- Inspect Hoses: Examine both the water supply hose and the high-pressure hose for any cuts, abrasions, bulges, or signs of wear. Pay special attention to the ends of the hoses where they connect to fittings.
- Look at the Pump: Carefully inspect the pump housing. Are there any wet spots or drips originating from the pump itself, particularly around seals or fittings?
- Examine the Spray Gun and Wand: Check the spray gun body, the connection point for the wand, and the nozzle for any signs of leaks.
Step 2: The “run And Observe” Method
Once you have a general idea, the best way to find the leak is to run the pressure washer briefly and observe.
- Connect Water Supply: Ensure the water supply hose is securely connected and the water is turned on.
- Start the Machine: Start the engine (or turn on the electric motor).
- Engage the Trigger (Briefly): Pull the trigger on the spray gun for a few seconds to build pressure.
- Turn Off Immediately: Turn off the engine/motor.
- Observe: Carefully look and feel around all components. Water under pressure can spray or seep out in unexpected ways. A leak that might be missed when the machine is off can become apparent when it’s running.
- Repeat if Necessary: You might need to repeat this process a few times, focusing on different areas, to pinpoint the source. Sometimes, running the machine with the trigger held down for a short period can help reveal leaks that only occur under pressure.
Step 3: Isolating Components (if Necessary)
If the leak is difficult to pinpoint, you may need to isolate components.
- Hose Disconnection: Disconnect the high-pressure hose from the spray gun. Turn on the machine briefly. If the leak stops, the problem is likely in the spray gun, wand, or the hose connection to the gun. If the leak continues from the pump outlet, the issue is with the pump or its direct connections.
- Wand Disconnection: Disconnect the wand from the spray gun. Run the machine briefly. If the leak stops, the issue is with the wand connection or the wand itself.
Pro Tip: Have rags or towels ready to absorb excess water during your diagnosis. This will help you see fresh drips more easily.

Credit: www.youtube.com
Common Pressure Washer Leaks And Their Solutions
Once you’ve identified the general area of the leak, you can move on to specific troubleshooting and repair.
1. Leaks At Hose Connections (inlet And Outlet)
This is arguably the most frequent type of leak. It occurs where the garden hose connects to the pressure washer inlet, or where the high-pressure hose connects to the pump outlet or spray gun.
- Cause: Loose fittings, worn or missing O-rings, damaged threads.
- Solution:
- Tighten Fittings: First, try simply tightening the connection. Ensure you’re turning it the correct way (usually clockwise).
- Inspect and Replace O-rings: Most quick-connect fittings and threaded couplings use rubber O-rings to create a seal. Carefully remove the fitting (you might need pliers or a wrench) and inspect the O-ring. If it’s cracked, brittle, flattened, or missing, it needs replacement. You can find replacement O-rings at hardware stores or online. Make sure to get the correct size and type of O-ring. Lubricating the new O-ring with a bit of plumber’s grease or silicone grease can help ensure a good seal and prevent damage during installation.
- Check Threads: Ensure the threads on both the fitting and the component it screws into are not damaged or cross-threaded. Damaged threads usually require replacing the component.
2. High-pressure Hose Leaks
Leaks along the length of the high-pressure hose are more serious due to the extreme pressures involved.
- Cause: Cuts, abrasions, punctures, internal wear, burst reinforcement layers.
- Solution:
- Minor Abrasion: If there’s a very minor abrasion without damage to the reinforcing layers, you might consider a heavy-duty hose repair kit, but this is often a temporary fix.
- Significant Damage/Bulging/Bursting: Any significant damage, such as cuts, bulges, kinks, or signs of the hose bursting, means the hose must be replaced immediately. Never attempt to repair a damaged high-pressure hose. The failure could be catastrophic and cause serious injury. Purchase a replacement hose specifically designed for your pressure washer’s PSI rating and ensure it has the correct end fittings.
3. Leaks From The Pump Seals
A leak originating directly from the pump housing is a more involved issue.
- Cause: Worn or damaged pump seals, worn pistons, damaged pump head.
- Solution:
- Identify Seal Location: Try to determine if the leak is coming from the shaft seal (where the drive shaft enters the pump) or from the cylinder head seals.
- Seal Replacement: Replacing pump seals typically requires disassembling parts of the pump. This can be a complex job. If you are comfortable with mechanical repairs and have the correct service manual for your pump model, you can attempt this. You will need specific seal kits designed for your pump.
- Professional Repair: For many users, it’s more practical and safer to take the pressure washer to a qualified repair shop or contact the manufacturer for service if the pump seals are leaking. A damaged pump can be costly to repair or replace.
4. Leaks From The Unloader Valve
The unloader valve can leak if it’s malfunctioning or its seals are worn.
- Cause: Debris stuck in the valve, worn internal seals, broken spring, loose fittings.
- Solution:
- Clean the Valve: Sometimes, debris can prevent the valve from seating properly. Consult your manual on how to safely remove and clean the unloader valve. Be careful with any springs or small parts.
- Check Fittings: Ensure the fittings connecting the unloader valve to the pump and bypass hose are tight and have good O-rings.
- Replace Valve: If cleaning doesn’t help, the unloader valve may need to be replaced. This is often a component that can be purchased separately and replaced by the user, but ensure you get the correct model compatible with your pressure washer.
5. Leaks From The Spray Gun Or Wand
These leaks are usually due to worn seals within the gun or at the wand connection.
- Cause: Worn O-rings in the wand coupler, worn trigger valve seals, cracks in the spray gun housing.
- Solution:
- Wand Connection: As mentioned earlier, check and replace the O-rings where the wand connects to the spray gun. This is a very common fix.
- Spray Gun Repair Kit: Many spray guns can be disassembled and repaired using specific rebuild kits. These kits typically include new O-rings, seals, and sometimes replacement springs for the trigger mechanism. Consult your spray gun’s manual or manufacturer’s website for available kits and instructions.
- Replace Spray Gun/Wand: If the housing is cracked or the internal damage is severe, it might be more cost-effective to replace the entire spray gun or wand assembly.
6. Leaks From The Water Inlet Filter/screen
Many pressure washers have a filter screen where the garden hose connects to prevent debris from entering the pump.
- Cause: Damaged screen, improperly seated screen, cracked inlet fitting.
- Solution:
- Clean and Reseat: Remove the screen, clean it thoroughly, and ensure it’s properly seated back into the inlet fitting.
- Replace Screen: If the screen is torn or damaged, replace it with a new one.
- Check Fitting: Inspect the plastic inlet fitting for cracks. If cracked, the entire fitting assembly may need replacement.

Credit: www.youtube.com
Preventative Maintenance To Avoid Leaks
The best way to deal with pressure washer leaks is to prevent them from happening in the first place. Regular maintenance and proper usage habits can significantly extend the life of your equipment and save you from frustrating downtime.
Regular Cleaning And Inspection
- After Each Use: Rinse off any excess dirt or debris from the pump exterior, hoses, and spray gun. Check for any new nicks or cuts on the hoses.
- Before Each Use: Perform a quick visual inspection of all connections, hoses, and the pump. Ensure all connections are snug and look for any obvious signs of wear or damage. Check the water inlet filter for debris.
Proper Storage
- Winterization (for Gas Models): If you live in an area with freezing temperatures, proper winterization is critical. Drain all water from the pump and hoses to prevent ice expansion damage. Many manufacturers recommend running pump saver fluid through the system. Failure to properly winterize is a leading cause of pump failure and leaks in cold climates.
- Storage Location: Store your pressure washer in a clean, dry place, protected from the elements. Avoid storing it where it could be exposed to extreme temperatures or physical damage.
- Hose Management: Avoid kinking or tightly coiling high-pressure hoses. Store them loosely to prevent undue stress on the internal reinforcement layers.
Using The Correct Water Supply
- Adequate Flow: Ensure your water source can supply the minimum flow rate required by your pressure washer (usually specified in GPM – gallons per minute). Insufficient water supply can cause the pump to overheat and damage seals.
- Water Quality: If your water is particularly hard or contains a lot of sediment, consider using an external water filter on your inlet hose to protect the pump.
Avoiding Strain And Overheating
- Don’t Run Dry: Never run the pressure washer without a sufficient water supply. This can quickly damage the pump seals and internal components.
- Don’t Run Continuously: Avoid running the pressure washer for excessively long periods without breaks, especially on older or less powerful models. Overheating can degrade seals and hoses.
- Trigger Use: When taking breaks, turn off the engine/motor rather than letting the machine run continuously with the trigger released (unless your model is specifically designed for extended bypass operation).
When To Call A Professional
While many common pressure washer leaks can be fixed with basic tools and replacement parts, there are times when it’s best to seek professional help.
- Internal Pump Damage: If you suspect major internal damage to the pump (e.g., cracked housing, damaged pistons, bearing failure), the repair can be complex and may require specialized tools. It might also be more economical to replace the pump or the entire unit.
- Repeated Failures: If you’ve attempted repairs but the leak persists, or if components fail repeatedly, a professional can diagnose underlying issues you might have missed.
- Safety Concerns: High-pressure water can be dangerous. If you’re uncomfortable with disassembling components or working with pressurized systems, it’s safer to let an expert handle the repair.
- Warranty Repairs: If your pressure washer is still under warranty, attempting DIY repairs could void the warranty. Always check your warranty terms and contact the manufacturer or an authorized service center for repairs.
A reputable pressure washer repair service will have the expertise, diagnostic tools, and genuine parts to fix your machine correctly. They can often assess whether a repair is economically viable compared to purchasing a new unit.
Comparison Of Common Leak Causes And Fixes
To provide a quick overview, here’s a table summarizing the most frequent leak points and their typical solutions.
| Leak Location | Common Cause | Typical Solution | Difficulty Level | Estimated Cost (Parts) |
|---|---|---|---|---|
| Inlet Hose Connection | Loose fitting, worn O-ring | Tighten fitting, replace O-ring | Easy | $1 – $5 |
| High-Pressure Hose Connection | Loose fitting, worn O-ring | Tighten fitting, replace O-ring | Easy | $1 – $5 |
| High-Pressure Hose (Mid-length) | Cut, abrasion, puncture, burst | Replace hose (CRITICAL SAFETY ISSUE) | Medium | $30 – $150+ |
| Pump Seals | Worn seals, damaged pistons | Replace seals (requires disassembly) | Hard | $20 – $100+ (for seal kit) |
| Unloader Valve | Debris, worn seals, faulty spring | Clean valve, replace valve assembly | Medium | $30 – $100+ |
| Spray Gun / Wand Connection | Worn O-rings | Replace O-rings | Easy | $1 – $5 |
| Spray Gun Internals | Worn trigger valve seals | Replace spray gun rebuild kit | Medium | $15 – $50 |
*Note: Costs are approximate and can vary significantly based on brand, model, and location.*
Understanding Different Pressure Washer Types And Leaks
The type of pressure washer you own can influence the nature and frequency of leaks.