
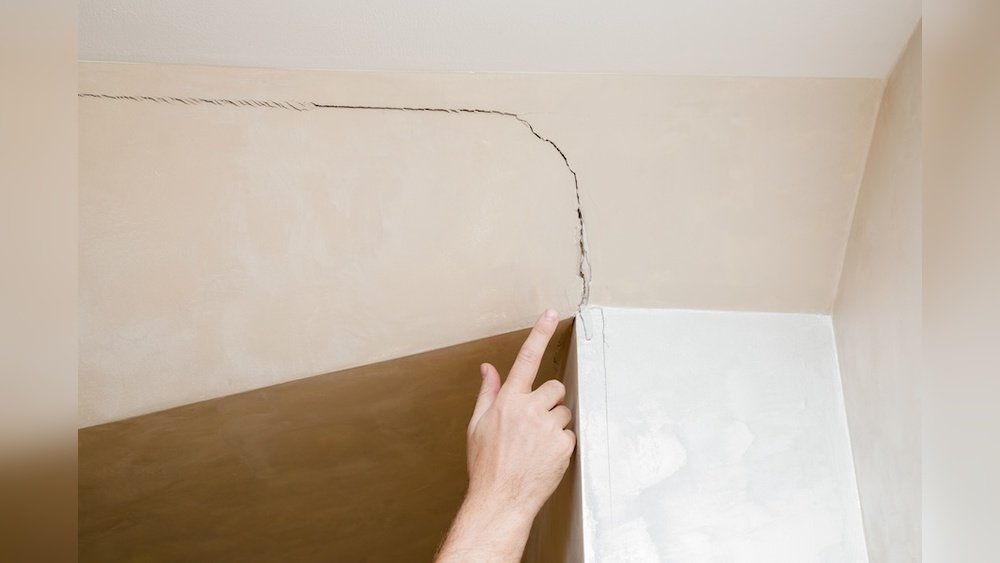
A hairline fracture spiderwebbing across your living room ceiling can be alarming. While often minor, ceiling cracks can sometimes signal underlying structural issues that require immediate attention. Understanding the various causes, from simple settling to more serious water damage or foundation problems, is crucial for homeowners. This article will guide you through identifying different types of cracks, pinpointing their origins, and implementing the most effective solutions to restore the integrity and appearance of your ceiling.
Key Takeaways
- Settling and drying of building materials are the most common causes of hairline cracks, particularly in newer homes.
- Temperature fluctuations can cause materials to expand and contract, leading to stress and cracking.
- Water damage from leaks in plumbing, roofs, or bathrooms is a serious cause that requires immediate repair of the source and the ceiling.
- Foundation movement is a significant structural issue that manifests as larger, often diagonal or stair-step cracks.
- Poor installation of drywall or joint compound can lead to cracks along seams.
- Simple hairline cracks can often be repaired with spackling and paint, while larger or structural cracks require professional assessment and repair.
- Regular home maintenance and prompt attention to small issues can prevent minor cracks from becoming major problems.

Credit: dailyideabook.com
Common Causes Of Ceiling Cracks
Ceiling cracks are a prevalent issue in homes, ranging from minor cosmetic imperfections to indicators of more significant structural concerns. Understanding the root cause is the first step toward an effective and lasting solution. The materials used in home construction, environmental factors, and the age of the building all play a role in their formation.
Natural Settling And Drying
One of the most frequent culprits behind ceiling cracks is the natural settling and drying of a house. This is especially true for newly constructed homes. As wood framing dries out over time, it shrinks. This shrinkage can cause minute shifts in the building’s structure, leading to stress on the drywall and the joint compound used to finish the seams. These cracks typically appear as fine, hairline fractures, often along the drywall seams or around light fixtures. They are usually not indicative of a serious problem and are considered a normal part of a home’s aging process.
Temperature And Humidity Fluctuations
Buildings are constantly subjected to changes in temperature and humidity. Materials like wood, drywall, and even concrete expand when warm and humid, and contract when cold and dry. This constant cycle of expansion and contraction puts stress on the building’s components. Over time, this repeated stress can cause materials to crack, especially at points where different materials meet or where there are existing weak spots. In attics, extreme temperature swings can also affect the structural integrity of the joists and beams, indirectly causing ceiling stress.
Structural Movement And Foundation Issues
More concerning causes of ceiling cracks involve structural movement, often stemming from issues with the home’s foundation. If a foundation settles unevenly, it can cause significant stress to propagate upwards through the walls and into the ceiling. These cracks are typically larger, wider, and may appear in patterns that indicate a larger problem. Diagonal cracks that run from a corner of a window or door frame upwards towards the ceiling, or stair-step cracks in masonry walls, are often signs of foundation settlement. These types of cracks require immediate professional assessment by a structural engineer or foundation repair specialist.
Water Damage And Leaks
Water damage is another common and potentially serious cause of ceiling cracks. Leaks can originate from various sources:
- Roof leaks: Damaged shingles, flashing, or ice dams can allow water to penetrate the attic and drip onto the ceiling drywall.
- Plumbing leaks: Leaky pipes within the ceiling cavity, often above bathrooms or kitchens, can saturate the drywall, causing it to sag and crack.
- Condensation: In humid environments, condensation can form on pipes or ductwork, leading to moisture buildup.
- Overflows: Bathtub or sink overflows from an upper floor can seep through to the ceiling below.
Water-damaged drywall becomes soft, weak, and discolored. It may initially sag, forming a bulge, before eventually cracking and even collapsing. Addressing the source of the leak is paramount before any ceiling repairs can be made.
Poor Installation Or Material Defects
Sometimes, cracks are the result of improper installation techniques or defective materials.
- Drywall seams: If drywall panels are not properly supported, taped, or if the joint compound is applied too thinly or too thickly, cracks can form along the seams as the house settles or experiences minor vibrations.
- Fasteners: Nails or screws used to attach drywall can sometimes loosen over time, especially if the wood framing shrinks. The slight movement around these fasteners can create small radiating cracks.
- Material quality: While less common, using low-quality joint compound or drywall that is damaged before installation can contribute to cracking issues.
Types Of Ceiling Cracks And What They Indicate
The appearance and location of a ceiling crack can offer valuable clues about its cause. Distinguishing between minor cosmetic issues and serious structural problems is essential for homeowners to determine the appropriate course of action.
Hairline Cracks
Hairline cracks are the most common type, appearing as thin, superficial lines on the ceiling surface. They are typically less than 1/16th of an inch wide and do not extend through the entire thickness of the drywall.
- Causes: Usually attributed to the normal settling of a house, minor temperature fluctuations, or the drying of new construction materials.
- Indication: Generally not a cause for alarm. They are often cosmetic and can be easily repaired.
- Appearance: Often appear along drywall seams, around light fixtures, or vents.
Spiderweb Cracks
Spiderweb cracks are a series of fine cracks radiating outwards from a central point, resembling a spider’s web.
- Causes: Often caused by a localized impact or stress point. This could be from something hitting the ceiling, or a fastener (like a nail or screw) that has popped loose and is causing stress around it. In some cases, they can also be an indicator of significant pressure being exerted on the ceiling from above, such as from heavy attic storage or water saturation.
- Indication: While often superficial, they warrant closer inspection to rule out underlying pressure or impact damage. If they are accompanied by sagging, water stains, or appear in conjunction with larger cracks, they could be part of a more significant issue.
Sagging And Bulging Cracks
When a section of the ceiling appears to sag or bulge downwards, often with a crack running through the lowest point, it’s a more serious concern.
- Causes: Almost always indicative of water damage. The drywall has become saturated, losing its rigidity and pulling away from the joists. The weight of the absorbed water causes the material to deform.
- Indication: Urgent attention is required. The source of the water leak must be identified and repaired immediately. The damaged drywall will likely need to be replaced entirely.
Diagonal Or Stair-step Cracks
Cracks that run diagonally across the ceiling, or form a stair-step pattern where they meet wall seams, are often linked to structural issues.
- Causes: Typically point to foundation settlement or structural shifting within the building’s frame. The uneven movement of the foundation puts immense stress on the entire structure, including the ceiling.
- Indication: These are serious structural concerns that require professional evaluation by a structural engineer. Ignoring these can lead to more extensive and costly damage over time.
Cracks Along Drywall Seams
Cracks that specifically run along the taped and finished seams between drywall panels are common.
- Causes: Can be due to inadequate taping during installation, shrinkage of the drywall or framing, or movement at the joint. If the tape is pulling away or bubbling, it often indicates moisture issues or poor adhesion.
- Indication: Often cosmetic, but if they are widening, accompanied by sagging, or if the tape is visibly failing, it might signal underlying moisture or movement issues.

Credit: www.handysquad.com
Solutions For Ceiling Cracks: From Diy To Professional Repair
The approach to fixing ceiling cracks varies significantly depending on the cause and severity. Minor cosmetic cracks can often be tackled by a handy homeowner, while more substantial issues require professional expertise.
Repairing Hairline And Minor Cracks (diy)
For superficial hairline cracks that are not associated with water damage or structural issues, a straightforward repair process can restore the ceiling’s appearance.
- Preparation:
- Clean the area: Wipe down the crack and surrounding area to remove dust and debris.
- Widen the crack slightly (optional but recommended): Using a putty knife or utility knife, lightly score along the crack. This creates a small V-groove that allows the filler to penetrate better and adhere more strongly.
- Sand lightly: If there are any loose paint flakes or rough edges, lightly sand the area.
- Applying Filler:
- Spackling compound or joint compound: For very fine cracks, a lightweight spackling compound is sufficient. For slightly wider cracks, a pre-mixed joint compound works well.
- Application: Using a flexible putty knife (a 3-4 inch wide one is ideal), apply the compound generously into the crack, pressing it in to ensure it fills the void.
- Smooth: Scrape off any excess compound, leaving a smooth, level surface that is flush with the ceiling. You may need to apply a second thin coat after the first has dried if there is any shrinkage.
- Sanding:
- Drying time: Allow the compound to dry completely according to the manufacturer’s instructions (this can take several hours).
- Sanding: Once dry, lightly sand the repaired area with fine-grit sandpaper (120-220 grit) until it is perfectly smooth and level with the surrounding ceiling. Be careful not to oversand, which can create a noticeable depression. Wipe away dust with a damp cloth.
- Priming and Painting:
- Prime: Apply a coat of ceiling primer over the repaired area. This seals the compound and ensures the paint adheres evenly.
- Paint: Once the primer is dry, paint the entire ceiling with your chosen ceiling paint, feathering the edges to blend the new paint with the old. You may need two coats for a seamless finish.
Addressing Water Damage And Leaks
When water damage is the cause, the repair process involves two critical stages: fixing the leak and repairing the ceiling.
- Identify and Repair the Leak: This is the absolute first priority.
- Roof leaks: Inspect the attic for wet insulation, water stains on the underside of the roof decking, or visible damage to shingles or flashing. Repair or replace damaged roofing materials.
- Plumbing leaks: Check pipes in the attic, basement, or wall cavities for drips or corrosion. Tighten fittings, replace damaged sections of pipe, or address faulty seals.
- Bathroom/kitchen leaks: Inspect grout, caulk, and seals around tubs, showers, sinks, and toilets. Check for leaks in supply lines or drain pipes.
- Professional Help: For complex plumbing or roofing issues, always call a qualified professional (plumber or roofer).
- Dry the Area: Ensure the affected ceiling area and any saturated materials (like insulation) are completely dry before proceeding with repairs. This may involve using fans and dehumidifiers for several days. If mold is present, it must be treated and remediated by professionals.
- Repair the Ceiling:
- Remove damaged material: Cut away the wet, sagging, or cracked drywall. You may need to replace a large section depending on the extent of the damage.
- Inspect joists: Check the ceiling joists for rot or damage. Treat or repair as necessary.
- Install new drywall: Cut and fit a new piece of drywall to replace the removed section. Secure it to the joists with drywall screws.
- Tape, mud, and sand: Apply drywall tape over the seams, followed by multiple thin coats of joint compound, sanding between each coat.
- Prime and paint: Once the joint compound is dry and smooth, prime and paint the repaired area to match the rest of the ceiling.
Dealing With Structural Cracks And Foundation Issues
Cracks indicating foundation movement or significant structural stress are the most serious and require expert intervention.
- Professional Assessment:
- Structural Engineer: The first step is to hire a structural engineer. They can assess the extent of the structural problem, determine the cause (e.g., soil instability, poor drainage, inadequate support), and recommend the appropriate repair methods.
- Foundation Repair Specialist: Based on the engineer’s report, a reputable foundation repair company can implement the necessary solutions.
- Potential Solutions (depending on assessment):
- Foundation Underpinning: Installing piers or piles to transfer the building’s load to more stable soil layers.
- Concrete Repair: Injecting epoxy or polyurethane into cracks in the foundation walls or slab.
- Drainage Improvements: Regrading the soil around the foundation, installing French drains, or improving gutter systems to direct water away from the house.
- Reinforcement: Adding steel beams or carbon fiber straps to reinforce weakened structural elements.
- Ceiling Repair Post-Structural Fix:
- Once the underlying structural issue is resolved and the building has stabilized, the ceiling cracks can be repaired using the methods described for minor cracks (filling, sanding, priming, painting).
- However, if the structural movement was significant, larger sections of drywall may need to be replaced, and the finishing process might be more extensive to ensure a smooth, seamless repair.
Drywall Seam And Fastener Issues
Cracks specifically along drywall seams or around fasteners often relate to installation quality or material movement.
- Re-taping seams: If tape is peeling or cracking, carefully remove the old tape and joint compound. Re-tape the seam using drywall tape (paper or fiberglass mesh) and apply multiple thin coats of joint compound, feathering the edges smoothly. Sand and paint as usual.
- Popped fasteners: If screws or nails have backed out, drive them back in slightly below the surface of the drywall. Apply joint compound over the fastener heads, feathering the edges. Sand and paint once dry. In some cases, it might be necessary to re-secure the drywall to the joists.
- Using mesh tape: For areas prone to movement, consider using fiberglass mesh tape, which is self-adhesive and can be more flexible than paper tape.

Credit: www.crackedslab.com
Maintaining Your Ceilings To Prevent Future Cracks
Preventive maintenance is key to minimizing the occurrence and severity of ceiling cracks. Regular checks and timely interventions can save homeowners significant cost and hassle down the line.
Regular Inspections
- Scheduled checks: Make it a habit to inspect your ceilings at least twice a year, perhaps during spring and fall cleaning. Pay close attention to areas prone to issues, such as bathrooms, kitchens, attics, and areas around chimneys or vents.
- Look for early signs: Be vigilant for any new hairline cracks, slight discoloration, or minor sagging. Addressing these small issues early is far easier and cheaper than waiting for them to worsen.
- Attic inspections: Regularly check your attic for signs of leaks, moisture, or condensation. Ensure proper ventilation is in place to prevent moisture buildup. Check that insulation isn’t blocking vents.
Managing Moisture And Humidity
- Ventilation: Ensure bathrooms and kitchens are equipped with working exhaust fans that vent *outside* the house. Run them during and for at least 15-20 minutes after showering or cooking to remove excess moisture.
- Attic ventilation: Proper attic ventilation (soffit vents, ridge vents, gable vents) is crucial for regulating temperature and preventing moisture buildup, which can lead to condensation and rot.
- Humidity control: In very humid climates, consider using a dehumidifier in the attic or basement, and ensure your home’s overall humidity levels are kept within a comfortable range (typically 30-50%).
- Fix leaks promptly: Immediately address any plumbing leaks, roof issues, or condensation problems. Don’t let small drips go unnoticed.
Addressing Temperature Extremes
- Insulation: Ensure your attic and walls are adequately insulated. Proper insulation helps regulate indoor temperatures, reducing the expansion and contraction cycles that stress building materials.
- Draft sealing: Seal air leaks around windows, doors, and electrical outlets to prevent drafts and maintain consistent indoor temperatures.
Load Management In Attics
- Avoid overloading: Be mindful of the weight you store in your attic. Excessive weight can put undue stress on ceiling joists, potentially leading to sagging or cracking. Consult your home’s building plans or a structural engineer if you plan on significant storage or renovations in the attic.
- Distribute weight: If storing items, distribute the weight evenly across the joists rather than concentrating it in one area.
Professional Maintenance
- Roof checks: Have your roof inspected periodically by a professional, especially after severe weather events.
- Gutter cleaning: Keep gutters clean and ensure they are properly directing water away from the foundation.
- HVAC servicing: Regular maintenance of your heating, ventilation, and air conditioning (HVAC) system can help prevent leaks or condensation issues related to ductwork.
When To Call A Professional
While many minor ceiling cracks can be a DIY fix, knowing when to escalate the issue to a professional is crucial for your home’s safety and integrity.
Signs You Need Professional Help
- Widespread cracking: If you notice numerous cracks appearing across multiple rooms or ceilings simultaneously.
- Large or widening cracks: Cracks wider than 1/4 inch, or those that are visibly getting larger over time, often indicate a more serious underlying issue.
- Sagging or bulging ceilings: Any visible downward bowing of the ceiling material is a strong indicator of water damage or structural stress that needs immediate professional attention.
- Diagonal or stair-step cracks: These patterns are classic signs of foundation settlement or structural movement.
- Water stains or active leaks: If you see brown stains, or if water is actively dripping from the ceiling, it signifies a leak that must be professionally diagnosed and repaired before any cosmetic fixes are attempted.
- Sound issues: If you hear creaking or popping sounds from the ceiling area that seem excessive or new.
- Lack of confidence: If you are unsure about the cause or the appropriate repair method, it’s always best to consult a professional to avoid making the problem worse.
Types Of Professionals To Contact
- General Contractor: For general repairs, especially after water damage has been addressed, a contractor can manage the drywall repair, painting, and finishing.
- Plumber: Essential for diagnosing and repairing leaks originating from plumbing systems.
- Roofer: Necessary for investigating and fixing leaks originating from the roof.
- Structural Engineer: The go-to professional for assessing foundation issues, significant structural movement, or any crack that raises concerns about the building’s integrity.
- Foundation Repair Specialist: Companies specializing in foundation repair implement the solutions recommended by structural engineers.
A proactive approach, coupled with prompt professional intervention when needed, is the most effective strategy for managing ceiling cracks and maintaining a safe, beautiful home.
Frequently Asked Questions
What Is The Difference Between A Cosmetic Crack And A Structural Crack?
Cosmetic cracks are typically fine, hairline fractures that appear on the surface of the paint or drywall finish. They are usually caused by normal settling, minor temperature fluctuations, or the drying of building materials. These cracks do not affect the structural integrity of the house and can often be repaired with simple filling and painting.
Structural cracks, on the other hand, are usually wider, deeper, and may appear in patterns like diagonal lines or stair-steps, particularly where ceilings meet walls or around openings. They often indicate underlying issues such as foundation settlement, water damage compromising structural elements, or significant stress on the building’s frame.
These require professional assessment and repair.
How Quickly Should I Address A Ceiling Crack?
The urgency depends on the type of crack. For hairline cracks that appear dry and stable, you can typically schedule a repair at your convenience. However, any crack associated with water damage (indicated by discoloration, sagging, or active leaks) requires immediate attention. You must first address the source of the leak. Cracks that are wide, deepening, or show diagonal/stair-step patterns should be inspected by a professional structural engineer or foundation specialist as soon as possible, as they can signal serious safety concerns.
Can Minor Ceiling Cracks Be Caused By Vibrations?
Yes, minor vibrations can contribute to the formation or worsening of hairline cracks, especially in drywall seams. Common sources of vibrations include heavy traffic near the home, construction work nearby, or even the operation of large appliances within the home. These vibrations can cause slight movements in the building’s structure, which can stress the drywall and joint compound, leading to superficial cracks, particularly along taped seams where the compound might be less flexible.
Is It Safe To Sleep Under A Ceiling With Cracks?
It is generally safe to sleep under a ceiling with minor, dry hairline cracks, especially if they are not accompanied by sagging or water stains. These are typically cosmetic. However, if the crack is wide, actively widening, accompanied by sagging or bulging, or shows signs of water damage, it is advisable to avoid the area directly underneath until it has been professionally inspected and deemed safe. A sagging ceiling indicates a potential for collapse, which poses a significant safety risk.
How Much Does It Typically Cost To Repair Ceiling Cracks?
The cost of repairing ceiling cracks varies widely based on the cause, size, and method of repair.
- DIY Repair: For simple hairline cracks, the cost is