
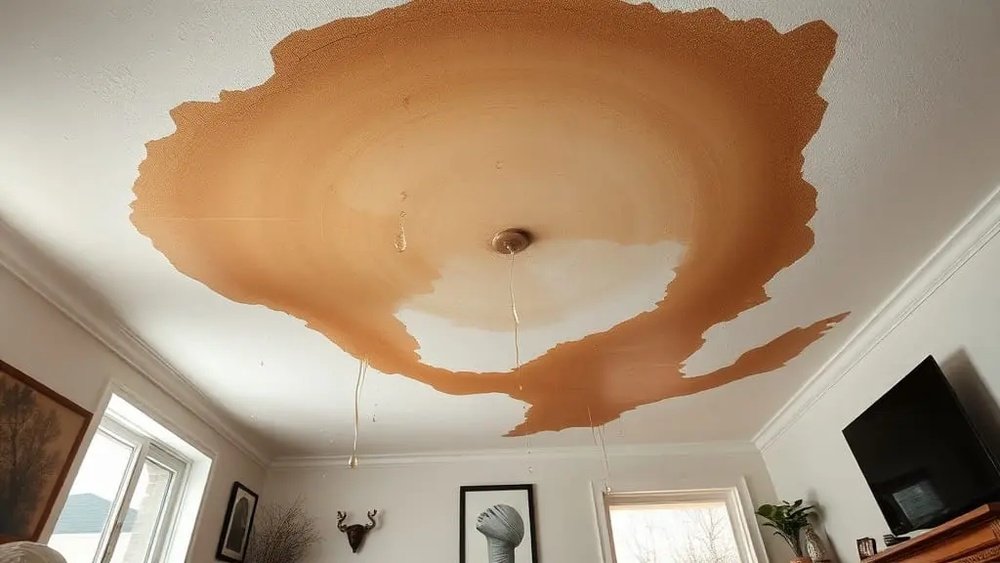
The sight of plaster crumbling and falling from your walls can be alarming. It’s not just an aesthetic issue; it can indicate underlying structural problems or moisture damage that, if left unaddressed, could lead to more significant and costly repairs.
Understanding the common causes behind this deterioration is the first step toward protecting your home’s integrity and maintaining its value.
From the subtle creep of dampness to the more dramatic effects of settlement, various factors can compromise the bond between plaster and the underlying substrate. Identifying these culprits requires a keen eye and a systematic approach, often involving a close examination of the affected areas and the surrounding environment.
This guide aims to equip you with the knowledge to diagnose why your plaster is falling off and what steps you can take to rectify the situation.
Key Takeaways
- Moisture is a primary culprit: Water ingress from leaks, high humidity, or rising damp weakens plaster and its bond.
- Settlement and structural movement can cause cracks and plaster detachment due to shifting foundations or building stress.
- Poor original workmanship or using the wrong materials during installation can lead to premature failure.
- Age and wear and tear naturally degrade plaster over time, especially in older properties.
- Impact damage from accidental knocks can dislodge plaster.
- Temperature fluctuations can cause expansion and contraction, stressing the plaster.
- Identifying the root cause is crucial for effective and lasting repair.
Understanding Wall Plaster And Its Vulnerabilities
Plaster, traditionally a mix of lime or gypsum, sand, and water, is applied in layers to create a smooth, durable surface for walls and ceilings. It acts as a protective coating and a base for decorative finishes like paint or wallpaper.
However, plaster is porous and susceptible to a range of environmental and structural stresses. Its strength lies not only in its composition but also in its adhesion to the lath or masonry substrate behind it. When this bond weakens or the plaster itself degrades, it can begin to crack, blister, and eventually fall away.
The substrate plays a significant role. Older homes often feature lath and plaster, where plaster is applied over thin wooden strips (laths). This system allows for some flexibility but can be prone to issues if the wood rots or shrinks.
Modern plasterboard (drywall) construction offers a different set of potential vulnerabilities, primarily related to the joints between boards or damage to the board itself. Regardless of the construction method, understanding the common failure points is key to diagnosis.

Credit: www.damp-solutions.com
Common Causes Of Falling Plaster
The reasons behind plaster falling off are diverse, ranging from environmental factors to construction defects. A thorough inspection often reveals tell-tale signs pointing to the specific issue at hand.
Moisture Intrusion: The Silent Destroyer
Water is arguably the most common and insidious cause of plaster failure. Its presence can manifest in several ways, each with its own set of symptoms and origins.
Leaking Pipes And Roofs
Plumbing leaks, whether from aging pipes within walls or faulty fixtures, can saturate the plaster and underlying materials. This constant dampness weakens the plaster’s structure and its bond to the substrate. Look for:
- Discoloured patches: Often brown or yellowish, indicating water staining.
- Blistering or bubbling: The moisture trapped behind the plaster can cause it to lift and bubble.
- Soft or crumbly plaster: When wet, plaster loses its rigidity.
- Musty odours: A persistent damp smell can signal hidden water issues.
Similarly, roof leaks that penetrate the ceiling or walls can introduce significant amounts of water. Even small, persistent drips can cause gradual damage over time, leading to plaster detachment, especially at the ceiling-to-wall junctions or around windows and doors where water might track down.
High Humidity And Condensation
Excessive moisture in the air, particularly in bathrooms, kitchens, and poorly ventilated basements, can lead to condensation on walls and ceilings. This moisture can be absorbed by the plaster, especially if it’s not adequately sealed or painted. Over time, repeated cycles of dampness and drying can degrade the plaster.
- Symptoms: Similar to minor leaks, but often more widespread and less localized. You might notice a general dampness, peeling wallpaper, or mould growth.
- Mitigation: Improving ventilation, using extractor fans, and ensuring proper insulation can help reduce condensation.
Rising Damp And Penetrating Damp
Rising damp is a phenomenon where groundwater is absorbed by porous building materials (like brick or stone foundations) and travels upwards through capillary action. This moisture can reach the plaster layer, causing it to decay and fall. It typically affects the lower sections of walls, usually up to about 1 meter in height.
Penetrating damp occurs when external water (rain, snowmelt) finds its way through the building fabric. This can be due to damaged render, cracked brickwork, faulty pointing, or poorly sealed window and door frames. It can appear at any height on a wall, depending on the source of the ingress.
Structural Movement And Settlement
Buildings are not static. They experience minor movements due to temperature changes, soil conditions, and the natural aging process. However, significant structural movement or settlement can exert considerable stress on plasterwork.
Foundation Issues
If a building’s foundations settle unevenly, it can cause the entire structure to shift. This movement translates into stress on the walls, leading to cracks that often start small but can widen over time. As the plaster is rigid, it cannot accommodate this movement and will crack and eventually detach from the substrate.
Expansion And Contraction Of Building Materials
Wood, metal, and even masonry expand and contract with changes in temperature and humidity. In lath and plaster systems, the wooden laths can shrink or swell, creating stress on the plaster applied over them. If the plaster is too brittle or the movement is too extreme, it can crack and fall.
Poor Installation And Material Defects
The quality of the initial plastering job significantly impacts its longevity. Several issues related to installation and materials can lead to premature failure.
Inadequate Substrate Preparation
If the lath or masonry surface is not properly prepared before plastering, adhesion can be compromised. For example, applying plaster over dusty, greasy, or excessively smooth surfaces can prevent a strong bond.
- Lath and Plaster Specifics: Insufficient “key”, the plaster needs to key into the gaps between laths for mechanical strength. If the plaster is applied too thinly or doesn’t fully embed the laths, it’s more prone to detaching.
Incorrect Material Mix
The ratio of ingredients (lime/gypsum, sand, water) in the plaster mix is crucial. An incorrect mix can result in plaster that is too weak, too brittle, or dries too quickly, leading to cracking and poor adhesion.
- Modern Plasters: Using inappropriate types of plaster for certain substrates (e.g., a highly cementitious render on an old, breathable lime-plastered wall) can trap moisture or create differential movement, causing failure.
Insufficient Drying Time
Allowing plaster to dry too quickly, perhaps due to excessive heat or drafts, can cause it to shrink unevenly and crack. Conversely, not allowing enough time for initial setting before applying subsequent coats can lead to delamination.
Age And General Wear And Tear
Like any building material, plaster deteriorates over time. In older properties, particularly those with traditional lime plaster, the material itself can become brittle and lose its strength.
- Natural Degradation: Over decades, plaster can become more susceptible to minor impacts, vibrations, and environmental changes.
- Vibrations: Proximity to heavy traffic or construction work can cause vibrations that, over time, can loosen plaster, especially if it’s already weakened by other factors.
Impact Damage
Direct physical impact is a straightforward cause of plaster falling off. A hard knock from furniture, a dropped tool, or even a ball can dislodge plaster, creating chips or larger sections that break away.
- Minor Impacts: Even seemingly minor impacts can create hairline cracks that, if not repaired, can allow moisture ingress and exacerbate the damage.

Credit: britishdampproofing.co.uk
Diagnosing The Cause: A Step-by-step Approach
Identifying why your plaster is falling off requires careful observation. Start by examining the affected area and its surroundings.
1. Assess The Location And Pattern Of Failure
- Lower Walls: Often points to rising damp or penetrating damp from ground level.
- Upper Walls/Ceilings: Suggests roof leaks, plumbing leaks in upper floors, or condensation issues.
- Around Windows/Doors: Can indicate issues with seals, frames, or penetrating damp.
- Corners and Edges: Prone to stress from structural movement or thermal expansion/contraction.
- Widespread vs. Localized: Widespread issues might point to general humidity or systemic problems, while localized patches suggest specific leaks or impacts.
2. Look For Signs Of Moisture
- Water Stains: Check for discolouration on the plaster or paint.
- Damp Patches: Feel the wall for cold, damp spots.
- Mould Growth: Black or green mould often thrives in damp conditions.
- Peeling Wallpaper: Moisture trapped behind wallpaper can cause it to lift.
- Musty Odours: A persistent smell of dampness is a strong indicator.
3. Examine The Substrate (if Possible)
If a piece of plaster has fallen off, try to examine the underlying surface.
- Lath and Plaster: Are the wooden laths intact? Do they appear rotten or excessively warped? Is there evidence of old repairs?
- Masonry: Is the brickwork or stonework damp? Is the mortar crumbling?
4. Consider The Building’s Age And History
Older homes are more prone to issues like rising damp, lime plaster degradation, and settlement. Recent renovations or changes to the building’s surroundings (e. g. , new paving, landscaping) could also be contributing factors.
5. Test For Soundness
Gently tap the plaster surface with a knuckle or a small rubber mallet.
- Hollow Sound: A hollow or drumming sound often indicates that the plaster has lost its bond with the substrate behind it, even if it hasn’t visibly fallen off yet. This is a critical warning sign.
- Solid Sound: A solid, consistent sound suggests the plaster is still well-adhered.

Credit: www.reddit.com
Common Scenarios And Their Solutions
Let’s explore typical situations where plaster falls off and the recommended remedies.
Scenario 1: Damp Patches And Crumbling Plaster At The Base Of Walls
- Likely Cause: Rising damp.
- Diagnosis: The dampness is confined to the lower section of the wall, typically below 1 meter. The plaster may feel soft and crumbly. You might see a tide mark or efflorescence (white, powdery salt deposits).
- Solution:
- Identify the Source: Confirm it’s rising damp and not just penetrating damp from a faulty external render.
- Install a Damp-Proof Course (DPC): This is the most effective long-term solution. It involves injecting a water-repellent cream or creating a physical barrier into the wall to stop moisture rising. This is a specialist job.
- Renew Plaster: Once the rising damp is treated, the affected plaster must be removed back to the brickwork. It’s crucial to use a salt-retardant plaster mix, as salts within the wall can continue to draw moisture from the air, even after the DPC is installed. Avoid standard gypsum plasters. Lime-based or sand-cement renders with appropriate additives are often recommended.
- Ventilation: Ensure good air circulation around the base of the wall.
Scenario 2: Blistering And Falling Plaster After Heavy Rain
- Likely Cause: Penetrating damp.
- Diagnosis: Damp patches and blistering appear after rainfall, often following cracks in external render, faulty pointing, or damaged gutters and downpipes. The issue might be localized to a specific area.
- Solution:
- External Inspection: Thoroughly inspect the exterior of the affected wall. Look for:
- Cracked or missing render.
- Damaged brickwork or crumbling mortar joints.
- Blocked or leaking gutters and downpipes.
- Faulty window or door seals.
- Issues with external pipework.
- Repair External Issues: Address the source of the water ingress. This might involve repointing brickwork, repairing render, cleaning gutters, or replacing seals.
- Internal Repair: Once the external source is fixed and the wall has dried, remove the damaged plaster. Allow the wall to dry thoroughly before replastering. Use a suitable plaster mix, ensuring good adhesion.
Scenario 3: Hollow-sounding Plaster And Hairline Cracks
- Likely Cause: Structural movement or age-related degradation.
- Diagnosis: Tapping the wall reveals a hollow sound, indicating a loss of adhesion. Hairline cracks may be visible, and small pieces of plaster might be flaking off. This is common in older lath and plaster ceilings and walls.
- Solution:
- Minor Cracks: For very minor, stable cracks, you might attempt to re-adhere the plaster using a specialized bonding agent and filler. However, this is often a temporary fix.
- Significant Delamination: If the hollow sound is widespread or large sections are loose, the most reliable solution is to remove the failing plaster entirely.
- Lath and Plaster Repair: If the laths are sound, you can replaster over them. This involves applying a bonding agent, followed by a suitable plaster mix (often a multi-finish plaster). Ensure the plaster keys well into the laths.
- Plasterboard Overlay: Alternatively, for larger areas, you can fix new plasterboard directly over the existing lath and plaster (if it’s stable enough) or directly to battens if the old plaster is removed. The new plasterboard is then skimmed to create a smooth finish. This is often more cost-effective than traditional replastering.
- Structural Assessment: If the cracking is severe and suggests significant structural movement, consult a structural engineer to assess the building’s stability before undertaking plaster repairs.
Scenario 4: Plaster Falling Around New Openings Or After Vibrations
- Likely Cause: Impact damage or stress from new openings/vibrations.
- Diagnosis: Plaster has broken away around a new doorway, window, or following nearby construction work.
- Solution:
- Repair Damage: Remove all loose and damaged plaster back to a sound edge.
- Reinforce: If the damage is near an opening, ensure the surrounding structure (e.g., lintel, timber frame) is sound. You might need to install reinforcing mesh (like scrim tape) over the repaired area before applying the final coat of plaster to bridge any residual cracks and provide extra strength.
- Plastering: Apply a suitable plaster mix in layers, allowing each to dry partially before applying the next. Finish with a smooth skim coat.
Repairing And Preventing Future Issues
Once the root cause is addressed, the focus shifts to repairing the damage and implementing preventative measures.
The Repair Process: Beyond Simple Patching
While small patches can sometimes suffice for minor damage, larger areas of falling plaster often require more comprehensive repair.
- Remove Damaged Plaster: Carefully chip away all loose, crumbling, or delaminated plaster using a plasterer’s hawk, trowel, and hammer. Extend the removal area beyond the visibly damaged zone to ensure you reach sound plaster.
- Prepare the Substrate: Clean the exposed lath or masonry thoroughly. Remove dust, debris, and any signs of mould or rot. If dealing with damp, ensure the substrate is as dry as possible before proceeding. For lath and plaster, ensure the laths are sound. If they are rotten, they may need replacing.
- Apply Bonding Agent/Primer: Depending on the substrate, apply a suitable bonding agent (e.g., PVA for plasterboard or masonry) or a specific primer (e.g., salt-retardant primer for damp walls). This improves adhesion for the new plaster.
- Apply Base Coat (Scratch Coat/Brown Coat): Apply a thicker base coat of plaster. For lath and plaster, this coat needs to be pushed well into the gaps between the laths to create a strong mechanical key. This coat should be slightly under the level of the surrounding good plaster.
- Allow to Dry: Let the base coat dry sufficiently. The drying time will vary depending on the plaster type, thickness, and environmental conditions.
- Apply Top Coat (Skim Coat): Apply a thinner finishing coat (skim coat) to achieve a smooth, level surface ready for decoration. This coat is applied slightly proud to match the level of the existing plaster.
- Curing and Decoration: Allow the final coat to cure fully (this can take several weeks for thicker applications) before decorating. Ensure any underlying damp issues are fully resolved before painting or wallpapering.
Preventing Future Plaster Failure
Proactive maintenance is key to avoiding recurring plaster problems.
- Maintain Gutters and Downpipes: Regularly clean and repair your guttering system to prevent water overflow and wall saturation.
- Check External Finishes: Inspect render, pointing, and seals around windows and doors annually for cracks or damage and repair promptly.
- Manage Indoor Humidity: Ensure adequate ventilation in bathrooms and kitchens. Use extractor fans and consider dehumidifiers in persistently damp areas.
- Monitor for Leaks: Address any plumbing drips or suspected leaks immediately.
- Address Settlement: If you notice significant or worsening cracks, consult a professional to assess the building’s structural integrity.
- Proper Decoration: Use breathable paints on older properties, especially those with lime plaster. Ensure wallpaper paste is suitable and applied correctly.
Comparison Of Plaster Repair Methods
Choosing the right repair method depends on the extent of the damage and the underlying cause. Here’s a comparison of common approaches:
| Method | Best For | Pros | Cons | Typical Cost Range (per sq m) |
|---|---|---|---|---|
| Patch Repair | Small, superficial cracks or chips | Quick, inexpensive, minimal disruption | May not address underlying issues, can be noticeable if not blended well | £50 – £150 |
| Full Wall/Ceiling Re-plastering (Lath & Plaster) | Extensive damage, delamination, rotten laths | Restores original finish, strong bond if done correctly | Labour-intensive, requires skilled tradesperson, can be costly | £100 – £250 |
| Plasterboard Overlay | Widespread damage, uneven surfaces, cost-effective alternative | Quick installation, creates a new, stable surface, good for covering imperfections | Reduces room size slightly, can mask underlying issues if not inspected first | £80 – £180 |
| Skim Coating Over Existing Plaster | Minor surface imperfections, hairline cracks (after addressing cause) | Fast, relatively inexpensive, smooth finish | Only suitable if the base plaster is sound and well-adhered | £40 – £100 |
*Note: Cost ranges are estimates and can vary significantly based on location, complexity, and tradesperson rates.*
When To Call A Professional
While minor plaster chips can sometimes be repaired by a competent DIYer, more significant issues warrant professional attention. You should call a professional if:
- The plaster failure is extensive or widespread.
- You suspect underlying damp issues (rising or penetrating).
- There are signs of significant structural movement or cracking.
- The affected area is a load-bearing wall or ceiling.
- You are dealing with lath and plaster and are unsure about the condition of the laths.
- You have attempted a DIY repair that has failed.
Professionals, such as plasterers, damp proofing specialists, or surveyors, have the expertise and tools to accurately diagnose the cause, recommend the most effective solution, and carry out the repairs to a high standard. For instance, a damp proofing specialist can conduct tests to confirm the source and extent of moisture problems, ensuring that any replastering is done with appropriate materials designed to cope with residual salts and moisture.
Data Insights On Building Material Failures
Building material failures, including plaster issues, are a significant concern in property maintenance. While specific statistics on “plaster falling off” are scarce, general data on building defects provides context. A report by the UK’s Building Research Establishment (BRE) has highlighted moisture-related issues as a leading cause of building defects, contributing to problems like decay, corrosion, and material degradation. For example, studies on domestic properties indicate that dampness affects a substantial percentage of homes, often stemming from issues like leaking pipes, condensation, and inadequate external maintenance.
Furthermore, the lifespan of traditional building materials can be a factor. Lime plaster, while breathable and flexible, may have a shorter effective lifespan compared to modern cementitious renders if not properly maintained or if subjected to conditions it wasn’t designed for.
Conversely, modern materials can fail if improperly applied or incompatible with older building structures. Understanding these broader trends underscores the importance of regular building inspections and prompt attention to any signs of deterioration.