
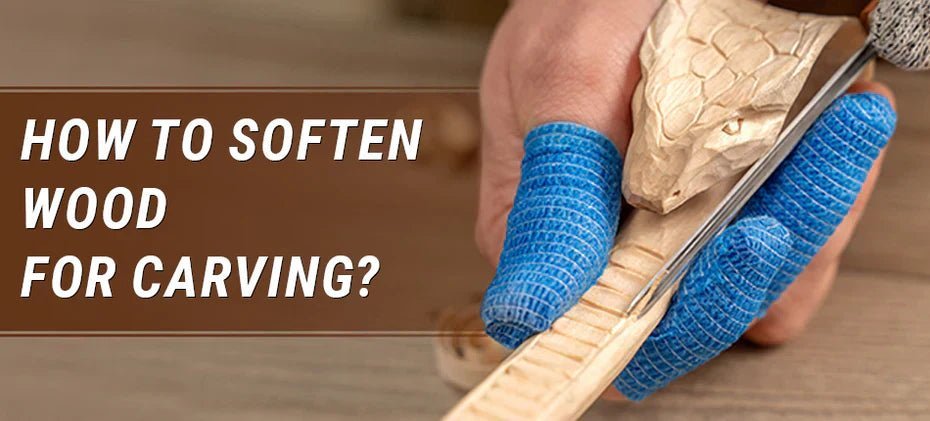
You can soften wood for carving by soaking it in a mixture of one part glycerin to four parts water for three to five days. This process helps the fibers become more pliable, which makes intricate details easier to cut without the material splitting. This guide explains the best soaking times, the safety steps you must take, and how to tell if your wood is ready for the blade.
How wood fibers soften for carving
Wood is a natural material that changes based on its moisture content. When you add water or a humectant like glycerin, you’re essentially replacing the air in the wood cells with a liquid that keeps the fibers flexible. This is used by carvers who work with dense or brittle hardwoods that would otherwise chip or crack under a sharp chisel.
Many people think that simply wetting the wood is enough, but water alone evaporates too quickly. If you don’t use a humectant, the wood will return to its original, hard state as it dries, which might cause it to warp or check. A consistent mixture ensures the wood remains workable for a longer period of time, allowing you to finish your project before the material hardens again.
Steps for Preparing Your Material
- Choose a container large enough to submerge your wood piece completely without it touching the sides.
- Mix one part vegetable-based glycerin with four parts warm water in the container.
- Place the wood in the liquid and weigh it down with a heavy, non-reactive object so it stays fully under the surface.
- Soak the wood for three to five days, depending on the thickness; a piece 1 inch thick usually needs the full five days.
- Remove the wood from the bath and wipe it dry with a clean cloth.
- Let it sit in a cool, shaded area for 24 hours to let the moisture even out through the grain.
If the wood feels greasy to the touch, you have used too much glycerin; wipe it down again with a damp cloth before you start. If you’re working with toxic or treated lumber, you must check the Environmental Protection Agency guidance on treated wood to ensure it’s safe to handle or carve. Never attempt to carve wood that has been treated with chemical preservatives, as dust from these materials can be harmful to your lungs.
Recommended Soaking Times and Ratios
The time required depends on the density of the species. Harder woods need longer soak times to ensure the glycerin penetrates the center.
| Wood Type | Mixture Ratio | Time Required | What to Watch For |
|---|---|---|---|
| Softwood (Pine) | 1:6 | 24 Hours | Rapid water absorption |
| Medium (Cherry) | 1:4 | 3 Days | Even moisture color |
| Hardwood (Oak) | 1:3 | 5-7 Days | Heavy weight gain |
| Green Wood | Water only | 0-2 Hours | Natural sap moisture |
If your wood piece exceeds two inches in thickness, add one full day to these soak times for every additional inch. Failing to account for depth leads to a brittle, untreated core that will crack once the exterior dries.
Use a simple displacement test to confirm saturation. If the wood floats high in the solution, it remains dry inside. Once the piece begins to sit just below the surface, the fibers are fully stabilized.
Avoid the common mistake of reusing a mixture that has turned cloudy or developed a film. This signals bacterial growth, which prevents proper absorption and leaves the wood prone to rot. If the liquid looks murky, discard it and mix a fresh batch to ensure consistent results.
Achieving Consistent Carving Results
Experience tells you that the secret is patience. If you rush the soaking process, the outside of the wood will be soft while the core remains hard. This leads to inconsistent cuts, where your tool moves smoothly one second and hits a hard, dense patch the next. Experienced carvers always weigh their wood before and after soaking; if the weight stops increasing, the wood has reached its saturation point.
You should also watch the grain direction carefully. Even when wood is softened, it still has a “preferred” direction for cutting. If you find your knife is digging in or tearing the fibers, stop immediately and reverse your direction. The goal is to slice through the fibers, not to pry them apart, which is a common mistake that ruins the surface finish of the carving.
Troubleshooting Common Carving Issues
If your wood isn’t behaving as expected, check these common signs to adjust your approach.
| What you notice | What it usually means | What to do first |
|---|---|---|
| Wood is too soft/mushy | Over-soaked or too much glycerin | Air dry for two days |
| Fuzzy surface finish | Dull blade or damp fibers | Sharpen your carving tool |
| Cracks appearing | Dried too fast | Wrap in a damp towel |
| Surface mold | Soaking water was dirty | Clean with a light bleach mix |
If you encounter fuzzy fibers despite a razor-sharp edge, stop carving immediately. This indicates the wood’s moisture content remains too high, causing fibers to bend rather than sever. Set the piece aside for 24 hours in a low-humidity area.
When cracks appear, you have likely moved the wood from a soaking bath to a dry room too abruptly. The outer layer shrinks faster than the core, tearing the grain. If the crack is under 2mm wide, a damp towel wrap can rehydrate the surface and close the gap.
Always use distilled water for soaking. Tap water contains minerals and organic matter that trigger mold growth within 48 hours. If you see dark spotting, scrub the surface with a 1:10 bleach solution before the rot penetrates the heartwood.
Safety and Environmental Standards
When you prepare wood for carving, you must follow basic safety rules to protect your health. Always wear a mask when carving, as even softened wood releases fine dust that can irritate your respiratory system. According to the Occupational Safety and Health Administration, you should ensure your workspace has proper ventilation to keep airborne particles at a minimum.
If you’re using glycerin, ensure it’s food-grade or cosmetic-grade. Never use industrial chemicals or unknown solvents to soften wood, as these can react poorly with your tools or your skin. If you’re unsure about the safety of a specific wood species, consult a local forestry office or a professional woodworker before you begin.
Avoid woods like yew or oleander, which contain potent toxins that remain active even after treatment. If you experience skin rashes or persistent coughing after handling a specific timber, stop immediately. These symptoms often indicate an allergic reaction to the wood’s natural oils rather than the softening agent.
Maintenance After the Job
Once your carving is complete, the wood will naturally lose its moisture over time. If you want to keep the wood from drying out completely and cracking, apply a light coat of boiled linseed oil or a furniture wax. This seals the surface and slows the rate of evaporation.
If the wood starts to feel brittle again, you can’t re-soak it once it has been finished with oil or varnish. If you need to store the wood for long periods, keep it in a plastic bag in a cool room to prevent it from drying out. You’ll know it’s time to re-oil the piece when the surface loses its luster and starts to look dull or thirsty.
When to Avoid This Method
This process isn’t for everyone. If you’re carving wood that will be used for food service, such as a spoon or bowl, don’t use glycerin as it can eventually go rancid or attract bacteria. Instead, use only warm water for a short soak or carve the wood while it’s still “green,” meaning it was recently cut from a living tree.
Additionally, if you’re making a structural piece that needs to be glued later, avoid glycerin. The oily residue prevents wood glue from bonding correctly, which will cause your joints to fail. For structural projects, use a simple water spray to dampen the surface just before you make your cuts, rather than soaking the entire piece.
Related guides
- How to Harden Wood Using Penetrating Epoxy Resin in 2026
- How Much Weight Can a Wood Closet Rod Hold Safely in 2026
- How to Stop Sap From Coming Out of Wood: Proven Fixes in 2026
Frequently asked questions
How long does softened wood stay soft?
The wood stays soft for two to four days after you remove it from the bath. As the moisture slowly evaporates, the wood will regain its original hardness. If you need to work on a large project for a longer time, keep the piece wrapped in a damp cloth between carving sessions.
Is it safe to carve wood soaked in glycerin?
Yes, it’s safe to carve wood treated with vegetable-based glycerin. It’s a non-toxic ingredient commonly found in soaps and lotions. However, you should still wear a dust mask while carving, as the fine wood particles themselves are the primary risk to your lungs, regardless of the softening agent used.
Can I soften wood without using glycerin?
Yes, you can use plain water for a similar effect, though it’s less effective for long-term flexibility. Simply submerge the wood in warm water for two to twelve hours. This is best for small, quick projects, but the wood will begin to harden as soon as it’s removed from the water.
What happens if I soak the wood for too long?
If you soak the wood for more than seven days, the fibers may start to break down or rot. This can make the wood punky, which means it will lose its strength and become crumbly when you try to carve it. Always monitor the wood daily and pull it out if the water starts to change color.
How do I stop the wood from molding during the soak?
You can prevent mold by adding a small amount of white vinegar to your water mixture. Change the soaking liquid if you notice any film forming on the surface or if the water becomes cloudy. Using a clean, non-porous plastic container will also help stop bacteria from growing during the process.
Does this method change the color of the wood?
Yes, soaking wood can cause some species to darken or stain, especially those containing natural tannins like oak or walnut. Always test a small scrap piece of the same wood species in your mixture first if the final color of your project is critical to your design.
Conclusion
Once your piece feels supple and ready, wipe away any excess moisture and let it sit for a few hours before you start. You’ll find that your tools glide through the grain much more smoothly than before. Grab your favorite chisel and enjoy the ease of shaping your next creative project.