
To seal burnt wood effectively, you must first remove the loose carbonized layer and then apply a finish that penetrates the fibers to prevent soot from transferring to your hands or clothing. Whether you’re working on a piece of Shou Sugi Ban furniture, a decorative art project, or reclaimed timber, the process requires careful surface preparation followed by the application of a compatible clear coat or oil-based sealer. By stabilizing the charred surface, you preserve the dramatic aesthetic of the carbon while ensuring the wood remains durable and clean for long-term use.
Key Takeaways

- Always remove excess soot with a soft nylon brush before applying any liquid sealer to prevent muddy streaks.
- Oil-based finishes, such as boiled linseed oil, typically provide better penetration into charred wood than water-based coatings.
- A spray-on lacquer or polyurethane is often the best choice for intricate textures where a brush might pull off too much carbon.
- Proper ventilation is essential when working with solvents or aerosol sealers to avoid inhaling volatile organic compounds.
- Test your chosen sealant on a scrap piece of the same wood species to ensure the final color and sheen meet your expectations.
How to Seal Burnt Wood Correctly
The process of sealing charred timber is primarily about managing the loose carbon particles that sit on the surface. If you attempt to brush or spray a finish directly onto a heavily charred piece without preparation, the soot will mix with the liquid, creating a dark, messy film that obscures the natural grain.
Start by using a stiff-bristled brush to remove the flaky, loose debris. Follow this with a soft-bristled brush to clean out the deeper grooves. Once the surface is stable, you can apply your chosen finish, which acts as a protective barrier against moisture and accidental smudging.
Preparation and Cleaning Steps
Before applying any product, the wood must be bone dry. Moisture trapped under a thick layer of sealer will eventually lead to peeling or mold growth. Use a vacuum with a HEPA filter to pull dust out of the crevices. Avoid using compressed air if possible, as it tends to blow fine carbon dust throughout your workspace.
If you must use compressed air, always wear an N95 respirator to protect your lungs from fine particulate matter. According to the OSHA safety guidelines for wood dust, minimizing airborne particles is critical for respiratory health during sanding or cleaning operations.
| Step | Action | Tool Required |
|---|---|---|
| 1 | Remove loose debris | Stiff nylon brush |
| 2 | Deep clean crevices | Vacuum with brush attachment |
| 3 | Final dust removal | Tack cloth |
| 4 | Apply base layer | Foam brush or sprayer |
| 5 | Cure and dry | Lint-free rags |
Choosing the Right Sealer Type
Selecting the correct sealer depends on the intended use of the item. For outdoor projects, you need a high-quality UV-resistant exterior finish. For indoor decorative items, a simple matte varnish or oil finish is usually sufficient. Avoid high-gloss finishes, as they tend to look unnatural on burnt wood and highlight any unevenness in the charring process. A matte finish or a satin sheen tends to complement the rustic, organic look of charred timber far better than a reflective, plastic-like coating.
Oil-Based Finishes vs. Lacquers
Oil-based finishes, such as tung oil or boiled linseed oil, penetrate the wood fibers deeply. They don’t leave a thick film on top, which makes them ideal for pieces that you want to touch or handle frequently. However, they don’t provide as much physical protection as a hard-shell lacquer. Lacquers and polyurethanes create a durable surface layer that’s excellent for high-traffic areas, but they can be difficult to touch up if they get scratched.
Tools and Materials List
To complete this project, you’ll need a specific set of tools. High-quality supplies will make the job much easier and ensure a professional result. Avoid cheap foam brushes that shed pieces into your finish, and always use high-quality applicators.
- Nylon scrub brushes (stiff and soft)
- HEPA-filtered vacuum
- Tack cloths
- Boiled linseed oil or tung oil
- Polyurethane spray (matte or satin)
- N95 respirator
- Nitrile gloves
Can You Use Spray Sealers?
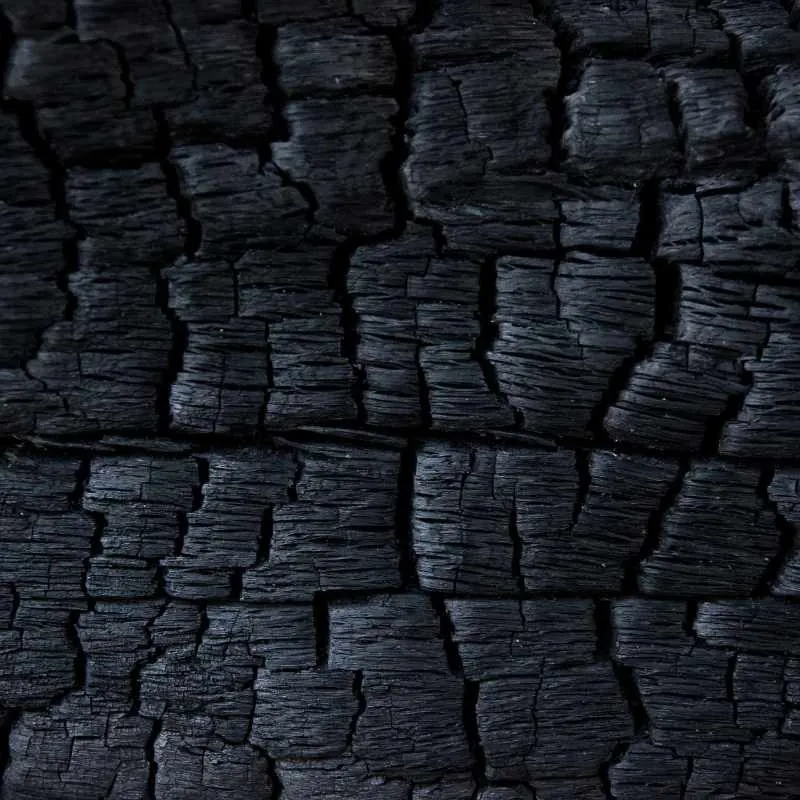
Yes, spray sealers are often the preferred method for sealing burnt wood. Because charred wood is highly textured, a brush can often snag on the burnt fibers, pulling them off and ruining the finish.
A spray-on product allows you to apply a thin, even layer without physically disturbing the fragile carbon surface. This is particularly helpful for delicate art pieces where maintaining the intricate patterns of the char is important. Always use a light dusting coat first, allow it to dry, and then follow with a second, heavier coat to ensure full coverage.
Managing the Charred Texture
The texture of burnt wood is its most defining feature. To keep it, you must be careful not to “over-seal” the piece. If you apply too much product, you’ll fill in the beautiful, deep ridges created by the fire, resulting in a flat, muddy appearance.
Apply your sealer in thin, buildable layers. If you’re using a liquid oil, wipe off the excess after 15 minutes. If you’re using a spray, keep the nozzle moving at all times to prevent pooling in the low spots of the wood grain.
Troubleshooting Common Finish Problems
Even with the best preparation, problems can arise. If you notice the finish looks cloudy, it’s likely due to trapped moisture. If the finish is peeling, the surface was likely not clean enough before application. A consistent surface is the key to a long-lasting finish.
| Issue | Potential Cause | Fix |
|---|---|---|
| Cloudy finish | Trapped moisture | Sand lightly and re-coat |
| Sticky surface | Over-application | Wipe with mineral spirits |
| Peeling finish | Dust contamination | Strip and clean thoroughly |
| Uneven sheen | Improper mixing | Stir product well before use |
How to Maintain Sealed Burnt Wood
Maintenance is relatively simple. Once the wood is sealed, it should be treated like any other piece of finished furniture. Dust it regularly with a dry cloth. If the surface is in an area that gets a lot of wear, you may need to apply a maintenance coat of oil or wax every few years.
Avoid harsh chemical cleaners, as these can break down the seal and cause the carbon underneath to begin flaking again. Use a mild soap and water solution if the piece requires a deeper cleaning.
Safety Precautions for Woodworking
Working with charred wood creates a significant amount of fine dust and soot. Always prioritize your safety by setting up your workspace in a well-ventilated area, preferably outdoors or in a garage with the door open. Use personal protective equipment consistently.
A dust mask is the absolute minimum requirement, but a respirator is better. Additionally, if you’re using oil-based finishes, be aware that the rags used to apply them can be a fire hazard. Always lay them flat to dry or store them in a water-filled metal container before disposal.
Best Practices for Professional Results
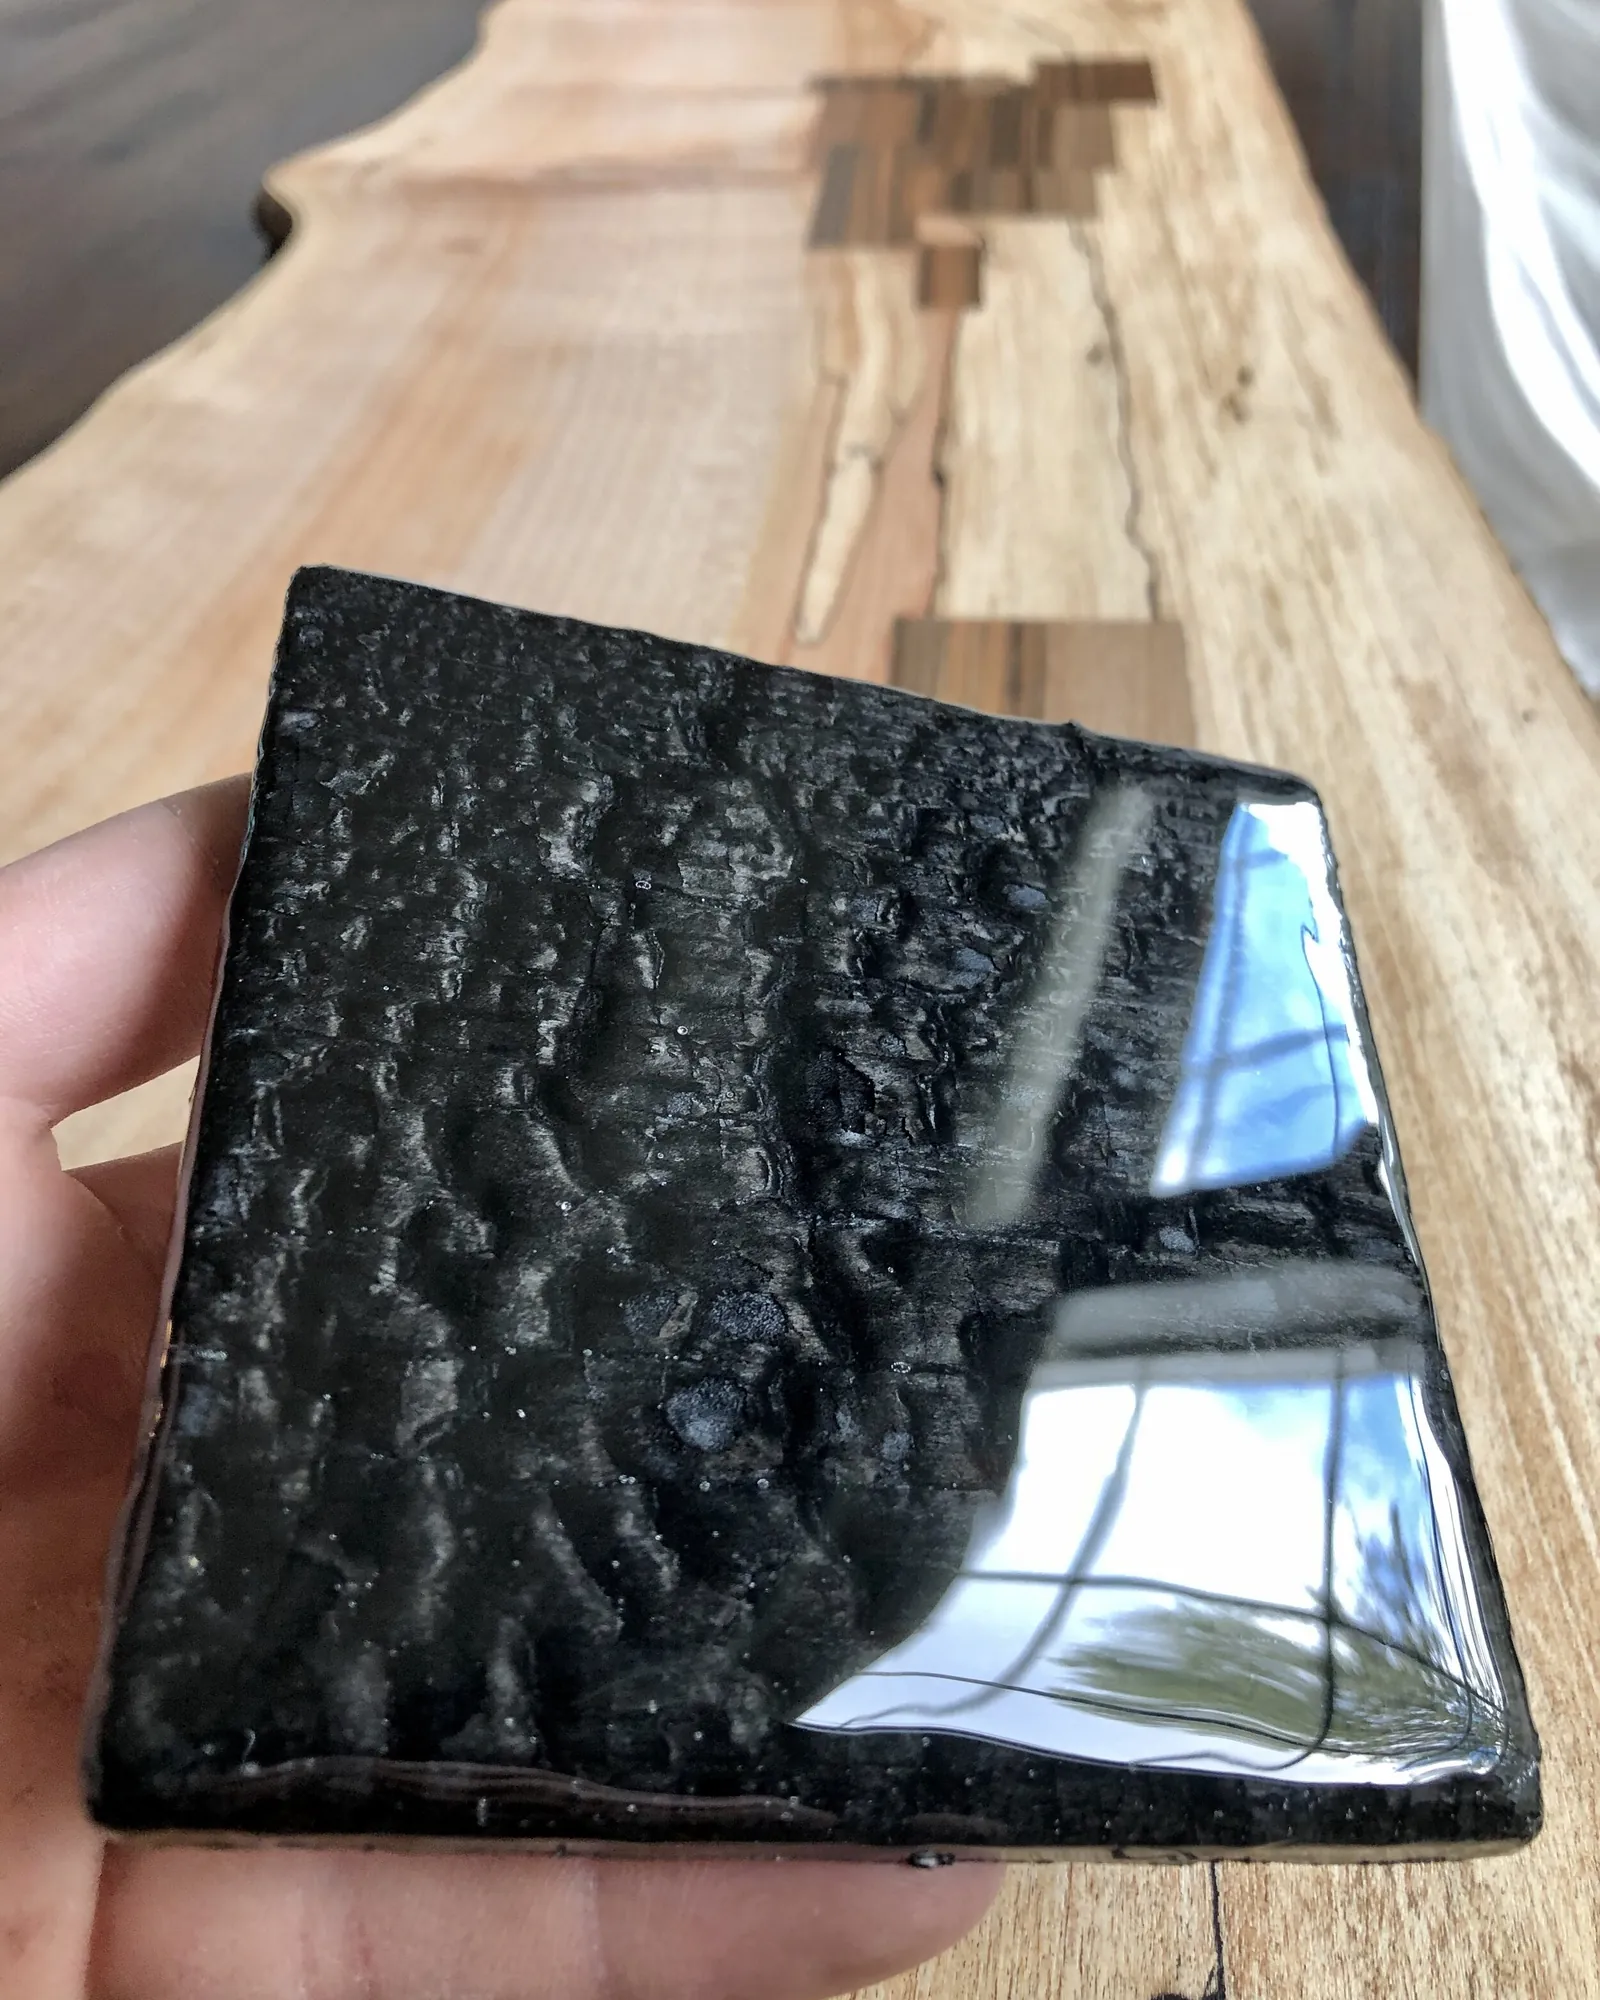
To achieve a result that looks like it was done by a master carpenter, focus on the details. Use high-quality sandpaper if you need to smooth out edges, but be careful not to remove the char entirely.
If you want to highlight the grain, you can lightly sand the high points of the burnt wood after the first coat of sealer has dried. This creates a stunning contrast between the dark, recessed areas and the lighter, natural wood highlights. It’s a technique that requires patience but produces a highly professional look.
Related guides
Frequently Asked Questions
Does sealing burnt wood stop the soot?
Yes, a proper sealer acts as a binder that locks the carbonized particles to the surface of the wood. Once the sealer has fully cured, the charred layer will no longer transfer onto your hands or clothing. You should ensure the surface is thoroughly cleaned of loose debris before application to guarantee the sealer adheres properly to the stable fibers beneath the char.
Can I use polyurethane on burnt wood?
You certainly can, and it’s an excellent choice for items that need high durability. A spray-on polyurethane is generally better than a brush-on version because it prevents the brush from snagging on the charred grain. Always choose a matte or satin finish to maintain the natural, rustic look of the wood, as high-gloss polyurethanes can often look artificial on charred surfaces.
Should I sand the wood before sealing?
You should lightly brush the wood to remove loose debris, but heavy sanding should be avoided if you want to keep the charred look. If you want to achieve a specific aesthetic, such as a two-tone effect, you can lightly sand the high spots after applying the first coat of sealer. This exposes some of the lighter wood grain while keeping the deep, dark char in the recessed areas.
How many coats of sealer do I need?
For most projects, two to three thin coats are sufficient. The goal is to create a protective barrier without filling in the texture of the wood. Always allow the manufacturer’s recommended drying time between coats. If you’re using an oil finish, you might find that the wood absorbs more on the first coat, so a third coat may be necessary to achieve a uniform appearance across the surface.
Is it safe to seal wood charred by a chemical fire?
No, you should never seal wood that has been charred by a chemical fire, electrical fire, or any fire involving plastics or unknown synthetic materials. These fires can leave behind toxic residues that may off-gas or continue to be harmful even after being sealed. Only apply sealers to wood that you’re certain was burned through a clean, natural wood-burning process.
Conclusion
Taking the time to properly prepare your charred wood ensures that your project remains beautiful and functional for years to come. Start by gently removing the loose soot, choosing the right finish for your specific item, and applying it in thin, controlled layers. With these steps completed, your next step is to select a high-quality, matte-finish spray or oil and perform a test on a small, inconspicuous area to confirm the desired look before finishing the entire piece.