
You can remove a screw with no head by using locking pliers or an extractor kit to create a new grip point on the remaining metal. This task typically takes 15 to 45 minutes depending on the metal hardness and screw depth. Patience is required to avoid damaging the surrounding material.
Gathering tools to remove the screw
| Item | How much | Why it’s needed | A substitute |
|---|---|---|---|
| Locking pliers | 1 pair | To grip the exposed metal | None — don’t swap this |
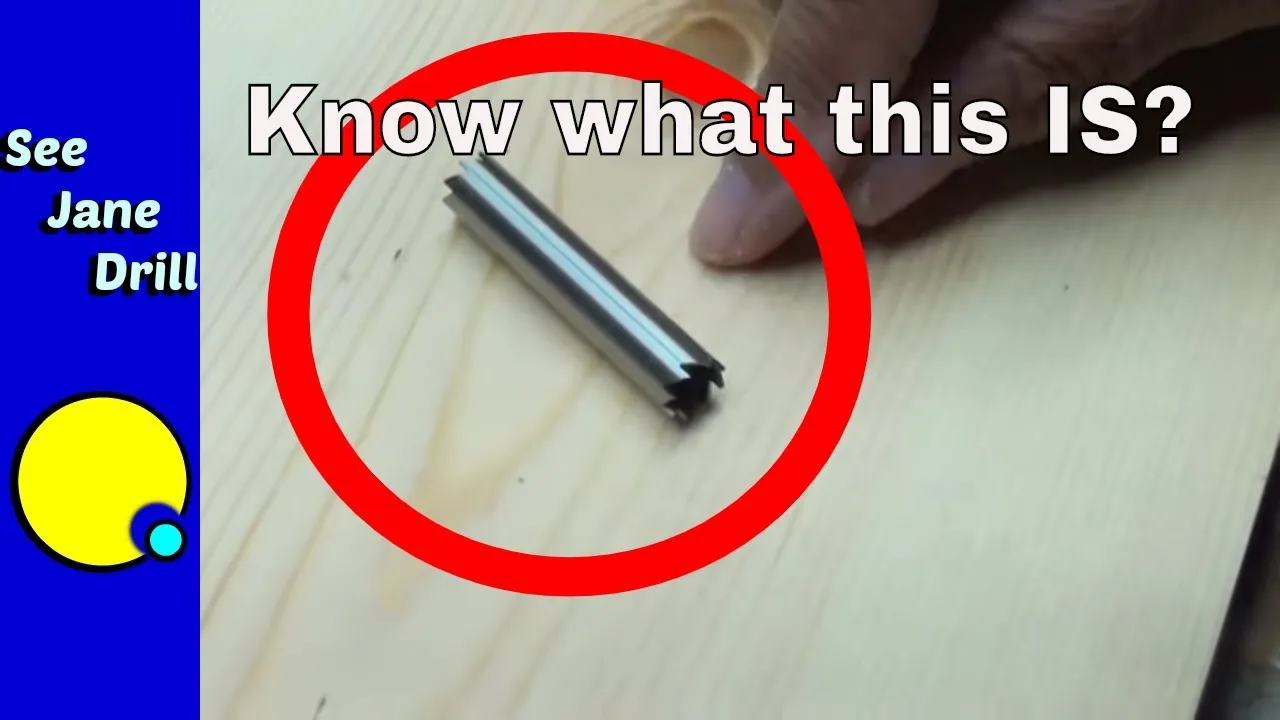
| Screw extractor | 1 set | To back out flush screws | Left-hand drill bits |
| Penetrating oil | 1 spray | To loosen rusted threads | None — don’t swap this |
| Electric drill | 1 unit | To create a pilot hole | Manual hand drill |
| Safety glasses | 1 pair | To protect your eyes | None — don’t swap this |
Choose a penetrating oil formulated specifically for seized hardware, such as those containing molybdenum disulfide. Generic lubricants often fail to break the molecular bond of oxidized steel. If the oil doesn’t seep into the threads within fifteen minutes, the rust may be too extensive for surface penetration. In that case, apply heat with a propane torch before attempting to turn the screw.
When selecting an extractor, opt for a square-tapered style over a spiral flute. Spiral extractors are prone to snapping inside the hole, which turns a simple repair into a permanent disaster. If the screw head is completely sheared off, use a center punch to create a divot before drilling. This prevents your bit from walking across the metal surface and damaging the surrounding material.
Always wear safety glasses during the drilling phase. Metal shards ejected at high speeds can easily penetrate soft tissue. If you wear prescription glasses, ensure they’re impact-resistant, as standard lenses can shatter upon contact with flying debris.
Preparation before you begin
Switch off and unplug any power tools or nearby electrical equipment that could be damaged by metal shavings or oil spray. Fine debris acts as a conductor, and a single stray filing can short out sensitive circuitry in seconds.
Clear the area around the screw to ensure you have a clean, stable surface for your drill bit to bite into the metal. If the surface is uneven, use a center punch to create a small divot. This prevents the bit from skating across the finish and damaging the surrounding material.
Apply a generous amount of penetrating oil to the threads and let it soak for at least 10 minutes to reduce friction. If the screw remains seized after this period, apply heat with a propane torch for 30 seconds to expand the metal.
Wear safety glasses to prevent metal fragments from causing eye injuries. High-speed drilling sends hot, jagged shards flying at unpredictable angles.
If the screw is located in a delicate or structural component, consult a professional contractor. Drilling into load-bearing surfaces without proper training can lead to structural failure or repairs costing thousands.
Steps for removal
-
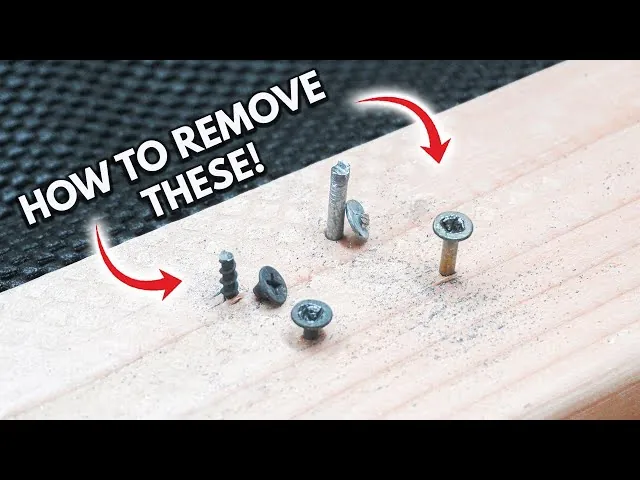
Inspect the broken screw to see if any part of the shank is sticking out above the surface. If you see at least 3 millimeters of metal, clamp your locking pliers tightly onto the stud. Turn the pliers slowly counter-clockwise to back the screw out. If the metal is flush with the surface, proceed to the next step.
-
Use a center punch to make a small indentation exactly in the middle of the broken screw. This prevents your drill bit from slipping off the hardened metal surface and scratching the surrounding material. A steady hand is critical here, as a mark that’s off-center will make the drilling process much harder later on.
-
Select a high-speed steel drill bit that’s roughly one-third the diameter of the screw shank. Begin drilling a pilot hole into the center of the screw using a low speed to avoid overheating the bit. If the bit starts to smoke, stop immediately and add more cutting oil to keep the metal cool and prevent the bit from snapping.
-
Switch to your screw extractor once the pilot hole is about 5 to 10 millimeters deep. Insert the extractor into the hole and tap it lightly with a hammer to ensure it bites into the metal. The extractor has reverse threads, meaning it will tighten itself into the hole as you turn your wrench counter-clockwise to remove the screw.
-
Turn the extractor handle slowly and steadily while applying firm downward pressure. You’ll feel the tension increase as the screw begins to move. If the screw doesn’t budge after a quarter turn, stop and apply more penetrating oil. Forcing the extractor can cause it to snap inside the hole, which makes the situation much worse.
-
Remove the screw completely by pulling it out with the extractor once it’s loose enough to turn by hand. Clean the hole with a rag to remove any metal shavings or old oil. Check the threads inside the hole for damage; if the threads look stripped or jagged, you may need to use a tap to clean them before inserting a new screw.
-
Test the hole by inserting a new screw of the same size and thread pitch. It should turn smoothly without requiring excessive force. If the new screw feels tight or sticks halfway, back it out and inspect the hole again for small metal burrs that might be blocking the path.
-
Wipe away any excess oil from the surrounding area using a clean cloth. Dispose of the metal shavings carefully, as they’re sharp and can easily cut your skin if left on a workbench or floor. Ensure the area is dry before you resume normal use of the object or machine.
How to verify the removal
The primary sign of success is the clean extraction of the entire screw shank without leaving any metal fragments inside the hole. Inspect the removed screw against the original length to ensure all threads are accounted for. If the screw came out in pieces, use a telescoping magnet or a dental pick to clear the bore. Any leftover steel shavings will prevent a new fastener from seating properly or cause it to cross-thread.
If the screw remains stuck, the most common sign is the extractor spinning freely without biting into the metal. You should also check for mushrooming, where the top of the screw has flattened and widened beyond the diameter of the pilot hole. If the metal looks deformed or the extractor slips repeatedly, stop immediately.
Forcing the tool further will likely snap the hardened steel tip of the extractor inside the hole. Because these bits are made of brittle, high-carbon steel, they can’t be drilled out with standard bits. If you feel the tool bind or hear a high-pitched metallic screech, you have reached the limit of DIY repair.
At this point, the cost of a broken tool outweighs the benefit of persistence. Seek a professional machinist who can use an electrical discharge machine to burn out the obstruction without ruining the surrounding material.
Troubleshooting common issues
| What happened | Why | What to do |
|---|---|---|
| Screw won’t move | Threads are rusted | Apply penetrating oil and wait 20 minutes |
| Extractor slips out | Hole is too shallow | Drill hole deeper to ensure 1/4 inch depth |
| Metal shavings everywhere | No cover used | Vacuum the area thoroughly before continuing |
| Drill bit feels dull | Metal is too hard | Switch to a cobalt-tipped bit immediately |
| Extractor feels loose | Hole is too wide | Move up to the next extractor size |
If you apply penetrating oil and the screw remains seized, tap the head firmly with a hammer to break the rust seal. Don’t force the tool, as snapping an extractor inside a bolt turns a simple repair into a machine shop job.
If your drill bit stops cutting, check your speed. High-speed drilling generates heat that ruins the temper of standard steel bits. Keep the drill at a low RPM and use cutting fluid to keep the metal cool.
If the extractor spins without grabbing, you have likely rounded the hole walls. In this case, stop immediately. Use a center punch to create a new pilot mark and start over with a smaller bit to avoid further damage.
Frequency of this task
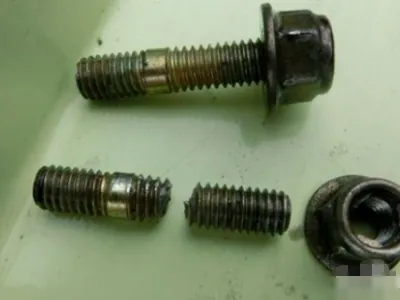
You should only need to perform this task when a screw head shears off due to over-tightening or corrosion. The frequency depends entirely on the quality of your fasteners and the environment where the equipment is stored.
If you work with stainless steel in humid or outdoor settings, expect to encounter this problem every few years. These metals are prone to galvanic corrosion, which effectively welds the threads to the housing. Conversely, if you use high-quality, lubricated fasteners, you may never need to remove a broken screw.
Most people make the mistake of using a driver that’s too small for the screw head. This creates a loose fit that concentrates force on the corners of the slot rather than the walls. If the driver slips or “cams out” even once, stop immediately. Continuing will round out the socket, turning a simple extraction job into a destructive drilling operation.
If the screw head is still intact but feels like it’s binding, apply a penetrating oil and wait twenty minutes before turning again. If you feel the resistance increase sharply, reverse the direction to clear the threads. If the resistance remains high, you have already reached the limit of the fastener’s structural integrity.
Frequently asked questions
Can I use a soldering iron to remove a headless screw?
You can heat a screw installed with thread-locking compound to break down the adhesive. Apply a soldering iron to the screw center for 2 to 3 minutes until the surrounding area is warm. Avoid this method near plastic or painted surfaces to prevent melting or discoloration.
Is it safe to drill out a screw in plastic?
You can safely drill out a screw in plastic by moving slowly to prevent melting. Friction generates heat that can deform the hole, so use a low drill speed and pause frequently to let the material cool. Stop immediately if you notice signs of melting.
What happens if the screw extractor breaks inside the hole?
A broken extractor is difficult to remove because the tool steel is too hard to drill through. You’ll likely need a carbide burr on a rotary tool to grind it away or require professional machine shop services. Never force the extractor to avoid this outcome.
How long does it take to remove a seized screw?
Removing a seized screw typically takes 20 to 40 minutes, including soaking time and drilling. Severely rusted screws may require longer oil soaking or heat application to expand the metal. Don’t rush the process, as breaking a tool will significantly increase your repair time.
Does it matter which drill bit I use?
You must use high-speed steel or cobalt drill bits because standard wood bits will dull instantly on metal. Cobalt bits are preferred for this task as they withstand higher temperatures without losing their edge. Always verify the bit is rated for metal before beginning.
How do I know if the screw is too damaged to remove?
A screw is likely impossible to remove if the hole is stripped, the metal is deformed, or no center remains for drilling. If an extractor fails to gain a grip, you have reached the limit of DIY repair. Consult a specialist for professional-grade extraction methods.
Conclusion
Once the damaged piece is finally out, it’s a good idea to inspect the hole for any remaining debris or metal shavings. If the wood or plastic looks a bit worn, you shouldn’t hesitate to use a filler before driving in a fresh replacement. You’ll be glad you took that extra moment.