
Painting wood veneer requires a systematic approach because the thin layer of real wood glued over particleboard or plywood behaves differently than solid lumber. To achieve a professional finish, you must focus on proper surface preparation, the use of high-quality bonding primers, and the application of thin, even coats of durable paint. Because veneer is porous and prone to swelling if exposed to excessive moisture, avoiding water-based cleaners and using solvent-based or shellac-based primers is the best way to ensure the finish adheres without causing the veneer to bubble or peel away from its substrate.
Key Takeaways
- Always test a hidden area of the furniture to ensure the veneer is stable and not already delaminating.
- Use a high-adhesion primer, such as a shellac-based product, to lock in the surface and prevent bleed-through.
- Avoid power sanders if possible; hand-sanding with a sanding block prevents you from burning through the thin veneer layer.
- Apply multiple thin coats of paint rather than one thick coat to avoid drips and ensure a smooth, durable finish.
- Allow for extended curing times, as veneer surfaces can remain tacky longer than solid wood.
Understanding Wood Veneer Characteristics
Veneer is essentially a thin slice of natural wood, usually less than 3 millimeters thick, bonded to a core material like MDF or particleboard. Unlike solid wood, which can be sanded aggressively, veneer has a very low tolerance for abrasive removal. If you sand too deeply, you’ll hit the core material, which is impossible to repair to a natural wood finish. Understanding this limitation is the first step in successful refinishing.
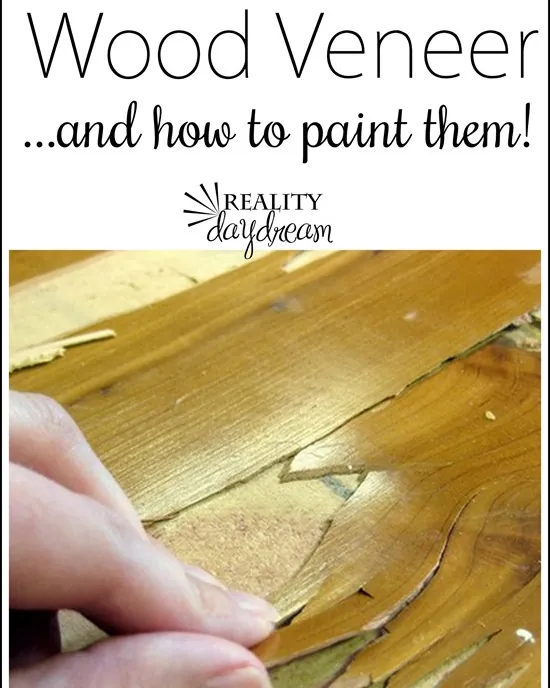
Surface integrity is the most important factor. If the veneer is bubbling, peeling, or cracked, those issues must be addressed before you even consider opening a can of paint. If the wood is loose, the moisture from your primer will seep behind the veneer and cause the glue to fail completely. Always inspect the edges, as these are the most common points of failure where the veneer meets the core.
How to Prepare the Surface
Preparation is 90% of the work when dealing with veneer. Because veneer is often factory-finished with a clear coat or lacquer, paint won’t stick to it without a proper mechanical bond. You must dull the existing finish significantly to provide a “tooth” for the primer to grip.
Mechanical abrasion should be done using a fine-grit sandpaper, typically in the 180 to 220 range. Don’t use coarse grits like 80 or 100, as these will scratch through the veneer fibers and create deep gouges that are difficult to fill. Use a sanding block to ensure even pressure across the surface. Once sanded, remove every speck of dust with a tack cloth or a vacuum with a HEPA filter. Residual dust is the number one cause of paint failure on furniture projects.
Choosing the Right Primer
Because veneer is often found on older furniture, there’s a risk of tannin bleed—where natural wood oils or old stains seep through the new paint, creating yellow or brown spots. A high-quality primer acts as a chemical barrier.
| Primer Type | Best Used For | Drying Time |
|---|---|---|
| Shellac-based | Blocking stains and odors | 30-60 minutes |
| Oil-based | Maximum adhesion to slick surfaces | 8-12 hours |
| Water-based | Low VOC needs and easy cleanup | 1-2 hours |
Pro Tip: Use a shellac-based primer like Zinsser B-I-N if you’re working on a piece with dark wood grain or potential water damage, as it seals the surface better than almost any other product.
How to Paint Wood Veneer
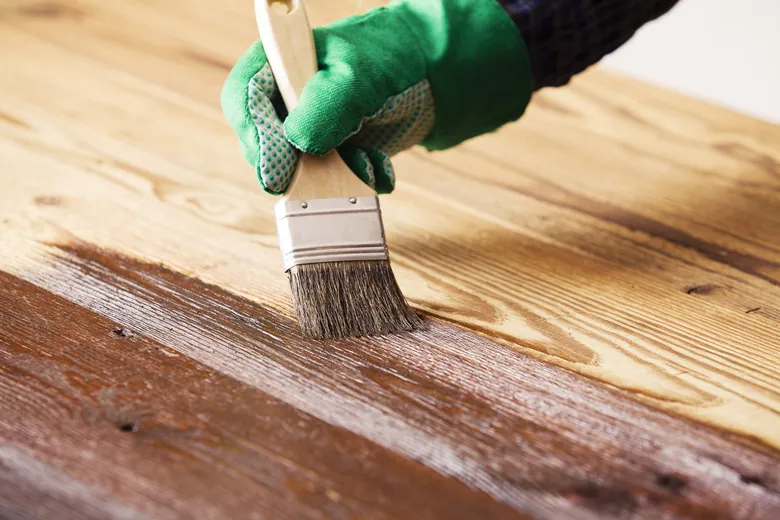
Once your primer has dried and been lightly sanded, you’re ready for the topcoat. Use a high-quality acrylic latex or enamel paint. Enamels are generally preferred for furniture because they cure to a harder finish, making them more resistant to scuffs and scratches in high-traffic areas.
- Brush Selection: Use a synthetic bristle brush for water-based paints. Natural bristles will soak up water and become limp.
- Foam Rollers: For large, flat surfaces, a high-density foam roller will provide a smooth, factory-like finish without brush marks.
- Application Technique: Always paint in the direction of the wood grain. Even though you’re covering it with paint, the texture of the grain will still show through. Following the grain ensures a more natural look.
- Thin Coats: It’s always better to apply three thin coats than one heavy, sagging coat. Allow for proper dry time between each layer according to the manufacturer’s instructions.
Dealing With Damaged Veneer
If your furniture has chips or missing sections, you can’t simply paint over them. The difference in texture between the wood and the void will be glaringly obvious once the paint is applied.
Wood filler is your primary tool for repairs. Use a stainable or paintable wood filler that doesn’t shrink excessively. Apply the filler with a putty knife, slightly overfilling the hole to account for shrinkage during the drying process. Once the filler is completely dry, sand it perfectly flush with the surrounding veneer. If you skip this, the patch will show up as a noticeable bump or depression under your topcoat.
Essential Tools and Materials
| Item | Purpose | Recommended Type |
|---|---|---|
| Sandpaper | Surface prep | 220-grit sanding sponges |
| Tack cloth | Dust removal | Wax-free cotton |
| Primer | Adhesion/Sealant | Shellac-based |
| Paint | Topcoat | Cabinet-grade enamel |
| Applicators | Finishing | Synthetic brushes/Foam rollers |
Warning: Never use chemical strippers on thin veneer. The harsh solvents can dissolve the original glue holding the veneer to the substrate, causing the entire sheet to lift or bubble instantly.
Maintaining Your Painted Furniture
Once the project is finished, the curing process begins. Even if the paint feels dry to the touch after a few hours, it may take up to 30 days to reach full hardness. During this time, treat the furniture with extreme care. Avoid placing heavy items, damp objects, or abrasive decor on the surface.
To clean your painted veneer, use only a soft, damp microfiber cloth. Avoid harsh household cleaners, ammonia, or bleach, as these can soften the paint film or cause discoloration over time. If the surface becomes sticky, it’s usually a sign that the paint hasn’t fully cured or was applied in an environment with high humidity. According to the Environmental Protection Agency, maintaining proper ventilation during the painting and curing process is essential for safety and optimal finish results.
Related guides
Frequently Asked Questions
Can I use spray paint on veneer?
Yes, spray paint can be used on veneer, but it requires careful technique. You must use multiple light, sweeping passes rather than holding the nozzle in one spot, which will cause runs. Because spray paint is thin, you’ll likely need more coats to achieve full coverage. Ensure you’re working in a well-ventilated area and use a high-quality primer first to ensure the spray paint adheres properly.
Do I need to strip the old finish?
You generally don’t need to strip the old finish, provided it’s stable and not peeling. Stripping is risky for thin veneer because of the potential for moisture damage or glue failure. Instead of stripping, focus on thorough cleaning and scuff-sanding the existing finish to create a surface profile that allows your new primer to bond tightly to the wood.
Why is my paint peeling off?
Peeling usually occurs due to poor surface preparation. If the veneer was dirty, oily, or glossy when you applied the paint, the bond will be weak. Another common cause is applying paint over a surface that wasn’t properly primed. If you used a water-based paint directly over a smooth, lacquered finish, the paint will likely flake off within a few weeks of use.
How do I fix a bubble in the veneer?
If you find a bubble, you can often fix it by cutting a very small slit in the bubble with a sharp utility knife, injecting a small amount of wood glue into the opening, and clamping the area firmly until it dries. Once the glue is set, sand the area lightly to level the surface, then prime and paint over the repair to hide the seam.
Can I paint veneer with a brush?
You can absolutely use a brush, but you must choose the right one to avoid streaks. Use a high-quality synthetic brush designed for water-based enamels. To minimize brush marks, use a technique called “laying off,” where you gently drag the tips of the brush across the wet paint in one long, smooth motion to level out the texture before it begins to dry.
How long does it take to dry?
Drying time depends on the specific product, but most primers are dry to the touch in one hour and ready for paint in two. Topcoats typically require four to eight hours between layers. For full curing, wait at least three to four weeks before placing heavy objects on the surface. Always check the back of your paint can for the manufacturer’s specific temperature and humidity recommendations.
Conclusion
Properly refinishing veneer furniture is a rewarding project that can modernize dated pieces while extending their lifespan. By prioritizing surface preparation and using the right priming products, you can overcome the challenges posed by the thin wood layer. Start your project by cleaning the piece thoroughly and testing your materials on a small, inconspicuous area to ensure compatibility before committing to the main surfaces.