

Cutting balsa wood effectively requires using a sharp, fine-toothed blade and applying multiple light passes rather than attempting to slice through the entire thickness in one aggressive motion. Because balsa is a remarkably lightweight and porous hardwood, it’s prone to crushing or splintering if the tool is dull or if the pressure is applied unevenly. By following professional techniques, you can achieve clean, precise edges that are essential for model building, architectural prototyping, or delicate craft projects.
Key Takeaways
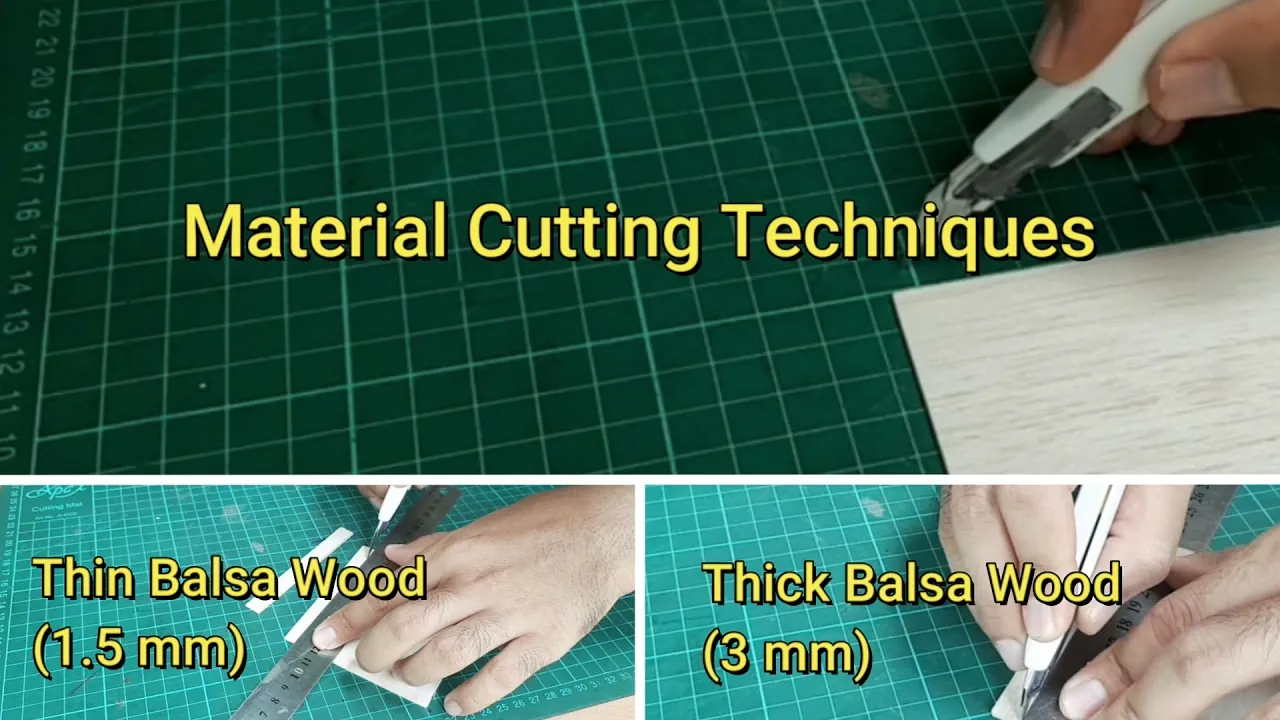
- Always use a fresh, razor-sharp blade to prevent the wood fibers from tearing or fraying during the cutting process.
- Employ a metal-edged ruler or straightedge as a guide to ensure your cuts remain perfectly straight across the material.
- Make several light scoring passes instead of forcing the blade through the wood, which maintains control and prevents splintering.
- Work on a self-healing cutting mat to protect your work surface and keep the blade edge sharp for longer periods.
- Consider the grain direction of the balsa wood, as cutting parallel to the grain is significantly easier than cutting against it.
How to Cut Balsa Wood Safely
The primary rule of working with balsa is that safety and precision go hand in hand. Because the material is so soft, it’s easy to become overconfident and lose focus, which often leads to slips. Always orient your hands behind the blade path, never in front of it. When applying pressure to your straightedge, ensure it’s held firmly with your non-dominant hand, keeping your fingers well away from the edge of the metal.
If you’re working with thicker sheets, don’t attempt to cut through the entire depth at once. The balsa density varies from piece to piece; some sheets are extremely soft and light, while others are denser and more resistant. By using a light touch, you can feel the resistance of the wood and adjust your pressure accordingly. If the blade feels like it is “grabbing” or jumping, stop and check the edge of your knife for debris or dullness.
Essential Tools for Precision Work
To get professional results, you need the right set of instruments. Investing in high-quality tools minimizes frustration and significantly improves the quality of your finished project. Below is a breakdown of the standard equipment used by experienced modelers.
| Tool Category | Recommended Item | Purpose |
|---|---|---|
| Cutting Blade | X-Acto #11 Blade | Fine, precise detail work |
| Straightedge | Aluminum Ruler | Guiding the blade for straight lines |
| Surface | Self-Healing Mat | Protecting the table and blade edge |
| Holding Tool | Spring Clamp | Securing the wood to the workbench |
| Safety Gear | Safety Glasses | Protecting eyes from wood splinters |
When choosing a handle, look for an ergonomic grip that fits comfortably in your hand. A heavy-duty handle provides more stability for thicker cuts, while a lighter, slimmer handle is better for intricate, tight curves or delicate fretwork.
Preparing Your Material for Cutting
Before you make your first cut, you must prepare the balsa sheet properly. Start by inspecting the wood for any natural defects, such as knots or uneven grain patterns, which can cause the blade to veer off course. If you’re working with a large sheet, it’s often easier to cut it into smaller, more manageable pieces before performing the final, precise cuts.
To ensure your cuts are accurate, use a pencil to mark your lines lightly. Avoid using thick markers, as the ink can bleed into the porous fibers of the balsa, leaving a messy edge. If you’re creating complex shapes, consider printing a template on paper and using a light adhesive to stick it to the wood. You can then cut directly through the paper and the wood simultaneously, ensuring a perfect match to your design.
Which Blade Types Work Best?
Selecting the correct blade profile is critical for success. The standard #11 scalpel-style blade is the industry standard for most balsa work because of its sharp, pointed tip and sloped edge. However, there are other options depending on the specific task.
- Chisel Blades: These have a flat, square edge, making them ideal for cutting straight lines or clearing out small notches in the wood.
- Curved Blades: These are excellent for cutting circular patterns or organic, rounded shapes where a straight blade would struggle to pivot.
- Saw Blades: For thicker balsa—usually over 1/4 inch—a small hobby saw or a razor saw is far more effective than a knife, as it removes material cleanly without crushing the sides of the cut.
Warning: Always replace your blades frequently. A dull blade is a dangerous blade because it requires more force to cut, which increases the likelihood of a slip. If you notice you’re having to “saw” back and forth to get through the wood, your blade is likely dull and needs to be swapped for a fresh one.
Understanding Balsa Grain Direction
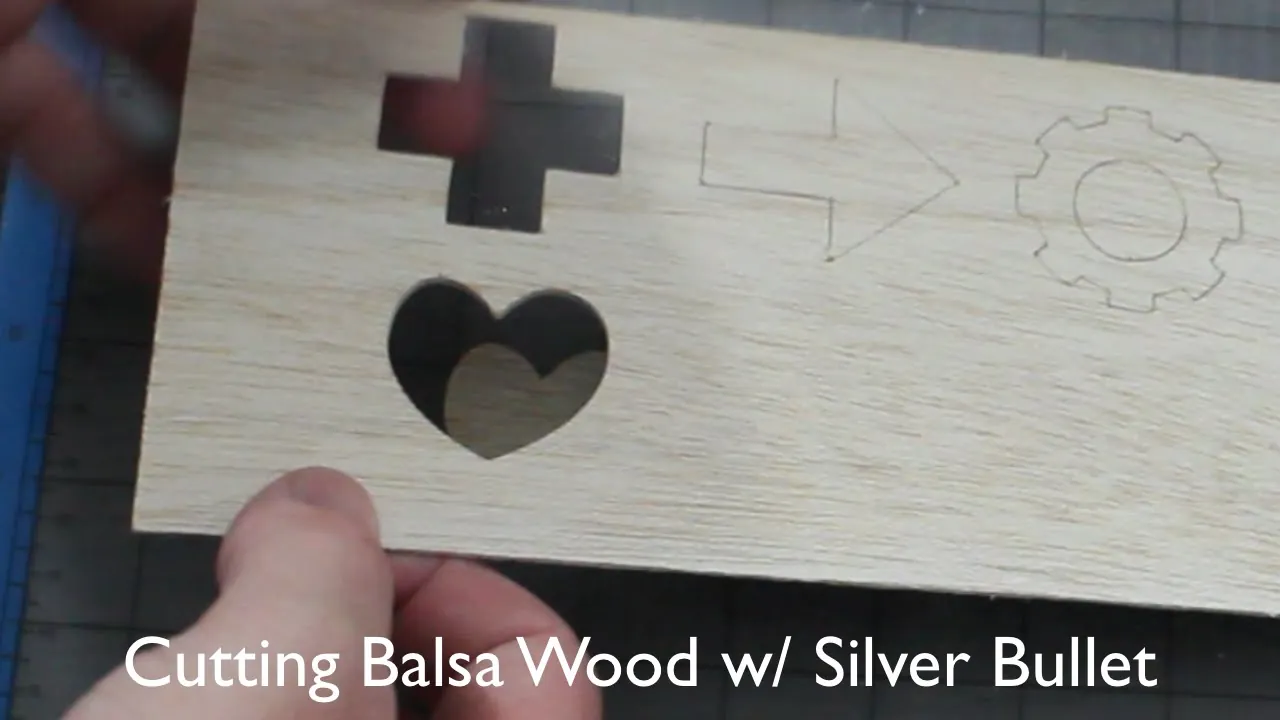
Balsa wood has a distinct grain that runs the length of the sheet. Understanding how to work with this grain is the difference between a clean cut and a jagged, broken edge. When you cut parallel to the grain, the blade will naturally want to follow the fibers. This makes straight cuts very easy, but it also means that if your hand slips, the blade can travel a long distance along the grain very quickly.
When you must cut across the grain, the wood is more prone to splintering. To mitigate this, use a sharp scoring technique. Score the top surface of the wood with a light pass, then follow up with deeper cuts. If you’re cutting across the grain, consider placing a piece of masking tape over the area you intend to cut.
This helps hold the wood fibers in place, preventing them from lifting or snapping as the blade passes through. According to the USDA Forest Service, the unique cellular structure of balsa wood gives it an incredibly high strength-to-weight ratio, which also means that its internal structure is highly sensitive to crushing forces during mechanical processing.
Techniques for Cutting Curves
Curves present a unique challenge because the blade must constantly change direction relative to the grain. To cut a curve, don’t try to twist the blade while it’s embedded deep in the wood. Instead, make a series of short, tangential cuts that follow the curve of your line.
Pro Tip: For very tight curves, it’s often better to cut “outside” the line and then sand down to your final mark. Using a fine-grit sanding block allows you to refine the edge without the risk of the blade catching and tearing the wood.
If you’re using a hobby knife for curves, keep the blade upright and perpendicular to the surface. Leaning the blade while turning will result in a beveled edge, which is usually undesirable unless you’re specifically trying to create a mitered joint.
How to Cut Thick Balsa Sheets
When dealing with balsa thicker than 1/8 inch, a single knife pass is rarely sufficient. You should plan on making three to five passes to get through the material cleanly. The first pass should be a light score that defines the path. The second and third passes should deepen that channel. By the final pass, you’re merely separating the two pieces.
If you find that the wood is still difficult to cut, consider using a razor saw. A razor saw has a very thin kerf, meaning it removes very little material, and its fine teeth are designed specifically for soft woods. Keep the saw blade light and let the tool do the work; if you press too hard, you’ll crush the delicate wood cells and leave a fuzzy, uneven edge that will be difficult to glue later.
Managing Dust and Workspace Safety
Balsa wood dust is very fine and can easily become airborne. While it’s generally not toxic, it can be an irritant to the lungs and eyes. Always work in a well-ventilated area, and if you’re doing a significant amount of sanding or sawing, wear a dust mask to protect your respiratory system.
Keep your workspace clean by wiping down your surface with a damp cloth after you finish cutting. Balsa dust can be slippery on hard surfaces and can interfere with the adhesion of wood glues or tapes if left on your materials. Maintaining an organized station ensures that your tools are always within reach and that your wood pieces remain free of debris.
Comparing Cutting Methods
Choosing the right method depends on the scale of your project and the thickness of your material.
| Method | Best For | Skill Level |
|---|---|---|
| Hand Knife | Intricate details, thin sheets | Beginner |
| Razor Saw | Thick planks, cross-cutting | Intermediate |
| Metal Straightedge | Long, straight cuts | Beginner |
| Sanding Block | Refining curves and edges | Intermediate |
If you’re a beginner, stick to the hand knife and a ruler. As you gain confidence, you can incorporate saws and specialized blades to expand your capabilities.
Troubleshooting Common Cutting Issues
Even experienced crafters encounter problems. Here is how to handle the most frequent issues encountered when working with balsa:
- Blade Skipping: This is caused by a dull blade or too much pressure. Slow down, use a fresh blade, and make more, lighter passes.
- Splintering Edges: The wood grain is likely tearing. Apply masking tape over the cut line before slicing, or use a sharper blade to shear the fibers rather than pushing them apart.
- Uneven Beveled Edges: Your hand is tilting the knife. Focus on keeping your wrist locked and the handle perfectly vertical relative to the cutting mat.
- Crushed Wood: You’re using too much downward pressure. Remember that balsa is soft; let the sharpness of the blade perform the cut, not the force of your arm.
Related guides
Frequently Asked Questions
Can I use a craft knife for all cuts?
For most hobby applications, a standard craft knife is sufficient. However, for extremely thick balsa or very long, straight lines, a razor saw or a dedicated balsa stripper tool will provide much cleaner results. The craft knife is best suited for detail work and sheets under 1/8 inch thick. Using the right tool for the specific thickness will save you time and prevent damage to your materials.
Does balsa wood require special glue?
Balsa wood is highly porous, so it absorbs standard wood glue very quickly. While standard yellow wood glue works well, many hobbyists prefer thin Cyanoacrylate (CA) glue, also known as super glue. CA glue wicks into the fibers and creates a near-instant bond. Always test your adhesive on a scrap piece of wood to ensure it doesn’t cause the wood to warp or discolor.
How do I stop balsa from splintering?
Splintering usually happens when the blade is dull or you’re cutting against the grain. To minimize this, always use a fresh blade for every new project. If you must cut across the grain, place a piece of masking tape over the cut line. The tape acts as a stabilizer, holding the wood fibers together while the blade passes through, resulting in a much cleaner, smoother edge.
Is it better to sand or cut curves?
For simple curves, cutting with a sharp blade is efficient. However, for tight or complex curves, it’s often safer and more accurate to cut slightly outside your marked line and then use a sanding block to refine the shape. Sanding gives you much finer control over the final profile and eliminates the risk of the blade grabbing the wood and causing a tear.
How do I keep my cuts straight?
The most effective way to ensure straight cuts is to use a metal-edged ruler as a guide. Press the ruler firmly against the wood, ensuring it doesn’t shift during the cut. Hold your knife blade against the edge of the ruler, keeping it perfectly vertical. Make several light passes rather than one deep one, as this prevents the blade from wandering or being pushed away from the ruler’s edge.
Conclusion
Practice your technique on scrap pieces of balsa before moving to your final project materials. By mastering the balance of blade sharpness, pressure, and grain awareness, you’ll be able to construct intricate models with professional-grade precision. Always prioritize safety, keep your workspace clean, and take your time to ensure every cut is deliberate and controlled.