
You can learn how to make cricut vinyl stick to wood by sealing the surface with a clear acrylic spray before applying your design. This preparation prevents the adhesive from soaking into the wood fibers, which is the main cause of peeling. The process takes about 2 hours and costs $15 to $20.
Gathering materials to make vinyl stick

| Item | How much | Why it’s needed | A substitute |
|---|---|---|---|
| Wood surface | 1 piece | The base for the project | None — don’t swap this |
| Sandpaper | 1 sheet | Smoothes the grain | Fine grit sanding block |
| Clear acrylic sealer | 1 can | Seals wood pores | Mod Podge craft sealer |
| Permanent vinyl | 1 sheet | The design material | None — don’t swap this |
| Transfer tape | 1 roll | Moves the design | Low-tack masking tape |
| Plastic scraper | 1 piece | Removes air bubbles | Old credit card |
Select wood with a moisture content below 12% to prevent your vinyl from peeling as the grain shifts. If your wood feels damp or cold to the touch, let it sit in a climate-controlled room for 48 hours before starting. High humidity is the primary cause of adhesive failure in these projects.
When sanding, stop once the surface feels like satin. If you over-sand, you create a fuzzy surface that prevents the vinyl adhesive from making full contact. You can test your surface by applying a small scrap piece of vinyl to an inconspicuous corner. If it peels up with a gentle tug, your surface is too porous and requires an extra coat of sealer.
Most beginners make the mistake of using high-tack transfer tape on delicate designs. This often stretches the vinyl and ruins the alignment. If your design features thin lines or intricate script, use the low-tack masking tape substitute instead. It releases the vinyl without distorting the shape.
Always keep your plastic scraper at a 45-degree angle during application. Pushing straight down forces air into the adhesive channels. If you see a bubble, don’t try to smooth it out with your thumb. Puncture the center with a needle and press the air out toward the hole to avoid stretching the material.
Preparing your workspace and surface
Clear a flat, well-lit area to work on and ensure the room temperature stays between 60°F and 80°F. Adhesive polymers lose their tack in the cold and become too fluid in extreme heat, leading to premature edge lifting.
Sand the wood surface using 220-grit sandpaper until it feels smooth. If you use a grit coarser than 320, you risk leaving deep scratches that show through thin vinyl. Always wipe away the resulting dust with a dry, lint-free cloth. Even a microscopic layer of sawdust acts as a barrier, preventing the adhesive from making direct contact with the wood fibers.
Apply two thin coats of clear acrylic sealer to the surface. Allow the first coat to dry for 30 minutes before adding the second. If you skip this, the vinyl adhesive will bond to loose wood fibers rather than the substrate, causing the design to peel within weeks.
Check the Cricut material compatibility guide to ensure your vinyl is rated for porous surfaces. Standard permanent vinyl often lacks the aggressive adhesive required for raw wood. If you’re working with pressure-treated lumber or wood finished with high-gloss enamel, perform a test on an inconspicuous underside area. If the vinyl peels away with the sealer or paint upon removal, the surface finish is too unstable for your project.
If your wood feels oily or waxy to the touch, wipe it down with isopropyl alcohol before sealing. This removes the natural resins that prevent sealers from curing properly. Without this step, your sealer will eventually flake off, taking your vinyl design with it.
Steps to make Cricut vinyl stick to wood
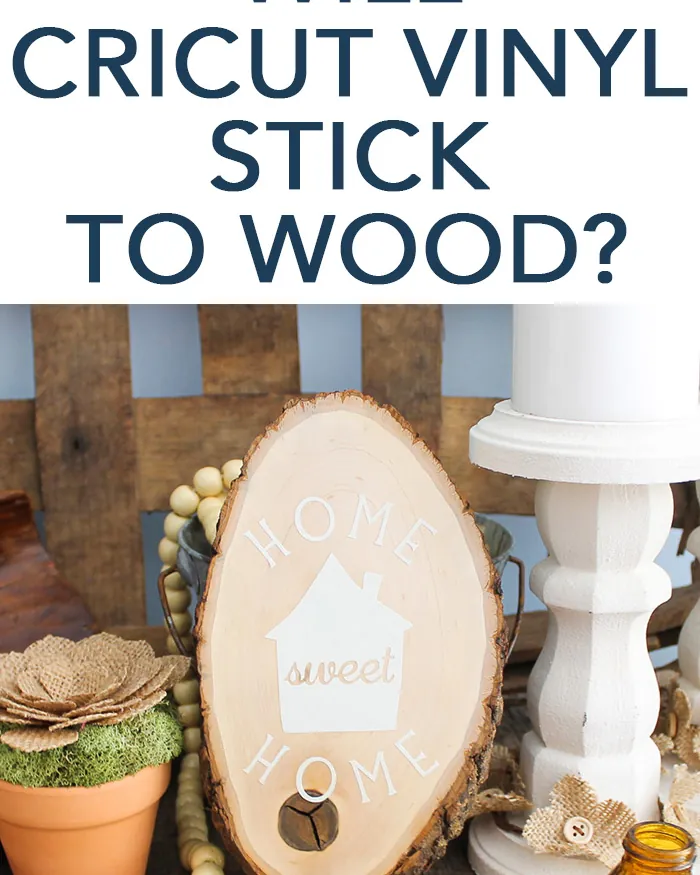
- Measure your wood surface and design your image in the software, ensuring the total width is at least 0.5 inches smaller than the wood piece.
- Cut your design using the machine set to the “Permanent Vinyl” or “Premium Vinyl” setting, which provides the correct pressure for a clean cut.
- Weed the excess vinyl from your design carefully, using a metal hook tool to remove the small pieces from inside letters or tight shapes.
- Cut a piece of transfer tape the same size as your weeded design and place it sticky-side down over the top of the vinyl.
- Rub the transfer tape firmly with a plastic scraper to ensure the vinyl sticks to the tape, working from the center toward the outer edges.
- Peel the backing paper away from the vinyl at a 45-degree angle, keeping the tape flat to ensure the vinyl stays attached to the tape.
- Position your design on the sealed wood piece, pressing down lightly first to ensure the placement is straight before you commit to the final position.
- Press the design onto the wood with your scraper, using firm, overlapping strokes to push out any air bubbles trapped under the vinyl.
- Remove the transfer tape slowly by pulling it back over itself, watching to ensure the vinyl stays attached to the wood surface.
- If a corner lifts, press it back down firmly with your fingers, but note that if the adhesive has failed, it may require a new piece of vinyl.
Signs of a successful bond
The vinyl should look completely flat against the wood with no visible air bubbles, wrinkles, or gaps around the edges of the letters. When you run your finger over the design, it should feel secure and not move or slide under light pressure. If the edges start to lift immediately after removing the transfer tape, the surface was either not smooth enough or the sealer had not fully cured.
A second round is necessary if the vinyl peels back when you lift the transfer tape, which suggests the adhesive didn’t bond to the sealed surface. If this happens, remove the vinyl, lightly sand the area again, and apply a fresh, thin layer of sealer. Let this new layer dry for at least 60 minutes before trying to apply the vinyl again.
The most common mistake is rushing the drying time, which leaves a tacky or damp surface that ruins the adhesive. If you live in a high-humidity area, allow for an extra hour of drying time to ensure the sealer is completely hard. You can test the cure by pressing a scrap piece of vinyl to an inconspicuous corner of the wood. If it pulls away cleanly without residue, the base is ready.
If the vinyl pulls up fibers or paint, the sealer is too thin or the wood wasn’t primed properly. In this case, stop immediately and apply a second coat of primer before sanding. If the vinyl stays flat but the edges feel sharp or raised, use a heat gun on a low setting for five seconds to soften the adhesive. Press the edges down firmly with a felt squeegee while the material remains warm.
Troubleshooting common application issues
| What happened | Why | What to do |
|---|---|---|
| Vinyl won’t stick | Surface is too rough | Sand again and reseal |
| Bubbles appear | Trapped air | Use scraper to push out |
| Vinyl tears | Blade is dull | Replace the cutting blade |
| Design is crooked | Rushed placement | Use a guide ruler |
| Edges peeling | Sealer not dry | Let dry longer |
If your vinyl refuses to adhere, check the surface texture with your fingertip. If you feel any grit or grain, the surface is too porous for the adhesive to bond. Sand the area with 220-grit sandpaper until smooth, then apply a fresh coat of primer.
Bubbles often indicate you’re pressing too hard in the center first. Always start your squeegee stroke from the middle and move outward toward the edges. If a bubble persists, pierce it with a needle and press the air out.
A dull blade causes ragged, jagged edges that lead to premature tearing. If you notice the machine struggling to finish a cut, swap the blade immediately.
For placement, align your design using a laser level or a T-square rather than your eyes. If you’re working on a curved surface, use a hairdryer for ten seconds to soften the vinyl. This makes the material pliable enough to conform without stretching the adhesive backing.
If edges peel within 24 hours, the surface likely held residual moisture. Wait at least 48 hours for any paint or sealer to cure fully before applying vinyl. If you live in a humid climate, add an extra day to this drying period.
How often to maintain your vinyl
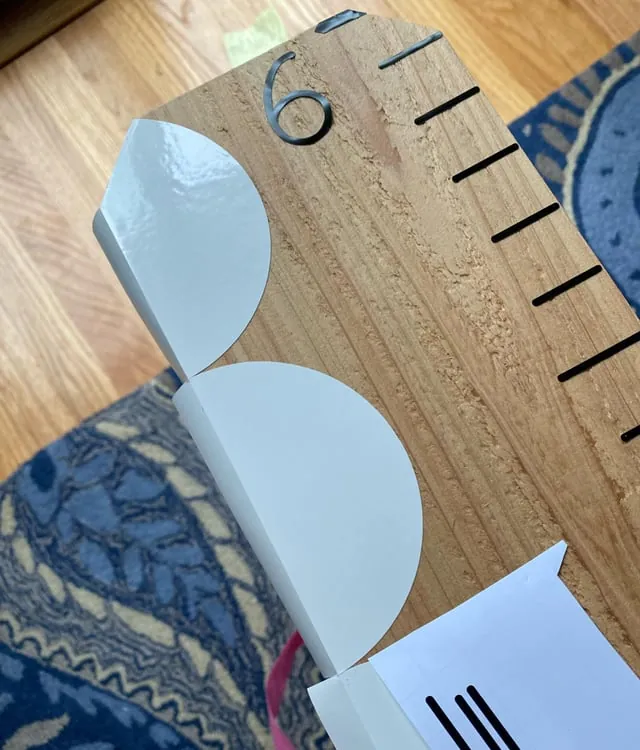
The two things that change this frequency are the location of the object and the temperature of the room.
If the item sits in direct sunlight or near a heating vent, the adhesive may dry out faster, so you should inspect it based on your specific environment and consult the owner’s manual for guidance. Conversely, items kept in a cool, dark room often stay secure for a long time without any maintenance.
To find your exact figure, touch the edges of the vinyl. If they feel crisp and flat, the bond is healthy. If they feel tacky or start to curl, the adhesive is failing.
Most people mistake a slight edge lift for a simple aesthetic flaw, but it’s actually a structural failure. Once the seal breaks, moisture creeps under the vinyl and causes the wood grain to swell, which permanently ruins the surface.
Applying liquid cleaners to a compromised seal accelerates the peeling process. Instead, use a low-heat hair dryer to soften the adhesive and press the edge back down firmly. If the vinyl doesn’t lay flat, the adhesive has failed and the decal should be removed and replaced. Always prioritize stability over appearance when the edges first begin to lift.
Related guides
Frequently asked questions
Can I apply vinyl to raw, unsealed wood?
You can’t expect permanent results on raw wood because the adhesive will soak into the porous fibers and lose its strength. While the vinyl might stick for a short time, it will peel off as the wood expands and contracts with changes in room temperature. Always use a clear acrylic sealer or a coat of paint to create a smooth, non-porous barrier before applying any adhesive material.
How long does the sealer need to dry?
The sealer usually needs at least 60 minutes to dry to the touch, but you should wait 2 hours for a full cure. If you live in a place with high humidity, you should wait up to 4 hours to ensure the surface is completely ready. You can check if it’s ready by touching an inconspicuous corner; if it feels cold or tacky, it needs more time to set.
Is it safe to use a hair dryer to help the vinyl stick?
It’s safe to use a hair dryer on a low setting for 10 seconds to soften the vinyl, but don’t overheat the adhesive. Applying too much heat will cause the glue to become runny, which makes the vinyl slide around and prevents a strong bond. If you choose to use heat, keep the dryer at least 6 inches away from the wood and move it constantly.
What happens if I use the wrong vinyl type?
If you use removable vinyl instead of permanent vinyl, your design will likely fall off within a few weeks. Removable vinyl is designed to be peeled away without leaving residue, which means the adhesive isn’t strong enough for wood. You can check the roll packaging to confirm the grade, or look for the “permanent” label on the manufacturer’s official product page.
Does the wood grain matter for the final look?
The wood grain matters because it creates small valleys that the vinyl must bridge, which often leads to air bubbles. You can minimize this effect by choosing a smooth wood like birch or maple instead of pine. If you must use a grain-heavy wood, you should apply an extra coat of sealer and sand it until the surface feels glass-smooth.
How many coats of sealer are enough?
Two thin coats of sealer are usually enough to create a perfect surface for your vinyl. A single coat often leaves small pinholes where the wood is still exposed, which ruins the grip of the adhesive. If you still see visible wood texture after two coats, apply a third very light layer and wait for it to dry completely before starting your project.
Conclusion
Ensure you always store your vinyl flat in a cool place to keep the adhesive fresh. If your roll has been sitting for more than 12 months, test a small scrap piece on a test board before starting your main project to ensure the glue is still effective.