
A shut valve toilet not working is a common household plumbing issue that can cause significant inconvenience. Whether it’s a complete lack of water flow to the toilet or a slow, inconsistent trickle, understanding the potential causes and solutions is crucial for any homeowner. This problem often stems from issues with the shut-off valve itself, the water supply line, or even internal toilet components that interact with the water supply. Addressing it promptly can prevent water wastage, potential damage, and the frustration of an unusable bathroom fixture.
This comprehensive guide will walk you through the most common reasons why your toilet’s shut-off valve might not be working as expected. We’ll explore diagnostic steps, common repair techniques, and when it’s time to call in a professional plumber. By the end of this article, you’ll be equipped to tackle this problem with confidence, ensuring your toilet functions reliably.
Key Takeaways
- A toilet shut-off valve not working can manifest as no water, slow water, or no pressure to the toilet tank.
- Common culprits include a faulty shut-off valve, a clogged water supply line, or problems within the toilet tank mechanism.
- Diagnostic steps involve checking for visible damage, testing valve operation, and inspecting the water supply line.
- Simple repairs often involve cleaning or replacing the valve, flushing the supply line, or adjusting toilet tank components.
- Signs you need a professional include persistent issues, lack of confidence in DIY repairs, or potential damage to plumbing.
- Regular toilet maintenance can prevent many shut-off valve issues.

Credit: reliantplumbing.com
Understanding The Toilet Shut-off Valve
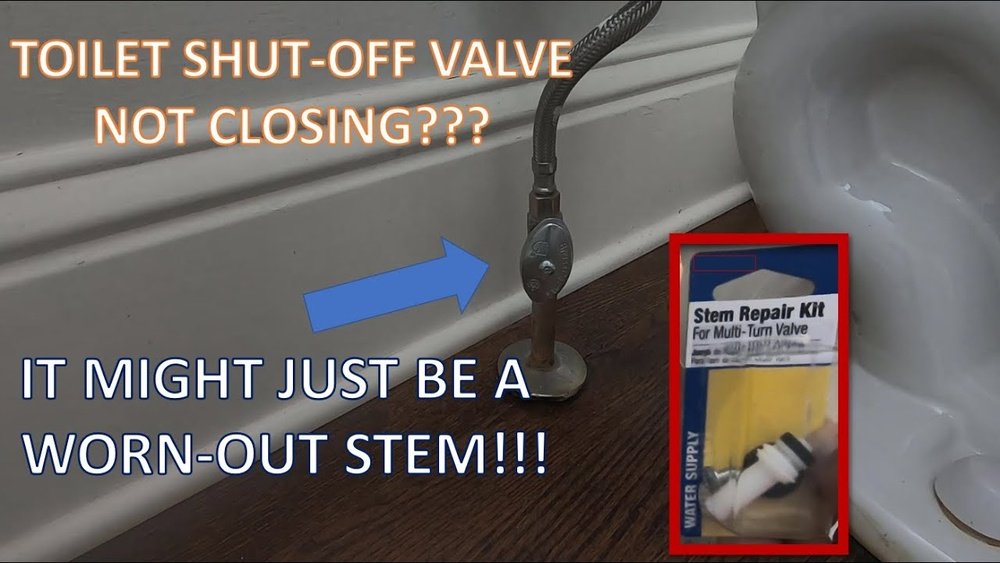
The toilet shut-off valve, also known as the angle stop or supply valve, is a critical component of your toilet’s plumbing system. Its primary function is to control the flow of water from the main water supply line into the toilet tank. This valve is typically located on the wall behind or beside the toilet, connected to the water supply pipe by a flexible hose or rigid pipe that leads to the fill valve inside the toilet tank.
When functioning correctly, the shut-off valve allows you to completely stop the water supply to the toilet, which is essential for maintenance, repairs, or in emergencies like a toilet overflow. Turning the handle, usually a quarter-turn ball valve with a lever or a multi-turn gate valve with a round handle, opens or closes the valve, regulating water flow.
Types Of Shut-off Valves
There are several common types of shut-off valves used for toilets, each with its own design and potential failure points:
- Ball Valves: These are the most common type today, characterized by a single lever handle. They use a rotating ball with a hole through it. When the hole is aligned with the pipe, water flows; when rotated 90 degrees, the solid part of the ball blocks the flow. They are known for their durability and ease of use.
- Gate Valves: These are an older style, often featuring a round knob or handle that you turn multiple times to open or close. They use a gate or wedge that moves up and down to block or allow water flow. These can be more prone to seizing or becoming difficult to turn over time.
- Saddle Valves: Less common for toilets and generally not recommended due to their tendency to leak, saddle valves are clamped directly onto a water pipe, piercing it to create a supply.
How The Valve Interacts With The Toilet
The shut-off valve acts as the gatekeeper for water entering the toilet tank. When you flush the toilet, the float mechanism inside the tank drops, signaling the fill valve to open and allow water to flow from the supply line, through the open shut-off valve, and into the tank. Once the tank fills to a predetermined level, the float rises and signals the fill valve to close, stopping the water flow. The shut-off valve remains in its open position during this process. If the shut-off valve is closed or malfunctioning, this entire sequence is interrupted.

Credit: www.youtube.com
Common Reasons For A Toilet Shut-off Valve Not Working
When your toilet’s shut-off valve isn’t working, it typically means water isn’t flowing into the tank, or the flow is severely restricted. Several factors can contribute to this problem.
1. The Valve Is Simply Turned Off
This might sound obvious, but it’s the most frequent reason and often overlooked. Sometimes, the valve is accidentally or intentionally turned to the closed position. This can happen during cleaning, if a child is playing with it, or even if it was closed for a previous repair and forgotten.
- Diagnosis: Visually inspect the valve handle. If it’s perpendicular to the pipe (for a quarter-turn ball valve) or fully turned down (for a multi-turn gate valve), it’s likely closed.
- Solution: Gently turn the handle to the open position. For a ball valve, the handle should be parallel to the pipe. For a gate valve, turn the knob counter-clockwise until it stops.
2. Mineral Buildup And Corrosion
Over time, minerals present in water (like calcium and magnesium) can build up inside the shut-off valve. This scale buildup can restrict the opening or even cause the valve’s internal components to seize. Corrosion, especially in older metal valves, can also lead to sticking or blockage.
- Diagnosis: If the valve is difficult to turn or doesn’t open fully when you try to turn it, mineral deposits or corrosion are likely culprits. You might also notice a very slow trickle of water or no water at all, even when the valve appears open.
- Solution: Sometimes, vigorously turning the valve back and forth can dislodge minor buildup. For more significant issues, the valve may need to be replaced. If you attempt to clean it, you’ll typically need to shut off the main water supply to the house, disconnect the supply line, and try to clear the valve mechanism. Often, replacement is more efficient and reliable.
3. Clogged Water Supply Line
The flexible hose or pipe connecting the shut-off valve to the toilet’s fill valve can become clogged. This is usually due to debris, sediment, or mineral deposits that have broken loose from the pipes or the valve itself.
- Diagnosis: If the shut-off valve appears fully open and functions correctly when tested (e.g., water flows freely when the supply line is disconnected), but no water reaches the toilet tank, the supply line is suspect.
- Solution:
- Shut off the main water supply to the house or at the toilet shut-off valve.
- Disconnect the supply line from both the shut-off valve and the toilet fill valve.
- Place a bucket under the disconnected ends to catch any residual water.
- Inspect the supply line for visible obstructions.
- Flush the line: Briefly turn on the shut-off valve (with the line disconnected from the toilet) to flush out any debris into the bucket. Do the same for the toilet’s fill valve inlet if possible.
- Clean or replace the supply line if it’s damaged or excessively clogged. A new flexible supply line is relatively inexpensive.
4. Faulty Fill Valve In The Toilet Tank
While this isn’t an issue with the shut-off valve itself, a malfunctioning fill valve inside the toilet tank can mimic the symptoms of a bad shut-off valve. If the fill valve is stuck in the closed position or is clogged internally, water from an open shut-off valve won’t enter the tank.
- Diagnosis:
- Turn off the shut-off valve.
- Flush the toilet.
- Disconnect the supply line from the fill valve.
- Turn the shut-off valve back on. If water flows freely from the supply line into the bucket, the shut-off valve is likely working.
- If water doesn’t flow from the supply line in this test, the issue is likely with the shut-off valve or the line itself. If water does flow, the problem is almost certainly the fill valve.
- Solution: The fill valve needs to be repaired or replaced. This is a common DIY task, and replacement kits are readily available at hardware stores.
5. Debris In The Shut-off Valve Mechanism
Even if the valve isn’t seized, small pieces of debris, such as rust flakes or sediment from the main water line, can lodge themselves in the valve’s internal mechanism, preventing it from opening fully.
- Diagnosis: Similar to mineral buildup, you might experience a very weak water flow or no flow at all, despite the valve handle being in the open position.
- Solution: Attempting to flush the valve by briefly opening and closing it can sometimes dislodge debris. If this doesn’t work, replacement is usually the best course of action. For some older gate valves, a mechanic might be able to remove the handle and stem to try and clear obstructions, but this is rarely successful and can damage the valve.
6. Damaged Valve Body Or Stem
Physical damage to the valve body or the stem (the part that connects the handle to the internal mechanism) can prevent it from operating correctly. This could be due to overtightening, physical impact, or simply wear and tear.
- Diagnosis: Visible cracks, leaks from the valve stem (where the handle attaches), or a handle that spins freely without affecting the valve’s internal operation point to physical damage.
- Solution: The valve must be replaced. This is a critical repair that requires shutting off the water supply to the house.

Credit: www.papapaella.co.uk
Diagnosing A Shut-off Valve Issue: A Step-by-step Approach
When faced with a toilet that isn’t receiving water, a systematic diagnostic process is key to pinpointing the problem and avoiding unnecessary repairs.
Step 1: Verify The Valve Position
The first and simplest step is to confirm the shut-off valve is in the open position.
- For Quarter-Turn Ball Valves: The handle should be parallel to the supply pipe. If it’s perpendicular, it’s closed.
- For Multi-Turn Gate Valves: Turn the handle counter-clockwise until it stops. If it was already turned all the way, it’s open.
Step 2: Check For Water Flow At The Valve
If the valve is open but there’s no water, you need to isolate whether the issue is before the valve, within the valve, or after the valve.
- Shut off the main water supply to the house. This is crucial for safety and to prevent flooding.
- Place a bucket beneath the connection where the flexible supply line attaches to the toilet’s fill valve.
- Disconnect the supply line from the toilet fill valve.
- Turn the shut-off valve back on (slowly).
- Observe:
- Water flows strongly into the bucket: The shut-off valve is working, and the supply line is clear. The problem is likely the toilet’s fill valve.
- Water trickles or doesn’t flow: The problem is likely with the shut-off valve itself or the supply line leading to it.
Step 3: Inspect The Supply Line
If water flowed freely in Step 2, the next step is to examine the flexible water supply line connecting the shut-off valve to the toilet.
- Ensure the shut-off valve is closed, and the main water supply is off.
- Disconnect the supply line from both the shut-off valve and the toilet fill valve.
- Visually inspect the inside of the supply line for any signs of kinks, damage, or blockages. You can try holding the line up to a light source.
- Flush the supply line: With the line disconnected from the toilet, briefly turn on the shut-off valve (if you suspect it’s working) to flush any debris out into the bucket.
- Consider replacement: Flexible supply lines are relatively inexpensive and can degrade over time. If yours is old, stiff, or shows any signs of wear, replacing it is a good preventative measure.
Step 4: Examine The Toilet Fill Valve
If water flowed freely from the shut-off valve (Step 2), the issue lies within the toilet’s tank mechanism, most commonly the fill valve.
- Remove the toilet tank lid.
- Observe the fill valve assembly. Look for any obvious damage or obstructions.
- Check the float mechanism: Ensure the float is not stuck in a position that prevents the valve from opening.
- Test the fill valve: With the shut-off valve open and the supply line disconnected from the fill valve, water should flow into the tank. If it doesn’t, the fill valve is the likely culprit.
Step 5: Assess The Shut-off Valve Itself
If water did not flow from the shut-off valve in Step 2, the valve itself is the prime suspect.
- Check for external damage: Look for cracks, leaks, or corrosion on the valve body.
- Try to operate the valve: Gently try to turn the handle back and forth. If it’s very stiff, seized, or feels loose and disconnected, it’s likely faulty.
- Attempt a flush (with caution): With the main water supply off, you can sometimes try to slightly open the shut-off valve and then quickly close it a few times to see if trapped debris is dislodged. Be prepared for potential leaks.
Repairing And Replacing A Toilet Shut-off Valve
Repairing a faulty shut-off valve can range from simple adjustments to complete replacement. Replacement is often the most reliable solution for older or significantly damaged valves.
Replacing The Shut-off Valve
This is a common DIY plumbing task, but it requires careful execution.
Tools and Materials You’ll Need:
- New shut-off valve (ensure it matches the pipe type and size)
- Adjustable wrench(es)
- Pipe thread sealant or Teflon tape
- Bucket
- Old towels or rags
- Penetrating oil (if the old valve is difficult to remove)
- Tubing cutter or hacksaw (if you need to trim the pipe)
Steps:
- Turn off the main water supply to the house. This is the most critical step. Open a faucet elsewhere in the house to drain residual water from the pipes.
- Drain the toilet tank: Flush the toilet and hold the handle down to empty as much water as possible. You can also use a sponge to soak up remaining water.
- Disconnect the supply line: Use an adjustable wrench to unscrew the supply line from the shut-off valve. Have a bucket ready to catch any water.
- Unscrew the old valve: Wrap the pipe coming from the wall with a rag to protect it. Use an adjustable wrench to grip the valve and turn it counter-clockwise to unscrew it from the copper or PEX pipe. If it’s stuck, apply penetrating oil and let it sit before trying again. Be careful not to damage the pipe.
- Clean the pipe end: Remove any old sealant or debris from the end of the pipe. Ensure it’s smooth and clean. If the pipe is damaged or corroded, you may need to cut it back and install a new fitting.
- Prepare the new valve: Apply pipe thread sealant or Teflon tape to the threads of the new valve that will connect to the wall pipe. Follow the manufacturer’s instructions for the specific sealant or tape.
- Install the new valve: Screw the new valve onto the pipe clockwise. Tighten it securely with a wrench, but avoid overtightening, which can damage the valve or pipe. Ensure the valve’s outlet is positioned correctly to connect to the supply line.
- Reconnect the supply line: Attach the flexible supply line to the new shut-off valve. Tighten the fitting securely.
- Turn on the water: Slowly turn the main water supply back on. Check the new valve and all connections for leaks.
- Test the toilet: Once you’re confident there are no leaks, turn the new shut-off valve to the open position. Flush the toilet to ensure water fills the tank correctly.
Cleaning The Shut-off Valve (limited Success)
For minor mineral buildup in a ball valve, you might attempt to clean it without replacement, though success is not guaranteed.
- Turn off the main water supply.
- Disconnect the supply line from the valve.
- Attempt to flush: With the supply line disconnected, slowly turn the shut-off valve handle on and off several times. This might dislodge loose debris.
- Vinegar flush (use with caution): For ball valves, you might try pouring a small amount of white vinegar into the valve opening and letting it sit for a few hours to dissolve minerals. Flush thoroughly with water afterward. This is generally more effective for faucet aerators than shut-off valves.
- Reassemble and test: Reconnect the supply line and slowly turn the water back on, checking for leaks.
Pro Tip: If the valve is old, corroded, or difficult to turn, replacement is almost always the better and more reliable option. The time and effort spent trying to clean a failing valve often outweigh the cost of a new one.
When To Call A Professional Plumber
While many toilet shut-off valve issues can be resolved with DIY effort, there are situations where calling a professional plumber is the wisest course of action.
- Lack of Confidence or Experience: If you’re uncomfortable working with plumbing, unsure about any step, or don’t have the necessary tools, it’s best to hire a professional. Mistakes can lead to water damage and more expensive repairs.
- Persistent Problems: If you’ve tried the basic troubleshooting steps and the valve still isn’t working, a plumber has specialized tools and expertise to diagnose complex issues.
- Damaged Pipes: If the pipe the shut-off valve connects to is corroded, cracked, or otherwise damaged, repairing or replacing it requires advanced plumbing skills and potentially different materials.
- Main Water Line Issues: If you suspect the problem lies further upstream in your home’s main water line, a plumber can diagnose and address these more significant issues.
- Leaking Valves: If the shut-off valve itself is leaking from the stem or body, it needs immediate attention. A plumber can replace it quickly and correctly, preventing water damage.
- Emergency Situations: In cases of major leaks or bursts, a plumber can provide immediate assistance to mitigate damage.
A plumber can typically diagnose and replace a shut-off valve within an hour or two, depending on the complexity of the installation and their availability. The cost can vary based on your location and the specific issue, but it generally ranges from $150 to $350 for a standard replacement, including parts and labor.
Preventing Future Shut-off Valve Problems
Regular maintenance and mindful usage can significantly extend the life of your toilet’s shut-off valve and prevent future issues.
Regular Valve Operation
- Exercise the valve: At least once a year, turn the shut-off valve off and then back on again. This helps prevent mineral buildup and keeps the internal components from seizing. Do this when you don’t have an immediate need, so if it becomes difficult to turn, you can address it without the pressure of an emergency.
Inspecting Supply Lines
- Check for wear and tear: Periodically inspect the flexible water supply line for signs of cracking, bulging, or corrosion. Replace it every 5-10 years as a preventative measure, especially if it’s an older rubber hose. Braided stainless steel lines are generally more durable.
Addressing Water Quality Issues
- Water softeners: If you have hard water, installing a whole-house water softener can significantly reduce mineral buildup in all your plumbing fixtures, including shut-off valves. This is a more significant investment but offers long-term benefits for your entire plumbing system. You can find more information on water softeners from organizations like the Environmental Protection Agency (EPA).
Proper Installation
- Use quality parts: When replacing a valve or supply line, always opt for reputable brands and appropriate materials for your plumbing system.
- Correct tightening: Avoid overtightening connections during installation, as this can damage threads and lead to leaks or make future removal difficult.
Monitoring Toilet Performance
- Listen for running water: If you hear water constantly running in the tank, it could indicate a faulty fill valve or a leak, which might indirectly affect the shut-off valve’s condition over time due to constant water pressure.
- Check water pressure: Noticeable drops in water pressure throughout the house could signal a larger issue with your main water line or municipal supply, which might eventually impact valve performance.
Frequently Asked Questions
Why Is There No Water In My Toilet Tank At All?
This is the most common symptom of a non-working shut-off valve. It means either the valve is fully closed, completely blocked internally by debris or mineral buildup, or the supply line leading to the toilet is severely obstructed. Start by checking if the valve handle is in the open position.
If it is, the next step is to test for water flow directly from the valve by disconnecting the supply line.
My Shut-off Valve Is Difficult To Turn. Should I Force It?
Warning: Forcing a stiff or seized shut-off valve can cause the handle