
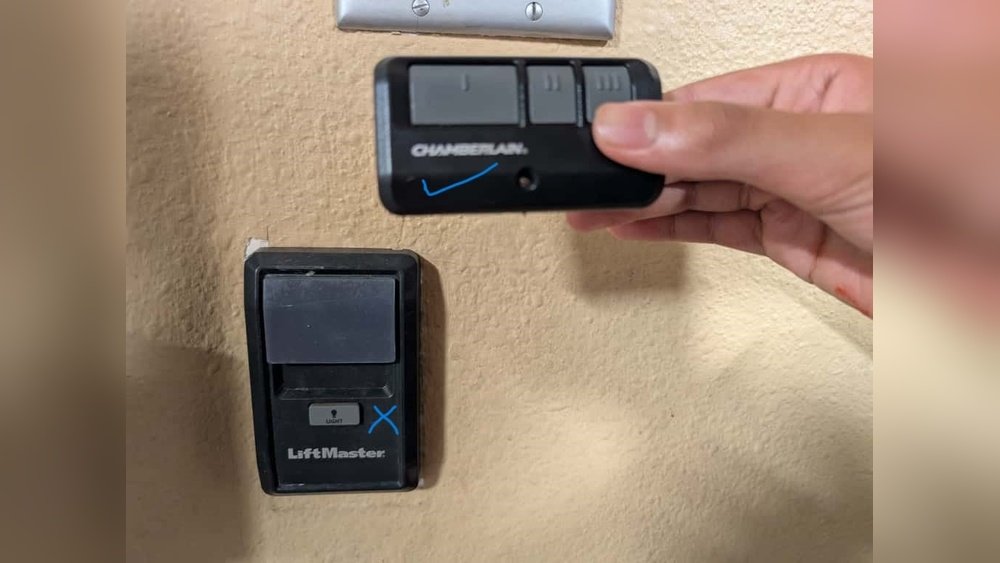
When your Liftmaster garage door opener wall control suddenly stops responding, it can be a significant inconvenience. This usually happens without warning, leaving you unable to open or close your garage door from the most convenient access point. While it might seem like a complex electrical issue, many common causes are relatively straightforward to diagnose and fix. Understanding these potential problems and the steps to resolve them can save you time, money, and the frustration of being locked out or unable to secure your home.
This guide will walk you through the most common reasons why your Liftmaster wall control might not be working, offering practical solutions and troubleshooting steps. We’ll cover everything from simple connection issues and battery problems to more complex wiring and logic board diagnostics.
By systematically addressing each possibility, you can regain full functionality of your garage door opener system and ensure your home’s security and convenience are restored.
Key Takeaways
- Loose Connections: Ensure wires are securely attached to the wall control and the garage door opener motor unit.
- Power Issues: Check the power supply to the opener and the wall control, including circuit breakers and GFCI outlets.
- Battery Problems: If your wall control has battery backup, test or replace the batteries.
- Wiring Faults: Inspect the low-voltage wires connecting the wall control to the opener for damage, breaks, or short circuits.
- Remote Interference: Other electronic devices can sometimes interfere with the opener’s signal.
- Faulty Wall Control Unit: The control panel itself may be damaged or malfunctioning and require replacement.
- Logic Board Issues: In rare cases, the garage door opener’s logic board may be the source of the problem.
- Safety Sensor Malfunction: While primarily for the door itself, a safety sensor issue can sometimes prevent wall control operation.
Understanding Your Liftmaster Wall Control
Liftmaster garage door opener wall controls, often referred to as multi-function control panels or Smart Control Panels, are designed to offer more than just a simple open/close button. Modern Liftmaster wall controls can include features like:
- Manual Open/Close: The primary function.
- Vacation Lock: Disables all remote operation for enhanced security.
- Light Control: Allows you to manually turn the opener’s light on or off.
- Diagnostic LEDs: Provide status information and error codes.
- Connectivity Features: Some models can connect to Wi-Fi for smartphone control via apps like MyQ.
These controls communicate with the garage door opener’s logic board using low-voltage wiring. When you press a button on the wall control, it sends a signal through these wires. The logic board then interprets this signal and commands the motor to operate the door. Understanding this basic communication flow is crucial for troubleshooting.
Types Of Liftmaster Wall Controls
Liftmaster offers various wall control models, each with slightly different features and wiring configurations. Common types include:
- Basic Push-Button Controls: Simple, often just one button.
- Multi-Function Control Panels: Offer more features like vacation lock and light control.
- Smart Control Panels: Integrate with MyQ technology for smartphone access.
The specific model you have will influence the troubleshooting steps, particularly regarding diagnostic lights and advanced features. You can usually find your model number on the back of the control panel or in your garage door opener’s manual.
How The Wall Control Communicates
The wall control operates on a low-voltage circuit. Typically, two wires run from the wall control to the motor unit of the garage door opener. One wire acts as a common ground, and the other carries the signal when a button is pressed. The logic board on the motor unit receives this signal.
- Wire 1 (Common): Usually connected to a terminal marked “COM” or a similar designation on both the wall control and the motor unit.
- Wire 2 (Wall Button): Connected to a terminal specifically for the wall button, often marked “WB,” “W,” or “Push Button.”
When the button is pressed, it momentarily completes a circuit between these two wires. The opener’s logic board detects this change and initiates the door’s movement. If this circuit is broken, or if the signal cannot be properly sent or received, the wall control will appear non-functional.

Credit: www.youtube.com
Common Causes For A Non-working Liftmaster Wall Control
When your Liftmaster wall control stops working, it’s usually due to one of several common issues. Diagnosing these requires a systematic approach, starting with the simplest checks.
Loose Or Disconnected Wires
This is by far the most frequent culprit. The low-voltage wires connecting the wall control to the motor unit can become loose over time due to vibrations, improper installation, or accidental tugging.
- At the Wall Control: Carefully remove the wall control panel from its mounting bracket. You may need a flathead screwdriver to gently pry it off. Once exposed, check the terminals where the wires connect. Ensure they are securely fastened under the screws or pushed firmly into the terminal block. If using push-in terminals, ensure the wire is fully inserted.
- At the Motor Unit: Locate the terminal block on the garage door opener motor unit, usually near where the wires enter the unit. Inspect the connections for the wall button and common wires. They should be tight and free of corrosion.
Pro Tip: If you find a wire is loose, gently strip a small amount of insulation from the end if it looks corroded or damaged, and re-secure it firmly. Ensure no bare wires are touching each other or any metal parts of the opener, as this can cause a short circuit.
Power Supply Issues
If the wall control is completely dead, no lights, no response, the problem might stem from the opener’s power supply.
- Circuit Breaker: Check your home’s electrical panel. The garage door opener is typically on a dedicated circuit. Ensure the breaker hasn’t tripped. If it has, reset it. If it trips again immediately, there’s a more serious electrical issue that requires professional attention.
- GFCI Outlet: Some garages have Ground Fault Circuit Interrupter (GFCI) outlets. If your opener is plugged into one, check if it has tripped. Press the “Reset” button on the outlet. If it continues to trip, the outlet or the opener may have a fault.
- Opener Unit Power: Ensure the opener unit itself is receiving power. Look for any status lights on the motor unit. If the opener has no power, the wall control won’t work.
Damaged Or Broken Wires
The low-voltage wires running from the wall control to the motor unit are often routed through walls, ceilings, or along beams. They can be susceptible to damage.
- Physical Damage: Inspect the entire length of the wire if possible. Look for cuts, nicks, kinks, or areas where the wire might have been pinched by a door, vehicle, or other object. Pay close attention to where the wire enters the wall and the motor unit.
- Rodent Damage: In some areas, rodents can chew through wires, causing breaks or shorts.
- Corrosion: If the wires run through a damp area, corrosion can build up on the copper strands, increasing resistance and potentially breaking the connection.
If you suspect damaged wiring, you can test continuity using a multimeter. Disconnect the wires from both the wall control and the motor unit. Test the resistance between the two ends of each wire. A continuous circuit should show very low resistance (close to 0 ohms). Any significant resistance or an open circuit (infinite resistance) indicates a break.
Faulty Wall Control Unit
Despite robust construction, wall control units can fail due to internal component failure, water damage, or wear and tear.
- Internal Failure: Electronic components within the control panel can degrade over time or fail unexpectedly.
- Water Damage: If the control panel is exposed to moisture, it can corrode internal components and lead to malfunction.
- Physical Damage: Accidental impact can damage the buttons or internal circuitry.
Testing for a Faulty Unit: The best way to confirm if the wall control itself is faulty is to bypass it. You can do this by temporarily shorting the wall button terminals on the motor unit. Using a screwdriver or a piece of wire, momentarily touch the two terminals where the wall button wires connect (typically “COM” and “WB”). If the door operates when you short these terminals, it strongly suggests the wall control unit is the problem. If the door *does not* operate, the issue lies elsewhere in the wiring or the opener’s logic board.
Remote Interference Or Pairing Issues
While less common for wall controls, sometimes other electronic devices operating on similar frequencies can cause intermittent issues.
- Frequency Interference: Devices like some wireless doorbells, security systems, or even certain types of lighting can operate on frequencies that might interfere with the garage door opener’s radio receiver.
- Receiver Malfunction: The radio receiver in the motor unit might be experiencing issues, preventing it from communicating with any remote devices, including the wall control if it has wireless capabilities.
If your wall control has diagnostic lights, consult your Liftmaster manual to see if any codes indicate a receiver issue. Sometimes, simply re-pairing your remotes and the wall control to the opener can resolve communication glitches. This process usually involves pressing and releasing a “Learn” or “Program” button on the motor unit, followed by pressing a button on the remote or wall control.
Logic Board Problems
The logic board within the garage door opener motor unit is the “brain” of the system. If it malfunctions, it can affect the operation of all connected components, including the wall control.
- Component Failure: Capacitors, relays, or microprocessors on the logic board can fail due to power surges, age, or manufacturing defects.
- Firmware Glitches: In rare cases, software-related issues on the logic board could cause unexpected behavior.
Diagnosing a faulty logic board is more complex and often requires a technician. Signs might include erratic behavior of the opener, failure to respond to any commands (wall control, remotes, keypads), or specific error codes displayed on diagnostic lights. If you’ve ruled out all other possibilities, the logic board is a likely suspect.
Replacement of a logic board can be expensive, sometimes approaching the cost of a new opener.
Safety Sensor Malfunction (indirect Impact)
The safety sensors are crucial for preventing the garage door from closing on an obstruction. They are located near the bottom of the garage door tracks. While they primarily affect the door’s closing function and remote operation, a severe malfunction can sometimes indirectly impact the wall control’s ability to initiate any movement.
- Misalignment: The sensors might be slightly out of alignment, preventing the door from closing.
- Obstruction: Something might be blocking the infrared beam between the sensors.
- Damaged Sensors: One of the sensors or its wiring could be damaged.
If the safety sensors are not functioning correctly, the opener might refuse to operate *at all*, including from the wall control. Check the indicator lights on the sensors; they usually have LEDs that show their status. If the lights indicate a problem (e.
g. , one is off or flashing inconsistently), troubleshoot the sensors first. Clean the lenses, ensure they are aligned, and check their wiring.
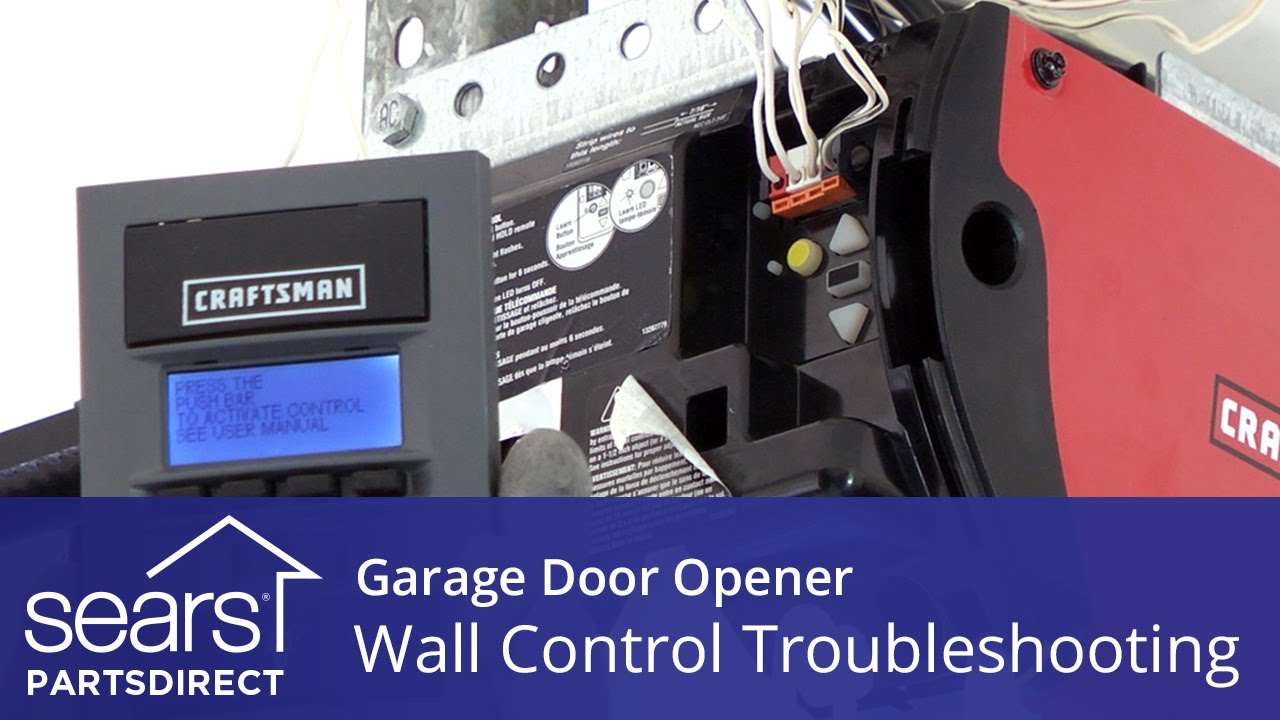
Credit: www.youtube.com
Troubleshooting Steps: A Systematic Approach
To effectively diagnose why your Liftmaster wall control isn’t working, follow these steps systematically. This approach prioritizes the easiest and most common solutions first.
Step 1: Visual Inspection And Basic Checks
- Check the Wall Control Panel: Is there any light on the panel? If it has a display, are there any error messages? If it’s completely dark, proceed to power checks.
- Check the Garage Door Opener Unit: Are there any status lights illuminated on the motor unit? Refer to your Liftmaster manual to understand what these lights indicate.
- Inspect Nearby Obstructions: Ensure nothing is physically blocking the garage door’s travel path or interfering with the wall control’s mounting.
Step 2: Test Power To The Opener
- Circuit Breaker: Locate your home’s electrical panel and check the breaker for the garage door opener. Reset it if tripped.
- GFCI Outlet: If your opener is plugged into a GFCI outlet, press the “Reset” button.
- Test with Another Device: Plug a known working device (like a lamp) into the same outlet the opener uses. If the device doesn’t work, the outlet or circuit is the problem.
Step 3: Inspect Wiring Connections
- At the Wall Control: Gently remove the wall control cover. Check that the wires connected to the terminals are secure. Ensure the correct wires are in the correct terminals (typically COM and WB).
- At the Motor Unit: Locate the terminal block on the opener. Verify that the wires from the wall control are firmly attached to the correct terminals.
- Wire Condition: Visually inspect the visible portions of the wire for any signs of damage, cuts, or fraying.
Step 4: Test The Wall Button Circuit (bypass Method)
This is a critical step to isolate the wall control unit itself.
- Safety First: Ensure the garage door is fully closed or that there is ample clearance underneath it.
- Locate Terminals: On the motor unit’s logic board, find the terminals for the wall button and common wire (often labeled “WB” and “COM”).
- Temporarily Short: Using a screwdriver or a short piece of wire, carefully touch the two terminals simultaneously for a second or two.
- Observe:
- If the garage door operates, the wiring and logic board are likely fine, and the wall control unit itself is faulty.
- If the garage door does not operate, the problem lies with the wiring, the motor unit’s logic board, or the power supply**.
Step 5: Test Wires With A Multimeter (advanced)
If the bypass test indicated a wiring or logic board issue, a multimeter can help pinpoint the problem.
- Disconnect: Disconnect the wires from both the wall control and the motor unit.
- Test Continuity: Set your multimeter to the continuity or resistance setting. Test each wire individually by placing the probes at each end.
- Good Wire: Should show very low resistance (near 0 ohms) or beep continuously on continuity setting.
- Bad Wire: Will show high resistance or no continuity (open circuit).
- Test for Shorts: Ensure no bare wires are touching each other or any metal components. Test for continuity between the two wires themselves; there should be none.
Step 6: Consider Other Factors
- Safety Sensors: If the door won’t close or operate intermittently, check your safety sensors. Ensure they are aligned and their indicator lights are on.
- Remote Interference: Temporarily turn off or move any nearby electronic devices that might cause interference.
- Logic Board: If all wiring is good and the bypass test fails, the logic board is the most likely culprit.
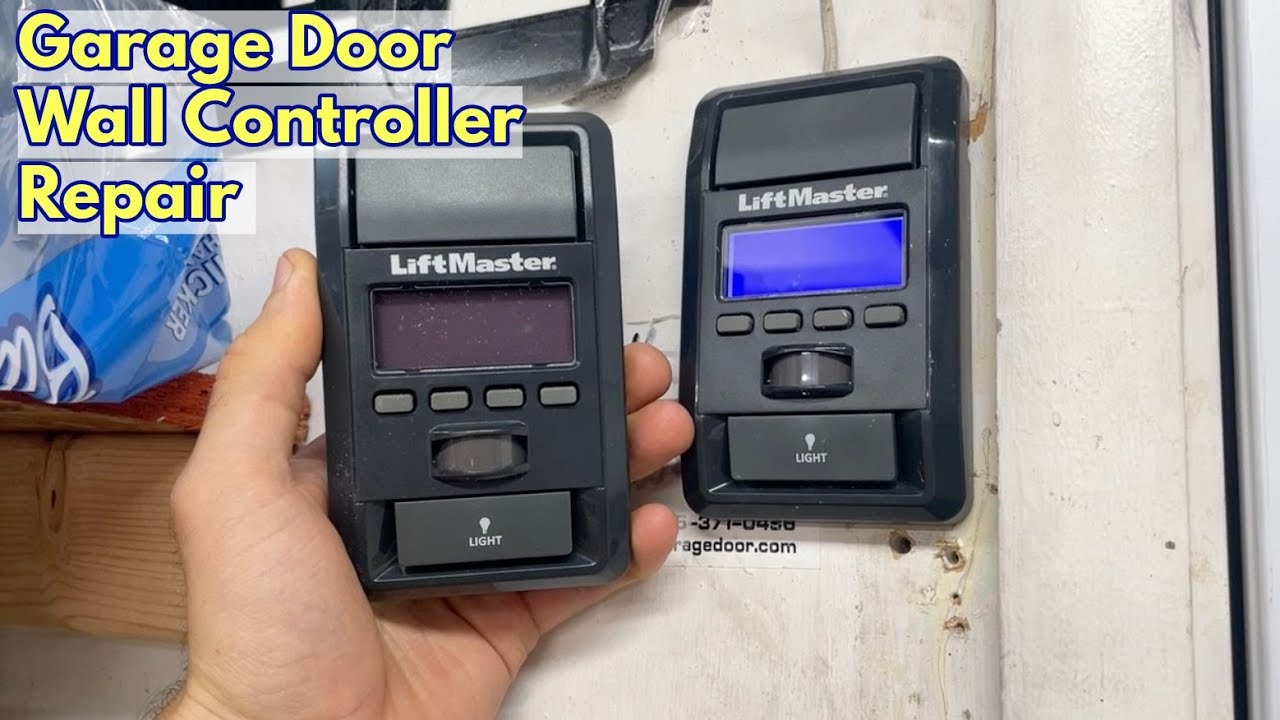
Credit: www.youtube.com
Replacing A Faulty Liftmaster Wall Control
If your troubleshooting confirms that the wall control unit itself is the issue, replacing it is usually a straightforward DIY task.
Choosing The Right Replacement
It’s essential to purchase a compatible Liftmaster wall control. You can find the model number of your existing control on the back or side. Alternatively, you can find the model number of your garage door opener and search for compatible wall controls. Liftmaster offers various models, including:
- 880LM: Multi-Function Control Panel
- 881LM: Smart Control Panel (for MyQ connectivity)
- 882LM: Multi-Function Control Panel (newer version)
Ensure the replacement unit has the features you need. If you want to use the MyQ app for smartphone control, you’ll need a smart control panel and ensure your opener’s logic board is MyQ compatible (usually indicated by a yellow, purple, red/orange, or green “Learn” button).
Installation Process
- Safety First: Disconnect power to the garage door opener at the circuit breaker. This is crucial to prevent electrical shock.
- Remove Old Unit: Gently pry the old wall control off its mounting bracket using a flathead screwdriver. Note which wires are connected to which terminals. You might want to take a picture before disconnecting.
- Disconnect Wires: Unscrew the terminals or release the wires from the old unit.
- Mount New Unit: Install the new mounting bracket, then snap the new wall control panel into place.
- Connect Wires: Connect the wires to the corresponding terminals on the new wall control. Ensure a secure connection. Typically, one wire goes to “COM” and the other to “WB” (Wall Button).
- Restore Power: Reconnect power to the garage door opener at the circuit breaker.
- Test the New Control: Press the button on the new wall control to ensure it operates the garage door.
- Program Remotes (If Necessary): If you replaced the control panel with a different model or if your opener requires it, you may need to reprogram your remote controls and keyless entry. Refer to your garage door opener’s manual for the specific programming steps, which usually involve pressing the “Learn” button on the motor unit.
Example: Let’s say you have a Liftmaster 880LM that stopped working. After confirming power and wiring are good, you decide to replace it. You purchase a new 880LM. You disconnect the wires from the old unit, noting the “red wire to COM” and “white wire to WB” connections. You snap off the old unit, snap on the new one, reattach the red wire to COM and the white wire to WB, restore power, and test. If the new unit works, the old one was indeed faulty.
When To Call A Professional
While many garage door issues can be resolved with DIY troubleshooting, some situations warrant professional assistance.
- Electrical Concerns: If you are uncomfortable working with electrical wiring or suspect a significant electrical fault (e.g., breaker repeatedly tripping), it’s best to call a qualified electrician or garage door technician.
- Logic Board Failure: Diagnosing and replacing a logic board can be complex. If you’ve ruled out other issues and suspect the logic board, a professional can confirm and perform the replacement.
- Damaged Tracks or Springs: Issues with the garage door itself, such as broken springs or damaged tracks, are dangerous and should only be handled by trained professionals.
- Complex Wiring Issues: If your wiring runs through difficult-to-access areas or you suspect extensive damage, a professional has the tools and expertise to diagnose and repair it efficiently.
- Persistent Problems: If you’ve followed all troubleshooting steps and the problem persists, a professional technician can offer advanced diagnostic capabilities and solutions.
According to the International Door Association (IDA), improper installation or repair of garage door systems can lead to serious injury. Always prioritize safety and consult professionals for tasks beyond your comfort level or expertise.
Maintaining Your Liftmaster Wall Control And Opener
Regular maintenance can prevent many common issues, including wall control malfunctions.
- Monthly:
- Test Safety Sensors: Place a solid object (like a 2×4 piece of wood) in the path of the closing door. The door should stop and reverse immediately.
- Check Balance: Manually disconnect the opener and try to lift the door. It should stay open mid-way. If it’s too heavy or drifts down, the springs may need adjustment.
- Annually:
- Inspect Wiring: Check all wiring connections for the opener, wall control, and sensors for security and corrosion.
- Lubricate Moving Parts: Apply lubricant to the rollers, hinges, and tracks (avoid the chain or belt).
- Tighten Hardware: Ensure all nuts and bolts on the opener and door are secure.
- Test Wall Control: Ensure the wall control responds promptly.
By performing these simple maintenance tasks, you can extend the life of your garage door opener system and minimize the chances of encountering a non-working wall control.
Frequently Asked Questions
My Liftmaster Wall Control Has A Light, But It’s Flashing A Specific Pattern. What Does This Mean?
Flashing lights on a Liftmaster wall control, especially on models like the Smart Control Panel (881LM), often indicate diagnostic codes. These codes can signal various issues, such as safety sensor problems, remote control errors, or logic board faults. You’ll need to consult your specific Liftmaster model’s owner’s manual to decipher the meaning of the flashing pattern. The manual will provide a table or list correlating light patterns to specific error conditions and troubleshooting steps.
Can I Use A Universal Wall Control With My Liftmaster Opener?
While universal *remotes* exist, universal *wall controls* are less common and often not recommended for Liftmaster systems. Liftmaster wall controls are designed to communicate with their specific opener logic boards using proprietary signals and wiring configurations. Using an incompatible wall control may result in it not working at all, or worse, causing damage to your opener’s logic board. It’s always best to use an official Liftmaster replacement part or a control specifically listed as compatible with your opener model.
How Do I Reset My Liftmaster Wall Control?
Many Liftmaster wall controls do not have a dedicated “reset” button in the way a router or modem does. However, you can effectively reset the control by disconnecting power to the entire garage door opener system for a minute or two. Go to your circuit breaker panel and switch off the breaker that powers the opener. After waiting, switch it back on. This power cycle can often clear temporary glitches in the opener’s logic board that might be