
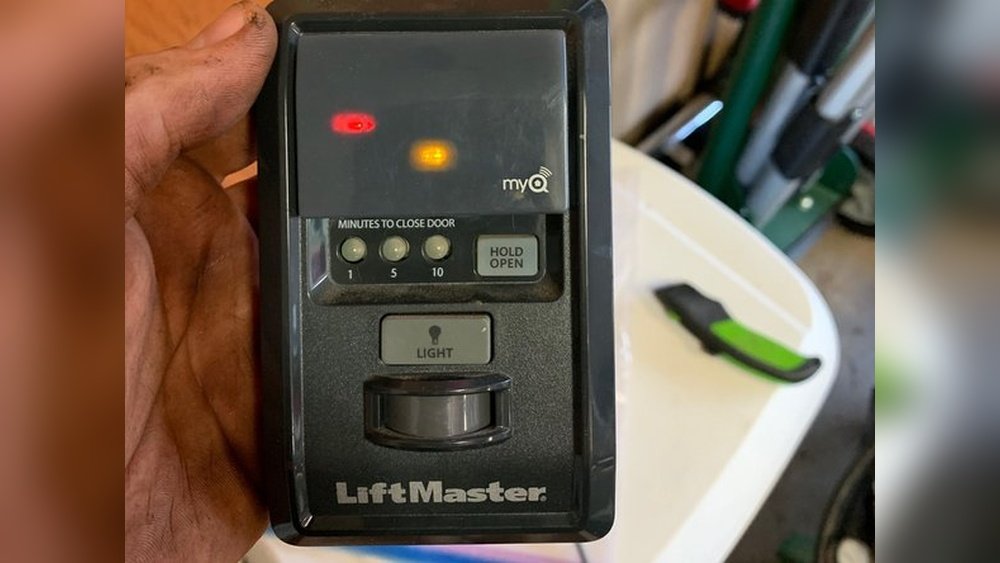
The Liftmaster garage door opener yellow light blinking is a common issue that can leave homeowners puzzled and their garage doors inoperable. This blinking light, often accompanied by an unresponsive opener, signals a problem that needs attention. While it might seem daunting, understanding the underlying causes and troubleshooting steps can help you resolve the issue efficiently. This guide will walk you through the most frequent reasons for a blinking yellow light on your Liftmaster opener and provide practical solutions, drawing on expert advice and common repair scenarios.
Key Takeaways
- A blinking yellow light on a Liftmaster garage door opener typically indicates an issue with the safety sensors or the logic board.
- The most common cause is misaligned or obstructed safety eyes, preventing the door from closing.
- Other potential culprits include loose wiring, remote control issues, travel limit settings, and internal component failure.
- Troubleshooting involves a systematic approach, starting with the simplest checks like sensor alignment and obstructions.
- Regular maintenance, including sensor cleaning and wiring checks, can prevent future issues.
- When in doubt, consulting the Liftmaster manual or contacting a qualified technician is recommended for complex problems.
Understanding The Liftmaster Yellow Light Indicator
Liftmaster garage door openers use a system of indicator lights to communicate the status of the opener and signal potential problems. The yellow light, in particular, is often associated with the safety reversal system. This system is crucial for preventing the garage door from closing on an obstruction, such as a person, pet, or vehicle. When the yellow light blinks, it means the opener has detected an anomaly within this safety mechanism, preventing normal operation, especially the closing cycle.
The safety sensors, also known as photo-electric eyes, are mounted near the bottom of the garage door tracks on either side. They emit an invisible infrared beam. If this beam is broken or misaligned, the opener interprets it as an obstruction and stops the door’s closing motion. The blinking yellow light is the opener’s way of telling you that this safety circuit is not functioning correctly.
The Role Of Safety Sensors
The safety reversal system is mandated by federal law in the United States to prevent entrapment accidents. Liftmaster openers are designed with sophisticated sensors that monitor the path of the closing door. These sensors consist of a transmitter and a receiver. The transmitter emits an infrared beam, and the receiver detects it. If the beam is interrupted, the opener’s logic board receives this signal, and it will immediately stop the door from closing and often reverse it back to the fully open position. The blinking yellow light is a direct consequence of the opener not receiving a consistent signal from these safety sensors.
Other Potential Indicator Lights
It’s important to distinguish the yellow blinking light from other indicator lights Liftmaster openers might display. For instance, a red light often indicates the opener is in the process of closing or opening, or it might signal a different type of error. A green light might indicate a solid connection or a successful operation. Understanding these different signals can help in diagnosing the specific problem you’re facing. However, for issues related to the safety system and preventing closure, the blinking yellow light is the primary indicator.

Credit: thriftygaragedoorrepair.ca
Common Causes For A Blinking Yellow Light
The blinking yellow light on your Liftmaster opener can stem from several common issues. Most of these are relatively straightforward to diagnose and fix, often requiring just a few simple steps.
1. Misaligned Safety Sensors
This is, by far, the most frequent reason for a blinking yellow light. The safety sensors are designed to be precisely aligned. Even a slight nudge or vibration can throw them off kilter. When they are misaligned, the beam from the transmitter does not reach the receiver, triggering the safety alert.
- Diagnosis: Look at the sensors. They usually have a small LED light on each unit. If one or both lights are off, or if they are blinking independently (not a steady light indicating a good connection), misalignment is highly probable.
- Solution: You’ll need to physically adjust the sensors. Loosen the mounting bracket on one or both sensors slightly. Gently move the sensor until its LED light becomes steady, indicating the beam is properly aligned. Once aligned, tighten the bracket. You might need to repeat this process until both sensors show a steady light.
2. Obstructions In The Sensor Path
Even if the sensors are perfectly aligned, anything blocking the infrared beam will trigger the safety mechanism. This could be a:
- Debris: Dust, cobwebs, leaves, or even a stray piece of packaging material can accumulate around the sensors.
- Tools or Equipment: Items stored near the garage door tracks, such as garden tools, sports equipment, or bicycles, can accidentally block the beam.
- The Garage Door Itself: If the door is slightly ajar or if something is protruding from it, it could obstruct the beam as the door attempts to close.
- Diagnosis: Visually inspect the area around the safety sensors and the entire path of the garage door.
- Solution: Carefully remove any obstructions. Clean the sensor lenses with a soft, dry cloth. Ensure nothing is in the way of the beam’s path.
3. Loose Or Damaged Wiring
The safety sensors are connected to the garage door opener’s logic board via wires. If these wires become loose, are cut, or are damaged in any way, the signal from the sensors will not reach the opener, resulting in the blinking yellow light.
- Diagnosis:
- Check connections: Inspect the wiring terminals where the sensor wires connect to the opener motor unit. Ensure they are securely fastened.
- Inspect wires: Follow the wires from the sensors to the opener. Look for any signs of fraying, cuts, or damage, especially where the wires run along the track or near moving parts of the opener.
- Solution: If wires are loose, re-secure them to the terminals. If wires are damaged, they may need to be repaired or replaced. This can sometimes be a DIY task if you are comfortable with basic electrical work, but for safety, it’s often best to call a professional.
4. Faulty Logic Board
While less common than sensor issues, a malfunctioning logic board within the garage door opener unit can also cause the yellow light to blink. The logic board is the “brain” of the opener, processing all signals and commands. If it’s faulty, it might incorrectly interpret signals or fail to operate correctly.
- Diagnosis: This is harder to diagnose without specialized tools. If you’ve exhausted all other possibilities, sensors are aligned, clean, wiring is intact, and no obstructions, the logic board might be the culprit.
- Solution: A faulty logic board typically requires replacement. This is a job best left to a qualified garage door technician, as it involves working with the main electrical components of the opener.
5. Remote Control Or Wall Button Issues
Sometimes, the problem isn’t with the safety sensors but with the signal being sent to the opener. A malfunctioning remote control or a stuck wall button could be sending erratic signals.
- Diagnosis: Try operating the garage door using a different remote control or the wall-mounted button. If the door operates normally with another control, the issue lies with the original remote. If neither works, and the yellow light is blinking, it’s less likely to be solely a remote issue.
- Solution:
- Remote: Replace the battery in the remote. If that doesn’t work, reprogram the remote to the opener. If it still malfunctions, the remote itself may need replacement.
- Wall Button: Check if the wall button is sticking. Clean around it. If it’s consistently faulty, it may need to be replaced.
6. Travel Limit Settings
The travel limits determine how far the garage door opens and closes. If these settings are improperly configured, the opener might struggle to complete its cycle, sometimes triggering safety alerts. While less directly linked to a blinking yellow light than safety sensors, incorrect limits can cause unusual behavior.
- Diagnosis: Observe the door’s movement. Does it stop short of fully closing or opening? Does it seem to struggle at a certain point?
- Solution: Consult your Liftmaster manual to reset and adjust the travel limits. This usually involves pressing specific buttons on the motor unit and setting the desired open and close positions.

Credit: www.ifixit.com
Troubleshooting Steps In Detail
When faced with a blinking yellow light, a systematic approach to troubleshooting is key. Start with the simplest and most common solutions and progress to more complex ones.
Step 1: Visual Inspection And Basic Checks
Before touching anything, take a moment to observe.
- Check the Safety Sensors: Locate the two safety sensors near the bottom of the garage door tracks. Note the indicator lights on each. Are they on? Are they steady? If one is off or blinking erratically, this is your primary area of focus.
- Look for Obstructions: Scan the entire path where the garage door travels. Check for anything that could be blocking the path of the infrared beam between the sensors. This includes debris, tools, toys, or even the garage door itself if it’s not fully open.
- Examine Wiring: Quickly glance at the wires leading to the sensors and the opener unit. Do you see any obvious damage, such as cuts or frayed insulation? Are the connections at the opener unit secure?
Step 2: Cleaning And Aligning Safety Sensors
This is where you’ll spend most of your time if the initial inspection points to sensor issues.
- Cleaning: Use a soft, dry microfiber cloth to gently wipe the lenses of both safety sensors. Avoid using harsh chemicals or abrasive materials, as they can damage the lenses. Sometimes, accumulated dust or grime is all that’s needed to disrupt the beam.
- Alignment:
- Identify the sensor with the steady light (if one has it) or the one that seems to be the issue.
- Locate the mounting bracket. You may need a screwdriver to slightly loosen the screws holding the sensor in place.
- Gently adjust the sensor’s position. You are looking for the point where the LED on the sensor becomes steady, indicating a proper connection with its counterpart.
- Once you find the sweet spot, hold the sensor steady and tighten the mounting screws.
- Repeat this process for the other sensor if necessary, ensuring both have steady indicator lights.
- Test the opener by pressing the remote or wall button. If the yellow light stops blinking and the door operates, you’ve found your solution.
Step 3: Checking Wiring And Connections
If cleaning and alignment don’t resolve the issue, the next step is to delve into the wiring.
- Secure Connections: Go to the garage door opener motor unit. You’ll see terminals where wires from the sensors connect. Ensure these wires are firmly attached. Sometimes, they can become loose over time. If they are just loose, re-inserting them firmly might solve the problem.
- Inspect for Damage: Carefully trace the wires from the sensors to the motor unit. Look for any signs of wear and tear, such as cuts, nicks, or pinches. Pay close attention to areas where the wires might rub against metal tracks or other moving parts. If you find damaged wiring, repair it using appropriate electrical tape or connectors. For significant damage, you might need to replace the wire section. If you are not comfortable with electrical repairs, it’s best to call a professional.
Step 4: Testing Remote Controls And Wall Button
The problem might not be with the safety system at all, but with the input signal.
- Remote Battery: If you’re using a remote, try replacing the battery. A weak battery can sometimes cause erratic signals.
- Reprogramming: If a new battery doesn’t help, try reprogramming your remote to the opener. Consult your Liftmaster manual for specific instructions, as the process varies by model.
- Wall Button Test: Use the wall-mounted button to try and operate the door. If the door works with the wall button but not the remote, the issue is likely with the remote. If neither works and the yellow light is still blinking, the problem is elsewhere.
- Sticking Button: Ensure the wall button isn’t physically stuck or damaged.
Step 5: Resetting The Opener
Sometimes, a simple reset can clear minor glitches in the opener’s logic board.
- Power Cycle: Disconnect the garage door opener from its power source (unplug it from the outlet). Wait for about 30 seconds to a minute, then plug it back in. This can sometimes reset the system and resolve temporary errors.
- Resetting Limits: If you suspect travel limit issues, follow your manual’s instructions to reset and reprogram the open and close limits.
Step 6: When To Call A Professional
If you’ve gone through all these steps and the yellow light continues to blink, it’s time to consider calling a professional garage door technician. This often indicates a more serious issue, such as:
- A faulty logic board within the opener.
- A broken wire deep within the wall or ceiling that is difficult to access.
- A malfunctioning internal component of the opener unit.
A technician has the expertise and tools to diagnose these more complex problems and perform the necessary repairs safely and effectively.

Credit: www.youtube.com
Liftmaster Models And Specific Yellow Light Behavior
While the general principles apply across most Liftmaster models, there can be subtle differences in how the yellow light behaves or what it signifies depending on the specific opener series and its age. Newer models often have more advanced diagnostic capabilities.
Liftmaster Elite Series
The Elite Series (e. g. , models like the 8500W, 8550W) typically features advanced diagnostics. A blinking yellow light on these models often points directly to the safety sensor alignment or obstruction. These openers are designed to be more communicative about issues.
- Example: If the sensors are misaligned on an 8550W, the yellow light will blink, and the opener will refuse to close. The diagnostic panel on some Elite models might even display a specific error code, providing a more precise clue.
Liftmaster Professional Series
Models in the Professional Series (e.g., PD752D, WD962) also rely heavily on the safety sensor system. The blinking yellow light follows the same logic: a disruption in the safety beam.
- Data Point: According to Liftmaster’s support documentation, the most common cause for a blinking yellow light across their product lines remains safety sensor alignment. Statistics from repair services often indicate that over 70% of blinking yellow light issues are resolved by cleaning and aligning these sensors.
Older Liftmaster Models
Older Liftmaster openers might have simpler indicator systems. The blinking yellow light might be less sophisticated in its signaling.
- Experience: In my experience with older models, a blinking yellow light could sometimes be triggered by intermittent wiring issues that newer models might self-correct or diagnose more granularly. The key is still to focus on the safety sensors and their connections first.
Understanding The Number Of Blinks
Some Liftmaster models use the number of blinks to indicate specific error codes. For instance, a specific number of yellow blinks might point to a motor issue, while another count could indicate a remote control pairing problem. Always refer to your specific Liftmaster model’s manual to decipher these blink codes.
- Example: A Liftmaster 3240 might blink the yellow light 4 times to indicate a problem with the up-travel limit, whereas a different model might use the same blink pattern for a sensor fault.
Maintenance Tips To Prevent Issues
Preventative maintenance is key to ensuring your Liftmaster garage door opener functions smoothly and to avoid unexpected issues like the blinking yellow light.
Regular Sensor Checks
- Monthly: Make it a habit to visually inspect your safety sensors monthly. Ensure they are free of obstructions and that their indicator lights are steady.
- Cleaning: Clean the sensor lenses with a soft cloth at least every six months, or more often if you live in a dusty environment.
Wiring Inspection
- Annually: Once a year, check the wiring connected to the sensors and the opener unit. Look for any signs of wear, damage, or loose connections. Gently tug on wires to ensure they are secure.
Lubrication And General Opener Maintenance
- Lubricate Moving Parts: Periodically lubricate the garage door’s springs, rollers, and hinges. This reduces strain on the opener motor.
- Check Door Balance: Ensure your garage door is properly balanced. A balanced door opens and closes smoothly with minimal effort. You can test this by disengaging the opener and trying to lift the door manually. It should stay open at any position without falling. If it’s heavy or slams shut, the springs may need adjustment, which can indirectly affect the opener.
Battery Replacement For Remotes
- Proactive Replacement: Replace batteries in your remote controls every 6-12 months, even if they still seem to be working. This prevents the frustration of a dead remote when you need it most and can avoid intermittent signal issues.
When To Upgrade Your Liftmaster Opener
If you find yourself consistently troubleshooting your Liftmaster opener, or if it’s an older model (over 10-15 years old), it might be time to consider an upgrade. Newer openers offer enhanced safety features, quieter operation, better energy efficiency, and smart home integration.
Signs It’s Time For An Upgrade
- Frequent Repairs: If you’re calling a technician more than once a year.
- Outdated Technology: Lack of modern safety features like rolling codes or obstruction sensors.
- Noise and Wear: The opener is excessively loud, or the door operation is jerky.
- Lack of Smart Features: You desire integration with smart home systems (e.g., voice control, remote monitoring via smartphone).
- Safety Concerns: Older models may not meet current safety standards.
Benefits Of Newer Models
Newer Liftmaster models, such as those in the MyQ® series, offer features like:
- Smartphone Control: Monitor and control your garage door from anywhere via the MyQ app.
- Real-time Alerts: Receive notifications when your garage door is opened or closed.
- Enhanced Security: 10,000 different code combinations with Security+ 2.0® technology make unauthorized access extremely difficult.
- Battery Backup: Ensure operation even during power outages.
Frequently Asked Questions
What Does A Blinking Yellow Light On A Liftmaster Mean?
A blinking yellow light on a Liftmaster garage door opener typically indicates an issue with the safety reversal system, most commonly the safety sensors (photo-electric eyes). It means the opener has detected a problem that prevents it from closing the garage door safely, usually due to misaligned or obstructed sensors.
How Do I Fix The Blinking Yellow Light On My Liftmaster?
The most common fix involves cleaning and realigning the safety sensors. Check for obstructions in their path, ensure wires are securely connected, and if necessary, reset the opener by unplugging it for a minute. If these steps don’t work, consult your manual or a professional.
Are The Safety Sensors The Only Reason For A Blinking Yellow Light?
While safety sensors are the most frequent cause, other issues can trigger a blinking yellow light. These include loose or damaged wiring, a faulty logic board in the opener, problems with the remote control or wall button, or incorrect travel limit settings.
How Often Should I Clean My Garage Door Opener’s Safety Sensors?
It’s recommended to clean the lenses of your safety sensors at least every six months. More frequent cleaning might be necessary if you live in a particularly dusty or dirty environment. Visually inspect them monthly for obstructions.
Can I Bypass The Safety Sensors If They Are Malfunctioning?
No, you should never bypass the safety sensors. They are a critical safety feature designed to prevent serious injury or damage. Bypassing them is dangerous and illegal in many areas. If the sensors are malfunctioning, they need to be repaired or replaced.
The Liftmaster garage door opener yellow light blinking is a signal that requires attention, but it’s often a solvable problem. By systematically troubleshooting the safety sensors, wiring, and other potential causes, you can often restore your garage door opener to full functionality. Remember that regular maintenance is your best defense against future issues, and when in doubt, always consult your owner’s manual or a qualified professional to ensure safety and proper operation.